
Aivia K8100 V2 - Keyboard GIGABYTE - Free user manual and instructions
Find the device manual for free Aivia K8100 V2 GIGABYTE in PDF.
| Product Type | Gaming Keyboard |
| Brand | Gigabyte |
| Model | Aivia K8100 V2 |
| Connectivity | USB 2.0 |
| Backlighting | Yes, with on/off switch |
| Anti-ghosting | 20 keys |
| Programmable Macro Keys | 25 (5 profiles x 5 keys) |
| Media Control Panel | Integrated touch |
| Macro Engine | GHOST™ Engine with editor |
| Included Software | Ghost Engine on CD |
| Supported Operating Systems | Windows XP/Vista/7 (32/64-bit) |
| Package Contents | Console, keycap puller, rubber coated WASD, CD, keyboard cover |
| Win Lock Function | Yes |
| Power Supply | Via USB, 5V |
| Maintenance | Clean with a soft, dry cloth. Do not use solvents. |
| Safety | Do not expose to moisture. Unplug before cleaning. |
| Spare Parts | Keycap puller included. Replaceable keys. |
| Main Functions | 20-key Anti-ghosting, GHOST macro, media touchpad, 5 profiles, backlighting, rubberized WASD keys |
Frequently Asked Questions - Aivia K8100 V2 GIGABYTE
User questions about Aivia K8100 V2 GIGABYTE
0 question about this device. Answer the ones you know or ask your own.
Ask a new question about this device
Download the instructions for your Keyboard in PDF format for free! Find your manual Aivia K8100 V2 - GIGABYTE and take your electronic device back in hand. On this page are published all the documents necessary for the use of your device. Aivia K8100 V2 by GIGABYTE.
USER MANUAL Aivia K8100 V2 GIGABYTE
Aivia Gaming Keyboard
Model No.: GK-K8100
User's Manual
English....2
繁體中文 11
简体中文....20
Deutsch 29
Português 38
Français....47
Español....56
Русский 65
Українська....74
한국어 83
Türkçe....92
Polski....101
Česky....110
1. Overview
1-1 Introduction
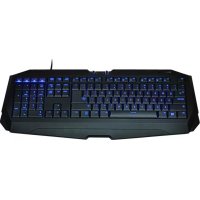
Congratulations on purchasing the first product of Aivia series – Aivia K8100 gaming keyboard. Coinciding with the concept of Aivia about advanced, intuitive, and versatile interface archetype, the K8100 is born to satisfy gamers' request. Aivia K8100 is equipped with three different levels of elastic force, Touch Panel Media control, 20 non-Ghosting keystroke capability and GHOST™ Macro Engine.
1-2 Package Contents
• Aivia K8100 Gaming Keyboard
- Keycap Puller
• Additional Rubber Coated WASD Keys
- Driver CD (User guide inside)
- Keyboard Protector
1-3 System Requirements
• CD-ROM or DVD-ROM player
• Available USB 2.0 Port x 1
- 40 MB of free hard disk space
- Windows XP / Vista / Vista 64bits / Windows 7 / Windows 7 64bits
2. Installation
2-1 Hardware Installation
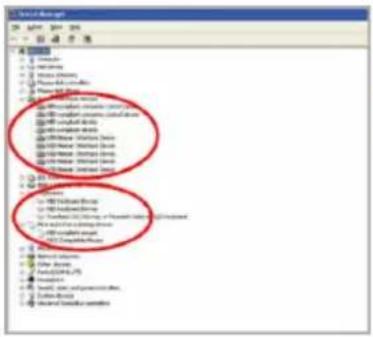
Step 1 Plug USB connector into either desktop or laptop's USB port
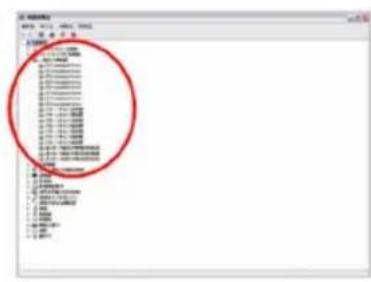
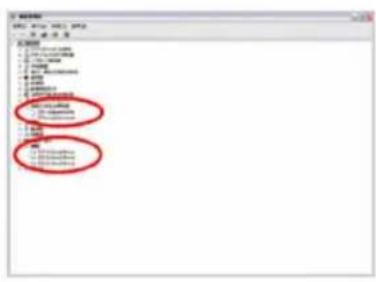
Step 2 Open "Control Panel" → "System" → "Hardware" → "Device Manager" and confirm the keyboard is working properly
![文件名(N): 文件类型(T): [ ] [ ] [ ] [ ] [ ] [ ] [ ] [ ] [ ] [ ] [ ] [ ] [ ] [ ] [ ] [ ] [ ] [ ] [ ] [ ] [ ] [ ] [ ] [ ] [ ] [ ] [ ] [ ] [ ] [ ] [ ] [ ] [ ] [ ] [ ] [ ] [ ] [ ] [ ] [ ] [ ] [ ] [ ] [ ] [ ] [ ] [ ] [ ] [ ] [ ] [ ] ( )](/content/2026/02/359783/images/6fcbee2aaed4bf7b7aef298a3336850b16deef4218956997ea7a3053a259e02d.jpg)

2-2 Software Installation
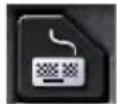
Before installing the driver of K8100, we suggest checking whether any other keyboard drivers have been previously installed on your system. If yes, in order to prevent possible conflict, please un-install or remove them before installing K8100 driver. (The following steps assume your CD-ROM Drive is Drive D).
Step 1 Please insert the driver CD into CD-ROM, you will see GIGABYTE CD main menu. (If it does not show up, run "D:\setup.exe")
Step 2 Click "Ghost™ Engine Installation" button to start Ghost™ Engine installation.
Step 3 Please select language for the installation process.
Step 4 Click on "Next" button.
Step 5 Click on "Install" button to begin installation.
Step 6 Click on "Finish" to exit the wizard.
3. Keyboard Overview
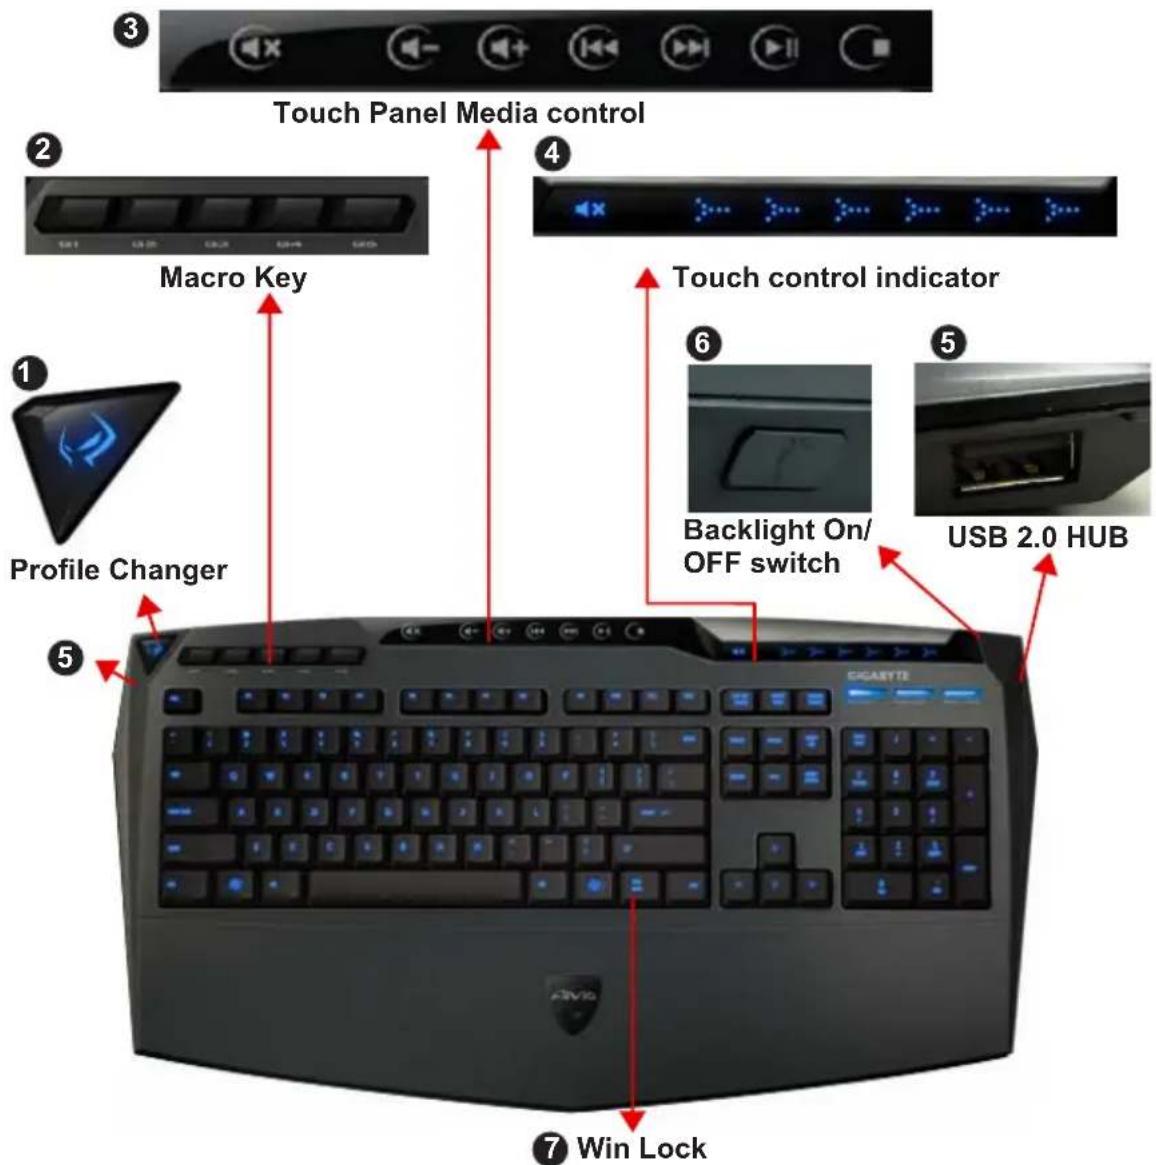
1 Profile Changer: Five colors to represent different profiles.
Tip
Red: mode 1, Green: mode 2, Blue: mode 3, Purple: mode 4, Light Blue: mode 5
② Macro Keys: One profile mode is bundled with 5 programmable Macro hot keys.
③ Touch Panel Media control: Intuitive touch-controlled media hotkeys to access media function.
Tip Keep pressing the volume up or down hotkeys to fasten volume adjusting.
4 Touch control indicator: Different LED indicator patterns vary from different touch function.
5 USB 2.0 HUB
6 Backlight On/OFF switch: Press this button to switch backlight On/OFF
⑦ Win Lock: Prevent Windows key from interrupting game operation.
4. Software Ghost™ Engine Overview
4.1 Main Panel
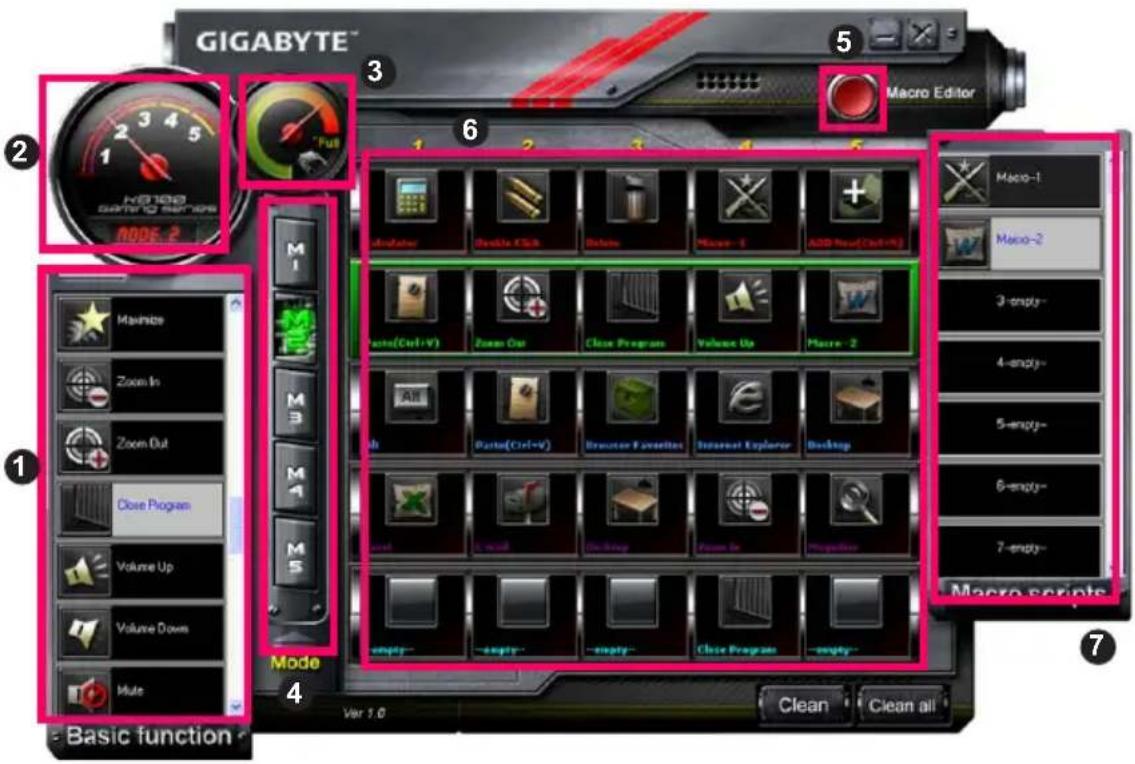
① Basic Function
② Profile Indicator
3 Memory Status (25 levels)
4 Profile Indicator
5 Macro Editor Button
6 Macro Hot Keys Monitor
7 Macro Scripts
4.1.1 Main panel Setting
① Basic Function
Collects some regular functions for gamers as Forward scrolling, Double click and multimedia hot keys. You can directly drag one icon and drop it into Macro Hot Keys Monitor to set a Macro hot key.
② Profile Indicator
Five different colors of Profile Changer represent each mode in use.
③ Memory Status (25 levels)
Display the amount of Macro hot keys in use.
4 Profile Indicator
The function is the same as item two.
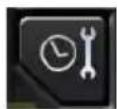
⑤ Macro Editor Button
Press this button to boot Macro Editor. Edit advanced Macro sets.
6 Macro Hot Key Monitor
Display all status of Macro hot keys.
7 Macro Scripts
Display all status of Macro Scripts.
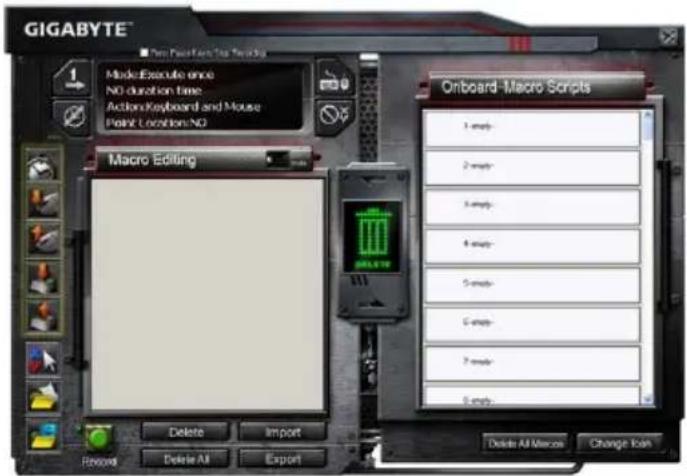
4.2 Macro Editor
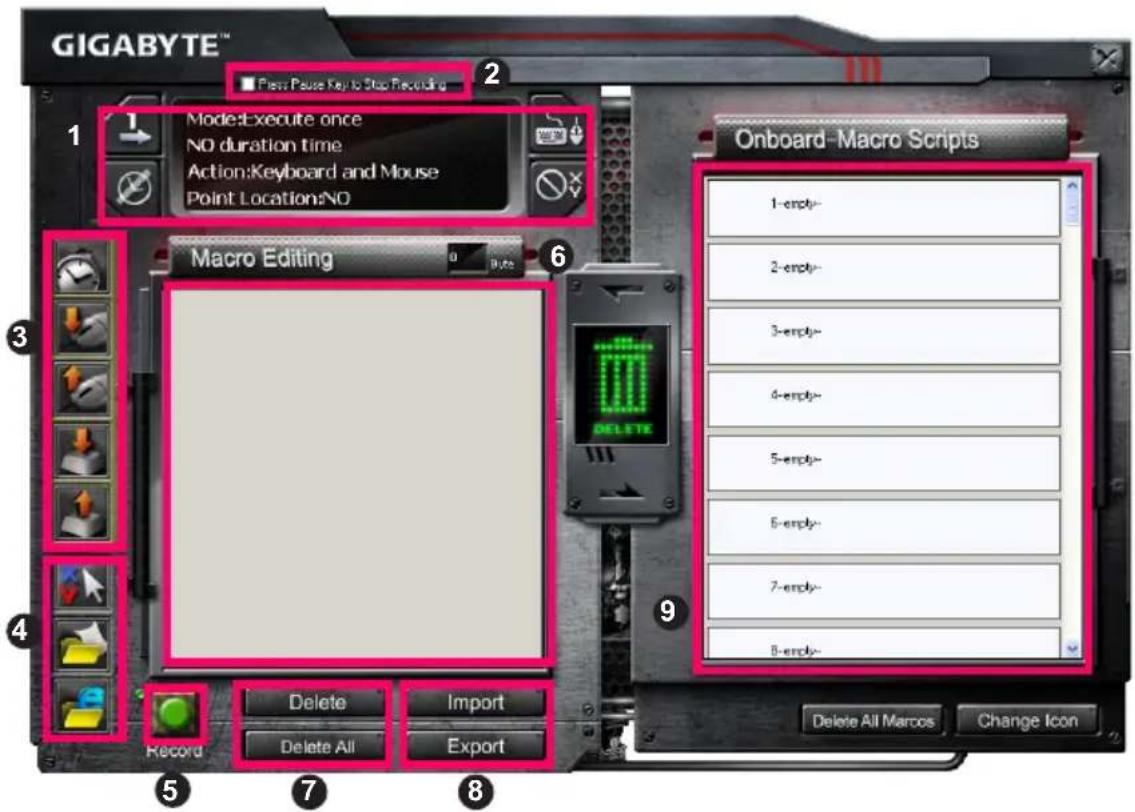
1 Macro Setting Panel
② Press Pause Key to Stop Recording
3 Quick-insert Bar
4 Special Command
5 Record/Stop Button
6 Macro Editing Note
7 Macro Editing Note Delete/Delete All
8 Macro Editing Note File Import/Export
9 Onboard Macro Scripts
4.2.1 Macro Editor setting
① Macro setting panel
- Macro Play Setting:

Execute Once

Loop Mode
Release to Stop
- Delay Time Setting:

Auto Detect Delay Time
Fix Time
No Delay Time
• Device Recording Choice
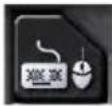
Keyboard and Mouse
Keyboard
- Cursor Point Recording Depend on Device Recording Choice)
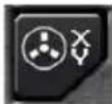
Location: Yes

Location: No
② Press Pause key to stop recording
Helps you stop Macro recording easily and conveniently.
③ Quick-insert bar
Helps you further modify Macro Editing Note & Macro Script.
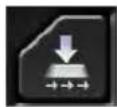
4 Special Command
- Open a file
- Open a Web
Note
- Thesetwo special commands only support English address.
EX: www.google.com; C:\Program Files\GIGABYTE\K8100\GhostK.exe - When pressing a Macro hot key with special command, please minimize the Ghost™ Engine firstly.
When you drag the folder icon or IE icon to drop into Macro Editing note, you have two advance setting options.
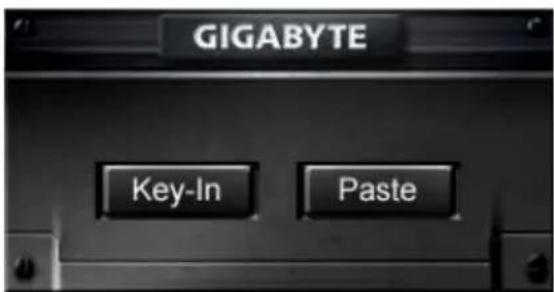
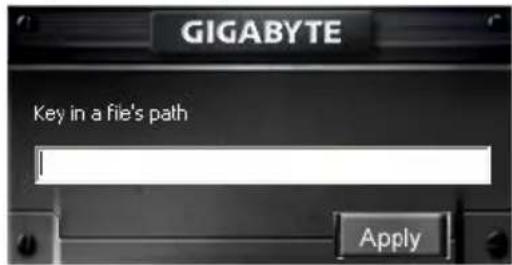
- Key-In: Please type in the desired folder path/website address directly.
- Paste:
(1) Open a file: You can press the Browse button to appoint a file address.
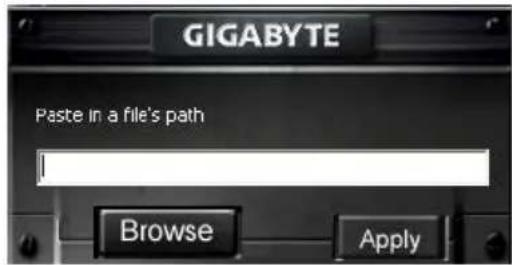
(2) Open a Web: Paste your favorite website address directly.
5 Record/Stop Button
Press this Button to Start / Stop Macro Recording.
6 Macro Editing Note
Display what Macro you are editing right now
7 Delete/Delete All
- Delete: delete one or multi- commands
- Delete All: delete all commands in Macro Editing Note
⑧ Import/Export
Call back a saved Macro Editing Note or back up a note
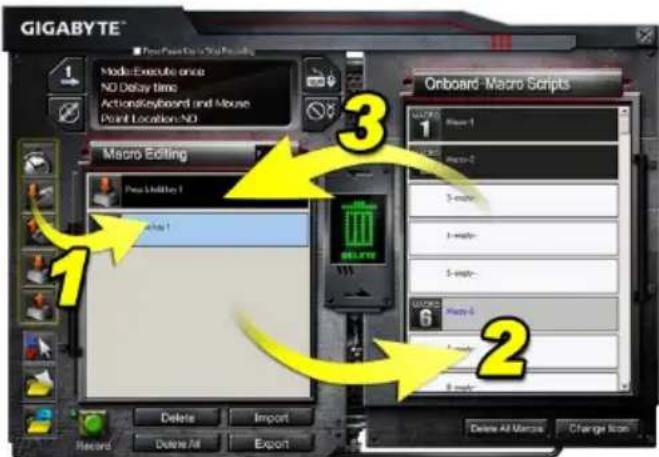
9 Onboard Macro Scripts
Drag an edited Macro Editing Note and drop it into a Script. Ghost™ engine will store it on board automatically.
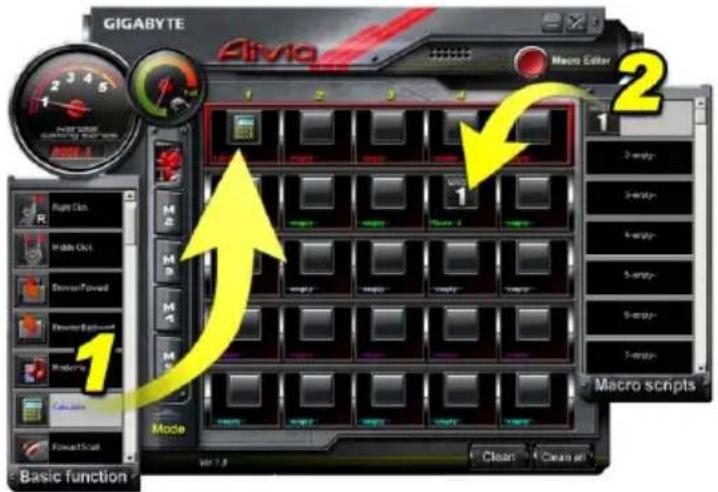
4.3 Ghost™ Engine Drag & drop user interface
The design concept of this application is based on Avatar system, just like in games.
Featuring easy to use drag-and-drop technology, it allows you to perform all actions in
Ghost™ Engine application program. Simply drag the icon of specific functionality
you'd like to apply and drop onto the intended keyboard Macro hot keys to finish assignment.
4.3.1 Main Panel
Drag one icon (Ex: Excel) from Basic function then drop in Profile one- Macro one.
When finish dropping icon, please close or minimize the Ghost™ Engine. The Macro hot key is then set up successfully.
Drag one icon (Ex: Macro One) from Macro Scripts then drop in Profile two- Macro four.
When finish dropping icon, please close or minimize the Ghost™ Engine. The Macro hot key is then set up successfully.
4.3.2 Macro editor
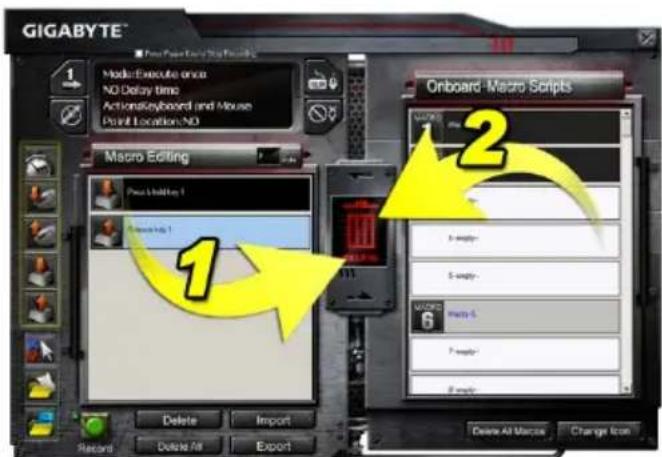
Before editing Macro key, please set up the command of Macro Setting Panel, then press Record button to start Macro Editing.
-
After you finish editing the Macro Editing Note, you can drag& drop icons from the Quick Insert Bar to further modify it. For the special command of folder and website address, please select one icon to drag& drop into Macro Editing Note setting.
-
When you finish a Macro setting process, please keep pressing the left button in the Macro Editing Note to drag & drop into Macro Scripts to define a Macro script. System will automatically name a number code for this new Macro script. You can rename and change icon for a script conveniently.
-
If you want to modify a Macro script, please drag& drop from Macro Scripts to Macro Editing Note to edit.
4.3.3 Delete a Macro Editing Note or Micro Script
-
You can press Delete All button or drag& drop into trash bin to delete all commands of Macro Editing Note. (With Shift or Ctrl button of keyboard to multi-delete commands.)
-
Drag& drop one Macro script directly into trash bin.
1. 簡介
1-1 產品簡介

- 貼上:
4.3.3 删除巨集
1. 简介
1-1 产品简介
- 贴上:
4.3.3 删除宏
1. Übersicht
1-1 Einleitung
2-1 Hardware Installation
2-2 Software Installation
BSP: www.google.com; C:\Program Files\GIGABYTE\K8100\GhostK.exe
4.3.2 Makro-Editor
1. Descrição Geral
1-1 Introdução
4.1 Painel Principal

- Colar:
1. Vue d'ensemble
1-1 Introduction
- Pollez :
- Copiar:
4.3.1 Panel Principal
1. Обзор
1-1 Введение
7 Win Lock
HANP: www.google.com; C:\Program Files\GIGABYTE\K8100\GhostK.exe
• Вставить:
1. Огляд
1-1 Вступ
• Вставити:
1.개요
1-1 서론

2-2 소프트웨어 설치
여: www.google.com; C:\Program Files\GIGABYTE\K8100\GhostK.exe
- 불여넣기:
1. Genel Bakış
1-1 Giriş
ÖR: www.google.com; C:\Program Files\GIGABYTE\K8100\GhostK.exe
- Yapıştır:
1. Opis
1-1 Wprowadzenie
natural_image
User interface toolbar with playback, audio, and play buttons (no text or symbols)7 Win Lock
• Wklejanie:
1. Přehled
1-1 Úvod
2-1 Instalace hardware


2-2 Instalace software
natural_image
User interface toolbar with playback, audio, and play button icons (no text or symbols)• Vložit:


- Aivia Gaming Keyboard
- User's Manual
- Overview
- 1-1 Introduction
- 1-2 Package Contents
- 1-3 System Requirements
- Installation
- 2-1 Hardware Installation
- 2-2 Software Installation
- Keyboard Overview
- Software Ghost™ Engine Overview
- Main Panel
- Main panel Setting
- ① Basic Function
- ② Profile Indicator
- ③ Memory Status (25 levels)
- Profile Indicator
- ⑤ Macro Editor Button
- Macro Hot Key Monitor
- Macro Scripts
- Macro Editor
- Macro Editor setting
- ① Macro setting panel
- ② Press Pause key to stop recording
- ③ Quick-insert bar
- Special Command
- Note
- Ghost™ Engine Drag & drop user interface
- Main Panel
- Macro editor
- Delete a Macro Editing Note or Micro Script
- 簡介
- 1-1 產品簡介
- 删除巨集
- 简介
- 1-1 产品简介
- 删除宏
- Übersicht
- 1-1 Einleitung
- Makro-Editor
- Descrição Geral
- 1-1 Introdução
- Painel Principal
- Vue d'ensemble
- - Copiar:
- Panel Principal
- Обзор
- 1-1 Введение
- Огляд
- 1-1 Вступ
- 1.개요
- 1-1 서론
- 2-2 소프트웨어 설치
- Genel Bakış
- 1-1 Giriş
- Opis
- 1-1 Wprowadzenie
- Přehled
- 1-1 Úvod
- 2-1 Instalace hardware
- 2-2 Instalace software
Brand : GIGABYTE
Model : Aivia K8100 V2
Category : Keyboard