USER MANUAL SOLAR PANEL WIRELESS VIDEOPHONE + 2 BADGES LEXMAN
Volver a vincular (Pletina x Monitor)
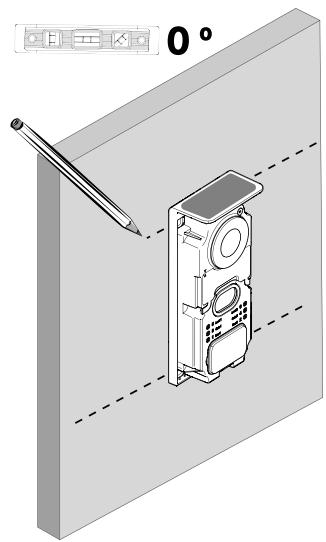
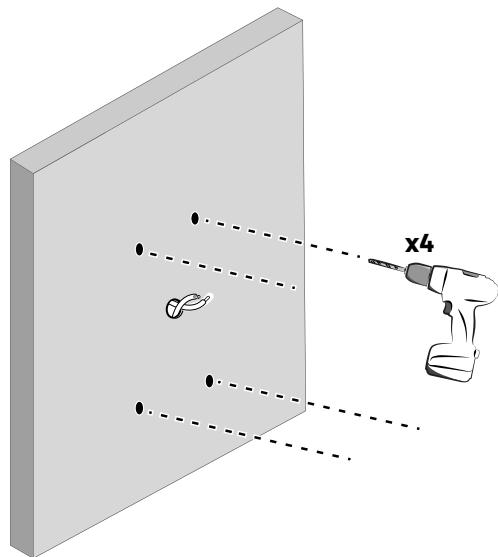
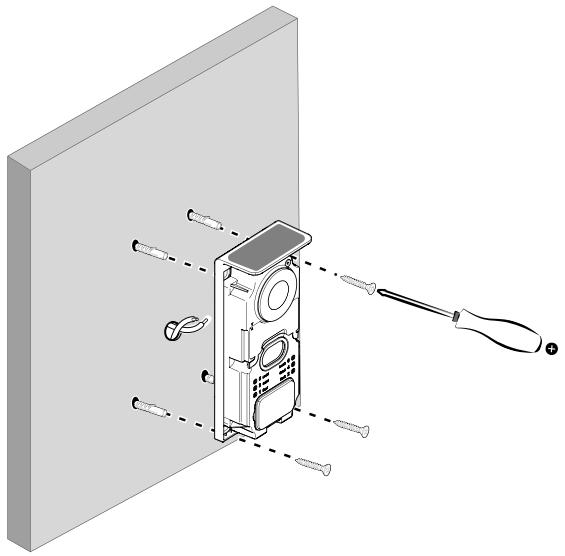
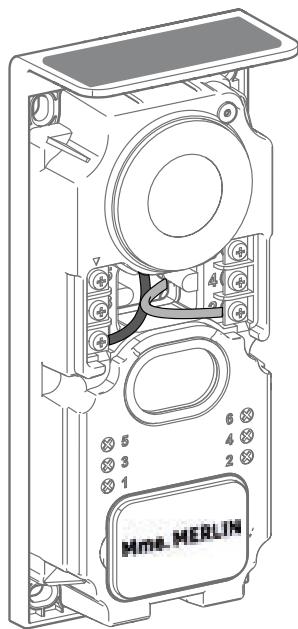
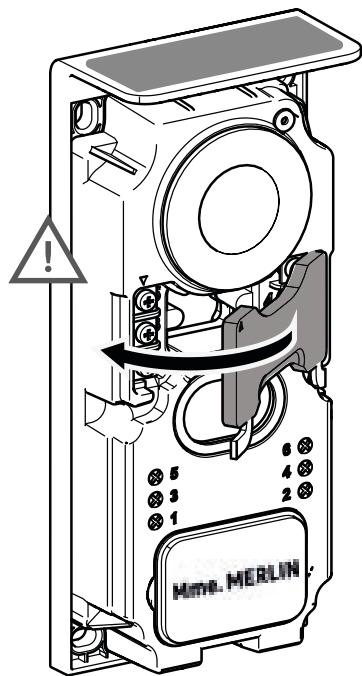
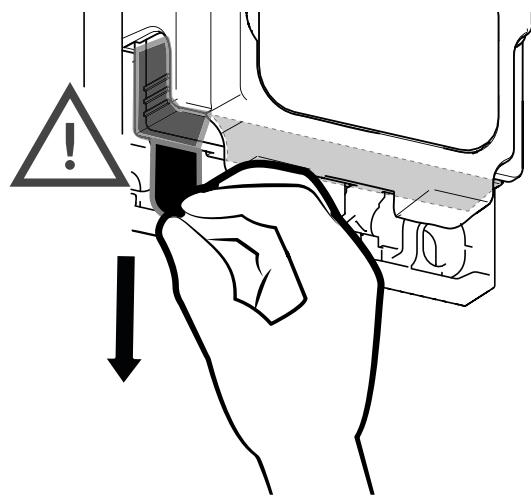
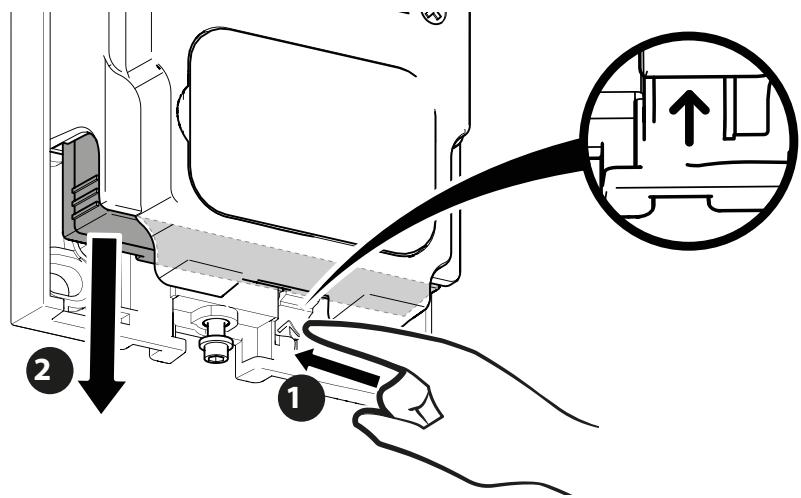
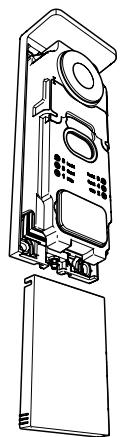
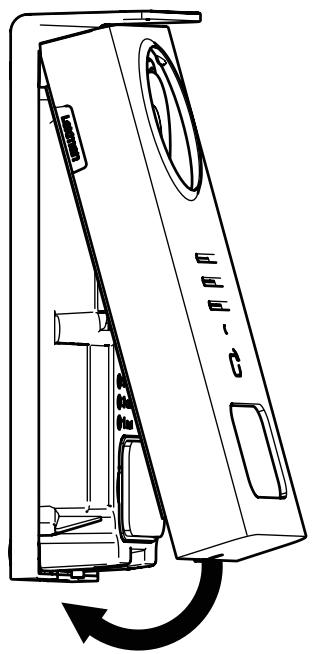
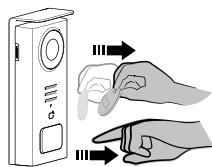
Before fixing the product, please carry out range tests (do not forget to remove the protective tab).
The communication range, evaluated in free field, can be influenced by obstacles between the door station and the monitor, in particular by different materials such as wood, plasterboard, stone or concrete.
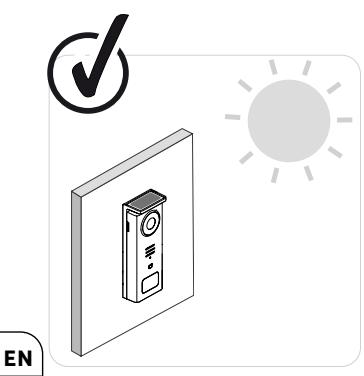

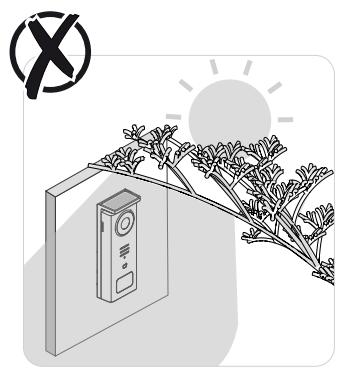

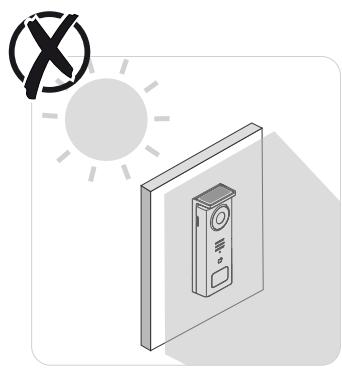


IMPORTANT: We recommend positioning the door station in full sunlight, as any form of partial or total shade will affect its ability to recharge via the solar panels.
It is advisable to wipe the door station once a month to maintain its charging capacity via the solar panel.


Wiring diagram 1: Installation without strike and gate (optional).
This installation only allows:
- Viewing visitors and communicating with them
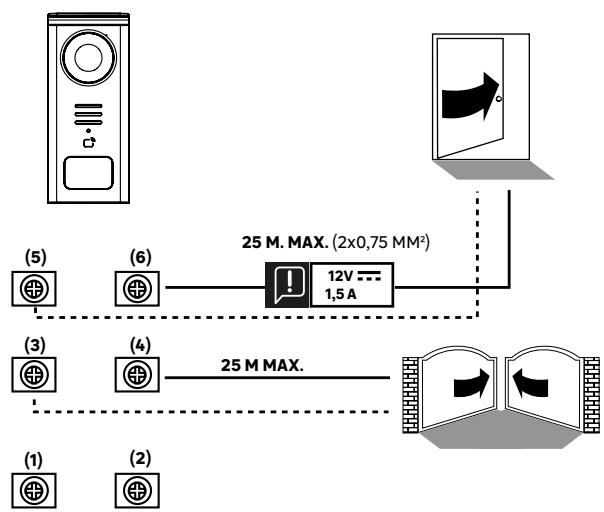

Wiring diagram 2: Installation with strike and gate (optional), this installation requires an independent 12V 1.5A power supply.


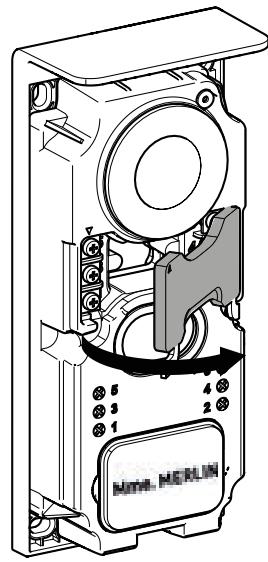
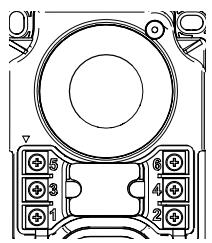
5&6- Control contact for electric strike
(requires an independent 12V 1.5A power supply) default dry contact
3&4-Gate control contact
1&2 - Terminal block for solar panel connection. 5V---max
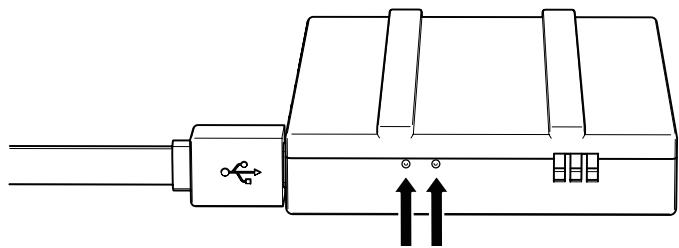
BATTERY STATUS
Red: charging in progress
Blue: charging complete

IMPORTANT: It is advisable to fully charge the battery before starting up.
Important note: a number of factors can reduce battery life:
Repeated use of the monitoring function (image displayed without a visitor present)
High number of calls per day
Heavy use of night vision
Distance and nature of obstacles between the street door panel and the monitor
Mounting the street street door panel in a shaded area

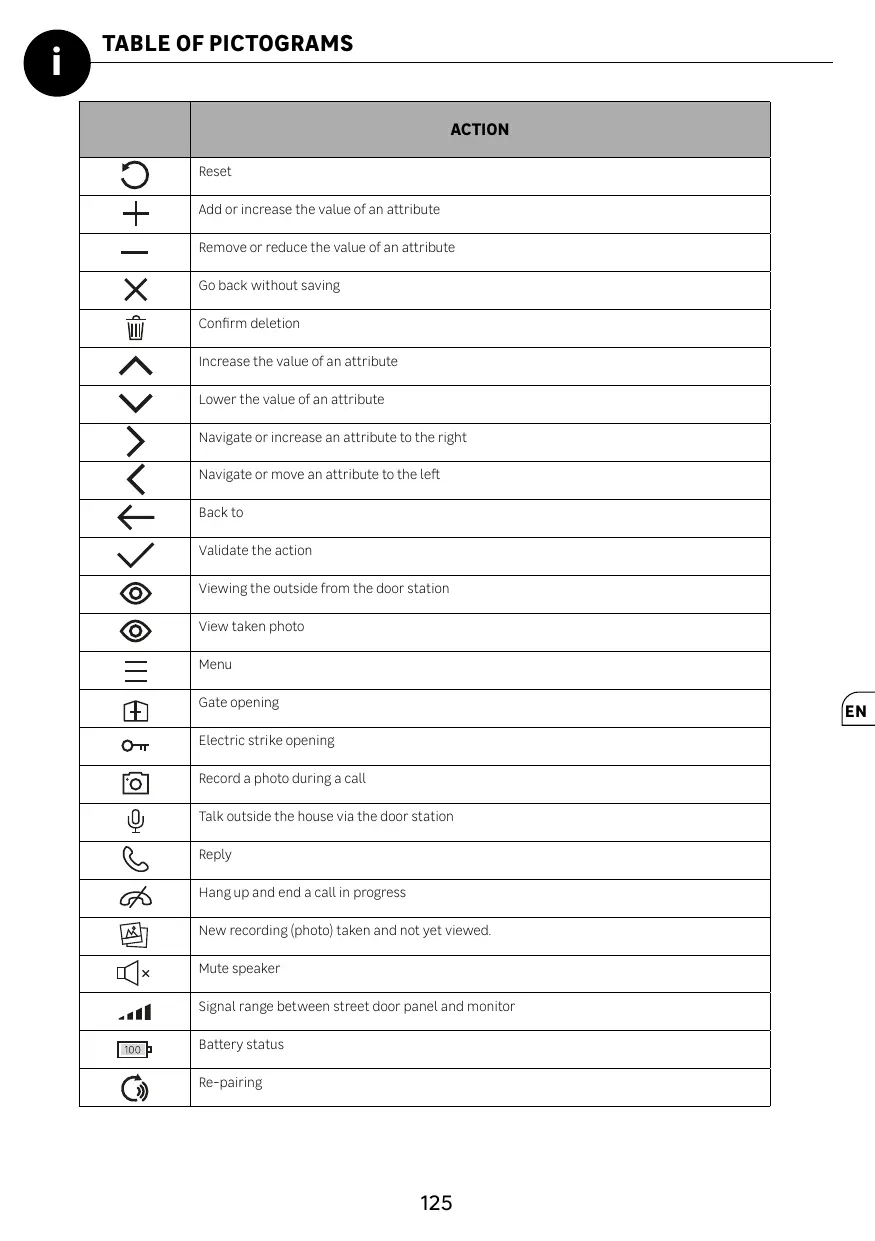
| ACTION |
| + | Reset |
| - | Add or increase the value of an attribute |
| × | Remove or reduce the value of an attribute |
| / | Go back without saving |
| \ | Confirm deletion |
| ^ | Increase the value of an attribute |
| ✓ | Lower the value of an attribute |
| > | Navigate or increase an attribute to the right |
| < | Navigate or move an attribute to the left |
| ← | Back to |
| ✓ | Validate the action |
| ◎ | Viewing the outside from the door station |
| ◎ | View taken photo |
| = | Menu |
| ⊕ | Gate opening |
| ONT | Electric strike opening |
| Record a photo during a call |
| Talk outside the house via the door station |
| Reply |
| Hang up and end a call in progress |
| New recording (photo) taken and not yet viewed. |
| × | Mute speaker |
| Signal range between street door panel and monitor |
| 100 | Battery status |
| Re-pairing |
EN

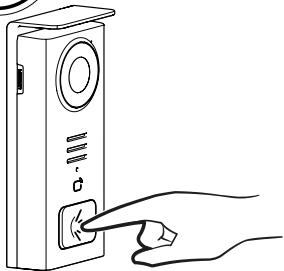


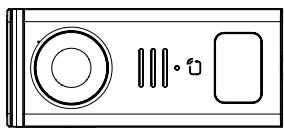
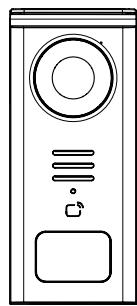
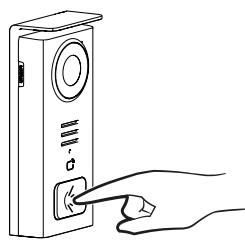
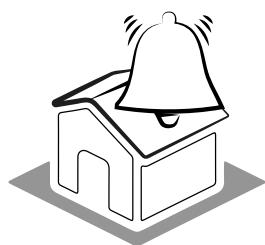
Use the name button to ring inside the house.
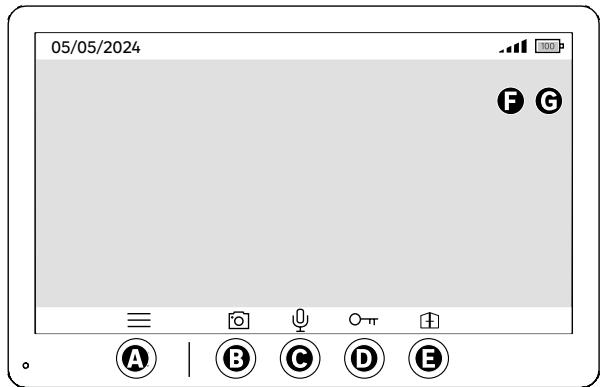
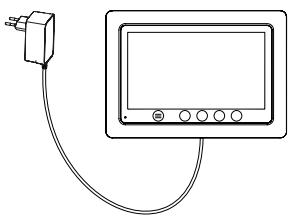
A-End call
B - Record a manual photo to be stored in the appliance
C - Enabling or disabling the microphone
D - Opening of the electric strike
E - Opening of the gate
F - Signal range between street-door station and monitor
G-Battery status
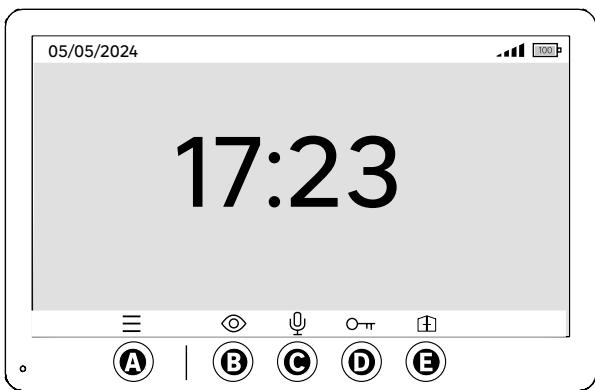
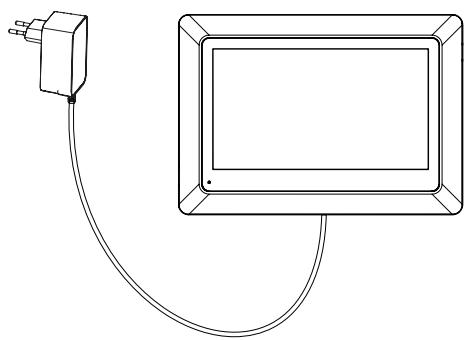
A-Menu
B-Off-call camera access
C - Enabling or disabling the microphone
D - Opening of the electric strike ectric strike
E - Opening of the gate
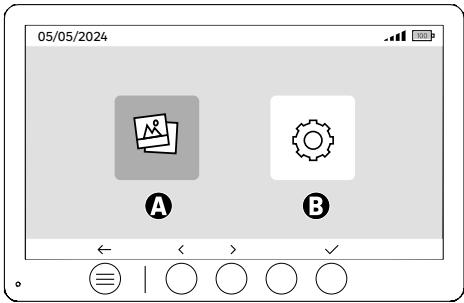
A - Photos recorded when you are away and/or manually
B-Configurations

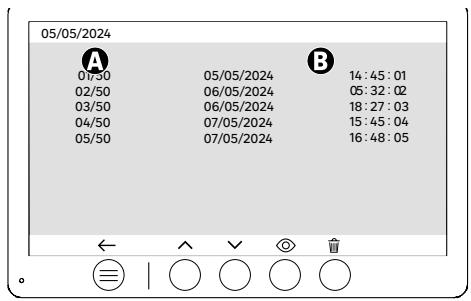
A: Media counter (The appliance has storage for up to 50 photos; when the storage is full, the last photo recorded will automatically replace the first. For example, Photo 51 will replace Photo 1.
B: Date and time of recorded photo
When the delete button is pressed, confirm the deletion by pressing the trash button a second time.

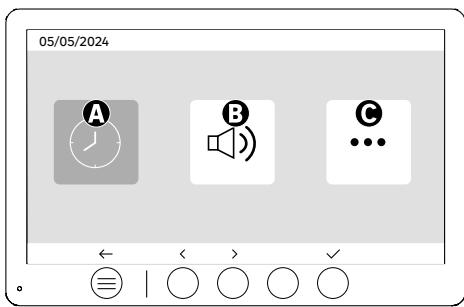
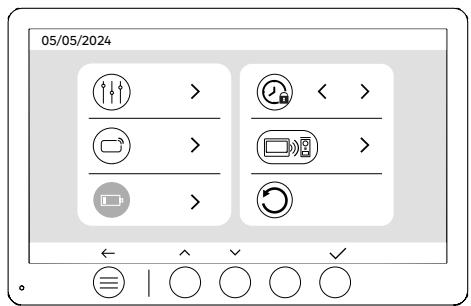
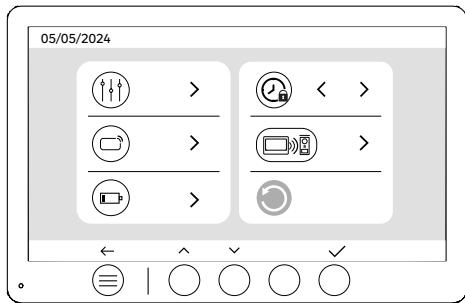
A: Date and time setting
B: Volume and sound settings
C: Advanced settings

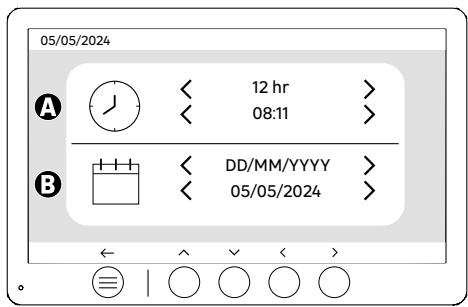
Date and time setting
A: Time setting: 12h or 24h formats available
B: Date setting: DD/MM/YYYY = Day/Month/Year or YYYY/MM/DD = Year/Month/Day formats available

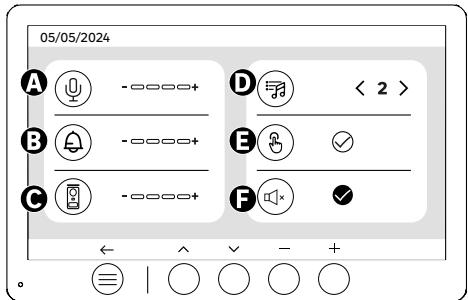
A: Indoor unit audio volume
B: Indoor unit ringer volume
C: Door station audio volume
D: Ringer (7 ring tones available)
E: Button sound (BEEP)
F: Silent mode (Disables the monitor ringer, the monitor will switch on as usual)

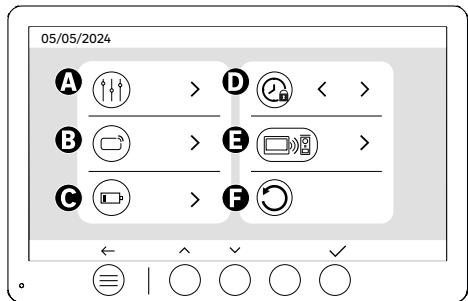
A: Image setting
B: Badge pairing (RFID)
C: Battery recharge
D: Duration of strike opening
E: Pairing (Street door panel x Monitor)
F: Reset to factory settings

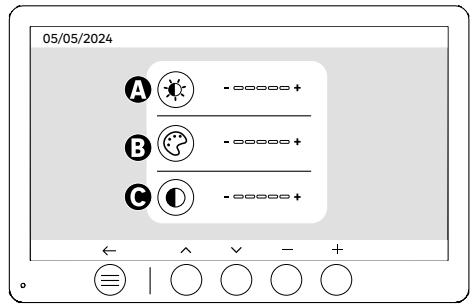
Screen settings
A: Brightness
B:Colour
C: Contrast

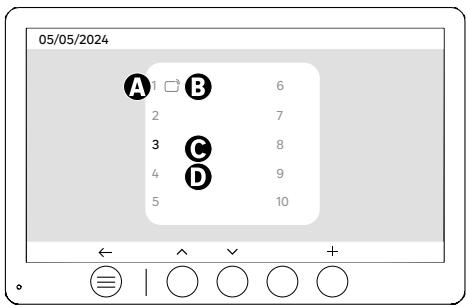
Badge pairing (RFID)
A: Badge number
B: Paired badge
C: Badge selected
D: No badge paired
To add a new badge, click on the (+) button, then swipe the badge on the door panel within 60 seconds. Up to 10 different badges can be added.
If the passed badge is already enrolled, the selection is positioned on its number.
If the swiped badge was not already enrolled, it will be added to the number of the next empty box.
To delete a paired badge, press (Trash), then click (Trash) again to confirm deletion or (X) to cancel deletion.

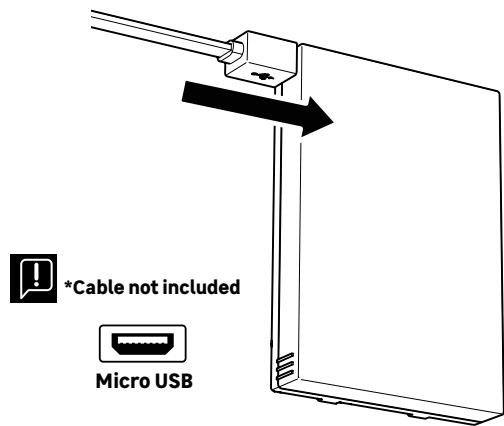
Battery recharge
Clicking on the button (tick) will take you to a tutorial on recharging the battery. Follow the steps to recharge the battery..

After being set to standby, the appliance will require a few extra seconds to enable the opening of the electric strike/gate when it is switched back on. The standby mode is designed to extend the battery's lifespan. Please continue to perform the action indicated.
1
2
3
4
5
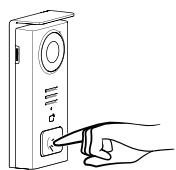
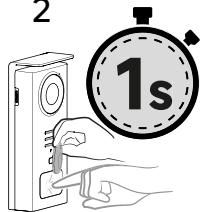
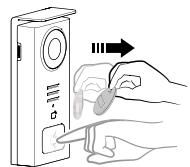
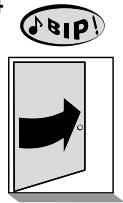
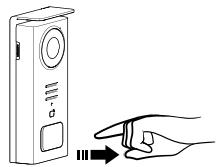
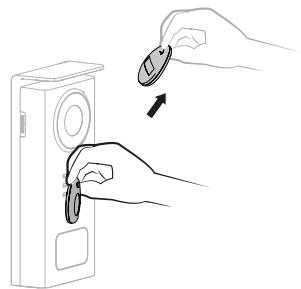
To activate the opening of your electric strike, hold down the button (1) then pass the badge briefly in front of the reader (2 and 3). A beep will confirm that the action has been carried out successfully (4). Then release the button (5).
If you do not hear the beep, repeat the procedure from step 2 without releasing the button.
No call will be made to the house.
If you hear a long beep, it means the badge is not paired. Pairing procedure available in the badge settings section.
1
2
3
4
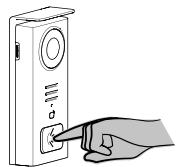
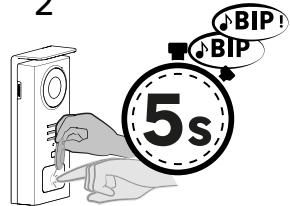
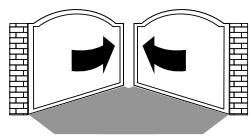
To activate the opening of your gate, hold down the button (1) and then hold the badge in front of the reader until you hear a double beep confirming that the action has been successful (2) and that the gate opens (3). Then release the badge and the button (4).
If you do not hear the double beep, repeat the procedure from step 2 without releasing the button.
No call will be made to the house.
If you hear a long beep, it means the badge is not paired. Pairing procedure available in the badge settings section.


If you do not swipe any enrolled badge before releasing the button, the buzzer will sound. Once the ringing tone has been triggered on the monitor, the badge reader remains available and will disconnect the call if an enrolled badge is swiped.
Door release opening time
The opening time of the electric strike (optional) connected to the door station can be set to 1s, 2s, 3s, 4s or 5s.


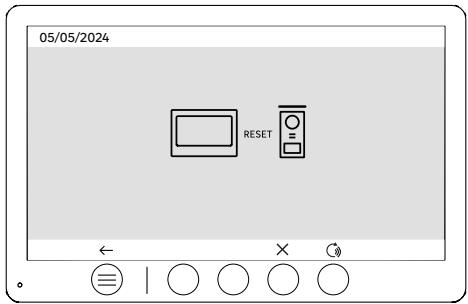
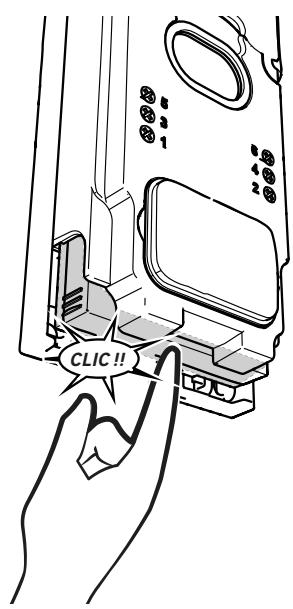
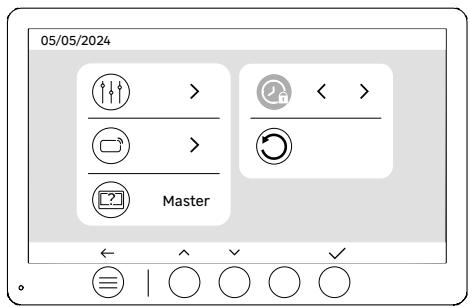
Pairing (street door panel x monitor)
This option allows the street door panel and monitor to be paired again. This is not normally required in the normal lifespan of the product, but it may be useful if the product is refurbished or if the street door panel is replaced following an after-sales service check, etc.
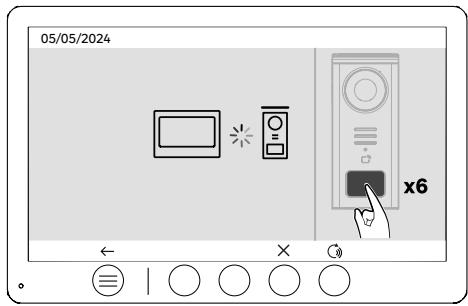
Press the button to start the procedure, once the action has been confirmed, press the street door panel call button 6 times to complete the action.

Reset (Factory configuration)
Factory reset restarts the device, erasing all previously saved content/parameters.
Standby function: When your videophone is connected but inactive, it will automatically switch to standby mode, it will switch to standby mode after 20 seconds of inactivity. To reactivate it, press any button. Power consumption in standby mode is less than/equal to 0.5W.
TROUBLESHOOTING
| Outage | Cause | Solution |
| - Monitor does not light up | The monitor is not powered | - Check that the power supply is correctly connected and switched on
- Check the polarity at the monitor or at the power supply output |
| - Connection error | - The appliance is fitted with major protection devices. Disconnect the power supply for at least 1 minute, rectify the installation error and reconnect. Note that the protections will be of no help if the product is connected directly to 230VAC, and that this error is not covered by the warranty. |
| - Reverse polarity on power supply |
| - Short-circuit on the line |
| The monitor lights up but there is no image and the call does not go through | - The board is not powered | - Check the presence and state of charge of the
of the battery
- Make sure that the protective tab
on the battery has been removed |
| - The solar panel is not charging or
is charging the battery insufficiently | - Where possible, ensure that the door station faces SOUTH
and away from shaded areas.
- If the solar panel of the solar panel, or in the event of intensive
intensive use of the videophone, it
be necessary, on an occasional basis
occasionally, it may be necessary to
solar charging by recharging the battery
the battery from the mains
via USB.
- If there is dust on the panel
clean the solar panel
with a damp cloth without detergent. |
| - Image too bright | - Camera position | - Do not place the camera lens in direct sunlight or on a reflective surface. |
| - Check monitor settings |
| - The volume from the door station is too low | - Microphone hole in door station blocked | - Check and rectify |
| - The badge does not open access and generates a long beep on the board | - Badge not associated with videophone | - Repeat the badge programming procedure.
Reminder:
Short pass of the badge (1 beep) = electric strike
Long beep (2 beeps) = dry contact/gate control
Badge not paired (long beep) |
| - Door release and motorisation are controlled via the monitor, not with the badges | - Programming error | - Carry out a reset and resume the badge programming procedure. |
| - The electric strike or lock does not work | - Connection error | - The electric strike or lock you order must have a mechanical memory. The strike current must not exceed 1.1A. |
| - The open function is only possible if the video of the respective door station is displayed. |
| - Check electrical connections |