
ONE+ OLM1833H - Cordless lawn mower RYOBI - Free user manual and instructions
Find the device manual for free ONE+ OLM1833H RYOBI in PDF.


| Product type | Cordless lawn mower |
| Brand | RYOBI |
| Model | ONE+ OLM1833H |
| Power source | 18 V Lithium-Ion battery (ONE+ pack), charger sold separately |
| Cutting width | 33 cm |
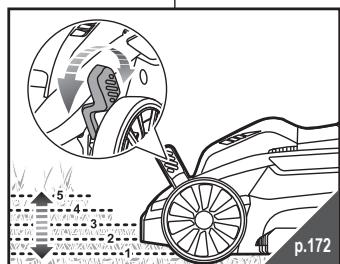
| Adjustable cutting height | Yes, via adjustment lever (positions 1 to 6 approx.) |
| Grass bag capacity | Not specified, but with fill indicator |
| Mulching function | Yes, with included mulching accessory |
| Guaranteed sound power level | 94 dB(A) |
| Measured sound power level | 89.96 dB(A) |
| Battery runtime (approximate) | Up to 250 m² with 5 Ah battery (depending on conditions) |
| Blade type | Steel, very sharp |
| Safety device | Safety key, dual button (Start + On/Off), overload and overheat protection |
| Intended use | Mowing private lawns, outdoors only |
| Warranty | 24 months, extendable to 30 months via online registration |
| Cleaning and maintenance | Remove key and battery before cleaning; use a clean, dry cloth; regularly check bolt tightness |
| Weight (estimated) | Approx. 14-16 kg |
| Repairability | Repairs by authorized service only, use original parts |
Frequently Asked Questions - ONE+ OLM1833H RYOBI
User questions about ONE+ OLM1833H RYOBI
0 question about this device. Answer the ones you know or ask your own.
Ask a new question about this device
Download the instructions for your Cordless lawn mower in PDF format for free! Find your manual ONE+ OLM1833H - RYOBI and take your electronic device back in hand. On this page are published all the documents necessary for the use of your device. ONE+ OLM1833H by RYOBI.
USER MANUAL ONE+ OLM1833H RYOBI
Safety, performance, and dependability have been given top priority in the design of your cordless lawn mower.
INTENDED USE
The cordless lawn mower is only intended for use outdoors.
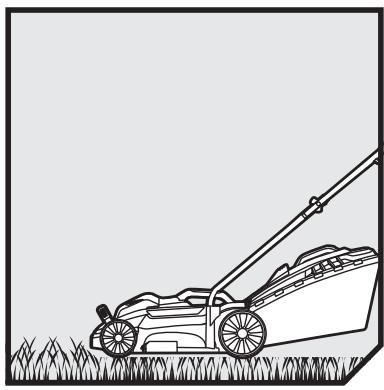
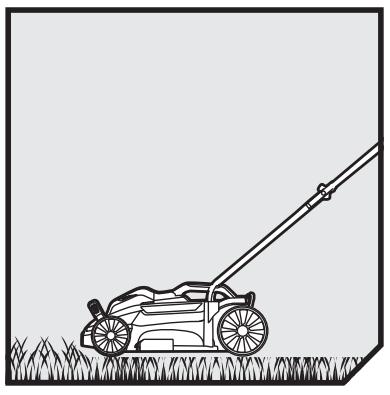
The product is designed for domestic lawn mowing. The cutting blade should rotate approximately parallel to the ground over which it is being wheeled. All four wheels should touch the ground while mowing. It is a pedestrian-controlled walk-behind mower designed to be pushed by hand.
The mower should never be operated with the wheels off the ground; it should not be pulled or ridden on. It should not be used to cut anything other than domestic grass lawns.
GENERAL SAFETY WARNINGS
A WARNING
When using the product, the safety rules must be followed. For your own safety and that of bystanders, please read these instructions before operating the product. Please keep the instructions safe for later use.
WARNING
The product should only be operated with the battery pack. When using battery operated product, basic safety precautions should always be followed to reduce the risk of fire, leaking batteries and personal injury.
PERSONAL SAFETY
The product is capable of amputating hands and feet, and throwing objects. Failure to observe all safety instructions could result in serious injury or death. - Read and understand the instructions and safety warnings. Be familiar with the controls and the correct use of the product. - Never allow children or people with reduced physical, sensory or mental capabilities, or people unfamiliar with these instructions, to operate, clean or maintain the product. Local regulations may restrict the age of the operator. Children should be adequately supervised to ensure they do not play with the appliance.
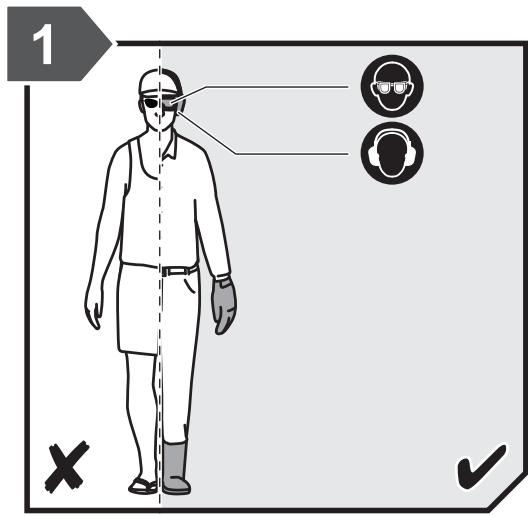
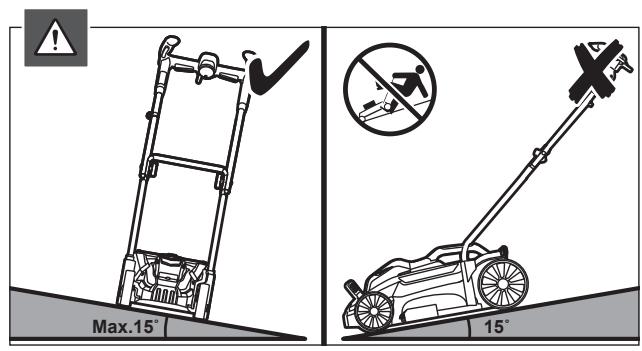
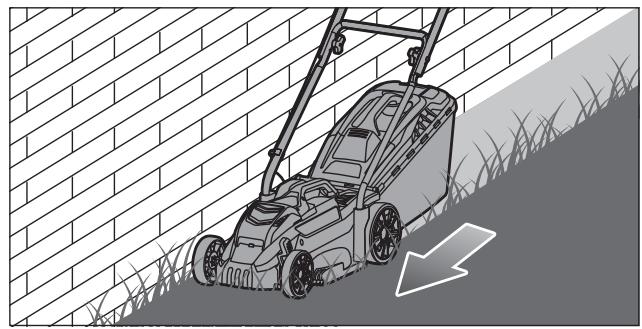
- Stay alert, watch what you are doing, and use common sense when operating the product. Do not operate the product while tired or under the influence of drugs, alcohol, or medication. A lapse in concentration while operating the product may result in serious personal injury. Wear heavy, long trousers, long sleeves, sturdy anti-slip footwear. Do not wear short trousers, sandals, or go barefoot. Avoid wearing clothing that is loose fitting or that has hanging cords or ties. Always wear safety glasses with side shields. Always be sure of your footing. Keep firm footing and balance. Walk, never run. Always be sure of your footing on slopes. Use the product across the face of slopes, never up and down. Exercise extreme caution when changing direction on slopes.
- Do not use the product near drop-offs, ditches, excessively steep slopes, or embankments. Poor footing could cause a slip and fall accident.
WORK AREA SAFETY
- Never use the product while people, especially children, or pets are within 15 m because of the danger of objects being thrown by contact with the blade.
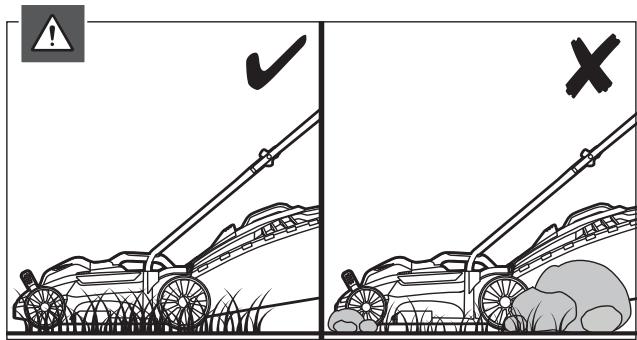
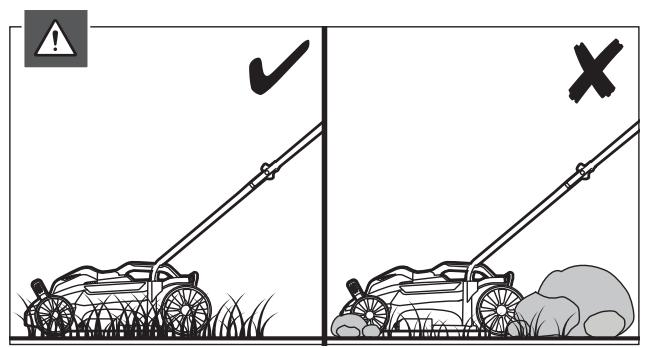
- Objects struck by the lawn mower blade can cause severe injuries to persons. Thoroughly inspect the area where the product is to be used and remove all rocks, sticks, metal, wire, bones, toys, or other foreign objects. Remember, string or wire may entangle with the cutting means. Always use the product in daylight or in good artificial light.
- Do not operate the product in explosive atmospheres, such as in the presence of flammable liquids, gases, or dust. The product creates sparks which may ignite the dust or fumes.
- Do not operate the product in wet grass or in the rain.
- Do not use the lawn mower when there is a risk of lightning.
- Keep in mind that the operator or user is responsible for accidents or hazards occurring to other people or their property.
- Tragic accidents can occur if the operator
is not alert to the presence of children. Children are often attracted to the product and the mowing activity. Never assume that children will remain where you last saw them.
- Keep children out of the mowing area and under the watchful care of a responsible adult other than the operator. Be alert and turn the product off if a child enters the area. Use extra care when approaching blind corners, shrubs, trees, or other objects including overhanging shrubs, etc., which may block your view.
BATTERY TOOL USE AND CARE
- Read, understand, and always follow the safety instructions which came with your battery and charger. Failure to do so may result in electric shock, fire, or other hazardous situations. Keep all the instructions together in a safe place for future reference.
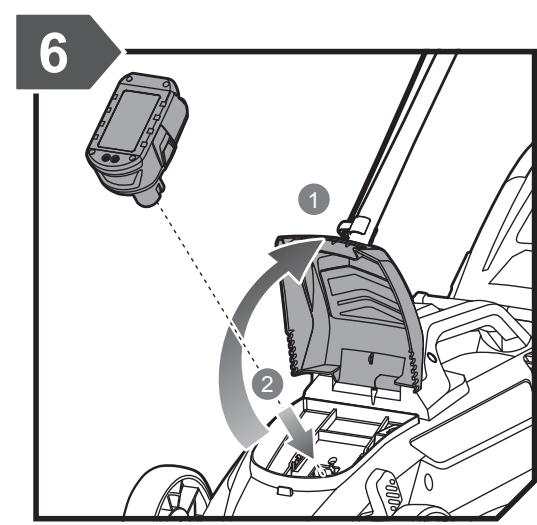
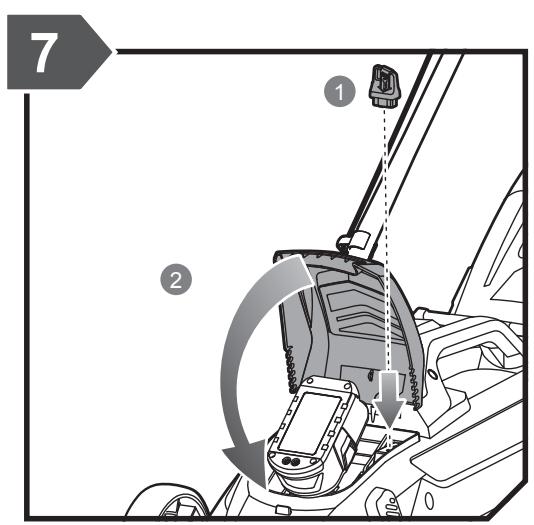
- Battery operated products do not have to be plugged into an electrical outlet; therefore, they are always in operating condition. Remove the isolator key whenever you are not operating the product.
- Remove the battery pack before making any adjustments, cleaning, or removing material from the product.
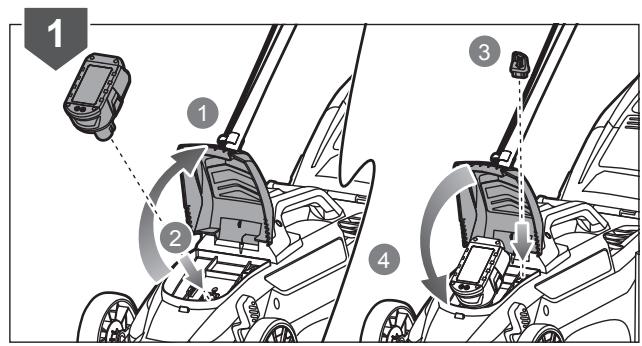
- Ensure the isolator key is removed before inserting battery pack.
- A battery pack must be recharged only with the charger specified by the manufacturer. Using a charger with an incompatible battery pack may create a risk of fire. Use battery pack only with the charger listed. Use only battery pack intended specifically for the product. Use of any other battery packs may result in a risk of fire, electric shock, or injury to persons.
- When battery pack is not in use, keep it away from other metal objects like, paper clips, coins, keys, nails, screws, or other small metal objects, that can make a connection from one terminal to another. Shorting the battery pack terminals together may cause sparks, burns, fire or explosion.
- Do not place battery products or their batteries near fire or heat. This increases the risk of explosion and possibly injury.
- Do not open or mutilate the battery pack. Released electrolyte is corrosive and may cause damage to the eyes or skin. It may be toxic if swallowed.
- Protect the battery pack against moisture and water. Do not charge the product in a damp or wet location. Following this rule will reduce the risk of electric shock. In case of damage and improper use of the battery, vapour may be emitted. Provide for fresh air and seek medical help in case of complaints. The vapour can irritate the respiratory system.
- Do not leave the battery pack inside a vehicle in hot or cold conditions. Do not incinerate the battery. Under abusive conditions, liquid may be ejected from the battery; avoid contact. If contact accidentally occurs, flush with water. If liquid contacts eyes, additionally seek medical help. Liquid ejected from the battery may cause irritation or burns.
LAWN MOWER SAFETY WARNINGS
Before using, always visually inspect to ensure blades, blade bolts, and cutter assembly are not worn or damaged. - Replace worn or damaged blades and bolts in sets to preserve balance. The blade on this mower is sharp, use extreme caution and wear heavy duty gloves when fitting, replacing, cleaning or checking bolt security. - Bring the product to an authorised service centre to replace damaged or unreadable labels. - Check all nuts, bolts, and screws at frequent intervals for proper tightness to be sure the equipment is in safe working condition. - Check the grass box frequently for wear, holes or deterioration. - Replace worn or damaged parts before operating the product. The mower must be started with the user behind the handlebars in the operator safety zone. Never start the product if:
- all four wheels are not on the ground
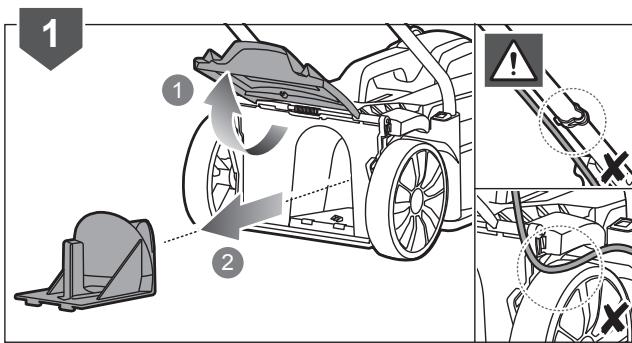
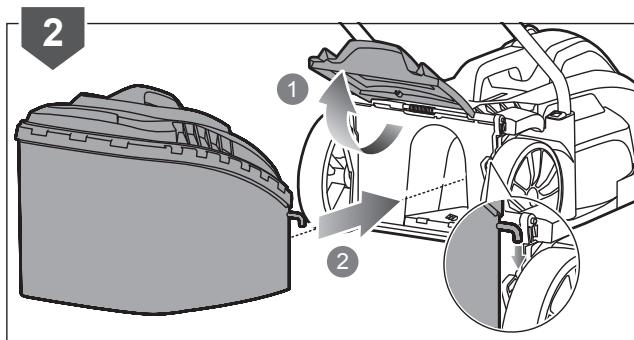
- the grass discharge chute is exposed without being protected by either the mulching plug and grass discharge
chute cover, or the grass box and grass discharge chute cover
- hands and feet of all persons are not clear of the cutting enclosure
- Never operate the product if the on/off switch on the handlebar does not properly start and stop the mower.
- Never attempt to lock the on/off switches in the on position, this is extremely dangerous.
- Do not force the product. It will do the job better and safer at the speed for which it was designed.
- Stop the blade when crossing gravel surfaces.
- Do not pull the product backward unless absolutely necessary. If you must back the product away from a wall or obstruction, first look down and behind to avoid tripping or pulling the product over your feet.
- Stop the motor and allow the blade to stop if the mower has to be tilted for transportation when crossing surfaces other than grass, and when transporting the product to and from the area to be mowed.
- Never use the product with defective guards or shields, or without safety devices, for example, deflectors and/or grass boxes, in place.
- Do not tilt the lawn mower when switching on the motor or while the motor is running. This exposes the blade and increases the probability of objects being thrown.
- Switch on the motor carefully according to instructions and keep hands and feet away from cutting area. Keep clear of the discharge opening at all times. Do not start the product when standing in front of the discharge opening.
- Do not put hands or feet near or under rotating parts. Keep clear of the discharge opening at all times.
- Never pick up or carry the product while it is running.
- Stop the mower motor and remove isolator key, make sure that all moving parts have come to a complete stop for the below cases:
- whenever you leave the product unattended (including disposal of grass clippings)
- before cleaning a blockage or unclogging
discharge chute
- before checking, cleaning or working on the product
- after striking a foreign object (inspect the product for damage and make repairs as necessary before restarting and operating the product)
- before removing the grass box or opening the grass discharge chute cover. If the product starts to vibrate abnormally (check immediately)
- inspect for damage, particularly the blades
- replace or repair any damaged parts
- check for and tighten any loose parts
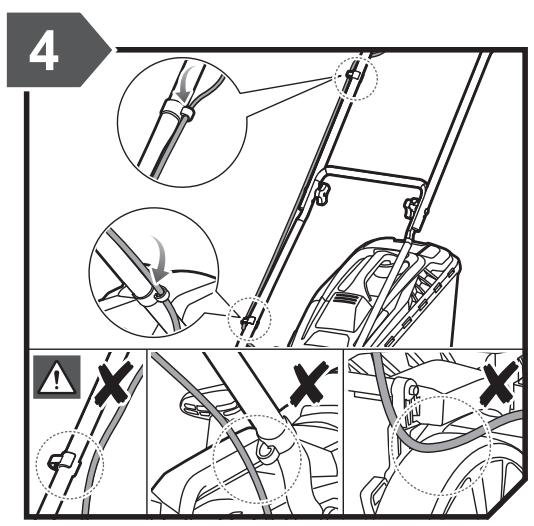
- Avoid holes, ruts, bumps, rocks, property stakes, or other hidden objects. Uneven terrain could cause a slip and fall accident. Always ensure the motor control cable is never trapped, pinched or otherwise damaged during assembly or when folding the handle.
OVERLOAD AND OVERHEAT PROTECTION
The product has an overload protection device. When overloading is detected, the product will automatically switch off. If the overload protector is actuated, the on-off button must be released. Press the on-off button to restart the product.
The battery pack has overheat protection. Excessive temperatures will cause the battery to stop powering the product. Feel the battery pack; if it is too warm, allow it to cool down before resuming operation. If the product still does not work, recharge the battery.
NOTE: The battery pack LED indicator will not work if the battery protection feature has caused the battery pack to stop powering the product. Release the on-off button or remove the battery pack from the product and the battery pack LED indicator will resume normal function.
RESIDUAL RISKS
Even when the product is used as prescribed, it is still impossible to completely eliminate certain residual risk factors. The following hazards may arise in use and the operator should pay special attention to avoid the following:
- Injury caused by vibration. Always use the right tool for the job, use designated handles and restrict working time and exposure. Exposure to noise can cause hearing injury. Wear ear protection and limit exposure.
- Contact with blades. Injury from thrown objects.
TRANSPORTATION AND STORAGE
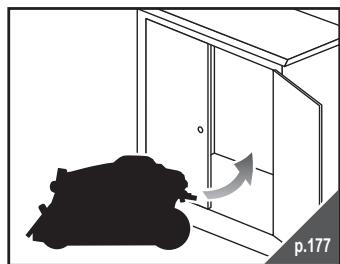
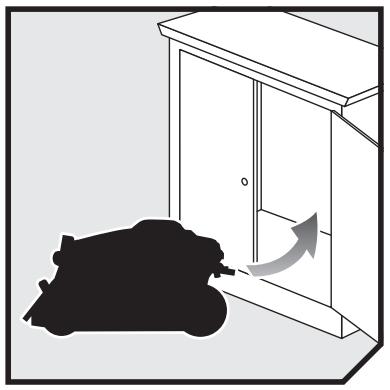
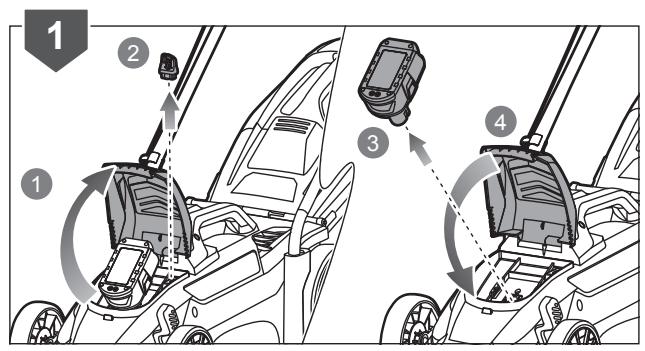
- Stop the product, remove the isolator key and the battery. Make sure that all moving parts have come to a complete stop. Allow the product to cool down before storing or transporting. Clean all foreign material from the product. Store it in a cool, dry, and well-ventilated place that is inaccessible to children. Keep away from corrosive agents such as garden chemicals and de-icing salts. Do not store outdoors.
- For transportation, remove isolator key, secure the product against movement or falling to prevent injury to persons or damage to the product.
WARNING
Use extreme caution when lifting or tilting the product for maintenance, cleaning, storage, or transportation. The blade is sharp. Keep all body parts away from the blade while it is exposed.
MAINTENANCE
WARNING
Use only original manufacturer's replacement parts, accessories and attachments. Failure to do so can cause injury, poor performance and may void your warranty.
WARNING
Servicing requires extreme care and knowledge and should be performed only by a qualified service technician. For service, we suggest you bring the product to your nearest authorised service centre for repair. When servicing, use only original replacement parts.
- Remove the isolator key and the battery before any cleaning or maintenance task. You may make adjustments and repairs described here. For other repairs, contact the authorised service agent.
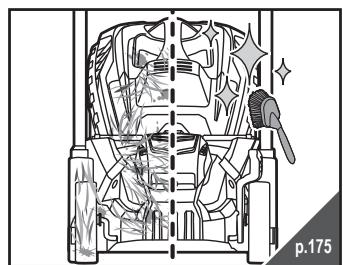
- Check the grass box frequently for wear or deterioration. After each use, clean the product with a soft dry cloth. Any part that is damaged should be properly repaired or replaced by an authorised service centre.
- Check all nuts, bolts and screws at frequent intervals for proper tightness to ensure the product is in safe working condition.
- Be careful during adjustment of the product to prevent entrapment of the fingers between moving blades and fixed parts of the product.
- When servicing the blades, be aware that even though the power source is switched off, the blades can still be moved. The blade on the product is sharp. Use extreme caution and wear heavy duty gloves when fitting, replacing, cleaning or checking bolt security.
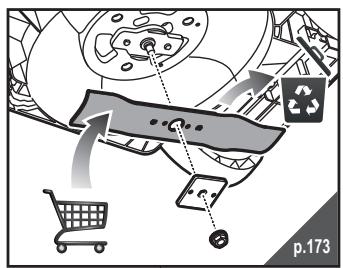
- Replace damaged blades and bolts in sets to preserve balance.
RISK REDUCTION
It has been reported that vibrations from handheld tools may contribute to a condition called Raynaud's Syndrome. Symptoms may include tingling, numbness and blanching of the fingers, usually apparent upon exposure to cold. Hereditary factors, exposure to cold and dampness, diet, smoking and work practices are all thought to contribute to the development of these symptoms. There are measures that can be taken by the operator to possibly reduce the effects of vibration:
- Keep your body warm in cold weather. When operating the product wear gloves to
keep the hands and wrists warm.
After each period of operation, exercise to increase blood circulation. Take frequent work breaks. Limit the amount of exposure per day.
If you experience any of the symptoms of this condition, immediately discontinue use and see your doctor.
WARNING
Injuries may be caused, or aggravated, by prolonged use of a tool. When using any tool for prolonged periods, ensure you take regular breaks.
KNOW YOUR PRODUCT
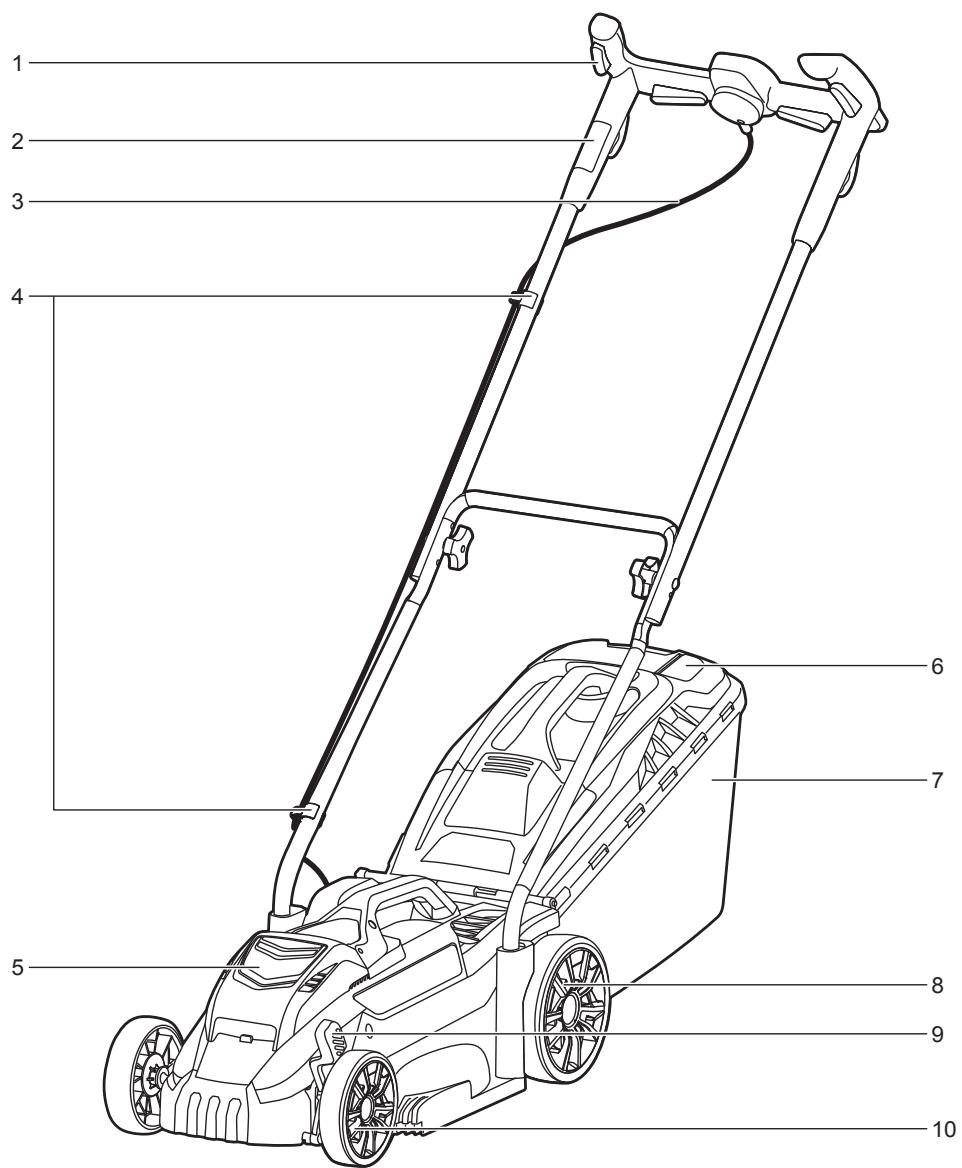
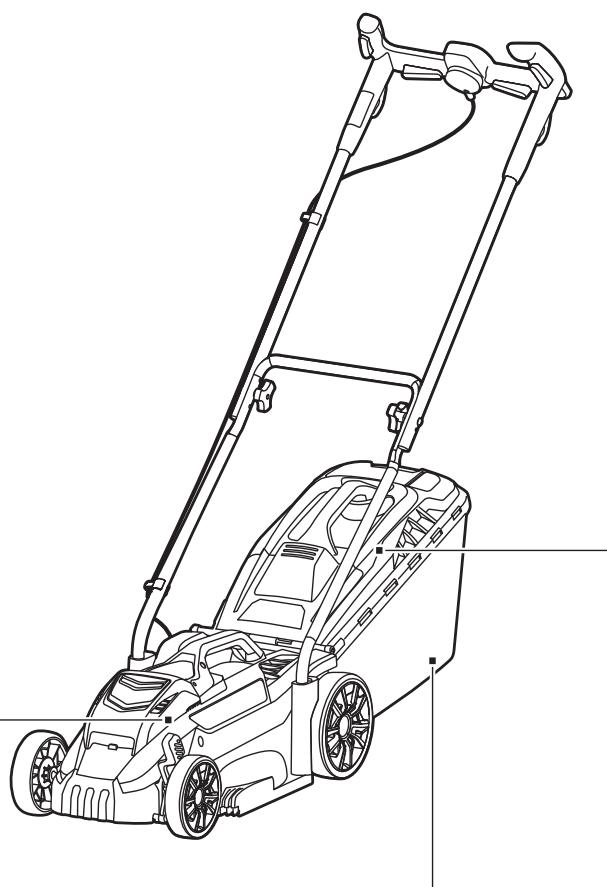
See page 163.
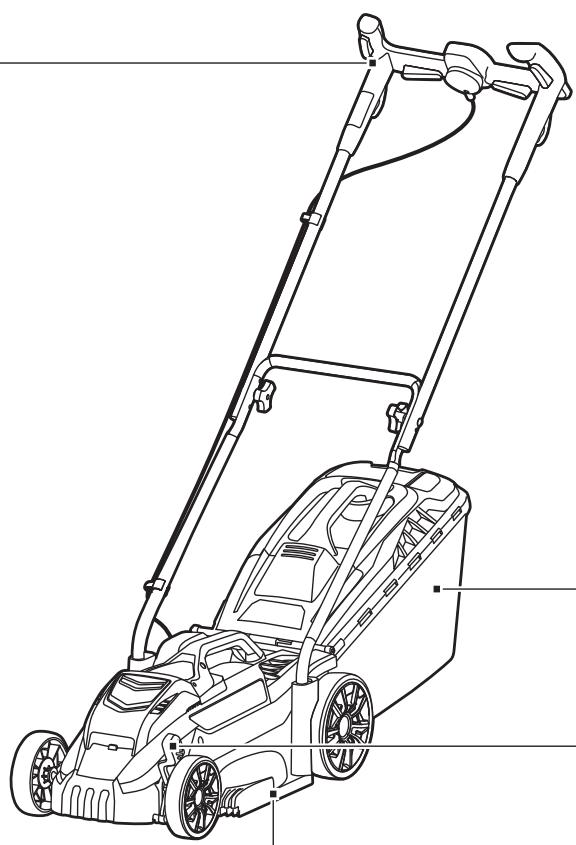
Parts
- On-off button
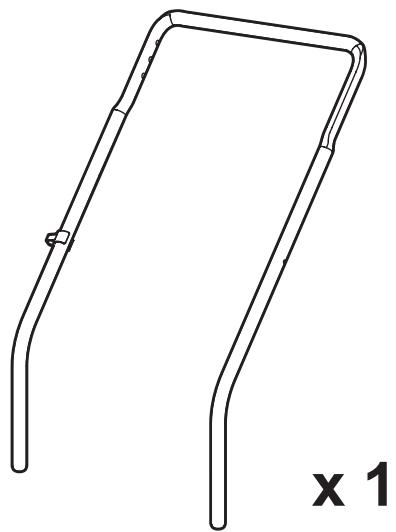
- Handle
- Motor control cable
- Cord retainer
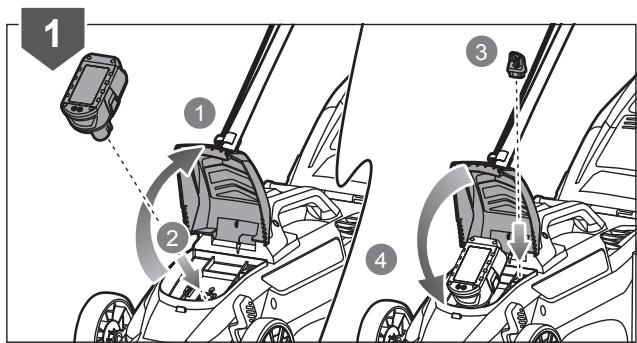
- Battery door
- Grassbox full indicator
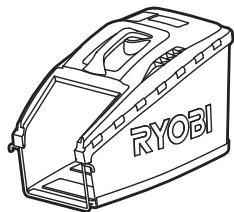
- Grassbox
- Rear wheel
- Height adjustment lever
- Front wheel
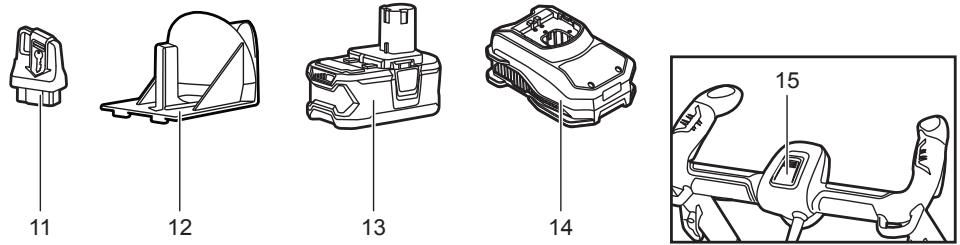
- Isolator key
- Mulching plug
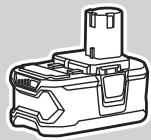
- Battery
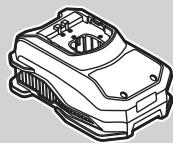
- Charger 15. Start button
SYMBOLS ON THE PRODUCT

Read and understand all instructions before operating the product, follow all warnings and safety instructions.

Wear ear protection.

Wear eye protection.

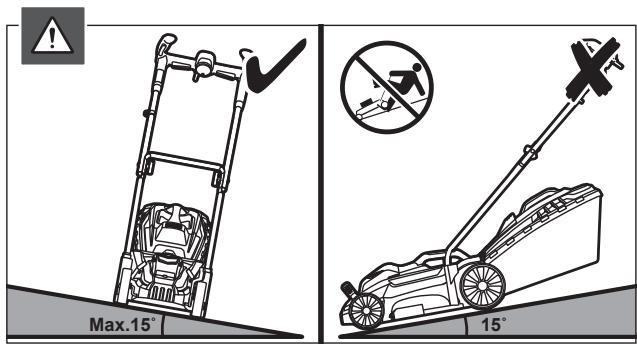
Do not operate on inclines greater than 15°. Mow across the face of slopes, never up and down.

Do not expose to rain or damp conditions.

Beware of sharp blades. Blades continue to rotate after the motor is switched off - Remove isolator key before maintenance.

Beware of thrown or flying objects. Keep all bystanders, especially children and pets, at least 15 m away from the operating area.
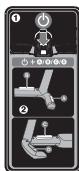
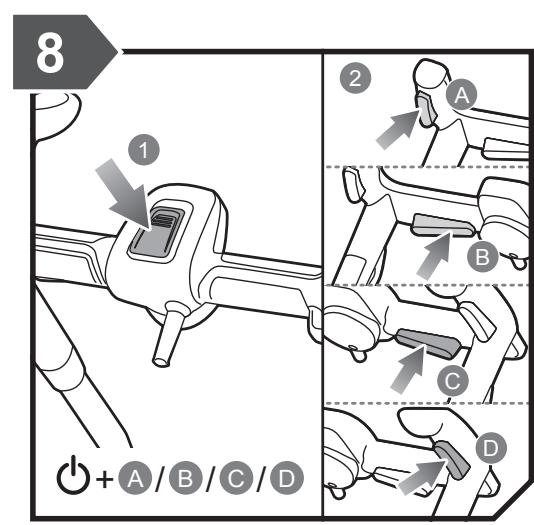
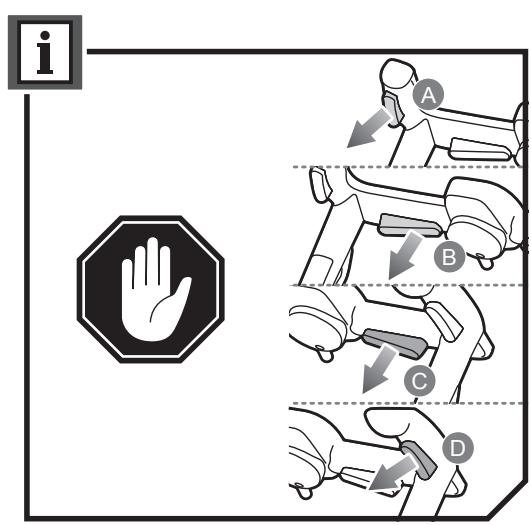
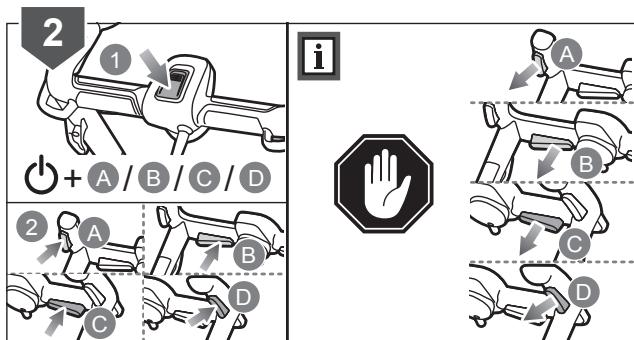
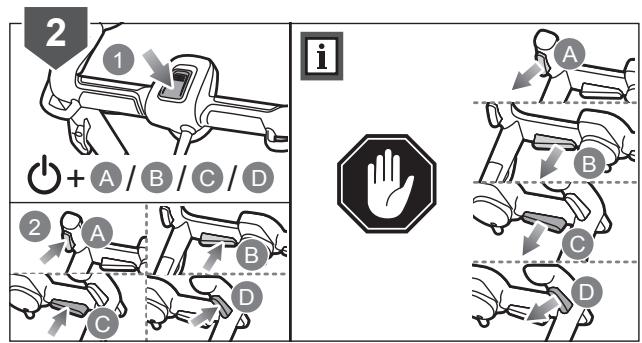
Press the Start button and then the On-off button (A, B, C or D) to start the product. Release the Start button and keep pressing the On-off button to run the product. Release the On-off button to stop the product.

Please read the instructions carefully before using the product.

Waste electrical products should not be disposed of with household waste. Please recycle where facilities exist. Check with your local authority or retailer for recycling advice.

Conforms to all regulatory standards in the country in the EU where the product is purchased.

EurAsian Conformity Mark

Ukrainian mark of conformity

The guaranteed sound power level is shown on this label by 94 dB.
The following signal words and meanings are intended to explain the levels of risk associated with the product:
DANGER
Indicates an imminently hazardous situation, which, if not avoided, will result in death or serious injury.

WARNING
Indicates a potentially hazardous situation, which, if not avoided, could result in death or serious injury.

CAUTION
Indicates a potentially hazardous situation, which, if not avoided, may result in minor or moderate injury.
CAUTION
(Without safety alert symbol) Indicates a situation that may result in property damage.
SYMBOLS IN THIS MANUAL

Parts or accessories sold separately

Waste electrical products should not be disposed of with household waste. Please recycle where facilities exist.

Keep hands away from blades

Note

Warning

Stop the product.
MOWING TIPS
The run time of the battery depends on the condition, length, and density of the grass.
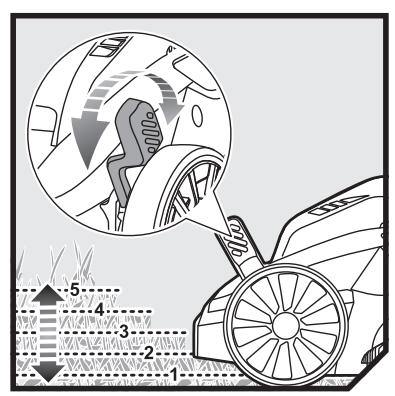
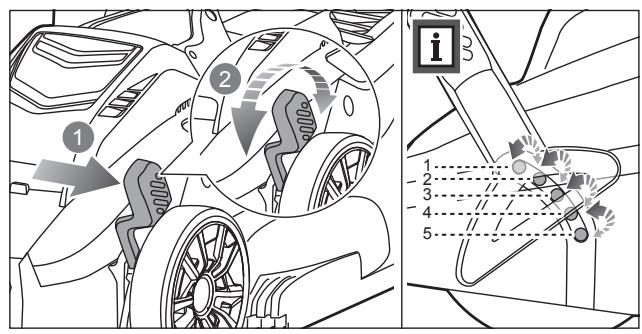
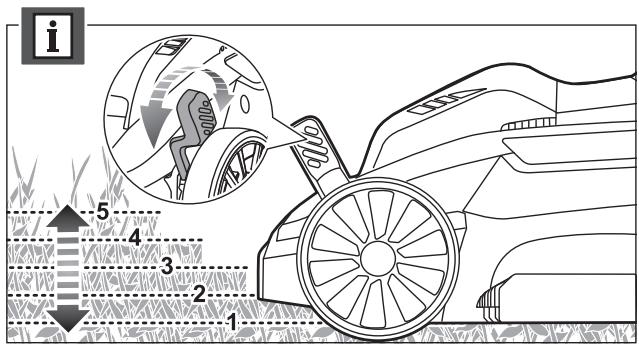
Adjust the cutting height of the lawn mower to suit the current condition of the lawn to be mowed.
| Grass conditions | Suggested height adjustment | Coverage (maximum) | ||
| First pass | Succeeding passes | 4 Ah battery | 5 Ah battery | |
| Very thin / Dry | 3 | 2 | 200 m² | 250 m² |
| Thin / Dry | 4 | 3 → 2 | 150 m² | 200 m² |
| Medium / Dense | 5 | 4 → 3 | 100 m² | 150 m² |
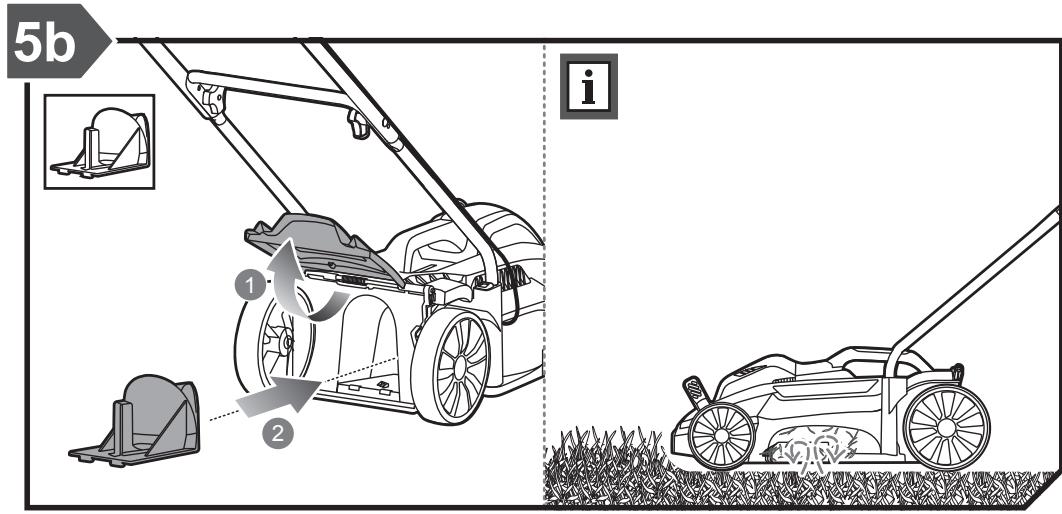
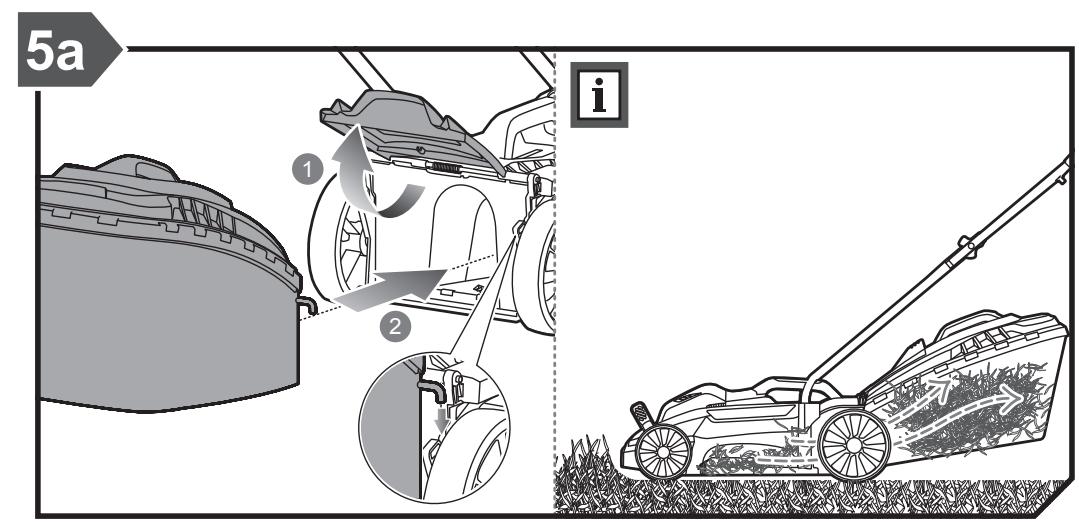
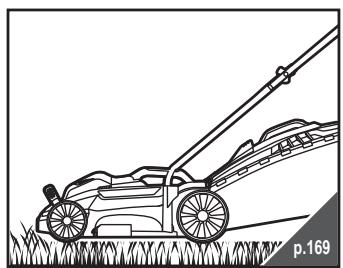
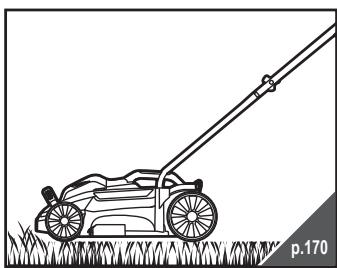
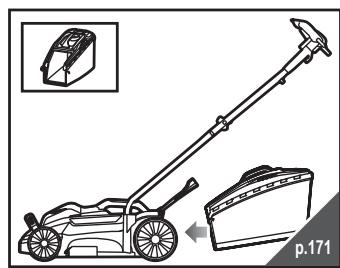
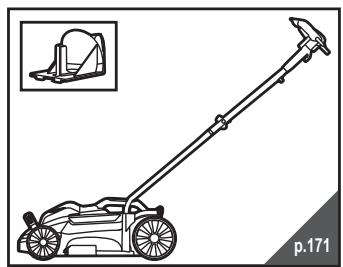
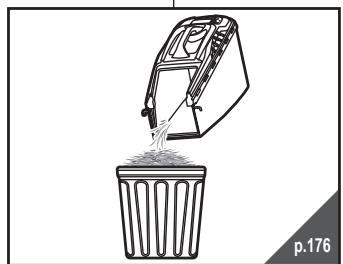
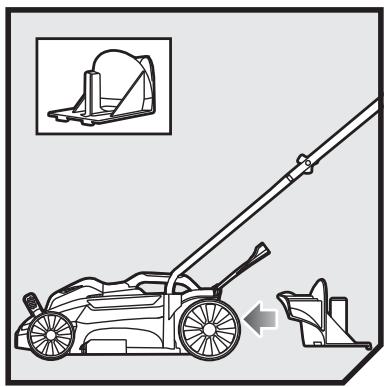
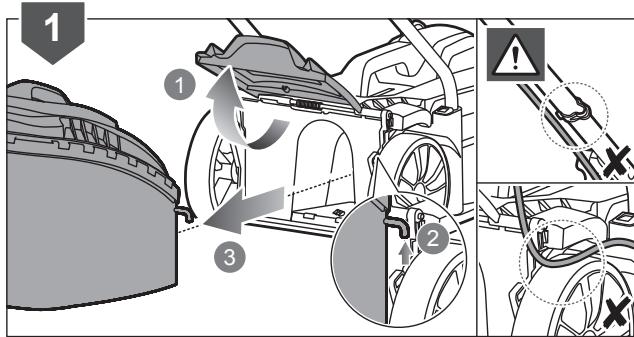
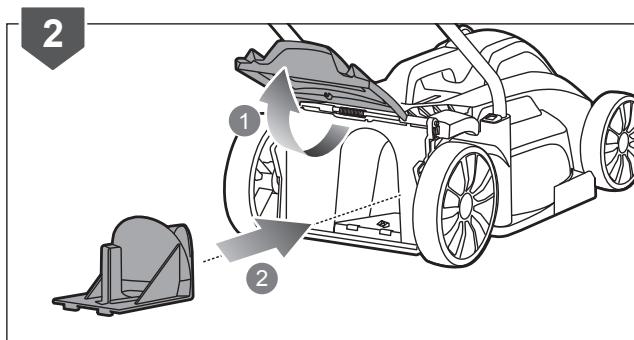
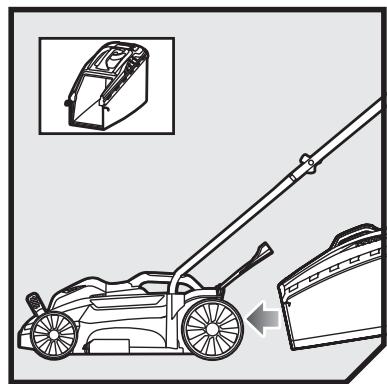
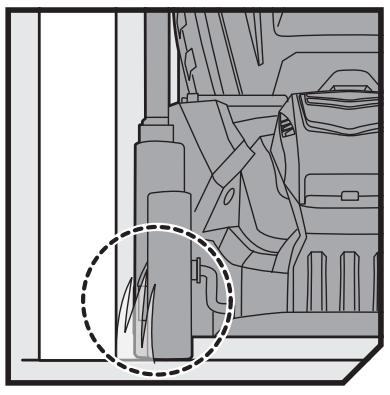
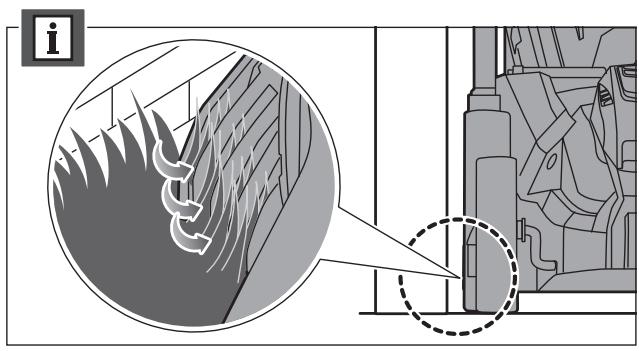
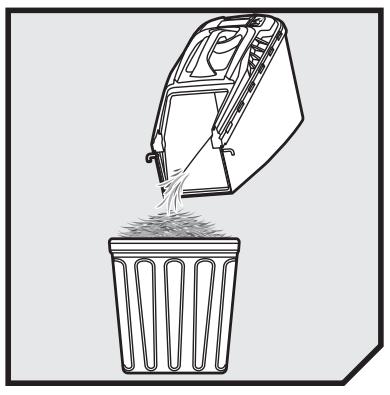
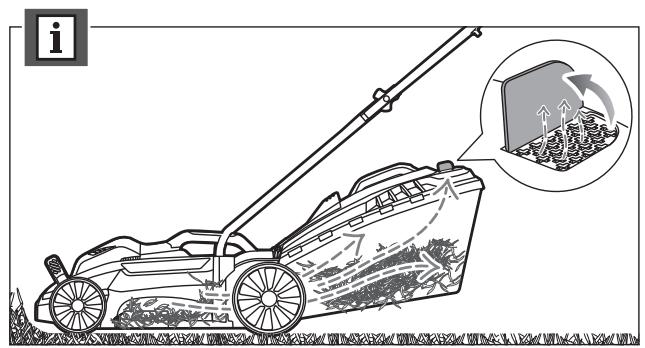
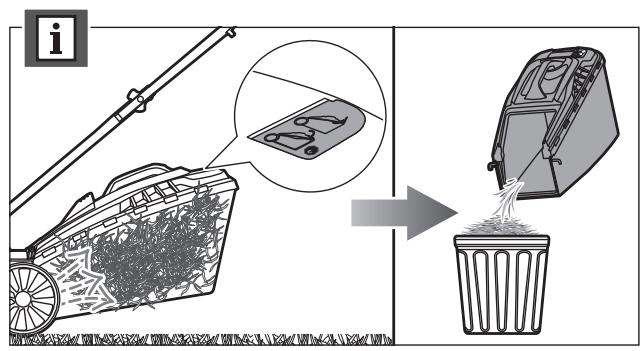
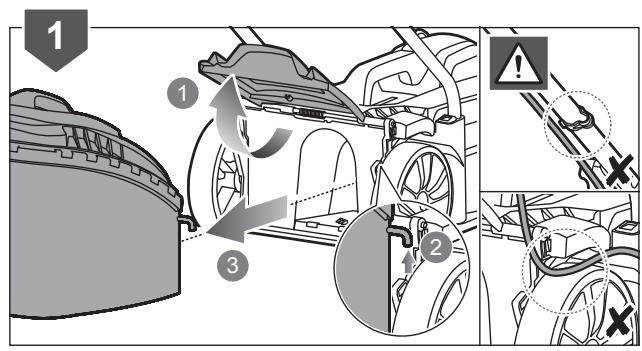
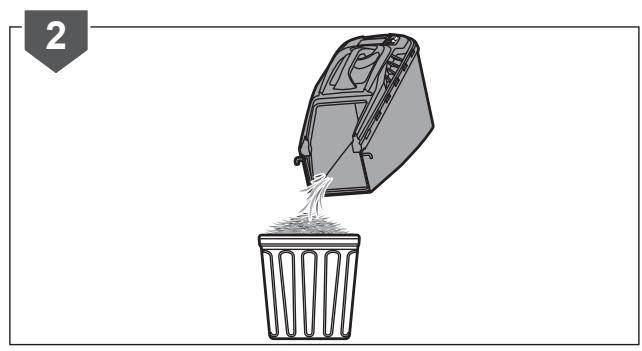
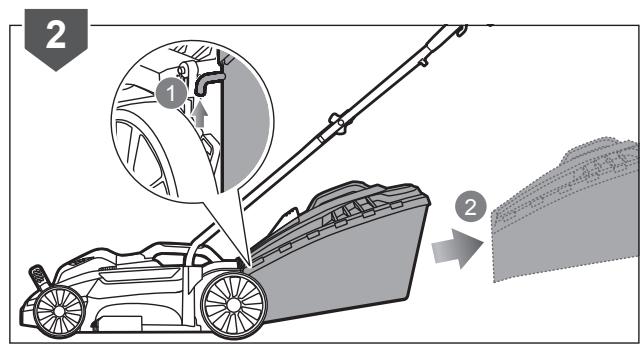
For best performance, always cut off one-third or less of the total height of the grass. - When cutting long grass, reduce walking speed to allow for more effective cutting and a proper discharge of the clippings. - Do not cut wet grass; it will stick to the underside of the deck and prevent proper collection or discharge of grass clippings. - New or thick grass may require a higher cutting height. A higher cutting height will extend the run time of the battery. If you wish to collect the grass cuttings for disposal, remove the mulching plug and fit the grass box making sure the top flap is properly closed. Empty the grass box regularly; otherwise, the discharge chute will become blocked with grass cuttings. If you are making a light cut and wish for the grass cuttings to remain on the lawn, fit the mulching plug and close the top flap to cover the discharge opening. It is not necessary to fit the grass box in this case. The mower is designed to operate and cut most effectively when moving forwards.
RISK REDUCTION
SYMBOLS APPLIED ON THE PRODUCT

GET TO KNOW YOUR PRODUCT
See page 163.
Parts
SYMBOLS ON THE PRODUCT

SAFETY WARNINGS
WARNING
SAFETY WARNINGS FOR LAWN MOWER
SYMBOLS ON THE PRODUCT

GENERAL SAFETY REGULATIONS
A WARNING
TRANSPORT AND STORAGE
SYMBOLS ON THE PRODUCT

KNOW YOUR PRODUCT
See page 163.
Parts
- On/Off button
- Handle
- Motor control cable
- Cord holder
- Battery door
- Full grass bag indicator
- Grass box
- Rear wheel
- Height adjuster
- Front wheel
- Insulator wrench
- Mulch plug
- Battery
- Charger
- Start button
SYMBOLS ON THE PRODUCT

Caution: Be careful when replacing the blades.
Do not use the device near ditches, trenches, or very steep slopes. The operator may slip and fall, causing injury.
WORK AREA SAFETY
It is forbidden to work with the device if within a radius of 15 m there are people, especially children or domestic animals, because objects thrown from contact with the blade may cause injury. Objects thrown by the blade of the mower may cause serious injury. Carefully inspect the area where the lawn mower is to be used and remove all stones, sticks, metal parts, wire, bones, toys, and other foreign objects. Remember that cords and cables may become entangled in the rotating parts. Perform mowing only in daylight or in good artificial light. Do not use the device in explosive atmospheres, such as in the presence of flammable liquids, gases, or dust. Sparks may be generated in the device, which could ignite dust or gas. Do not work with the device on wet grass or in the rain. Do not use the device if the blade is damaged. Be aware that the operator or user is responsible for accidents or hazards occurring to other people or their property. Serious accidents can occur if the operator is not attentive to the presence of children. Children are often attracted to the machine and its activity. Never assume that children will stay where you last saw them. Keep children out of the mowing area and under the careful supervision of a responsible adult.
Do not operate the device if a child enters the work area.
Use extra caution when approaching blind corners, bushes, trees, or other objects that may hide a child from your view.
OPERATION OF THE DEVICE WITH BATTERY POWER SUPPLY
Read, understand, and always follow the safety instructions provided with the battery and charger. Failure to follow the instructions may result in electric shock, fire, and other dangerous situations. Keep all instructions together in a safe place for future reference. There is no need to plug battery-powered devices into an electrical outlet; they are always in working condition. Remove the connector when you are not using the device. ■ Before performing any adjustments, cleaning, or removing material from the device, remove the battery. ■ Before installing the battery, make sure that the device is turned off. Charge the battery only with the charger recommended by the manufacturer. Using a charger with an incompatible battery may create a risk of fire. Use batteries only with the specified chargers. Use only the batteries intended for this device. Using other types of batteries may result in fire, electric shock, or personal injury. If the battery
is used, store it separately from other metal objects, such as paper clips, coins, keys, nails, screws, and other small metal objects that could short-circuit the battery contacts. Short-circuiting the battery terminals may cause sparks, fire, or explosion.
Never disassemble the battery. Working with heat sources increases the risk of explosion and injury. Do not open or disassemble the battery. Electrolyte leakage is a corrosive substance that can cause eye or skin damage. If electrolyte is swallowed, it can cause poisoning. Protect the battery from moisture and water. Do not charge the device in high humidity, dust, or moisture. Water entering the charging device creates a risk of electric shock. If the battery is damaged or improperly used, vapors may be emitted. In case of signs of illness, ensure fresh air supply and seek medical help. Vapors may cause respiratory irritation. Do not leave the battery in a car or outdoors at high or low ambient temperatures. Do not incinerate the battery. Under abnormal conditions, liquid may leak from the battery; avoid contact. If contact cannot be avoided, rinse the liquid with water. If liquid gets into eyes, after rinsing them, seek medical help. Liquid leaking from the battery may cause irritation or burns.
PRECAUTIONS REGARDING SAFE USE OF THE TRIMMER
Before each use, always check the trimmer head for wear or damage, the cutting line, the line spool, and the trimmer head assembly. Replace worn or damaged trimmer heads with those in the kit to ensure balance. The blade used in the device is very sharp; be extremely careful and perform installation, replacement, cleaning, and bolt tightening checks with protective gloves. Contact an authorized service center for replacement of damaged or unreadable product labels. Check all bolts, slides, screws, and intervals for proper tightness to ensure the equipment is in a safe, working condition. Regularly check the trimmer for wear, damage, and effectiveness. Replace worn or damaged parts before starting the device. Before starting the device, the operator must be behind the handles in a safe position. Do not start the device unless the following conditions are met:
All four wheels are not on the ground - the grass discharge chute is closed with the plug, the grass discharge chute is closed with the mulching plug, and the grass discharge chute is closed with the side discharge chute - the operator and other people are at a safe distance from the device, wearing long pants and closed-toe shoes, and there are no obstacles.
Do not use the device if it is possible to stop the engine with the switch located on the handle.
Never attempt to block the switch of the "ON" button; this is extremely dangerous. Do not apply excessive force when working with this tool. It is better and safer to work at the speed for which the device is designed. When crossing gravel-covered areas, stop the cutting blade. Do not pull the device backwards unless absolutely necessary. If you need to move the device away from a wall or fence, first look behind you to avoid injuring your feet during movement. Stop the engine and wait for the blade to stop if the lawnmower needs to be tilted for transport when crossing open grassy surfaces and when transporting the device to the mowing site and back. Never use the tool if protective devices are damaged or without installed shields or other protective devices, for example, without deflectors and/or grass catcher. Do not tilt the lawnmower during starting and operation of the engine. This opens the blade and increases the risk of dangerous objects flying out. Start the engine carefully following the instructions, avoiding contact with the cutting zone. Keep the discharge chute open at all times. Do not start the engine when standing in front of the discharge chute. Keep hands and feet away from rotating parts and underneath. Keep the discharge chute open at all times. Do not lift or carry the device while the engine is running. Stop the engine of the lawnmower and remove the blocking device, make sure that all moving parts have completely stopped in the following cases:
When the product is left unattended (including when ejecting grass clippings) - before removing blockages or cleaning the chute: - before checking, cleaning, or servicing the product; - after hitting a foreign object; inspect the device for damage and repair as necessary before restarting and operating the device; - before emptying the grass catcher or opening the discharge chute cover if the product starts to vibrate (check immediately).
- Inspect for damage, especially the blades - replace or repair damaged parts - check and, if necessary, tighten loose parts
Avoid holes, ruts, bumps, stones, or other hidden objects. Uneven terrain may cause an accident if you slip or fall. Always ensure that the cord coming from the lawnmower handle is not tangled, pinched, or damaged in any way during assembly or when folding the handle.
OVERLOAD PROTECTION CIRCUIT BREAKER
This product is equipped with an overload protection device that activates in case of overcurrent or overload, automatically cutting off power to the product. If the overload protection device activates, you must turn off the ON/OFF button. Press the ON/OFF button to restart the device.
Battery charging may cause deviation of the tool. Overheating may cause the battery to fail. Check the battery; if it is too hot, let it cool down. If the tool still does not work after that, charge the battery.
NOTE: Indicator lights.
The battery may not work if the tool's shutdown from the battery is caused by the battery protection function. Release the trigger switch, remove the battery from the tool, after which the indicator will resume normal operation.
ALWAYS BE CAREFUL
Even when the tool is used according to the instructions, it is impossible to completely eliminate risk factors. During operation, the following situations may arise, which the user must pay special attention to in order to avoid problems:
Injuries caused by vibration. Use the tool only for its intended purpose, use proper handles, and follow the working mode. Exposure to noise may cause hearing damage. Wear hearing protection and limit the duration of noise exposure. Contact with the blade and injuries from thrown objects.
TRANSPORTATION AND STORAGE
Stop the engine and remove the ignition key. Make sure all moving parts have come to a complete stop. Allow the device to cool before storing or transporting. Clean the device of all foreign materials. Store it in a cool, dry, well-ventilated place out of reach of children. Do not keep it near corrosive substances such as garden chemicals or de-icing salts. Do not store outdoors. For transport, secure the device so that it cannot move and cause injury to personnel or damage to the device.
CAUTION
Be extremely careful when lifting or tilting the device for maintenance, cleaning, storage, or transport. The blade is very sharp. If the blade is exposed, keep it away from your body.
MAINTENANCE
CAUTION
Use only original spare parts, accessories, and attachments from the manufacturer. Failure to comply with this requirement may result in injury, reduced performance, or voiding of the warranty.
CAUTION
Maintenance requires special care and knowledge and should be performed only by qualified service technicians. For service, we recommend that you return the device to your nearest authorized service center for repair. When performing maintenance, use only recommended spare parts.
The machine is designed to be serviced before maintenance. You can also perform other types of adjustments and repair work described in this manual. For repairs, contact an authorized service center. Keep the mechanism in good working condition. After each use, wipe the product with a soft, dry cloth. In case of damage to any part, contact an authorized service center for proper repair or replacement.
Check all bolts, slides, and screws at regular intervals for proper tightness to ensure the product is in safe working condition. When adjusting the tool, be careful to avoid pinching fingers between moving and cutting parts or stationary parts of the tool. When handling cutting blades, remember that even with the power supply disconnected, the blade may move. The blade of the product is sharp. Be extremely careful and perform installation, replacement, cleaning, and checking of bolt tightness with protective gloves. Replace worn or damaged cutting blades with the set to ensure balance.
RISK REDUCTION
It is believed that vibration of hand tools may contribute to the development of Raynaud's Syndrome in some individuals. Symptoms may include tingling, numbness, and blanching of the fingers (as if exposed to cold). It is thought that hereditary factors, cold and humidity, diet, smoking, and work practices contribute to the development of these symptoms. Below are measures that the operator can take to reduce the effects of vibration:
Dress warmly in cold weather. When operating the product, wear gloves to keep your hands warm. After each work stage, perform exercises to improve blood circulation. Take frequent breaks from work. Limit the duration of daily exposure to open air.
If any of the listed symptoms occur, stop work immediately and consult a doctor.
CAUTION
Excessively prolonged use of the tool may lead to injury. When using the tool for extended periods, take regular breaks.
KNOW YOUR PRODUCT
See page 163.
Parts
- On/Off switch
- Handle
- Guide bar 4. Cord lock 5. Battery compartment door 6. Grass bag full indicator
- Grass bag
- Rear wheel
- Adjusting the height
- Front wheel
- Lifting lever
- Start for mowing.
- Battery
- Charging device
- Start button
SYMBOLS AND DESIGNATIONS OF THE PRODUCT

Carefully read all instructions before using the product, follow all warnings and safety instructions.

Wear hearing protection

Wear eye protection

Do not work on slopes with an angle of inclination greater than 15°. Do not mow across slopes, never up or down.

Do not expose the tool to rain and do not use in conditions of high humidity.

Be careful with sharp blades. The blade continues to rotate after the motor is switched off. Remove the safety key before performing maintenance.
WARNING: The device may eject objects that are thrown by the device or fall out of it. Do not allow bystanders, especially children and pets, to approach the work area closer than 15 m.
Press the Start button, then the On/Off button (A, B, C, or D) to start the device.
Release the Start button. Keep the On/Off button pressed for the device to operate. Release the On/Off button to stop the product.
Before using the device, carefully read this instruction manual.
Used electrical products must be disposed of together with household waste. Recycle them if there is special technical equipment. For recycling inquiries, contact your local authority or the retail outlet where you purchased the product.

This instrument complies with all official standards of the EU country in which it was purchased.
EAC
Eurasian Conformity mark. Certificate of Conformity No. TC RUC-DE.AE11.B.04144. Validity period of the certificate of conformity: until 09.08.2020. Expert body and quality control - Certification Center "Euro-Test" 109147, Moscow, Malaya Kalitnikovskaya Street, building 7

Ukrainian standardization mark

Guaranteed sound power level 94 dB
The following signal words and meanings are intended to explain the level of risk associated with this product:
DANGER
Indicates an imminent hazardous situation which, if not avoided, will result in death or serious injury.
CAUTION
Indicates a potentially hazardous situation which, if not avoided, may result in death or serious injury.
CAUTION
Indicates a potentially dangerous situation which, if not avoided, may result in minor or moderate injury.
CAUTION
(Used without the safety alert symbol) Indicates a situation that may result in damage to property.
CONVENTIONS USED IN THIS MANUAL.

Details for accessories, purchased separately

Processed electrical products must be disposed of together with household waste. Recycle if special technical equipment is available.

Do not touch the cutting blades.

Note

Caution

Stop device.
BLADE TIP
Battery operating time depends on the condition, fullness, and type of grass.
Adjust the cutting height according to the condition of the lawn being mowed.
W17 Y2015, where Y2015 is the year of manufacture
The product can be made according to the table below, using the example of 2015.
Note! The number of weeks in a month varies from year to year.
GET TO KNOW YOUR PRODUCT
See page 163.
Parts
GET TO KNOW YOUR PRODUCT
See page 163.
Parts
Replace or repair damaged parts - check if there are any damaged parts and replace them if necessary.
Avoid sharp edges, burrs, hooks, nails or other sharp objects. Do not place the device below the level of use and storage. The cable connecting the plug to the device body must be installed so that it cannot be caught, cut or damaged in any other way.
OVERLOAD AND OVERLOAD PROTECTION
The product has an overload protection device that activates when overload or short circuit occurs, automatically disconnecting the product's power supply. If the overload protection activates, you must unplug the power cord. Press the power cord plug to restart the product.
The battery has protection against overloading. Extremely high temperatures will affect the battery's ability to charge the instrument. Check the battery; if it is swollen or hot, let it cool down. If the instrument still does not work, replace the battery.
NOTE: The battery indicator light will work if the battery protection function has been triggered to protect the instrument from the battery. Unplug the instrument or remove the battery from the instrument and the battery indicator light will return to normal operation.
The product is to be used only for its intended purpose. It is impossible to completely eliminate the influence of certain risk factors. The risks described below may arise during use, and the operator must pay attention


To avoid the following:
Injuries caused by vibration. When using, use suitable tools for the corresponding work and purpose, and limit the working time and exposure to risk. Excessive use may lead to hearing damage. Wear hearing protection and limit exposure. Contact with sharp edges or moving parts
TRANSPORTATION AND STORAGE
Turn off the engine and remove the spark plug cap. Make sure all moving parts have come to a complete stop. Allow the product to cool sufficiently before transporting or storing it. Clean the product of all dirt and debris. Store it in a cool, dry, and well-ventilated place, which is essential for the device. Do not leave it near corrosive materials such as chemicals or de-icing salts. Do not store it outdoors. When transporting the product, secure it so that it cannot move or fall, as this may cause injury to people or damage to the product.
WARNING
Be extremely careful when lifting or tilting the machine to transport or perform work on surfaces, cleaning, or storage. The blade is sharp. Keep all parts of your body away from the blade when it is exposed.
SURFACE
WARNING
Use only original spare parts, accessories, and attachments from the manufacturer. Otherwise, the operation of the tool may be impaired or safety may be compromised, and the warranty will become void.
WARNING
Servicing requires exceptional attention and specific knowledge and must be performed only by qualified technicians. For servicing and repairs, we recommend taking the product to the nearest authorized service center. For repairs, use only original spare parts.
Before using the device, check the battery and the power cord for damage. You may make adjustments and repairs described in this manual. For other repairs, contact an authorized service agent. It is recommended to check the collector regularly for wear or damage. All users should use the product with dry hands. Any damaged part must be repaired or replaced by an authorized service center. ■Periodically check that all nuts, bolts, and screws are properly tightened, so that the product is safe. Be careful when adjusting the instrument to prevent your fingers from being caught between moving and stationary parts of the instrument. ■When servicing the blades, you must know that even if the power source is disconnected, the blades may still move. The blade of the product is very sharp.
Be careful and wear protective gloves when tightening, filling, cleaning, or inspecting the bolts.
Replace worn or damaged blades and bolts immediately to protect the balance.
RISK REDUCTION
It is known that vibrations from hand-held instruments may cause some users to develop a condition called Raynaud's Syndrome. Symptoms may include tingling, numbness, and blanching of the fingers, usually triggered by exposure to cold. It is believed that hereditary factors, exposure to cold and damp, diet, smoking, and certain work habits contribute to the development of these symptoms. Some measures can be taken by the operator to reduce the effects of vibration:
Keep your body warm in cold weather. When working with the product, wear gloves to keep your hands and wrists warm. Do exercises to activate blood circulation after each work cycle. Take regular breaks. Organize the vibration exposure of the work.
If any of the symptoms of this condition appear, immediately stop using the instrument and consult a doctor.
PROLONGED USE
Prolonged use of the instrument may lead to fatigue or injury. When using the instrument for prolonged periods, take regular breaks.
IDENTIFY YOUR PRODUCT
See page 163.
Parts
- Switch for turning on/off
- Handle
- Cable for controlling the feeder
- Mulcher attachment
- Door for batteries
- Indicator for fuel level and warning
- Fuel tank
- Rear wheel
- Adjustable cutting height
- Empty wheel
- Ignition key 12. Mulching attachment 13. Battery.
- Starter device
- Button for starting
PRODUCT SYMBOLS

Read and understand all instructions before starting work with the product; follow all safety warnings and instructions.

Wear protective gloves

Wear eye protection

Do not work on slopes greater than 15°. Keep the slope surfaces firm, never go up or down.

General handling conditions.

Be careful of sharp edges. The edges must be turned to avoid injury when removing the device from the packaging. Remove the key of the isolator before cleaning the surface.

Be careful of ejected or flying objects. Do not allow bystanders, especially children and animals, within 15 m of the work area.
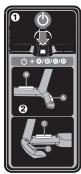
Press the "Start" button and then the button for switching on/off (A, B, C or D) to start the device. Release the "Start" button and press the button for switching on/off to work with the device. Release the button for switching on/off to stop the product.

Read the instructions carefully before starting the machine.

Electrical devices must not be disposed of with household waste. Recycle where possible. Contact your local authorities or retailers for recycling advice.

This machine complies with the EU regulations in force at the time of purchase.

Eurasian Conformity mark

Ukrainian Conformity mark

Guaranteed noise level of 94 dB.
The following symbols and their corresponding meanings explain the dangers associated with the use of this product:
DANGER
Indicates an imminent dangerous situation that, if not avoided, will result in serious injury or death.
WARNING
Indicates a potentially dangerous situation that, if not avoided, may result in serious injury or death.
WARNING
Indicates a potentially dangerous situation which, if not avoided, may result in damage to the mower.
WARNING
(Without safety alert symbol) Indicates a situation that may result in property damage.
SYMBOLS IN THIS MANUAL

The accessories are sold separately. Electrical devices must not be disposed of together with household waste. Recycle them where facilities exist.

Keep the blades sharp.

Maintenance

Warning

Stop the device.
Contact
The charging time of the battery depends on the condition, height, and moisture of the grass.
Adjust the cutting height of the mower deck so that it matches the current condition of the grass you are cutting.
| Условая на травata | Пелорьчitelно рergулираце на Височина | Плоз (мaksimална) | ||
| Първо косен | Посnéдваши Okосяваши | Ахмунатога 6бетерia 4 А | Ахмунатога 6бетерia 5 А | |
| Мнoro тьнka / суха | 3 | 2 | 200 m² | 250 m² |
| Тьнka / суха | 4 | 3 → 2 | 150 m² | 200 m² |
| Среда / гьста | 5 | 4 → 3 | 100 m² | 150 m² |
For best mowing performance, do not cut more than one third of the total grass height at a time. When mowing tall grass, remember to walk slowly for better efficiency and proper discharge of the cut grass. Do not mow wet grass; it will clog the underside of the housing and impair proper collection or discharge of grass clippings. For young or sparse grass, a higher cutting height may be applied. A higher cutting height extends the battery runtime. If you want to collect the cut grass, attach the mulching adapter and install the grass catcher, making sure to close the rear flap properly. Empty the grass catcher regularly; otherwise, the discharge of grass will become clogged with grass clippings. If you only want to mulch the grass and want the clippings to remain on the lawn, install the mulching adapter and close the rear flap so that the discharge is covered. In this case, it is not necessary to install the grass catcher. The mower is designed to work most efficiently when you are mowing.
Pay special attention to safety, power, and reliability when using the cordless lawn mower.
PIZNAUYENNYA
This product is intended only for use in open air.
This instrument is intended for mowing grass on lawns. The mower deck must be kept strictly parallel to the mowing surface. All mower wheels must touch the ground. The lawn mower is controlled by a person using the handle.
It is forbidden to use the lawn mower if its wheels are lifted off the ground; do not pull the mower and ride on it. The instrument is intended exclusively for mowing grass on residential lawns.
GENERAL SAFETY MEASURES
WARNING
When using products with battery power, it is necessary to follow basic safety precautions to reduce the risk of injury, fire, and battery damage. Read all safety and operating instructions before using the product. Keep the safety instructions for future reference.
WARNING
The product must be operated only with the battery container. When using products with battery power, it is necessary to follow basic safety precautions to reduce the risk of injury, fire, and battery damage.
PERSONAL SAFETY
If used improperly, the device can cut off hands or feet, and during operation it can throw objects that can hit the operator. Failure to follow safety rules can lead to
serious injuries or even fatal accidents.
Read and understand the instructions and safety warnings. Familiarize yourself with the controls and proper use of the machine. Never allow children or people with reduced physical, sensory or mental capabilities, or those unfamiliar with these instructions, to operate, clean or maintain the machine. Local legislation may restrict the operator's age. It is necessary to carefully supervise children to ensure they do not play with the machine. Be careful, watch what you are doing, and use common sense when operating the product. Do not operate the product if you are tired or under the influence of drugs, alcohol or medication. A moment of inattention while operating the product can lead to serious injury. It is mandatory to wear long trousers made of sturdy material, with long sleeves and non-slip footwear. Do not wear loose clothing, shorts, jewelry, or go barefoot. Avoid wearing loose clothing or clothing with hanging cords or ties. Always wear safety goggles with side shields. Always make sure of your footing. Keep proper footing and balance at all times. Walk, never run. Always be sure of your footing on slopes. When mowing on slopes, move the mower across the slope surface, not up and down. Use extreme caution when changing direction on slopes. Do not use the product near embankments, canals, steep slopes or cliffs. Poor footing can lead to slipping and accidents.
WORK AREA SAFETY
Use the product only when people, especially children, or animals are at a distance of at least 15 m, because
there is a danger that objects may be thrown into contact with the blade during operation.
Objects thrown by the mower can cause serious injury to people. Carefully inspect the area where the product will be used and remove all stones, large sticks, metal objects, wires, bones, toys, and other foreign objects. Remember that wires and strings can get tangled in rotating parts. Use the product in daylight or with good artificial lighting. Do not use the product in explosive atmospheres, such as in the presence of flammable liquids, gases, or dust. During mower operation, sparks are generated that can ignite dust or vapors. Do not use the machine on wet grass or in the rain. Do not use the product if there is a risk of lightning. Be aware that the operator or user is responsible for accidents or hazards caused to other people or their property. Carelessness of the operator of the lawnmower in the presence of children can have serious consequences. Children are very attracted to the tool itself and the process of mowing grass. Do not assume that children will stay where you last saw them. Do not allow children to be in the work area during grass trimming. Make sure that children are under the supervision of another responsible adult, other than the person using the mower. Be attentive and turn off the tool when children are on the mowing area. Pay special attention when working near blind corners, bushes, trees, animals, etc., which may obstruct your view.
USING THE TOOL WITH BATTERIES
Read, understand, and always follow the safety instructions
that apply to the battery and the charging device. Failure to follow these instructions may result in electric shock, fire, or other dangerous situations. Keep all instructions together in a safe place for future use.
The battery-powered machine must not be connected to an electrical outlet; therefore, it is always in working condition. Remove the ignition key when you are not using the mower. Remove the battery before adjusting, cleaning, or removing material from the product. Before inserting the battery block, make sure that the key is removed.
WARNING. The battery pack must be charged only with the charger specified in the manual. Use of a charger with a different battery pack may create a risk of fire. The battery must be charged only with the charger recommended by the manufacturer. Use only battery packs specifically designed for this machine. Use of any other batteries may create a risk of injury, electric shock, or fire. When the battery is not in use, keep it away from metal objects such as paper clips, coins, keys, nails, screws, or other small metal objects that can bridge the contacts. Shorting the battery terminals may cause burns, fire, or explosion. Do not expose battery products or their batteries to fire or excessive heat. This increases the risk of explosion and possibly injury. Do not open or disassemble the battery. Electrolyte is corrosive and may cause damage to eyes or skin. It may be toxic.
Guidelines.
Protect the battery pack from moisture and water. Do not charge in wet or damp places. Following this rule reduces the risk of electric shock. In case of damage or improper use of the battery, vapor may escape. Ensure fresh air and seek medical help if symptoms occur. Vapor may irritate the respiratory tract. Do not expose the battery pack to rain or store it in open areas where it is hot or cold. Do not drop the battery. Under extreme conditions, liquid may leak from the battery; avoid contact. If contact occurs, rinse with water. If liquid gets into eyes, seek medical help. Liquid from the battery may cause irritation or burns.
PROTECTION AGAINST OVERLOAD AND OVERHEATING
The product has protection against overload. When the product is overloaded or the current is too high, the product automatically shuts down. If the overload protection is triggered, the product must be turned off and then on again. Press the on/off switch to reset the product.
The battery has protection against overheating. Excessive temperature may cause the product to shut down. Remove the battery; if it is hot, let it cool down,
before resuming work. If the product still does not work, replace the battery.
NOTE: The LED will not work if the battery protection function has triggered a shutdown of the product. Press the on/off switch or remove the battery from the product; the LED indicator will return to normal function.
RESIDUAL RISKS
Even when the product is used as described, it is impossible to completely eliminate all residual risk factors. The following hazards may arise and the operator must pay special attention to avoid the following:
Before using the tool, carefully read the instructions. Use the proper tool, use the designated handles and work area. The blade can cause hearing damage. Use hearing protection and limit exposure. Contact with sharp objects can cause injury.
TRANSPORTATION AND STORAGE
Turn off the product, remove the battery, and allow it to cool before storing or transporting. Make sure all moving parts have stopped. Allow the product to cool adequately before storing or transporting. Clean all foreign material from the product. Store it in a dry, cool, well-ventilated place, inaccessible to children. Keep away from corrosive agents, such as garden chemicals and de-icing salts. Do not store outdoors. For transportation, remove the ignition key and secure the mower to prevent injury or damage to the tool itself.
WARNING
Do not expose the blade to rain or wet conditions.

Remember that the blade is very sharp. After turning off the mower, the blade continues to rotate. Before performing maintenance, remove the spark plug connector.

Beware of thrown or flying objects. Keep all bystanders, especially children and pets, at least 15 m away from the work area.
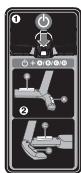
To start the mower, press the start button, then press the lever (A, B, C, or D). Release the start button and continue holding the lever during operation. To stop the tool, release the lever.

Please read the instructions carefully before starting the product.

Electrical products should not be disposed of with household waste. Please recycle where facilities exist. Check with your local authority or retailer for recycling advice.

Complies with all regulatory standards in the countries where it is sold.

CE Mark of Conformity

Ukrainian Mark of Conformity

Guaranteed sound power level 94 dB.
The following signal words and meanings are intended to explain the levels of risk associated with the product.

Indicates a dangerous situation which, if not avoided, could result in death or serious injury.

WARNING
Indicates a potentially dangerous situation which, if not avoided, could result in death or serious injury.

WARNING
Indicates a potentially dangerous situation which, if not avoided, could result in moderate or minor injury.
WARNING
(Without safety alert symbol) Indicates a situation that could result in property damage.
SYMBOLS IN THIS MANUAL

Spare parts and accessories sold separately

Output of electrical products should not be connected together with household outputs. Please, rework where the installation is present.

Keep hands away

Caution

Warning

Stop the product.
Before operating the accumulator, set it to the state, height, and density of the grass.
Adjust the cutting height of the mower according to the exact state of the lawn you are going to mow.
| Стан Трави | Рекомендована висota скошуваня | Плоба охоллени (Мakсимум) | ||
| Перший пroxiod | Настулни пroxовид | Актуларог 4 Ar | Актуларог 5 Ar | |
| Духе тонka/Суха | 3 | 2 | 200 m² | 250 m² |
| Тонka/Cуха | 4 | 3 → 2 | 150 m² | 200 m² |
| Середnia/Густа | 5 | 4 → 3 | 100 m² | 150 m² |
To ensure optimal productivity, cut a third or less of the total grass height. Cutting tall grass requires more frequent mowing to ensure effective collection and reliable discharge of cut grass. Do not use the device on wet grass; it will stick to the lower surface of the deck and hinder reliable collection of cut grass. For mowing very thick grass, a higher collection height is necessary. The accumulator works better at a higher collection height. If you plan to collect grass clippings for composting, remove the mulch plug and install the collection bag; make sure the upper discharge flap is closed securely. Regularly empty the collection bag, otherwise the discharge will be blocked by grass clippings. If you make a small cut and want the clippings to remain on the lawn, install the mulch plug and close the upper discharge flap to cover the discharge opening. In this case, the collection bag does not need to be installed. The mower design ensures the most effective mowing when it moves forward.
RLM18X33H40
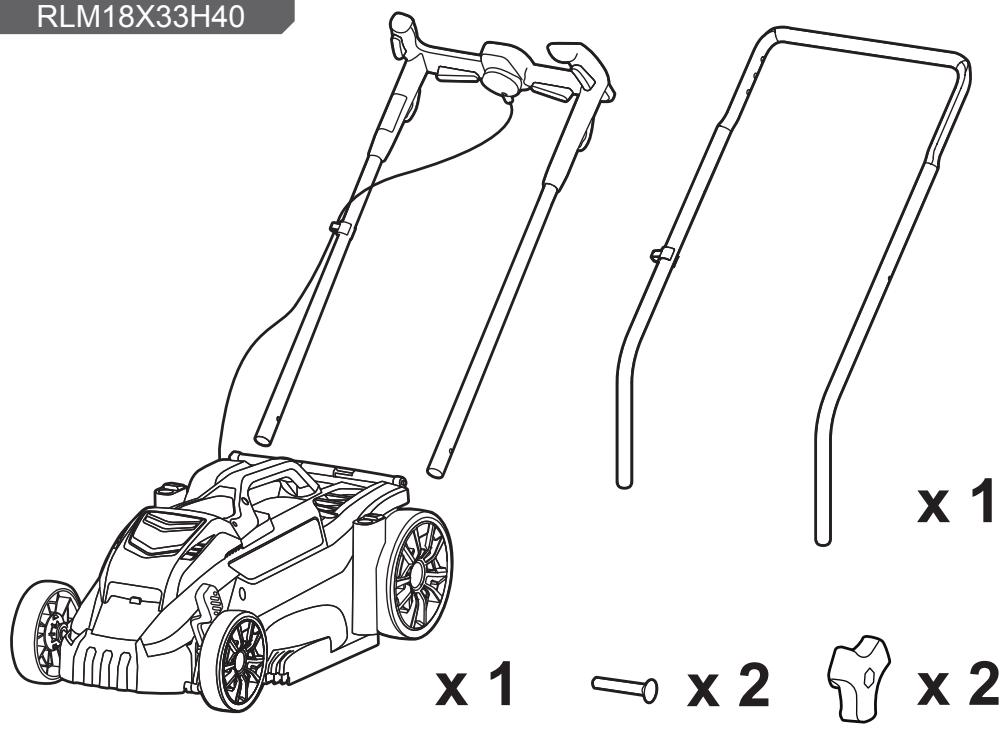
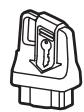
x1
x 1
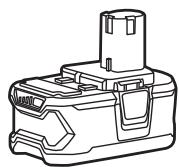
x1

x1
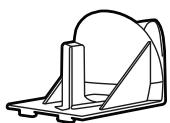
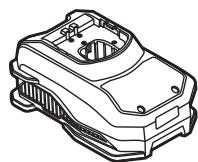
x 1
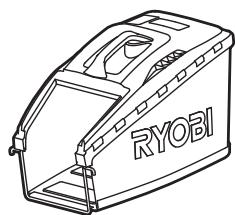
x1
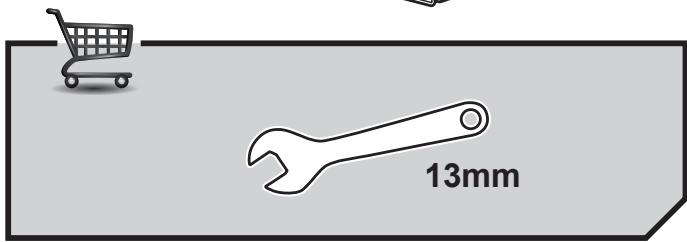
OLM1833H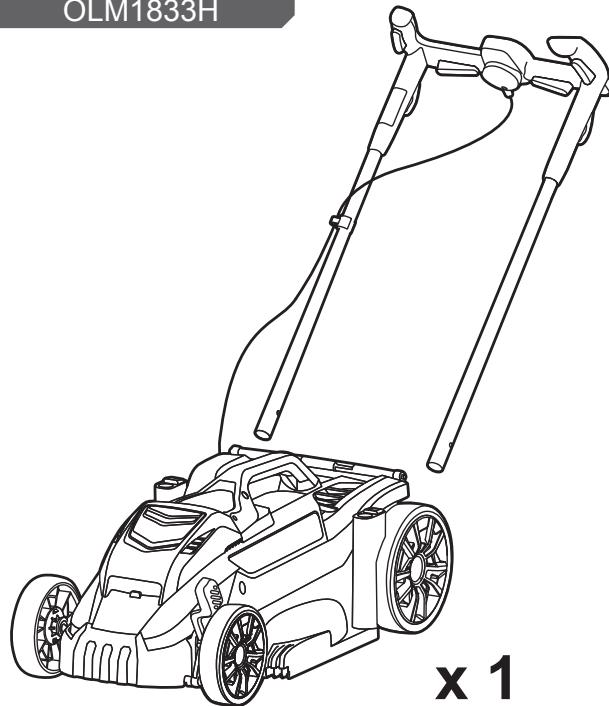

x1
⇒ x 2

x2




| English | François | Deutsch | Espanol | Italiano | Nederland |
| Product specifications | Caracteristique des produits | Produkt-Spezifikationen | Caracteristic del produit | Caracteristiche del prodotto | Productgegevens |
| Cordless Lawn Mower | Tondeuse à Gazon Sans-fil | Akku Rasenmäher | Cortacésped inalámbrio | TosaerbaZA sncav | Snoerloze grasmaaier |
| Model | Modèle | Modell | Modelo | Modello | Model |
| Rated voltage | Tension nominale | Nennspannung | Tensión nominal | Voltaggio nominale | Toegekende spanning |
| Width of cut | Largeur de coupe | Schnittbreite | Anchura de fresado | Larghezza di fresatura | Freesbrendte |
| Height of cut | Hauteur de coupe | Schnithöhe | Altura del corte | Altezza del taglio | Hoopte van de snede |
| No-load speed | Vitesse de rotation | Leerlaufgeschwindigkeit | Velocidad sin cargo | Velocitàenza carico | Snelheid zonder lading |
| Weight (without battery pack) | Poids (Sans batterie) | Gewicht (ohne Akku) | Peso (sin la batería) | Peso (senza batterie) | Gewicht (zonder batterij) |
| Grassbox capacity | Contenance du panier | Grasfangkorbvolumen | Capacidad de la caja de la hierba | Capacità scatola di raccolta erba | Capaciteit grasopvangbak |
| Vibration level (in accordance with EN 60335-2-77 Annex FF) | Niveau de vibrations (selon l'Annexe FF de EN 60335-2-77) | Vibrationsgrad (entspricht Anhang FF von EN 60335-2-77) | Nivel de vibración (según el Anexo FF de EN 60335-2-77) | Livillo di vibrazioni (Secondo quantico indicate dall'Allegato FF di EN 60335-2-77) | Trillingsniveau (in overeenstemming met bijage FF van EN 60335-2-77) |
| Right handle | Poinée droite | Rechter griff | Empuñadura derecha | Manico destro | Rechter handgreep |
| Left handle | Poinée gauche | Linker griff | Empuñadura izquierda | Manico sinistro | Linker handgreep |
| Uncertainty of measurement | Incertitude de la mesure | Unsicherheit der Messung | Incertidumbre de medicación | Incerteza della misurazione | Onzekerheid bij meting |
| Declared vibration value | Valeur déclarée des vibrations | Angegebener Vibrationswert | Valor de vibración declarado | Valore dichiarato vibrazioni | Verklaarde trillingswaarde |
| Noise emission level (in accordance with EN 60335-2-77 Annex GG) | Niveau d'émission sonore (selon l'Annexe GG de EN 60335-2-77) | Geräuschemission (entspricht Anhang GG von EN 60335-2-77) | Nivel de emisión de ruido (según el Anexo GG de EN 60335-2-77) | Livillo di emissione rumori (Secondo quantico indicate dall'Allegato GG di EN 60335-2-77) | Niveau geluidsemissie (in overeenstemming met bijage GG van EN 60335-2-77) |
| A-weighted sound pressure level at operator's position | Niveau de pression sonore pondéré A au niveau de l'opérateur | A-bewerteter Schaldruckpegel an der Position des Benutzers | Nivel de presión sonora ponderado A en la posición del operario | Livillo di pressione sonora ponderata A alla posizione dell'operatore | A-gewogen geluidsdruk niveau bij positie van gebruiker |
| Uncertainty of measurement | Incertitude de la mesure | Unsicherheit der Messung | Incertidumbre de medicación | Incerteza della misurazione | Onzekerheid bij meting |
| A-weighted sound power level | Niveau de puissance sonore pondéré-A | A-bewerteter Schalleistungspegel | Nivel de potenza acústica ponderada en A | Livillo di potenza sonora pesato A | A-gewogen geluidsniveau |
| Uncertainty of measurement | Incertitude de la mesure | Unsicherheit der Messung | Incertidumbre de medicación | Incerteza della misurazione | Onzekerheid bij meting |
| Português | Dansk | Svenska | Suomi | Norsk | Рusský | |
| Characteristicado aparelho | Produkt specificationser | Produkt specificationser | Tuotteen teknisitetiedot | Produkt speifiikasjoner | Характөрістникиндөлүяя | |
| Corta-relva sem fios | Ledningsfri plæneklipper | Sladlögråsklippare | Johdoton ruohonleikkuri | Kabelfi r gressklipper | Беспровodная raцонокosityka | |
| Modelo | Model | Modell | Malli | Modell | Модаь | RLM18X33H40/OLM1833H |
| Tensão nominal | Mærkespænding | Spänning | Nimellisjännite | Nominal spentning | Номиналыhoe наргайене | DC 18V |
| Largura de fresagem | Fræsebredde | Fråsbredd | Jyrsintäleveys | Fresbredde | ШирINAфразовьк | 33 cm |
| Altura de corte | Klippehøjde | Klipphøj | Leikkuukorkeus | Klippehøyde | Бысотастрижки | 25-65 mm |
| Velocidade sem carga | Tomgangshastighed | Hastighet utan belastning | Nopeus ilman kuormaa | Tomgangshastighet | Холочая скорсть | 4.200±10% min-1 |
| Peso (sem a bateria) | Vægt (uden batteri) | Vikt (utan batteri) | Paino (ilman akkua) | Vekt (uten batteri) | Масca (бezа сатарий) | 10.5 kg |
| Capacidade da caixa de relva | Græsbokskapacitet | Kapacitet for grāsláda | Ruoholaatikon tilavuus | Gressbokskapatit | Вмостимость контейнера在这方面 trавь | 35 L |
| Nivel de vibrationag(segundo o Anexo FF da norma EN 60335-2-77) | Vibrationsniveau (i henhold til bilag FF til EN 60335-2-77) | Vibrationsnivă (enligt Annex FF i EN 60335-2-77) | Tärinătaso (EN 60335-2-77 -standardin liitteen FF mukaan) | Vibrasjonsnivă (i samsvar med Tillegg FF til EN 60335-2-77) | Учовень вибашии (в сотовевствени с Плитохени EM FF stанда对接 EN 60335-2-77) | |
| Punho direito | Højre händtag | Höger handtag | Oikea kahva | Høyre händtak | Прави ручи | 3.1 m/s2 |
| Punho esquerdo | Venstre händtag | Vänster handtag | Vasen kahva | Venstre händtak | Лево ручи | 4.2 m/s2 |
| Incerteza de medicijes | Målingusikkerhed | Osakerhet i mäntninger | Mittausten epätarkkuus | Usikkerhet ved málging | Пог'reшноctь Имершии | 1.5 m/s2 |
| Valor de vibrationadeclarado | Deklareret vibrationsværdi | Deklararat vibrationsvärde | Ilmoitettu tärinäravo | Erklaert vibrazjonsverdi | Заяvelенhoe знUCHени Спун�юнец | 5.7 m/s2 |
| Nivel de emissiónruido (segundo o Anexo GG da norma EN 60335-2-77) | Stajemissionsniveau (i henhold til bilag GG til EN 60335-2-77) | Bullernivă (enligt Annex GG i EN 60335-2-77) | Melutaso (EN 60335-2-77 -standardin liitteen GG mukaan) | Stayemissionsnivă (i samsvar med Tillegg GG till EN 60335-2-77) | Учовень ушima (в сотовевствени с Плитохени EM GG stанда对接 EN 60335-2-77) | |
| Nivel de pressiónsonora ponderada A na posições do operador | A-vægtet hydtrykniveau ved operatoren's position | A-viktad ljdtryknsvävi ved operatör'splats | A-painotettu káytäjaän kohdistuva äenepainataso | Staynivävekting ved operatoren'sposijon | Ал'mп'tун'dу-bз've徳ный учовень 38уковоздамени Спун�юнец Melete опетаportа | 77.7 dB(A) |
| Incerteza de medicijes | Målingusikkerhed | Osakerhet i mäntninger | Mittausten epätarkkuus | Usikkerhet ved málging | Пог'reшноctь Имершии | 2.5 dB |
| Nivel de potênciasonora ponderada A | A-vægtet lydeffektniveau | A-vögål juleffektsnivă | A-painotettu äenenteho | A-vektet ljdeffektnivă | Учовень A-Bз've徳ный 38уковоздамени | 89.96 dB(A) |
| Incerteza de medicijes | Målingusikkerhed | Osakerhet i mäntninger | Mittausten epätarkkuus | Usikkerhet ved málging | Пог'reшноctь Имершии | 1.75 dB |

| Polsk | Čeština | Magyar | Románă | Latviski | Lietuviškai |
| Parametry techniczne | Technické udaje produktu | Termék műszaki adatai | Specificàtile produsului | Produkta specifikácijas | Gaminio techninés savybès |
| Kosiarka bezprzewodowa | Akkumulátoros fünyiró | Akumulátorová sekačka trávy | Maşină de tuns gazonul fãră cablu | Brežična kosilnica | Bežična kosilica |
| Model | Model | Tipus | Model | Modelis | Modelis |
| Napićie znamionowe | Jmenovité napěti | Névleges festzült ség | Tensiunea nominală | Nominálais spiregums | Nominali jtampa |
| Szerokóc frezowania | Šífka frézoványi | Marăsi szélesség | Lăjtime de frezare | Griezuma platums | Pjovimo plotis |
| Wysokoóc cięcia | Výška sećení | Vágasmagasság | Înălțimea de tăiere | Grieşanas augstums | Pjovimo akústis |
| Prědkóc obrotowa bez obciążenia | Rychlost naprázdno | Üresjárati fordulatszám | Viteză fãră sarcină | Greitis be apkrovimo | Greitis be apkrovimo |
| Cieźar (bez akumulatóra) | Hmotnost (bez baterie) | Tómeg (akkumulátor nělkūl) | Greutate (fãră accumulator) | Svars (bez baterijas) | Svoris (be lado) |
| Pojemnosć kosza na trawe | Kapacita sběmného vaku | Fügyüjtő tírfogata | Capacitate colector de iarbă | Záles savácêja ietilpîba | Žolés surinkimo déžés talpa |
| Poziomogrǎn (zgodnie z aneksem FF normy EN 60335-2-77) | 'Urovenibrác (v souladu s pflöhou FF normy EN 60335-2-77) | Vibrációsztint (az EN 60335-2-77 FF. fuggeléke szerint) | Nivelul vibraților (in conformitate cu anexa FF din EN 60335-2-77) | Vibrácijs limenis (saskană ar EN 60335-2-77 pielikumu FF) | Vibraciños lygis (pagal EN 60335-2-77 standardo FF prieda.) |
| Uchwyt prawy | Pravá rukoje' | Jobb oldali fogantyú | Mâner drepta | Labais rokturis | Dešiné rankena |
| Uchwyt lewy | Leva rukoje' | Bal oldali fogantyú | Mâner stânga | Kreisais rokturis | Kairë rankena |
| Niewnosć pomiaru | Nejistota měřeni | MérésBizonytalansága | Incertitudine a măsurări. | Mérjuma mainigums | Matmenu paklaïda |
| Deklarowana wartóć vibracji | Deklarována hodnota vibraci | Deklaralt vibráció érték | Valoare de vibrações declarată | Noteikta vibrácijas věrtíba | Deklaruota vibracjos vertë |
| Poziom emisi ji halasu (zgodnie z aneksem GG normy EN 60335-2-77) | Hladina emise hluku (v souladu s pflöhou GG normy EN 60335-2-77) | Zajkibocsátás zişnt (az EN 60335-2-77 GG. fuggeléke szerint) | Nivel emise zgomot (in conformitate cu anexa GG din EN 60335-2-77) | Trokšna emisijas limenis (saskană ar EN 60335-2-77 pielikumu GG) | Triukšmo emisiju norma (pagal EN 60335-2-77 standardo G povlá.) |
| Poziom cisnienia akustycznégo w pozycjì operatora | Hladina akustického tlaku vázene f Funkci A v poloze obsluhy | A-súlyozott hangynomässzt a kezelö helyén | Un nival de presiune al suntului maihare la poziţia operatorului. | Lietotă za posićijă ir ar A novétěs skjanas spiiedena limestenis. | A lygio svorinis garso sleGIS operatoriaus padétyje. |
| Niewepnosć pomiaru | Nejistota měřeni | MérésBizonytalansága | Incertitudine a măsurări. | Mérjuma mainigums | Matmenu paklaïda |
| A-wazony poziom natęzenia halasu | Hladina akustického výkonu vázene f Funkci A | A-súlyozott hangteljesitményszint | Nivel de putere acustică ponderată A | A-límeṇa skjanas jaudas limestenis | A svertinis garso galios lygis |
| Niewepnosć pomiaru | Nejistota měřeni | Mérésbizonytalansága | Incertitudine a măsurări. | Mérjuma mainigums | Matmenu paklaïda |

| Eesti | Hrvatski | Slovensko | Slovenčina | Бългэрь | Украïнскы | |
| Toote tehnilsed andimed | Specifikacione proizvoda | Specifikacione izdelka | Špecifikación produktu | Тechнистухаростит�и prodуктý | Тechнистухаростит�и prodуктý | |
| Akutoitega muruniduk | Belaide vejapJVé | Bezvydary záles plavějs | Akumulátorová kosačka | Бezжунчka kocáчka | Бezжунчka kocáчka | |
| Mudel | Model | Model | Modelis | Модел | Модел | RLM18X33H40/ OLM1833H |
| Nimipinge | Nazivni napon | Nazivna napetost | Menovité napatie | Номинален волтук | Номинален волтук | DC 18V |
| Löikeliaus | Śirina glodanja | Śirina reza | Śríka rezu | ШирINA на ряазане | ШирINA pížy | 33 cm |
| Löikelkörgus | Visina rezanja | Višina rezanja | Vyška strihania | Височина поор�аоу | Висота сухшовпя | 25-65 mm |
| Tuhikäigukirius | Brzina bez opterečinja | Hitrost neobremjenega motorja | Rychlost naprázdno | Сокорst в Нетатоварени реким | Шухдість бezмавандегеня | 4.200±10% min-1 |
| Kaal (ilma akuta) | Težina (bez baterije) | Teža (brez baterije) | Hmotnost (bez akumuladora) | Терно (бez latерпату) | Bara (Бezakу миторom) | 10.5 kg |
| Rohukasti maht | Kapacitet kutije za travu | Kapaciteta posode za travo | Kapacita zberača trávy | Вмесимост на Ктугая за трава | Смсість Травозерпika | 35 L |
| Vibratsionointase (vastavalt standardi EN 60335-2-77 lisle FF) | Razina vibracije (u skladu s Dodatkom FF EN 60335-2-77) | Raven vibracij (v skladu z aneksomal FF v EN 60335-2-77) | 'Uroveř vibraciji (v suliade s Dodatkom FF normу EN 60335-2-77) | Инbero на Вибраци (в с被告пстец с пожике FF на EN 60335-2-77) | Ровень bірраць (вiodовдю до EN 60335-2-77 дадатков FF) | |
| Parempoolne käepide | Desna ruëica | Desni ročaj | Pravá rukovát | Дясанта рьхочbatka | Прара ручка | 3.1 m/s2 |
| Vasakpoolne käepide | Lijeva ruëica | Levi ročaj | L'avá rukovát | Лава рьхочbatka | Лва ручка | 4.2 m/s2 |
| Mõotmismāramatus | Neodredenost mjeranja | Negotovost meritev | Nespofahlivost merani | Есигурност на Измерва themselves | Есиг��нэність вимірва themselves | 1.5 m/s2 |
| Deklareritud vibratsionoi vãrtus | Deklarirana vrijednost vibracija | Deklarirana vrednost tresljajev | Deklarovaná hodnotа vibraciji | Посочныстийся на Вибрациime | Заяbilene з havочны bір? Заянень bір? Zаянень bір? Zаянень bір? Zаянень bір? Zаянень bір? Zаянень bір? Zаянень bір? Zаянень bір? Zаянень bір? Zаянень bір? Zаянень bір? Zаянень bір? Zaleyнendust Zaleymeni rôru tase operatori toókhal | 5.7 m/s2 |
| Mūraemissionoi tase (vastavalt standardi EN 60335-2-77 lisle GG) | Razina emittirane buke (u skladu s Dodatkom GG EN 60335-2-77) | Raven emisii hrupa (v skladu z aneksomal GG v EN 60335-2-77) | 'Uroveř emisii hluku (v suliade s Dodatkom GG normу EN 60335-2-77) | Инbero на Шу'mоб,在а ручка | Ровеньшу'may (Bi'dnɔdɪn do EN 60335-2-77 Annen GG) | |
| A-kaalutud muraemissionoi rôru tase operatori toókhal | A-ponderirana razina zvučnog tlaki u položaju operatera | A-izmerjena raven zvočnega tlaki pri položaju upravljavca | Vázeniǎ A hladina akustického tlaki na poziči obshuhujéce osoby. | Равишие А на ИнBOTо на Шу'mobOTO на мястого на оретору. | А-разжени ровь; Звуково тасу на розону міці оретору. | 77.7 dB(A) |
| Mõotmismāramatus | Neodredenost mjeranja | Negotovost meritev | Nespofahlivost merani | Есигурност на Измерва themselves | Есиг��нэність вимірва themselves | 2.5 dB |
| A-kaalutud helivömsuse tase | Ponderirana razina zvučne snage | A-izmerjena raven zvočne moci | Vázeniǎ A hladina akustického vykonu | Инbero на с Pilatingа на šу'mа с равишие А | А-разжени ровь; Звуково тасу на розону міці oретору. | 89.96 dB(A) |
| Mõotmismāramatus | Neodredenost mjeranja | Negotovost meritev | Nespofahlivost merani | Есигурност на Измерва themselves | Есиг��нэність вимірва themselves | 1.75 dB |

| English | François | Deutsch | Espanol | Italiano | Nederlands | Português |
| Battery and charger | Batterie et chargeur | Akku und Ladegerät | Bateria y cargador | Batteria e caricatore | Accu en oplader | Bateria e caricadora |
| Model | Modèle | Model | Modelo | Modello | Model | Modelo |
| Battery Pack | Batterie | Akku | Batería | Batteria | Accu | Bateria |
| Weight | Poids | Gewicht | Peso | Peso | Peso | Gewicht |
| Charger | Chargeur | Ladegerät | Cargador | Caricatore | Lader | Carregador |
| Compatible battery packs | Packs Batterie-Compatible | Kompatible Akkus | Paquetes de batería compatibles | Gruppo batterie compatibili | Compatibile accompanies | Baterias Compatibleis |
| Compatible charger | Chargeur compatible | Kompatibles ladegerät | Cargador compatible | Caricatore compatible | Kompatibel oplader | Carregador compatible |
| Replacement part | Pièce de rechange | Ersatzteil | Pieza de repuesto | Ricambio | Vervangonderdeel | Peça de substituição |
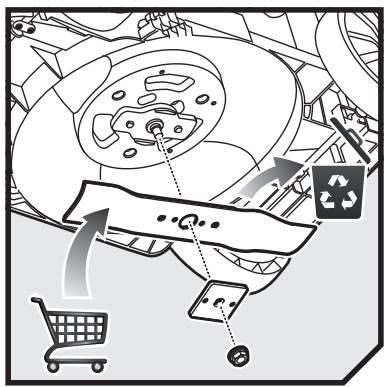
| Blade | Lame | Messer | Hoja | Lama | Zaagblad | Làmina |

| Polski | Čeština | Magyar | Română | Latviski | Lietuviškai | Eesti |
| Akumulator i ladowarka | Nabiječka a baterie | Akkumulátor és tõltő | Bateri与此incârcatórul | Akumulators un lădêtãjs | Akumulatorius ir jkroviklis | Aku ja laadija |
| Model | Model | Típus | Model | Modelis | Modelis | Mudel |
| Akumulator | Baterie | Akkumulátor | Accumulator | Akumulators | Baterija | Aku paketiga |
| Greutate | Waga | Bec | Tömeg | Teža | Težina | Mass |
| Ladowarka | Nabiječka | Tõltő | Incârcatór | Lădêtãjs | l'koviklis | Laadija |
| Pas subjace akumulatory | Kompatibilní akumúátory | Kompatbilis akumulátorok | Accumatori compatibil | Savietojami akumulatoru komplekti | Suderinami baterijos paketai | Ühilduvad akupaketid |
| Odpowednia ladowarka | Kompatibilní nabiječka | Kompatbilis tõltő | Incârcatór compatibil | Saderiggs lădêtãjs | Tinkamas jkroviklis | Kasutatav laadija |
| Częsci zamienne | Náhradni dil | Cserealkatrész | Piesä de schimb | Rezerves dela | Atsarginé dalis | Varuosa |
| Ostrze | Nüž | Kés | Lamă | Asmens | Gelezté | Saeleht |
| Dansk | Svenska | Suomi | Norsk | Рсский | ||
| Batteri og oplader | Batteri och batteriladdare | Akker ja laturi | Batteri og lader | Аккуmpлагория 6атареги зарадное устрийстvo | ||
| Model | Modell | Malli | Modell | Модаль | RLM18X33H40 | OLM1833H |
| Batteri | Batteri | Akker | Batteri | Аккуmpлагор | RB18L40 | - |
| Vikt | Vægt | Vekt | Paino | Hmotnost | 0.73 kg | - |
| Oplader | Batteriladdare | Laturi | Lader | Зардноe устрийстvo | BCL14181H | - |
| KOMPATIBLE Batterier | KOMPATIBla batteripaket | Yhteensopivat akut | Kompatabile batteripakker | Сов戒指имая akкуmpлагория 6атарег | RB18L13/RB18L15/RB18L25/ RB18L26/RBL18L40/ RB18L50 | |
| KOMPATIBLE oplader | Passande laddare | Yhteensopiva laturi | Kompatabel lader | Сов戒指имoe зардноe устрийстvo | BCL14181H/BCL14183H | |
| Reservedel | Ersättningsdel | Varaosat | Erstantingsdel | Заменяемы detали | ||
| Klinge | Blad | Terä | Blad | Пильhoe полотно | RAC431 (682072) | |

| Hrvatski | Slovensko | Slovenčina | Бългагия | Украïнсыка | ||
| Baterija i punjač | Baterija in polnilinik | Akumulátor a nabijačka | Батерия и заю устroystvo | Актультор i заюд�� писчтari | ||
| Model | Model | Modelis | Моden | Моdenь | RLM18X33H40 | OLM1833H |
| Baterija | Akumulator | Batéraia | Батерия | Контейнера 3 akумлаятором | RB18L40 | - |
| Masé | Svars | Hmotnost' | Тergо | Bara | 0,73 kg | - |
| Punjac | Polnilec | Nabijačka | Зарадно устroyстvo | Зарадный писчтari | BCL14181H | - |
| Kompatibilna pakiranba baterija | Združljive baterije | Komatbiliné"Justnotky akumuliatorov | Съвмостими Батерий | Суmicни akумлаятори бл_OKи | RB18L13/RB18L15/RB18L25/ RB18L26/RB18L18L40/ RB18L50 | |
| Kompatibilni punjač | Združljiv polnilec | Komatbiliná nabijačka | Съвмостимо заю устroyстvo | Суmicни заюпристri | BCL14181H/BCL14183H | |
| Zamjenski dijelovi | Nadomestni deli | Náhradné diely | Рezерва част | Зminна частиа | ||
| Oštrica | Rezilo | Ostrie | Остриe | Лесо | RAC431 (682072) | |
EN
GUARANTEE
In addition to any statutory rights resulting from the purchase, this product is covered by a guarantee as stated below.
- The guarantee period is 24 months for consumers and commences on the date when the product was purchased. This date has to be documented by an invoice or other proof of purchase. The product is designed and dedicated to consumer and private use only. So there is no guarantee provided in case of professional or commercial use.
- There is, in some cases (i.e. promotion, range of tools), a possibility to extend the warranty period over the period described above using the registration on the www.ryobitools.eu website. The eligibility of the tool is clearly displayed in stores and/or on packaging. The end user needs to register his/her newly-acquired tools online within 8 days from the date of purchase. The end user may register for the extended warranty in his country of residence if listed on the online registration form where this option is valid. Furthermore, end users must give their consent to the storage of the data which are required to enter online and they have to accept the terms and conditions. The registration confirmation receipt, which is sent out by e-mail, and the original invoice showing the date of purchase will serve as proof of the extended warranty. Your statutory rights remain unaffected.
- The guarantee covers all defects of the product during the warranty period due to defaults in workmanship or material at the purchase date. The guarantee is limited to repair and/or replacement and does not include any other obligations including but not limited to incidental or consequential damages. The warranty is not valid if the product has been misused, used contrary to the instruction manual, or being incorrectly connected. This guarantee does not apply to
- any damage to the product that is the result of improper maintenance
- any product that has been altered or modified
- any product where original identification (trade mark, serial number) markings have been defaced, altered or removed
- any damage caused by non-observation of the instruction manual
- any non CE product
any product which has been attempted to be repaired by an nonqualified professional or without prior authorization by Techronic Industries
- any product connected to improper power supply (amps, voltage, frequency)
- any product used with inappropriate fuel mixture (fuel, oil, percentage of oil)
- any damage caused by external influences (chemical, physical, shocks) or foreign substances
normal wear and tear of spare parts
- inappropriate use, overloading of the tool
- use of non-approved accessories or parts
carburettor after 6 months, carburettor adjustments after 6 months
components (parts and accessories) subject to natural wear and tear, including but not limited to bump knobs, drive belts, clutch, blades of hedge trimmers or lawn mowers, harness, cable throttle, carbon brushes, power cord, tines, felt washers, hitch pins, blower fans, blower and vacuum tubes, vacuum bag and straps, guide bars, saw chains, hoses, connector fittings, spray nozzles, wheels, spray warts, inner reels, outer spools, cutting lines, spark plugs, air filters, gas filters, mulching blades, etc.
- For servicing, the product must be sent or presented to a RYOBI authorized service station listed for each country in the following list of service station addresses. In some countries your local RYOBI dealer undertakes to send the product to the RYOBI service organisation. When sending a product to a RYOBI service station, the product should be safely packed without any dangerous contents such as petrol, marked with sender's address and accompanied by a short description of the fault.
- A repair/replacement under this guarantee is free of charge. It does not constitute an extension or a new start of the guarantee period. Exchanged parts or tools become our property. In some countries delivery charges or postage will have to be paid by the sender.
- This guarantee is valid in the European Community, Switzerland, Iceland, Norway, Liechtenstein, Turkey and Russia. Outside these areas, please contact your authorized RYOBI dealer to determine if another warranty applies.
AUTHORISED SERVICE CENTRE
To find an authorised service centre near you, visit http://uk.ryobitools.eu/ header/service-and-support/service-agents.
GARANTIE
Damage caused by failure to follow the instructions for this tool
Missing CE marking
The product has been repaired or modified by unauthorized persons or outside the authorized service center
- The product was connected to an unsuitable power source (incorrect voltage, frequency)
- The product was used with an unsuitable fuel mixture (fuel, oil, additives)
- Damage caused by external influences (chemical, physical, impacts) or foreign substances
This is due to normal wear of replaceable parts
- This is due to improper use or overloading of the tool.
This is related to the use of non-recommended accessories or parts.
- Carburetor used in the engine, fuel supply
Components (parts) are subject to natural wear, including: blades, drive belts, clutches, cutting line, spark plugs, air filters, fuel filters, brushes, cables, hoses, tires, wheels, bumpers, internal and external trims, cutting strings, ignition coils, air filters, gas filters, mechanical parts, etc.
4. For carrying out warranty repairs, the product must be presented in a condition that allows identification of the defect. The warranty does not cover defects caused by normal wear and tear, or by failure to follow the instructions in the manual. Replacement of parts or accessories becomes the responsibility of the owner. In some countries, delivery costs and postage expenses are charged to the customer. 5. Repair or replacement under warranty is provided free of charge, provided that the warranty period has not expired and the warranty conditions are met. 6. This warranty is valid in the EU, Switzerland, Iceland, Norway, Turkey, and Russia. For warranty service in other regions, please contact the authorized service center of the company RYOBI.
AUTHORIZED SERVICE CENTERS
To find an authorized service center, please visit: https://en.ryobitools.eu/header/service-and-support and service agents.
PL
WARRANTY
EC DECLARATION OF CONFORMITY
Techtronic Industries GmbH
Max-Eyth-Straße 10, 71364 Winnenden, Germany
Herewith we declare that the product
Cordless Lawn Mower
Brand: Ryobi
Model number: RLM18X33H40/OLM1833H
Serial number range:
RLM18X33H40: 44464601000001 - 44464601999999
OLM1833H: 44464701000001-44464701999999
is in conformity with the following European Directives and harmonised standards 2006/42/EC, 2004/108/EC (until 19 April 2016), 2014/30/EU (from 20 April 2016), 2000/14/EC, 2005/88/EC, 2011/65/EU, EN 60335-1:2012+A1:2014, EN 60335-2-77:2010, EN ISO 3744:2010, EN 55014-1:2006+A1:2009+A2:2011, EN 55014-2:1997+A1:2001+A2:2008, EN 62233:2008, EN 50581:2012
Measured sound power level:
89.96 dB(A)
Guaranteed sound power level:
94 dB(A)
Conformity assessment method to Annex VI Directive 2000/14/EC amended by 2005/88/EC.
The notified body involved:
Vice President, Regulatory & Safety
Winnenden, Dec. 18, 2015
Authorised to compile the technical file:
Alexander Krug, Managing Director
Techtronic Industries GmbH
Max-Eyth-Straße 10, 71364 Winnenden, Germany

Max-Eyth-Straße 10, 71364 Winnenden, Germany
Winnenden, Dec. 18, 2015
Max-Eyth-Straße 10, 71364 Winnenden, Germany

EC DECLARATION OF CONFORMITY
Techtronic Industries GmbH
Max-Eyth-Straße 10, 71364 Winnenden, Germany
Winnenden, Dec. 18, 2015
Max-Eyth-Straße 10, 71364 Winnenden, Germany

Max-Eyth-Straße 10, 71364 Winnenden, Germany
Winnenden, Dec. 18, 2015
Authorized to compile the technical file:
Alexander Krug, Executive Administrator
Techtronic Industries GmbH
Max-Eyth-Straße 10, 71364 Winnenden, Germany
Max-Eyth-Straße 10, 71364 Winnenden, Germany
2006/42/EC, 2004/108/EC (until April 19, 2016), 2014/30/EU (until
April 20, 2016), 2000/14/EC, 2005/88/EC, 2011/65/EU, EN 60335
1:2012+A1:2014, EN 60335-2-77:2010, EN ISO 3744:2010, EN
55014-1:2006+A1:2009+A2:2011
EN 55014-2:1997+A1:2001+A2:2008, EN 62233:2008, EN 50581:2012
Winnenden, Dec. 18, 2015
Max-Eyth-Straße 10, 71364 Winnenden, Germany

NL EC CONFORMITEITSVERKLARING
Techtronic Industries GmbH
Max-Eyth-Straße 10, 71364 Winnenden, Germany
Winnenden, Dec. 18, 2015
Max-Eyth-Straße 10, 71364 Winnenden, Germany
PT DECLARACAO EC DE CONFORMIDADE
Techtronic Industries GmbH
Max-Eyth-Straße 10, 71364 Winnenden, Germany
We hereby declare that the products
2006/42/EC, 2004/108/EC (until 19 April 2016), 2014/30/EU (from 20 April 2016), 2000/14/EC, 2005/88/EC, 2011/65/EU, EN 60335-1:2012+A1:2014, EN
2016), 2000/14/EC, 2005/88/EC, 2011/65/EU, EN 60335-1:2012+A1:2014, EN
60335-2-77:2010, EN ISO 3744:2010, EN 55014-1:2006+A1:2009+A2:2011
EN 55014-2:1997+A1:2001+A2:2008, EN 62233:2008, EN 50581:2012
Max-Eyth-Straße 10, 71364 Winnenden, Germany
DECLARATION OF CONFORMITY
Techtronic Industries GmbH
Max-Eyth-Straße 10, 71364 Winnenden, Germany
We hereby declare that the products
Cordless lawn mower
Brand: Ryobi
Brand: Ryobi
Model number: RLM18X33H40/OLM1833H
Serial number range:
RLM18X33H40: 44464601000001 - 44464601999999
OLM1833H: 44464701000001 - 44464701999999
2006/42/EC, 2004/108/EC (until 19 April 2016), 2014/30/EU (from
20 April 2016), 2000/14/EC, 2005/88/EC, 2011/65/EU, EN 60335
1:2012+A1:2014, EN 60335-2-77:2010, EN ISO 3744:2010, EN
55014-1:2006+A1:2009+A2:2011
EN 55014-2:1997+A1:2001+A2:2008, EN 62233:2008, EN 50581:2012
Measured sound level:
89.96 dB(A)
Guaranteed sound level:
94 dB(A)
Conformity assessment method to Annex VI Directive 2000/14/EC amended by 2005/88/EC.
The relevant approval authority:
Winnenden, Dec. 18, 2015
Max-Eyth-Straße 10, 71364 Winnenden, Germany

EC DECLARATION OF CONFORMITY
Techtronic Industries GmbH
Max-Eyth-Straße 10, 71364 Winnenden, Germany
Winnenden, Dec. 18, 2015
Max-Eyth-Straße 10, 71364 Winnenden, Germany

EC DECLARATION OF CONFORMITY
Techtronic Industries GmbH
Max-Eyth-Straße 10, 71364 Winnenden, Germany
We hereby declare that the products
2006/42/EC, 2004/108/EC (until 19 April 2016), 2014/30/EU (from 20 April 2016),
2000/14/EC, 2005/88/EC, 2011/65/EU, EN 60335-1:2012+A1:2014, EN
60335-2-77:2010, EN ISO 3744:2010, EN 55014-1:2006+A1:2009+A2:2011
EN 55014-2:1997+A1:2001+A2:2008, EN 62233:2008, EN 50581:2012
Measured sound power level: 89.96 dB(A)
Guaranteed sound power level: 94 dB(A)
Winnenden, Dec. 18, 2015
Max-Eyth-Straße 10, 71364 Winnenden, Germany

EC REGULATIONS COMPLIANCE
Techtronic Industries GmbH
Max-Eyth-Straße 10, 71364 Winnenden, Germany
2006/42/EC, 2004/108/EC (until 19 April 2016), 2014/30/EU (from 20
April 2016), 2000/14/EC, 2005/88/EC, 2011/65/EU, EN 60335-
1:2012+A1:2014, EN 60335-2-77:2010, EN ISO 3744:2010, EN
55014-1:2006+A1:2009+A2:2011,
EN 55014-2:1997+A1:2001+A2:2008, EN 62233:2008, EN 50581:2012
Measured sound power:
89.96 dB(A)
Guaranteed sound power:
94 dB(A)
Winnenden, Dec. 18, 2015
Max-Eyth-Straße 10, 71364 Winnenden, Germany

EC DECLARATION OF CONFORMITY
Techtronic Industries GmbH
Max-Eyth-Straße 10, 71364 Winnenden, Germany
We declare that this product
Cordless lawn mower
Brand: Ryobi
Model number: RLM18X33H40/OLM1833H
Serial number range:
RLM18X33H40: 44464601000001 - 44464601999999
OLM1833H: 44464701000001-44464701999999
Conforms to the relevant EC Directives and harmonized
standards
2006/42/EC, 2004/108/EC (until 19 April 2016), 2014/30/EU (from 20 April
2016), 2000/14/EC, 2005/88/EC, 2011/65/EU, EN 60335-1:2012+A1:2014, EN
60335-2-77:2010, EN ISO 3744:2010, EN 55014-1:2006+A1:2009+A2:2011
EN 55014-2:1997+A1:2001+A2:2008, EN 62233:2008, EN 50581:2012
Measured sound power level: 89.96 dB(A)
Guaranteed sound power level: 94 dB(A)
Conformity assessment method used: Annex VI of Directive 2000/14/EC as amended by
2005/88/EC
Notified body involved:
Winnenden, Dec. 18, 2015
Person authorized to compile the technical file:
Alexander Krug, Director
Techtronic Industries GmbH
Max-Eyth-Straße 10, 71364 Winnenden, Germany


EC DECLARATION OF CONFORMITY
Techtronic Industries GmbH
Max-Eyth-Straße 10, 71364 Winnenden, Germany
Winnenden, Dec. 18, 2015
Max-Eyth-Straße 10, 71364 Winnenden, Germany

EC DECLARATION OF CONFORMITY
Techtronic Industries GmbH
Max-Eyth-Straße 10, 71364 Winnenden, Germany
Winnenden, Dec. 18, 2015
Max-Eyth-Straße 10, 71364 Winnenden, Germany

EC DECLARATION OF CONFORMITY
Techtronic Industries GmbH
Max-Eyth-Straße 10, 71364 Winnenden, Germany
We hereby declare that the products
Winnenden, Dec. 18, 2015
Max-Eyth-Straße 10, 71364 Winnenden, Germany

EC DECLARATION OF CONFORMITY
Techtronic Industries GmbH
Max-Eyth-Straße 10, 71364 Winnenden, Germany
Winnenden, Dec. 18, 2015
Authorized to compile the technical file:
Alexander Krug, General Manager
Techtronic Industries GmbH
Max-Eyth-Straße 10, 71364 Winnenden, Germany
LV EC DECLARATION OF CONFORMITY
Techtronic Industries GmbH
Max-Eyth-Straße 10, 71364 Winnenden, Germany
We hereby declare that the product
Cordless lawn mower
Brand: Ryobi
Model number: RLM18X33H40/OLM1833H
Serial number interval:
RLM18X33H40: 44464601000001-44464601999999
OLM1833H: 44464701000001-44464701999999
conforms to the following European directives and standards
2006/42/EC, 2004/108/EC (until 19 April 2016), 2014/30/EU (from 20 April 2016),
2000/14/EC, 2005/88/EC, 2011/65/EU, EN 60335-1:2012+A1:2014, EN
60335-2-77:2010, EN ISO 3744:2010, EN 55014-1:2006+A1:2009+A2:2011
EN 55014-2:1997+A1:2001+A2:2008, EN 62233:2008, EN 50581:2012
Measured sound power level:
89.96 dB(A)
Guaranteed sound intensity level:
94 dB(A)
Conformity assessment method to Annex VI of Directive 2000/14/EC amended by 2005/88/EC.
Winnenden, Dec. 18, 2015
Authorized to compile the technical file:
Alexander Krug, Managing Director
Techtronic Industries GmbH
Max-Eyth-Straße 10, 71364 Winnenden, Germany
EC DECLARATION OF CONFORMITY
Techtronic Industries GmbH
Max-Eyth-Straße 10, 71364 Winnenden, Germany
We declare that this product
Winnenden, Dec. 18, 2015
Max-Eyth-Straße 10, 71364 Winnenden, Germany
DECLARATION OF CONFORMITY
Techtronic Industries GmbH
Max-Eyth-Straße 10, 71364 Winnenden, Germany
Winnenden, Dec. 18, 2015
Max-Eyth-Straße 10, 71364 Winnenden, Germany
HR EC DECLARATION OF CONFORMITY
Techtronic Industries GmbH
Max-Eyth-Straße 10, 71364 Winnenden, Germany
2006/42/EC, 2004/108/EC (until 19 April 2016), 2014/30/EU (from 20 April 2016),
2000/14/EC, 2005/88/EC, 2011/65/EU, EN 60335-1:2012+A1:2014, EN
60335-2-77:2010, EN ISO 3744:2010, EN 55014-1:2006+A1:2009+A2:2011
EN 55014-2:1997+A1:2001+A2:2008, EN 62233:2008, EN 50581:2012
Measured sound power level: 89.96 dB(A)
Guaranteed sound power level: 94 dB(A)
Conformity assessment method according to Annex VI of Directive 2000/14/EC as amended by 2005/88/EC.
Winnenden, Dec. 18, 2015
Authorized to compile the technical file:
Alexander Krug, Director of Management
Techtronic Industries GmbH
Max-Eyth-Straße 10, 71364 Winnenden, Germany
SL
EC DECLARATION OF CONFORMITY
Techtronic Industries GmbH
Max-Eyth-Straße 10, 71364 Winnenden, Germany
Winnenden, Dec. 18, 2015
Max-Eyth-Straße 10, 71364 Winnenden, Germany
BG
EC DECLARATION OF CONFORMITY
Techtronic Industries GmbH
Max-Eyth-Straße 10, 71364 Winnenden, Germany
We declare under our sole responsibility that the product
Cordless grass trimmer
Brand: Ryobi
Model name: RLM18X33H40/OLM1833H
Serial number range
RLM18X33H40: 44464601000001 - 44464601999999
OLM1833H: 44464701000001 - 44464701999999
DECLARATION OF CONFORMITY WITH EU STANDARDS
2006/42/EC, 2004/108/EC (until 19 April 2016), 2014/30/EU (from 20 April 2016),
2000/14/EC, 2005/88/EC, 2011/65/EU, EN 60335-1:2012+A1:2014, EN
60335-2-77:2010, EN ISO 3744:2010, EN 55014-1:2006+A1:2009+A2:2011
EN 55014-2:1997+A1:2001+A2:2008, EN 62233:2008, EN 50581:2012
Measured sound power level: 89.96 dB(A)
Guaranteed sound power level: 94 dB(A)
Method of assessment of conformity to Annex V of Directive 2000/14/EC, as amended by 2005/88/EC.
NOTIFIED BODY
Societe Nationale de Certification et d'Homologation (Notified body 0499)
2a. Kalchesbruck L-1852 Luxembourg
CE
Andrew John Eyre (BEng, CEng, MIET)
Vice President, Engineering and Safety
Winnenden, Dec. 18, 2015
Alexander Krug, Managing Director
Techtronic Industries GmbH
Max-Eyth-Straße 10, 71364 Winnenden, Germany
SK
EC DECLARATION OF CONFORMITY
Techtronic Industries GmbH
Max-Eyth-Straße 10, 71364 Winnenden, Germany
Winnenden, Dec. 18, 2015
Max-Eyth-Straße 10, 71364 Winnenden, Germany
UK
EC DECLARATION OF CONFORMITY
Techtronic Industries GmbH
Max-Eyth-Straße 10, 71364 Winnenden, Germany
Please replace the product
Cordless lawn mower
Brand: Ryobi
Model name: RLM18X33H40/OLM1833H
Serial number range:
RLM18X33H40: 44464601000001 - 44464601999999
OLM1833H
In accordance with the following European directives and harmonized standards
2006/42/EC, 2004/108/EC (until 19 April 2016), 2014/30/EU (from 20 April
2016), 2000/14/EC, 2005/88/EC, 2011/65/EU, EN 60335-1:2012+A1:2014, EN
60335-2-77:2010, EN ISO 3744:2010, EN 55014-1:2006+A1:2009+A2:2011
EN 55014-2:1997+A1:2001+A2:2008, EN 62233:2008, EN 50581:2012
Measured sound power level
89.96 dB(A)
Guaranteed sound power level
94 dB(A)
Motor oil, hydraulic oil, and lubricant according to Directive 2000/14/EC as amended by 2005/88/EC.
Authorized representative:
Winnenden, Dec. 18, 2015
Signature of the technical file:
Alexander Krug, Managing Director
Techtronic Industries GmbH
Max-Eyth-Straße 10, 71364 Winnenden, Germany


RYOBI.
Techtronic Industries GmbH
Max-Eyth-Straße 10,
71364 Winnenden, Germany




- INTENDED USE
- GENERAL SAFETY WARNINGS
- A WARNING
- WARNING
- PERSONAL SAFETY
- WORK AREA SAFETY
- BATTERY TOOL USE AND CARE
- LAWN MOWER SAFETY WARNINGS
- OVERLOAD AND OVERHEAT PROTECTION
- RESIDUAL RISKS
- TRANSPORTATION AND STORAGE
- MAINTENANCE
- RISK REDUCTION
- KNOW YOUR PRODUCT
- PARTS
- SYMBOLS ON THE PRODUCT
- DANGER
- CAUTION
- SYMBOLS IN THIS MANUAL
- MOWING TIPS
- SYMBOLS APPLIED ON THE PRODUCT
- GET TO KNOW YOUR PRODUCT
- SAFETY WARNINGS
- SAFETY WARNINGS FOR LAWN MOWER
- GENERAL SAFETY REGULATIONS
- TRANSPORT AND STORAGE
- OPERATION OF THE DEVICE WITH BATTERY POWER SUPPLY
- PRECAUTIONS REGARDING SAFE USE OF THE TRIMMER
- OVERLOAD PROTECTION CIRCUIT BREAKER
- ALWAYS BE CAREFUL
- SYMBOLS AND DESIGNATIONS OF THE PRODUCT
- EAC
- CONVENTIONS USED IN THIS MANUAL
- BLADE TIP
- OVERLOAD AND OVERLOAD PROTECTION
- SURFACE
- PROLONGED USE
- IDENTIFY YOUR PRODUCT
- PRODUCT SYMBOLS
- CONTACT
- PIZNAUYENNYA
- GENERAL SAFETY MEASURES
- USING THE TOOL WITH BATTERIES
- PROTECTION AGAINST OVERLOAD AND OVERHEATING
- EN
- GUARANTEE
- AUTHORISED SERVICE CENTRE
- GARANTIE
- AUTHORIZED SERVICE CENTERS
- PL
- WARRANTY
- EC DECLARATION OF CONFORMITY
- NL EC CONFORMITEITSVERKLARING
- PT DECLARACAO EC DE CONFORMIDADE
- TECHTRONIC INDUSTRIES GMBH
- EC REGULATIONS COMPLIANCE
- LV EC DECLARATION OF CONFORMITY
- DECLARATION OF CONFORMITY
- HR EC DECLARATION OF CONFORMITY
- SL
- BG
- CE
- SK
- UK
- RYOBI
Brand : RYOBI
Model : ONE+ OLM1833H
Category : Cordless lawn mower