
HHC9.8FLTX - Cooker HOTPOINT - Free user manual and instructions
Find the device manual for free HHC9.8FLTX HOTPOINT in PDF.



| Product type | Extractor hood |
| Brand | Hotpoint |
| Model | HHC9.8FLTX |
| Height (min-max) | 66,5 - 109 cm |
| Width | 89,8 cm |
| Depth | 50,5 cm |
| Exhaust connection diameter | 15 / 12,5 / 12 cm |
| Lighting type | LED |
| Number of bulbs | 2 |
| Grease filter | Washable metal |
| Activated charcoal filter | Optional, replace every 4 months |
| Controls | Electronic panel with touch controls |
| Suction speeds | Silent, medium, high, intensive (timed 5 min) |
| Automatic stop | Yes, adjustable according to speed |
| Temperature sensor | Yes, with automatic activation of medium speed |
| Electrical supply | 220-240 V |
| Usage | External extraction or recirculation |
| Minimum safety distance | 65 cm for gas hob, 50 cm for electric |
| Grease filter maintenance | Monthly cleaning (manual or dishwasher) |
| Lamp replacement | LED: after-sales service |
Frequently Asked Questions - HHC9.8FLTX HOTPOINT
User questions about HHC9.8FLTX HOTPOINT
0 question about this device. Answer the ones you know or ask your own.
Ask a new question about this device
Download the instructions for your Cooker in PDF format for free! Find your manual HHC9.8FLTX - HOTPOINT and take your electronic device back in hand. On this page are published all the documents necessary for the use of your device. HHC9.8FLTX by HOTPOINT.
USER MANUAL HHC9.8FLTX HOTPOINT
HHBS 6.5F AM X - HHBS 9.5F AM X
HHF 6.4 F AM X - HHF 6.4 F AM K
HHF 9.4 F AM X - HHF 9.5 F AM X
HHBS 6.7F LL X - RHHF 9.7F LB X
RHHBS 9.7F LB X - RHHGC 9.7F LB X
HHBS 9.7F LLI X - HHF 6.7F LL X
HHBS 9.5F AB X - HHBS 9.7F LBI X
HHBS 9.7F LB X - HHBS 6.7F LB X
HHGC 9.7F LB X - HHGC 6.7F LB X
HHGC 6.5F AB X - HHF 9.7F LB X
HHF 6.7F LB X - HHGC 9.4F AM X
HHGC 6.4F AM X - HHBS 6.7F LT X
HHBS 6.7F LT DS - HHBS 6.7F LT CF
HHBS 9.8F LT X - HHBS 9.8F LT DS
HHBS 9.8F LT CF - HHBS 9.8F LT ICE
HHBS 9.8F LT W - HHC 6.7F LT X
HHC 9.7F LB X - HHC 6.8F LT X
HHC 9.8F LT X - RHHC 9.7F LB X
HHC 6.7F LB X
Instructions for use
HHF 6.4 F AM X HHF 6.4 F AM K HHF 9.4 F AM X HHF 9.5 F AM X RHHF 9.7F LB X HHF 6.7F LL X HHF 9.7F LB X HHF 6.7F LB X
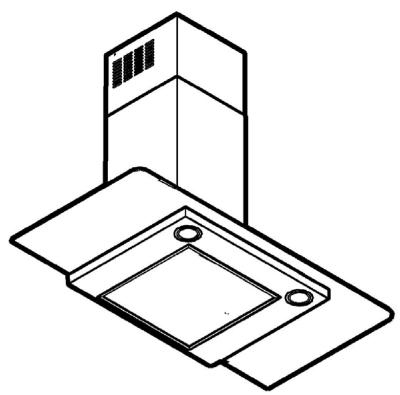
RHHGC 9.7F LB X HHGC 9.7F LB X HHGC 6.7F LB X HHGC 6.5F AB X HHGC 9.4F AM X HHGC 6.4F AM X
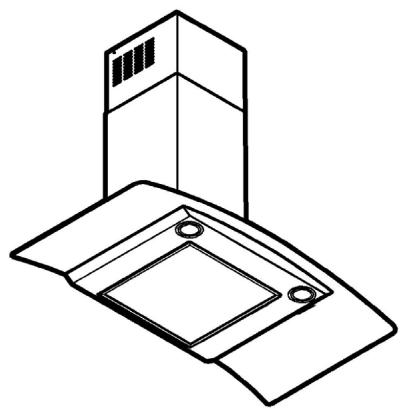
HHBS 9.5F AM X RHHBS 9.7F LB X HHBS 9.7F LLI X HHBS 9.5F AB X HHBS 9.7F LBI X HHBS 9.7F LB X HHBS 9.8F LT X HHBS 9.8F LT DS HHBS 9.8F LT CF HHBS 9.8F LT ICE HHBS 9.8F LT W
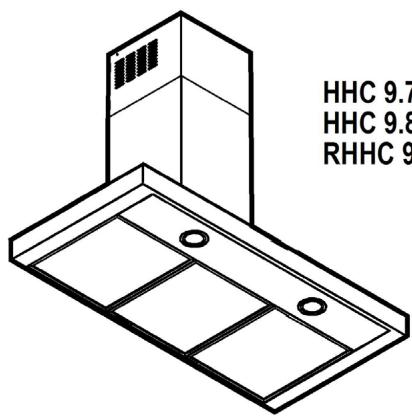
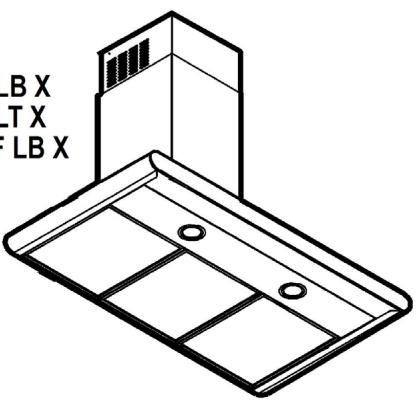
HHBS 6.5F AM X HHBS 6.7F LL X HHBS 6.7F LB X HHBS 6.7F LT X HHBS 6.7F LT DS HHBS 6.7F LT CF
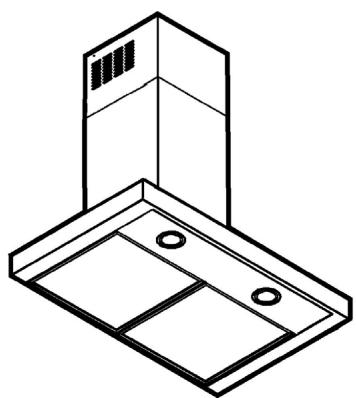
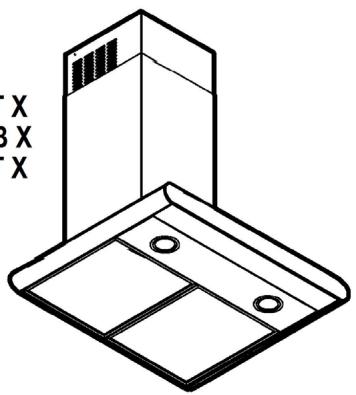
HHC 6.7F LT X HHC 6.7F LB X HHC 6.8F LT X

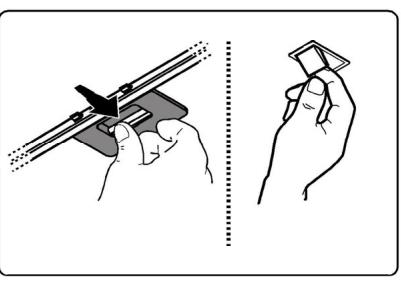
GENERAL SAFETY
HHBS 6.5F AM X - HHBS 9.5F AM X - HHF 6.4 F AM X - HHF 6.4 F AM K HHF 9.4 F AM X - HHF 9.5 F AM X - HHGC 9.4F AM X - HHGC 6.4F AM X
RHHF 9.7F LB X - RHHBS 9.7F LB X - RHHGC 9.7F LB X RRHC 9.7F LB X
T1
T2
T3
T4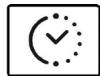
HHBS 9.5F AB X - HHBS 9.7F LBI X - HHBS 9.7F LB X - HHBS 6.7F LB X - HHGC 9.7F LB X - HHGC 6.7F LB X - HHGC 6.5F AB X - HHE 9.7F LB X - HHE 6.7F LB X
HHC 9.7F LB X - HHC 6.7F LB X
T1
T2


T3
T4
HHC 6.7F LT X - HHC 6.8F LT X - HHC 9.8F LT X
T1
T2
T3
T4
T5
T6
HHBS 6.7F LL X - RHHF 9.7F LB X - RHHBS 9.7F LB X - HHBS 9.7F LLI X - HHF 6.7F LL X - HHBS 9.7F LBI X - HHBS 9.7F LB X - HHBS 6.7F LB X - HHGC 9.7F LB X - HHGC 6.7F LB X - HHF 9.7F LB X - HHF 6.7F LB X - HHBS 6.7F LT X - HHBS 6.7F LT DS - HHBS 6.7F LT CF - HHBS 9.8F LT X - HHBS 9.8F LT DS - HHBS 9.8F LT CF - HHBS 9.8F LT ICE - HHBS 9.8F LT W - HHC 6.7F LT X - HHC 9.7F LB X - HHC 6.8F LT X - HHC 9.8F LT X - RHHC 9.7F LB X - HHC 6.7F LB X
HHBS 6.7F LL X - RHHF 9.7F LB X - RHHBS 9.7F LB X - HHBS 9.7F LLI X - HHF 6.7F LL X - HHBS 9.7F LBI X - HHBS 9.7F LB X - HHBS 6.7F LB X - HHGC 9.7F LB X - HHGC 6.7F LB X - HHF 9.7F LB X - HHF 6.7F LB X - HHBS 6.7F LT X - HHBS 6.7F LT DS - HHBS 6.7F LT CF - HHBS 9.8F LT X - HHBS 9.8F LT DS - HHBS 9.8F LT CF - HHBS 9.8F LT ICE - HHBS 9.8F LT W - HHC 6.7F LT X - HHC 9.7F LB X - HHC 6.8F LT X - HHC 9.8F LT X - RHHC 9.7F LB X - HHC 6.7F LB X
Before any cleaning or maintenance operation, disconnect the hood from the mains by removing the plug or disconnecting the mains electrical supply.
Always wear work gloves for all installation and maintenance operations.
This appliance can be used by children aged from 8 years and above and persons with reduced physical, sensory or mental capabilities or lack of experience and knowledge if they have been given supervision or instruction concerning use of the appliance in a safe way and understand the hazards involved.
Children shall not be allowed to tamper with the controls or play with the appliance.
Cleaning and user maintenance shall not be made by children without supervision.
The premises where the appliance is installed must be sufficiently ventilated, when the kitchen hood is used together with other gas combustion devices or other fuels.
The hood must be regularly cleaned on both the inside and outside (AT LEAST ONCE A MONTH).
This must be completed in accordance with the maintenance instructions provided. Failure to follow the instructions provided regarding the cleaning of the hood and filters will lead to the risk of fires.
Do not flambé under the range hood.
The use of exposed flames is detrimental to the filters and may cause a fire risk, and must therefore be avoided in all circumstances.
Any frying must be done with care in order to make sure that the oil does not overheat and ignite.
CAUTION: Accessible parts of the hood may become hot when used with cooking appliances.
For lamp replacement use only lamp type indicated in the Maintenance/Replacing lamps section of this manual.
WARNING! Do not connect the appliance to the mains until the installation is fully complete.
With regards to the technical and safety measures to be adopted for fume discharging it is important to closely follow the regulations provided by the local authorities.
The air must not be discharged into a flue that is used for exhausting fumes from appliance burning gas or other fuels.
Do not use or leave the hood without the lamp correctly mounted due to the possible risk of electric shocks.
Never use the hood without effectively mounted grids.
The hood must NEVER be used as a support surface unless specifically indicated.
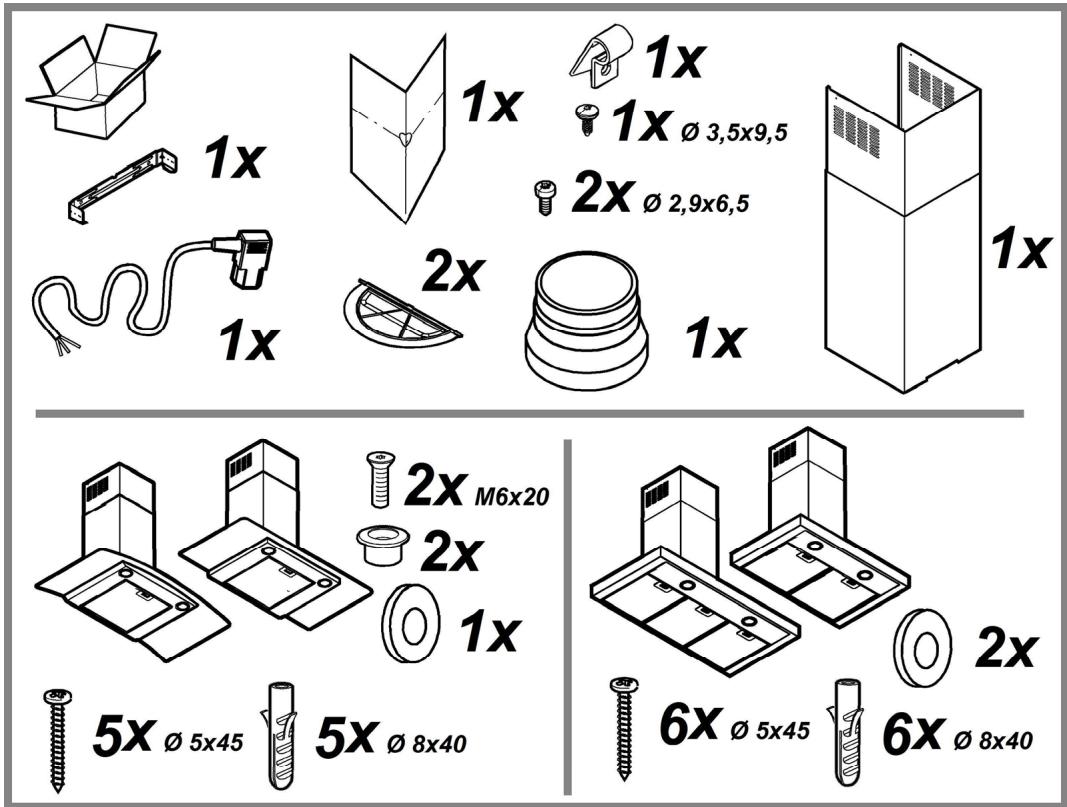
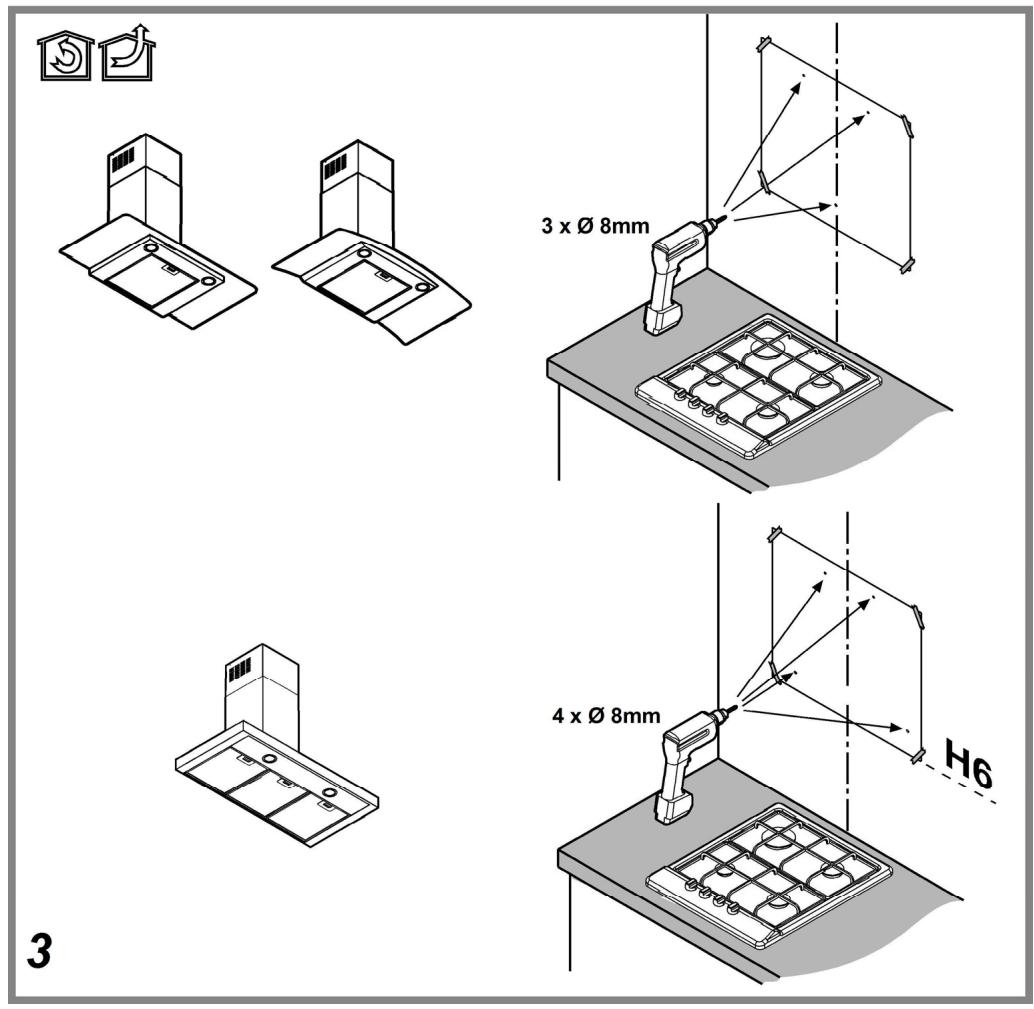
Use only the fixing screws supplied with the product for installation or, if not supplied, purchase the correct screws type.
Use the correct length for the screws which are identified in the Installation Guide.
In case of doubt, consult an authorised service assistance centre or similar qualified person.
WARNING! Failure to install the screws or fixing device in accordance with these instructions may result in electrical hazards.
Do not use with a programmer, timer, separate remote control system or any other device that switches on automatically.
The hood can look different to that illustrated in the drawings in this booklet. The instructions for use, maintenance and installation, however, remain the same.
Closely follow the instructions set out in this manual. All responsibility, for any eventual inconveniences, damages or fires caused by not complying with the instructions in this manual, is declined. This appliance is intended to be used in household and similar application such as: - staff kitchen areas in shop, offices and other working environments; - farm houses; - by clients in hotels, motels and other residential type environments; - bed and breakfast type environments.
It is important to conserve this booklet for consultation at any moment. In the case of sale, cession or move, make sure it is together with the product. ! Read the instructions carefully: there is important information about installation, use and safety. ! Do not carry out electrical or mechanical variations on the product or on the discharge conduits. ! Before proceeding with the installation of the appliance verify that there are no damaged all components. Otherwise contact your dealer and do not proceed with the installation.
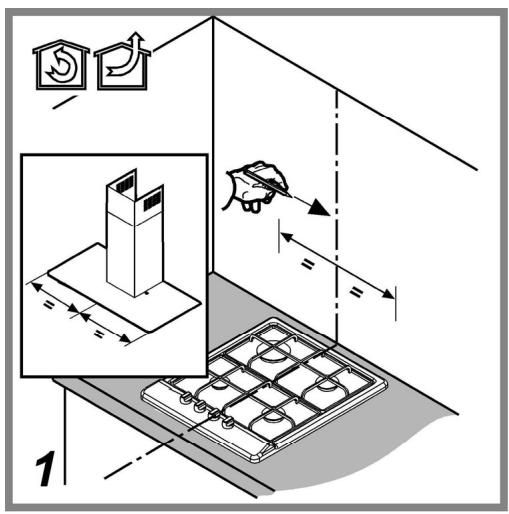
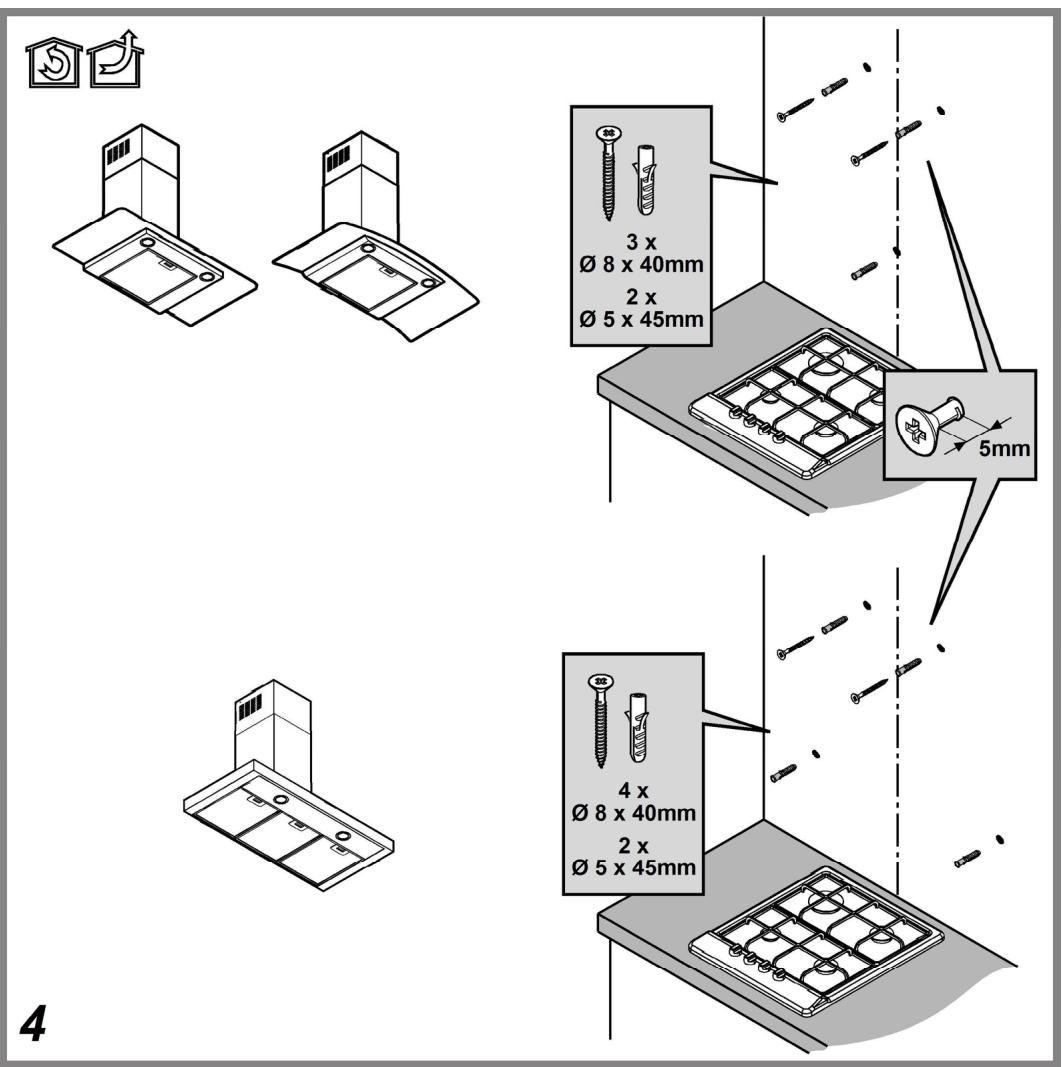
The minimum distance between the supporting surface for the cooking equipment on the hob and the lowest part of the range hood must be not less than 50 cm from electric cookers and 65 cm from gas or mixed cookers.
If the instructions for installation for the gas hob specify a greater distance, this must be adhered to.
ELECTRICAL CONNECTION
The mains power supply must correspond to the rating indicated on the plate situated inside the hood. If provided with a plug, connect the hood to a socket in compliance with current regulations and positioned in an accessible area, after installation. If it is not fitted with a plug (direct mains connection) or if the plug is not located in an accessible area, after installation, apply a double pole switch in accordance with standards which assures the complete disconnection of the mains under conditions relating to over-current category III, in accordance with installation instructions.
Warning! Before re-connecting the hood circuit to the mains supply and checking the efficient function, always check that the mains cable is correctly assembled.
Replacing the power cable
The hood is provided with a special power cable; if the cable is damaged, request a new one from Technical Service.
AIR VENT
(for the suction versions)
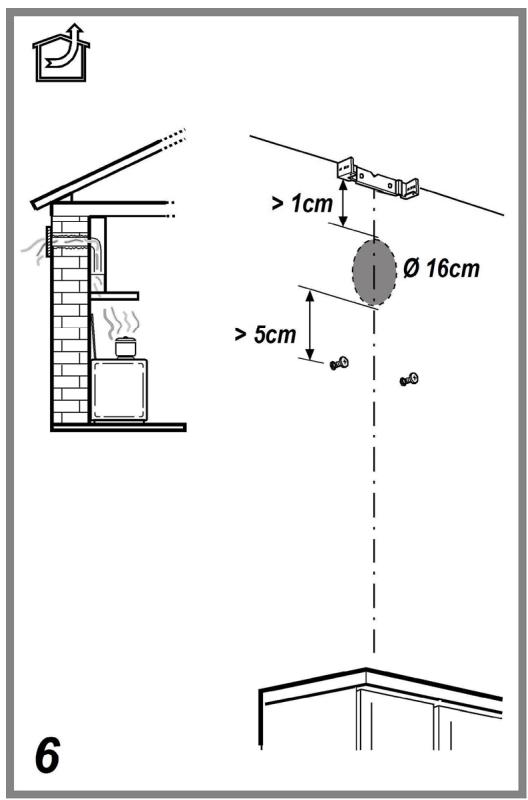
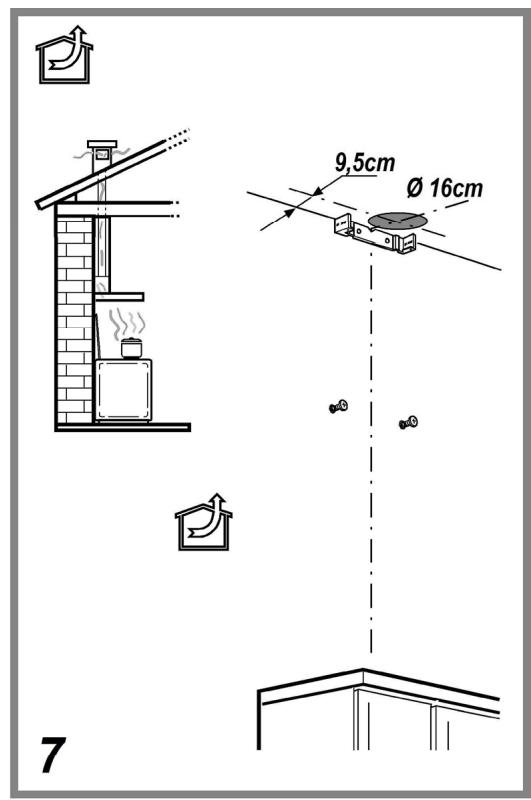
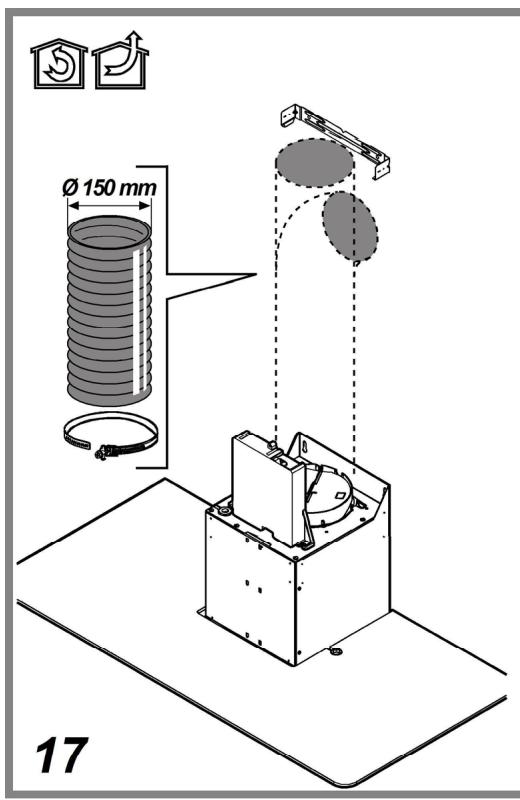
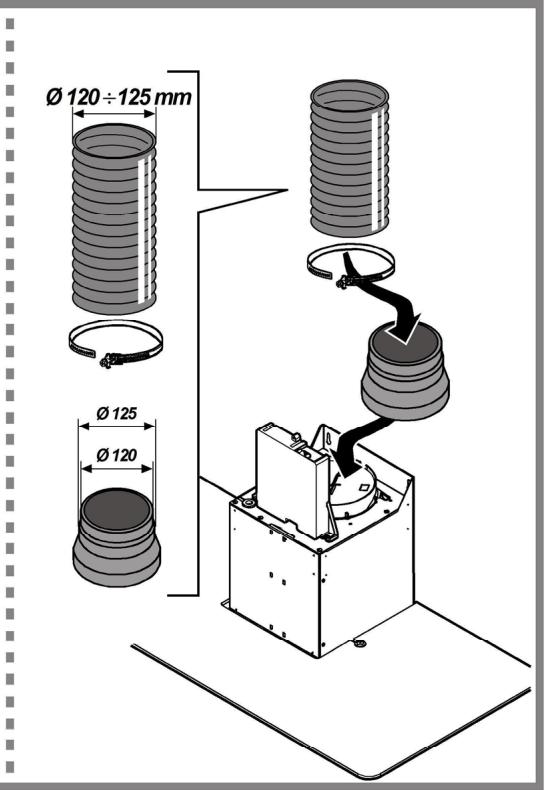
Connect the hood and discharge holes on the walls with a diameter equivalent to the air outlet (connection flange).
Using the tubes and discharge holes on walls with smaller dimensions will cause a diminution of the suction performance and a drastic increase in noise.
Any responsibility in the matter is therefore declined.
Use a duct of the minimum indispensable length. Use a duct with as few elbows as possible (maximum elbow angle: 90°). Avoid drastic changes in the duct cross-section. The company declines any responsibility whenever these regulations are not respected.
FILTERING OR DUCTING?
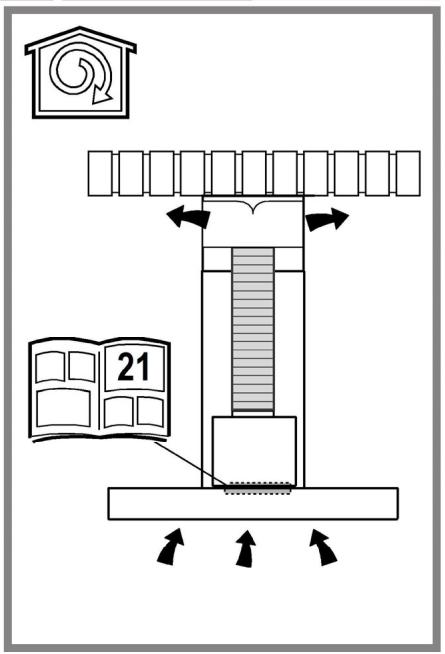
! Your cooker hood is ready to be used in suction version.
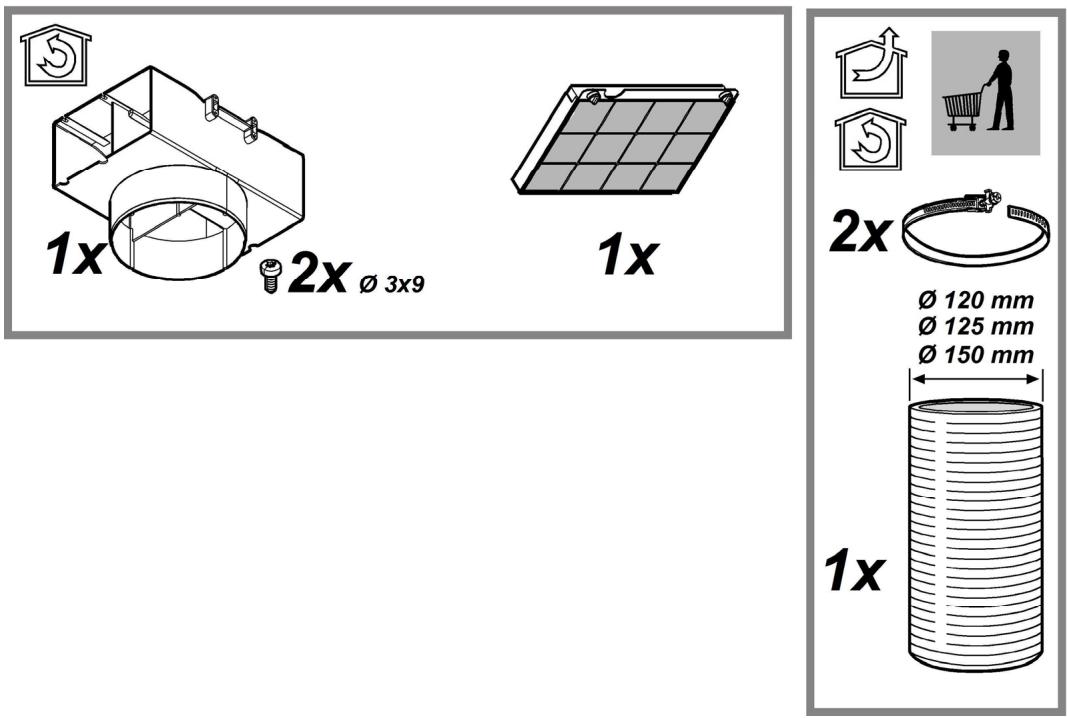
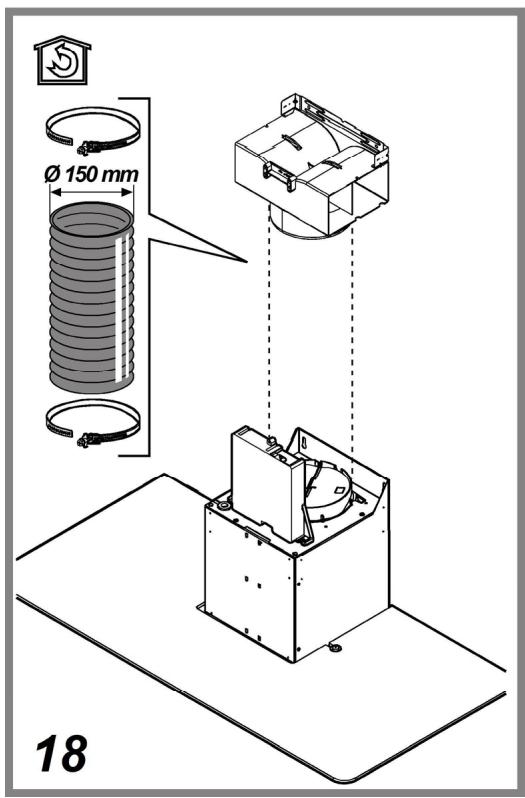
To use the hood in filtering version the special ACCESSORY KIT must be installed.
Check on the first pages of this manual if the ACCESSORY KIT is furnished or must be bought separately.
Note: If furnished, in certain cases, the additional activated carbon filtering system may be installed on the hood.
Information about the conversion of the hood from suction version to filtering version is present in this manual.

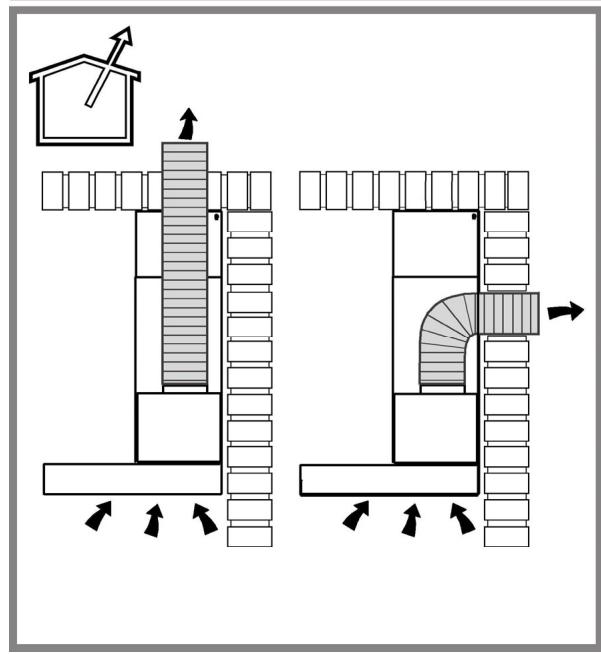
In this case the fumes are conveyed outside of the building by means of a special pipe connected with the connection ring located on top of the hood.
Attention! The exhausting pipe is not supplied and must be purchased apart.
Diameter of the exhausting pipe must be equal to that of the connection ring.
Attention! If the hood is supplied with active charcoal filter, then it must be removed.

The aspirated air will be degreased and deodorised before being fed back into the room.
In order to use the hood in this version, you have to install a system of additional filtering based on activated charcoal.
CONTROLS
The hood is fitted with a control panel with aspiration speed selection control and a light switch to control cooking area lights.
Models with mechanical control panel
HHBS 6.5F AM X - HHBS 9.5F AM X - HHF 6.4 F AM X - HHF 6.4 F AM K HHF 9.4 F AM X - HHF 9.5 F AM X - HHGC 9.4F AM X - HHGC 6.4F AM X
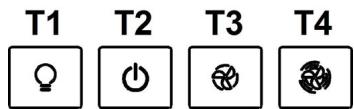
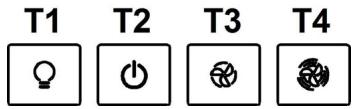
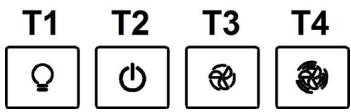
T1. ON/OFF light switch T2. Speed 1/OFF switch T3. 2-speed selection T4. 3-speed selection
Models with Soft Button panel + LCD Display
HHBS 6.7F LL X - HHBS 9.7F LLI X - HHE 6.7F LL X

T1. Button ON/OFF suction motor T2. Selection button for medium, high and intensive operating suction speed (power).
Note: Intensive suction speed (power) (LED L1 flashing) lasts for approximately 5 minutes, then the medium suction speed (power) is automatically set.
T3. Selection button for 'silent' suction speed (power) T4. Button ON/OFF lighting
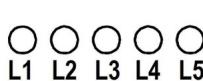
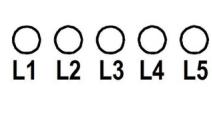
L1. Status icon suction speeds (powers) L2. Status icon saturation indicator for grease filter L3. Status icon low (silent) suction speed (power) L4. Status icon saturation indicator charcoal filter L5. Status icon lighting
Reset filter saturation indicator
After performing maintenance of the filter, press and hold button T3, the icon indicating saturation will switch off. Repeat the operation if both icons indicating saturation (grease and charcoal) are on.
Activation of the icon for charcoal filter saturation
The icon for charcoal filter saturation is normally disabled. To activate it, proceed as follows:
With the hood off, press and hold for a long time and simultaneously T1 and T3: L4 flashes at first then it switches on with steady light to indicate successful activation.
Disabling the icon for charcoal filter saturation: repeat the above operation, L4 switches on with steady light then flashes and in the end switches off to indicate successful disabling.
Automatic operation at high temperature
The hood is fitted with a sensor that detects the temperature. When this becomes too high, the sensor automatically activates the medium suction speed (power). The hood switches off when the temperature detected by the sensor has lowered significantly.
Models with Soft Button panel + Delay OFF
RHHF 9.7F LB X - RHHBS 9.7F LB X - RHHGC 9.7F LB X
RHHC 9.7F LB X
T1
T2
T3
T4
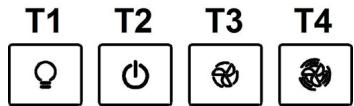
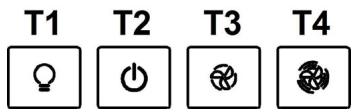
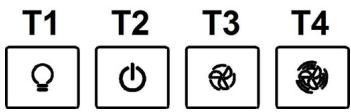
T1. Button ON/OFF suction motor T2. Selection button operating suction speed (power)
Note: The intensive suction speed (power) (LED L3 flashing) lasts for approximately 5 minutes, then the medium suction speed (power) is automatically set (LED L2 on)
T3. Button ON/OFF lighting T4. Automatic shutdown button:
Note: press this button to set the automatic shutdown after:
Low suction speed (power): 20 minutes
Medium suction speed (power): 15 minutes
High suction speed (power): 10 minutes
Intensive suction speed (power): 5 minutes
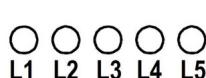
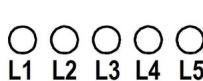
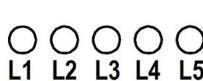
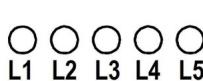
L1. LED low suction speed (power) L2. LED medium suction speed (power) L3. LED high suction speed (power) L4 LED intensive suction speed (power) - timed (5 min.). L5 LED for filter saturation:
flashing: carry out maintenance of the charcoal filter;
on: carry out maintenance of grease filters.
L1+L2+L3 flashing in sequence: automatic operation at high temperature (see related section)
Reset filter saturation
After carrying out filter maintenance, press and hold button T1, LED L5 switches off.
Activation of the LED for charcoal filter saturation
The LED for charcoal filter saturation is normally disabled. To activate it, proceed as follows:
With the hood off, press and hold for a long time and simultaneously T1 and T4: L1 flashes at first, then L2 as well, to indicate successful activation.
Disabling the LED for charcoal filter saturation: repeat the above operation, first L1 and L2 start flashing then only L1 to indicate successful disabling.
Automatic operation at high temperature
The hood is fitted with a sensor that detects the temperature. When this becomes too high, the sensor automatically switches on the medium suction speed (power). The hood switches off when the temperature detected by the sensor has lowered significantly.
Models with Soft Button panel + Silent Speed
HHBS 9.5F AB X - HHBS 9.7F LBI X - HHBS 9.7F LB X HHBS 6.7F LB X - HHGC 9.7F LB X - HHGC 6.7F LB X
HHGC 6.5F AB X - HHF 9.7F LB X - HHF 6.7F LB X
HHC 9.7F LB X - HHC 6.7F LB X
T1
T2
O 12
14
C
T3
T4
T1. Button ON/OFF suction motor T2. Selection button operating suction speed (power)
Note: The intensive suction speed (power) (LED L3 flashing) lasts for approximately 5 minutes, then the medium suction speed (power) is automatically set (LED L2 on)
T3. Button ON/OFF lighting
T4. Selection button 'silent' suction speed (power)
L1. LED medium suction speed (power) L2. LED high suction speed (power) L3 LED intensive suction speed (power) - timed (5 min.). L4 LED filter saturation:
flashing: carry out maintenance of the charcoal filter; on: carry out maintenance of grease filters.
L5 LED low (silent) suction speed (power)
L1+L2+L3 flashing in sequence: automatic operation at high temperature (see related section)
Reset filter saturation
After carrying out filter maintenance, press and hold button T1, LED L4 switches off.
Activation of the LED for charcoal filter saturation
The LED for charcoal filter saturation is normally disabled. To activate it, proceed as follows:
With the hood off, press and hold for a long time and simultaneously T1 and T4: L1 flashes first then L2 as well, to indicate successful activation.
Disabling the LED for charcoal filter saturation: repeat the above operation, L1 and L2 start flashing first, then only L1, to indicate successful disabling.
Automatic operation at high temperature
The hood is fitted with a sensor that detects the temperature. When this becomes too high, the sensor automatically activates the medium suction speed (power). The hood switches off when the temperature detected by the sensor has lowered significantly.
Model with SOFT-TOUCH control panel
HHBS 6.7F LT X - HHBS 6.7F LT DS - HHBS 6.7F LT CF HHBS 9.8F LT X - HHBS 9.8F LT DS - HHBS 9.8F LT CF
HHBS 9.8F LT ICE - HHBS 9.8F LT W
HHC 6.7F LT X - HHC 6.8F LT X - HHC 9.8F LT X
T1
T2
T3
T4
T5
T6
To select hood functions, simply touch the controls:
T1. Button ON/OFF suction motor. T2. Button to select medium suction speed (power). T3. Button to select high and intensive suction speed (power). Press once to select high suction speed (power) (LED L3 on);
Press again to select intensive suction speed (power) (LED L3 flashing). Note: The intensive suction (power) speed lasts for approximately 5 minutes, then the high suction speed (power) is set automatically.
T4. Automatic shutdown button (Timer) and saturation indicator for charcoal filter: Automatic shutdown: Press this button to set the automatic shutdown of the active suction speed (power): Silent suction speed (power): 10 minutes. Medium suction speed (power): 20 minutes. High suction speed (power): 15 minutes. Saturation indicator charcoal filter: When flashing, perform maintenance of the charcoal filter, if installed, then keep the button T6 pressed for a long time to stop the flashing. T5. Button to select 'silent' suction speed (power) and saturation indicator for grease filter. Note: when flashing, perform maintenance of the grease filter; then keep the button T6 pressed for a long time to stop the flashing. T6. Button ON/OFF lighting. T3+T4+T5 flashing: automatic operation under high temperature conditions (see relevant paragraph).
Activation of the charcoal filter saturation indicator
This indicator is normally deactivated. To activate it, proceed as follows:
With the hood off, press and keep pressed simultaneously T4 and T5: T5 starts flashing first, then T4 as well, to indicate successful activation.
Deactivation of charcoal filter saturation LED: repeat the operation described above; T5 and T4 start flashing, then only T5 to indicate successful deactivation.
Automatic operation under high temperature conditions
The hood is equipped with a sensor which detects the temperature. When this becomes too high, the sensor automatically turns on the medium suction speed (power). The hood turns off as soon as the temperature detected by the sensor is lowered significantly.
MAINTENANCE
Cleaning
Clean using ONLY the cloth dampened with neutral liquid detergent. DO NOT CLEAN WITH TOOLS OR INSTRUMENTS. Do not use abrasive products. DO NOT USE ALCOHOL!
Perimeter aspiration panel
Clean the perimeter aspiration panel with the same frequency as the anti-grease filters, using a cloth and not too concentrated liquid detergent. Do not use abrasive substances.
Maintenance of the anti-grease filters
Traps cooking grease particles.
This must be cleaned once a month (or when the filter saturation indication system - if envisaged on the model in possession - indicates this necessity) using non aggressive detergents, either by hand or in the dishwasher, which must be set to a low temperature and a short cycle.
When washed in a dishwasher, the grease filter may discolour slightly, but this does not affect its filtering capacity.
To remove the grease filter, pull the spring release handle.
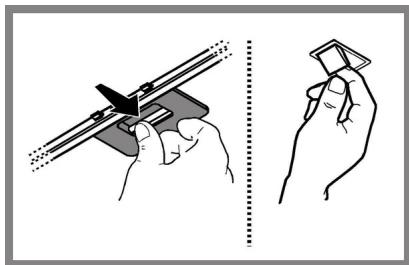
Maintenance of the charcoal filter
It absorbs unpleasant odours caused by cooking.
The saturation of the charcoal filter occurs after more or less prolonged use, depending on the type of cooking and the regularity of cleaning of the grease filter.
In any case it is necessary to replace the cartridge at least every four months (or when the filter saturation indication system - if envisaged on the model in possession - indicates this necessity). The charcoal filter may NOT be washed or regenerated.
Assembly
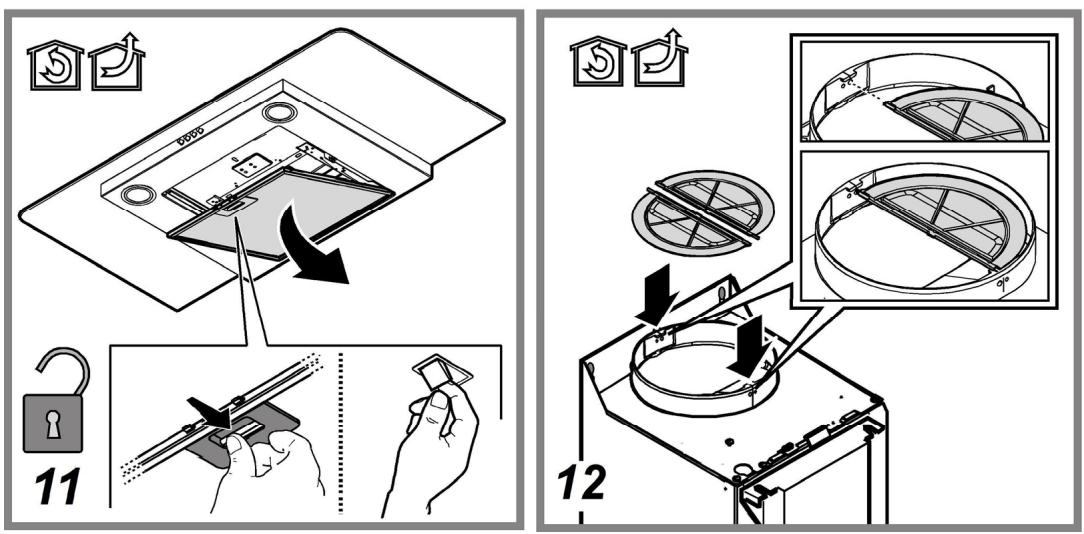
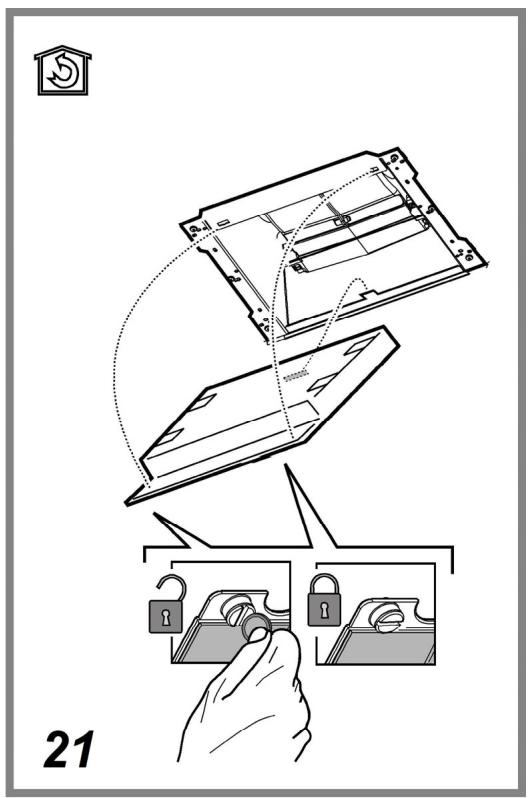
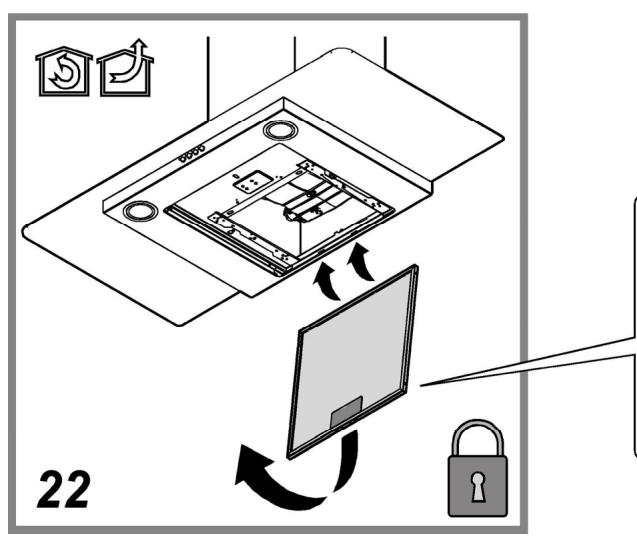
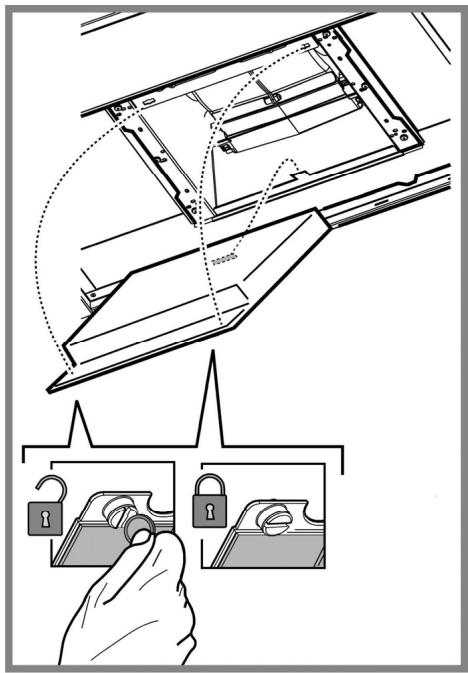
Hook the charcoal filter at the back on the metal tongue of the hood first, then on the front with the two knobs.
Disassembly
Remove the charcoal filter by turning the knobs fixing it to the hood by 90° .
Replacing lamps
HHBS 6.5F AM X, HHBS 9.5F AM X, HHF 6.4 F AM X, HHF 6.4 F AM K, HHF 9.4 F AM X, HHF 9.5 F AM X, HHBS 9.5F AB X, HHGC 6.5F AB X, HHGC 9.4F AM X, HHGC 6.4F AM X
Disconnect the appliance from the electricity.
Warning! Prior to touching the light bulbs ensure they are cooled down.
Replace the old light bulb with the one of the same type as specified in the feature label or near the light lamp on the hood.
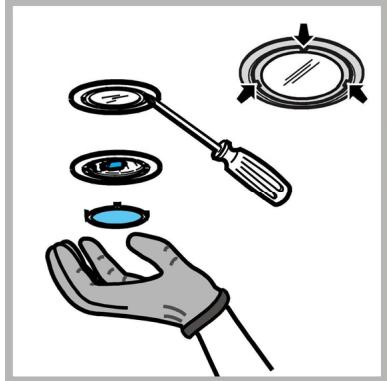
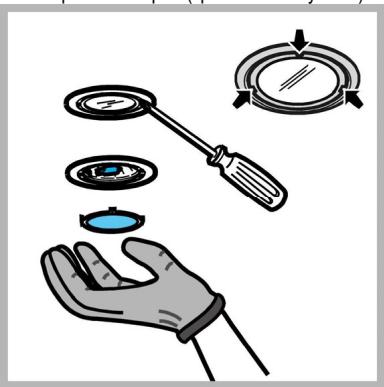
- Using a flat head screwdriver or equivalent tool, carefully pry loose the light cover.
- Remove the damaged light and replace with a new 12 Volt, 20 Watt (Maximum) halogen light made for a G-4 base SUITABLE FOR USE IN OPEN LUMINAIRES. Follow package directions and do not touch new light with bare hands.
- Reinstall the light cover. (It will snap shut.)
HHBS 6.7F LL X - RHHF 9.7F LB X - RHHBS 9.7F LB X - HHBS 9.7F LLI X - HHF 6.7F LL X - HHBS 9.7F LBI X - HHBS 9.7F LB X - HHBS 6.7F LB X - HHGC 9.7F LB X - HHGC 6.7F LB X - HHF 9.7F LB X - HHF 6.7F LB X - HHBS 6.7F LT X - HHBS 6.7F LT DS - HHBS 6.7F LT CF - HHBS 9.8F LT X - HHBS 9.8F LT DS - HHBS 9.8F LT CF - HHBS 9.8F LT ICE - HHBS 9.8F LT W - HHC 6.7F LT X - HHC 9.7F LB X - HHC 6.8F LT X - HHC 9.8F LT X - RHHC 9.7F LB X - HHC 6.7F LB X
The hood is equipped with a lighting system based on LED technology.
The LEDs guarantee an optimum lighting, a duration up to 10 times as long as the traditional lamps and allow to save 90% electrical energy.
For replacement, contact the technical service.
DISPOSAL
This appliance is marked according to the European directive 2012/19/EC on Waste Electrical and Electronic Equipment (WEEE). By ensuring this product is disposed of correctly, you will help prevent potential negative consequences for the environment and human health, which could otherwise be caused by inappropriate waste handling of this product.

The symbol on the product, or on the documents accompanying the product, indicates that this appliance may not be treated as household waste. Instead it should be taken to the appropriate collection point for the recycling of electrical and electronic equipment. Disposal must be carried out in accordance with local environmental regulations for waste disposal.
For further detailed information regarding the process, collection and recycling of this product, please contact the appropriate department of your local authorities or the local department for household waste or the shop where you purchased this product.
Appliance designed, tested and manufactured according to:
Safety: EN/IEC 60335-1; EN/IEC 60335-2-31. EN/IEC 62233. - Performance: EN/IEC 61591; ISO 5167-1; ISO 5167-3; ISO 5168; EN/IEC 60704-1; EN/IEC 60704-2-13; EN/IEC 60704-3; ISO 3741; EN 50564; IEC 62301. - EMC: EN 55014-1; CISPR 14-1; EN 55014-2; CISPR 14-2; EN/IEC 61000-3-2; EN/IEC 61000-3-3. Suggestions for a correct use in order to reduce the environmental impact: Switch ON the hood at minimum speed when you start cooking and keep it running for a few minutes after cooking is finished. Increase the speed only in case of large amount of smoke and vapour and use boost speed(s) only in extreme situations. Replace the charcoal filter(s) when necessary to maintain a good odour reduction efficiency. Clean the grease filter(s) when necessary to maintain a good grease filter efficiency. Use the maximum diameter of the ducting system indicated in this manual to optimize efficiency and minimize noise.
MALFUNCTIONS
If something appears not to be working properly, do the following simple checks before calling Technical Service:
If the hood is not working:
Check that:
- The power has not been disconnected.
- A speed has been selected.
If the hood performs inefficiently:
Check that:
- The motor speed selected is sufficient for the amount of smoke and vapours released.
- The kitchen is sufficiently ventilated to allow air intake.
- The charcoal filter is not worn (hood in filtering version).
If the hood has turned off during normal functioning:
Check that:
- The power has not been disconnected.
- the omnipolar disconnection device has not tripped.
If the hood fails to operate correctly, briefly disconnect it from the mains power supply for almost 5 sec. by pulling out the plug. Then plug it in again and try once more before contacting the Technical Assistance Service.
TECHNICAL DATA
| Model | Height (cm) | Width (cm) | Tiefe (cm) | Ø of exhaust tube (cm) |
| HHBS6.5FAMX HHBS6.7FLLX HHBS6.7FLBX | 61,9 - 114 70,4 - 114 | 59,8 | 45 | 15-12,5-12 |
| HHBS9.5FAMX RHHBS9.7FLBx HHBS9.7FLLIX HHBS9.5FABX HHBS9.7FLBIX HHBS9.7FLBX | 61,9 - 114 70,4 - 114 | 89,8 | 45 | 15-12,5-12 |
| HHF6.4 FAMX HHF6.4 FAMK HHF6.7FLLX HHGC6.7FLBx HHGC6.5FABX HHF6.7FLBX HHGC6.4FAMX | 60 - 112,5 68,5 - 112,5 | 59,8 | 45 | 15-12,5-12 |
| HHF9.4FAMX HHF9.5FAMX RHHF9.7FLBX HHF9.7FLBX | 60 - 112,5 68,5 - 112,5 | 89,8 | 45 | 15-12,5-12 |
| RHHGC9.7FLBX HHGC9.7FLBX HHGC9.4FAMX | 62,3 - 114,8 70,8 - 114,8 | 89,8 | 45 | 15-12,5-12 |
| HHBS6.7FLTX HHBS6.7FLTDS HHBS6.7FLTCF | 62,3 - 114,8 70,8 - 114,8 | 59,8 | 45,5 | 15-12,5-12 |
| HHBS9.8FLTX HHBS9.8FLTDS HHBS9.8FLTCF HHBS9.8FLTICE HHBS9.8FLTW | 62,3 - 114,8 70,8 - 114,8 | 89,8 | 45,5 | 15-12,5-12 |
| HHC 6.7F LT X HHC 6.8F LT X | 66,5 - 109 75 - 115 | 59,8 | 50,5 | 15-12,5-12 |
| HHC 6.7F LB X | 66,5 - 109 75 - 115 | 59,8 | 50 | 15-12,5-12 |
| HHC 9.7F LB X RHHC 9.7F LB X | 66,5 - 109 75 - 115 | 89,8 | 50 | 15-12,5-12 |
| HHC 9.8F LT X | 66,5 - 109 75 - 115 | 89,8 | 50,5 | 15-12,5-12 |
Please check the plate in order to verify the total absorption and the light absorption.
HHBS 6.5F AM X, HHBS 9.5F AM X, HHF 6.4 F AM X, HHF 6.4 F AM K, HHF 9.4 F AM X, HHF 9.5 F AM X, HHBS 9.5F AB X, HHGC 6.5F AB X, HHGC 9.4F AM X, HHGC 6.4F AM X
| Power (W) | Voltage (V) | Cap | Dimensions (mm) | |
| Halogen | 2 x 20W | 12 | G4 | 33xØ10 |
HHBS 6.7F LL X - RHHF 9.7F LB X - RHHBS 9.7F LB X - RHHGCS 9.7F LB X - HHBS 9.7F LLI X - HHF 6.7F LL X - HHBS 9.7F LBI X - HHBS 9.7F LB X - HHBS 6.7F LB X - HHGC 9.7F LB X - HHGC 6.7F LB X - HHF 9.7F LB X - HHF 6.7F LB X - HHBS 6.7F LT X - HHBS 6.7F LT DS - HHBS 6.7F LT CF - HHBS 9.8F LT X - HHBS 9.8F LT DS - HHBS 9.8F LT CF - HHBS 9.8F LT ICE - HHBS 9.8F LT W - HHC 6.7F LT X - HHC 9.7F LB X - HHC 6.8F LT X - HHC 9.8F LT X - RHHC 9.7F LB X - HHC 6.7F LB X
The hood is equipped with a lighting system based on LED technology. For replacement, contact the technical service.


Components not provided with the product
GENERAL SAFETY
HHBS 6.5F AM X - HHBS 9.5F AM X - HHF 6.4 F AM X - HHF 6.4 F AM K HHF 9.4 F AM X - HHF 9.5 F AM X - HHGC 9.4F AM X - HHGC 6.4F AM X
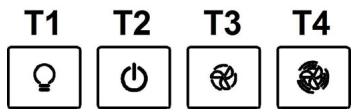
RHHF 9.7F LB X - RHHBS 9.7F LB X - RHHGC 9.7F LB X RRHC 9.7F LB X
T1
T2


T3
T4
HHBS 9.5F AB X - HHBS 9.7F LBI X - HHBS 9.7F LB X - HHBS 6.7F LB X - HHGC 9.7F LB X - HHGC 6.7F LB X - HHGC 6.5F AB X - HHE 9.7F LB X - HHE 6.7F LB X
HHC 9.7F LB X - HHC 6.7F LB X
T1
T2


T3
T4
HHC 6.7F LT X - HHC 6.8F LT X - HHC 9.8F LT X
T1
T2
T3
T4
T5
T6
HHBS 6.7F LL X - RHHF 9.7F LB X - RHHBS 9.7F LB X - HHBS 9.7F LLI X - HHF 6.7F LL X - HHBS 9.7F LBI X - HHBS 9.7F LB X - HHBS 6.7F LB X - HHGC 9.7F LB X - HHGC 6.7F LB X - HHF 9.7F LB X - HHF 6.7F LB X - HHBS 6.7F LT X - HHBS 6.7F LT DS - HHBS 6.7F LT CF - HHBS 9.8F LT X - HHBS 9.8F LT DS - HHBS 9.8F LT CF - HHBS 9.8F LT ICE - HHBS 9.8F LT W - HHC 6.7F LT X - HHC 9.7F LB X - HHC 6.8F LT X - HHC 9.8F LT X - RHHC 9.7F LB X - HHC 6.7F LB X
HHBS 6.7F LL X - RHHF 9.7F LB X - RHHBS 9.7F LB X - HHBS 9.7F LLI X - HHF 6.7F LL X - HHBS 9.7F LBI X - HHBS 9.7F LB X - HHBS 6.7F LB X - HHGC 9.7F LB X - HHGC 6.7F LB X - HHF 9.7F LB X - HHF 6.7F LB X - HHBS 6.7F LT X - HHBS 6.7F LT DS - HHBS 6.7F LT CF - HHBS 9.8F LT X - HHBS 9.8F LT DS - HHBS 9.8F LT CF - HHBS 9.8F LT ICE - HHBS 9.8F LT W - HHC 6.7F LT X - HHC 9.7F LB X - HHC 6.8F LT X - HHC 9.8F LT X - RHHC 9.7F LB X - HHC 6.7F LB X
HHBS 6.5F AM X - HHBS 9.5F AM X - HHF 6.4F AM X - HHF 6.4F AM K - HHF 9.4F AM X - HHF 9.5F AM X - HHGC 9.4F AM X - HHGC 6.4F AM X
RHHF 9.7F LB X - RHHBS 9.7F LB X - RHHGC 9.7F LB X
RHHC 9.7F LB X
T1
T2
T3
T4
HHBS 9.5F AB X - HHBS 9.7F LBI X - HHBS 9.7F LB X - HHBS 6.7F LB X - HHGC 9.7F LB X - HHGC 6.7F LB X
HHGC 6.5F AB X - HHF 9.7F LB X - HHF 6.7F LB X
HHC 9.7F LB X - HHC 6.7F LB X
T1
T2
O 12
14

C T3
T4
HHBS 9.8F LT ICE - HHBS 9.8F LT W
HHC 6.7F LT X - HHC 6.8F LT X - HHC 9.8F LT X
T1
T2
T3
T4
T5
T6
HHBS 6.7F LL X - RHHF 9.7F LB X - RHHBS 9.7F LB X - HHBS 9.7F LLI X - HHF 6.7F LL X - HHBS 9.7F LBI X - HHBS 9.7F LB X - HHBS 6.7F LB X - HHGC 9.7F LB X - HHGC 6.7F LB X - HHF 9.7F LB X - HHF 6.7F LB X - HHBS 6.7F LT X - HHBS 6.7F LT DS - HHBS 6.7F LT CF - HHBS 9.8F LT X - HHBS 9.8F LT DS - HHBS 9.8F LT CF - HHBS 9.8F LT ICE - HHBS 9.8F LT W - HHC 6.7F LT X - HHC 9.7F LB X - HHC 6.8F LT X - HHC 9.8F LT X - RHHC 9.7F LB X - HHC 6.7F LB X
HHBS 6.7F LL X - RHHF 9.7F LB X - RHHBS 9.7F LB X - HHBS 9.7F LLI X - HHF 6.7F LL X - HHBS 9.7F LBI X - HHBS 9.7F LB X - HHBS 6.7F LB X - HHGC 9.7F LB X - HHGC 6.7F LB X - HHF 9.7F LB X - HHF 6.7F LB X - HHBS 6.7F LT X - HHBS 6.7F LT DS - HHBS 6.7F LT CF - HHBS 9.8F LT X - HHBS 9.8F LT DS - HHBS 9.8F LT CF - HHBS 9.8F LT ICE - HHBS 9.8F LT W - HHC 6.7F LT X - HHC 9.7F LB X - HHC 6.8F LT X - HHC 9.8F LT X - RHHC 9.7F LB X - HHC 6.7F LB X
HHBS 6.5F AM X - HHBS 9.5F AM X - HHF 6.4F AM X - HHF 6.4F AM K - HHF 9.4F AM X - HHF 9.5F AM X - HHGC 9.4F AM X - HHGC 6.4F AM X
RHHF 9.7F LB X - RHHBS 9.7F LB X - RHHGC 9.7F LB X - RHHC 9.7F LB X

HHBS 9.5F AB X - HHBS 9.7F LBI X - HHBS 9.7F LB X - HHBS 6.7F LB X - HHGC 9.7F LB X - HHGC 6.7F LB X - HHGC 6.5F AB X - HHE 9.7F LB X - HHE 6.7F LB X
HHC 9.7F LB X - HHC 6.7F LB X
T1
T2


T3
T4
HHC 6.7F LT X - HHC 6.8F LT X - HHC 9.8F LT X
T1
T2
T3
T4
T5
T6
HHBS 6.7F LL X - RHHF 9.7F LB X - RHHBS 9.7F LB X - HHBS 9.7F LLI X - HHF 6.7F LL X - HHBS 9.7F LBI X - HHBS 9.7F LB X - HHBS 6.7F LB X - HHGC 9.7F LB X - HHGC 6.7F LB X - HHF 9.7F LB X - HHF 6.7F LB X - HHBS 6.7F LT X - HHBS 6.7F LT DS - HHBS 6.7F LT CF - HHBS 9.8F LT X - HHBS 9.8F LT DS - HHBS 9.8F LT CF - HHBS 9.8F LT ICE - HHBS 9.8F LT W - HHC 6.7F LT X - HHC 9.7F LB X - HHC 6.8F LT X - HHC 9.8F LT X - RHHC 9.7F LB X - HHC 6.7F LB X
HHBS 6.7F LL X - RHHF 9.7F LB X - RHHBS 9.7F LB X - HHBS 9.7F LLI X - HHF 6.7F LL X - HHBS 9.7F LBI X - HHBS 9.7F LB X - HHBS 6.7F LB X - HHGC 9.7F LB X - HHGC 6.7F LB X - HHF 9.7F LB X - HHF 6.7F LB X - HHBS 6.7F LT X - HHBS 6.7F LT DS - HHBS 6.7F LT CF - HHBS 9.8F LT X - HHBS 9.8F LT DS - HHBS 9.8F LT CF - HHBS 9.8F LT ICE - HHBS 9.8F LT W - HHC 6.7F LT X - HHC 9.7F LB X - HHC 6.8F LT X - HHC 9.8F LT X - RHHC 9.7F LB X - HHC 6.7F LB X
HHBS 6.5F AM X - HHBS 9.5F AM X - HHF 6.4 F AM X - HHF 6.4 F AM K HHF 9.4 F AM X - HHF 9.5 F AM X - HHGC 9.4F AM X
Reset filter saturation indicator
RHHF 9.7F LB X - RHHBS 9.7F LB X - RHHGC 9.7F LB X
RHHC 9.7F LB X
T1
T2
T3
T4
T1. Suction motor ON/OFF
L5 LED filter saturation:
Reset filter saturation indicator
HHBS 9.5F AB X - HHBS 9.7F LBI X - HHBS 9.7F LB X HHBS 6.7F LB X - HHGC 9.7F LB X - HHGC 6.7F LB X
HHGC 6.5F AB X - HHF 9.7F LB X - HHF 6.7F LB X
HHC 9.7F LB X - HHC 6.7F LB X
T1
T2
12
14
L
T3
T4
Reset filter saturation
HHBS 9.8F LT X - HHBS 9.8F LT DS - HHBS 9.8F LT CF HHBS 9.8F LT ICE - HHBS 9.8F LT W
HHC 6.7F LT X - HHC 6.8F LT X - HHC 9.8F LT X
T1
T2
T3
T4
T5
T6
HHBS 6.7F LL X - RHHF 9.7F LB X - RHHBS 9.7F LB X - RHHGCS 9.7F LB X - HHBS 9.7F LLI X - HHF 6.7F LL X - HHBS 9.7F LBI X - HHBS 9.7F LB X - HHBS 6.7F LB X - HHGC 9.7F LB X - HHGC 6.7F LB X - HHF 9.7F LB X - HHF 6.7F LB X - HHBS 6.7F LT X - HHBS 6.7F LT DS - HHBS 6.7F LT CF - HHBS 9.8F LT X - HHBS 9.8F LT DS - HHBS 9.8F LT CF - HHBS 9.8F LT ICE - HHBS 9.8F LT W - HHC 6.7F LT X - HHC 9.7F LB X - HHC 6.8F LT X - HHC 9.8F LT X - RHHC 9.7F LB X - HHC 6.7F LB X
HHBS 6.7F LL X - RHHF 9.7F LB X - RHHBS 9.7F LB X - HHBS 9.7F LLI X - HHF 6.7F LL X - HHBS 9.7F LBI X - HHBS 9.7F LB X - HHBS 6.7F LB X - HHGC 9.7F LB X - HHGC 6.7F LB X - HHF 9.7F LB X - HHF 6.7F LB X - HHBS 6.7F LT X - HHBS 6.7F LT DS - HHBS 6.7F LT CF - HHBS 9.8F LT X - HHBS 9.8F LT DS - HHBS 9.8F LT CF - HHBS 9.8F LT ICE - HHBS 9.8F LT W - HHC 6.7F LT X - HHC 9.7F LB X - HHC 6.8F LT X - HHC 9.8F LT X - RHHC 9.7F LB X - HHC 6.7F LB X
HHBS 6.5F AM X - HHBS 9.5F AM X - HHF 6.4F AM X - HHF 6.4F AM K - HHF 9.4F AM X - HHF 9.5F AM X - HHGC 9.4F AM X - HHGC 6.4F AM X
RHHF 9.7F LB X - RHHBS 9.7F LB X - RHHGC 9.7F LB X - RRHC 9.7F LB X


HHBS 9.5F AB X - HHBS 9.7F LBI X - HHBS 9.7F LB X - HHBS 6.7F LB X - HHGC 9.7F LB X - HHGC 6.7F LB X - HHGC 6.5F AB X - HHE 9.7F LB X - HHE 6.7F LB X
HHC 9.7F LB X - HHC 6.7F LB X
T1
T2


∴ m = 3/11
T3
T4
HHC 6.7F LT X - HHC 6.8F LT X - HHC 9.8F LT X
T1
T2
T3
T4
T5
T6
HHBS 6.7F LL X - RHHF 9.7F LB X - RHHBS 9.7F LB X - HHBS 9.7F LLI X - HHF 6.7F LL X - HHBS 9.7F LBI X - HHBS 9.7F LB X - HHBS 6.7F LB X - HHGC 9.7F LB X - HHGC 6.7F LB X - HHF 9.7F LB X - HHF 6.7F LB X - HHBS 6.7F LT X - HHBS 6.7F LT DS - HHBS 6.7F LT CF - HHBS 9.8F LT X - HHBS 9.8F LT DS - HHBS 9.8F LT CF - HHBS 9.8F LT ICE - HHBS 9.8F LT W - HHC 6.7F LT X - HHC 9.7F LB X - HHC 6.8F LT X - HHC 9.8F LT X - RHHC 9.7F LB X - HHC 6.7F LB X
HHBS 6.7F LL X - RHHF 9.7F LB X - RHHBS 9.7F LB X - HHBS 9.7F LLI X - HHF 6.7F LL X - HHBS 9.7F LBI X - HHBS 9.7F LB X - HHBS 6.7F LB X - HHGC 9.7F LB X - HHGC 6.7F LB X - HHF 9.7F LB X - HHF 6.7F LB X - HHBS 6.7F LT X - HHBS 6.7F LT DS - HHBS 6.7F LT CF - HHBS 9.8F LT X - HHBS 9.8F LT DS - HHBS 9.8F LT CF - HHBS 9.8F LT ICE - HHBS 9.8F LT W - HHC 6.7F LT X - HHC 9.7F LB X - HHC 6.8F LT X - HHC 9.8F LT X - RHHC 9.7F LB X - HHC 6.7F LB X
HHBS 6.5F AM X - HHBS 9.5F AM X - HHF 6.4F AM X - HHF 6.4F AM K HHF 9.4F AM X - HHF 9.5F AM X - HHGC 9.4F AM X - HHGC 6.4F AM X
RHHF 9.7F LB X - RHHBS 9.7F LB X - RHHGC 9.7F LB X
RHHC 9.7F LB X
T1
T2
T3
T4
T1. Suction motor ON/OFF button
T2. Suction Higgins button Note: After the device operates at high suction speed (power) (LED L3 flashes) for 5 minutes, it automatically switches to medium suction speed (power) (LED L2 lights up).
T3. Lighting ON/OFF button
T4. Automatic shut-off button: Note: Press this button to select the automatic shut-off function after the device has been operating at the following speeds: Low suction speed (power): 20 minutes; Medium suction speed (power): 15 minutes; High suction speed (power): 10 minutes; Intensive suction speed (power): 5 minutes.
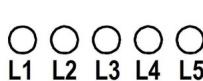
L1. LED low suction speed (power)
L2. LED medium suction speed (power)
L3. LED high suction speed (power)
L4. LED intensive - variable suction speed (power) (5 min.)
HHBS 9.5F AB X - HHBS 9.7F LBI X - HHBS 9.7F LB X HHBS 6.7F LB X - HHGC 9.7F LB X - HHGC 6.7F LB X
HHBS 6.7F LB X - HHGC 9.7F LB X - HHGC 6.7F LB X HHGC 6.5F AB X - HHF 9.7F LB X - HHF 6.7F LB X
HHC 9.7F LB X - HHC 6.7F LB X
T1
T2
12
O O 14 15
T3
T4
T1. Suction motor ON/OFF button; T2. Suction speed (power) button
Note: After the device operates at high suction speed (power) (LED L3 flashing) for 5 minutes, it automatically switches to medium suction speed (power) (LED L2 lights up).
T3. Lighting ON/OFF button T4. "Silent" suction speed (power) button
HHBS 9.8F LT ICE - HHBS 9.8F LT W
HHC 6.7F LT X - HHC 6.8F LT X - HHC 9.8F LT X
T1
T2
T3
T4
T5
T6
HHBS 6.7F LL X - RHHF 9.7F LB X - RHHBS 9.7F LB X - HHBS 9.7F LLI X - HHF 6.7F LL X - HHBS 9.7F LBI X - HHBS 9.7F LB X - HHBS 6.7F LB X - HHGC 9.7F LB X - HHGC 6.7F LB X - HHF 9.7F LB X - HHF 6.7F LB X - HHBS 6.7F LT X - HHBS 6.7F LT DS - HHBS 6.7F LT CF - HHBS 9.8F LT X - HHBS 9.8F LT DS - HHBS 9.8F LT CF - HHBS 9.8F LT ICE - HHBS 9.8F LT W - HHC 6.7F LT X - HHC 9.7F LB X - HHC 6.8F LT X - HHC 9.8F LT X - RHHC 9.7F LB X - HHC 6.7F LB X
HHBS 6.7F LL X - RHHF 9.7F LB X - RHHBS 9.7F LB X - HHBS 9.7F LLI X - HHF 6.7F LL X - HHBS 9.7F LBI X - HHBS 9.7F LB X - HHBS 6.7F LB X - HHGC 9.7F LB X - HHGC 6.7F LB X - HHF 9.7F LB X - HHF 6.7F LB X - HHBS 6.7F LT X - HHBS 6.7F LT DS - HHBS 6.7F LT CF - HHBS 9.8F LT X - HHBS 9.8F LT DS - HHBS 9.8F LT CF - HHBS 9.8F LT ICE - HHBS 9.8F LT W - HHC 6.7F LT X - HHC 9.7F LB X - HHC 6.8F LT X - HHC 9.8F LT X - RHHC 9.7F LB X - HHC 6.7F LB X
HHBS 6.5F AM X - HHBS 9.5F AM X - HHF 6.4 F AM X - HHF 6.4 F AM K HHF 9.4 F AM X - HHF 9.5 F AM X - HHGC 9.4F AM X - HHGC 6.4F AM X
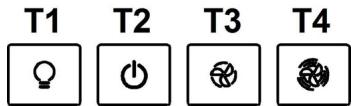
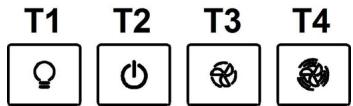
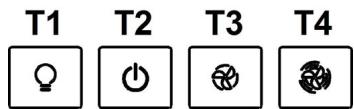
T1. Lighting ON/OFF. T2. Lighting ON/OFF and speed selection 1 T3. Speed selection 2 T4. Speed selection 3
RHHF 9.7F LB X - RHHBS 9.7F LB X - RHHGC 9.7F LB X RRHC 9.7F LB X
T1
T2


T3
T4
HHBS 9.5F AB X - HHBS 9.7F LBI X - HHBS 9.7F LB X - HHBS 6.7F LB X - HHGC 9.7F LB X - HHGC 6.7F LB X - HHGC 6.5F AB X - HHE 9.7F LB X - HHE 6.7F LB X
HHC 9.7F LB X - HHC 6.7F LB X
T1
T2


T3
T4
HHC 6.7F LT X - HHC 6.8F LT X - HHC 9.8F LT X
T1
T2
T3
T4
T5
T6
The appliance is intended for household use and similar applications, and must be used according to the instructions.
HHBS 6.7F LL X - RHHF 9.7F LB X - RHHBS 9.7F LB X - RHHGC 9.7F LB X - HHBS 9.7F LLI X - HHF 6.7F LL X - HHBS 9.7F LBI X - HHBS 9.7F LB X - HHBS 6.7F LB X - HHGC 9.7F LB X - HHGC 6.7F LB X - HHF 9.7F LB X - HHF 6.7F LB X - HHBS 6.7F LT X - HHBS 6.7F LT DS - HHBS 6.7F LT CF - HHBS 9.8F LT X - HHBS 9.8F LT DS - HHBS 9.8F LT CF - HHBS 9.8F LT ICE - HHBS 9.8F LT W - HHC 6.7F LT X - HHC 9.7F LB X - HHC 6.8F LT X - HHC 9.8F LT X - RHHC 9.7F LB X - HHC 6.7F LB X
The appliance uses LED technology for lighting.
LED technology is energy efficient, with a lifespan of up to 10 hours, which is longer than conventional lamps, while also providing up to 90% energy savings.
For replacement, contact the technical support service.
DISPOSAL
This appliance is marked according to the European Directive 2012/19/EC regarding waste electrical and electronic equipment (WEEE).
HHBS 6.7F LL X - RHHF 9.7F LB X - RHHBS 9.7F LB X - HHBS 9.7F LLI X - HHF 6.7F LL X - HHBS 9.7F LBI X - HHBS 9.7F LB X - HHBS 6.7F LB X - HHGC 9.7F LB X - HHGC 6.7F LB X - HHF 9.7F LB X - HHF 6.7F LB X - HHBS 6.7F LT X - HHBS 6.7F LT DS - HHBS 6.7F LT CF - HHBS 9.8F LT X - HHBS 9.8F LT DS - HHBS 9.8F LT CF - HHBS 9.8F LT ICE - HHBS 9.8F LT W - HHC 6.7F LT X - HHC 9.7F LB X - HHC 6.8F LT X - HHC 9.8F LT X - RHHC 9.7F LB X - HHC 6.7F LB X
The appliance is equipped with a lighting system that uses LED technology.
For replacement, contact the technical support service.


If the appliance is not working properly
SAFETY INSTRUCTIONS AND WARNINGS
Before cleaning or servicing, disconnect the appliance from the power supply by unplugging it from the socket or switching off the circuit breaker. Use protective gloves during installation and servicing.
This appliance can be used by children aged from 8 years and above and persons with reduced physical, sensory or mental capabilities or lack of experience and knowledge if they have been given supervision or instruction concerning use of the appliance in a safe way and understand the hazards involved.
Children shall not play with the appliance.
Cleaning and user maintenance shall not be made by children without supervision.
The room must have sufficient
ventilation when the kitchen hood is used
simultaneously with appliances that operate on gas or other fuels.
The hood should be cleaned frequently both inside and outside (at least once a month), following the instructions for maintenance.
Failure to clean the hood and replace and clean filters increases the risk of fire.
It is strictly forbidden to cook food over an open flame under the hood.
Using an open flame damages the filters and may cause a fire, so it must be avoided at all costs.
Frying must be done under supervision to avoid overheated oil catching fire.
CAUTION: When the hob surface is operating, accessible parts of the hood may become hot.
For lamp replacement, use only the lamp type specified in the maintenance section of this manual.
Warning! Do not connect the appliance to the electrical supply until the installation is fully completed.
As for technical and safety measures regarding the use of the hood, strictly follow the regulations of local competent authorities.
The hood must be installed so that it can be used for exhausting fumes from appliances that operate on gas or other fuels.
Do not use the hood without properly installed lamps, as there is a risk of electric shock.
Never use the hood without the properly installed filter!
The hood must never be used as a support surface, unless otherwise specified.
Use only the accessories supplied with the product for installation, or if not included, purchase the correct type of accessories. Use the correct type of screws as indicated in the installation manual. In case of doubt, consult an authorized
service center with qualified personnel.
WARNING! Failure to install the appropriate screws and accessories in accordance with these instructions may result in electrical hazards.
The hood may have a different appearance from the hood shown in the figures of this manual, however, the operating, maintenance, and installation instructions remain the same. This product is for household use. The manufacturer disclaims all liability for damage or injury arising from the use of the appliance due to failure to follow the instructions provided in this manual. The hood is intended for extracting fumes and steam during cooking and is designed solely for domestic use.
! It is very important to keep this manual so that you can refer to it at any time. If the product is sold, transferred, or moved, make sure the manual is always with it. Read the manual carefully. It contains important information on installation, operation, and safety. It is forbidden to make any modifications to the electrical or mechanical parts of the product or in the exhaust pipes. Before starting installation, make sure all components are intact and in good condition. If any damage is found, contact the supplier and do not begin installation under any circumstances.
The distance between the lower edge of the hood and the support surface must be at least 50 cm for electric hobs, and at least 65 cm for gas or combination hobs.
If the installation manual for the gas hob specifies a greater distance, follow that.
ELECTRICAL CONNECTION
The voltage must correspond to the voltage indicated on the technical data plate located inside the appliance. If the hood is equipped with a plug, connect the hood to a suitable socket. It must comply with current regulations and be easily accessible. The plug can be inserted after installation. If the hood is not equipped with a plug (direct connection to the mains) or if the socket is not accessible after installation, use a suitable omnipolar switch that ensures complete disconnection from the mains under overvoltage category III conditions, in accordance with installation instructions.
Warning! Before connecting to the electrical network, check that the power supply system is properly grounded and verify that the power cable is correctly installed.
Replacing the power cable
The unit has a special power cable; in case of cable damage, it must be ordered from the technical service department.
Air flow
HHBS 6.5F AM X - HHBS 9.5F AM X - HHF 6.4 F AM X - HHF 6.4 F AM K HHF 9.4 F AM X - HHF 9.5 F AM X - HHGC 9.4F AM X - HHGC 6.4F AM X
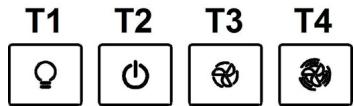
T1. Lighting switch ON/OFF. T2. Switch OFF/speed 1 T3. Speed selector 2 T4. Speed selector 3
Model with Soft Button + LCD display

T1. ON/OFF button for suction motor T2. Speed (power) selection button for suction: medium, high, and intensive operation. Note: Intensive suction speed (power) (LED L1 flashing) lasts approximately 5 minutes, after which medium suction speed (power) will be set automatically. T3. Speed (power) selection button for "silent" suction. T4. ON/OFF button for lighting
L1. Indicator for suction speed (power) status L2. Indicator for filter saturation status L3. Indicator for low suction speed (power) status (silent) L4. Indicator for activated carbon filter saturation status L5. Lighting status indicator
Reset filter saturation indicator
After filter maintenance has been performed, press and hold button T3 for a long time, the indicator showing saturation will turn off. Repeat the operation in case of activation without any indicators showing filter saturation (carbon filter activated).
Activating the activated carbon filter saturation indicator
The activated carbon filter saturation indicator is usually off. To activate it, perform the following operations:
With the hood switched off, press and hold simultaneously T1 and T3 for a long time: L4 first flashes, then turns on with a steady light indicating the activation.
Deactivating the activated carbon filter saturation indicator: Repeat the operation described above, L4 will turn on with a steady light, then flash until it turns off, indicating the deactivation.
Automatic operation at high temperature
The hood is equipped with a sensor that determines the temperature. If it becomes too high, the sensor automatically switches on the speed (power) of medium suction. The hood switches off as soon as the temperature determined by the sensor drops significantly.
Model with Soft Button and Delay OFF
RHHF 9.7F LB X - RHHBS 9.7F LB X - RHHGC 9.7F LB X
RHHC 9.7F LB X
T1
T2
T3
T4
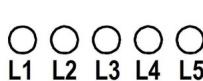
T1. Button for switching the suction motor on/off. T2. Button for selecting the speed (power) of the working suction. Note: The speed (power) of intensive suction (LED L3 flashing) is limited to 5 minutes, after which the speed (power) of medium suction will be automatically set (LED L2 on). T3. Button for switching the light on/off. T4. Button for automatic switch-off. Note: Press this button to set automatic switch-off after: Speed (power) of low suction: 20 minutes. Speed (power) of medium suction: 15 minutes. Speed (power) of high suction: 10 minutes. Speed (power) of intensive suction: 5 minutes. L1. LED for speed (power) of low suction. L2. LED for speed (power) of medium suction. L3. LED for speed (power) of high suction. L4. LED for speed (power) of intensive suction - temporary (5 min.). L5. LED for filter saturation: Flashing: perform maintenance of the activated carbon filter. On: perform maintenance of the grease filters. L1+L2+L3 flashing in a defined sequence: automatic operation at too high temperature (see relative paragraph).
Reset filter saturation
After performing filter maintenance, press button T1 for a long time; LED L5 switches off.
Switching on the LED for saturation of activated carbon filters. The LED for saturation of activated carbon filters is usually off. To switch it on, perform the following operation:
With the hood switched off, press and hold simultaneously T1 and T4 for a long time: first L1 flashes, then also L2, indicating the switching on.
Switching off the LED for saturation of activated carbon filters: repeat the operation described above; first L1 and L2 flash, then only L1 indicates the switching off.
The extractor fan automatically switches to high speed when the temperature is too high.
The extractor is equipped with a sensor that detects the temperature. If it becomes too high, the sensor automatically activates the speed (power) of the medium extraction. The extraction will switch off as soon as the temperature detected by the sensor drops significantly.
Models with Soft Button and Silent Speed
HHBS 9.5F AB X - HHBS 9.7F LBI X - HHBS 9.7F LB X - HHBS 6.7F LB X - HHGC 9.7F LB X - HHGC 6.7F LB X
HHGC 6.5F AB X - HHF 9.7F LB X - HHF 6.7F LB X
HHC 9.7F LB X - HHC 6.7F LB X
T1
T2
12
O 14

T3
T4
T1. On/Off button for the hood. T2. Speed (power) selection button for the working extraction.
Note: The speed (power) of intensive extraction (LED L3 flashing) is set for approximately 5 minutes, after which the speed (power) of medium extraction will be automatically set (LED L2 on).
T3. On/Off button for the light. T4. Speed (power) selection button for "silent" extraction.
L1. LED speed (power) of medium suction L2. LED speed (power) of high suction L3. LED speed (power) of intensive suction - temporary (5 min.). L4. LED filter saturation: flashing: perform filter maintenance. On: perform filter maintenance of activated carbon. L5. LED speed (power) of low suction (silent)
L1+L2+L3 flashing in sequence: automatic operation at too high temperature (see relative paragraph)
Reset filter saturation
After performing filter maintenance, press the T1 button for a long time, LED L4 turns off.
Turning on the LED for activated carbon filter saturation
The LED for activated carbon filter saturation is usually off. To turn it on, perform the following operations:
With the extractor hood switched off, press and hold the T1 and T4 buttons simultaneously for a long time: first L1 flashes, then also L2, indicating the activation.
Turning off the LED for activated carbon filter saturation: repeat the operation described above, first L1 and L2 flash, then L1 indicates the deactivation.
Automatic operation at high temperature
The hood is equipped with a temperature sensor. If it becomes too high, the sensor automatically activates the medium suction speed (power). The hood switches off as soon as the temperature detected by the sensor drops significantly.
Model 3 with SOFT-TOUCH control
HHBS 6.7F LT X - HHBS 6.7F LT DS - HHBS 6.7F LT CF
HHBS 9.8F LT X - HHBS 9.8F LT DS - HHBS 9.8F LT CF HHBS 9.8F LT ICE - HHBS 9.8F LT W
HHC 6.7F LT X - HHC 6.8F LT X - HHC 9.8F LT X
T1
T2
T3
T4
T5
T6
To select the suction function, simply press the control buttons:
T1. On/off button for the suction motor T2. Speed (power) selection button for medium suction T3. Speed (power) selection button for high-intensity suction
Press once to select the high suction speed (power) (LED L3 on);
Press again to select the intensive suction speed (power) (LED L3 flashes).
Note: The intensive suction speed (power) lasts for approximately 5 minutes, after which the high suction speed (power) will be automatically selected.
T4. Automatic shut-off button (timer) and saturation indicator of the filter activated:
Automatic shut-off:
Press this button to set the automatic shut-off of the suction speed (power) of the active suction:
Speed (power) of silent suction: 10 minutes
Speed (power) of medium suction: 20 minutes
Speed (power) high suction: 15 minutes
Indicator for saturation of the activated carbon filter
When you want to perform drying of the activated carbon filter, after installation, press and hold button T6 for a long time to stop the motor.
T5. Button for selecting the speed (power) of "silent" suction. Indicator for saturation of the carbon filter
Note: When you want to perform maintenance of the carbon filter, after that press and hold button T6 for a long time to stop the motor.
T6. Button for switching the lighting on/off
T3+T4+T5 buttons: automatic operation in the presence of high temperature (see relevant paragraph)
Activation of the indicator for saturation of the activated carbon filter
This indicator, as a rule, is off. To turn it on, you need to do as indicated below:
With the hood off, press and hold the buttons T4 and T5 simultaneously: first press T5, then also T4, indicating the activation.
Deactivation of the LED indicator for saturation of the activated carbon filter: repeat the operation described above, first press T5 and T4, then only T5, indicating the deactivation.
Automatic operation in the presence of high temperature
The hood is equipped with a sensor that measures temperature. When it becomes too high, the sensor automatically activates the medium suction speed (power). The hood will turn off as soon as the temperature measured by the sensor drops significantly.
TECHNICAL MAINTENANCE
Cleaning
The hood is designed to be used with a filter that is not too concentrated with a cleaning agent. Never use abrasive substances.
Maintenance of grease filters
Retains grease particles coming from cooking.
The filter should be cleaned monthly (or when the filter saturation indicator system, if present on your model, indicates the need) with non-abrasive cleaning agents, by hand or in a dishwasher at low temperature and with a short wash cycle.
Washing in a dishwasher may cause some discoloration of the grease filter, but its filtering characteristics remain essentially unchanged.
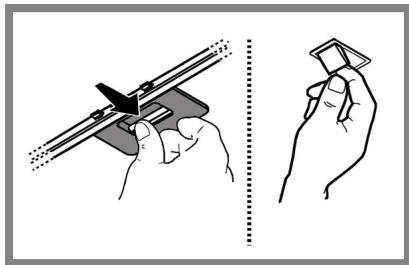
To remove the grease filter, pull the spring-loaded handle towards you.
Maintenance of the charcoal filter
Removes unpleasant odors from cooking.
The saturation of the charcoal filter occurs after a period of use that is more or less long, depending on the type of cooking and the frequency of cleaning of the grease filters. In any case, replace the cartridge at least every 4 months (or when the filter saturation indicator system, if present on your model, indicates the need).
The charcoal filter cannot be washed or regenerated.
Installation
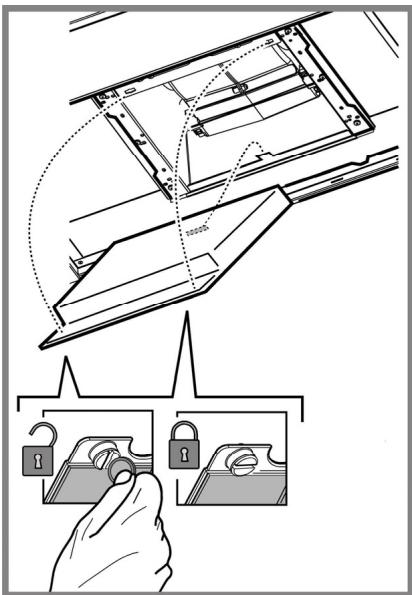
Install the charcoal filter first on the rear side of the metal suction grille, then the front one, securing it with the two handles.
Removal
Remove the charcoal filter by turning the handles 90°, which fix it to the grille.
Replacing the lamps
HHBS 6.5F AM X, HHBS 9.5F AM X, HHF 6.4 F AM X, HHF 6.4 F AM K, HHF 9.4 F AM X, HHF 9.5 F AM X, HHBS 9.5F AB X, HHGC 6.5F AB X, HHGC 9.4F AM X, HHGC 6.4F AM X
The lamp type is indicated on the label.
Attention! Before touching the lamps, make sure they have cooled down.
Replace the damaged lamp with a new one of the same type as indicated on the label, next to the lamp holder.
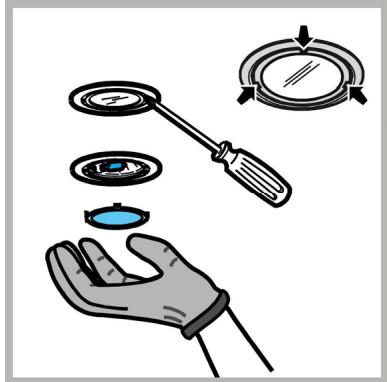
- Using a flathead screwdriver or similar tool, carefully remove the protective element.
- Replace the burnt-out lamp.
Use halogen lamps of 12 volts, maximum power 20 watts, made for G4 base, suitable for use in enclosed luminaires.
Follow the instructions and do not touch the new lamps with bare hands.
- Close the reflector (fastening with latch).
HHBS 6.7F LL X - RHHF 9.7F LB X - RHHBS 9.7F LB X - HHBS 9.7F LLI X - HHF 6.7F LL X - HHBS 9.7F LBI X - HHBS 9.7F LB X - HHBS 6.7F LB X - HHGC 9.7F LB X - HHGC 6.7F LB X - HHF 9.7F LB X - HHF 6.7F LB X - HHBS 6.7F LT X - HHBS 6.7F LT DS - HHBS 6.7F LT CF - HHBS 9.8F LT X - HHBS 9.8F LT DS - HHBS 9.8F LT CF - HHBS 9.8F LT ICE - HHBS 9.8F LT W - HHC 6.7F LT X - HHC 9.7F LB X - HHC 6.8F LT X - HHC 9.8F LT X - RHHC 9.7F LB X - HHC 6.7F LB X
The hood is equipped with LED lighting.
The LEDs provide optimal illumination, their service life is 10 times longer than that of traditional lamps, and they save 90% of electricity.
- If the hood does not work:
Check:
That the power supply has not been interrupted.
so that the speed can be selected.
- If the hood does not work well:
Check:
that the selected motor speed is sufficient for the amount of steam produced. - that the kitchen is sufficiently ventilated for the hood to perform its air extraction function. - that the charcoal filter is not saturated (hood in recirculation mode).
- If the hood switches off during normal operation: Check:
- that the power supply is not interrupted.
- that the thermal cut-out switch has not been triggered.
In case of possible anomalies in operation, before contacting technical support, disconnect the appliance from the power supply for at least 5 seconds, then reconnect it. If the anomaly persists, contact technical support.
TECHNICAL DATA
| Модань | Выковая (cm) | ШирINA (cm) | Глубина (cm) | Ø Быковский trубы (cm) |
| HHBS6.5FAMX HHBS6.7FLLX HHBS6.7FLBX | 61,9- 114 70,4- 114 | 59,8 | 45 | 15-12,5-12 |
| HHBS9.5FAMX RHHBS9.7FLBX HHBS9.7FLLIX HHBS9.5FABX HHBS9.7FLBIX HHBS9.7FLBX | 61,9- 114 70,4- 114 | 89,8 | 45 | 15-12,5-12 |
| HHF6.4 FAMX HHF6.4 FAMK HHF6.7FLLX HHGC6.7FLBX HHGC6.5FABX HHF6.7FLBX HHGC6.4FAMX | 60- 112,5 68,5- 112,5 | 59,8 | 45 | 15-12,5-12 |
| HHF9.4FAMX HHF9.5FAMX RHHF9.7FLBX HHF9.7FLBX | 60- 112,5 68,5- 112,5 | 89,8 | 45 | 15-12,5-12 |
| RHHGC9.7FLBX HHGC9.7FLBX HHGC9.4FAMX | 62,3- 114,8 70,8- 114,8 | 89,8 | 45 | 15-12,5-12 |
| HHBS6.7FLTX HHBS6.7FLTDS HHBS6.7FLTCF | 62,3- 114,8 70,8- 114,8 | 59,8 | 45,5 | 15-12,5-12 |
| HHBS9.8FLTX HHBS9.8FLTDS HHBS9.8FLTCF HHBS9.8FLTICE HHBS9.8FLTW | 62,3- 114,8 70,8- 114,8 | 89,8 | 45,5 | 15-12,5-12 |
| HHC 6.7F LT X HHC 6.8F LT X | 66,5- 109 75-115 | 59,8 | 50,5 | 15-12,5-12 |
| HHC 6.7F LB X | 66,5- 109 75-115 | 59,8 | 50 | 15-12,5-12 |
| HHC 9.7F LB X RHHC 9.7F LB X | 66,5- 109 75-115 | 89,8 | 50 | 15-12,5-12 |
| HHC 9.8F LT X | 66,5- 109 75-115 | 89,8 | 50,5 | 15-12,5-12 |
See the table of characteristics for the model and model type.
HHBS 6.5F AM X, HHBS 9.5F AM X, HHF 6.4 F AM X, HHF 6.4 F AM K, HHF 9.4 F AM X, HHF 9.5 F AM X, HHBS 9.5F AB X, HHGC 6.5F AB X, HHGC 9.4F AM X, HHGC 6.4F AM X
HHBS 6.7F LL X - RHHF 9.7F LB X - RHHBS 9.7F LB X - HHBS 9.7F LLI X - HHF 6.7F LL X - HHBS 9.7F LBI X - HHBS 9.7F LB X - HHBS 6.7F LB X - HHGC 9.7F LB X - HHGC 6.7F LB X - HHF 9.7F LB X - HHF 6.7F LB X - HHBS 6.7F LT X - HHBS 6.7F LT DS - HHBS 6.7F LT CF - HHBS 9.8F LT X - HHBS 9.8F LT DS - HHBS 9.8F LT CF - HHBS 9.8F LT ICE - HHBS 9.8F LT W - HHC 6.7F LT X - HHC 9.7F LB X - HHC 6.8F LT X - HHC 9.8F LT X - RHHC 9.7F LB X - HHC 6.7F LB X
The hood is equipped with LED lighting.
The appliance should not be operated without supervision.
The appliance must have sufficient ventilation. If the appliance is used simultaneously with other gas or other fuel appliances, the ventilation must be increased.
The ventilation should be cleaned both inside and outside (at least once a month), following the instructions in the maintenance manual.
Failure to clean and replace the filters increases the risk of fire.
It is strictly forbidden to cook food over an open flame under the hood.
Using an open flame damages the filters and may cause a fire, so it must be avoided in any case.
Regular maintenance should be carried out to avoid the risk of fire.
WARNING: The surfaces of the appliance may become hot during use.
Use only the specified type of lamp for replacement. Replacement of lamps should be done by a qualified technician.
WARNING: Do not connect the appliance to the electrical supply until the installation is completely finished.
Regarding technical and safety measures for use with steam appliances, strictly follow the instructions of local competent authorities.
The air drawn in must not be discharged into a flue used for exhaust from appliances burning gas or other fuels.
Do not use or operate the hood without properly installed lamps, as there is a risk of electric shock.
Never use the hood without the correctly installed grille!
The hood should never be used on a surface unless it is indicated.
Use the product set for installation, the set includes the necessary components for proper installation.
Use the correct hood according to the installation instructions. In case of doubt, consult an authorized service center or qualified personnel.
WARNING! Failure to install the hood and devices in accordance with these instructions may result in electric shock.
The hood may have a design that differs from the hoods shown in the illustrations of these instructions, but in this case the instructions for installation, maintenance and operation remain unchanged.
Follow the instructions given in this manual. The manufacturer disclaims all liability for damage, breakdowns or malfunctions that may occur as a result of improper use of the device, contrary to the instructions given in this manual. Such misuse will void the warranty and the product will not be covered by the warranty.
! Important to keep the instructions so that you can refer to them at any time. In case of sale, before moving, make sure that the instructions are with the product. !Important to read the instructions: They contain important information for installation, use and safety. 1 It is forbidden to make electrical or mechanical modifications to the product or in the ventilation ducts. !Before starting the installation of the product, check all components for defects and that they are not damaged. In the opposite case, contact the seller and stop the installation of the product.
The distance between the lower part of the hood and the hob must be at least 50 cm for electric hobs, and 65 cm for gas and combined hobs.
It is necessary to take into account the distances indicated in the installation instructions for the gas hob.
ELECTRICAL CONNECTION
The voltage in the electrical network must correspond to the characteristics indicated on the label located inside the hood. If the plug is included in the hood, connect the plug to a socket that meets the current standards and is in an accessible place, which can be done after installation. If the plug is not included in the hood, or the socket is not in an accessible place, also after installation, use a reliable two-pole switch, which will ensure complete disconnection from the network in case of overvoltage category III, in full compliance with the installation rules.
Warning! Before connecting the hood to the electrical network and checking the correctness of operation, make sure that the network is installed correctly.
Replacement of the power cable
The hood has a special power cable; in case of damage to the cable, replace it in the technical service.
DISPOSAL
HHBS 6.5F AM X - HHBS 9.5F AM X - HHF 6.4 F AM X - HHF 6.4 F AM K HHF 9.4 F AM X - HHF 9.5 F AM X - HHGC 9.4F AM X - HHGC 6.4F AM X
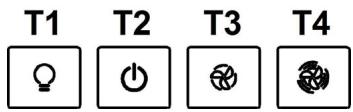
T1. ON/OFF button. T2. OFF/STANDBY button. T3. Speed selector 2. T4. Speed selector 3.
Model with Soft Button and LCD display

T1. ON/OFF button for operation. T2. Speed (power) selection button for medium, high, and intensive operation. Note: Intensive speed (power) operation (LED L1 flashing) lasts for 5 minutes, after which medium speed (power) operation will be set automatically. T3. Speed (power) selection button for "silent" operation. T4. Light ON/OFF button. L1. Speed (power) operation status indicator. L2. Filter saturation indicator. L3. Low (silent) speed (power) operation status indicator. L4. Activated carbon filter saturation indicator. L5. Light status indicator.
Reset filter saturation indicator
After maintenance, press and hold button T3 for a few seconds until the indicator shows filter saturation. Repeat the operation in the direction of the indicators showing saturation (for both filters) to turn them off.
Activating the activated carbon filter saturation indicator
The activated carbon filter saturation indicator is normally off. To activate it, perform the following steps:
With the hood off, press and hold buttons T1 and T3 for about 5 seconds: L4 flashes, then turns on with a fixed light indicating activation.
Deactivating the activated carbon filter saturation indicator: repeat the operation described above, L4 turns on with a fixed light, then flashes and goes off, indicating deactivation.
Automatic operation at high temperature
The hood is equipped with a temperature sensor. When it starts to be excessively high, it automatically activates medium speed (power) operation. The hood turns off only when the temperature sensor detects that the temperature has dropped.
Model with Soft Button + Delay OFF
RHHF 9.7F LB X - RHHBS 9.7F LB X - RHHGC 9.7F LB X RRHC 9.7F LB X
T1
T2


T3
T4
T1. On/Off button for the motor. T2. Button for selecting the intensity (power) of the suction mode. Note: The intensity (power) of intensive suction (LED L3 is on) must be at least 5 minutes, after which the intensity (power) of medium suction (LED L2 is on) will be set automatically. T3. Lighting on/off button. T4. Automatic switch-on button. Note: Press the button to set automatic switch-on after: intensity (power) of suction low level: 20 minutes; intensity (power) of suction medium level: 15 minutes; intensity (power) of suction high level: 10 minutes; intensity (power) of suction intensive level: 5 minutes.
L1. LED for low suction intensity (power). L2. LED for medium suction intensity (power). L3. LED for high suction intensity (power). L4. LED for intensive suction intensity (power) - time (5 min.). L5. LED for filter saturation: Flashing: perform filter maintenance actively. On: perform filter maintenance. L1+L2+L3 flashing in sequence: automatic operation when high temperature is detected (see corresponding paragraph).
Models with Soft Button + Silent Speed
HHBS 9.5F AB X - HHBS 9.7F LBI X - HHBS 9.7F LB X HHBS 6.7F LB X - HHGC 9.7F LB X HHGC 6.7F LB X HHGC 6.5F AB X - HHE 9.7F LB X - HHE 6.7F LB X
HHC 9.7F LB X - HHC 6.7F LB X
T1
T2


T3
T4
T1. On/Off button for the motor. T2. Button for selecting the intensity (power) of the suction mode. Note: The intensity (power) of intensive suction (LED L3 is on) must be at least 5 minutes, after which the intensity (power) of medium suction (LED L2 is on) will be set automatically. T3. Lighting on/off button. T4. Button for selecting the intensity (power) of "silent" suction. L1. LED for medium suction intensity (power). L2. LED for high suction intensity (power). L3. LED for intensive suction intensity (power) - time (5 min.). L4. LED for filter saturation: Flashing: perform filter maintenance actively. On: perform filter maintenance. L5. LED for low suction intensity (power) (silent). L1+L2+L3 flashing in sequence: automatic operation when high temperature is detected (see corresponding paragraph).
Switching on the filter saturation indicator of the active filter
The LED for the filter saturation of the active filter is not on. To switch it on, perform the following steps:
When switching off the extractor and holding the buttons pressed simultaneously for a few seconds, press T1 and T4: first L1 flashes, then L2 also turns on, indicating the switching off.
The LED indicator will light up when the device is activated: repeat the operation described above, first press L1 and L2, then the L1 LED will indicate that the device is switched on.
Automatic operation at high temperature
The hood is equipped with a temperature sensor. When the temperature starts to rise excessively, the sensor automatically activates the boost (suction) function. The hood will switch off only when the temperature on the sensor drops.
Model with SOFT-TOUCH control
HHBS 6.7F LT X - HHBS 6.7F LT DS - HHBS 6.7F LT CF HHBS 9.8F LT X - HHBS 9.8F LT DS - HHBS 9.8F LT CF HHBS 9.8F LT ICE - HHBS 9.8F LT W
HHC 6.7F LT X - HHC 6.8F LT X - HHC 9.8F LT X
T1
T2
T3
T4
T5
T6
To select the hood function, simply touch the control buttons:
T1. Button for switching the hood on/off. T2. Button for selecting the medium speed (power) of the hood. T3. Button for selecting the high and intensive speed (power) of the hood.
Press once to select the high speed (power) of the hood (LED L3 on);
Press the button 3 times to select the intensity (power) of intensive soaking (LED L3 flashes).
Note: The intensity (power) of intensive soaking will be approximately 5 minutes, after which the high intensity (power) of soaking will be selected automatically.
T4. Automatic switch-on button (filter saturation indicator) activated by pressing:
Automatic switch-on:
Press button 10 times to set the automatic switch-on of the active carbon filter power:
Silent soaking power: 10 minutes; medium soaking power: 20 minutes; high soaking power: 15 minutes. Filter saturation indicator activated by pressing.
When it is time to service the active carbon filter, the indicator will be set; after that, press and hold button T6 to reset.
T5. Button for selecting the power of "silent" soaking; indicator of the grease filter saturation
Note: When it is time to service the grease filter, press and hold button T6 to reset.
T6. Lighting on/off button
T3+T4+T5 simultaneously: automatic operation in the presence of high temperature (see paragraph)
Turning on the indicator of the active carbon filter saturation
This indicator, if correct, is turned on. To turn it on, you need to do as indicated below:
To turn off the hood, press and hold simultaneously T4 and T5: first press T5, then also T4, indicating the activation.
Turning off the LED of the active carbon filter saturation: repeat the operation described above, first press T5 and T4, then only T5, indicating the deactivation.
Automatic operation at high temperature
The unit is equipped with a sensor that measures temperature. When it becomes too high, the sensor automatically turns off the device (power). The device will only turn on again when the temperature measured by the sensor has dropped significantly.
MAINTENANCE
Cleaning
For cleaning, use only a soft cloth dampened with a mild detergent. Do not use
abrasive agents or tools for cleaning!
Do not use agents containing abrasive materials. Do not use alcohol!
Periodic maintenance
Clean the outside of the device periodically with the same frequency as the air filter, using a soft cloth and a non-concentrated cleaning agent. Never use abrasive agents.
Maintenance of the air filters
Remove the filters that have become dirty during use and clean them.
Use only halogen lamps of 12V-20W max G4, without touching them with your hands.
- Close the flap (with the shutter).
HHBS 6.7F LL X - RHHF 9.7F LB X - RHHBS 9.7F LB X - HHBS 9.7F LLI X - HHF 6.7F LL X - HHBS 9.7F LBI X - HHBS 9.7F LB X - HHBS 6.7F LB X - HHGC 9.7F LB X - HHGC 6.7F LB X - HHF 9.7F LB X - HHF 6.7F LB X - HHBS 6.7F LT X - HHBS 6.7F LT DS - HHBS 6.7F LT CF - HHBS 9.8F LT X - HHBS 9.8F LT DS - HHBS 9.8F LT CF - HHBS 9.8F LT ICE - HHBS 9.8F LT W - HHC 6.7F LT X - HHC 9.7F LB X - HHC 6.8F LT X - HHC 9.8F LT X - RHHC 9.7F LB X - HHC 6.7F LB X
HHBS 6.7F LL X - RHHF 9.7F LB X - RHHBS 9.7F LB X - HHBS 9.7F LLI X - HHF 6.7F LL X - HHBS 9.7F LBI X - HHBS 9.7F LB X - HHBS 6.7F LB X - HHGC 9.7F LB X - HHGC 6.7F LB X - HHF 9.7F LB X - HHF 6.7F LB X - HHBS 6.7F LT X - HHBS 6.7F LT DS - HHBS 6.7F LT CF - HHBS 9.8F LT X - HHBS 9.8F LT DS - HHBS 9.8F LT CF - HHBS 9.8F LT ICE - HHBS 9.8F LT W - HHC 6.7F LT X - HHC 9.7F LB X - HHC 6.8F LT X - HHC 9.8F LT X - RHHC 9.7F LB X - HHC 6.7F LB X
The device is equipped with LED lighting. To replace them, contact the technical service department.


Not included in the spare parts kit.
Importer: LLC "Indeit Ukraine", Ukraine, 01001, Kyiv, ave. Muzeiny
GENERAL SAFETY PRECAUTIONS
HHBS 6.5F AM X - HHBS 9.5F AM X - HHF 6.4 F AM X - HHF 6.4 F AM K HHF 9.4 F AM X - HHF 9.5 F AM X - HHGC 9.4F AM X - HHGC 6.4F AM X
Models with Soft Button control + Delay OFF
RHHF 9.7F LB X - RHHBS 9.7F LB X - RHHGC 9.7F LB X
RHHC 9.7F LB X
T1
T2
T3
T4
T1. ON/OFF button for extraction motor
HHBS 9.5F AB X - HHBS 9.7F LBI X - HHBS 9.7F LB X HHBS 6.7F LB X - HHGC 9.7F LB X - HHGC 6.7F LB X
HHBS 6.7F LB X - HHGC 9.7F LB X - HHGC 6.7F LB X HHGC 6.5F AB X - HHF 9.7F LB X - HHF 6.7F LB X
HHC 9.7F LB X - HHC 6.7F LB X
T1
T2
O 12
14
L
T3
T4
HHBS 9.8F LT ICE - HHBS 9.8F LT W
HHC 6.7F LT X - HHC 6.8F LT X - HHC 9.8F LT X
T1
T2
T3
T4
T5
T6
HHBS 6.7F LL X - RHHF 9.7F LB X - RHHBS 9.7F LB X - HHBS 9.7F LLI X - HHF 6.7F LL X - HHBS 9.7F LBI X - HHBS 9.7F LB X - HHBS 6.7F LB X - HHGC 9.7F LB X - HHGC 6.7F LB X - HHF 9.7F LB X - HHF 6.7F LB X - HHBS 6.7F LT X - HHBS 6.7F LT DS - HHBS 6.7F LT CF - HHBS 9.8F LT X - HHBS 9.8F LT DS - HHBS 9.8F LT CF - HHBS 9.8F LT ICE - HHBS 9.8F LT W - HHC 6.7F LT X - HHC 9.7F LB X - HHC 6.8F LT X - HHC 9.8F LT X - RHHC 9.7F LB X - HHC 6.7F LB X
HHBS 6.7F LL X - RHHF 9.7F LB X - RHHBS 9.7F LB X - HHBS 9.7F LLI X - HHF 6.7F LL X - HHBS 9.7F LBI X - HHBS 9.7F LB X - HHBS 6.7F LB X - HHGC 9.7F LB X - HHGC 6.7F LB X - HHF 9.7F LB X - HHF 6.7F LB X - HHBS 6.7F LT X - HHBS 6.7F LT DS - HHBS 6.7F LT CF - HHBS 9.8F LT X - HHBS 9.8F LT DS - HHBS 9.8F LT CF - HHBS 9.8F LT ICE - HHBS 9.8F LT W - HHC 6.7F LT X - HHC 9.7F LB X - HHC 6.8F LT X - HHC 9.8F LT X - RHHC 9.7F LB X - HHC 6.7F LB X
HHBS 6.5F AM X - HHBS 9.5F AM X - HHF 6.4F AM X - HHF 6.4F AM K - HHF 9.4F AM X - HHF 9.5F AM X - HHGC 9.4F AM X - HHGC 6.4F AM X
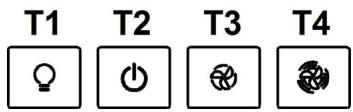
T1. Light switch ON/OFF. T2. Light switch OFF/speed 1. T3. Speed selection 2. T4. Speed selection 3.
Models with Soft Button control panel + LCD display

T1. ON/OFF button for extraction motor. T2. Button for selecting medium, high, and intensive extraction speed (power). Note: Intensive extraction speed (power) (LED L1 blinking) lasts about 5 minutes, then automatically sets to medium extraction speed (power). T3. Button for selecting "quiet" extraction speed (power). T4. ON/OFF button for lighting.
RHHF 9.7F LB X - RHHBS 9.7F LB X - RHHGC 9.7F LB X - RRHC 9.7F LB X

T1. ON/OFF button for extraction motor. T2. Button for selecting extraction speed (power). Note: Intensive extraction speed (power) (LED L3 blinking) lasts about 5 minutes, then automatically sets to medium extraction speed (power) (LED L2 lit). T3. ON/OFF button for lighting. T4. Automatic shutdown button: Note: press this button to set automatic shutdown after: Low extraction speed (power): 20 minutes. Medium extraction speed (power): 15 minutes. High extraction speed (power): 10 minutes. Intensive extraction speed (power): 5 minutes.
HHBS 9.5F AB X - HHBS 9.7F LBI X - HHBS 9.7F LB X - HHBS 6.7F LB X - HHGC 9.7F LB X - HHGC 6.7F LB X - HHGC 6.5F AB X - HHE 9.7F LB X - HHE 6.7F LB X
HHC 9.7F LB X - HHC 6.7F LB X
T1
T2


T3
T4
T1. ON/OFF button for the extraction motor. T2. Button for selecting the operating speed (power) of the extraction.
Note: The intensive speed (power) of the extraction (LED L3 flashing) lasts about 5 minutes, then it automatically switches to the medium speed (power) of the extraction (LED L2 lit).
T3. ON/OFF button for the lighting. T4. Button for selecting the "silent" speed (power) of the extraction.
L1. LED medium speed (power) of the extraction. L2. LED high speed (power) of the extraction. L3. LED intensive speed (power) of the extraction - temporary (5 min.). L4. LED filter saturation: flashing: perform maintenance of the carbon filter. lit: perform maintenance of the grease filters. L5. LED low "silent" speed (power) of the extraction. L1+L2+L3 flashing in sequence: automatic operation in the presence of high temperature (see relevant section).
Reset filter saturation
After performing filter maintenance, press and hold button T1, LED L4 will turn off.
HHC 6.7F LT X - HHC 6.8F LT X - HHC 9.8F LT X
T1
T2
T3
T4
T5
T6
HHBS 6.7F LL X - RHHF 9.7F LB X - RHHBS 9.7F LB X - HHBS 9.7F LLI X - HHF 6.7F LL X - HHBS 9.7F LBI X - HHBS 9.7F LB X - HHBS 6.7F LB X - HHGC 9.7F LB X - HHGC 6.7F LB X - HHF 9.7F LB X - HHF 6.7F LB X - HHBS 6.7F LT X - HHBS 6.7F LT DS - HHBS 6.7F LT CF - HHBS 9.8F LT X - HHBS 9.8F LT DS - HHBS 9.8F LT CF - HHBS 9.8F LT ICE - HHBS 9.8F LT W - HHC 6.7F LT X - HHC 9.7F LB X - HHC 6.8F LT X - HHC 9.8F LT X - RHHC 9.7F LB X - HHC 6.7F LB X
The extractor hood is equipped with a lighting system based on LED technology.
HHBS 6.7F LL X - RHHF 9.7F LB X - RHHBS 9.7F LB X - HHBS 9.7F LLI X - HHF 6.7F LL X - HHBS 9.7F LBI X - HHBS 9.7F LB X - HHBS 6.7F LB X - HHGC 9.7F LB X - HHGC 6.7F LB X - HHF 9.7F LB X - HHF 6.7F LB X - HHBS 6.7F LT X - HHBS 6.7F LT DS - HHBS 6.7F LT CF - HHBS 9.8F LT X - HHBS 9.8F LT DS - HHBS 9.8F LT CF - HHBS 9.8F LT ICE - HHBS 9.8F LT W - HHC 6.7F LT X - HHC 9.7F LB X - HHC 6.8F LT X - HHC 9.8F LT X - RHHC 9.7F LB X - HHC 6.7F LB X
The extractor hood is equipped with a lighting system based on LED technology.
For replacement, contact technical service.


Use the correct length for the screws which are identified in the Installation Guide.
HHBS 6.5F AM X - HHBS 9.5F AM X - HHF 6.4 F AM X - HHF 6.4 F AM K HHF 9.4 F AM X - HHF 9.5 F AM X - HHGC 9.4F AM X - HHGC 6.4F AM X
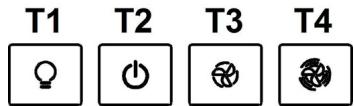
T1. Light switch ON/OFF. T2. Switch OFF/speed 1 T3. Quick selection 2 T4. Quick selection 3
Model with control panel with Soft Button type button + LCD display

T1. ON/OFF button for suction motor T2. Button for selecting the suction speed (power) of medium, high and intensive exercise. Note: The intensive suction speed (power) (flashing LED L1) lasts about 5 minutes, after which the medium suction speed (power) is set automatically. T3. Button for selecting "silent" suction speed (power) T4. ON/OFF button for lighting.
RHHF 9.7F LB X - RHHBS 9.7F LB X - RHHGC 9.7F LB X
Reset saturation filter
After performing filter maintenance, press and hold button T1, LED L5 will turn off.
Activate carbon filter saturation LED
The carbon filter saturation LED is normally deactivated. To activate it, proceed as follows:
With the hood off, press and hold T1 and T4 simultaneously: first L1 flashes, then also L2, to indicate activation.
HHBS 9.5F AB X - HHBS 9.7F LBI X - HHBS 9.7F LB X HHBS 6.7F LB X - HHGC 9.7F LB X - HHGC 6.7F LB X
HHGC 6.5F AB X - HHF 9.7F LB X - HHF 6.7F LB X

T1

T2


T3


T4
T1. Suction motor ON/OFF button T2. Suction speed (power) selection button
HHBS 6.7F LL X - RHHF 9.7F LB X - RHHBS 9.7F LB X - HHBS 9.7F LLI X - HHF 6.7F LL X - HHBS 9.7F LBI X - HHBS 9.7F LB X - HHBS 6.7F LB X - HHGC 9.7F LB X - HHGC 6.7F LB X - HHF 9.7F LB X - HHF 6.7F LB X - HHBS 6.7F LT X - HHBS 6.7F LT DS - HHBS 6.7F LT CF - HHBS 9.8F LT X - HHBS 9.8F LT DS - HHBS 9.8F LT CF - HHBS 9.8F LT ICE - HHBS 9.8F LT W - HHC 6.7F LT X - HHC 9.7F LB X - HHC 6.8F LT X - HHC 9.8F LT X - RHHC 9.7F LB X - HHC 6.7F LB X
HHBS 6.7F LL X - RHHF 9.7F LB X - RHHBS 9.7F LB X - HHBS 9.7F LLI X - HHF 6.7F LL X - HHBS 9.7F LBI X - HHBS 9.7F LB X - HHBS 6.7F LB X - HHGC 9.7F LB X - HHGC 6.7F LB X - HHF 9.7F LB X - HHF 6.7F LB X - HHBS 6.7F LT X - HHBS 6.7F LT DS - HHBS 6.7F LT CF - HHBS 9.8F LT X - HHBS 9.8F LT DS - HHBS 9.8F LT CF - HHBS 9.8F LT ICE - HHBS 9.8F LT W - HHC 6.7F LT X - HHC 9.7F LB X - HHC 6.8F LT X - HHC 9.8F LT X - RHHC 9.7F LB X - HHC 6.7F LB X
HHBS 6.5F AM X - HHBS 9.5F AM X - HHF 6.4 F AM X - HHF 6.4 F AM K HHF 9.4 F AM X - HHF 9.5 F AM X - HHGC 9.4F AM X
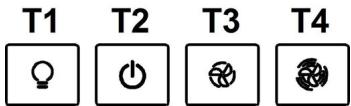
T1. On/Off button T2. First speed selection T3. Second speed selection T4. Third speed selection
All models listed above

T1. Suction motor on/off button T2. Button for selecting medium, high, and low suction power. Note: Low suction power (L1) operates for 5 minutes, then automatically switches to medium suction power. T3. Button for selecting 'turbo' suction power T4. Light on/off button
L1. Suction power indicator light L2. Water level indicator light L3. Low (turbo) suction power indicator light L4. Water level indicator light L5. Charging indicator light
Press the water level indicator button
When technical maintenance is required, press the T3 button, then the required indicator will light up. If two indicators (low and high) are lit, contact the service center.
Kemip cy3ricih KaHbIKtbIK 6eJIiueecin 6eIceHdpy
Kemip cyricinH KaHbIKbIK bEnriweci eJeTte eWiyni 6oanaB1. OHb6enCeHdipy yuH, KeNeci Kaamdapbl opbHdaHb3:
Copfblw eWipnyi 6bnFaHda, T1 XaHe T3 TymEnepin 6ip yaKbTTBaacbln TypbHb3: Catti 6encHdpinyi Kepcety yuH, anDbimelL4XbInbInbIKTaTaNbI, codah coH TypaKTBj KapbIKneh KocblJaNb.
Kemip cy3ricih Kahtbiktbk 6enriwecih eipy: KofapbldaftbpekeTTi KaTanaHbI3, L4 TypaTbI JapkbIneH KocblnJHaHaDbI, coaH COH CoBhHa cTtI aXbIpaTydbI KepeTy yuH eEidi.
KorapbI TemnepaTypa da ABTomAtbI Kymbic
CopfblttemnepaTpaHbI aHbIKTaIbTH daTcNKeH XabIbIaTaNFaH. TemnepaTpa TbIM JxOFapbl 6oIraH Ke3e, DaTcN ABToMaTTbI Typde opTaWa copy KblIaMdbIbH (KyaTbIH) 6eIceHdipei. DaTcNKeH aHbIKTaIaHempePa eDeyip TeMeHdereHe, copfblw eEeDi.
BnptyaIbI Tyme naHeni XeHe kiDipicTi eWipy cyHKcnaCbI 6ap ynrinep
RHHF 9.7F LB X - RHHBS 9.7F LB X - RHHGC 9.7F LB X RRHC 9.7F LB X

T1. Copy MOTopbIHbIH Kocy/ewipy TyuMeci T2. Bapkny copy Kblldamdbfbih (KyaTbH) TaHday Tymeci Eckeptne: Kapkbhdcopy Xblidmbfdfbi (KyaTbI) (L3 Japblk DnOdbj XblnbjltaTaNbl) WAmMeH 5 MNHTka CO3bIaNbl, CoDAH COH opTaHa copy XbldAmdbfbl (KyaTbI) aBTOMATbTI TypDe opHaTbIaNbl (L2 Japblk DnOdbj KaHaNb). T3. Kapbiktbl Kocy/ewipy TyuMeci T4. ABTomattbI ewiPy TyuMeci:
Eckeptne: aBTOMaTTbI eWipydi KeNeci apanbIKTaH KeiH opHaTy UwIH MbHa TymMeHi bAcbIbI3:
TemeH copy XbIJaMaDbIfbl (KyaTbI): 20 MmHyT
OpTaIa copy XbIJaMdbIbFbl (KyaTbI): 15 MnHyT
KofapbI copy XblIaMdbIfbI (KyaTbI): 10 MNHyT
KapkblDbl copy KbldAmDblfbl (KyaTb): 5 MnHyT
L1. Temeh copy kbldAmdbifbl (kyaTbI) kapblk dnoDbI
L2. Hot water supply (boiler) Kharkiv plant
L3. Hot water supply boiler (boiler) Zharyk plant
L4. Hot water supply boiler Karbyk plant - with white marking (5 min.).
L5. Hot water line for the water heater: for maintenance: technical service organization; with:
L1+L2+L3 sequence in the heater: automatic temperature control (with white marking)
Water heater start-up and adjustment
For technical service of the water heater, press and hold T1 for 5 seconds, then L5 hot water line appears.
To check the hot water line of the water heater, the hot water line must be turned on. For checking, do the following: when turning on, press T1 and T4 simultaneously; to check the network, press L1, then L2 heater.
To turn on the hot water line of the water heater: press the above button, press L1 and L2 together, then L1 again to turn on the network.
Automatic temperature control
Press the button to set the temperature. When the temperature is higher than the set value, the automatic button turns off the hot water supply (boiler). When the temperature is lower than the set value, the hot water turns on.
Possible malfunctions and their elimination
HHBS 9.5F AB X - HHBS 9.7F LBI X - HHBS 9.7F LB X HHBS 6.7F LB X - HHGC 9.7F LB X - HHGC 6.7F LB X HHGC 6.5F AB X - HHF 9.7F LB X - HHF 6.7F LB X HUG 0.3F LB X - HUG 6.7F LB X
T1
T2

Therefore, m = 3/11 ;

T3
T4
T1. Hot water supply circuit
T2. Cold water supply (consumption) circuit Expert: Cold water supply (consumption) (L3 hot water outlet) is created within 5 minutes, then the cold water supply (consumption) automatic is installed (L2 hot water channel).
T3. Hot water circulation circuit
T4. "Dybys3" hot water supply (consumption) detection circuit
L1. Hot water supply (consumption) hot water outlet
L2. High hot water supply (consumption) hot water channels
L3 Hot water supply hot water outlet - with a safety margin (5 min.).
L4 Hot water channel for the sink: outlet: technical service connection for the sink; circulation: technical service connection for the sink.
L5 Low (unused) hot water supply (consumption) hot water channel
L1+L2+L3 sequence in the radiator: high temperature automatic operation (without opening the valve)
Sink channel connection to the main line
Technical service for the sink, T1 circuit is in operation, then the hot water channel is opened. Sink channel connection to the hot water channel
The hot water tap is open. They are used for cleaning, in the following order:
When the hot water is turned on, T1 and T4 are opened simultaneously: the hot water is directed to the cold water supply, then to L1, then to L2.
Hot water tap operation: the above steps are repeated, with L1 and L2 opened together, then L1 is opened to direct the hot water to the cold water supply.
High temperature automatic operation
The hot water temperature is measured by a sensor. When the temperature is too high, the sensor automatically opens the hot water drain valve (cold water). If the temperature measured by the sensor is lower than the set value, the hot water is drained.
SOFT-TOUCH control panel is available
HHBS 6.7F LT X - HHBS 6.7F LT DS - HHBS 6.7F LT CF HHBS 9.8F LT X - HHBS 9.8F LT DS - HHBS 9.8F LT CF HHBS 9.8F LT ICE - HHBS 9.8F LT W
HHC 6.7F LT X - HHC 6.8F LT X - HHC 9.8F LT X
T1
T2
T3
T4
T5
T6
CopfbltbH fynkuiapbH taHday yuiH, kai fana backapy 3neMeHTepi H TpytHi3:
T1. Copy MOTOpbIbH IN KOCY/THIIIPY TYmeci
T2. Optawa copy kblIaMdbIFbIH (KyaT) TaHdayFa apHaIHaT Tyme
T3. Xorapbl XeHe KapKbIHdbI copy XblnDaMdbIFbH (KyaT) TaHdayFa apHaflraH TyIme
KoFapbI copy KbldAmdbIfbIH (Kyat) (L3 XapbIK dnoBb Kocybl) taHaay yuiH 6ip pet 6acblb3;
KapkblDbl copy XbldAmdbfBn (KyaT) (L3 XkapbIK DIObl XblblkTaaiDbl) TaHday yuHIn KaNTa 6acblHbI3.
EckepTne: KapKbIHbI copy KblJaMdbIfbl (Kyat) WAmamEn 5 MNHTKa CO3bJaDb, COaH KeiH XOFapbl copy KblJaMaDbIfbl (KyaT) aBTOMaTTb Tpype OPhaTbJaDbI.
T4. ABOtOMaTTbI eWipy TyuMeci (Taumep) XeHe KEmip cy3riche apHaHFaH KaHbIKTBIK INHdNKaTOPbl:
ABTomTbI Θwipy:
Bencendi copy XbldAmdbfblHbH (KyaT) ABTomaTTbI Θwippy fYHKUcBbH opnaty yuiH, ocbI tyMeHi bAcBhl3:
品 i 6 b i c c b i 3 copy XbIaDAmdbiFbl (kyaT):10 MNHT
OpTaWa copy KbIJaMaDmbiFbl (KyAT): 20 MmHyT
Kofapbl copy XblnlaDmbIbI (kyat): 15 MNHyT KEmip cy3ricHH KaHbIKTBIK INHdkaTopbl
Uam XbInbInbIKtaFah Ke3de, Kemip cy3riche (opHaTbInFaH 6oJca) TexHnKaIbIK KbI3MeK epcTeHi3, XbInbInbIKTaYdbi TOK TaTy yuH, T6 TuMecin y3ak yaBt 6obI 6acbl TypbHb3.
T5. "Дыбicb3" copy XblamdbfBih (KyaT) xe He MaI cy3ricHH KaHbIKbIK INHdkaTopbIH TaHdayFa apHaIIHaft TVHMe
Attention: before performing any technical maintenance, disconnect the device from the power supply and wait until the device has cooled down.
6. Replacing the lamps
T3+T4+T5 lamps: automatic test at high temperature conditions (without cooling)
Checking the coolant level indicator
This indicator may be damaged. To check it, proceed as follows:
If it is damaged, T4 and T5 are pressed simultaneously: to check the coolant, press T5, then T4 lamps.
Checking the coolant level indicator: if the indicator is damaged, press T5 and T4 lamps, then check the coolant.
Automatic test at high temperature conditions
The temperature sensor is attached to the radiator. When it is heated, the sensor automatically turns on the cooling fan. If the sensor is damaged, the temperature will rise and the device will overheat.
TECHNICAL MAINTENANCE
Cleaning
For cleaning, use only a dry cloth. Do not use water or cleaning agents! Do not use abrasive cloths or cleaning agents. Use only a dry cloth!
Replacing the fuse
Use a fuse of the same type and rating. Disconnect the device from the power supply before replacing the fuse. Do not use fuses of higher ratings.
For minor repairs, contact technical service or the manufacturer.
The filter must be cleaned at least once a year or when the temperature is high and the air is humid. (Or the filter can be replaced, if available in your unit, as indicated in the instructions).
The cleaning procedure is described in the user manual. However, it is not recommended to clean it too often.
Remove the air filter by pulling the handle.
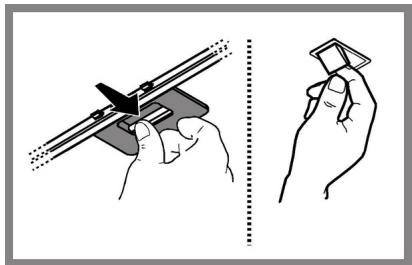
Service the air filter.
Do not operate the unit without the filter.
The air filter may need to be cleaned more frequently if the unit is used for long periods in dusty or polluted environments. In any case, replace the filter every 4 months (or when the filter replacement indicator lights up, if your model has one).
Do not use water or flammable solvents.
Cleaning
Remove the air filter by pulling the handle, then wash it with water and dry it in the shade.
Maintenance
Remove the air filter by turning it 90 degrees and pulling it out.
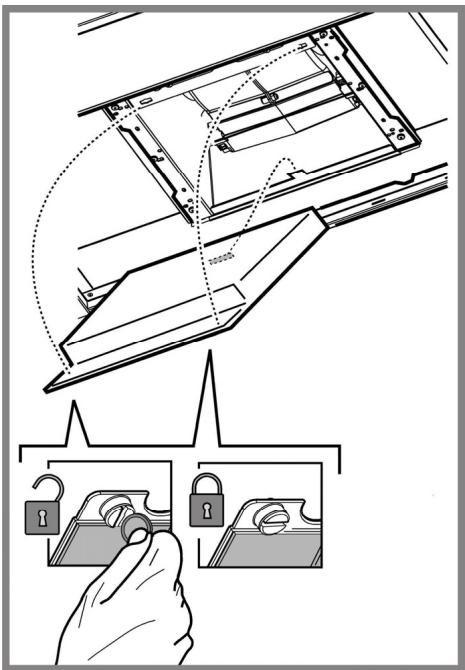
Replacement
HHBS 6.5F AM X, HHBS 9.5F AM X, HHF 6.4 F AM X, HHF 6.4 F AM K, HHF 9.4 F AM X, HHF 9.5 F AM X, HHBS 9.5F AB X, HHGC 6.5F AB X, HHGC 9.4F AM X, HHGC 6.4F AM X
Connect to the power supply.
Warning! Before cleaning, make sure they are disconnected from the power source.
The lamp must be installed in the housing of the luminaire, and if the lamp is damaged, it must be replaced with a new one.
- Before installation, check the housing for damage. 2. Make sure it is switched off. Max. 12V -20W -G4 halogen lamp must be installed. Do not install it without checking.
- The housing panel must be fixed with screws (fixator).
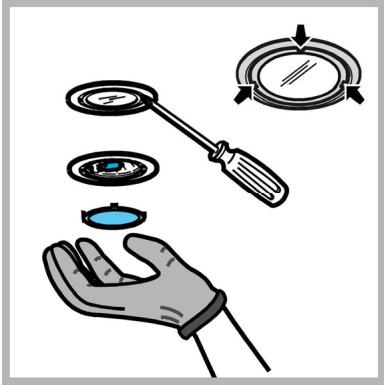
HHBS 6.7F LL X - RHHF 9.7F LB X - RHHBS 9.7F LB X - RHHGC 9.7F LB X - HHBS 9.7F LLX - HHF 6.7F LLX - HHBS 9.7F LBI X - HHBS 9.7F LB X - HHBS 6.7F LB X - HHGC 9.7F LB X - HHGC 6.7F LB X - HHF 9.7F LB X - HHF 6.7F LB X - HHBS 6.7F LT X - HHBS 6.7F LT DS - HHBS 6.7F LT CF - HHBS 9.8F LT X - HHBS 9.8F LT DS - HHBS 9.8F LT CF - HHBS 9.8F LT ICE - HHBS 9.8F LT W - HHC 6.7F LT X - HHC 9.7F LB X - HHC 6.8F LT X - HHC 9.8F LT X - RHHC 9.7F LB X - HHC 6.7F LB X
The housing is made of heat-resistant material and is protected against heat.
The heat sinks are designed to dissipate heat and, when properly installed, can save up to 90% of electrical energy.
For installation, contact a qualified electrician.
Electrical and electronic appliances must be disposed of separately in accordance with the European Directive 2012/19/EC (WEEE).
Do not dispose of this product with household waste. Please contact your local waste collection point or the dealer where you purchased the product for proper disposal.

If the appliance or its parts are damaged, do not use it. It must be disposed of at a designated collection point for electrical and electronic appliances.
Disposal must be carried out in accordance with local regulations.
Such products should be disposed of at appropriate collection points, not with household waste. Contact your local waste management service or the dealer where you purchased the product for proper disposal.
The product has been tested and complies with the following standards:
- Safety: EN/IEC 60335-1; EN/IEC 60335-2-31, EN/IEC 62233.
- Reference: EN/IEC 61591; ISO 5167-1; ISO 5167-3; ISO 5168; EN/IEC 60704-1; EN/IEC 60704-2-13; EN/IEC 60704-3; ISO 3741; EN 50564; IEC 62301.
- EMC: EN 55014-1; CISPR 14-1; EN 55014-2; CISPR 14-2; EN/IEC 61000-3-2; EN/IEC 61000-3-3.
When using the appliance, follow the safety instructions and warnings given in this manual. Use the appliance only for its intended purpose as described in the instructions. Keep the appliance and its cord out of reach of children under 8 years of age. Do not allow children to play with the appliance. Cleaning and user maintenance shall not be made by children unless they are older than 8 and supervised.
TROUBLESHOOTING
If the appliance does not work properly, check the following before contacting the technical service:
If the appliance does not work:
Check the following: - Power cord not plugged in. - Power outage.
If the appliance does not operate correctly:
Check the following: - The hood is not installed at the recommended height. - The air outlet is blocked. - The carbon filter is saturated (if the hood is in recirculation mode).
If the appliance is noisy:
Check the following: - Power cord not plugged in. - The installation is not secure.
Check the functionality of the system, open the door, close the socket, and check the operation accurately. For this, contact the technical service.
TECHNICAL DEFECTS
| Улгi | Биiktiri (cm) | Енi (cm) | Калыndысы (cm) | Шытapy тугіrinін Ø (cm) |
| HHBS6.5FAMX HHBS6.7FLLX HHBS6.7FLBX | 61,9 - 114 70,4 - 114 | 59,8 | 45 | 15-12,5-12 |
| HHBS9.5FAMX RHHBS9.7FLBX HHBS9.7FLLIX HHBS9.5FABX HHBS9.7FLBIX HHBS9.7FLBX | 61,9 - 114 70,4 - 114 | 89,8 | 45 | 15-12,5-12 |
| HHF6.4 FAMX HHF6.4 FAMK HHF6.7FLXX HHGC6.7FLBX HHGC6.5FABX HHF6.7FLBX HHGC6.4FAMX | 60 - 112,5 68,5 - 112,5 | 59,8 | 45 | 15-12,5-12 |
| HHF9.4FAMX HHF9.5FAMX RHHF9.7FLBX HHF9.7FLBX | 60 - 112,5 68,5 - 112,5 | 89,8 | 45 | 15-12,5-12 |
| RHHGC9.7FLBX HHGC9.7FLBX HHGC9.4FAMX | 62,3 - 114,8 70,8 - 114,8 | 89,8 | 45 | 15-12,5-12 |
| HHBS6.7FLTX HHBS6.7FLTDS HHBS6.7FLTCF | 62,3 - 114,8 70,8 - 114,8 | 59,8 | 45,5 | 15-12,5-12 |
| HHBS9.8FLTX HHBS9.8FLTDS HHBS9.8FLTCF HHBS9.8FLTICE HHBS9.8FLTW | 62,3 - 114,8 70,8 - 114,8 | 89,8 | 45,5 | 15-12,5-12 |
| HHC 6.7F LT X HHC 6.8F LT X | 66,5 - 109 75 - 115 | 59,8 | 50,5 | 15-12,5-12 |
| HHC 6.7F LB X | 66,5 - 109 75 - 115 | 59,8 | 50 | 15-12,5-12 |
| HHC 9.7F LB X RHHC 9.7F LB X | 66,5 - 109 75 - 115 | 89,8 | 50 | 15-12,5-12 |
| HHC 9.8F LT X | 66,5 - 109 75 - 115 | 89,8 | 50,5 | 15-12,5-12 |
Check the cold and hot water supply.
HHBS 6.5F AM X, HHBS 9.5F AM X, HHF 6.4 F AM X, HHF 6.4 F AM K, HHF 9.4 F AM X, HHF 9.5 F AM X, HHBS 9.5F AB X, HHGC 6.5F AB X, HHGC 9.4F AM X, HHGC 6.4F AM X
| Куат(Bт) | Керney(B) | Кашик | Өлшемер(mm) | |
| Alogena | 2 x 20W | 12 | G4 | 33xØ10 |
HHBS 6.7F LL X - RHHF 9.7F LB X - RHHBS 9.7F LB X - HHBS 9.7F LLI X - HHF 6.7F LL X - HHBS 9.7F LBI X - HHBS 9.7F LB X - HHBS 6.7F LB X - HHGC 9.7F LB X - HHGC 6.7F LB X - HHF 9.7F LB X - HHF 6.7F LB X - HHBS 6.7F LT X - HHBS 6.7F LT DS - HHBS 6.7F LT CF - HHBS 9.8F LT X - HHBS 9.8F LT DS - HHBS 9.8F LT CF - HHBS 9.8F LT ICE - HHBS 9.8F LT W - HHC 6.7F LT X - HHC 9.7F LB X - HHC 6.8F LT X - HHC 9.8F LT X - RHHC 9.7F LB X - HHC 6.7F LB X
The housing is made using hot air technology and is equipped with a hot air system.
It is covered.
For adjustment, contact the technical service.


Warnings for users
15 11 12 13 14 15 16 17 18 19 20 21 22 23 24 25 26 27 28 29 30 31 32 33 34 35 36 37 38 39 40 41 42 43 44 45 46 47 48 49 50 51 52 53 54 55 56 57 58 59 60
1234567890 (afj/1j) ON/OFF jj.T1
.ajgall glll, bwgol jw l w (jdd) aew jzjj .T2
5 (aL1-LED) aIgll bawl (oJ) acw oog: abol. lalilabwgill bawl (oJ) acw loeoy ayi y
"olalll" bddl (j) d j. T3
(aj/1j)ON/OFF jyJyj. T4
bawll (c) cegw JLgaiL.1
JgJJIgEeJgOaIJIgA.1.L2
(aio) aiaiaiiI IaII (oJ) acw alL aigai. L3
RHHF 9.7F LB X - RHHBS 9.7F LB X - RHHGC 9.7F LB X
RHHC 9.7F LB X
T1
T2
O L2
L4

T3
T4
1234567890 (afj/1j) ON/OFF jj.T1
jduI baw (oJ) aJw Jzjj .T2
5dd(aaogol3-LED)aallbawll(o)acw:
Ljalai abwgajll beil (oj) aJw bwo Loey aay y jy (aL2-LED aJ)
(aj/1j)ON/OFF jz. T3
:laJJJ Jj .T4
jai jaii i jil jil jil jil jil jil jil jil jil jil jil jil jil jil jil jil jil jil jil jil jil jil jil jil jil jil jil jil jil jil jil jil jil jil jil jil jil jil jil jil jil jil jil jil jil jil jil jil
a20:aaasiallbeWll()d
fbaa gl oyla
.12000000000000000000000000000000000000000
aalal aab bysy ygogooj jy jld oosg5 goluswll
a a a a a a a a a a a a a a a a a a a a a a a a a a a a a a a a a
aag aal baw go aao do buwll uogyol jilfo oog cokl .
Jdgo Jbawjly Jolc Jdgo no a bdo Jgwoy aoal Jdaol J. Jull oioo g od ydg jol


(5) {1,2,3}
HHBS 6.5F AM X - HHBS 9.5F AM X - HHF 6.4 F AM X - HHF 6.4 F AM KHHF 9.4 F AM X - HHF 9.5 F AM X - HHGC 9.4F AM X - HHGC 6.4F AM

T1


.12
1 ACW I/O OFF CLA! CTAO .T2
2 ACW | JW I. T3
3 ACW | JUS I. T4
LCD + Soft Button
HHBS 6.7F LL X - HHBS 9.7F LLI X - HHF 6.7F LL X
T1
T2
L1
L2 L
L4
T3

T4
abwglbwl (j,j) aeLLEDaL.L1
aJlll baw (jdd) acw LED aL .L2
.(5)cagg-aaall(aJ)aeLEDaL L3
:JLLED L4
.0jySll jilaiLoo 1yJoo
jgl jil aIoo 1y j:J
HHBS 9.8F LT ICE - HHBS 9.8F LT W
HHC 6.7F LT X - HHC 6.8F LT X - HHC 9.8F LT X
bdu (du/du) ON/OFF jj.T1
bwgoll bawll (oj) aej jj .T2
.ajgllg jlll lalil bsh (j)dd JJ.T3
L3-LEDaJ) aJlll bJull (oJ) acjw JxJy oJy bJxJ
(1)
L 5 0 0 0 0 0 0 0 0 0 0 0 0 0 0 0 0 0 0
Lalabi aJlll baiil (o) aJw b
:Jg j 1 g (c) j. T4
a 15:abwgoal bawll (oJ) a
10: aJallbawll (oJ) ac
g5:agallbawl()acw
aiaaiI [oo] aLLED
abwglblbll (jdd) aeLLED aL.L2
aJJI bJJI (oJ) aJw LED aJL.L3
.(5)cagg-aaal(0j)aLEDaL4
LED L5
LED indicator
LED indicator
LED indicator
LED indicator
LED indicator
LED indicator
LED indicator
LED indicator
LED indicator
LED indicator
LED indicator
LED indicator
LED indicator
LED indicator
Soft Button ^+ Silent Speed 1jzJg
HHBS 9.5F AB X - HHBS 9.7F LBI X - HHBS 9.7F LB X
HHBS 6.7F LB X - HHGC 9.7F LB X - HHGC 6.7F LB X
HHGC 6.5F AB X - HHF 9.7F LB X - HHF 6.7F LB X
HHC 9.7F LB X - HHC 6.7F LB X



T1
T2
T3
T4
1234567890 (afj/ jf) ON/OFF jj.T1
Jbaw (oJ) aJjT2
5do(aagol3-LED)aallbaw(o)acjw:
(L2-LED)
(aj/1j) ON/OFF jyjj .T3
"olalll" bddl (j) aJ jT4
:dlUgU Iaag aiaag oJuslg Jaaai
.EN/IEC 60335-1; EN/IEC 60335-2-31, EN/IEC 62233
;EN/IEC 61591; ISO 5167-1; ISO 5167-3; ISO 5168 :|d|
;EN/IEC 60704-1; EN/IEC 60704-2-13; EN/IEC 60704-3
.ISO 3741; EN 50564; IEC 62301
EN 55014-1; CISPR 14-1; EN 55014-2; CISPR 14-2; EN/IEC :EMC·
.61000-3-2; EN/IEC 61000-3-3
c: 11111111111111111111111111
d 45jg jlll aacrllglc baoa baw jn bpa 1 g 3b00b000000000000000000000000000000000000000000000000000000000000000000000000000000000000000
Jz
a 1
Lgssd jdo yduuall 1 no gaae!
dall 3 dll jw gol osgill w no ydl lal
aballblaw jdsduwclawll no yjally ggtgall
2bwwyjw yduwyyd wdy d yu 1
A
.2
gill no-gaal 12 12
G4
.3
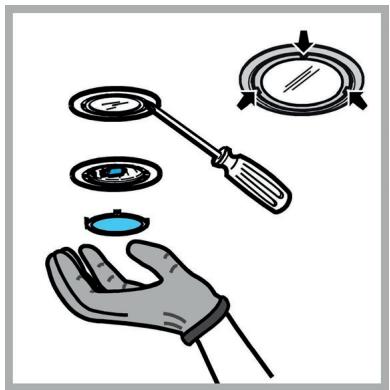
HHBS 6.7F LL X - RHHF 9.7F LB X - RHHBS 9.7F LB X - RHHGC 9.7F LB X - HHBS 9.7F LLI X - HHF 6.7F LL X - HHBS 9.7F LBI X - HHBS 9.7F LB X - HHBS 6.7F LB X - HHGC 9.7F LB X - HHGC 6.7F LB X - HHF 9.7F LB X - HHF 6.7F LB X - HHBS 6.7F LT X - HHBS 6.7F LT DS - HHBS 6.7F LT CF - HHBS 9.8F LT X - HHBS 9.8F LT DS - HHBS 9.8F LT CF - HHBS 9.8F LT ICE - HHBS 9.8F LT W - HHC 6.7F LT X - HHC 9.7F LB X - HHC 6.8F LT X - HHC 9.8F LT X -
RHHC 9.7F LB X - HHC 6.7F LB X
.(LED) aaggall ggsi jol ool albgo
a 10 0g 10 LED
. 15% 15% 15% 15% 15% 15% 15% 15% 15% 15%
y
jgljj jolal
a2012/19/EC 2012/19
- aagjSlyg aLuygul yg=U1 Uy (u) aagjSlyg aLuygul yg=U1
Jooa aalaae aee aee eae ae eae ae ae ae ae ae ae ae ae ae ae ae ae ae ae ae ae ae ae ae ae ae ae ae ae ae ae ae ae ae ae ae ae ae ae ae ae ae ae ae ae ae ae ae ae ae ae ae ae ae ae ae ae ae ae ae ae ae ae ae ae ae ae ae ae ae ae ae ae ae ae ae ae ae ae ae ae ae ae ae aaee
aalall aalll Jc aaggl jll

a aalall lgl gallgagall jol
yj yj jolll oJagol J do d8g 80 Jolzill g ooll lie julcl od
aalal aalal alalgall
daiol g, clll ldo jao valll nc logall no yjoll lc bblb
g j 10000000000000000000000000000000000000000000
gao 10000000000000000000000000000000000000000000
Claaall 1g 1
HHBS 6.5F AM X, HHBS 9.5F AM X, HHF 6.4 F AM X, HHF 6.4 F AM K, HHF 9.4 F AM X, HHF 9.5 F AM X, HHBS 9.5F AB X, HHGC 6.5F AB X, HHGC 9.4F AM X, HHGC 6.4F AM X
| (الbv) و (الجعَة) | (الجعَة) | (الجعَة) | (الجعَة) | |
| الbv 20 | 12 | G4 | 33x010 |
HHBS 6.7F LL X - RHHF 9.7F LB X - RHHBS 9.7F LB X - RHHGC 9.7F LB X - HHBS 9.7F LLI X - HHF 6.7F LL X - HHBS 9.7F LBI X - HHBS 9.7F LB X - HHBS 6.7F LB X - HHGC 9.7F LB X - HHGC 6.7F LB X - HHF 9.7F LB X - HHF 6.7F LB X - HHBS 6.7F LT X - HHBS 6.7F LT DS - HHBS 6.7F LT CF - HHBS 9.8F LT X - HHBS 9.8F LT DS - HHBS 9.8F LT CF - HHBS 9.8F LT ICE - HHBS 9.8F LT W - HHC 6.7F LT X - HHC 9.7F LB X - HHC 6.8F LT X - HHC 9.8F LT X - RHHC 9.7F LB X - HHC 6.7F LB X

A
| الإستعمال | الإستعمال | الإستعمال | ال,enGLISH | الترجمة الحرفية |
| (س威慑) | (س威慑) | (س威慑) | (س威慑) | |
| HHBS6.5FAMX HHBS6.7FLLX HHBS6.7FLBX | -114 61,9 114 - 70,4 | 59,8 | 45 | 12-12,5-15 |
| HHBS9.5FAMX RHHBS9.7FLBX HHBS9.7FLLIX HHBS9.5FABX HHBS9.7FLBIX HHBS9.7FLBX | 114 - 61,9 114 - 70,4 | 89,8 | 45 | 12-12,5-15 |
| HHF6.4 FAMX HHF6.4 FAMK HHF6.7FLLX HHGC6.7FLBX HHGC6.5FABX HHF6.7FLBX HHGC6.4FAMX | 112,5 - 60 112,5- 68,5 | 59,8 | 45 | 12-12,5-15 |
| HHF9.4FAMX HHF9.5FAMX RHHF9.7FLBX HHF9.7FLBX | 112,5 - 60 112,5- 68,5 | 89,8 | 45 | 12-12,5-15 |
| RHHGC9.7FLBX HHGC9.7FLBX HHGC9.4FAMX | 114,8 - 62,3 114,8- 70,8 | 89,8 | 45 | 12-12,5-15 |
| HHBS6.7FLTX HHBS6.7FLTDS HHBS6.7FLTCF | 114,8 - 62,3 114,8- 70,8 | 59,8 | 45,5 | 12-12,5-15 |
| HHBS9.8FLTX HHBS9.8FLTDS HHBS9.8FLTCF HHBS9.8FLTICE HHBS9.8FLTW | 114,8 - 62,3 114,8- 70,8 | 89,8 | 45,5 | 12-12,5-15 |
| HHC 6.7F LT X HHC 6.8F LT X | 109 - 66,5 115- 75 | 59,8 | 50,5 | 12-12,5-15 |
| HHC 6.7F LB X | 109 - 66,5 115- 75 | 59,8 | 50 | 12-12,5-15 |
| HHC 9.7F LB X RHHC 9.7F LB X | 109 - 66,5 115- 75 | 89,8 | 50 | 12-12,5-15 |
| HHC 9.8F LT X | 109 - 66,5 115- 75 | 89,8 | 50,5 | 12-12,5-15 |
- GENERAL SAFETY
- ELECTRICAL CONNECTION
- REPLACING THE POWER CABLE
- AIR VENT
- FILTERING OR DUCTING
- CONTROLS
- HHBS 6.7F LL X - HHBS 9.7F LLI X - HHE 6.7F LL X
- RESET FILTER SATURATION INDICATOR
- ACTIVATION OF THE ICON FOR CHARCOAL FILTER SATURATION
- AUTOMATIC OPERATION AT HIGH TEMPERATURE
- RHHF 9.7F LB X - RHHBS 9.7F LB X - RHHGC 9.7F LB X
- RHHC 9.7F LB X
- RESET FILTER SATURATION
- ACTIVATION OF THE LED FOR CHARCOAL FILTER SATURATION
- AUTOMATIC OPERATION UNDER HIGH TEMPERATURE CONDITIONS
- MAINTENANCE
- CLEANING
- PERIMETER ASPIRATION PANEL
- MAINTENANCE OF THE ANTI-GREASE FILTERS
- TRAPS COOKING GREASE PARTICLES
- MAINTENANCE OF THE CHARCOAL FILTER
- IT ABSORBS UNPLEASANT ODOURS CAUSED BY COOKING
- ASSEMBLY
- DISASSEMBLY
- REPLACING LAMPS
- DISPOSAL
- MALFUNCTIONS
- SAFETY INSTRUCTIONS AND WARNINGS
- AIR FLOW
- ACTIVATING THE ACTIVATED CARBON FILTER SATURATION INDICATOR
- THE EXTRACTOR FAN AUTOMATICALLY SWITCHES TO HIGH SPEED WHEN THE TEMPERATURE IS TOO HIGH
- TECHNICAL MAINTENANCE
- MAINTENANCE OF GREASE FILTERS
- RETAINS GREASE PARTICLES COMING FROM COOKING
- REMOVES UNPLEASANT ODORS FROM COOKING
- INSTALLATION
- REMOVAL
- REPLACING THE LAMPS
- HHBS 6.5F AM X, HHBS 9.5F AM X, HHF 6.4 F AM X, HHF 6.4 F AM K, HHF 9.4 F AM X, HHF 9.5 F AM X, HHBS 9.5F AB X, HHGC 6.5F AB X, HHGC 9.4F AM X, HHGC 6.4F AM X
- REPLACEMENT OF THE POWER CABLE
- PERIODIC MAINTENANCE
- MAINTENANCE OF THE AIR FILTERS
- GENERAL SAFETY PRECAUTIONS
- RESET SATURATION FILTER
- ALL MODELS LISTED ABOVE
- KEMIP CY3RICIH KAHBIKTBIK 6EJIIUEECIN 6EICEHDPY
- KORAPBI TEMNEPATYPA DA ABTOMATBI KYMBIC
- AUTOMATIC TEMPERATURE CONTROL
- HIGH TEMPERATURE AUTOMATIC OPERATION
- REPLACING THE FUSE
- FOR MINOR REPAIRS, CONTACT TECHNICAL SERVICE OR THE MANUFACTURER
- SERVICE THE AIR FILTER
- DO NOT OPERATE THE UNIT WITHOUT THE FILTER
- REPLACEMENT
- TROUBLESHOOTING
- JZ
- RHHC 9.7F LB X - HHC 6.7F LB X
Brand : HOTPOINT
Model : HHC9.8FLTX
Category : Cooker