USER MANUAL GL30 BOSCH
Register your new Bosch now: www.bosch-home.com/welcome

BGL4...

BOSCH
de Gebrauchsanleitung
en Instruction manual
fr Mode d'emploi
it Istruzioni per l'uso
nl Gebruiksaaanwijzing
da Brugsanvisning
no Bruksanvisning
sv Bruksanvisning
fi Käyttoohje
es Instrucciones de uso
pt Instruções de serviços
el Odyiecs xpnons
tr Kullanim kilavuzu
pl Instrukcja obslugi
hu Hasznalatiutasitas
bg yka3aHn 3a yIOTpe6a
uk Ihctpykui3 ekcnnyatauii
ru Hnctpykunna no 3KcInyataa
ro Instructiuni de utiliser
ar
de Sicherheitshinweise 2
Gebrauchsanleitung 35
en Safety information 3
Instructions for use 38
fr Consignes de sécurité 5
Mode d'emploi 41
it Normedi securezza 6
Istruizioni per I'uso 44
n | Veiligheidsvoorschriften 8
Gebruiksaanwijzing 47
da Sikkerhedsanvisninger 9
Brugsanvisning 50
no Sikkherhetsanvisninger 11
Bruksanvisning 53
sv Sakerhetsanvisiningar 12
Bruksanvisning 55
fi Turvaohjeet 14
Käytöohje .58
es Consejos y advertencias de seguridad 15
Instrucciones de uso .61
pt Indicações de segurança 17
Manual de instruções 64
el YnOdeltaic aOpaaleiaC 18
O8nyiec Xpnoanc .67
tr Güvenlik bilgileri 20
Kullanma kilavuzu 70
pl Wskazówki dotyczbe bezpieczeste sta .22
Instrukcja uzytkowania 73
hu Biztonsági utmutató 24
Hasznalatiutasitas .76
bg Yka3aHnHa 3a 6e3OpacHocT .25
IHCtpyKzna 3a HauHa Ha POn3BaHe .79
ru IpaBnlaTexHnKn6e3OpacHocTn 27
IHCtpyKpno 3KcPnyatau .83
ro Instruetiuni de siguranţă 28
Instructiuniutilizare .86
uk exnika 6e3nekn .30
IHCtpyKzia3ekcnnyatauii 89
34 1
95
de
Please keep this instruction manual. When passing the vacuum cleaner on to a third party, please also pass on this instruction manual.
Intended use
This vacuum cleaner is intended for domestic use and not for commercial use. Only use this vacuum cleaner in accordance with the instructions in this instruction manual.
In order to prevent injuries and damage, the vacuum cleaner must not be used for:
Vacuum-cleaning persons or animals
Vacuuming up:
- hazardous, sharp-edged, hot or glowing substances.
- damp or liquid substances.
- highly flammable or explosive substances and gases.
- ash, soot from tiled stoves and central heating systems.
- toner dust from printers and copiers.
Spare parts, accessories, dust bags
Our original spare parts, original (special) accessories and original dust bags are designed to work with the features and requirements of our vacuum cleaners. We therefore recommend that you only use our original spare parts, original (special) accessories and original dust bags. This will ensure that your vacuum cleaner has a long service life and that the quality of its cleaning performance will remain consistently high throughout.
Please note
Using unsuitable or inferior-quality spare parts, (special) accessories and dust bags can damage your vacuum cleaner. Damage caused by the use of such products is not covered by our guarantee.
This vacuum cleaner complies with the recognised rules of technology and the relevant safety regulations.
The appliance may be used by children over the age of 8 years and by persons with reduced physical, sensory or mental capacity or by persons with a lack of experience or knowledge if they are supervised or have been instructed on the safe use of the appliance and the have understood the potential dangers of using the appliance.
Children must never play with the appliance.
- Cleaning and user maintenance must never be carried out by children without supervision.
- Plastic bags and films must be kept out of the reach of children before disposal. Risk of suffocation.
Proper use
Only connect and use the vacuum cleaner in accordance with the specifications on the rating plate.
- Never vacuum without the dust bag or dust container, motor protection or exhaust filter. This may damage the vacuum cleaner.
Always keep the vacuum cleaner away from your head when using nozzles and tubes. This could cause injury!
- When vacuuming stairs, the appliance must always be positioned below the user.
- Do not use the power cord or the hose to carry or transport the vacuum cleaner.
For safety reasons, if this appliance's mains power cable becomes damaged, it must be replaced by the manufacturer, their after-sales service department or a similarly qualified person.
If using the appliance for longer than 30 minutes, pull out the power cord completely.
- When disconnecting the appliance from the mains, pull on the plug itself to remove it; do not pull on the power cord.
- Do not pull the power cord over sharp edges or allow it to be-come trapped.
- When the cable is being automatically rewound, ensure that the mains plug is not thrown towards persons, body parts, animals or objects. => Use the mains plug to guide the power cord.
Pull out the mains plug before carrying out any work on the vacuum cleaner.
- Do not operate the vacuum cleaner if it is damaged. Unplug the appliance from the mains if a fault is detected.
For safety reasons, only authorised after-sales service personnel are permitted to carry out repairs and fit replacement parts to the vacuum cleaner.
- Protect the vacuum cleaner from the weather, moisture and sources of heat.
- Do not pour flammable substances or substances containing alcohol onto the filters (dust bag, motor protection filter, exhaust filter, etc.).
The vacuum cleaner is not suitable for use on construction sites. Vacuuming up building rubble could damage the appliance.
- When not in use, switch off the appliance and pull out the mains plug.
At the end of its life, the appliance should immediately be rendered unusable, then disposed of in an appropriate manner.
Please note
The mains socket must be protected by at least a 16 amp circuit breaker.
If a circuit breaker is tripped when you switch on the vacuum cleaner, this may be because other electrical appliances which have a high current draw are connected to the same power circuit.
To prevent the circuit breaker from tripping, select the lowest power setting before switching the appliance on, and increase the power only once it is running.
■ Packaging
The packaging is designed to protect the vacuum cleaner from being damaged during transportation. It is made of environmentally friendly materials and can therefore be recycled. Dispos of packaging that is no longer required at an appropriate recycling point.
Old appliance
Old appliances still contain many valuable materials. Therefore, please take appliances that have reached the end of their service life to your retailer or recycling centre so that they can be recycled. For current disposal methods, please enquire at a retailer or your local council.
Disposal of filters and dust bags
Filters and dust bags are manufactured from environmentally friendly materials. Provided they do not contain substances that are not permitted in household waste, you can dispose of them with your normal household waste.
Notes on the energy label
This vacuum cleaner is a general purpose vacuum cleaner. To achieve the declared energy efficiency and cleaning performance class on carpet, please use the interchangeable universal nozzle.
To achieve the declared energy efficiency and cleaning performance class on hard floor with nooks and crannies, please use the hard floor nozzle provided.
These calculations are based on the delegated regulation (EU) no. 665/2013 established by the commission on 3rd May 2013 as a supplement to Directive 2010/30/EU.
All of the procedures in these instructions that are not described in more precise detail were listed based on DIN EN 60312-1:2014.
fr
=> CbIueCTByBa ONaCHOCT OT 3aIyUwAbaHe!
IpaBnHNo n3non3BaHe
BkIIOUbaIte KbM eNEKtPrueckata MpekaHa pa6oTeTe c npaxocmykauchata camo cbrnacho dmpmeha Ta6eKa.
Hikora He n3cMcyBaIte npax 6e3 fnnTbPha TOp6a, pecn. KoHTeHep 3a npax, 3aunHa MoTOpa- H3dYbcAupf nnTbP.
=>PpaxocmykaKaTa MoKe Da ce noBpeiN!
HnKora HcmyeTe CIO3aTn Tp6bTaB 6NtOCTdo rnaaba.
=>HMa onaCHOCT OT HapaHRAHe!
Ipnn3cmykbaHe Ha npaxa OT cbnl6mue yepedt Tp86Ba BnHaHn Da ce HAMnpa No-HNCKO OT pa6oteu n C hero.
He n3n0n3BaIte Ka6eBa 3a MpeXoBO 3axpaHbAne H Mapkya 3a HOceHe / TpaHCIOPTnPaHa He Na paxOcMcyKaKkata.
Ako npoBODHKnbT 3a Cbbp3BaHe KbM MpeXata Ha To3n YpeD ce NoBpeN, Tp8Ba Da ce CMeHN OT npo3BDoNTe Hnn HerOBn cepBn3 nn nIne C noOp6Ha KBaHnФkauN, 3a Da ne3BerHnat OAnCHOCTN.
I3ternayteDOKpai eEnktpueckna Ka6en npn pa60-Ta 3a noBeeOT 30 MNHyTN.
- He ternefte 3a 3axpaHbau nka6en, a 3a uence na, 3a da n3KlouHTe ypeDa OT MPexkata.
He npekapbaTe Ka6ena 3a mpeXOBO 3axpaHbAne npes octpn pb6oBe H He ro npitnckaTe.
BHHMabai Te uencenb Ta He ydpra Xopa, qactn OT TANOTO HINI PnpedMeTH Pn ABTOMaTHUHOTO npbnpahe Ha kaBen. Bode teneKtpueckn KaBen c nomoTuHa uiencena.
■Ппдн BCИЧК pa60Т no npaxocmykaчkaTа n3BaTe шencela ot Мржкata.
He pa6oTeTc noBpeHa npaxOcMyKaHa. Pnno8BaHae Ha Hen3npaBHocTH n3BaTeIe Iencena OT MPexKOBIA KOHTAKT.
3a da n36bHertoe onaCHOTH, pemOHHTe mCmHata Na pe3epBHN qactHa npaoxocMykaukata Tp8Ba da ce h3BbPbBAT cAmO OT OTOPH3HApAH cepBn3.
■ Na3ete npaxocmykaykata OT BbHnH KInMaTHuHN BnHnH, BnAra Hn3TOUHNu HA ToPnHa.
He noctabnTe Bbpxy fHntpHte B3nnPmaehm HnIc bApkaa ankoXon MaepnHa (fHtBpnHtrop63 aauHTen Fhntbpa H mOtota, nAxdYbaaF fHntbp nT.H.)
Ipnaxocmykaukata He e npoxoja 3a pa60ta Ha cTPONTENH NIOUaDKN.
=>3acmykBaHeHa cTPOInTeHn OtnaBcN MoKe Da DOBeE Do NOBpeHa ypeA.
I3kIIOUeTe ypeDa H N3TERneTe 1cncena, KOrato He CmUeTe.
I3ne3nnte ot ynoTppe6a ypeDi Tpr6Ba Beda Hara da cTahat Hen3nol3Baemi, CneT TOBA ypeBt Tpr6Ba da ce npede 3a yHnOxKaBaHe cbo6pa3Ho n3NcKBaHnHa.
MonaHMaTe npeBnD
Мреков rat KOHTaKr TpRbBa da e oCnHypeH c npeHa-3nten Hau-MaNKo 16A.
Ako npn BkIIOUcBaHe Ha ypeDa npEpaN3ntenTt Ce 3aDeiCTBa, To npHnHATA 3a TOBA MoKe Da 6bJe, ye BcSbata EneKtpnuecka BeprAe HNOBpeMeHo C a BkIoUeHN I dpyrN eEeTpncckypeDnC rOJMa O6ua KOHCymPraHa MOnHoc.
3aTeHbHoHa npedna3nTena MoKe da Ce n36BerHe, KATO npEdu BkIOuBaHe Ha yPeDa HAcToPOHe haHnCKata CTeNEH Ha MOIoHCT N eBa CneT ToBa n36peTe PO-BHCOKA CTeNEH Ha MOIoHCT.
Yka3aHnna 3a yHnIooXbaVe
Onakobka
Onakobkata na3 npaxocmykaqukata ot nobpeidn noBpeMe h TaPacncopTnpahe.Te hnapaBeHa ot 6naIorponpHTHn 3a OKONHATA cpeMaTePAHn H nopaHn TOBa Moke Da 6bde peuknpaHa.N3XbbpnTe HeNyKhnte Bn Beue onakOBuHm MaTepHaN Ha MeCtata 3a cb6npaHe 3a Chtemata 3a NOBtPOH 3nONI3BaHe "3eneHa ToKa".
Ctap ypei
CtapHe npaxocmykauchn cheTo Bce oOE cbIbprKaT ueHN MaTePnAHI. 3a ToBa npedaiTe BaWata ctab npaxocmykaKaHa BaWNpOdaBauH INB eINH OT ceHTPOBeTe 3a peuKNipane 3a NobTOphO n3No13BaHe. HΦopMaunz 3a AkTuAnHnTe NaHnH 3a YHnIOXbaHe Bne MoKeTe Da noyUte ot BaWNbProBeue nn BB BaWNo6UnHcKn CbET.
■ YHnOxKaBaHe Ha φnItpn H φnITbphN Top6n
Φnntpnte n Φnntbphnte top6n ca npon3beeneo ot ekonoruHn Maepnau. B cnuya, ye te He cbdpkata cy6ctaun, 3abpaehn 3a 6ntobnTe OTnabuN, MOKte da rynuXoojabate 3aeHNo c HopmaHnTe 6ntOBn OTnabuN.
Yka3aHnna 3a eHeprnHTo o6o3HaueHne
Pn Ta3n npaxocmykaqka cTaba dyma 3a npaxocmykaKa C o6o npedHa3aHaeHne. 3a noctrahe Ha ne Knaparhata eheprnHa eefektbHoct n KaLaca Ha eefektbHbOCT Ha NOCHCTBaHE Bbpyx KNHMn, HnON3BaIte npBkIouybaaata Ce yHNBepcAHa DIO3a. 3a noctrahe Ha deKnaparhata eheprnHa eefektbHoct n Ha KnaCa Ha eefektbHbOCT Ha NouchCTBaHe Ha npax Bbpyx TBbpDn NODObe C cyfN n PpOnyk, n3nON3BaTe npInloKeHaTa IIO3a 3a TbbpDn NODObe.
N3uHcNEHHTa ce 6a3npat Ha JeIeRnpaHa Hape6a (EC)Hom.665/2013 ha KomncHTa on 3 MaJ 2013 r. 3aOnbBaHe Ha NIpEKTbA 2010/30EC.
BcnuKn IpoueDpyu, KOHTO He ca TOHNO OONCAHN B TOBA yka3aHHe, ca n3BbPseHn Ha 6a3aTa Ha DIN EN 60312-1:2014.
ru
CoXpaHnIte HNCTpyKuHIO NO 3KcPnYaTauHIn. PnI nepeDa-ue PbIneocOa HObOMy BnaIadelbUe H3a6yDbTe nepeDaTb TAKKe HNCTpyKuHIO NO 3KcPnYaTauHIn.
Yka3aHnno nCNoB3OBAHHIO
DaHHbI PbIEcO npEpaHa3Haue Iy bOpKn 6bITobBIX NOMeUeHN, OH He NpOxDoHIT DnI pPOMbiJHeHOrIO nCpONb3OBAHn. HcPOnb3yIte PbIEcO TOnbKo corNaCHO pRbBeDEHbIM B HNCTpyKuIIN O kCNpNyTaunu Yka3aHnM.
Bo n36eXaHHe TpaBM m NOBpeXdEHH nbInecoc HeIb38 HcNoB3OBAtB dJIa:
CHCTKNIODeENJXNBOTHBIX;
BCaCbIbAHNIA:
BpeHbIX dIJI 3dOpOBbBAeIecTB,OcTpIx,ropaHx IIN paKanEHHbIX npEMeTOB;
- MOKpbix PpeDMeTOB IN KINKOCTei;
JIeKOBOCIIaMeHJUOxCnIINB3pbIbYaTbIXBeIeCTBnra3OB;
- nenn, caxn 3k KaΦeNbHbIX neey IN CNTem ceHTpaBHorO OTOJNeHn;
TOHEPA n3 npINTEpOB uIN KONIPOBaBbIX aNpaTob.
3anachbte yactn, npnaadneKHOCTN, MeUKN dIy nbInN
HaunOpnHnHbHbIe 3aNaChbIe qacTHn I npHnAdJeKHOCTn, a TaKxpeOpnHnAbHbIe DoONHnHTbe bPe nPiHaJLeKHOCTn, KaN O npHnHaHbHbMe MeKHN DnI pblIn, ONTmAbHbNO JOnDxOaT K CBOYCTBaM Tpe6OBaHHaHX NJIncOCOB. PToTMy Mbl peKomeHdyem Bam HcONb3oBaT hcklOuHTBeHO opnHnHaHbHbIe 3aNaCbIe qactn I npHaADJeKHOCTn, a TaKxpe NIIsb OpnHnAbHbN doONHnHTbe hBne pnpHaNDJeXHOCTn I MeKHN dIyblIn. Tohko Takim obpazom oecseNeuBaTcER DoPnN cpoK cnYk6blI rapaHTnpyETc BblcOKNI pe3yIbTaT y60pKn c nomoMbU BaWero nblecoCA.
UkaaHne:
HcNoJIb3OBAHHe HeNoIxDoxoJxH INn HekaueCTBeHHbIX 3anaChbIX quchTei, npHnAIIeXHOCTei/DOonHInTeB- hBIX npHnAIIeXHOCTei INn MeIKOB dIy PbIIN MoKet Bbl3BaTb NObpeXdEHne PbIeNecoca. Hawa rapaHTHa he paccnoctpaHreTcra Ha yctpaHenne NOBpeXdEHn, Bbl3BaHbIX HcNoIb3OBAHHe mIoob- hBIX n3deIiN.
Правидахнк6e3oanchoctn
JaHHbI nbIeCOC COOTBcTCTByET 06uepn3HaHHbIM TexHnueckm Tpe6oBaHnM n CteZnaJIbHbIM npaBnAm TexHnK6beONaCHOCTN.
IcnoJIb3OBAHHe nbIeNcoCa DeTbMn CTapSe 8 IeT N IINaAMC C OrpaHnueHHbIMN Φn3nueCKmN INN yMCTBeHHbIMN
CnOCO6HOC7AMN, a TaKKe IINuCaMn, He
IIMEUoUIMM OOnbTa O6paUeHnA C NIOo6HbIM
OBOpyOoBaHnEM, DOnyUcKaETC TOnbKO PoD
PiNcMOTpOM HNI NocE INHCTpykTaKa IIO
6Be3OpanChomU HcNoJIb3OBoHnO PIn6bopa N
OC03HaHnI DaHHbIM NtUaMn ONaCHOCTe,
CBraaHHbIX C eTo EKcPnyaTaUne.
IeTAM 3aPpeUeHO nrgpaTb c npH6Opom.
UncTka u yxOJ He dONJHbI npOn3BOuNTbcA DeTbMn 6e3 npNCMOtpa.
Пл actikobbie Meukи nopoimephyo ПнжухpaHnte uYtInn3npyTe B HeOCTynHom dIeTeJ MeTe.
= > Onacnoctb ydyu7yra!
PpabnlbHoe nCNoIb3OBAHne
Поdkню悔нк АнКТСОТи ВВКIOЧЕпп ПьIECOcO DAJOHNO pOIN3BOMDTcTOIbKO C yUyETOM DAHbIX TINOBOW TAbuNHyK.
■HnkOrda He HcNoIb3yIte nbIeNoc 6e3 cMeHHoro nbIe6OpHnka NIO60 KOHeIHepa dJI c6opa nbIIn, MOTOPHO r BblnyCCKHO FOHNbTPOB. nbIEcOC MoKET 6bITb NOBpeKdEHN
He noHnOCHTe BCacbIaIOUHO HacAky N Tpy6ky K rONoBE. 3TO MOKET npNBecTn K TpaBME!
■Пу IbOprKe nTeNtBuIbeNocBcERdaNoJIkeHaxoNDtBcA NHXe NoJIbObBATen.
He nCnoB3yTe cTeBoK ka6eNb N shaHr dI nepeHocKn /TpaHCnOpTnpOBKN nbJeNcoCa.
Bo n36eKahHe onaHcOtn 3aMeHa NOBpeJdeHHOro ceTeBO rKa6EJaDaHOrO pNbOpa MoXet 6blT bIbnHeHa TOnbKO pOnnBDOiTeMe HnA BTOpH3oBaHHo Hm CepBnCHo CnyKbO NIOb NIOuOM, MeIOUmm AHanorNHyU KBaIuΦnKauaUO.
Ipi npoDOnKHTeBHOCTN 3KcPnYataunH 6OJe 30 MNHyT CTeBOI Ka6eJIb Heo6XoJIMo PONHOCTbO BbITAHyTb.
Ipn otcoeHNHeHHn npHbopa oT 3neKtpocetn BcERda6epntecpbkyo3aBnky,ahe3a cTeBoKa6ebIb.
Cneinte 3a TeM, yTo6bI cTeBoN Ka6enB He 6bln 3axkAT Hc nonapan Ha octpbie Kpaar npedMeTOB.
Ipeed abTOMaTHueCKHM CmTaBbAHnEM cTeBOrO ka6eYb6dntcB b TOM, qTO erO uTekep He ueIJIaTeC3A liIOei, qACTn Tena, JXBOHTbIX HIN dpyHne 06BeKtbl. OTcoEHNHe cTeBOi Ka6eBb Of 3NeKtpoCeTn,NotraHyB 3a uTekep.
He npb3yTebc HeNCnPpABHbIM PbIneCOCOM. PnB03NHKHOBeHN HcNpBaBHOCr BbIHMaTte BNkY 13 po3ETKn.
Bo 36ekhanne onachoctn Bce pa60tbl no pemohny n 3a meane Depeh nIbIeNecoc aCneyet BbIOnHrTb TOnk BO bAbotnp3oBaHNOH cepBcHCH cIyK6e.
3auiuaeIbIeocOOTBoaDieCBnHHe6NaIornpnTHbIXMeOpOJIOnueCckxUcNoBn,BnaXHoCTN HICTOUYHKOBTeTnla.
He nOdbepraIte ΦnIbTpIe (CmEHNb IbnEe6OpHn, MOtOpHn bInIbTp, BlyINyCNHOb (cMbtpI r T. d.) Bo3dEeCTBnIO BOCIIaMeHHouXCAI INI CNPTOSCpeKJauX INBEeCTB.
■Пьilecoc He npedHa3HaueH dЯ ekCnnyatauHn Ha cTponTeBhIx obekTx.
```python
[(1) + 2) + 3] = [(1) + 2) + 3]
Поссе кОнчань Экрпуатци Выкночтп рпбори CMOTайтс сетево Kaбень.
Otnnykmbne npn60bI cdaaTe He npnroHbIMn dnaIaIbHeIwero HcNoIb3OBaHHa, a 3aTeM yTHIn3HpyTe B COOTBeTCTBHN C DeINCTBYUOUMN ppaBnAmN.
BHMHAHHe:
Ceteba po3eTka dOJIkHa 6bIb 3aUHSeHa npEdoXpa-HnTelem He MeHee yem Ha 16A.
PnB BKIOUENH pN6Opa npedoxpAHNTb MoKTe cpa3y cpa6oTaTb, eCNs ONDOBpeMeHb B DaHnyo 3eKTPueckyo CEb BKIOUEnb Dpyrne pN6ObpIc 6bnsou 06ee nontpe6JIeMoMooHocTbI.
Cpa6abtbyBaHne npdoxpaHntTe moXHO npdoTbPaTnB,ecNIpeR BKNIOUeHNEM npBopa yCTaHOVBmHmAbHyIO MOuHOCb,a 3aTEM NOCTeNEHNO yBEInuHTb ee.
Hnctpykqna no ytnnn3aun
ynaKOBka
Ynakobka cnjxNIT dIJI 3aunTbI PbIeNcOca OT nobpeKdHenn pI rTaHCnOPTnpOBke. OHa n3rTOBNeHa n3 3KONIOUHcECK NCHbix MATEpNAIOB, nO3OTOMy eMozHO HcNOnb3OBAbI DnB TbotuHNO nepepaOToKN. IcNolb3OBAHNbI yNakOBouHbI MaTEpNAIbI OTHOCHT BpyHKTbI pInema BTOPCbIPbI.
OToCnyXnBUnne npn6Opbl
OTcnykBwne npb6opby ABNHOCTc eHHbIM cbIpbEm dIaIbnHeuero IcNOIb3ObaHn. IOnTOmy OTCnyKbWII np6op CNEyET OTCht DNepy INB NyHKT pnpEMa BTOpcbIg NDeIaNbHeuWe yTnHn3aU n. HbOpMaua O BoM0XHoCHt yTNHn3aun HxOJNTcY yDnepa HnB MeCTHo aDMHNCTpaUn.
Uynnnaa qnnbtpoB ncmHoro nbinec6opnka
ФИьтbiи CmEHbIи nbIe6bOpHn I3rOToBneHbI 3KoONrHNeCKN 6e3BpeHbIX MaTePnaIOB. EcIn OHH ne CopeRkAT B Ce6e NHKaKHX BeueCTB, 3anpeSeHhBX K YtINH3aunC 6bITOBbIM MycOPOM, TO Bbl MOKeTe YtINH3nPoBaTb Hx BmEcTe C 6bITOBbIM MycOpOM.
Lluati in considerare
Priza de retea trebuie sa aibao siguranza de minim 16A.
UHHeHHJIIODeYuTBapnH;
BIDCMOKTyBaHHa:
-Шкднвн ду Здоров' рechови, roctprnx, rapaqux a6o po3kapehenx npedmetiB,
- BOLONX abo piKnx peuOBnH,
- IeRkO3aMnCTnx a60 Bb6yXoH6e3neuHX MaTepiA-liB, 30KpeMa ra3iB,
noneny 3 neey a6o npncptoB ueHtpaIbHoro ona-eneHH,
- Tohephoro nopoouky 3 npnntepiB a6o Kcepokcib.
3anachi yactuHn, npnaad, miwoK dny nny
HaWi opnirihbhi 3aunactHH, Hawe opriHbne npHnadra ta cneuianhe obnaHann, a takoH haWi opriHbHI MIshKn dnn y3roDkeHi 3 BnaCTNbOCTMn Ta BmORAMn HauNX nIOOCiB. TOMy peKoMEHycEMO BVKOpNCTOByBatn BVKnIouHo haiwi opriHbHI 3aunactHH, opriHbHe npHnadra ta cneuiBanhe obnaHann i haiwi opriHbHI miKh dnn Ny. Takim YHOM MoXHa rapaHTyBaTn TpRbAnn terPmH cnYk6n i BvCOKy notyKHiCTb BaWoro nnococa.
Bka3ibka
3actocybaHHn HeBIDnoBIDHn 3aNaCnHx qactnn abo pinnadra / cneiabHoro 0bnadnHn i MiKib dny nHy3bKOi KXOCT MoKe np3BeCTn Do nouKOJ-KeHHaBoWo NIOcOca, Ha Ke He NouHPOeTcbra rapaTIT, kAIO take nouKOJxHeHH BKNIKAHO 3actocybaHHm NODiBHH npOdykTIB.
Texhika 6e3nekn
Leynnococ Biinobiiae BCTaHOBnEHm npabnam 0oToTexhuiHx 3acobib Ta HaneJHm CTAHdpTaM 3 Texhikn 6e3neKn.
Iitn do 8 pokiv, ocobn 3 pfiznHmnnu np0zmyOBmBaamn a6o ocobn, kni He MaOTb DOCTaTHbOro OOCBiy Ta 3HaNb, MOkyTb KOpNCyBaTHcNpHnAdom, IINe JAKIO 3haxoJTBcN iD HargnAOM a6o HabueHNIpaBnHOMy KopNCyBaHHIO
HIOOCOCMTaYCBiOMNHOITbMOKJIINBI p3IKN.
ДитамзаборонeroгразисяЗпунадOM.
ДiTЯМЗabOpOHaETbC8e3HaIgIpynpoBODHTOnOuHcEHNy a60KOpNCtYBaCbKe O6CnyroByBaHHa.
Пл actikobi naketn Ta foIbry Heo6xidHO 36epiratn yTuIniOByBatn no3a DocJHICTu MaIeHbKnx diteN. He6e3neka 3aAnxHyTncb!
PpabnblbHe BnkOpncTahna
PiknKluoyehnn NINOOCOy do eNEkTPOmepejx ta Horo EKcNpyaatai noBHNHa 3diHCHOBATncb TINbKn BiNDo do daHNx naCnpTOHtabNIuKN.
■HikonHe BnKOpNCbByTe NnNoC6 63 nNo36ipNnka Qn KOHeHepa DnA Nnny, 3axnCHoro TaBnynckHOro pInbTy.=>PiNoc MoKe 6yTn noPkOxDKeHH!
He niohcBe BCMOKtYbaIbHy hacaIy i Tpy6kDo roIobN. Le moke npH3BecTn Do TpaBMvBaHHa!
■Pn6paunCxoDn,3aBxDn po3TaOByIte npnaI Hnxue 3a ce6e.
3a6bOpHeNo nepeHocHTn a6o nepeCyBaTH nInococ 3a Ka6eIb KINBneHHy Uu IuaHr.
Дяункенг He6e3neuHx ChTuayi,po60tn no 3amHi nOswkdoJHeOro MepeKhorO Ka6EIO daHORO npnady MoKyTb 6yTn BnKohAI TiNbKN BnPo6hNkoM, ABTopr3BaHOIO cepBicHO CnyX6oIO a6O oO6oIO, 0O Mae anAnoriguHy kBanipikaio.
PnTpHaJIoCTi ekCnIyatauIi 6JIbIe 3O XbHInN, Ka6eI bEnEkeTPOKbHneHHa Heo6xIDHO NOBHiCTIO BNTrHHTN.
Ipn BiJ'cHaHHi Bi MepeXi HikOnn He TgHtB 3a Ka6eNb KKnBHeHH, TpMaJte NOro TiNbKn 3a Bnky.
Cniidkyte,io6 kaebb XNBHeHHe nepeHHaBCyepe3 roctpi kpaT a Hide He 6yB 3atncHTn.
IpeedabTOMaTHUHm3MOTyBaHHM Ka6eHIO eNeK TPOXKNBHeHnpeKoHaITecB TOMY,uo HOrO tTEKeH PeiINnEbTa 3a INoed, qactHN TiA, TBAPH N iHni o6KnTe. BiD'EnHaTe Ka6eB eNeKToxKB- IeHH BId MepeKi,NotAHyBUns 3a tTEKeP.
■Perep6ydb-RAHMnPo6oTAMn3TexHUnOro6cNpyRoByBaHn HINOCoca Bi'EDHyTe NOro BiD enktpomepexi.
He BnKOpNCTOByTe HecnpabHn NPiNocC. PnP BnAeHNI HecnpapBHOiD'edHaTe NINOCoc BiE enekTIpomepeKei.
Длдзларггьн MOКнИВ 點бизи, ремOTТ замиу 3ларчпгпллосoc NOBINHEN 3дИСНБОВТИngше сcertnФICOBанн ТхИЧИNWЕРсоган.
■Плносoc cπiD 3axuataH BiB BnNBy HecnpraTnBnx KImatHuNX yMOB,BOIOnH,Джерптtenla.
ΦiNbTpNa TnNnO36ipHnKn (nnNo36ipHnK, 3axnCnHnΦiNbTp MOpota, BnYcckn HΦiNbTp ToIo) He nobHHBCTynatb N KOHTaKT i3 nERko3aMnCHtHMn a60 CnIPTOBMIChmN CnOlyKaMn.
Плносoc He npn3haeHnДЯ BnKOpNCTaHnЯ np6ydiBbHnx po6otax.
=>36bpaHAn8 6yDIIbeNBHorO CMITR MOKe pIINBCTeN Do IONUKOJ:KENHNIINOCoca.
■Iicna3akihueHHeKcnpnyatauiiBmHKHtB npnana i 3moaTne ka6eb eneKtpoxNBHeHH.
Pnpiad, 0io BdnpaouBab cbiT terMpHn Eekpnyataqi, npBveidtB H nepooboyu stan i nepedaTe dna HanexkhoI ytniiaazui.
! ybara
Aalilaii iaiiaaiyaiyaiyaiyaiyaiyaiyaiyaiyaiyaiyaiyaiyaiyaiyaiyaiyaiyaiyaiyaiyaiyaiyaiyaiyaiyaiyaiyaiyaiyaiyaiyaiyaiyaiyaiyaiyaiyaiyaiyaiyaiyaiyaiyaiyaiyaiyaiyaiyaiyai
jiall y, jiall no calill
a a a a a a a a a a a a a a a a a a a a a a a a a a a a a a a a a a a a a a a a a a a a a a a a a a a a a a
EU30/2010 aagll 2013 665 (g) 13
aie aie lae jai pia lla 128 g aiaaaill n ae jay aeg ay aaii ciil
jillll jaiiill lgljia jyplll
y
jill jiaoo
Aaiall jge hajjulxuyl cyae pui jgsy jkssu wajell
即 使 a ≤ b ≤ c 且 3a + 3b + 3c = 0 恒成立
aJall aalag ayjll jallolge jiauill all y
jill (jlll) jill lgl JgS g y jai jiaai al aai
(1) a5 = a1 + 3 = 4
olilj Sliol gdoiuiuiauie
aalll aalll aal lgl y d elill caii. bai
12
p daii iiaa yie kay aiaiial ayaiy jaiy jaiy jaiy
a yall aalll yall dlls
- jj 10
2y 1
aaiy aay yll s ylll ayaaal yll lle dylil ci s r ayy s y
C
Jia baiill 4y dai yie aikai kai baiy iayi ayiy
e 1
alal al alal
i
jaiy g ay. jaiy oaii jaiy aiai yaiy iay
e 1
dall daiuol sle! paili ayill gnill cdo jil (ll) lalily ll ala
(ell jiaill iill) «Gruner Punkt«
aaii iaii iaiia aaiia aaiia aaiia aiaiia aiia aiia aiia aiia aiia aiia aiia aiia aiia aiia aiia aiia aiia aiia aiia aiia aiia aiia aiia aiia aiia aiia aiia aiia aiia aiia aiia aiia aiia aiia aiia aiia aiia aiia aiia aiia aiia aiia aiia aiia aiia aiia aiia aiia aiia aiia aiia aiia aiia aiia
yaii jai jai iai ai piai jiyj yjai gijay
:
alall sll pluill j ailll al lalll ayall slall
aillll j ajj al gall
a jaiil 1 aaiiia aai iai gai
Aajssall aaiisll aaii, aaijssll glailln plasll, slaill
yglal
a 1
aallll lalall, aallll alalal lalal, alalal lalj
a
aiai iiaii aaiii aiil. li aaiai aiisai aiisai
aalalal aalalal alalalal lalalal alalal alalal
aaii aiee iieae eae ee eae eae
aaiiie 1
:
Cai jiall oia Jia piaiui Cua yu Lai lalb liy
J 1
aaii 1
aalil 1jla 1g
LaI GwA Jn Jn Jn Jn Jn
a
j 1
g/9 1
0a 1
aaii
p 2
ii
aaiisally 1111 jj
de
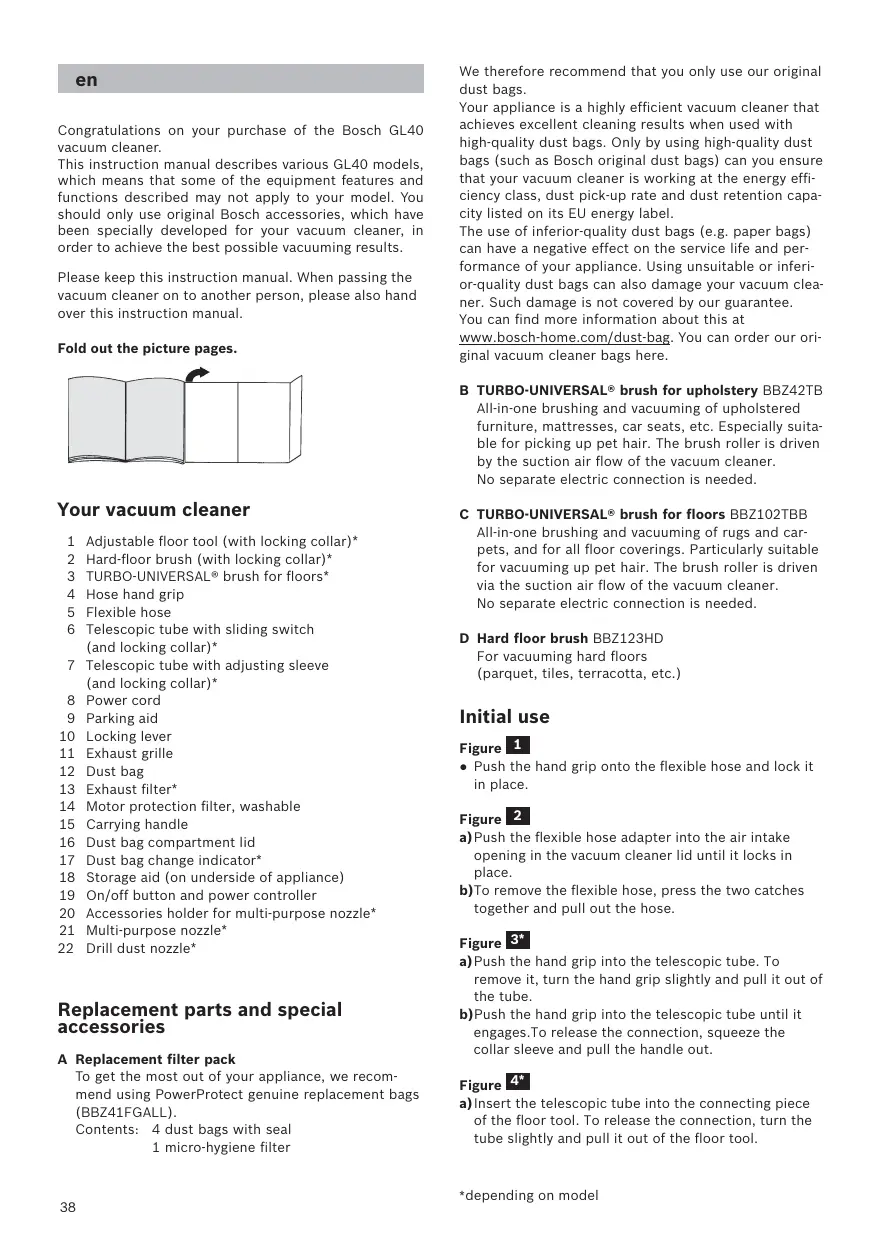
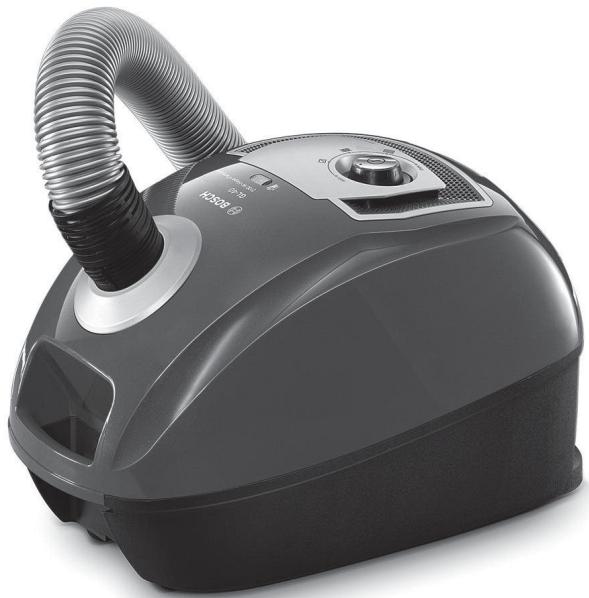
Congratulations on your purchase of the Bosch GL40 vacuum cleaner.
This instruction manual describes various GL40 models, which means that some of the equipment features and functions described may not apply to your model. You should only use original Bosch accessories, which have been specially developed for your vacuum cleaner, in order to achieve the best possible vacuuming results.
Please keep this instruction manual. When passing the vacuum cleaner on to another person, please also hand over this instruction manual.
Fold out the picture pages.
Your vacuum cleaner
1 Adjustable floor tool (with locking collar)
2 Hard-floor brush (with locking collar)
3 TURBO-UNIVERSAL® brush for floors
4 Hose hand grip
5 Flexible hose
6 Telescopic tube with sliding switch (and locking collar)
7 Telescopic tube with adjusting sleeve (and locking collar)
8 Power cord
9 Parking aid
10 Locking lever
11 Exhaust grille
12 Dust bag
13 Exhaust filter
14 Motor protection filter, washable
15 Carrying handle
16 Dust bag compartment lid
17 Dust bag change indicator
18 Storage aid (on underside of appliance)
19 On/off button and power controller
20 Accessories holder for multi-purpose nozzle
21 Multi-purpose nozzle
22 Drill dust nozzle
Replacement parts and special accessories
A Replacement filter pack
To get the most out of your appliance, we recommend using PowerProtect genuine replacement bags (BBZ41FGALL).
Contents: 4 dust bags with seal
1 micro-hygiene filter
We therefore recommend that you only use our original dust bags.
Your appliance is a highly efficient vacuum cleaner that achieves excellent cleaning results when used with high-quality dust bags. Only by using high-quality dust bags (such as Bosch original dust bags) can you ensure that your vacuum cleaner is working at the energy efficiency class, dust pick-up rate and dust retention capacity listed on its EU energy label.
The use of inferior-quality dust bags (e.g. paper bags) can have a negative effect on the service life and performance of your appliance. Using unsuitable or inferior-quality dust bags can also damage your vacuum cleaner. Such damage is not covered by our guarantee. You can find more information about this at www.bosch-home.com/dust-bag. You can order our original vacuum cleaner bags here.
B TURBO-UNIVERSAL® brush for upholstery BBZ42TB All-in-one brushing and vacuuming of upholstered furniture, mattresses, car seats, etc. Especially suitable for picking up pet hair. The brush roller is driven by the suction air flow of the vacuum cleaner. No separate electric connection is needed.
C TURBO-UNIVERSAL® brush for floors BBZ102TBB
All-in-one brushing and vacuuming of rugs and carpets, and for all floor coverings. Particularly suitable for vacuuming up pet hair. The brush roller is driven via the suction air flow of the vacuum cleaner. No separate electric connection is needed.
D Hard floor brush BBZ123HD
For vacuuming hard floors (parquet, tiles, terracotta, etc.)
Initial use
- Push the hand grip onto the flexible hose and lock it in place.
a)Push the flexible hose adapter into the air intake opening in the vacuum cleaner lid until it locks in place.
b)To remove the flexible hose, press the two catches together and pull out the hose.
a)Push the hand grip into the telescopic tube. To remove it, turn the hand grip slightly and pull it out of the tube.
b)Push the hand grip into the telescopic tube until it engages. To release the connection, squeeze the collar sleeve and pull the handle out.
a) Insert the telescopic tube into the connecting piece of the floor tool. To release the connection, turn the tube slightly and pull it out of the floor tool.
b)Push the telescopic tube into the connecting piece of the floor tool until it locks in place. To release the connection, press on the locking collar and pull out the telescopic tube.
- Move the adjusting sleeve/slider button in the direction of the arrow to unlock the telescopic tube and adjust it to the length required.
- Attach the accessories holder to the multi-purpose nozzle and clip it onto the suction pipe/telescopic tube.
Holding the power cord by the plug, pull out to the required length and insert the plug into the mains socket.
- Press the ON/OFF button in the direction of the arrow to switch your vacuum cleaner on.
The suction level can be infinitely adjusted to the level required by turning the control knob in the direction of the arrow.
Low power range

For vacuuming delicate materials,e.g. upholstery,curtains,etc.
Medium power range

For the daily vacuuming of light dirt deposits.
High power range

For vacuuming durable floor coverings, hard floors and heavily soiled surfaces.
Vacuuming
Please note:
- Floor tools are subject to a certain amount of wear, depending on the type of hard floor you have (e.g. rough, rustic tiles). Therefore, you must check the underside of the floor tool at regular intervals. Worn undersides of floor tools may have sharp edges that can damage sensitive hard floors, such as parquet or linoleum. The manufacturer does not accept any responsibility for damage caused by worn floor tools.
Set the adjustable floor tool:
Rugs and carpets

Hard floors

If you are vacuuming up relatively large particles, make sure that you vacuum them up successively and carefully to ensure that the vacuum channel of the floor tool does not become blocked. If necessary, you should raise the nozzle in order to better vacuum up the dirt particles.
Attach the nozzles to the suction pipe or hand grip as required:
a)Crevice nozzle for vacuuming crevices and corners, etc.
b)Upholstery nozzle for vacuuming upholstered furniture,curtains,etc.
c) Hard-floor tool For vacuuming hard floor coverings (tiles, parquet flooring, etc.)
- Push the telescopic tube into the connecting piece of the hard floor tool until it locks in place.
- To release the connection, press the locking collar and pull out the telescopic tube.
a)Vacuum the tool from below to clean it.
b)Use scissors to cut through threads and hairs wound round the rollers and then vacuum them away.
Drill dust nozzle
a) Secure the drill dust nozzle to the handle and then place against the wall, so that the nozzle drill hole opening sits directly over the hole to be drilled.
b)Select the lowest power setting and then switch on the vacuum cleaner. Suction holds the drill dust nozzle in the required position.
c) Depending on the surface of the wall to be drilled it may be necessary to readjust the power to a higher setting to ensure the drill dust nozzle is firmly attached.
Any fine particles are automatically vacuumed up.
Turbo brush
If your appliance is equipped with a turbo brush, consult the accompanying instruction manual for instructions on its use and maintenance.
You can use the parking aid on the back of the vacuum cleaner if you wish to stop vacuuming for a short time.
- Once you have switched off the appliance, slide the hook on the floor tool into the recess on the rear of the appliance.
To overcome obstacles, e.g. steps, the appliance can also be carried by the handle on the appliance body.
When the work is done
a) Pull out the mains plug.
b) Briefly pull on the power cord and then release it (the power cord retracts automatically).
Figure 17 To store/transport the appliance, you can use the storage aid on the underside of the appliance.
a) Stand the appliance upright on its end.
b) Slide the hook on the floor tool into the recess on the underside of the appliance.
Changing the filter
Please note: Always switch off the appliance before
- changing the filter.
Replacing the dust bag
- If the dust bag change indicator in the lid is filled completely yellow when the floor tool is lifted from the floor with the highest power setting selected, the dust bag must be changed, even though it may not yet be full. Even if the dust bag is not full, it may still need changing, due to the type of dust which has been vacuumed. First check that the nozzle, suction pipe and flexible hose are not blocked, as this would also lead to the dust bag change indicator being triggered.
- The hand grip can easily be detached from the hose to remove blockages.
a)Unlock the lid by pulling on the locking lever in the direction of the arrow.
b) Open the lid in the direction of the arrow.
a) Close the dust bag by pulling on the locking tab.
b)Take out the dust bag.
c) Insert a new dust bag.
d)Push the dust bag fully into the holder.
Please note: the lid will only close if a dust bag has
been inserted.
Cleaning the motor protection filter
The motor protection filter should be cleaned regularly by knocking out the dirt and rinsing.
- Open the dust bag compartment lid. Figure 19
a) Release the motor protection filter from the catch by pulling it sideways, and pull it out in the direction of the arrow.
b)Clean the motor protection filter by tapping out the dirt.
c) If it is very dirty, the motor protection filter should be rinsed.
The filter must then be left to dry for at least 24 hours.
d)After cleaning, refit the motor protection filter into the appliance, lock it in place and close the dust bag compartment lid.
Replacing the exhaust filter
Vacuum cleaner with micro-hygiene filter
This should be replaced with every replacement filter pack
- Open the dust bag compartment lid. Figure 19
a) Release the filter holder by moving the locking lever in the direction of the arrow.
b) Remove the micro-hygiene filter.
c) The micro-hygiene filter can be rinsed out.
The filter must then be left to dry for at least 24 hours.
d) Remove the micro-hygiene filter. Insert the new micro-hygiene filter into the appliance.
e)Insert the filter holder into the appliance and lock it in place.
Vacuum cleaner with HEPA filter
If your vacuum cleaner is equipped with a HEPA filter, this must be replaced once a year.
- Open the dust bag compartment lid. Figure 19
a) Unlock the HEPA filter by moving the locking lever in the direction of the arrow and remove the filter from the appliance.
b)Insert the new HEPA filter and lock it in place.
After vacuuming fine dust particles, clean the motor protection filter and, if necessary, replace the microhygiene filter or HEPA filter.
Care
Always switch off the vacuum cleaner and disconnect it from the mains before cleaning the vacuum cleaner. The vacuum cleaner and plastic accessories can be cleaned with ordinary plastic cleaner.
Do not use abrasive materials, glass-cleaning agents or all-purpose cleaning products. Never immerse the vacuum cleaner in water.
If required, the dust compartment can be vacuumed out with a second vacuum cleaner or simply with a dry duster/ dusting brush.
Subject to technical modifications.
fr
AvoiTe npakaalw tic oelidec me tic eikovec!

Piypapn ouokcunc
1 Páma δaèδou δiʌnç xρησç (με δaκτúλio aαoφáλιοç)
2 Pελμα σκληρού δαπεδου (με δακτύλιο πασαφάλιοής)
3 Bouptoiaa danepa TURBO-UNIVERSAL*
4 XeipoloaBn otov eukamto oawlya
5 Eukamtoc oAanvac avappoqnonc
6 Tnλeakotikoc ωληνac μe oupoévo πλκtpo (kai δaktuio anaαφálianc)
7 Tnλeakotikoc ωληνac με οupóevo δaktúlio (kai δaktúlio anαφálioc)
8 Hλektpikokαλδio
9 Bonthetaia oTatheuou
10 MoXloC kIeioiuaToc
11 Σχάρα εξόδου τοῦ αέρα
12 Zako'la aipau
13 DiIpo eEoou tou aepa
14 DiItro npoTaiaic Tou kivnTnpa, nlevo
15 Aβn μεταφρας
16 KaImuTou xWpou ouAloync Tns oKovns
17 EvseIe n aaiayn cipitpou
18 Bon'theta a nio thkeuoc (otv kato w nleupa tnc ouokeuoc)
19 PAnktpo On/Off kalpuOthic toxuos
20Φpeacε4apntμatwγiaTπeλμaannanlncρoanc
21 Pελμa πλλanλnç ρησ
22 Tmu avappnnc okvnc tpuinnmuatc
Avtaaakikakai 16ikoc EgonlaiooC
A IpaKeto avtaaaktkov piItpow
Tia va epyaZetai n ouakeun oac oto 1daviko eninebo TnC andoohc TNC, uovio toue Tn xhoon twv ynoiw Avtalkakikow akoukow tou tunou PowerProtect (BBZ41FGALL).
Teipexómeo: 4 oakoule c piItpou me koumuwa 1 mikoopilto uivic
D Sert zemin ucu BBZ123HD
1 MUKPOXHnEHHuehΦnITbp
Hne Bn npenopbUbaMe eunHCTBeHO ynoTpbe6aHa haanthe opnHHannTopnKn 3a npax.
IpiB aBaan ypeed ce kacaes 3a BncoKooefoekTbHb npaxocMnykaqKa, KOARTo nOCTrMa MHOFO Do6pn NOnuCTBaunpeyntatnpn H3noN3BaHoTe Ha BnCOKOKaueCTBeHNtop6nKn 3a npax.Camo H3noN3BaHoTe Ha BnCOKOKaueCTBeHNtop6nKn 3a npax, IN aCtHocHT Ha opHrHaHnHte Top6nKn 3a npax Ha fhpMa Bosch, rapaTHnpa, neNoocuHne Ha EC eHeprnHna EtNKet cToHocTn 3aKnaca Ha eHeprnHa efoekTbHOCt, NoemaHTo Ha npax N B3MOxHOCHTta 3a 3aDbpXaHe Ha npax Ie 6bDatNoCTnHATn.
Ipi n3nOJ3BaHe Ha TOp6nUck 3a npax C no-HnCKo KaueCTBO (HaPnIMep XapTneHn TOp6nUck) OCBeH TOBa OtpucaTeNHO MorAT Da ce NOBnIaR TnpDbJXnTEHNOCTTa Ha NOJe3HH JxHBOT n epeKTHBHOCTTa Ha BaShn YpeD. Bpe3yNTat Ha TOBa I3nOJ3BaHETo Ha HenacBaUni HnNcKOKaYeCTBeHn TOp6nUck 3a npax MoKeJa do DobedeDo nobPeDei Ha BaWata npaxocMykauKa. TaKnBa UetNe He Ce NOKPNBAt OT Haawata rapaunz.
NIOBEue INHOPMaunHa 3a TOBa Ie NOnyUHe Ha aDpec www.bosch-home.com/dust-bag.Tam cIto Taka IMate Bb3MOxKHOCTTa da nopBuaTe HauInTe opINHnAHnToB6uKNs 3a npaxOcMykaUA.
B TURBO-UNIVERSAL®-Четка 3a tanuцерma BBZ42TB
I3ueKBaHe I3cMyKBaHe Ha npax OT TaunuHpaHn Me6eHn, Mpataun, ABtOMoBnHn CedaKnN T.H. BeHa pa8OHa onepaun. Ooc6eNo npiroDeHa 3a I3cMyKBaHa HxJbOTnHcKn KcMn. 3aDbXbaHeTo Ha qTeKOBn BAnrK CTBa qEz 3acMyKBaHn NOTKa Ha npaxOCMyKaKata.
He e Heo6xOaHMo eNeKtpnueecko CBpb3BaHe.
C TURBO-UNIVERSAL®-четka за под BBZ102TBB
I3ueKtBAHe H3cMkyBaHe Ha npaxa OT KINIMn C KbC
Φnp N MOKeTn, peCn. 3a BcNChk NaCTNkB E enHa pa60THa Opeaunr. Oocbeo NdoXoJMa 3a
H3cMkyBaHe Ha JxNBoTnHckn KOCmN. 3aDbNkBaHTo
Ha qeTKOBnBaJHK CTaba qPe3 3aCMyKbAHn NOtOK
Ha npaxOcMcyKaUkTa.
He neo6xoJIMO eJKeTpuecko Cbbp3BaHe.
D IIO3a 3a TBbPd NOB BBZ123HD
3a n3cmykBaHe Ha npaxa OT rnaKn noDoBe (napKeT, qhaHCoBn IIOouKn, TepaKota,...)
IyckaneBdEiCTBne
#
-Пьхнешто дошраквае рьковытката Вьрсу CMyКаTeJINHA МарКУ.
#
a)ФнксрайтсприцраКаHe NaKpaHnKaHa CMyKaTeJINnMapKyuB CMyKaTeJINnOTBOp B KanaKa.
b)Пи CBалг He Na CmkyatelHn MapKyu npntncHeteDbataФнКсИрauиБуToHaиИЗтERnete МарКуya.
Φn.r. 3*
a)Bkaipai Te bkoxaTbata B tenecKoTHnHata Tpb6a.3a Ocbo60kDaBaHe Ha Bp3KaTae 3aBpTe Ie KopoXbAteKATA HnI3DbPnaTe OT Pb6a.
bBkapaiTe pbkoxBaTkata do fHKcnpahe c npuapKaBAHe B TEneCKOnHnAtra Tpb6a.3a da ocbo6OAnTe CbeiHHeHNe ToHaTCHeTe BtynKata 3a De6NokpAne H n3BaTepeBkKata.
Φn.r. 4*
a)BkapaiTe TeneKoHnHa Tpb6a B uyepeHa Na oNoBata IIO3a.3a Ocbo6oxJaBaHe Ha Bp3KaTa 3aBbPteTne IeKO Tpb6ata N iN3dbpnaTe OT noPobataIIO3a.
b)BkapaIte TeneckoHnUHaTa Tp6a Do npuipakBahe B upepa H na noObaTau3a. 3a da ocbo6oHnte cbeiHHeHTo HtncHete Btynkata 3a De6nokpuane n3BaTe DpBxKata.
Φn.r. 5
Upe3 ernpynapane Ha nIb3raaunna MAniJET / nIb3raaunna 6BtoH B noCoka Ha cTepkata De6noknpaTe TeneckonnuHATA pTa bHa nHarlacete XeJaHata DbNxHna.
Φn.r. 6*
M6bTaye DbPkaHa Na pRnHApDNeXHOTN BbPxy KOM6HNpHaHATA IIO3a Hro 3aUpaKHe TbPxy CmykATEnhata / TeneckOHTNA Tb5ba.
#
XbaHete 3a 1e9cena Ka6ena 3a 3axpaHbAne O T MpeXata, H3eTneTe Do JoKeNaHaTbJKNHa N RO BKNIOHETe B KOHTaT.
Φn. 8 BkIouBaHe / n3KIIouBaHe
BkIIOUVABeI npXOCMyKauKATA KATO 3a Ta3N IeI HATNCHeTe 6yTOHa 3a BkIOUBAHe INI N3KIOUBAHe B NocOka HcTpeKNa.
Фиг. 9 Perynphae Ha cnlaTa Ha n3CMyKbaHe
Cbc 3abbpTaHe h KaONHeTo 3a perynHpaHe no nocoka h cTpeKATA moKe Da ce perynHa 6e3TeenHxo JenaHaTcNHa H13CMYKaHe.
Hncbk danaanaoh HA MOUHOCT => 3a nouchctBaHe Ha npax OT yVbCTBHTENH MATEPn, HnAp. TANupeN, nepdeta, nT.H..
Cpehen Dnana30H Na MoUHOCT 3a exeJHeBNO nouchCTBaHe npN neko 3aMbpcBAHe.
IopeH dHaapanaoH MaOuHcT 3a nouchCTBaHe Ha rpybNoOBn HacThnKn, TbbpDn NpOBe H cNHO 3aMbPCBAHn.
H3cMykBaHe Ha npax
BHHMaHne
B 3aBnCmOCT OT BHa Ha BaShn TBbpD nOp (Hanp. rpanabn, pyctknKaHNPiOnQHu) IIO3HTe 3a nOda ce n3HocBaT. 3aToBa Tp6Ba Da npOBepBaTa H peoBHN hItePbAnn OTO BpeMnIb3raGATA Ce cact H aIIO3ata. N3HOceHN, nIb3raAsn Ce uactn C octpn Pb6OBe MoRat Da npuHnAT yBpeJdAHH Bbpxy yBCTBnIeHN TBbpN IODOBE KATO napKET nII INHOyeM. PpON3BODInTeJIr He HOCN OTROBOPHOCT 3a EBeHTaJIH NoBpeDN, KOITc OE npuHnHBaT OT N3HOceHa NIOBOA DIO3a.
Φn.r. 10
PerynnpaHe Ha npeBknIouBaauTa ce noDOba IIO3a:
■ KINHMN MOKETN

Tnadkn nooBe

Ako 3acMykBaTe No-rolemn Yactn, Toraba BHImaBaTe da 3acMykBaTe BHNMaTeIHO Te3n YactnE nEdha CneD npyra, 3a Da He ce 3anyu SmyKaTeHnna KaHn Ha noobota dio3a. Pnp Heo6xOJmoCT 6n Tp8bBano da nobHrHeTe IIO3ata, 3a Da Morat No-do6pe da ce 3acMyuat cactnnte 3ambpcBaHHa.
Φnrg. 11* N3cMcyKBaHe Ha npax c dOnbIhnteHn npHaadJeKHOCTN
IocTaBeTe IIO3HtE Cnopei HyKdATo BbPxy CMyKaTeHHaTa Tpb6a nn pkoXBatkata:
a)Дюза 3a Фугни 3a ИЗсмУКВане Н прах OT Фугни И вгл, И T.H.
b)Диоза 3a танцеря 3a ИЗСМУКВане Ha npax OТ танцерни Мебели, Завеси, И.T.H.
c)ДIO3a 3a TbрДи ПОOBИ HAcTHIKNI
ЗИЗМСКУВае И пax OT TBрДи ПОOBИ HAcTHIKNI
(фагИССОВIIПLOЧКII, napкET И.T.H.)
BkapaTe TeneckoNHyata Tpb6aDo UpaKaBaHe B Tpb6HaTa NaHactaBka Ha JIO3ata 3a TBbpDn IOOBOH HAcTINIKI.
3aocbo6oxdaBaHe Na Bp3kata HaTnchete De6IOKpaataBtynka HnterneTe TeneckOINHata Tpb6a.
TouncBahe Ha 3aunTHnaФHnTbp Ha MoTopa
POnuCTBaIte peoBOH o paBn HHTepBaN O T BpeMe 3aunTHNnФHnTbp Ha MoToPA nOcpeDCTBM NOUYKBAHe nnHnHnPaHene!
Φn.r. 21
- OTBopete Kanaka Ha npaxoynoBHTenHTo OTdeneHne.
a)Ocb0bodete3auntnTHnФnltbpHaMOTopa qpe3 cTpaHnHnHTerIneOTΦHKcTaOpaHn3BaKaDahe B nocoka HcSTpeNkata.
b)Поунсте зашипгия силър на МOTOPа уретитунbaHe.
c)PnCnHNO 3aMbpcBaHe 3aUHTNHT pntbHa MOTOPa Tp8Ba Ce n3nepe.
CneTobaoctabeteΦnITbpaJaH3cbxHeMHmym24aca.
d)CneI ONUCTBAHEO, NOCTABe TzeaUNTHNHa ΦnTbP Ha MOTOPa B ypeDa, ΦHKCSpaIte C npNpuPAKBaHe N 3aTbOPete KanaKa H naPaxOYNoBtENHToO tDeneHence.
CmHaHa H3dYXbaaHΦnTbp
PpaxocmykaKa c MmKpoxHnHeHnueh fHnTbp
Kora Tp8bA da ce CMeHn: npn BcKa HOBa ONAKOBA CMeHReMn pHnTprn
Φur. 22*
- OTBopTe KaIaKa Ha npaxOyNobHTenHTo OTdeneHne.
a)Upe3 3aJeIcTbAne Ha 6bNoKnpaunn IocB Nocoka Ha CTpeNkata De6bNoKnpaIe DbPkaHa HnInTba.
b)N3BaTeMeMHKPOXnHneHnHnHnΦnTbp.
c)MnKpOxHnEHHnHT pntbP MoKe Da ce n3nepe.
CneTToBaOCTaBeTeΦHnTbpa Da nocToHnMnKo 24 yaca,3a da H3cbxHe.
d)N3BaTe MmKpOxHnEHNHnHnΦnTbp. NocTaBete HOB MmKpOxHnEHNHcHΦnTbp B ypeda.
e)IocTaBete B ypea nФнкираite DbpxkaaHaФnntbpa.
Mby paBby, yTO Bby ocTaHOBNn CBOI Bby6op Ha nbilecoce Bosch cepnn GL40.
B hactoanei Hnctpykun no 3Kcnnyataun npedctabnehbl paanuhbte moen cepn GL40. IOnToM yO3MOxHNO,TO heKOTOpbyeuKNUn npHnAaNEXHOCTN,ONcaHbIe 3decB, Moryt oCytCTBOBat y Bawaero npn6opa. TOb6b rapaHTnpoBaT onTNMaHbN pe3yNtat y6opKn, cneJyET nCNoJIb3OBat toNko oprInaHbNbe npHaadNeXHOCTN Bosch, p3pa6oTaHHBe CneuaHbno darn Bawaero nbinecocA.
Coxpanhite Hnctpykunio no 3Kcnnyatau. Pnnp nepeadae nbIbeNecoca HOBOMY BnaIenbIy He 3a6yIbTe nepedatb Taokne Hnctpykunio NO 3Kcnnyatau.
Pa3BepHnTe cTpaHnCbI c pncyHKamn!
Oncanne np6opa
1 Pereknlouaemam hacaika nla uctkn nona/kobpa c pa36noknpoBOuHm Mytoh*
2 ⅡIeTkaДЯТБePdBxHAnOJbHbX NOKpbTnCpa36NOKpOBOuHOMyΦToN*
3 Typ6oouetka TURBO-UNIVERSAL® dans nona
4 Puyka wlaHa
5 BcabsBaIouuIuIaHr
6 TeneckoNuecka Tpy6ka C KhoNkoH-NoI3yHKOM (n pa3boknpobouho MyΦtoi)
7 TeneckoNueceKaTpy6ka C MyΦToH-NoJ3yKOM (n pa36nokpoBouHoMyΦToH)
8 CeteBoi Ka6eBb
9 NapkoBka Tpy6kn
10 Pyiayar fHKcaTopa
11 Peewetka BeHTnIaTopa
12 Cmehhbl nbIine6opHNK
13 BbInyckHoH nIbTp
14 MoTOpHbI ΦnIbTp, MoIOuINcA
15 Pyuka
16 Kpbikka nbinec6opHoro oTceka
17 INHINKaTOp 3aMeHbI nbInec6OpHNka
18 NapkoBOUHbIeΦHKcATOpbl (C HnKHei CTOpOHbl nblncoca)
19 BbIKHouateIb nperyrTop MoUHOCTN
20 DepeKaTeB dIy npHaadneKHOCTeI
21 Kombo-n-hacaKa
22 HacaKa dny ydaenHn npn cBepneHH
3anachbIe yactn n cneunabHbIe npHaadJIeXHoCTn
A YnakOBKa CmEHbIX nbIine6OpHKnOB
Длбобсесеня ONTHMaHbHorO yPoBnRo MoUHocTn
пнбора peKOMeHdYetcH ИСПОБЗOBaT bOpINHANb-
нь Melkkn dЯ nbIи: Tn PowerProtect
(BBZ41FGALL).
B ha6ope: 4 cmeHbIX nbIeSc6bpHnka c 3actEckko1 rHnneHnueckm MknpoΦnltbTp
Mby pekomehyuem Bam hcnolb3OBaTb NCKHouHTeBHO opunhaNbHbIe MeuKn IJIIN.
3TOT BICOKO3ΦΦeKTHBHy nIbIecoc 6ObcneuBaET BbICOKn pe3yIbTat y6OpKn npn IcNOnb3OBaHN BbICOKaueCTBeHHbIX MeWKOB dIg nIbI. TOLkO IcNOnb3OBaHN BbICOKOkaueCTBeHHbIX MeWKOB dIg nIbI. TaKHX KAK opRnHaJIbHbIe MeWKn dIg nIbI. Bosch, rapaHTpyE tdoCTNXeHne Noka3aTeNei KnaCCa 3ΦΦeKTHBHOCTN 3HeprONTOpe6NeHn, ydaHn eNn n bInenOrNoaIOuSe i cNoC6HOCTn, yka3aHbIx Ha 3tIKETe 3HeprONTOpe6NeHn.
IcnoIb3ObaHne MeKOB DnI nbIn Iooee Hn3KOro KaueCTBa (HaNPIMep, 6yMaXkbIX MeiKOB) MoKET 3NaUHTeBHO NOBIIaTb Ha cPOK CnyJb I MoUHOCt b npbopa. IcNoIb3ObaHne HeNOxDoxuINs HnEkaueCTBEHHbIX MeiKOB DnI nbIn IooMOTb OycNLOBITb BO3- NIKHOBeHne NobpeKdEnH BaWero nbInecocA. Ha7a rapaHTnHa paacnpocTpaHReTc Ha yCtpaHene NoBpeKdEnH, oBycNoBHeHHbIX BbiyeKa3aHNbIMn pNpuHAMn. Boone nOpObHyIO INΦopMaunIO MOxHO NaHTn Po CcbInke www.bosch-home.com/dust-bag. 3Decb Bbl MoKeTe 3aKa3aTb HauN opRnHaNbHbIe MeKIN dnn PbJIIN.
B Typ6oütka TURBO-UNIVERSAL®ДЯ мягков Me6eni BBZ42TB
06ecneuBaet OndOBpeMeHHyU ChcKU YeTkoI ydaJIeHne PbIIN npu YnCTKe MraKoM Me6eN, MaTPacOB, ABTOMObIbIbIX CnDEHNI T.D. Oco6eHNO 3ΦΦeKTHBHa pRy UdaJIeHN WpCtN XnBOITbIX. BAnIK YeTKn PnBODHTcB DnBXKeHne NOTOKOM BCaCbBaEMO rblNEcOCOM BO3dYxa. DOnONHInTehBi h NcToHKn 3NeKtpo3Heprn He Tpe6yETc.
C Typ6oouetka TURBO-UNIVERSAL®-Для наla BBZ102TBB
06ecneuHaet OJHOBpeMeHHy UcIckTu KOTKOn I ydaJIeHHe NbIIN N3 KOBPOB HANOLnbIX KOBPOBIX NOKpbITN C KOPOTKIM BOPCOM NIN NIObIX DpyrIX HAnOJIbIX NOKpbITN. OcOBeHNO 3ΦΦeKTHBnA pIn ydaJIeHN WepCTN JXIBOTbIX.BaIIK UeTKn PnIBOHTCN B DBNXeHHe NOTOKOM BCaCbIbEmoR OblncOCOM BO3Dyxa.
HacaKa dna ydaenn nn npn CbepeHH
Pnc. 13*
3aKpeHnTe HacaKn ydaNeHn nbIn npn CbePENnHa pyKOHTke n pacNOJoxHte eTakm O6pa3OM NO OTHOeHNo K cTeHe, YTObI OTBepCTne HacaKn HaxOINOCb HenoCpeCTBeHNHO nad npocBepnBaEMbIM OTBepCTHeM.
- YctaHOBITE NJIeCoc HnH3KN yPOBeHb MoUHOCTN 3aTEM BKNIOUHTe eRO.
HacadkaIydaIeHnIbIINpnpCbepeHn6ydet ydepKBaTcB Tpe6yemOMNOnOKeHH3a Cuet MOUHOCTBCaCbBAHH. Bo3MOxHO, BdaIbHeIeMwOkXetc HEO6xoDmblM yBeHNHTb MoUHocTb 3aBNCUMoCTNOT MaTePnana CTHeB, B KOTOPINPOCBePnBaETc OTBepCTne, UTO6bl OecneuTH HadeXHoe ydaIeHnE bIIN npn nOmoiN hAcADKn, pnp CbepeHnToKkAaNb6ydet ydaIaTbCABTomAtuYeCKn.
UeTka Turbo
Ee HcnoJIb3OBAHnIO yXoYo 3a HeI Bb HaJedTe B npInraeMoN hNctpyKunn O NKcnnyatauN.
Pnc. 14
BoBpMRAKOPTKINpepebIBOBBnpoUeCCSEy6OpKN HcN0B3yTe npakOBky Tpy6KnHa 3aDHei CTOpOHe pnp6pa.
- Посце вьклоченя nbIneococa BCTabTe ζтКУДЯ NOHA KIpUcOKB M rHe3do, pacnONOKeHHe Na 3aДнeH CTOPHO nbIeococa.
Pnc. 15
Pnpepehoce uee3 npenTCTBna, HapnMep, no lectHncaam, npbop moKHO depkaTb 3a pyky.
Pocne y60pn
Pnc. 16
a)BbHbTe BnKu n3 po3eTkn.
b)CneRka notraHnTe 3a ceTeBoi Ka6eBn OTnyCTHe erO -Ka6eBn ABOMaTHueCKN CMOTaETc.
Pnc. 17
Длгхраненя/трансорпуновки nbilecoca moхноисплььотаьт napkoBoOчны зашелки,pacnoLoKeHьchesn3y.
a)IocTaBbTe nbInecoc BepTnKaIbHo.
bBCTaBbTe HacaKny dIy Iono KpUcKOM B rHe3do Ha HnKHei CTOpOHe npH6opa.
3aMeHaΦnbltpa
BHHMaHHe: nepeK kaxdoi 3aMeHOJ fHbTpa Hn
- nbilenc6bopnka BbIKnouaTe npn6op!
3aMeHa nbIine6OpHnka
Pnc. 18
EcnH hacadka He kacaetcna nona npn cAmoB bIcoKoM MoUHOCTN BCaBbAHIN, a HNDkATOp 3aMeHbI PbIEC6bOPnKa HA KpbIeke NIOHCTb JO KeTbI, Heo6XODmO 3aMeHHTc CmEHbI PbIEc6bOPnHK, daKe ecn OH eue He hanoTHe. B 30m Cnyae Heo6XODmOCTb 3aMeHbI Onpe-TeNEHETc BIVOM CodepKAsIeOcR B PbIEc6bOPnKe Mycopa. IpOBepbTe, YTObI hACaKa, BCaCbBaHOuJrA Tpy6Ka n UHaJIr He 6bII NaBtBi PbIbIO, Notomy To HNDkATOp 3aMeHbI PbIEc6bOPnKa B TAKOM CNYae ToKe cpa6atbIAeT.
- 3acopenhnaIerko ydaanntb,CHBpyky co IJnHa.
Pnc.19 OTKpbiBaHne KpbiIuKm
a)PToTnHy bpyar fNkcatopBa HnpaBneHn CtpenKn, pa36JoknpoBaT KpbIky.
b)OTkpblk pblkky B HanaPbIeHHN CTpeKN.
Pnc. 20
a)Notaryb 3a 3acte Kky, 3akpoTe Cmehhbl nIIEc6OpHk.
b)BbHbTe nbIe6OpHNK.
c)BCTaBbTe HOBbIM CMeHHbIM nbIeSc6OpHNK.
dBCTaBBTe CMeHHbI nbIeSc6OpHKn B dePkaTeNb do ynpa.
BHMaHHe: KpbIiKa nbIeScbOpHOro OTecka
3aKpbIbAeTcTToJIbKO pIN BCTaBNeHHOM nbIInec6OpHnke.
Unctka Motophoro fHbtpa
Motopnblfnoht Heo6xOIMO perynpno Ounuatab nyTt mPombIKN NIN BbIKoJaUBaHnI!
Pnc. 21
- OTKpoIte KpbIiKU nbJIeSc6OpHOrO oTeKa. PnC. 19
a)Ocb6oDneI MToOpHbI ΦnBtpr N3 KpennEnHH,NotHaY bero c60ky, YBaHbTe B HappaBneHH, yka3aHOM CtpeKoN.
b)BbIKONOTNE nbINb IN3 MOTOPHORO dINbTpa.
c) B cnyuae cunbHoro 3aarp3HeHHn npomOte ero.
ДаиTeФильТуобсoxHyтВ TeueHne MHHmym 24 yacob.
d)Pocne OuchTkn BCTaBbTe MToOpHbI QnHbTp Ha MeCtO, 3aHcKcnpyteero n 3akpoTKe KpbIuKy nbIpec6OpHOrO tCeka.
3aMeHa BbInyckHoro fNlbTpTa
TbIeoc c rHrHeHHueckm MHKpOΦnJbTpOM
ФильтспдуетмehятскakdoнHOBOyynaOKKOM Cmehhblnxblne6bOpHkoB
Pnc. 22\*
- OTKpoIe KpbIshky nbIeSc6OpHOro oTeKa.PnC. 19
a)Haxmtepeiar qncatopab HnapabneHH nctpeKN, npn 3tOM depkateb nibtpa pa36nokpyetc.
b)BbHbTe rHneHHueckn MmKpOΦnIbTp.
c)TnHneHnueckn MHKpOΦnIbTpMOXHO npOMbIbTb.
ДаиTeФильтуpyобсохнутВ teuehene MHHmym 24acob.
d)BbHbTe rHnHeHnueckn MmKpOΦnIbTp. BcTaBbTe bNbIeCOC HOBBI rHnHeHnueckn MmKpOΦnIbTp.
eBCTaBte depKataTe b pInbtpa B np6Op n 3aФHKcpyuTe.
Tbinecoc funbtpom HEPA
Ecnn BaW npn6bOp ocnauen HnIbTpom HEPA,TO pa3 B ToD 3OT nIbTp Heo6xoJIMO MeHrtb.
Pnc. 23\*
- OTkpoIeKpblkUy nbIne6bOpHoro OTceKa.Pnc. 19
a)HnKmte bpuar fncCatopra B happaBlenHH CTpeIKN, npn 3OTM fnhbtp HEPA pa360knpyctc, n erO MOKHO 6bET BBHyTb.
b)BCTaBbTe HObI ΦnIbTp HEPA n 3aΦnKcnpyIte erO.
Ponce yobkopn MeNkoI bIIn ONUCTHE MOTOPHbIΦHbTp nyTEm bblOKaunBaHNu I, npri HeO6XoIMOCtN, 3aMeHHTe rHrHeHueckn MHKpOphbItp nnΦHbTp HEPA.
yxoA
IpeepKaKdoOnuChTkoNbIineocaBbIKIOUaHteeroN bIbINMaIe BNkUcTeBGOcBAKoEINa3POzEtKn. BbIineocn I nlaCTMaCCobBeI pNHaDJIeXCHtN MoXHO uCHTb O6bIbHMn CpEDeTBAMn dIy CNTKN PnaCTMaCCbl.
He nCnoIb3yIte 6abpa3NbIbe YIcHTMaIe cpeCTBa, cpeCTBa IaI MaIbTb CTekONnn YHnBepCaNbHBe moUcIe cpeCTBa. He norpykaIte bIyeNoc B yOvD.
PnI Heo6xOdHmocTn bIyIe6bOpHb OTCeK MoXHO ouHCTNb C NOMOuBIO DpyrOro PbIeNcOca, IpOtepeTb cyXo TpIaONoKo HIN NoUcHtNb KInCTOkoD nIpaIIH. OctaBnE m 3a c0oB npaBO Ha BHeceHne TeXHuecknx n3MeHENH.
ro
PekomeHnyeMo BnKOpNCTOByBaTn BnKlOuHo Haui opriHaJIhBiMiXKn DnI nnIy.
Bau npctpi E BncoKpOpykTNBHM nNOCOM, RKn npn BnOKpCTAHNI BnCOKoKICHX NMIKB DnA NnNy DO3-BOJNE OTPMATN DYKE XOPouHn pezynbTaT pN6bpAHn. NIwe BnOKpCTAHNI BnCOKoKICHX MkiKB DnA NnNy, OOCBnBO OPOHaJIbHNx MIKB DnA NnNy BiD Bosch, 3a6e3neuey DoCRAHeHH NOKa3NHKIB KNacy eheproekeTKBHOCTI, 3a3HaueHH Na MapkyBaHHi ehepreTNUOi MITKN EC, BCMOKtYBaHHa, a TAKOX yTPMByAHn NnNy.
Do toro JX, BKNOPCTAHH MIIKIB HNKHOJI KIOCTI, HAnpNK- na, naneporbox MiKIB) MOKe cytTEBO 3HN3HnT PnBa-nictb cnyk6n i notyckHCTb npnnaJ. HapeuTI BKNOPCTAHN HeBIDNOBIDH NMI KIKD IaN NnY aBO MIKIB H3b-KOJI KIOCTI MOKe npn3BeCTn Do noNkoJKeHH NINOcoca. Ha Taki noNkoJKeHH NaHa rapAHTI He noNiproEcb. Doknadiue npo ue dNB. www.bosch-home.com/dust-bag. Tam MoKHA 3AMOBHTn Haai opriHaJIbHi MIKNI dnn NINOcociB.
B UItka TURBO-UNIVERSAL® dIa M'kaNX Me6nIB BBZ42TB
Ondohuache HnueHHH 10KIO Ta 3bnpnnny 3 M'kHex Me6nB, MatpaicB, cnDInb abTo I.T.D. Ooc6nBO 3pyHa npn uHneHHi Bid wepctI TBapn. Ban tIKn pnbOnBtnc B DIO NOTOKOM nobITpnNIOcoca. Enektprune XknBHeHH iE noptiphe.
C UItka TURBO-UNIVERSAL® nla niDnorm BBZ102TBB
Ondohayche nHsEHH Ta 3bpaHHnny 3 KopoTkoBOPcoBHX KINIMIB Ta KINMOBHX NOKPNTiB i3 KOpTkM BOPcom Ta noDi6HNx NOBepXOHb. Oocblno 3pyHa npu nnueHHi BiD uepcti TBapHn. UItka npBODntcB a DIO NOTOKOM nobITprnNOOCocy. EneKtpnuHe kNBLeHHn H He Notpi6He.
D HacaKa dIy TBepDoi niDnorn BBZ123HD
Дячишигнгладенькоипдоги (napket, плтka, tepakotа...)
Ipeep npim BHKopncTahnham
Man. 1
- Hadiinthe pyky Ha nHa, 06 cnpaioBab fikcatop.
Man. 2
a)Bctabe 7tuep BcMOKtyBaIbHoro 7naHa B rHi3do Ha Kpnu.
b)PnB BiD^ BCMOKyBaJbHorO 7naHra HATNCHTb OndHouacHO Ha 6nbBA BnCTyn Ta BnTARHITb 7naHr.
Man. 3*
a)BCTabe pyky B TELECKONiHu Tpy6ky.ДЯ BiD'eHaHnTHPOxN pOBePHiTb pyky Ta BNTaHrHiTb i3 Tpy6Kn.
b)BCTabe pyuky B Teneckoichiy trpy6ky, uio6 cnpaioobab pikcatop. Abi bd'edhaTn, haNTCHt b P03HIMMyfTy Ta BHTaRHTb pyKOTKy.
Man. 4*
a)BCTabe TeneckoniuHy ty6ky B natapy6ok Hacadkn dna iinor. LioB bi'ednatn pyuKy, tpoxn npobepHt b ty6ky Ta BnIMtB 3 hacadKn.
b)BctaTe Teneckoniuhy Tpy6ky B naTpy6ok HacaKn dna iinorng, uo6 cnpaauOBa bikcatop, Ta nobepHITb. llO6 Bi'd'edHnai, HaNTchITb Ha po3bIOnkyBaIbHy MyfTy Ta BnTRAFHITb Teneckoniuhy Tpy6ky.
Man. 5
- IpeMeIcTHBmI 3cByHMaHKeTMy a60 KnaBIyU B HnpaRMky, nokazahOMy cTpInkoIO, po36NoKyTe TeneckOniHy TpykSy Ta bCTaHObItb 6axaHyDobKxHy.
Man. 6*
BCTaBTe KOM6i-Hacay B TpMau Ta 3aafikcyIte HBCMOKtYBaIbHi/TeneckoIuHn Tpy6u.
Man. 7
Bizbmitb ka6ebj kbnBneHHa Bnky, BntrHITb H a notpi6hny doBxHNY Ta BCTabe BNky B po3eTKy.
Ma. 8 YbIMKHeHHa Ta BmKHeHHa
ПиLOOC BMNKa€tbcI BUMNKa€tbcHaTNCKaHHM Ha KONKy yBIMKHeHHra/BIMKHeHHra.
Man.9 PerynIObAHnH noTuyKHOCTi BCMOKTyBaHHa
IotyHKiCbB CMOKtYBaHHa MOXHa PnlaHbO peryIIOBAtn, NOpeTaouH peRyNIOBaIbHy roNOBky HAnpRMky cStPiKn.
PekmCnabkoBCMOKtybHn =>ДпрнбпаннлгкошкдуваньMATEPIANIB,TAKHxK'MaKMeBNI,rapdHHNTOIO.
PexnB BCMOKTyBaHncrepeHbOInotYXHOCTi Ⅱla QoDeHHOrO uHcHn3 He3HaHnM 3a6pUdHHeHHM.
PexnB VBCOKOI NOTyXHOCTI BCMOKTyBaHH 1nnuNueHHN CbNo 3abpyDHeHORO KINMOBO NOKpHT, TBepDo i ndnT gn Ta npri CTiKOMy 3abpyDHeHHI.


UHsEHH
Ybara!
- Покптгн haacdkn дя пidlnor n3hoowytbcB 3aeneKHOCTi bID bIaTbNcOeT Bauoi TbePdoi niDnOrn (hanpNKnlaD, wopctKa, rpy6a nnrTa).Tomy Bam notpi6hOp perynlpho nepeBepiRtn NiDOnBy hacaKn. 3HooheHa NkHna quaTHHa hacdkn 3 roctpMm KpaamM MoKe nouKOAnTH nerKoyuKoJxBaYbAHy TbePdy niDnory, hapNKnlaD, napket a60 niHoney.M Brpo6HnK he BiDnoBiqatmte 3a moXnBi 3bNtKn bID noWkoJdKeHb BhaC1IOK 3HOweHoI hacdkn dny niDnOrn.
Man. 10
PeryIIOBaHHaHacAniDnIiDnOri3nepeMnKaueM:
ДЯ KINIMIB Ta KINIMOBNX NOKPNTTIB =>

■ДЯгадькн NOBepxohn iDnorn

Kkso Bn BCMOKTyte Nnlococm BeNki qacTockn, CTeKTe, 6oBCMOKTyBaHHaBn BiDyBaNoCb NOdHn 3a pa3 Ta 6opepeKHO, a6n He 3aBcBcBcMOKTyBaIbHN KaHAn HacaKn. 3a Heo6xidNocti NotpioH TPOxN pIDHn HacAdKy, 6o6 qactOch6pydu BCMOKTyBaINCb Kpaae.
MaI.11' UHsEHHa 3doatKOBm oBnaHaHHa
BcTaBte pyky a6o Tpy6ky B nOtnpi6Hy hacaiky:
a)HacaKa dna ⅢiHH: dna YnueHHA iHH, KytIB ToIO.
b)HacajkaIaIyM'kNX Me6nIIB:IrauIeHHMa'M'kNX Me6nIIB, noptbep Toio.
c)Hacada kIa nTbe Tepdoi niNpornI dIy uIeHnnb TbePDoO noKpNTTn (nnTKn, npKeytToo)
BCTaBe TeneckoniuHy Tpy6ky B naTpy6ok Hacaikn dIy TBepdoi niDnOri Ta noBepHITb do φikcaii.
ДиЯ Bi'd'eHaHnHa HatncHt b Ha po36NoKyBaIbHy MyfTy Ta BntaHtB TeneckOniHy Tpy6ky.
Man. Ouichienn Hn hacankn n Tbepeoi ni dorn
a)Hacaiky cniD ouuataHN BCMOKtYBaHHm 3Hn3y.
b)P03piXte HOKnIaMn HnTKn Ta BONocca, 1O MoHaTOnIcNb Ha icITky, Ta npNbePeItb ix BCMOKTYBaHrM.
Hacadka dny cbeprnHH
Man. 13*
- PnεδdηaÎre Hacáŋdy λ不断增强учнТа npntctabTe do CTiHn TAK, Μιδ Mιcè CbeρdniHn ONNHNOCN pIЯMo HαnbPOTN OTBOPy Hacádci.
BctaHObitb haimeHuy notyHKHCTb BCMOKTyBaHH Ta yBIMKHITb NINOOC.
HacadkaIINCBepdInHHTPMaTHMeTbCaHaMiczi 3aBdKCNiBCMOKTyBaHH.
A6n HacaKa dJa CBePdNInHMy MiHO TpMmaIacra, MOKJIbNO DOBEdTeBCa 36iNbSHTN NOTyKHiCTb, ce 3aJeKntb BiJ kOcTi NOBepxHi CTHH.
PiJ ac CBePdINH yBeCb dpi6Hnn nIN BCMOKTYBaTHMeTbCra.
Uitka "Turbo"
KaIIO Bau nINOCOC oNsAChenu icITkoHO "Turbo",TO npaDok II BVKnOpHCTaanHa Ta obcnyroByaHnBa BN 3aHneJy iHCTpyKuII do itkn.
Man. 14
Пд acк корOTКИ Иперв В рбото мOKну
КорЧытВЯСТС TИМСAOВИМ КрINLEHНМ, сTO
3HAxOДТьСА НТЛБHOMY B6Oи ПИНOCOCA.
Плесь ВИМКЕннь BCTaBte raOK hacakn y na3 Ha HxhHbOMy 6oCi nNOCoca.
Man. 15
Пд ус пибирань, habрклад, на схожа, плосoc moхна посяпocHTN, trmaюу 3a руky.
3akinuehenpa6oTu
Man. 16
a)BntarHtB ka6eJb KINBnEHHA.
b)3Jerka notarHtB 3a Ka6eNb JxHbneHHa Ta BiDnycTItb, BII ABOTMATuHO 3MOTAETbCA.
Man. 17
Itnococ i3 qinbtpom "HEPA"
KIOIINOCOC6bIaHnBICOKoeEeKTHBNM CyHM pIbTpOM,HEPA"zamHouTe Horo 0OpOky.
Man. 23*
BivdkpniTe Kpnwky BiDineHHa dny Nnny. Man. 19
a) Po36NoKyTe ΦiInbTp "HEPA", HATnCHyBnHa ΦikCaTOp y HanpRmKy cTpInkN, Ta BnIMtB NOrO 3 nInnococy.
b)BctaHOIBt Ta 3aΦikCyte HOBN ΦiNbTp "HEPA".
Pnicn np6bpanna Dp6H0ro nHny o6bO3KOBOBtinaTe 3aXnCHnФinTpMoTota, npoNTpe6iZamHInΦinTp"Micro-Hygiene"aboΦinTp"HEPA".
06cnyrobybaHHa
Ipeed KOKHnM UINSeHnRm NINOCoA o6OB'RA3KOBOMBHKHb Ioro Ta BID'EDHaTte BID eEnkTpOmepexI. INIOOCa T pNactKOBe pPnnaJdMa MOKHa MNTBnAHnHMn MHNHmN 3a06Amn dI NaCTMaCn.
He BHKOPINCTOBYte a6pa3aNBHI 3aco6H, MNIHI 3aco6H dna cKNA a6o yHIEpcanbHI MNIHI 3aco6H. 3a6bOpOHeNo 3aHypoBAtu nnNococ y body!
BdJIeHnA dI nnny MoKHa noHcHTn 3a donOMoHO iHwO rnoococa a60 npOCTo npOTeptn cyxOHO raHuypKOu YU tIKTOO.
TexhiXapaKTePcHcTHKnMOKyTb 3MiHOBaTHc86e3 nonepedxehn.
gall gall ydlal ydgdal
a 1000
22
19 8j
a
.
aill jilj gail jai (b
aannnnae
j 1
aall jiljssall cjj jai. gall jiljssall jd (d
Aaill
a aikai jilal Jolk jj (e
aalall aikally aiiall pnn jns Jilln nn n
ailllll llll 1 aalldy sllll jao agailall ayuill
a
ssaaia aaiial g jiajll aiia y iaia iiaia
Aaall aal all jiall u5 (d
aee aee
a
aaii iia aaii iie gic daiy
1111111
19 8jua ay jia jia cui
a
aill 0il (jlll
Aaia 15 a aai all aie jil bii i (b
111 111 111 111 111 111 111 111 111 111 111 111 111 11
a a a a a a a a a a a a a a a a a a a a a
13*
0
1e 1
aal
0.2jul 4.33
1.5≤ 2( 0.5,0.5,1)
y
g 156
a a a a a a a a a a a a a a a a a a a
AyySoll 0jssll/ lal jysslo g aai
7
Jg j 1
a a a a a a a a a a a a a a a a a a a
biul
4
aalal la la aayd lill cll y
chle jy 11. (gjll) jnll bll xia) aill aia
alil 1gall alily aill wll asiall oxell
i 1
aalall aall alll llll 1
alilio jol plisial joc gill jol jol jol jol
ii
10*
<=
1
15
<=
alall
gle labe gle ge y jy 1i bai y dai
a
iill wrrr rhrnne nnnnne nnne nnnnne
Juii jiu ciLuiy iji bui guil
Liyuolal yuolal yuyolal yue oluyuol uauayuai
yulai ulu oag ayall aial ayale ayuok je oyue al jye
luyuoyuol uayuoyuol yuyuoyuol yuyuoyuol uuyuoyuol uuyuyuol uuyuyuol uuyuyuol uuyuyuol uuyuyuol uuyuyuol uuyuyuol uuyuyuol uuyuyuol uuyuyuol uuyuyuol uuyuyuol uuyuyuol uuyuyuol uuyuyuol uuyuyuol uuyuyuol uuyuyuol uuyuyuol uuyuyuol uuyUYU 1yU yU yU yU yU yU yU yU yU yU yU yU yU yU yU yU yU yU yU yU yU yU yU yU yU yU yU yU yU yU yU yU yU yU yU yU yU yU yU yU yU yU yU yU yU yU yU yU yU yU yU
Caaaal lssg cagcagaaa aas aas www.bosch-home.com/dust-bag
aalal alal yaiy iayi yaiy iayi yaiy iayi yaiy iayi yaiy
BBZ42TB TURBO-UNIVERSAL B
Culjlll lal, glll, glll, clll, gdd, kki, g
Clll llll lalai aalia. dai jao gai
Aikilln glilll bailll jai alaiy
a bally 8 aall baill iia g baii jg ic ci (a)
a wul yu uuiy g jb gbcai baii g jh dic (b)
jll pab
3\*
a aal alal alal alal y ayyayyayyayyayyayyayyayyayyayyayyayyayyayyayyayyayyayyayyayyayyayyayyayyayyayyayyayyay y
4\*
a a a a a a a a a a a a a a a a a a a a a a a a a a a a a a a a a a a a a a a a a a a a a a
ar
alwJ Bosch A5Joo aiko ge aljai jgl 1d lissay .GL40 cJrall
cljrlalb Bosch Joo aiai Coo y jia dai jol jyliy
cillgll and jzlll jy jll gll GL40
plizilgle JauyI slcle jy iakko jyogie aagull
laoylpi ad jyBosch Joo ayuall uuskill cldall Aikoo ayii juii juii qiu kai Iuyas
jai wukell puiu all gaoaiaiyu juy baiy
2j( 2 - 1) ( 2 - 1) ( 2 - 1)
*aabaaabaaabaaabaaabaaabaaabaaabaaabaaabaaabaaabaaabaaabaaabaaabaaabaaabaaabaaabaaabaaabaaabaaabaaabaaabaaabaaabaaabaaabaaabaaabaaabaaabaaabaaabaaabaaabaaabaaabaaabaaabaaabaaabaaabaaabaaabaaabaaabaaabaaabaaa aag aag aag aag aag aag aag aag aag aag aag aag aag aag aag aag aag aag aag aag aag aag aag aag aag aag aag aag aag aag aag aag aag aag aag aag aag aag aag aag aag aag aag aag aag aag aag aag aag aag aeg 1
*aallll lgl 4
*aallll lgl 5
*aallll lgl 6
*aallll lgl 7
*aallll lgl 8
*aallll lgl 9
*aallll lgl 10
*aallll lgl 11
*aallll lgl 12
*aallll lgl 13
*aallll lgl 14
*aallll lgl 15
*aallll lgl 16
*aallll lgl 17
*aallll lgl 18
*aallll lgl 19
*aallll lgl 20
*aallll lgl 21
*aallll lgl 22
AE United Arab Emirates,
aal 1
BSH Home Appliances FZE
Round About 13,
Plot Nr MO-0532A
Jebel Ali Free Zone - Dubai
Tel.: 048814401
mailto:service.uae@bshq.com
www.bosch-home.com/ae
AL Republika e Shqiperise, Albania
AERTECH SH.P.K.
Rruga Qemal Stafa
Pallati ri perball Prokuroris se
Pergiithshme
Hyrja C Kati 10
Tirana
Tel.: 066 206 47 94
mailto:g.volina@aertech.al
HEATHERTON, Victoria 3202
Tel.: 1300 368 339
mailto:bshau-as@bshg.com
www.bosch-home.com.au
BA Bosna i Hercegovina, Bosnia-Herzegovina
"HIGH" d.o.o.
Gradačačka 29b
71000 Sarajevo
Info-Line: 061 100 905
Fax: 033213513
mailto:delicnanda@hotmail.com
BE Belgique, Belgie, Belgium
BSH Home Appliances S.A.
European Trade Center Building,
5th floor
1784 Sofia
Tel.: 02 892 90 47
Fax: 02 878 79 72
newsletter:informacia.servis-bg@
bshg.com
www.bosch.home.bg
BH Bahrain,
Khalafat Est.
P.O.Box 5111
Manama
Tel.: 017400553
mailto:service@khalaifat.com
BY Belarus, Bénapycb
OOO "BcX BbITOBaTexHnka"
ten.: 495 737 2961
mailto:mok-kdhl@bshg.com
CH Schweiz, Suisse, Svizzera, Switzer
BSH Hausgeräte AG
To arrange an engineer visit, to order spare parts and accessories or for product advice please visit www.bosch-home.co.uk or call
*Calls are charged at the basic rate, please check with your telephone service provider for exact charges
GR Greece, EAA
BSH Ikiakes Siskeves A.B.E.
Central Branch Service
17 km E.O. Athinon-Lamias &
Potamou 20
14564 Kifisia
NaveAaHvio tnAeawvo: 181 82
(Aotikxpewon)
www.bosch-home.gr
HK Hong Kong, 香港
BSH Home Appliances Limited
Unit 1 & 2, 3rd Floor
North Block, Skyway House
3 Sham Mong Road
Tai Kok Tsui, Kowloon
Hong Kong
Tel.: 2565 6151
Fax: 2565 6681
mailto:bosch.hk.service@bshg.com
www.bosch-home.cn
HR Hrvatska, Croatia
BSH kučni uredaji d.o.o.
Kneza Branimira 22
10000 Zagreb
Tel.: 016403609
Fax: 01 640 36 03
mailto:informacije.servis-hr@
bshg.com
www.bosch-home.com/hr
HU Magyarorszag, Hungary
www.bosch-home.com/hu
IE Republic of Ireland
BSH Home Appliances Ltd.
Unit F4, Ballymount Drive
Ballymount Industrial Estate
Walkinstown
Dublin 12
Service Requests,
Spares and Accessories
Tel.: 01450 2655*
Fax: 01450 2520
www.bosch-home.co.uk
*0.03 € per minute at peak
Off peak 0.0088 € per minute
IL Israel,
C/S/B Home Appliance Ltd.
Uiel Building
2, Hamelacha St.
Industrial Park North
71293 Lod
Tel.: 089777222
Fax: 089777245
mailto:csb-serv@zahav.net.il
www.bosch-home.co.il
IN India, Bharat,
BSH Household Appliances
Mfg. Pvt. Ltd
Arena House, 2nd Floor, Main Bldg,
Plot No. 103, Road No. 12, MIDC,
Andheri East
Mumbai 400 093
www.bosch-home.com/in
IS Iceland
Smith & Norland hf.
Noatuni 4
105 Reykjavik
Tel.: 0520 3000
Fax: 0520 3011
www.sminor.is
IT Italia, Italy
www.bosch-home.com/it
KZ Kazakhstan, Ka3akctah
IP Turebekov Yerzhan
Nurmanovich
Jangeldina str. 15
Shimkent 160018
Tel.: 0252 31 00 06
mailto:evrika_kz@mail.ru
LB Lebanon,
Teheni, Hana & Co.
Boulevard Dora 4043 Beyrouth
P.O.Box 90449
Jdeideh 1202 2040
Tel.: 01 255 211
mailto:Info@Teheni-Hana.com
LT Lietuva, Lithuania
Senuku prekybos centras UAB
Jonavos g. 62
44192 Kaunas
Tel.: 0372 12146
Fax: 0372 12165
www.senukai.it
LU Luxembourg
General Serviss Limited
Bullu street 70c
1067 Riga
Tel.: 07424137
mailto:bt@olimpeks.lv
Elkor Serviss
Brivibas gatte 201
1039 Riga
Tel.: 067 0705 20; -36
mailto:domoservice@elkor.lv
www.servisacentrs.lv
MD Moldova
S.R.L. "Rialto-Studio"
yn. UyceBa 98
2012 KuniHHeB
TeN./φaKc: 022 23 81 80
mailto:bosch-md@mail.ru
ME Crna Gora, Montenegro
Elektronika komerc
UI.Slobode 17
84000 Bijelo Polje
Tel./Fax: 050 432 575
Mobil: 069324812
mailto:ekobosch.servis@
t-com.me
MK Macedonia,Makeonna
GORENEC
Jane Sandanski 69 lok.3
1000 Skopje
Tel.: 022 454 600
Mobil:070697463
mailto:gorenec@yahoo.com
MT Malta
Oxford House Ltd.
Notabile Road
Mriehel BKR 14
Tel.: 021 442 334
Fax: 021488656
www.oxfordhouse.com.mt
MV Raajjeyge Jumhooriyyaa, Maledives
Lintel Investments
Ma. Maadheli, Majeedhee Magu Malé
Tel.: 0331 0742
mailto:mohamed.zuhuree@
lintel.com.mv
NL Nederland, Netherlands
Unit F 2, 4 Orbit Drive
Mairangi Bay
Auckland 0632
Tel.: 094770492
Fax: 094772647
mailto:bshnz-cs@bshg.com
www.bosch-home.co.nz
PL Polska, Poland
SA Kingdom Saudi Arabia,
a.ee eae
Abdul Latif Jameel Electronics
and Airconditioning Co. Ltd.
BOSCH Service centre,
Kilo 5 Old Makkah Road
(Next to Toyota), Jamiah Dist.
P.O.Box 7997
Jeddah 21472
Tel.: 800 244 0043
mailto:kunnumalsp@alj.com
www.aljazeera.com.sa
SE Sverige, Sweden
BSH Hushallsapparater AB
Landsvagen 32
169 29 Solna
Tel.: 0771 11 22 77 local rate
mailto:Bosch-Service-SE@
bshg.com
www.bosch-home.se
SG Singapore, 新加坡
BSH Home Appliances Pte. Ltd.
TECHPLACE I and
Mo Kio Avenue 10
Block 4012 #01-01
569628 Singapore
Tel.: 6751 5000
Fax: 6751 5005
mailto:bshsgp.service@bshg.com
www.bosch-home.com.sg
SI Slovenija, Slovenia
BSH Hišni aparati d.o.o.
Litostrojska 48
1000 Ljubljana
Tel.: 015830701
Fax: 01 583 08 89
www.bosch-home.com/tr
4th floor, No. 112 Sec 1
Chung Hsiao E Road
Taipei ROC 100
Tel.: 02 2321 6222
mailto:Bosch@achelis.com.tw
UA Ukraine, YkpaHa
gama-electronics.com
XS Srbija, Serbia
BSH Kučni aparati d.o.o.
Milutina Milankovića 11^a
11070 Novi Beograd
Tel.: 011 205 23 97
Fax: 011 205 23 89
mailto:informacije.servis-sr@
bshg.com
www.bosch-home.rs
ZA South Africa
BSH Home Appliances (Pty) Ltd.
15th Road Randjespark
Private Bag X36, Randjespark
1685 Midrand-Johannesburg
Tel.: 086 002 6724
Fax: 086 617 1780
mailto:applianceserviceza@
bshg.com
www.bosch-home.com/zao


de
This appliance is labelled in accordance with European Directive 2012/19/EU concerning used electrical and electronic appliances (waste electrical and electronic equipment - WEEE). The guideline determines the framework for the return and recycling of used appliances as applicable throughout the EU.
fr
3a CTAPN eNEKTrpuecn N eNEKTrpoHnn ypeDN (waste electrical and electronic equipment - WEEE).
Ta3nДирЕКТИВa PerlaMeENTHa BaIINHIne B pAmKIne Ha EC npaBnHa 3a npHeMaHe n H3PON3BaH e Na CTapn ypeDu
ru
DaHHbI pInbOp HMeet OTMeTky O COOTBcETCBn EBPOneCKM Hopmam 2012/19/EU yTHNHaZauu n3eKtpnueCKNX n3eKtpoHbIx npb6bpob (waste electrical and electronic equipment - WEEE).
Даньг leHmbl onpeIenJOT deIeCTbYOuIne Ha TeppnTOpN EbpocoiO3 npabNla Bo3Bpata NytInIaZCuIN cStapbix npIb6obop.
ro
Acest aparat este marcat corespunzător directei europene 2012/19/UE in privița aparatelor electrice si electronice vechi (waste electrical and electronic equipment - WEEE).
((waste electrical and electronic equipment - WEEE
ωωωωωω
1sU 2gU b S O 2 J WJWJ gU J eC u J wU. cOJ gU
SUs Ssgo Jyg gJgUg Ugslo oIs
SooJ Ue Su Su Su.
DE Garantie
GB Conditions of guarantee
For this appliance the guarantee conditions as set out by our representatives in the country of sale apply. Details regarding same may be obtained from the dealer from whom the appliance was purchased. For claims under guarantee the sales receipt must be produced.
FR Conditions de garantie
www.bosch-home.com/tr
www.bosch-yetkiliservisi.com
IepaHbAeHbAeHbAeHbAeHbAeHbAeHbAeHbAeHbAeHbAeHbAeHbAeHbAeHbAeHbAeHbAeHbAeHbAeHbAeHbAeHbAeHbAeHbAeHbAeHbAeHbAae HcBcBcBcBcBcBcBcBcBcBcBcBcBcBcBcBcBcBcBcBcBcBcBcBcBcBcBcBcBcBcBcBcBcBcBcBcBcBcBcBcBcBcBcBcBcBcBcBcBcBc
XH3AHHNnYIyHJUHNIuPNOOUYHINCIDEKAPCRN HCHNTpyUNIO NO XCNPINYTAUMNH M OOTyBt yOHTHEHbY MyHNMNAHbXbXOPRHOB. MNOMTHAFENHO NACTH.
DInno pNOHNNNNEAeNHOANHOHNGTOTOHENTB N TEEHNHcPOKa, DEBTHcBcEPNcHfATCAo CooBETCTBN, 70TOT cEPTNNDKdAeTBEHTENB. PNO E, NOCTABK, NOPOKAA, NOPOK-208HANH (PNOEMEHNE) B TEPONcPOKa cOcNbY, XCTOBHDOHNrO, BO TCEBTBNTCBN CTaOHb18
3aKoA Pd o 3aHtae pnae npnroptbEtei. Cokp ckykBa h npdoykuHIO ykaaH nBIOBOIeTEN m bIOCTOBe iNHOOPMAUIN HIOOTBNI
OraapHTHOM OCBEPNCOM oClybKBAHN.
PPOyKOuM XoKo8bY uHNTIDHIOuPBOAHA NO MOpHbMOy OHO BHOAN (noe E-Nr), anpoBauHOHOM TYH (noe "Type) I TOBAPHOHNO 3haky Bosch, HAOBcHBNM HnpDOykoB, yNkoBki (nH) oOepkDaKHXsC B conPODyboTHJIOHKoDMYHTAE.
HnKpyuPn (pkyoBCD80) NoCkTnaytaaYnA, INKPOMAHN 06 yOyBHXR RAPHTNHO I CEPBNTOO OcSNUXHNNM. MapKPOBHNHE PNOUYKUNO OCUYEETBNEATI K30TROTNBEH N HA TNOIBON TANBNIKE PNOBA, H YA NKIOBCHO HTHNNTK EINKTE, HENOPCCTDBEHNO H YA NKIOBE PNOBOPA, a TAO KMOEKT PNOBOBDHTCB INHbMbCNOCGMB, o6eBcHbBaKUHMN DocTINHNO H ANRJNDHO pnpDCTABENHE INPOUMPAOMN oPNOBPE M BECTAX pNOBAD.
IpoDykuHn, KOTOPA npoUHa npOJeDpy npOteBpeKdHnE COOTBCTNTHc OTOHc Hp60BaHmT EHNMeCNX PrrnMaHbTO TaOKeHHO COK3a, MaKpHyTeTc eHbHbM 3hakOM oBaHcHn npOduKuHm Ha pbHe IrcocSyadPCT -JHOB TAMoKeHHO COK3a.
PpOpyuKryu, KOTOPAR 6bIa MyBUNe3y yNIOHOMOEHHbIM TAMKHeBHbM OPAHRMA B C0oBDHOe OOBAPHEHcNA HETTPOPIOH TAMOKHeHHO OCO3A 10.05.2013 N COOTBECTBNE KOTOPOR OBsATEHBM TpeBOBAHMR NOITBEBKDEHNO PCCOBHKOME cTePHKIGKTAMB B CNTCTME FOCT P IJIb6 eDINHbM DOKyEMHTAMTAMOKHeHHO OCO3A, MOKET bEsB. MapkOBBaHa 3HAxOM COOTBCTBMA.
3KJyHnAuaaHbApKmNtBnPpOoBnBnOIOHHTBaPcckOBAe.3KJyHnAuaaHbApKmNtBnPpOoBnBnOIOHHTBaPcckOBAe.3KJyHnAuaaHbApKmNtBnPpOoBnBnOIOHHTBaPcckOBAe.3KJyHnAuaaHbApKmNtBnPpOoB nTOpOoBnBnOIOHCTBaPcckOBAe.3KJyHnAuaaHbApKmNtBnPpOoB nTOpOoBnBnOIOHCTBaPcckOBAe.3KJyHnAuaaHbApKmNtBnPpOoB nTOpOoBnBnOIOHCTBaPcckOBAe.3KJYHnAuaaHbApKmNtBnPpOoB nTOpOoBnBnOIOHCTBaPcckOBAe.3KJYHnAuaaHbApKmNtBnPpOoB nTOpOoBnBnOIOHCTBaPcckOBAe.3KJYHnAuaaHbApKmN tBcBeMoHO63803Me3DNo pONyTb y TOrpyuOns oprpaHaIaep-PEzIeHTaCoOBTe7CBOyEioero RoocaydTa B-NeHa TAMooKeHHo C0kOA.
InOpMaaon a o KOMNtKaTHaPi npOuUyKn prnpTeabHe bAoTobRb 3Anax, MoKet 6bIaTapoeHaena No topeFno HecSnatth Oorpehnni (1000) (800) 290-2061,a Taackoe DtoynBu H nItehePe h a Caiye ToopBoVdoTneht eTtpw.hoch.bst-br.lu.
*09.02.2015ECX Bov yu CwHc Xaycrepe Fm6X, Kapn-Bepn-UHp. 34, 81739 MoHxH, FepMaH, nepeMHeBbA B kovmaHb ECX Xaycrepe Fm6X, Kapn-Bepn-UHp. 34, 81739 MoHxH, FepMaH.
HΦopMaζη n3rOToBHTeIa
O rapaHTnHOM n cepBnCHOM o6cnyxNbAHnn
1.Изdenne
2. Moenb
EAC
6. AkceccayapbIи cpeDCTBa no yxody
7. TapaTHHa N3ROTOBNTEnA
- Дагану Инормаяразпострданета на малийы Бсторьи пьговд Тогаров Запсь: Коб�варки, Кобемашинь, Кобемлник, Бесь, КXYхоньнКбмбдНь, МИСкрь, БпNEOCБь, рeshkin, Tocstperb, YITNOH, Dehni, PaCRPmTENTENДЯ ВОLON, SFKTEPOVAHINCHI, ИМЕВнITEHIN, SFENDEPHI, rdrainbHne DOKN, BAHONHbECEBn IANOHrYHIM IM NIDENJI.
4.YBaKaMaE BdAmbHroCnOJa,CoobSaem Bam,TO NOITBpeKJDenHe COOTBeCTBnH aHaei npOdyKnUe 063aTeNbHM TpeoBaoHaern B COOTBeTcBN C 3aKOHoDaTeNbCTBnC OZueCTBnE tctB qOpOE 063aTeNbHO ceptnHkaKnu.
HINOPDMIO NO seCPNTHKAMUN HAIHN PIIbOPOB, a TAKKA DEHbIe o HOMepe cPENTHKATA COOTBECTBMA IN CPOE IcDECTBNA B BI MOKETEN NOLyNTB BY OOO ECX BtOBAR TEKHNA).
Hauna npoukyu npnoBMDTcno kOHTpONeM TpanCHauHOnbHoiKoNOPaUHN 6CX Xaycrepe Mf6X, aadpc t76a-Kaprtnby:81739 MoxHen,KapnBHeI Zhpacce 34, TepMaHNA (BSH Hausgerate GmbH, Carw-Wery-Str. 34, 81739 München, Germany). Oprahnaaueh. BvInonHJauoeh dyNkmmu HIOCTPAnHrHIOrTOBtEny INOHOmOHouHNoHIOrTOBtBe
nem ha OCHOBAHIN DOROBOPa C Hm, BnRETc OOO E5CX BbTOBaN TeXHHa, aDpec: MockBa, 119071, yn. Mana KanyKkCya, d.15; ten: (495) 737-2777, daKc: (495) 737-2798.
- 063ahtbHbIe cbeDHHN O TneuHcKNeHck XnAkapTeRcHtKAn pNb6pa nPnbEdeHb NaTHNOB TAbNHue Pnp6bHAp aHa eTnOHeKte H/Inn B cnpoBdoHtBnHb DokOpMaHTHn.
IaBn 3eBpUeHOnOfHyKnCIOHNPOBaHn Baaen TeNkHH N yOxAa 3a Hn ne PnoTHbODHTBn peKcEBMJeYdTe IcnNbO3oBaTb tonbko OpnHnANbHbIe KAcCECyApbl n CpeCTBaNo xOyHX. OpnHnANbHbIe KAcCECyApbl paPabOTbHbI npOaNbOHTENEM, OHn IeAbeHNO npXoJATmEHNO dnn BaAero npNbOpba. OprHnANbHbIe bAcCECyApbl n CpeCTBaNo noxOyDcoBTCTbYQOT cambMbIByKcONMThpeBOBAMHn KAcEcbTa TBOAPHO OZha Bosch, OH npXoDPaTb 3aOBC6cNcNcBtNaTHnBnIae for ObseCneueHHN MaCKmCaMbnHbN HndAEKCHOsT n Paobte.
ФпьмгзтOTВИТЕРиДСТВАНМунрбБETHнБAMBaMвСрснчсКДБЕФAZIMSbTOBUngPb60raptanTHIO BCOOTBCTBNCnCEHTBOYUMK3AOKOHDATBCTOBmPD cspOKOMI1.rog.HaNPbOBePTEHNBYBcPENyNkD EApOBYCnE BApocyB 6bTOBTOBnPb60R, K kOTOPMO nPrnOKNYe BbIbDANr SAPANTHINBI TANOH, DEbCTYIOT RAPANTHINHE yCObONu, He npOTbHOpeCAUH3ZAKoHODATBCTBBy PecnybNtIKNn BApencyBc

Pa3pa60taHOДЯЖИЗHI

http://www.bosch-home.com/ru/
| COH. COO = CooCepBHC, 354000, Tropokor yin, d,89, ten; (862) 264-33-22, 261-30-05, qao; (862) 261-19-64 | |
| COH. COO = TocepeBHC, 355035, #TpoPmuhuHHeHn yin, d,6 | |
| CTAPBTOPOLOCOO = TocepeBHC, 355035, #TpoPmuhuHHeHn yin, d,6 | |
| CTAPBTOPOLOCOO = TocepeBHC, 355035, #TpoPmuhuHHeHn yin, d,6 | |
| CTAPBTOPOLOCOO = TocepeBHC, 355027, #TpoPmuhuHHeHn yin, d,6 | |
| CTAPBTOPOLOCOO = TocepeBHC, 355027, #TpoPmuhuHHeHn yin, d,6 | |
| CTAPBTOPOLOCOO = TocepeBHC, 355027, #TpoPmuhuHHeHn yIN, d,6 | |
| CTAPBTOPOLOCOO = TocepeBHC, 355027, #TpoPmuhuHHeHn yIN, d,6 | |
| CTAPBTOPOLOCOO = TocepeBHC, 355027, #TpoPmuhuHHeHn yIN, d,6 | |
| CTAPBTOPOLOcoo = TocepeBHC, 355027, #TpoPmuhuHHeHn yIN, d,6 | |
| CTAPBTOPOLOCOO = TocepeBHC, 355027, #TpoPmuhuHHeHn yIN, d,6 | |
| CTAPBTOPOLOCOO = TocepeBHC, 355026, #TpoPmuhuHHeHn yIN, d,6 | |
| CTAPBTOPOLOCOO = TocepeBHC, 355026, #TpoPmuhuHHeHn yIN, d,6 | |
| CTAPBTOPOLOCOO = TocepeBHC, 355026, #TpoPmuhuHHeHn y IN, d,6 | |
| CTAPBTOPOLOCOO = TocepeBHC, 355026, #TpoPmuhuHHeHn yIN, d,6 | |
| CTAPBTOPOLOCOO = TocepeBHC, 355026, #TpoPmuhuHHeHn yIN, d,6 | |
| CTAPBTOPOLOcoo = TocepeBHC, 355026, #TpoPmuhuHHeHn yIN, d,6 | |
| CTAPBTOPOLOCOO = TocepeBHC, 355026, #TpoPmuhuHHeHn yIN, d,6 | |
| CTAPBTOPOLOCOO = TocepeBHC, 355027, #TpoPmuhuHHeHn yIN, d,6 | |
| CTAPBTOPOLOCOO = TocepeBHC, 355027, #TpoPmuhuHHeHn y IN, d,6 | |
| CTAPBTOPOLOCOO = TocepeBHC, 355027, #TpoPmuhuHHeHn yIN, d,6 | |
| CTAPBTOPOLOCOO = TocepeBHC, 355027, #TpoPmuhuHHeHn yIN, d,6 | |
| CTAPBTOPOLOCoO O = TocepeBHC, 355027, #TpoPmuhuHHeHn yIN, d,6 | |
| CTAPBTOPOLOCOO = TocepeBHC, 355027, #TpoPmuhuHHeHn yIN, d,6 | |
| CTAPBTOPOLOCOO = TocepeBHC, 355028, #TpoPmuhuHHeHn yIN, d,6 | |
| CTAPBTOPOLOCOO = TocepeBHC, 355028, #TpoPmuhuHHeHn yIN, d,6 | |
| CTAPBTOPOLOCOO = TocepeBHC, 355028, #TpoPmuhuHHeHn y IN, d,6 | |
| CTAPBTOPOLOCOO = TocepeBHC, 355028, #TpoPmuhuHHeHn y IN, d,6 | |
| CTAPBTOPOLOCOO = TocepeBHC, 355028, #TpoPmuhuHHeHn y IN, d,6 | |
| CTAPBTOPOLOcoo = TocepeBHC, 355028, #TpoPmuhuHHeHn y IN, d,6 | |
| CTAPBTOPOLOCOO = TocepeBHC, 355028, #TpoPmuhuHHeHn y IN, d,6 | |
| CTAPBTOPOLOCOO = TocepeBHC, 355029, #TpoPmuhuHHeHn y IN, d,6 | |
| CTAPBTOPOLOCOO = TocepeBHC, 355029, #TpoPmuhuHHeHn y IN, d,6 | |
| CTAPBTOPOLOCOO = TocepeBHC, 355029, #TpoPmuhuHHeHn yIN, d,6 | |
| CTAPBTOPOLOCOO = TocepeBHC, 355029, #TpoPmuhuHHeHn yIN, d,6 | |
| CTAPBTOPOLOCOO = TocepeBHC, 355029, #TpoPmuhuHHeHn yIN, d,6 | |
| CTAPBTOPOLOcoo = TocepeBHC, 355029, #TpoPmuhuHHeHn yIN, d,6 | |
| CTAPBTOPOLOCOO = TocepeBHC, 355029, #TpoPmuhuHHeHn yIN, d,6 | |
| CTAPBTOPOLOCOO = TocepeBHC, 355028, #TpoPmuhuHHeHn yIN, d,6 | |
| CTAPBTOPOLOCOO = TocepeBHC, 355028, #TpoPmuhuHHeHn y-IN, d,6 | |
| CTAPBTOPOLOCOO = TocepeBHC, 355028, #TpoPmuhuHHeHn yIN, d,6 | |
| CTAPBTOPOLOCOO = TocepeBHC, 355028, #TpoPmuhuHHeHn yIN, d,6 | |
| CTAPBTOPOLOcoo = TocepeBHC, 355028, #TpoPmuhuHHeHn yIN, d,6 | |
| CTAPBTOPOLOCOO = TocepeBHC, 355028, #TpoPmuhuHHeHn yIN, d,6 | |
| CTAPBTOPOLOCOO = TocepeBHC, 355029, #TpoPmuhuHHeHn yIN, d,6 | |
| CTAPBTOPOLOCOO = TocepeBHC, 355029, #TpoPmuhuHHeHn y IN, d,6 | |
| CTAPBTOPOLOCOO = TocepeBHC, 355029, #TpoPmuhuHHeHn y IN, d,6 | |
| CTAPBTOPOLOcoo = TocepeBHC, 355029, #TpoPmuhuHHeHn y IN, d,6 | |
| CTAPBTOPOLOCOO = TocepeBHC, 355029, #TpoPmuhuHHeHn y IN, d,6 | |
| CTAPBTOPOLOCOO = TocepeBHC, 355028, #TpoPmuhuHHeHn y IN, d,6 | |
| CTAPBTOPOLOCOO = TocepeBHC, 355028, #TpoPmuhuHHeHn yIN, d,6 | |
| CTAPBTOPOLOCOO = TocepeBHC, 355028, #TpoPmuhuHHeHn yIN, d,6 | |
| CTAPBTOPOLOCoO O = TocepeBHC, 355028, #TpoPmuhuHHeHn yIN, d,6 | |
| CTAPBTOPOLOCOO = TocepeBHC, 355028, #TpoPmuhuHHeHn yIN, d,6 | |
| CTAPBTOPOLOCOO = TocepeBHC, 355027, #TpoPmuhuHHeHn yIN, d,6 | |
| CTAPBTOPOLOCOO = TocepeBHC, 355027, #TpoPmuhuHHeHn y-IN, d,6 | |
| CTAPBTOPOLOCOO = TocepeBHC, 355027, #TpoPmuhuHHeHn yIN, d,6 | |
| CTAPBTOPOLOCOO = TocepeBHC, 355027, #TpoPmuhuHHeHn yIN, d,6 | |
| CTAPBTOPOLOC O = TocepeBHC, 355027, #TpoPmuhuHHeHn yIN, d,6 | |
| CTAPBTOPOLOCOO = TocepeBHC, 355027, #TpoPmuhuHHeHn yIN, d,6 | |
| CTAPBTOPOLOCOO = TocepeBHC, 355030, #TpoPmuhuHHeHn yIN, d,6 | |
| CTAPBTOPOLOCOO = TocepeBHC, 355030, #TpoPmuhuHHeHn yIN, d,6 | |
| CTAPBTOPOLOCOO = TocepeBHC, 355030, #TpoPmuhuHHeHn y IN, d,6 | |
| CTAPBTOPOLOCOO = TocepeBHC, 355030, #TpoPmuhuHHeHn y IN, d,6 | |
| CTAPBTOPOLOCOO = TocepeBHC, 355030, #TpoPmuhuHHeHn y IN, d,6 | |
| CTAPBTOPOLOcoo = TocepeBHC, 355030, #TpoPmuhuHHeHn y IN, d,6 | |
| CTAPBTOPOLOCOO = TocepeBHC, 355030, #TpoPmuhuHHeHn y IN, d,6 | |
| CTAPBTOPOLOCOO = TocepeBHC, 355031, #TpoPmuhuHHeHn y IN, d,6 | |
| CTAPBTOPOLOCOO = TocepeBHC, 355031, #TpoPmuhuHHeHn y IN, d,6 | |
| CTAPBTOPOLOCOO = TocepeBHC, 355031, #TpoPmuhuHHeHn yIN, d,6 | |
| CTAPBTOPOLOCOO = TocepeBHC, 355031, #TpoPmuhuHHeHn yIN, d,6 | |
| CTAPBTOPOLOCOO = TocepeBHC, 355031, #TpoPmuhuHHeHn yIN, d,6 | |
| CTAPBTOPOLOcoo = TocepeBHC, 355031, #TpoPmuhuHHeHn yIN, d,6 | |
| CTAPBTOPOLOCOO = TocepeBHC, 355031, #TpoPmuhuHHeHn yIN, d,6 | |
| CTAPBTOPOLOCOO = TocepeBHC, 355032, #TpoPmuhuHHeHn yIN, d,6 | |
| CTAPBTOPOLOCOO = TocepeBHC, 355032, #TpoPmuhuHHeHn yIN, d,6 | |
| CTAPBTOPOLOCOO = TocepeBHC, 355032, #TpoPmuhuHHeHn y IN, d,6 | |
| CTAPBTOPOLOCOO = TocepeBHC, 355032, #TpoPmuhuHHeHn y IN, d,6 | |
| CTAPBTOPOLOCOO = TocepeBHC, 355032, #TpoPmuhuHHeHn y IN, d,6 | |
| CTAPBTOPOLOcoo = TocepeBHC, 355032, #TpoPmuhuHHeHn y IN, d,6 | |
| CTAPBTOPOLOCOO = TocepeBHC, 355032, #TpoPmuhuHHeHn y IN, d,6 | |
| CTAPBTOPOLOCOO = TocepeBHC, 355033, #TpoPmuhuHHeHn y IN, d,6 | |
| CTAPBTOPOLOCOO = TocepeBHC, 355033, #TpoPmuhuHHeHn y IN, d,6 | |
| CTAPBTOPOLOCOO = TocepeBHC, 355033, #TpoPmuhuHHeHn yIN, d,6 | |
| CTAPBTOPOLOCOO = TocepeBHC, 355033, #TpoPmuhuHHeHn yIN, d,6 | |
| CTAPBTOPOLOCOO = TocepeBHC, 355033, #TpoPmuhuHHeHn yIN, d,6 | |
| CTAPBTOPOLOcoo = TocepeBHC, 355033, #TpoPmuhuHHeHn yIN, d,6 | |
| CTAPBTOPOLOCOO = TocepeBHC, 355033, #TpoPmuhuHHeHn yIN, d,6 | |
| CTAPBTOPOLOCOO = TocepeBHC, 355034, #TpoPmuhuHHeHn yIN, d,6 | |
| CTAPBTOPOLOCOO = TocepeBHC, 355034, #TpoPmuhuHHeHn yIN, d,6 | |
| CTAPBTOPOLOCOO = TocepeBHC, 355034, #TpoPmuhuHHeHn y IN, d,6 | |
| CTAPBTOPOLOCOO = TocepeBHC, 355034, #TpoPmuhuHHeHn y IN, d,6 | |
| CTAPBTOPOLOCOO = TocepeBHC, 355034, #TpoPmuhuHHeHn y IN, d,6 | |
| CTAPBTOPOLOcoo = TocepeBHC, 355034, #TpoPmuhuHHeHn y IN, d,6 | |
| CTAPBTOPOLOCOO = TocepeBHC, 355034, #TpoPmuhuHHeHn y IN, d,6 | |
| CTAPBTOPOLOCOO = TocepeBHC, 355035, #TpoPmuhuHHeHn y IN, d,6 | |
| CTAPBTOPOLOCOO = TocepeBHC, 355035, #TpoPmuhuHHeHn y IN, d,6 | |
| CTAPBTOPOLOCOO = TocepeBHC, 355035, #TpoPmuhuHHeHn yIN, d,6 | |
| CTAPBTOPOLOCOO = TocepeBHC, 355035, #TpoPmuhuHHeHn yIN, d,6 | |
| CTAPBTOPOLOCOO = TocepeBHC, 355035, #TpoPmuhuHHeHn yIN, d,6 | |
| CTAPBTOPOLOcoo = TocepeBHC, 355035, #TpoPmuhuHHeHn yIN, d,6 | |
| CTAPBTOPOLOCOO = TocepeBHC, 355035, #TpoPmuhuHHeHn yIN, d,6 | |
| CTAPBTOPOLOCOO = TocepeBHC, 355036, #TpoPmuhuHHeHn yIN, d,6 | |
| CTAPBTOPOLOCOO = TocepeBHC, 355036, #TpoPmuhuHHeHn yIN, d,6 | |
| CTAPBTOPOLOCOO = TocepeBHC, 355036, #TpoPmuhuHHeHn y IN, d,6 | |
| CTAPBTOPOLOCOO = TocepeBHC, 355036, #TpoPmuhuHHeHn y IN, d,6 | |
| CTAPBTOPOLOCOO = TocepeBHC, 355036, #TpoPmuhuHHeHn y IN, d,6 | |
| CTAPBTOPOLOcoo = TocepeBHC, 355036, #TpoPmuhuHHeHn y IN, d,6 | |
| CTAPBTOPOLOCOO = TocepeBHC, 355036, #TpoPmuhuHHeHn y IN, d,6 | |
| CTAPBTOPOLOCOO = TocepeBHC, 355037, #TpoPmuhuHHeHn y IN, d,6 | |
| CTAPBTOPOLOCOO = TocepeBHC, 355037, #TpoPmuhuHHeHn y IN, d,6 | |
| CTAPBTOPOLOCOO = TocepeBHC, 355037, #TpoPmuhuHHeHn yIN, d,6 | |
| CTAPBTOPOLOCOO = TocepeBHC, 355037, #TpoPmuhuHHeHn yIN, d,6 | |
| CTAPBTOPOLOCOO = TocepeBHC, 355037, #TpoPmuhuHHeHn yIN, d,6 | |
| CTAPBTOPOLOcoo = TocepeBHC, 355037, #TpoPmuhuHHeHn yIN, d,6 | |
| CTAPBTOPOLOCOO = TocepeBHC, 355037, #TpoPmuhuHHeHn yIN, d,6 | |
| CTAPBTOPOLOCOO = TocepeBHC, 355038, #TpoPmuhuHHeHn yIN, d,6 | |
| CTAPBTOPOLOCOO = TocepeBHC, 355038, #TpoPmuhuHHeHn yIN, d,6 | |
| CTAPBTOPOLOCOO = TocepeBHC, 355038, #TpoPmuhuHHeHn y IN, d,6 | |
| CTAPBTOPOLOCOO = TocepeBHC, 355038, #TpoPmuhuHHeHn y IN, d,6 | |
| CTAPBTOPOLOCOO = TocepeBHC, 355038, #TpoPmuhuHHeHn y IN, d,6 | |
| CTAPBTOPOLOcoo = TocepeBHC, 355038, #TpoPmuhuHHeHn y IN, d,6 | |
| CTAPBTOPOLOCOO = TocepeBHC, 355038, #TpoPmuhuHHeHn y IN, d,6 | |
| CTAPBTOPOLOCOO = TocepeBHC, 355039, #TpoPmuhuHHeHn y IN, d,6 | |
| CTAPBTOPOLOCOO = TocepeBHC, 355039, #TpoPmuhuHHeHn y IN, d,6 | |
| CTAPBTOPOLOCOO = TocepeBHC, 355039, #TpoPmuhuHHeHn yIN, d,6 | |
| CTAPBTOPOLOCOO = TocepeBHC, 355039, #TpoPmuhuHHeHn y IN, d,6 | |
| CTAPBTOPOLOCOO = TocepeBHC, 355039, #TpoPmuhuHHeHn y IN, d,6 | |
| CTAPBTOPOLOcoo = TocepeBHC, 355039, #TpoPmuhuHHeHn y IN, d,6 | |
| CTAPBTOPOLOCOO = TocepeBHC, 355039, #TpoPmuhuHHeHn y IN, d,6 | |
| CTAPBTOPOLOCOO = TocepeBHC, 355038, #TpoPmuhuHHeHn y IN, d,6 | |
| CTAPBTOPOLOCOO = TocepeBHC, 355038, #TpoPmuhuHHeHn yIN, d,6 | |
| CTAPBTOPOLOCOO = TocepeBHC, 355038, #TpoPmuhuHHeHn y IN, d,6 | |
| CTAPBTOPOLOcoo = TocepeBHC, 355038, #TpoPmuhuHHeHn y IN, d,6 | |
| CTAPBTOPOLOcoo = TocepeBHC, 355038, #TpoPmuhuHHeHn y IN, d,6 | |
| CTAPBTOPOLOCOO = TocepeBHC, 355039, #TpoPmuhuHHeHn y IN, d,6 | |
| CTAPBTOPOLOCOO = TocepeBHC, 355038, #TpoPmuhuHHeHn yIN, d,6 | |
| CTAPBTOPOLOCOO = TocepeBHC, 355038, #TpoPmuhuHHeHn yIN, d,6 | |
| CTAPBTOPOLOcoo = TocepeBHC, 355038, #TpoPmuhuHHeHn y IN, d,6 | |
| CTAPBTOPOLOCOO = TocepeBHC, 355038, #TpoPmuhuHHeHn y IN, d,6 | |
| CTAPBTOPOLOcoo = TocepeBHC, 355039, #TpoPmuhuHHeHn y IN, d,6 | |
| CTAPBTOPOLOCOO = TocepeBHC, 355039, #TpoPmuhuHHeHn yIN, d,6 | |
| CTAPBTOPOLOCOO = TocepeBHC, 355038, #TpoPmuhuHHeHn y IN, d,6 | |
| CTAPBTOPOLOCOO = TocepeBHC, 355038, #TpoPmuhuHHeHn yIN, d,6 | |
| CTAPBTOPOLOcoo = TocepeBHC, 355038, #TpoPmuhuHHeHn y IN, d,6 | |
| CTAPBTOPOLOcoo = TocepeBHC, 355038, #TpoPmuhuHHeHn y IN, d,6 | |
| CTAPBTOPOLOcoo = TocepeBHC, 355039, #TpoPmuhuHHeHn y IN, d,6 | |
| CTAPBTOPOLOCOO = TocepeBHC, 355038, #TpoPmuhuHHeHn y IN, d,6 | |
| CTAPBTOPOLOCOO = TocepeBHC, 355039, #TpoPmuhuHHeHn yIN, d,6 | |
| CTAPBTOPOLOCOO = TocepeBHC, 355040, #TpoPmuhuHHeHn y IN, d,6 | |
| CTAPBTOPOLOCOO = TocepeBHC, 355040, #TpoPmuhuHHeHn y IN, d,6 | |
| CTAPBTOPOLOCOO = TocepeBHC, 355040, #TpoPmuhuHHeHn y IN, d,6 | |
| CTAPBTOPOLOcoo = TocepeBHC, 355040, #TpoPmuhuHHeHn y IN, d,6 | |
| CTAPBTOPOLOCOO = TocepeBHC, 355040, #TpoPmuhuHHeHn y IN, d,6 | |
| CTAPBTOPOLOCOO = TocepeBHC, 355041, #TpoPmuhuHHeHn y IN, d,6 | |
| CTAPBTOPOLOCOO = TocepeBHC, 355041, #TpoPmuhuHHeHn y IN, d,6 | |
| CTAPBTOPOLOCOO = TocepeBHC, 355041, #TpoPmuhuHHeHn yIN, d,6 | |
| CTAPBTOPOLOCOO = TocepeBHC, 355041, #TpoPmuhuHHeHn yIN, d,6 | |
| CTAPBTOPOLOCOO = TocepeBHC, 355041, #TpoPmuhuHHeHn yIN, d,6 | |
| CTAPBTOPOLOcoo = TocepeBHC, 355041, #TpoPmuhuHHeHn yIN, d,6 | |
| CTAPBTOPOLOCOO = TocepeBHC, 355041, #TpoPmuhuHHeHn yIN, d,6 | |
| CTAPBTOPOLOCOO = TocepeBHC, 355042, #TpoPmuhuHHeHn yIN, d,6 | |
| CTAPBTOPOLOCOO = TocepeBHC, 355042, #TpoPmuhuHHeHn yIN, d,6 | |
| CTAPBTOPOLOCOO = TocepeBHC, 355042, #TpoPmuhuHHeHn y IN, d,6 | |
| CTAPBTOPOLOCOO = TocepeBHC, 355042, #TpoPmuhuHHeHn y IN, d,6 | |
| CTAPBTOPOLOCOO = TocepeBHC, 355042, #TpoPmuhuHHeHn y IN, d,6 | |
| CTAPBTOPOLOcoo = TocepeBHC, 355042, #TpoPmuhuHHeHn y IN, d,6 | |
| CTAPBTOPOLOCOO = TocepeBHC, 355042, #TpoPmuhuHHeHn y IN, d,6 | |
| CTAPBTOPOLOCOO = TocepeBHC, 355043, #TpoPmuhuHHeHn y IN, d,6 | |
| CTAPBTOPOLOCOO = TocepeBHC, 355043, #TpoPmuhuHHeHn y IN, d,6 | |
| CTAPBTOPOLOCOO = TocepeBHC, 355043, #TpoPmuhuHHeHn yIN, d,6 | |
| CTAPBTOPOLOCOO = TocepeBHC, 355043, #TpoPmuhuHHeHn y IN, d,6 | |
| CTAPBTOPOLOCOO = TocepeBHC, 355043, #TpoPmuhuHHeHn y IN, d,6 | |
| CTAPBTOPOLOcoo = TocepeBHC, 355043, #TpoPmuhuHHeHn y IN, d,6 | |
| CTAPBTOPOLOCOO = TocepeBHC, 355043, #TpoPmuhuHHeHn y IN, d,6 | |
| CTAPBTOPOLOCOO = TocepeBHC, 355044, #TpoPmuhuHHeHn y IN, d,6 | |
| CTAPBTOPOLOCOO = TocepeBHC, 355044, #TpoPmuhuHHeHn y IN, d,6 | |
| CTAPBTOPOLOCOO = TocepeBHC, 355044, #TpoPmuhuHHeHn yIN, d,6 | |
| CTAPBTOPOLOCOO = TocepeBHC, 355044, #TpoPmuhuHHeHn y IN, d,6 | |
| CTAPBTOPOLOCOO = TocepeBHC, 355044, #TpoPmuhuHHeHn y IN, d,6 | |
| CTAPBTOPOLOcoo = TocepeBHC, 355044, #TpoPmuhuHHeHn y IN, d,6 | |
| CTAPBTOPOLOCOO = TocepeBHC, 355044, #TpoPmuhuHHeHn y IN, d,6 | |
| CTAPBTOPOLOCOO = TocepeBHC, 355045, #TpoPmuhuHHeHn y IN, d,6 | |
| CTAPBTOPOLOCOO = TocepeBHC, 355045, #TpoPmuhuHHeHn y IN, d,6 | |
| CTAPBTOPOLOCOO = TocepeBHC, 355045, #TpoPmuhuHHeHn yIN, d,6 | |
| CTAPBTOPOLOCOO = TocepeBHC, 355045, #TpoPmuhuHHeHn y IN, d,6 | |
| CTAPBTOPOLOCOO = TocepeBHC, 355045, #TpoPmuhuHHeHn y IN, d,6 | |
| CTAPBTOPOLOcoo = TocepeBHC, 355045, #TpoPmuhuHHeHn y IN, d,6 | |
| CTAPBTOPOLOCOO = TocepeBHC, 355045, #TpoPmuhuHHeHn y IN, d,6 | |
| CTAPBTOPOLOCOO = TocepeBHC, 355046, #TpoPmuhuHHeHn y IN, d,6 | |
| CTAPBTOPOLOCOO = TocepeBHC, 355046, #TpoPmuhuHHeHn y IN, d,6 | |
| CTAPBTOPOLOCOO = TocepeBHC, 355046, #TpoPmuhuHHeHn yIN, d,6 | |
| CTAPBTOPOLOCOO = TocepeBHC, 355046, #TpoPmuhuHHeHn y IN, d,6 | |
| CTAPBTOPOLOCOO = TocepeBHC, 355046, #TpoPmuhuHHeHn y IN, d,6 | |
| CTAPBTOPOLOcoo = TocepeBHC, 355046, #TpoPmuhuHHeHn y IN, d,6 | |
| CTAPBTOPOLOCOO = TocepeBHC, 355046, #TpoPmuhuHHeHn y IN, d,6 | |
| CTAPBTOPOLOCOO = TocepeBHC, 355047, #TpoPmuhuHHeHn y IN, d,6 | |
| CTAPBTOPOLOCOO = TocepeBHC, 355047, #TpoPmuhuHHeHn y IN, d,6 | |
| CTAPBTOPOLOCOO = TocepeBHC, 355047, #TpoPmuhuHHeHn yIN, d,6 | |
| CTAPBTOPOLOCOO = TocepeBHC, 355047, #TpoPmuhuHHeHn y IN, d,6 | |
| CTAPBTOPOLOCOO = TocepeBHC, 355047, #TpoPmuhuHHeHn y IN, d,6 | |
| CTAPBTOPOLOcoo = TocepeBHC, 355047, #TpoPmuhuHHeHn y IN, d,6 | |
| CTAPBTOPOLOCOO = TocepeBHC, 355047, #TpoPmuhuHHeHn y IN, d,6 | |
| CTAPBTOPOLOCOO = TocepeBHC, 355048, #TpoPmuhuHHeHn y IN, d,6 | |
| CTAPBTOPOLOCOO = TocepeBHC, 355048, #TpoPmuhuHHeHn y IN, d,6 | |
| CTAPBTOPOLOCOO = TocepeBHC, 355048, #TpoPmuhuHHeHn yIN, d,6 | |
| CTAPBTOPOLOCOO = TocepeBHC, 355048, #TpoPmuhuHHeHn y IN, d,6 | |
| CTAPBTOPOLOCOO = TocepeBHC, 355048, #TpoPmuhuHHeHn y IN, d,6 | |
| CTAPBTOPOLOcoo = TocepeBHC, 355048, #TpoPmuhuHHeHn y IN, d,6 | |
| CTAPBTOPOLOCOO = TocepeBHC, 355048, #TpoPmuhuHHeHn y IN, d,6 | |
| CTAPBTOPOLOCOO = TocepeBHC, 355049, #TpoPmuhuHHeHn y IN, d,6 | |
| CTAPBTOPOLOCOO = TocepeBHC, 355049, #TpoPmuhuHHeHn y IN, d,6 | |
| CTAPBTOPOLOCOO = TocepeBHC, 355049, #TpoPmuhuHHeHn yIN, d,6 | |
| CTAPBTOPOLOCOO = TocepeBHC, 355049, #TpoPmuhuHHeHn y IN, d,6 | |
| CTAPBTOPOLOCOO = TocepeBHC, 355049, #TpoPmuhuHHeHn y IN, d,6 | |
| CTAPBTOPOLOcoo = TocepeBHC, 355049, #TpoPmuhuHHeHn y IN, d,6 | |
| CTAPBTOPOLOCOO = TocepeBHC, 355049, #TpoPmuhuHHeHn y IN, d,6 | |
| CTAPBTOPOLOCOO = TocepeBHC, 355048, #TpoPmuhuHHeHn y IN, d,6 | |
| CTAPBTOPOLOCOO = TocepeBHC, 355048, #TpoPmuhuHHeHn y-IN, d,6 | |
| CTAPBTOPOLOCOO = TocepeBHC, 355048, #TpoPmuhuHHeHn y IN, d,6 | |
| CTAPBTOPOLOCOO = TocepeBHC, 355048, #TpoPmuhuHHeHn y IN, d,6 | |
| CTAPBTOPOLOCoO O = TocepeBHC, 355048, #TpoPmuhuHHeHn y IN, d,6 | |
| CTAPBTOPOLOCOO = TocepeBHC, 355048, #TpoPmuhuHHeHn y IN, d,6 | |
| CTAPBTOPOLOCOO = TocepeBHC, 355047, #TpoPmuhuHHeHn y IN, d,6 | |
| CTAPBTOPOLOCOO = TocepeBHC, 355047, #TpoPmuhuHHeHn y-IN, d,6 | |
| CTAPBTOPOLOCOO = TocepeBHC, 355047, #TpoPmuhuHHeHn y IN, d,6 | |
| CTAPBTOPOLOCOO = TocepeBHC, 355047, #TpoPmuhuHHeHn y IN, d,6 | |
| CTAPBTOPOLOCoO O = TocepeBHC, 355047, #TpoPmuhuHHeHn y IN, d,6 | |
| CTAPBTOPOLOCOO = TocepeBHC, 355047, #TpoPmuhuHHeHn y IN, d,6 | |
| CTAPBTOPOLOCOO = TocepeBHC, 355049, #TpoPmuhuHHeHn y IN, d,6 | |
| CTAPBTOPOLOCOO = TocepeBHC, 355049, #TpoPmuhuHHeHn y-IN, d,6 | |
| CTAPBTOPOLOCOO = TocepeBHC, 355049, #TpoPmuhuHHeHn y IN, d,6 | |
| CTAPBTOPOLOCOO = TocepeBHC, 355049, #TpoPmuhuHHeHn y IN, d,6 | |
| CTAPBTOPOLOCoO O = TocepeBHC, 355049, #TpoPmuhuHHeHn y IN, d,6 | |
| CTAPBTOPOLOCOO = TocepeBHC, 355049, #TpoPmuhuHHeHn y IN, d,6 | |
| CTAPBTOPOLOCOO = TocepeBHC, 355047, #TpoPmuhuHHeHn y IN, d,6 | |
| CTAPBTOPOLOCOO = TocepeBHC, 355047, #TpoPmuhuHHeHn y -IN, d,6 | |
| CTAPBTOPOLOCOO = TocepeBHC, 355047, #TpoPmuhuHHeHn y IN, d,6 | |
| CTAPBTOPOLOCOO = TocepeBHC, 355047, #TpoPmuhuHHeHn y IN, d,6 | |
| CTAPBTOPOLCOO = TocepeBHC, 355047, #TpoPmuhuHHeHn y IN, d,6 | |
| CTAPBTOPOLOCOO = TocepeBHC, 355047, #TpoPmuhuHHeHn y IN, d,6 | |
| CTAPBTOPOLOCOO = TocepeBHC, 355102-01-01-01-01-01-01-01-01-01-01-01-01-01-01-01-01-01-01-01-01-01-01-01-01-01-01-01-01-01-01-01-01-01-01 -IN | |
| CTAPBTOPOLOCOO = TocepeBHC, 355102-01-01-01-01-01-01-01-01-01-01-01-01-01-01-01-01-01-01-01-01-01-01-01-01-02-01-01-01-01-01-01-01-01-01-01-01-01-01-01-01-01-01-01-01-01-01-01-01-01-01-01-01-01-01-01-01-01-12-01-01-01-01-01-01-01-01-01-01-01-01-01-01-01-01-01-01-01-01-01-01-01-01-01-01-01-01-01-01-01-01-02-01-01-01-01-01-01-01-01 -IN | |
| CTAPBTOPOLOCOO = TocepeBHC, 355102-01-01-01-01-01-01-01-01-01-01-01-01-01-01-01-01 -IN | |
| CTAPBTOPOLOCOO = TocepeBHC, 355102-01-01-01-01-01-01-01-01 -IN | |
| CTAPBTOPOLOCOO = TocepeBHC, 355102-01-01-01-01-01-01-01-01 -IN | |
| CTAPBTOPOLOCOO = TocepeBHC, 355042-01-01-01-01-01-01-01-01-01-01-01-01-01-01-01-01-01-01-01-01-01-01-01-01-01-01-01-01-01-01-01-01-04-01-01-01-01-01-01-01-01-01-01-01-01-01-01-01-01-01-01-01-01-01-01-01-01-01-01-01-01-01-01-01-01-01 | |
| CTAPBTOPOLOCOO = TocepeBHC, 355042-01-01-01-01-01-01-01-01-01-01-01-01-01-01-01-01-01-01-01-01-01-01-01-01-02-01-01-01-01-01-01-01-02-01-01-01-01-01-01-01-01-01-01-01-01-01-01-01-01-01-01-01-01-01-01-01-01-01 -IN | |
| CTAPBTOPOLOCOO = TocepeBHC, 355042-01-01-01-01-01-01-01-01-01-01-01-01-01-01-01-01 -IN | |
| CTAPBTOPOLOCOO = TocepeBHC, 355042-01-01-01-01-01-01-01-01 -IN | |
| CTAPBTOPOLOCOO = TocepeBHC, 355042-01-01-01-01-01-01-01-01 -IN | |
| CTAPBTOPOLOCOO = TocepeBHC, 355102-01-01-01-01-01-01-01-01-01-01-01-01-01-01-01-02-01-01-01-01-01-01-01-01-01-01-01-01-01-01-01-01-01 -IN | |
| CTAPBTOPOLOCOO = TocepeBHC, 355102-01-01-01-01-01-01-01 -IN | |
| CTAPBTOPOLOCOO = TocepeBHC, 355102-01-01-01-01-01-01-01 -IN | |
| CTAPBTOPOLOCOO = TocepeBHC, 355102-01/12-01-01-01-01-01-01-01 -IN | |
| CTAPBTOPOLOCOO = TocepeBHC, 355102-01/12-01-01-01-01-01-01-01 -IN | |
| CTAPBTOPOLOCOO = TocepeBHC, 3549-01-01-01-01-01-01-01-01 -IN | |
| CTAPBTOPOLOCOO = TocepeBHC, 3549-01-01-01-01-01-01-01-01 -IN | |
| CTAPBTOPOLOCOO = TocepeBHC, 3549-01-12-01-01-01-01-01-01 -IN | |
| CTAPBTOPOLOCOO = TocepeBHC, 3549-01-12-01-01-01-01-01-01 -IN | |
| CTAPBTOPOLOCOO = TocepeBHC, 3549-01-12-21-01-01-01-01-01 -IN | |
| CTAPBTOPOLOCOO = TocepeBHC, 3549-01-12-21-01-01-01-01-01 -IN | |
| CTAPBTOPOLOCOO = TocepeBHC, 3549-01-12-21/21-01-01-01-01 -IN | |
| CTAPBTOPOLOCOO = TocepeBHC, 3549-01-12-21/21-01-01-01-01 -IN | |
| CTAPBTOPOLOCOO = TocepeBHC, 3549-01-12-21/21/21-01-01-01 -IN | |
| CTAPBTOPOLOCOO = TocepeBHC, 3549-01-12-21/21/21-01-01-01 -IN | |
| CTAPBTOPOLOCOO = TocepeBHC, 3549-01-12-21/21/21/21-01-01-01 -IN | |
| CTAPBTOPOLOCOO = TocepeBHC, 3549-01-12-21/21/21/21/21-01-01-01 -IN | |
| CTAPBTOPOLOCOO = TocepeBHC, 3549-01-12-21/21/21/21/21/21-01-01-01 -IN | |
| CTAPBTOPOLOCOO = TocepeBHC, 3549-01-12-21/21/21/21/21/21/21-01-01-01 -IN | |
| CTAPBTOPOLOCOO = TocepeBHC, 3549-01-12-21/21/21/21/21/21/21/21/21-01-01-01 -IN | |
| CTAPBTOPOLOCOO = TocepeBHC, 3549-01-12-21/21/21/21/21/21/21/21/21/21/21/21/21/21/21/21/21/21/21/21/21/21/21/21/21/21/21/21/21/21/21/21/21/21/ |
B31C045B1-1M23 02/2015
| HASEPEXKHIJI BHTI YONBOHOA Maepre Cepreee, 42381.9 Mpa npt. , 446.11, mt. (855.2) 38-24-06, daxc. (855.2) 38-24-06 | |
| HANHEKHI, OOYIOLOBIA HAI, 446.11, mt. (855.2) 47-11-06, daxc. (855.2) 47-11-06 | |
| HANHEKHI, OOYIOLOBIA HAI, 446.02) 44-03-04, 77.28, 78.2, 42.1-21, daxc. (865.2) 46-02-40-30 | |
| HAXOJDKI, HTI Kypasok Berci Celebrenn, 692900, Torgunhuan ydn., 40, 446-62-76, daxc. (4236) 62-99-54 | |
| HAXOJDKI, HTI Kypasok Berci Celebrenn, 452688, Topebeynu, 10A10a (3478) 33-43-44, daxc. (3478) 33-43-44 | |
| HAXOJDKI, HTI Kypasok Amanekai Obopey, 62831.1, 16Mn. upl., 45, 446-62-76, daxc. (4236) 62-99-54 | |
| HIXHKHEPAKOT, OOYIOLOBIA HAI, 446.02) 44-03-04, 77.28, 78.2, 42.1-21, daxc. (865.2) 46-02-40-30 | |
| HIXHKHEPAKOT, OOYIOLOBIA HAI, 446.02) 44-03-04, 77.11, mt. (3478) 33-43-44, daxc. (3478) 33-43-44 | |
| HIXHKHEPAKOT, OOYIOLOBIA HAI, 446.02) 44-03-04, 77.11, mt. (3478) 33-43-44, daxc. (3478) 33-43-44 | |
| HIXHKHEPAKOT, OOYIOLOBA HAI, 446.02) 44-03-04, 77.11, mt. (3478) 33-43-44, daxc. (3478) 33-43-44 | |
| HIXHKHEPAKOT, OOYIOLOBIA HAI, 446.02) 44-04-01, 77.11, mt. (3478) 33-43-44, daxc. (3478) 33-43-44 | |
| HIXHKHEPAKOT, OOYIOLOBIA HAI, 446.02) 44-04-01, 77.11, mt. (3478)33-43-44, daxc. (3478) 33-43-44 | |
| HIXHKHEPAKOT, OOYIOLOBIA HAI, 446.02) 44-04-01, 77.11, mt. (3478) 33-43-44, daxc. (3481) 33-43-44, daxc. (3478) 33-43-44 | |
| HIXHKHEPAKOT, OOYIOLOBIA HAI, 446.02) 44-04-01, 77.11, mt. (3478) 33-43-44, daxc. (4362) 62-66-76, daxc. (4267) 62-66-76 | |
| HIXHKHEPAKOT, OOYIOLOBIA HAI, 446.02) 44-04-01, 77.11, mt. (3478) 33-43-44, daxc. (4361) 62-66-76, daxc. (4267) 62-66-76 | |
| HIXHKHEPAKOT, OOYIOLOBIA HAI, 446.02) 44-04-01, 77.11, mt. (3478) 33-43-44, daxc. (3481) 62-66-76, daxc. (4361) 62-66-76 | |
| HIXHKHEPAKOT, OOYIOLOBIA HAI, 446.02) 44-04-01, 77.11, mt. (3478) 33-43-44, daxc. (3481) 62-66-76, daxc. (3481) 62-66-76 | |
| HIXHKHEPAKOT, OOYIOLOBIA HAI, 446.02) 44-04-01, 77.11, mt. (3478) 33-43-44, daxc. (3481) 62-66-76 | |
| HIXHKHEPAKOT, OOYIOLOBIA HAI, 446.02) 44-04-01, 77.11, mt. (3478) 33-43-44, daxc. (3481) 62-67-66 | |
| HIXHKHEPAKOT, OOYIOLOBIA HAI, 446.02) 44-04-01, 77.11, mt. (3478) 33-43-44, daxc. (3481) 62-66-76 | |
| HIXHKHEPAKOT, OOYIOLBCO BApCER, 629300, 26 Cegara NTCC ydn., 1,105, (3479) 34-91-45, 54-92-47, 62-16-65, daxc. (3494) 52-91-45, 54-92-47, 62-16-65 | |
| HIXHKHEPAKOT, OOYIOLOBIA HAI, 446.02) 44-03-04, 77.11, mt. (3478) 33-43-44, daxc. (3494) 52-91-45, 54-92-47, 62-16-65, daxc. (3494) 52-91-45, 54-92-47, 62-16-65 | |
| HIXHKHEPAKOT, OOYIOLOBIA HAI, 446.02) 44-11-06, 77.11, mt. (3478) 33-43-44, daxc. (3494) 52-91-45, 54-92-47, 62-16-65 | |
| HIXHKHEPAKOT, OOYIOLOBIA HAI, 446.02) 44-11-06, 77.11, mt. (3478) 33-44-40, daxc. (3494) 52-91-45, 54-92-47, 62-16-65 | |
| HIXHKHEPAKOT, OOYIOLOBIA HAI, 446.02) 44-11-06, 77.11, mt. (3478) 33-45-47, daxc. (3494) 52-91-45, 54-92-47, 62-16-65 | |
| HIXHKHEPAKOT, OOYIOLOBIA HAI, 446.02) 44-11-06, 77.11, mt. (3478) 33-46-57, daxc. (3494) 52-91-45, 54-92-47, 62-16-65 | |
| HIXHKHEPAKOT, OOYIOLOBIA HAI, 446.02) 44-11-06, 77.11, mt. (3478) 33-51-27, daxc. (4236) 52-91-45, 54-92-47, daxc. (3494) 52-91-45, 54-92-47, daxc. (3494) 52-91-45, 54-92-47, daxc. (3494) 52-91-45, 54-92-47, daxc. (3494) 52-91-46, daxc. (3494) 52-91-45, 54-92-47, daxc. (3494) 52-91-45, 54-92-47, daxc. (3494) 52-91-45, 54-92-47, daxc. (3495) 52-91-45, 54-92-47, daxc. (3495) 52-91-45, 54-92-47, daxc. (3495) 52-91-45, 54-92-47, daxc. (3495) 52-91-46, daxc. (3495) 52-91-45, 54-92-47, daxc. (3495) 52-91-45, 54-92-47, daxc. (3495) 52-91-45, 54-92-47, daxc. (3496) 52-91-45, 54-92-47, daxc. (3496) 52-91-45, 54-92-47, daxc. (3496) 52-91-45, 54-92-47, daxc. (3497) 52-91-45, 54-92-47, daxc. (3497) 52-91-45, 54-92-47, daxc. (3497) 52-91-45, 54-92-47, daxc. (3498) 52-91-45, 54-92-47, daxc. (3498) 52-91-45, 54-92-47, daxc. (3498) 52-91-45, 54-92-47, daxc. (3499) 52-91-45, 54-92-47, daxc. (3499) 52-91-45, 54-92-47, daxc. (3499) 52-91-45, 54-92-47, daxc. (3499) 52-91-46, daxc. (3499) 52-91-46, daxc. (3499) 52-91-46, daxc. (3499) 52-91-46, daxc. (3499) 52-91-46, daxc. (3499) 52-91-47, daxc. (3499) 52-91-46, daxc. (3499) 52-91-46, daxc. (3499) 52-91-46, daxc. (3499) 52-91-46, daxc. (3499) 52-92-00, 77.28, 78.2, 42-16-65, daxc. (3499) 52-92-00, 77.28, 78.2, 42-16-65, daxc. (3499) 52-92-00, 77.28, 78.2, 42-16-65, daxc. (3499) 53-000, daxc. (3499) 53-000, daxc. (3499) 53-000, daxc. (3499) 53-000, daxc. (3499) 53-000, daxc. (3499) 53-000, daxc. (3498) 53-000, daxc. (3498) 53-000, daxc. (3498) 53-000, daxc. (3498) 53-000, daxc. (3498) 53-000, daxc. (3498) 53-000, cebperey npt. 10A10a (3478) 33-43-44, daxc. (3478) 33-43-44, daxc. (3478) 33-43-44, daxc. (3478) 33-43-44, daxc. (3478) 33-43-44, daxc. (3478) 33-43-44, daxc | |
| HIXHKHEPAKOT, OOYIOLOBIA HAI, 446.02) 44-03-04, 77.11, mt. (3478) 33-43-44, daxc. (3478) 33-43-44, daxc. (3478) 33-43-44, daxc. (3478) 33-43-44, daxc. (3478) 33-43-44, dax | |
| HIXHKHEPAKOT, OOYIOLOBIA HAI, 446.02) 44-03-04, 77.11, mt. (3478) 33-43-44, daxc. (3478) 33-43-44, daxc. (3478) 33-44-40, daxc. (3478) 33-43-44, daxc. (3478) 33-43-44, daxc. (3478) 33-43-44, daxc. (3478) 33-43-44, daxc. (3478) 33-43-45, daxc. (3478) 33-43-45, daxc. (3478) 33-43-45, daxc. (3478) 33-43-45, daxc. (3478) 33-43-45, daxc. (3478) 33-43-46, daxc. (3478) 33-43-46, daxc. (3478) 33-43-46, daxc. (3478) 33-43-46, daxc. (3478) 33-43-46, daxc. (3478) 33-43-47, daxc. (3478) 33-43-47, daxc. (3478) 33-43-47, daxc. (3478) 33-43-47, daxc. (3478) 33-43-47, daxc. (3478) 33-43-48, daxc. (3478) 33-43-48, daxc. (3478) 33-43-48, daxc. (3478) 33-43-48, daxc. (3478) 33-43-48, daxc. (3478) 33-43-49, daxc. (3478) 33-43-50, daxc. (3478) 33-43-50, daxc. (3478) 33-43-50, daxc. (3478) 33-43-50, daxc. (3478) 33-43-50, daxc. (3478) 33-43-51, daxc. (3478) 33-43-51, daxc. (3478) 33-43-51, daxc. (3478) 33-43-51, daxc. (3478) 33-43-51, daxc. (3478) 33-43-52, daxc. (3478) 33-43-52, daxc. (3478) 33-43-52, daxc. (3478) 33-43-52, daxc. (3478) 33-43-52, daxc. (3478) 33-43-53, daxc. (3478) 33-43-52, daxc. (3478) 33-43-52, daxc. (3478) 33-43-52, daxc. (3478) 33-43-52, daxc. (3478) 33-43-51, daxc. (3478) 33-43-52, daxc. (3478) 33-43-52, daxc. (3478) 33-43-52, daxc. (3478) 33-43-53, daxc. (3478) 33-43-53, daxc. (3478) 33-43-53, daxc. (3478) 33-43-53, daxc. (3478) 33-43-53, daxc. (3478) 33-43-52, daxc. (3478) 33-43-52, daxc. (3478) 33-43-52, daxc. (3478) 33-43-53, daxc. (3478) 33-43-51, daxc. (3478) 33-43-52, daxc. (3478) 33-43-52, daxc. (3478) 33-43-52, daxc. (3478) 33-43-51, daxc. (3478) 33-43-51, daxc. (3478) 33-43-52, daxc. (3478) 33-43-52, daxc. (3478) 33-43-51, daxc. (3478) 33-43-52, daxc. (3478) 33-43-51, daxc. (3478) 33-43-52, daxc. (3478) 33-43-52, daxc. (3478) 33-43-51, daxc. (3478) 33-43-51, daxc. (3478) 33-43-51, daxc. (3478) 33-43-51, daxc. (3478) 33-43-50, daxc. (3478) 33-43-51, daxc. (3478) 33-43-51, daxc. (3478) 33-43-51, daxc. (3478) 33-43-50, daxc. (3478) 33-43-50, daxc. (3478) 33-43-50, daxc. (3478) 33-43-50, daxc. (3478) 33-43-52, daxc. (3478) 33-43-50, daxc. (3478) 33-43-50, daxc. (3478) 33-43-50, daxc. (3478) 33-43-50, daxc. (3478) 33-43-55, daxc. (3478) 33-43-50, daxc. (3478) 33-43-50, daxc. (3478) 33-43-50, daxc. (3478) 33-43-50, daxc. (3478) 33-43-56, daxc. (3478) 33-43-50, daxc. (3478) 33-43-50, daxc. (3478) 33-43-50, daxc. (3478) 33-43-50, daxc. (3478) 33-43-58, daxc. (3478) 33-43-50, daxc. (3478) 33-43-50, daxc. (3478) 33-43-50, daxc. (3478) 33-43-50, daxc. (3478) 33-43-59, daxc. (3478) 33-43-50, daxc. (3478) 33-43-50, daxc. (3478) 33-43-50, daxc. (3478) 33-43-50, daxc. (3478) 33-43-62, daxc. (3478) 33-43-62, daxc. (3478) 33-43-62, daxc. (3478) 33-43-62, daxc. (3478) 33-43-62, daxc. (3478) 33-43-60, daxc. (3478) 33-43-60, daxc. (3478) 33-43-60, daxc. (3478) 33-43-60, daxc. (3478) 33-43-60, daxc. (3478) 33-43-61, daxc. (3478) 33-43-61, daxc. (3478) 33-43-61, daxc. (3478) 33-43-61, daxc. (3478) 33-43-61, daxc. (3478) 33-43-62, daxc. (3478) 33-43-62, daxc. (3478) 33-43-62, daxc. (3478) 33-43-62, daxc. (3478) 33-43-61, daxc. (3478) 33-43-61, daxc. (3478) 33-43-61, daxc. (3478) 33-43-61, daxc. (3478) 33-43-60, daxc. (3478) 33-43-61, daxc. (3478) 33-43-61, daxc. (3478) 33-43-61, daxc. (3478) 33-43-62, daxc. (3478) 33-43-61, daxc. (3478) 33-43-61, daxc. (3478) 33-43-61, daxc. (3478) 33-43-62, daxc. (3478) 33-43-60, daxc. (3478) 33-43-60, daxc. (3478) 33-43-60, daxc. (3478) 33-43-61, daxc. (3478) 33-43-60, daxc. (3478) 33-43-61, daxc. (3478) 33-43-61, daxc. (3478) 33-43-60, daxc. (3478) 33-43-61, daxc. (3478) 33-43-60, daxc. (3478) 33-43-61, daxc. (3478) 33-43-60, daxc. (3478) 33-43-60, daxc. (3478) 33-43-61, daxc. (3478) 33-43-61, daxc. (3478) 33-43-60, daxc. (3478) 33-43-60, daxc. (3478) 33-43-61, daxc. (3478) 33-43-60, daxc. (3478) 33-43-60, daxc. (3478) 33-43-60, daxc. (3478) 33-43-60, daxc. (3478) 33-43-62, daxc. (3478) 33-43-62, daxc. (3478) 33-43-62, daxc. (3478) 33-43-62, daxc. (3478) 33-43-59, daxc. (3478) 33-43-62, daxc. (3478) 33-43-62, daxc. (3478) 33-43-62, daxc. (3478) 33-43-62, daxc. (3478) 33-43-65, daxc. (3478) 33-43-62, daxc. (3478) 33-43-62, daxc. (3478) 33-43-62, daxc. (3478) 33-43-62, daxc. (3478) 33-43-66, daxc. (3478) 33-43-62, daxc. (3478) 33-43-62, daxc. (3478) 33-43-62, daxc. (3478) 33-43-62, daxc. (3478) 33-43-68, daxc. (3478) 33-43-62, daxc. (3478) 33-43-62, daxc. (3478) 33-43-62, daxc. (3478) 33-43-62, daxc. (3478) 33-43-69, daxc. (3478) 33-43-62, daxc. (3478) 33-43-69, daxc. (3478) 33-43-69, daxc. (3478) 33-43-69, daxc. (3478) 33-43-69, daxc. (3478) 33-43-69, daxc. (3478) 33-43-68, daxc. (3478) 33-43-69, daxc. (3478) 33-43-69, daxc. (3478) 33-43-69, daxc. (3478) 33-43-69, daxc. (3478) 33-43-66, daxc. (3478) 33-43-69, daxc. (3478) 33-43-69, daxc. (3478) 33-43-69, daxc. (3478) 33-43-69, daxc. (3478) 33-43-65, daxc. (3478) 33-43-69, daxc. (3478) 33-43-69, daxc. (3478) 33-43-69, daxc. (3478) 33-43-69, daxc. (3478) 33-43-67, daxc. (3478) 33-43-69, daxc. (3478) 33-43-69, daxc. (3478) 33-43-69, daxc. (3478) 33-43-69, daxc. (3478) 33-43-62, daxc. (3478) 33-43-69, daxc. (3478) 33-43-69, daxc. (3478) 33-43-62, daxc. (3478) 33-43-69, daxc. (3478) 33-43-62, daxc. (3478) 33-43-69, daxc. (3478) 33-43-62, daxc. (3478) 33-43-62, daxc. (3478) 33-43-62, daxc. (3478) 33-43-62, daxc. (3478) 33-43-58, daxc. (3478) 33-43-62, daxc. (3478) 33-43-62, daxc. (3478) 33-43-62, daxc. (3478) 33-43-62, daxc. (3478) 33-43-56, daxc. (3478) 33-43-62, daxc. (3478) 33-43-56, daxc. (3478) 33-43-56, daxc. (3478) 33-43-56, daxc. (3478) 33-43-56, daxc. (3478) 33-43-56, daxc. (3478) 33-43-55, daxc. (3478) 33-43-55, daxc. (3478) 33-43-55, daxc. (3478) 33-43-55, daxc. (3478) 33-43-55, daxc. (3478) 33-43-56, daxc. (3478) 33-43-55, daxc. (3478) 33-43-55, daxc. (3478) 33-43-55, daxc. (3478) 33-43-56, daxc. (3478) 33-43-56, daxc. (3478) 33-43-56, daxc. (3478) 33-43-56, daxc. (3478) 33-43-57, daxc. (3478) 33-43-56, daxc. (3478) 33-43-56, daxc. (3478) 33-43-56, daxc. (3478) 33-43-56, daxc. (3478) 33-43-58, daxc. (3478) 33-43-56, daxc. (3478) 33-43-56, daxc. (3478) 33-43-56, daxc. (3478) 33-43-56, daxc. (3478) 33-43-59, daxc. (3478) 33-43-59, daxc. (3478) 33-43-59, daxc. (3478) 33-43-60, daxc. (3478) 33-43-60, daxc. (3478) 33-43-60, daxc. (3478) 33-43-60, daxc. (3478) 33-43-65, daxc. (3478) 33-43-60, daxc. (3478) 33-43-60, daxc. (3478) 33-43-60, daxc. (3478) 33-43-60, daxc. (3478) 33-43-66, daxc. (3478) 33-43-60, daxc. (3478) 33-43-60, daxc. (3478) 33-43-60, daxc. (3478) 33-43-60, daxc. (3478) 33-43-69, daxc. (3478) 33-43-60, daxc. (3478) 33-43-69, daxc. (3478) 33-43-69, daxc. (3478) 33-43-69, daxc. (3478) 33-43-69, daxc. (3478) 33-43-60, daxc. (3478) 33-43-69, daxc. (3478) 33-43-69, daxc. (3478) 33-43-60, daxc. (3478) 33-43-69, daxc. (3478) 33-43-60, daxc. (3478) 33-43-60, daxc. (3478) 33-43-60, daxc. (3478) 33-43-60, daxc. (3478) 33-43-59, daxc. (3478) 33-43-60, daxc. (3478) 33-43-59, daxc. (3478) 33-43-59, daxc. (3478) 33-43-59, daxc. (3478) 33-43-59, daxc. (3478) 33-43-59, daxc. (3478) 33-43-58, daxc. (3478) 33-43-59, daxc. (3478) 33-43-59, daxc. (3478) 33-43-59, daxc. (3478) 33-43-59, daxc. (3478) 33-43-56, daxc. (3478) 33-43-59, daxc. (3478) 33-43-59, daxc. (3478) 33-43-59, daxc. (3478) 33-43-59, daxc. (3478) 33-43-55, daxc. (3478) 33-43-59, daxc. (3478) 33-43-59, daxc. (3478) 33-43-59, daxc. (3478) 33-43-59, daxc. (3478) 33-43-57, daxc. (3478) 33-43-59, daxc. (3478) 33-43-59, daxc. (3478) 33-43-59, daxc. (3478) 33-43-59, daxc. (3478) 33-43-51, daxc. (3478) 329/60, daxc. (200/61), daxc. (200/61), daxc. (200/61), daxc. (200/61), daxc. (200/61), daxc. (200/61), daxc. (200/61), daxc. (200/61), daxc. (200/61), daxc. | HIXHKHEKHI I NTHN PHTN PHTN PHTN PHTN PHTN PHTN PHTN PHTN PHTN PHTN PHTN PHTN PHTN PHTN PHTN PHTN PHTN PHTN PHTN PHTN PHTN PHTN PHTN PHTN PHTN PHTN PHTN PHTN PHTN PHTN PHTN PHTN PHTN PHTNs PHTN PHTN PHTN PHTN PHTN PHTN PHTN PHTN PHTN PHTN PHTN PHTN PHTN PHTN PHTN PHTN PHTN PHTN PHTN PHTN PHTN PHTN PHTN PHTN PHTN PHTN PHTN PHTN PHTN PHTN PHTN PHTN PHTN |
| HIXHKHEKHI I NTHN PHTN PHTN PHTN PHTN PHTN PHTN PHTN PHTN PHTN PHTN PHTN PHTN PHTN PHTN PHTN PHTN PHTN PHTN PHTN PHTN PHTN PHTN PHTN PHTN PHTN PHTN PHTN PHTN PHTN PTT | |
| HIXHKHEKHI I NTHN PHTN PHTN PHTN PHTN PHTN PHTN PHTN PHTN PHTN PHTN PHTN PHTN PHTN PHTN PHTN PHTN PHTN PHTN PHTN PHTN PHTN PHTN PHTN PHTN PHTN PHTN PTT | |
| HIXHKHEKHI I NTHN PHTN PHTM PHTN PHTN PHTN PHTN PHTN PHTN PHTN PHTN PHTN PTT | |
| HIXHKHEKHI I NTHN PHTN PHTN PHTN PHTN PHTN PHTN PTT | |
| HIXHKHEKHI I NTHN PHTN PHTN PHTN PTT | |
| HIXHKHEKHI I NTHN PHTN PHTN PTT | |
| HIXHKHEKHI I NTHN PHTN PTT | |
| HIXHKHEKHI I NTHN PHTN PTT | |
| HIXHKHEKHI I NTHN PTT | |
| HIXHKHEKHI I NTHN PTT | |
| HIXHKHEKHI I NTHN PTT | |
| HIXHKHEKHI I NTHN PTT | |
| HIXHKHEKHI I NTHN PTT | |
| HIXHKHEKHI I NTHN PTT | |
| HIXHKHEKHI I NTHN PTT | |
| HIXHKDEKHI I NTHN PTT | |
| HIXHKDEKHI I NTHN PTT | |
| HIXHKDEKHI I NTHN PTT | |
| HIXHKDEKHI I NTHN PTT | |
| HIXHKDEKHI I NTHN PTT | |
| HIXHKDEKHI I NTHN PTT | |
| HIXHKDEKHI I NTHN PTT | |
Adepeca cepBnchbIX ceHTpoB no 06cnyKbAHHIO 6bITOBOy TEXHNK
| HIXECKB. OOx HINrny, 426057, B CHINBOH.n,152, ren (3421)77-10-10, dianh.(3421)24-95-13 |
| HHTA. HITHeTHeTHeTHeTHeTHeTHeTHeTHeTHeTHeTHeTHeTHeTHeTHeTHeTHeTHeTHeTHeTHeTHeTHeTHeTHeTHeTHeTHeTHeTHeTHeTHeTHeTHeTHeTHeTHeTHeTHeTHeTHeTHeTHeTHeTHeTHeTHeTHeTHeTHe Tn(3421)83-7-1-1-1, ren (8321)1-1-1-1, dianh.(3421)3-1-1-1-1 |
| HIXUKAP-OJIA. HIXUeBaKBeBaCeBaCer BaIaIbIaIbIaIbIaIbIaIbIaIbIaIbIaIbIaIbIaIbIaIbIaIbIaIbIaIbIaIbIaIbIaIbIaIbIaIbIaIbIaIbIaIbIaIbIaIbIaIbIaI b(3420)42-4000, BCHIOBAZBaCeBaCer BaIaIbIaIbIaIbIaIbIaIbIaIbIaIbIaIbIaIbIaIbIaIbIaIbIaIbIaIbIaIbIaIbIaIbIaIbIaIbIaIbIaIbIaIbIaIbI a(3421)65-54-22, ren (3421)1-1-1-1, dianh.(3421)45-46-22, ren (3421)5-20-22, ren (3421)29-20-22, ren (3421)29-20-22, ren (3421)29-20-22, ren (3421)29-20-22, ren (3421)29-20-22, ren (3421)29-20-22, ren (3421)29-20 |
| KA3AHb. Oo oopooepocceBcBcBcBcBcBcBcBcBcBcBcBcBcBcBcBcBcBcBcBcBcBcBcBcBcBcBcBcBcBcBcBcBcBcBcBcBcBcBcBcBcBcBcBcBcBcBcBcBcBcBb(3421)20-20-20-20, ren (3421)5-20-20-20, ren (3421)5-20-20-20, ren (3421)5-20-20-20, ren (3421)5-20-20-20, ren (3421)5-20-20-20, ren (3421)5-20-20-20 |
| KA3AHb. Oo lyooaao. 420080, DaeBacBcBcBcBcBcBcBcBcBcBcBcBcBcBcBcBcBcBcBcBcBcBcBcBcBcBcBcBcBcBcBcBcBcBcBcBcBcBcBcBcBcBcBcBcBcBcBcBcBcBbc(3421)20-20-20-20, ren (3421)5-20-20-20, ren (3421)5-20-20-20, ren (3421)5-20-20-20, ren (3421)5-20-20-20, ren (3421)5-18-21, ren (3421)5-18-21, ren (3421)5-18-21, ren (3421)5-18-21, ren (3421)5-18-21, ren (3421)5-18-21, ren (3421)5-18-21, ren (3421)5 -18-21, ren (3421)5-18-21, ren (3421)5-18-21, ren (3421)5-18-21, ren (3421)5-18-21, ren (3421)5-18-21, ren (3421)5-18-21, ren (3393-3393), BaeBacBcBcBcBcBcBcBcBcBcBcBcBcBcBcBcBcBcBcBcBcBcBcBcBcBcBcBcBcBcBcBcBcBcBcBcBcBcBcBcBcBcBcBcBcBcBcBcBc BcBcBcBcBcBcBcBcBcBcBcBcBcBcBcBcBcBcBcBcBcBcBcBcBcBcBcBcBcBcBcBcBcBcBcBcBcBcBcBcBcBcBcBcBcBcBcBcBcBc BcBb(3421)35-34-29, ren (3421)35-34-29, ren (3421)35-34-29, ren (3421)35-34-29, ren (3421)35-34-29, ren (3421)35-34-29, ren (3421)35-34-29, ren (3420)35-34-29, ren (3420)35-34-29, ren (3420)35-34-29, ren (3420)35-34-29, ren (3420)35-34-29, ren (3420)35-34-29, ren (3420)35 -14-20, ren (3420)35-14-20, ren (3420)35-14-20, ren (3420)35-14-20, ren (3420)35-14-20, ren (3420)35-14-20, ren (3420)35-14-20, ren (3420)35-14-19, ren (3420)35-14-19, ren (3420)35-14-19, ren (3420)35-14-19, ren (3420)35-14-19, ren (3420)35-14-19, ren (3420)35-14-19, ren (16300), BaeBcBcBcBcBcBcBcBcBcBcBcBcBcBcBcBcBcBcBcBcBcBcBcBcBcBcBcBcBcBcBcBcBcBcBcBcBcBcBcBcBcBcBcBcBcBcBcBcBcB cBcBcBcBcBcBcBcBcBcBcBcBcBcBcBcBcBcBcBcBcBcBcBcBcBcBcBcBcBcBcBcBcBcBcBcBcBcBcBcBcBcBcBcBcBcBcBcBcBcBac(3421)35-34-29, ren (3421)35-34-29, ren (3421)35-34-29, ren (3421)35-34-29, ren (3421)35-34-29, ren (3421)35-34-29, ren (3400), BaeBcBcBcBcBcBcBcBcBcBcBcBcBcBcBcBcBcBcBcBcBcBcBcBcBcBcBcBcBcBcBcBcBcBcBcBcBcBcBcBcBcBcBcBcBcBcBc BcBcBb(3421)35-34-29, ren (3421)35-34-29, ren (3421)35-34-29, ren (3421)35-34-29, ren (3421)35-34-29, ren (3421)35-34-29, ren(3421)35-34-29, ren (3421)35-34-29, ren (3421)35-34-29, ren (3421)35-34-29, ren (3421)35-34-29, ren (3421)35-34-29, ren (34100), BaeBcBcBcBcBcBcBcBcBcBcBcBcBcBcBcBcBcBcBcBcBcBcBcBcBcBcBcBcBcBcBcBcBcBcBcBcBcBcBcBcBcBcBcBcBcBcBcBA(3421)35-34-29, ren (3421)35-34-29, ren (3421)35-34-29, ren (3421)35-34-29, ren (3421)35-34-29, ren (3421)35-34-29, ren (34400), BaeBcBcBcBcBcBcBcBcBcBcBcBcBcBcBcBcBcBcBcBcBcBcBcBcBcBcBcBcBcBcBcBcBcBcBcBcBcBcBcBcBcBcBcBcBcBcBb(3421)-3421, ren (3421)-3421, ren (3421)-3421, ren (3421)-3421, ren (3421)-3421, ren (3421)-3421, ren (3421)-3421, ren (3421)-3421, ren (3421)-3421, ren (3420)35-34-29, ren (3420)35-34-29, ren (3420)35-34-29, ren (3420)35-34-29, ren (3420)35-34-29, ren (3420)35-34-29, ren (16300), BaeBcBcBcBcBcBcBcBcBcBcBcBcBcBcBcBcBcBcBcBcBcBcBcBcBcBcBcBcBcBcBcBcBcBcBcBcBcBcBcBcBcBcBcBb(3421)35-34-29, ren (3421)35-34-29, ren (3421)35-34-29, ren (3421)35-34-29, ren (3421)35-34-29, ren (3421)35-34-29 |
| KAKAYU. Oo CmPrnCpCmPrnCpCmPrnCpCmPrnCpCmPrnCpCmPrnCpCmPrnCpCmPrnCpCmPrnCpCmPrnCpCmPrnCpCmPrnCpCmPrnCpCmPrnCpCmPrnCpCmPrnCpCmPrnCpCmPrn CpCmPrnCpCmPrnCpCmPrnCpCmPrnCpCmPrnCpCmPrnCpCmPrnCpCmPrnCpCmPrnCpCmPrnCpCmPrnCpCmPrnCpCmPrnCpCmPrnCpCmPrnCpCmPrnCpCmPRn(3421)35-34-29, ren (3421)35-34-29, ren (3421)35-34-29, ren (3421)35-34-29, ren (3421)35-34-29, ren (3421)35-34-29, ren (34300), BaeBcBcBcBcBcBcBcBcBcBcBcBcBcBcBcBcBcBcBcBcBcBcBcBcBcBcBcBcBcBcBcBcBcBcBcBcBcBcBcBcBcBcBcBcBcBcBb(B34) 35-34-29, ren (3421)35-34-29, ren (3421)35-34-29, ren (3421)35-34-29, ren (3421)35-34-29, ren (3421)35-34-29, ren (3421)35-14-20, ren (3421)35-14-20, ren (3421)35-14-20, ren (3421)35-14-20, ren (3421)35-14-20, ren (3421)35-14-20, ren (3421)35-14-20, ren (16300), BaeBcBcBcBcBcBcBcBcBcBcBcBcBcBcBcBcBcBcBcBcBcBcBcBcBcBcBcBcBcBcBcBcBcBcBcBcBcBcBcBcBcBcBcBc BcBcBcBcBcBb(3421)35-34-29, ren (3421)35-34-29, ren (3421)35-34-29, ren (3421)35-34-29, ren (3421)35-34-29, ren (3421)35 -14-20, ren (3421)35-34-29, ren (3421)35-34-29, ren (3421)35-34-29, ren (3421)35-34-29, ren (3421)35-34-29, ren (3421)35-34-29, ren (16300), BaeBcBcBcBcBcBcBcBcBcBcBcBcBcBcBcBcBcBcBcBcBcBcBcBcBcBcBcBc BcBcBcBcBcBcBcBcBcBcBcBcBc BcBcBcBcBcBcBc BcBcBcBcBc BcBcBcBc BcBcBc BcBcBc BcBc Bc Bc Bc Bc Bc Bc Bc Bc Bc Bc Bc Bc Bc Bc Bc Bc Bc Bc Bc Bc Bc Bc Bc Bc Bc Bc Bc Bc Bc Bc Bc Bc Bc Bc Bc Bc Bc Bc Bc Bc Bc Bc Bc Bc Bc Bc Bc Bc Bc Bc BB(3421)35-34-29, ren (3421)35-34-29, ren (3421)35-34-29, ren (3421)35-34-29, ren (3421)35-34-29, ren (3421)35-34-29, ren (34) 35-34-29, ren (34) 35-34-29, ren (34) 35-34-29, ren (34) 35-34-29, ren (34) 35-34-29, ren (34) 35-34-29, ren (34) 35-34-29,ren (34) 35-34-29, ren (34) 35-34-29, ren (34) 35-34-29, ren (34) 35-34-29, ren (34) 35-34-29, ren (34) 35-34-29, ren (34) 35-36-29, ren (34) 35-36-29, ren (34) 35-36-29, ren (34) 35-36-29, ren (34) 35-36-29, ren (34) 35-36-29, ren (34) 35-36-29, ren (34)35-36-29, ren (34) 35-36-29, ren (34) 35-36-29, ren (34) 35-36-29, ren (34) 35-36-29, ren (34) 35-36-29, ren (34) 35-36-29,ren (34) 35-36-29, ren (34) 35-36-29, ren (34) 35-36-29, ren (34) 35-36-29, ren (34) 35-36-29, ren (34) 35-36-29, ren (34) 35-35-29, ren (34) 35-36-29, ren (34) 35-36-29, ren (34) 35-36-29, ren (34) 35-36-29, ren (34) 35-36-29, ren (34) 35-36-29, ren (34) \( {35} - {34} - {29} - {20} \) , ren (3421)35-34-29, ren (3421)35-34-29, ren (3421)35-34-29, ren (3421)35-34-29, ren (3421)35-34-29, ren (3421)35-34-29, ren (3600), BaeBcBcBcBcBcBcBcBcBcBcBcBcBc BcBc Bc Bc Bc Bc Bc Bc Bc Bc Bc Bc Bc Bc Bc Bc Bc Bc Bc Bc Bc Bc Bc Bc Bc Bc Bc Bc Bc Bc Bc Bc Bc Bc Bc Bc Bc Bc Bc Bc Bc Bc Bc Bc Bc Bc Bc BA(3421)35-34-29, ren (3421)35-34-29, ren (3421)35-34-29, ren (3421)35-34-29, ren (3421)35-34-29, ren (3421)35-34-29, ren (34), 35-34-29, ren (34) 35-34-29, ren (34) 35-34-29, ren (34) 35-34-29, ren (34) 35-34-29, ren (34) 35-34-29, ren (34) 35-34-29 |
| KAKAYU. Oo CmPrnCpCmPrnCpCmPrnCpCmPrnCpCmPrnCpCmPrnCpCmPrnCpCmPrnCpCmPrnCpCmPrnCpCmPrnCpCmPrnCpCmPrnCpCmPrN(3421)35-34-29, ren (3421)35-34-29, ren (3421)35-34-29, ren (3421)35-34-29, ren (3421)35-34-29, ren (3421)35-34-29, ren (34,29-200, ren (3421)35-34-29, ren (3421)35-34-29, ren (3421)35-34-29, ren (3421)35-34-29, ren (3421)35-34-29, ren (3421)35-34-29, ren(3420)35-34-29, ren (3420)35-34-29, ren (3420)35-34-29, ren (3420)35-34-29, ren (3420)35-34-29, ren (3420)35-34-29, ren (3421)35-34-29, ren (3421)35-34-29, ren (3421)35-34-29, ren (3421)35-34-29, ren (3421)35-34-29, ren (3421)35 -14-20, ren (3420)35-34-29, ren (3420)35-34-29, ren (3420)35-34-29, ren (3420)35-34-29, ren (3420)35-34-29, ren (3420)35-34-29, ren (D1600), BaeBcBcBcBcBcBcBcBcBcBcBcBc Bc Bc Bc Bc Bc Bc Bc Bc Bc Bc Bc Bc Bc Bc Bc Bc Bc Bc Bc Bc Bc Bc Bc Bc Bc Bc Bc Bc Bc Bc Bc Bc Bc Bc Bc Bc Bc Bc Bc Bc Bc Bc Bc Bc Bc Bc Bc Bc BA(3421)36-36-29, ren (3421)36-36-29, ren (3421)36-36-29, ren (3421)36-36-29, ren (3421)36-36-29, ren (3421)36-36-29, ren (3421)36-36-29, ren (3420)36-36-29, ren (3420)36-36-29, ren (3420)36-36-29, ren (3420)36-36-29, ren (3420)36-36-29, ren (3420)36-36-29, ren (3420)36 -14 -19, ren (3420)36 -14 -19, ren (3420)36 -14 -19, ren (3420)36 -14 -19, ren (3420)36 -14 -19, ren (3420)36 -14 -19, ren (3420)36 -14 -19, ren(3420)36 -14 -19, ren (3420)36 -14 -19, ren (3420)36 -14 -19, ren (3420)36 -14 -19, ren (3420)36 -14 -19, ren (3420)36 -14 -19, ren (3421)36-36-29, ren (3421)36-36-29, ren (3421)36-36-29, ren (3421)36-36-29, ren (3421)36-36-29, ren (3421)36-36-29, ren(3421)36-36-29, ren (3420)36 -14 -19, ren (3420)36 -14 -19, ren (3420)36 -14 -19, ren (3420)36 -14 -19, ren (3420)36 -14 -19, ren (3420)36-36-29, ren (3420)36 -14 -19, ren (3420)36 -14 -19, ren (3420)36 -14 -19, ren (3420)36 -14 -19, ren (3420)36 -14 -19, ren(3420)36 -14 -19, ren(3420)36 -14 -19, ren(3420)36 -14 -19, ren(3420)36 -14 -19, ren(3420)36 -14 -19, ren(3420)36 -14 -19, ren(3421)36-36-29, ren (3421)36-36-29, ren (3421)36-36-29, ren (3421)36-36-29, ren (3421)36-36-29, ren (3421)36-36-29, ren (34) 35-34-29, ren (34) 35-34-29, ren (34) 35-34-29, ren (34) 35-34-29, ren (34) 35-34-29, ren (34) 35-34-29, ren (34) \( {35} - {36} - {29} \) , ren (34) 35-36-29, ren (34) 35-36-29, ren (34) 35-36-29, ren (34) 35-36-29, ren (34) 35-36-29, ren (34) 35-36-29, ren (34) 35- 36-29, ren (34) 35-36-29, ren (34) 35-36-29, ren (34) 35-36-29, ren (34) 35-36-29, ren (34) 35-36-29, ren (34) 35-36-29, ren (3600), BaeBcBcBcBcBcBcBcBcBcBc Bc Bc Bc Bc Bc Bc Bc Bc Bc Bc Bc Bc Bc Bc Bc Bc Bc Bc Bc Bc Bc Bc Bc Bc Bc Bc Bc Bc Bc Bc Bc Bc Bc Bc Bc Bc Bc Bc Bc Bb(3421) 35-34-29, ren (3421) 35-34-29, ren (3421) 35-34-29, ren (3421) 35-34-29, ren (3421) 35-34-29, ren (3421) 35-34-29, ren (3421) 35-34-29 |
| KAKAYU. Oo CmPrnCpCmPrnCpCmPrnCpCmPrnCpCmPrnCpCmPrnCpCmPrnCpCmPrnCpCmPrnCpCmPrnCpCmPrnCpCmPrnCpCmPrnCpC mPrnCpCmPrnCpCmPrnCpCmPrnCpCmPrnCpCmPrnCpCmPrnCpCmPrnCpCmPrnCpCmPrnCpCmPrnCpCmPrnCpCmPrnCpCmPrnCpCmPrnCpCmPrnCpCmPrnC pCmPrnCpCmPrnCpCmPrnCpCmPrnCpCmPrnCpCmPrnCpCmPrnCpCmPrnCpCmPrnCpCmPrnCpCmPrnCpCmPrnCpCmPrnCpCmPrnCpCmPrnCpCmPrnCpCmPr nCpCmPrnCpCmPrnCpCmPrnCpCmPrnCpCmPrnCpCmPrnCpCmPrnCpCmPrnCpCmPrnCpCmPrnCpCmPrnCpCmPrnCpCmPrnCpCmPrnCpCmPrnCpCmPrnCpC mPrnCpCmPrnCpCmPrnCpCmPrn CpCmPrnCpCmPrnCpCmPrnCpCmPrnCpCmPrnCpCmPrnCpCmPrnCpCmPrnCpCmPrnCpCmPrnCpCmPrnCpCmPrnCpCmPrnC pCmPrnCpCmPrnCpCmPrnCpCm PrnCpCmPrnCpCmPrnCpCmPrnCpCmPrnCpCmPrnCpCmPrnCpCmPrnCpCmPrnCpCmPrnCpCmPrnCpCmPrnCpCmPrnCpCmPrnCpCmPrnCpCmPrnCpCmPrnCp CmPrnCpCmPrnCpCmPrnCpCmPrnCpCmPrnCpCmPrnCpCmPrnCpCmPrnCpCmPrnCpCmPrnCpCmPrnCpCmPrnCpCmPrnCpCmPrnCpCmPrnCpCmPrnCpCmPr n CpCmPrnCpCmPrnCpCmPrnCpCmPrnCpCmPrnCpCmPrnCpCmPrnCpCmPrnCpCmPrnCpCmPrnCpCmPrnCpCmPrn CpCmPrnCpCmPrn CpCmPrn CpCmPrn CpCmPrn CpCmPrn CpCmPrn CpCmPrn CpCmPrn CpCmPrn CpCmPrn CpCmPrn CpCmPrn CpCmPrn CpCmPrn CpCmPrn CpCmPrn CpCmPrn CpCmprn CpCmPrn CpCmPrn CpCmPrn CpCmPrn CpCmPrn CpCmPrn CpCmPrn CpCmPrn CpCmPrn CpCmPrn CpCmPrn CpCmPrn CpCmPrn CpCmPrn CpCmPrn CpCmPrn Cp CmPrn CpCmPrn CpCmPrn CpCmPrn CpCmPrn CpCmPrn CpCmPrn CpCmPrn CpCmPrn CpCmPrn CpCmPrn CpCmPrn CpCmPrn CpCmPrn CpCmPrn CpCmPrn CpCmPrn(C) 35-34-29, ren (3421) 35-34-29, ren (3421) 35-34-29, ren (3421) 35-34-29, ren (3421) 35-34-29, ren (3421) 35-34-29, ren (3600), BaeBcBcBcBcBcBcBcBcBcBcBc Bc Bc Bc Bc Bc Bc Bc Bc Bc Bc Bc Bc Bc Bc Bc Bc Bc Bc Bc Bc Bc Bc Bc Bc Bc Bc Bc Bc Bc Bc Bc Bc Bc Bc Bc Bc Bc Bc Bb(3421) 35-34-29, ren (34 29 -100, ren (34 29 -100, ren (34 29 -100, ren (34 29 -100, ren (34 29 -100, ren (34 29 -100, ren (34 29 -100, ren (34 29 -100, ren (34 29 -100, ren (D1600), BaeBcBcBcBcBcBcBcBc Bc Bc Bc Bc Bc Bc Bc Bc Bc Bc Bc Bc Bc Bc Bc Bc Bc Bc Bc Bc Bc Bc Bc Bc Bc Bc Bc Bc Bc Bc Bc Bc Bc Bc Bc Bc Bc Bc Bc Bc Bc Bb(3421) 35-34-29, ren (D1600), BaeBcBcBcBcBcBcBcBc Bc Bc Bc Bc Bc Bc Bc Bc Bc Bc Bc Bc Bc Bc Bc Bc Bc Bc Bc Bc Bc Bc Bc Bc Bc Bc Bc Bc Bb(3421) 35-34-29, ren (D1600), BaeBcBcBcBcBcBc Bc Bc Bc Bc Bc Bc Bc Bc Bc Bc Bc Bc Bc Bc Bc Bb(3421) 35-34-29, ren (D1600), BaeBcBcBcBcBc Bc Bc Bc Bc Bc Bc Bb(3421) 35-34-29, ren (D1600), BaeBcBcBcBc Bc Bc Bc Bc Bb(3421) 35-34-29, ren (D1600), BaeBcBcBc Bc Bc Bb(3421) 35-34-29, ren (D1600), BaeBb(3421) 35-34-29, ren (D1600), BaeBb(3421) 35-34-29, ren (D1600), BaeBb(3421) 35-34-29, ren (D1600), BaeBb(3421) 35-34-28, ren (D1600), BaeBb(3421) 35-34-28, ren (D1600), BaeBb(3421) 35-34-28, ren (D1600), BaeBb(3421) 35-34-28, ren (D1600), BaeBb(3) 35-34-28, ren (D1600), BaeBb(3) 35-34-28, ren (D1600), BaeBb(3) 35-34-28, ren (D1600), BaeBb(3) 35-34-28, ren (D1600), BaeBb( 3 ) 35-34-28, ren (D1600), BaeBb( 3 ) 35-34-28, ren (D1600), BaeBb( 3 ) 35-34-28, ren (D1600), BaeBb( 3 ) 35-34-28, ren (D1600), BaeB b( 3 ) 35-34-28, ren (D1600), BaeBb( 3 ) 35-34-28, ren (D1600), BaeBb( 3 ) 35-34-28, ren (D1600), BaeBb( 3 ) 35-34-28, ren (D1600) 35-34-28, ren (D1600), BaeBb( 3 ) 35-34-28, ren (D1600), BaeBb( 3 ) 35-34-28, ren (D1600), BaeBb( 3 ) 35-34-28, ren (D1600), Bae Bb( 3 ) 35-34-28, ren (D1600), Bae Bb( 3 ) 35-34-28, ren (D1600), Bae Bb( 3 ) 35-34-28, ren (D1600), Bae Bb( 3 ) 35-34-28, ren (D160 0 ), 18 18 18 18 18 18 18 18 18 18 18 18 18 18 18 18 18 18 18 18 18 18 18 18 18 18 18 18 18 18 18 18 18 1818 18 18 18 18 18 18 18 18 18 18 18 18 18 18 18 18 18 18 18 18 18 18 18 18 18 18 18 18 18 18 18 18 0 0 0 0 0 0 0 0 0 0 0 0 0 0 0 0 0 0 0 0 0 0 0 0 0 0 0 0 0 0 0 0 0 0 0 0 0 0 0 0 0 0 0 0 0 0 0 0 0 0 18 18 18 18 18 18 18 18 18 18 18 18 18 18 18 18 18 18 18 18 18 18 18 18 18 18 18 18 18 18 18 18 18 |
| POCSIN |
| ABAKAH, IN KóboBHKNK ROMAN CepreBeeHH, 655010, Topocoa yn. d.15, ran. (300) 26-65-64, fashc. (300) 22-65-64 |
| ANMBETBECK, IN BanyiBNHN Mairat PardarBeeHH, 423450, KIeKemenny y. d.18a, ran. (300) 26-65-64 |
| ANMBETBECK, IN BanyiBNHN Mairat PardarBeeHH, 423450, KIeKemenny y. d.18a, ran. (300) 26-65-64 |
| ANMBETBECK, IN BanyiBNHN Mairat PardarBeeHH, 4233440, AcpocBraNcoy y. d.18a, ran. (861) 31-69-69, 8-8-918, 215-575 |
| APNTMTH, IN KOTKOBENAR HoiY OeiBeeHH, 184200, Yin 3HIOBeeHH, 22,22 |
| APNTMTH, IN KOTKOBENAR HoiY OeiBeeHH, 184200, Yin 3HIOBeeHH, 22,22 |
| APNTMTH, IN KOTKOBENAR HoiY OeiBeeHH, 184200, Yin 3HIOBeeHH, 22,22 |
| ATMPAC, IN BAOKOBIM DMIY NIKHNI ANECHIAOBBH, 607224, 9-MeMa y. d.14, ran. (831) 47-70-73-82, fashc. (831) 7-73-82 |
| APXABH, IN KOTKOBENAR CepreBeeHH, 352900, KOMOKONBeky y. d.115, ran. (861) 37-80-80 |
| APXAHREBCK, OO KDBHNA CepreBeeHH, 163000, CaoBaoyu y. d.21, ran. (861) 37-80-80 |
| APXAHREBCK, OO KDBHNA CepreBeeHH, 163000, CaoBaoyu y. d.21, ran. (861) 37-80-80 |
| APXAHREBCK, OO KDBHNA CepreBeeHH, LMEK, 163000, FaragbaHya n. d.1, ran. (818) 27-60-66, 27-55-100, fashc. (818) 27-60-66 |
| APXAHREBCK, OO KDBHNA CepreBeeHH, LMEK, 14041, 14067, 14068, 14069, 14070, 14071, 14072, 14073, 14074, 14075, 14076, 14077, 14078, 14079, 14080, 14081, 14082, 14083, 14084, 14085, 14086, 14087, 14088, 14089, 14090, 14091, 14092, 14093, 14094, 14095, 14096, 14097, 14098, 14100, 14101, 14102, 14103, 14104, 14105, 14106, 14107, 14108, 14109, 14110, 14111, 14112, 14113, 14114, 14115, 14116, 14117, 14118, 14119, 14120, 14121, 14122, 14123, 14124, 14125, 14126, 14127, 14128, 14129, 14130, 14131, 14132, 14133, 14134, 14135, 14136, 14137, 14138, 14139, 14140, 14141, 14142, 14143, 14144, 14145, 14146, 14147, 14148, 14149, 14150, 14151, 14152, 14153, 14154, 14155, 14156, 14157, 14158, 14159, 14160, 14161, 14162, 14163, 14164, 14165, 14166, 14167, 14168, 14169, 14170, 14171, 14172, 14173, 14174, 14175, 14176, 14177, 14178, 14179, 14180, 14181, 14182, 14183, 14184, 14185, 14186, 14187, 14188, 14189, 14190, 14191, 14192, 14193, 14194, 14195, 14196, 14197, 14198, 14200, 14201, 14202, 14203, 14204, 14205, 14206, 14207, 14208, 14209, 14210, 14211, 14212, 14213, 14214, 14215, 14216, 14217, 14218, 14219, 14220, 14221, 14222, 14223, 14224, 14225, 14226, 14227, 14228, 14229, 14230, 14231, 14232, 14233, 14234, 14235, 14236, 14237, 14238, 14239, 14240, 14241, 14242, 14243, 14244, 14245, 14246, 14247, 14248, 14249, 14250, 14251, 14252, 14253, 14254, 14255, 14256, 14257, 14258, 14259, 14260, 14261, 14262, 14263, 14264, 14265, 14266, 14267, 14268, 14269, 14270, 14271, 14272, 14273, 14274, 14275, 14276, 14277, 14278, 14279, 14280, 14281, 14282, 14283, 14284, 14285, 14286, 14287, 14288, 14289, 14290, 14291, 14292, 14293, 14294, 14295, 14296, 14297, 14298, 14299, 14300, 14301, 14302, 14303, 14304, 14305, 14306, 14307, 14308, 14309, 14310, 14311, 14312, 14313, 14314, 14315, 14316, 14317, 14318, 14319, 14320, 14321, 14322, 14323, 14324, 14325, 14326, 14327, 14328, 14329, 14330, 14331, 14332, 14333, 14334, 14335, 14336, 14337, 14338, 14339, 14340, 14341, 14342, 14343, 14344, 14345, 14346, 14347, 14348, 14349, 14350, 14351, 14352, 14353, 14354, 14355, 14356, 14357, 14358, 14359, 14360, 14361, 14362, 14363, 14364, 14365, 14366, 14367, 14368, 14369, 14370, 14371, 14372, 14373, 14374, 14375, 14376, 14377, 14378, 14379, 14380, 14381, 14382, 14383, 14384, 14385, 14386, 14387, 14388, 14389, 14390, 14391, 14392, 14393, 14394, 14395, 14396, 14397, 14398, 14399, 14400, 14401, 14402, 14403, 14404, 14405, 14406, 14407, 14408, 14409, 14410, 14411, 14412, 14413, 14414, 14415, 14416, 14417, 14418, 14419, 14420, 14421, 14422, 14423, 14424, 14425, 14426, 14427, 14428, 14429, 14430, 14431, 14432, 14433, 14434, 14435, 14436, 14437, 14438, 14439, 14440, 14441, 14442, 14443, 14444, 14445, 14446, 14447, 14448, 14449, 14450, 14451, 14452, 14453, 14454, 14455, 14456, 14457, 14458, 14459, 14460, 14461, 14462, 14463, 14464, 14465, 14466, 14467, 14468, 14469, 14500, 14501, 14502, 14503, 14504, 14505, 14506, 14507, 14508, 14509, 14510, 14511, 14512, 14513, 14514, 14515, 14516, 14517, 14518, 14519, 14520, 14521, 14522, 14523, 14524, 14525, 14526, 14527, 14528, 14529, 14530, 14531, 14532, 14533, 14534, 14535, 14536, 14537, 14538, 14539, 14540, 14541, 14542, 14543, 14544, 14545, 14546, 14547, 14550, 14551, 14552, 14553, 14554, 14555, 14556, 14557, 14558, 14559, 14560, 14561, 14562, 14563, 14564, 14565, 14566, 14567, 14568, 14569, 14570, 14571, 14572, 14573, 14574, 14575, 14576, 14577, 14578, 14579, 14580, 14581, 14582, 14583, 14584, 14585, 14586, 14587, 14588, 14589, 14600, 14601, 14602, 14603, 14604, 14605, 14606, 14607, 14608, 14609, 14610, 14611, 14612, 14613, 14614, 14615, 14616, 14617, 14618, 14619, 14620, 14621, 14622, 14623, 14624, 14625, 14626, 14627, 14628, 14629, 14630, 14631, 14632, 14633, 14634, 14635, 14636, 14637, 14638, 14639, 14640, 14641, 14642, 14643, 14644, 14645, 14646, 14647, 14648, 14649, 14650, 14651, 14652, 14653, 14654, 14655, 14656, 14657, 14658, 14659, 14660, 14661, 14662, 14663 |
| APXABH |
BHHMaHHe!CnKOCCEPBCHBxIeHTPOB NOCTOARHO 06HOBnRETCa