HDP304 - Blender KENWOOD - Free user manual and instructions
Find the device manual for free HDP304 KENWOOD in PDF.
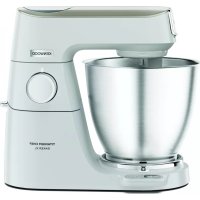
| Product type | Multifunction food processor with blender attachment |
| Brand | Kenwood |
| Model | HDP304 |
| Power supply | 220-240 V ~ 50/60 Hz |
| Main functions | Mixing, beating, kneading, chopping, blending, juicing, centrifugal |
| Blender capacity | 1.2 L |
| Bowl capacity (dough) | Up to 500 g flour (800 g total) |
| Centrifugal juicer capacity | 800 g hard fruits/vegetables, 500 g soft |
| Speeds | Electronic speed control with Pulse function |
| Materials | Stainless steel bowl, glass blender, food-grade plastic |
| Included accessories | Whisk, K-beater, dough hook, food processor with blade and discs, citrus press, blender, centrifugal juicer, mincer |
| Safety | Head and cover locks, automatic stop, indicator light |
| Care and cleaning | Wipe motor unit, parts dishwasher safe (top rack, max 50°C) or hand wash |
| After-sales service | Contact the retailer or an authorized Kenwood repair service |
Frequently Asked Questions - HDP304 KENWOOD
User questions about HDP304 KENWOOD
0 question about this device. Answer the ones you know or ask your own.
Ask a new question about this device
Download the instructions for your Blender in PDF format for free! Find your manual HDP304 - KENWOOD and take your electronic device back in hand. On this page are published all the documents necessary for the use of your device. HDP304 by KENWOOD.
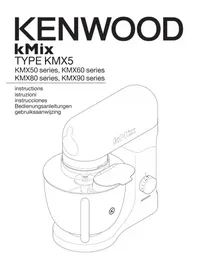
USER MANUAL HDP304 KENWOOD
-
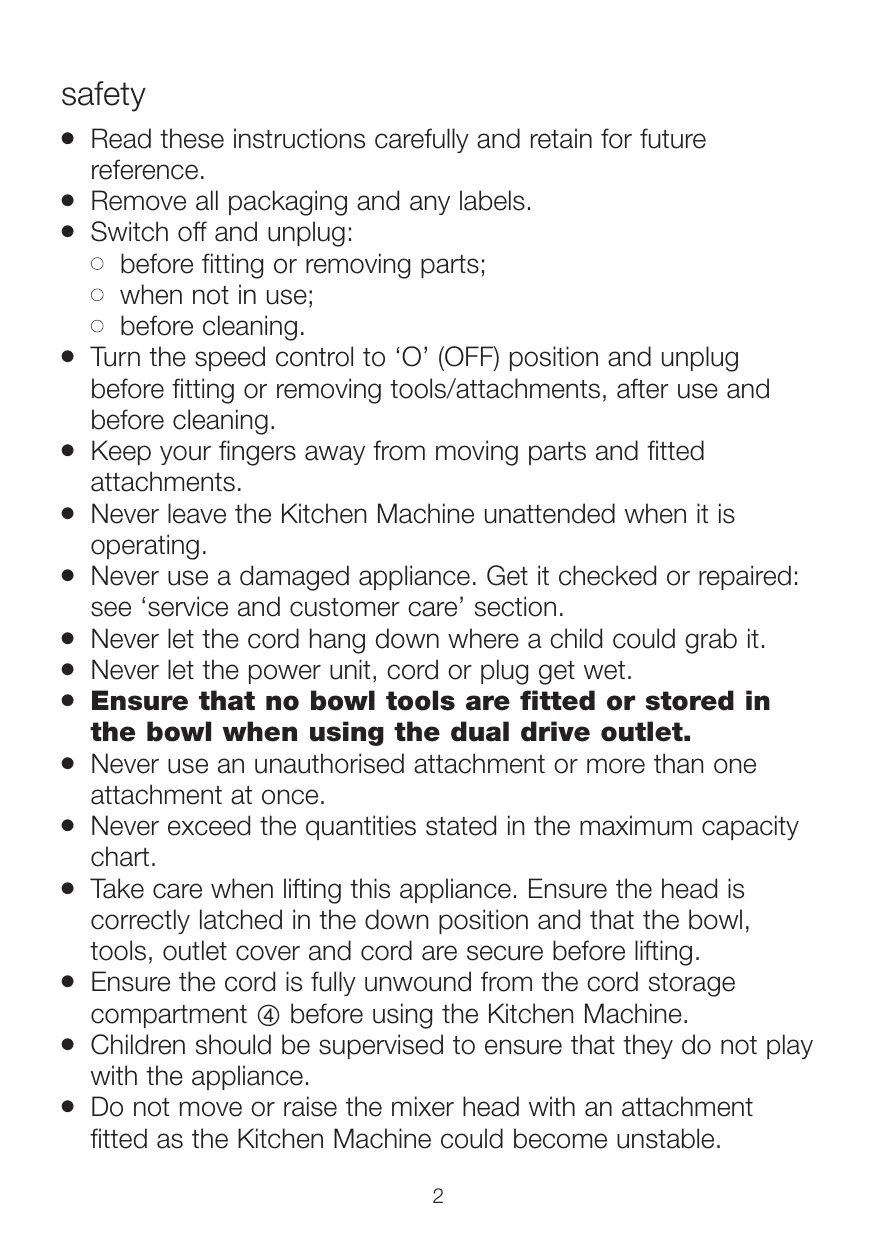
Read these instructions carefully and retain for future reference.
-
Remove all packaging and any labels.
-
Switch off and unplug:
-
before fitting or removing parts;
when not in use;
before cleaning. -
Turn the speed control to 'O' (OFF) position and unplug before fitting or removing tools/attachments, after use and before cleaning.
- Keep your fingers away from moving parts and fitted attachments.
- Never leave the Kitchen Machine unattended when it is operating.
- Never use a damaged appliance. Get it checked or repaired: see 'service and customer care' section.
- Never let the cord hang down where a child could grab it.
- Never let the power unit, cord or plug get wet.
- Ensure that no bowl tools are fitted or stored in the bowl when using the dual drive outlet.
- Never use an unauthorised attachment or more than one attachment at once.
- Never exceed the quantities stated in the maximum capacity chart.
- Take care when lifting this appliance. Ensure the head is correctly latched in the down position and that the bowl, tools, outlet cover and cord are secure before lifting.
- Ensure the cord is fully unwound from the cord storage compartment ④ before using the Kitchen Machine.
- Children should be supervised to ensure that they do not play with the appliance.
-
Do not move or raise the mixer head with an attachment fitted as the Kitchen Machine could become unstable.
-
Do not operate your appliance near the edge of a work surface.
- Appliances can be used by persons with reduced physical, sensory or mental capabilities or lack of experience and knowledge if they have been given supervision or instruction concerning use of the appliance in a safe way and if they understand the hazards involved.
- Misuse of your appliance can result in injury.
- This appliance shall not be used by children. Keep the appliance and its cord out of reach of children.
- Only use the appliance for its intended domestic use. Kenwood will not accept any liability if the appliance is subject to improper use, or failure to comply with these instructions.
- The maximum rating is based on the attachment that draws the greatest load. Other attachments may draw less power.
- Attachments will be damaged and may cause injury if the interlock mechanism is subjected to excessive force.
Food Processor attachment
- The food processor knife blade and discs are extremely sharp, handle with care. Always hold by the finger grip at the top, away from the cutting edge, both when handling and cleaning.
- Always remove the knife blade before pouring contents from the bowl.
- Keep hands and utensils out of the food processor bowl whilst connected to the power supply.
- Never use your fingers to push food down the feed tube. Always use the pusher supplied.
- Before removing the lid from the food processor bowl:
- switch off;
-
wait until the attachment/blades have completely stopped.
-
Never remove the food processor lid until the knife blades/cutting discs have completely stopped.
-
SCALD RISK: Hot ingredients should be allowed to cool to room temperature before processing in the attachment.
-
Do not use the lid to operate the food processor, always use the speed/pulse control.
Blender attachment
-
Keep hands and utensils out of the blender goblet whilst connected to the power supply.
-
Never fit the blade unit to the power unit without the blender goblet fitted.
-
SCALD RISK: Hot ingredients should be allowed to cool to room temperature before processing or blending in the attachment.
-
Only operate the blender with the lid in place.
-
Only use the goblet with the blade assembly supplied.
-
Never run the blender empty.
-
To ensure the long life of your blender, never run for longer than 60 seconds. Switch off as soon as you have achieved the right consistency.
-
The processing of spices is not recommended as they may damage the plastic parts.
-
Smoothie recipes – never blend frozen ingredients that have formed a solid mass during freezing; break it up before adding to the goblet.
Food Mincer attachment
- Always ensure bones and rind etc. are removed from the meat before mincing.
- When mincing nuts only feed a few down at a time and allow the scroll to pick them up before adding any more.
Always use the pusher supplied. Never put your fingers or utensils in the feed tube. - Warning – the cutting blade is sharp, handle with care both in use and when cleaning.
- Ensure the attachment is secured in position before switching on.
Juice Extractor attachment
- Do not use the juicer if the filter is damaged.
- The cutting blades on the base of the filter are very sharp, take care when handling and cleaning the filter.
- Do not use the lid to operate the juicer, always use the speed/pulse control.
- Should excessive vibration occur when using this attachment, either adjust the speed or stop the machine, unplug and clear any pulp from the drum (the juicer vibrates if the pulp becomes unevenly distributed).
before plugging in
- Make sure your electricity supply is the same as the one shown on the underside of your appliance.
- This appliance conforms to EC directive 2004/108/EC on Electromagnetic Compatibility and EC regulation no. 1935/2004 of 27/10/2004 on materials intended for contact with food.
before using for the first time
- Wash the parts: see 'care and cleaning'.
key
① outlet cover
② dual drive outlet (medium and high speed)
③ interlocks
④ cord storage compartment
⑤ speed/pulse control
(6) power unit
⑦ bowl tool socket
⑧ bowl
⑨ mixer head
10 head release lever
1 K-beater
⑫ spiral dough hook
13 whisk
⑭ splashguard
attachments
food processor
16 citrus juicer
⑰ glass blender
18 juice extractor
food mincer
Refer to the recommended speed chart for each attachment.
the mixing tools and some of their uses
K-beater
- For making cakes, biscuits, pastry, icing, fillings, éclairs and mashed potato.
whisk
- For eggs, cream, batters, fatless sponges, meringues, cheeses, moustes, souffles. Do not use the whisk for heavy mixtures (eg creaming fat and sugar) - you could damage it.
spiral dough hook
- For yeast mixtures.
to use your bowl tools
1 Press the head release lever down ① and raise the mixer head until it locks into position.
2 Fit the bowl into the base and turn anti-clockwise to lock into position ②.
3 Select a tool and push into the tool socket until it clicks ⑥.
4 Press the head release lever down and lower the mixer head until it locks into position.
5 Plug into the power supply. To switch on, turn the speed switch to the desired setting. To switch off turn to 'O' (OFF) position.
If the mixer head is in the raised position or the outlet cover is not fitted, the Power On light will flash and the machine will not operate.
- Switch to pulse P for short bursts.
6 Unplug from the power supply.
7 Raise the mixer head and whilst holding it steady, pull the tool from the tool socket.
important
- If the mixer head is raised during operation, the machine will stop working straight away. To re-start, lower the mixer head, turn the speed switch to the 'O' (OFF) position, wait a few seconds and then re-select the speed. The machine should resume operating straight away.
- If for any reason power is interrupted and the machine stops working, turn the speed switch to the 'O' (OFF) position, wait a few seconds and then re-select the speed. It should resume operating straight away.
- The machine will not operate unless the outlet cover is correctly fitted.
- If you hear the machine labouring either switch off and remove some of the mixture or increase the speed.
Always remove attachments fitted to the dual drive outlet before raising the mixer head.
- Ensure that no bowl tools are fitted or stored in the bowl when using the dual drive outlet.
Hints
- Switch off and scrape the bowl with a spatula when necessary.
- Eggs at room temperature are best for whisking.
- Before whisking egg whites, make sure there is no grease or egg yolk on the whisk or bowl.
- Use cold ingredients for pastry unless your recipe states otherwise.
- When creaming fat and sugar for cake mixes, always use the fat at room temperature or soften it first.
- Your machine has been fitted with a 'soft start' feature to minimise spillage. However if the machine is switched on with a heavy mixture in the bowl such as bread dough, you may notice that it takes a few seconds to reach the selected speed.
points for bread making
important
- Some movement of the mixer head is normal when mixing heavy loads such as bread dough.
- Never exceed the maximum capacities stated - you will overload the machine.
- The ingredients mix best if you put the liquid in first.
- At intervals stop the machine and scrape the mixture off the dough hook.
- Different batches of flour vary considerably in the quantities of liquid required and the stickiness of the dough can have a marked effect on the load imposed on the machine. You are advised to keep the machine under observation whilst the dough is being mixed; the operation should take no longer than 6-8 minutes.
to fit and use your splashguard
1 Fit the bowl into the base and add the ingredients.
2 Fit the splashguard by aligning the tabs with the bowl tool socket ⑦ and rotate anti-clockwise to lock into position ④.
3 Fit the tool then lower the mixer head.
4 To remove the splashguard reverse the above procedure.
- During mixing, ingredients can be added directly to the bowl via the chute.
electronic speed sensor control
Your mixer is fitted with an electronic speed sensor control that is designed to maintain the speed under different load conditions, such as when kneading bread dough or when eggs are added to a cake mix. You may therefore hear some variation in speed during the operation as the mixer adjusts to the load and speed selected - this is normal.
⑤ food processor
A pusher
⑧ feed tube
C lid
⑥ knifeblade
E bowl with drive shaft
E thick slicing/grating disc
⑥ thin slicing/grating disc
extra fine grating disc
① detachable drive shaft
to use your food processor
1 Remove the outlet cover by turning it anticlockwise and lifting off ⑤.
2 Fit the bowl (E) over the outlet with the handle to the right hand side and turn clockwise until it locks into position (G).
3 Add the knife blade or detachable drive shaft with the desired attachment.
Note: The detachable drive shaft ① should only be fitted when using the discs and citrus juicer.
Always fit the bowl and attachment onto the processor before adding ingredients.
4 Fit the lid 7 - ensuring the top of the knife blade/drive shaft locates into the centre of the lid.
- Do not use the lid to operate the processor, always use the speed/pulse control.
5 Plug in, switch on and select a speed (refer to the recommended speed chart).
- The processor will not operate if the bowl or lid are not fitted correctly into the interlocks. Check that the feed tube and bowl handle are situated to the front.
- Use the pulse (P) for short bursts. The pulse will operate for as long as the control is held in position.
6 Reverse the above procedure to remove the lid, attachments and bowl.
Always switch off and unplug before removing the lid.
important
- Your processor is not suitable for crushing or grinding coffee beans, or converting granulated sugar to caster sugar.
- When adding almond essence or flavouring to mixtures, avoid contact with the plastic as this may result in permanent marking.
- Do not process hot ingredients.
knifeblade ①
The knife blade is the most versatile of all the attachments. The length of the processing time will determine the texture achieved.
For coarser textures use the pulse control.
Use the knife blade for cake and pastry making, chopping raw and cooked meat, vegetables, nuts, pâté, dips, pureeing soups and to also make crumbs from biscuits and bread.
Hints
Cut food such as meat, bread, vegetables into cubes approximately 2cm / 34 in before processing.
- Biscuits should be broken into pieces and added down the feed tube whilst the machine is running.
- When making pastry, use fat straight from the fridge cut into 2cm / 34 in cubes.
Take care not to over-process.
- Do not use the knife blade to mix heavy loads such as bread dough.
- Do not use the knife blade to chop ice cubes or other hard foods, such as spices, they may damage the attachment.
slicing/grating discs
to use the discs
reversible slicing/grating discs - thick ① thin ⑥
Use the grating side for cheese, carrots, potatoes and foods of a similar nature.
Use the slicing side for cheese, carrots, potatoes, cabbage, cucumber, beetroot and onions.
extra fine grating disc
Grates Parmesan cheese and potatoes for German potato dumplings.
to use the cutting discs
1 Fit the bowl on the power unit, add the detachable drive shaft.
2 Hold by the centre grip, place the disc onto the drive shaft with the appropriate side uppermost.
3 Fit the lid.
4 Put the food in the feed tube.
5 Switch on, then push down evenly with the pusher - never put your fingers in the feed tube.
Hints
Use fresh ingredients.
- Do not cut food too small. Fill the width of the feed tube fairly full. This prevents the food from slipping sideways during processing.
- Food placed upright comes out shorter than food placed horizontally.
- There will always be a small amount of waste on the disc or in the bowl after processing.
⑥ citrusjuicer
Use the citrus juicer to squeeze the juice from citrus fruits (e.g. oranges, lemons, limes and grapefruits).
A cone
B sieve
to use the citrus juicer
1 Fit the bowl onto the power unit, add the detachable drive shaft.
2 Fit the sieve into the bowl - ensuring the sieve handle is locked into position directly over the bowl handle ⑧.
3 Place the cone over the drive shaft turning until it drops all the way down ⑨.
4 Cut the fruit in half. Then switch on and press the fruit onto the cone.
- The citrus juicer will not operate if the sieve is not locked correctly.
- For best results store and juice the fruit at room temperature and hand roll on a worktop before juicing.
- To help with juice extraction move the fruit from side to side when juicing.
- When juicing large quantities, empty the strainer regularly to prevent the build up of pulp and seeds.
⑰ glass blender
A filler cap
B lid
⑥ goblet
⑥ sealing ring
E blade unit
to use your glass blender
1 Fit the sealing ring ① into the blade unit ⑤ - ensuring the seal is located correctly in the grooved area.
- Leaking will occur if the seal is damaged or incorrectly fitted.
2 Screw the goblet onto the blade assembly 10. Refer to the graphics on the underside of the blade unit as follows:
- unlocked position
- locked position
The blender will not operate if incorrectly assembled.
3 Put your ingredients into the goblet.
4 Fit the lid to the goblet and push down to secure 11. Fit the filler cap.
5 Remove the dual drive outlet cover by turning it anti-clockwise and lifting off.
6 Place the blender onto the power unit, and turn clockwise until it clicks into position.
- The appliance will not operate if the blender is incorrectly fitted to the interlock.
7 Select a speed (refer to recommended speed chart) or use pulse () for short bursts.
Hints
- When making mayonnaise, put all the ingredients, except the oil, into the blender. Remove the filler cap. Then, with the appliance running, add the oil slowly through the hole in the lid.
- Thick mixtures, e.g. pâtés and dips, may need scraping down. If the mixture is difficult to process, add more liquid.
- Ice crushing - operate the pulse in short bursts until crushed to the desired consistency.
- The processing of spices is not recommended as they may damage the plastic parts.
-
The appliance will not work if the blender is incorrectly fitted.
-
To blend dry ingredients - cut into pieces, remove the filler cap, then with the appliance running, drop the pieces down one by one. Keep your hand over the opening. For best results empty regularly.
- Do not use the blender as a storage container. Keep it empty before and after use.
- Never blend more than 1.2 litres (42 fl oz) – less for frothy liquids like milkshakes.
⑱ juice extractor
Use the juice extractor for making juice from firm fruit and vegetables.
A pusher
B juicer lid
⑥ pulp remover
⑩ filterdrum
E juicer bowl
F spout
to use your juice extractor
1 Fit the juicer bowl ⑤ over the dual drive outlet with the spout ⑤ to the left hand side and turn clockwise until it locks 18.
2 Place the pulp remover ⑥ into the filter drum ① - ensuring the tabs locate with the slots in the bottom of the drum ⑫.
3 Fit the filter drum 13.
4 Place the juicer lid ⑧ onto the bowl and turn until it locks 16 . Your juicer will not operate if the bowl or lid are not fitted correctly into the interlock.
5 Place a suitable container under the juice outlet.
6 Cut the food to fit the feed tube.
7 Switch to maximum speed, then place the food into the feed tube. Push down evenly with the pusher - never put your fingers in the feed tube. Process fully before adding more.
- After adding the last piece, let the juicer run for a further 30 seconds to extract all the juice from the filter drum.
important
- If the juicer starts to vibrate, switch off and empty the pulp from the filter. (The juicer vibrates if the pulp becomes unevenly distributed).
Maximum capacity that can be processed at one time is 800g (1lb 12oz) of fruit or vegetables. -
Some very hard foods may make your attachment slow down or stop. If this happens switch off and unblock the filter.
-
Switch off and empty the pulp and juice containers regularly during use.
Hints
- Insert soft food slowly to get the most juice.
- Vitamins disappear - the sooner you drink your juice, the more vitamins you will get.
- If you need to store the juice for a few hours put it in the fridge. It will keep better if you add a few drops of lemon juice.
- Do not drink more than three 230mls (8 fl.oz.) glasses of juice a day unless you are used to it.
- Dilute juice for children with an equal amount of water.
- Juice from dark green (broccoli, spinach etc) or dark red (beetroot, red cabbage etc) vegetables is extremely strong, so always dilute it.
- Fruit juice is high in Fructose (fruit sugar), so people with diabetes or low blood sugar should avoid drinking too much.
food mincer
Use the food mincer to process meat, poultry and fish.
A spanner
⑧ ring nut
⑥ screens: medium and coarse
Cutter
scroll
body
⑥ feed tube
H tray
① pusher
to assemble
1 Fit the scroll E inside the food mincer body F.
2 Fit the cutter ① - cutting side outermost. Ensure it is seated properly, otherwise you could damage your food mincer.
3 Fit a screen ⑥ .Put the notch over the locating tab 17.
4 Loosely fit the ring nut (B).
to use your food mincer
1 Raise the mixer head.
2 With the food mincer in the position shown, align the drive tabs on the end of the scroll with the corresponding slots in the drive outlet 16.
3 Push the food mincer into the outlet and turn anticlockwise until it locks into place.
4 Hold the feed tube in place and tighten the ring nut by hand.
5 Fit the tray 19.
6 Thaw frozen food thoroughly before mincing. Cut meat into 2.5cm (1") wide strips.
7 Switch to maximum speed. Using the pusher, gently push the food through one piece at a time.
Do not push hard - you could damage your food mincer.
important
- Never operate the food mincer attachment for longer than 10 minutes as this could damage your mixer.
- The food minerer attachment will not operate unless the dual speed outlet cover is fitted.
8 Once all the food has been minced, switch off and unplug.
9 Remove the food mincer. Use the spanner A to remove the ring nut if it is too tight.
care and cleaning
Always switch off and unplug before cleaning.
- Dismantle attachments fully before cleaning.
power unit
- Wipe with a damp cloth, then dry.
- Never use abrasives or immerse in water.
- Store excess cord in the storage compartment ④ at the back of the machine.
- Ensure the feet on the base of the mixer are kept clean.
bowl, tools, splashguard
- Wash by hand, then dry thoroughly.
- Never use a wire brush, steel wool or bleach to clean your stainless steel bowl. Use vinegar to remove limescale.
- Keep away from heat (cooker tops, ovens, microwaves).
food processor
- Handle the blades and discs with care - they are extremely sharp.
- Some foods may discolour the plastic. This is perfectly normal and won't harm the plastic or affect the flavour of your food. Rub with a cloth dipped in vegetable oil to remove the discolouration.
citrus juicer
- Wash by hand, then dry thoroughly.
blender
1 Empty the goblet before unscrewing it from the blade unit.
2 Wash the goblet by hand.
3 Remove and wash the seal.
4 Do not touch the sharp blades - brush them clean using hot soapy water, then rinse thoroughly under the tap. Do not immerse the blade unit in water.
5 Leave to dry upside down.
juice extractor
- For easier cleaning always wash the parts immediately after use.
- Some foods, e.g. carrot, will discolour the plastic. Rubbing with a cloth dipped in vegetable oil helps remove discolouring.
- Clean the filter using a soft brush.
- Check the filter regularly for signs of damage. Do not use if the filter is damaged. Refer to "service and customer care".
food mincer
- Wash all parts in hot soapy water, then dry thoroughly. Do not wash any part in the dishwasher. Never use a soda solution.
- Wipe the screens with vegetable oil, then wrap in greaseproof paper to prevent discolouring/rusting.
all other parts
- Wash by hand, then dry.
- Alternatively, refer to dishwasher chart for parts that are dishwasher safe and can be washed on the top rack of your dishwasher. Avoid placing items on the bottom rack directly over the heating element. A short, low temperature (Maximum 50^ ) programme is recommended.
| item | suitable for dishwashing |
| Mixer | |
| Bowl | ✓ |
| Whisk, beater and dough hook | ✓ |
| Splashguard | ✓ |
| Outlet cover | x |
| Food Processor | |
| Main bowl, lid and pusher | ✓ |
| Knife blade | ✓ |
| Detachable drive shaft | ✓ |
| Discs | ✓ |
| Citrus juicer | |
| Cone, sieve | ✓ |
| Blender | |
| Goblet, lid and filler cap | ✓ |
| Blade unit and seal | x |
| Juice extractor | |
| Bowl, pusher, lid, filter drum and pulp remover | ✓ |
| Food mincer | |
| Ring nut, screens, cutter, scroll and body | x |
| Tray and pusher | ✓ |
service and customer care
- If the cord is damaged it must, for safety reasons, be replaced by KENWOOD or an authorised KENWOOD repairer.
- If you experience any problems with the operation of the Kitchen Machine or attachments, before calling for assistance refer to the troubleshooting guide.
If you need help with:
- using your appliance
servicing or repairs -
Contact the shop where you bought your appliance.
-
Designed and engineered by Kenwood in the UK.
Made in China.

IMPORTANT INFORMATION FOR CORRECT DISPOSAL OF THE PRODUCT IN ACCORDANCE WITH EC DIRECTIVE 2002/96/EC.
At the end of its working life, the product must not be disposed of as urban waste.
It must be taken to a special local authority differentiated waste collection centre or to a dealer providing this service.
Disposing of a household appliance separately avoids possible negative consequences for the environment and health deriving from inappropriate disposal and enables the constituent materials to be recovered to obtain significant savings in energy and resources. As a reminder of the need to dispose of household appliances separately, the product is marked with a crossed-out wheeled dustbin.
| recommended speed chart and maximum capacities | ||||
| These are a guide only and will vary depending upon the quantity of mix in the bowl and the ingredients being mixed. | ||||
| tool/ attachment | recipe type | speed | time | maximum capacities |
| Kitchen machine | ||||
| Whisk | Egg whites | Min to Max | 2 mins | 2-8 (70g-280g/2oz-10oz) |
| Cream | Min to Max | 1½ mins | 125ml/4½ fl oz600ml/21 fl oz | |
| Beater | All in one cake mixes | Min to Max | 1½ mins | 1.6kg /3lb 8oz total weight8 egg mix |
| Fruit cake - creaming fat and sugar Folding in flour, fruit, etc. | Min to MaxMin | 4 minsUp to 1 min | 1.8kg/4lb total weight6 egg mix | |
| Rubbing fat into flourAdding water to combine pastry ingredients | Min to Speed 2Min | 5 mins30 secs | 450g/1lb flour | |
| Dough hook | Bread dough (stiff yeasted) | Min to Speed 2 | 4 mins | 500g/1lb 2oz flour weight800g/1lb 12oz total weight |
| Food processor | ||||
| Knife blade | All in one cake mixes | Max | 15 secs | 600g/1lb 5oz total weight3 egg mix |
| Rubbing fat into flourAdding water to combine pastry ingredients | MaxMax | Up to 1 min10 secs | 340g/12oz flour weight | |
| Chopping/pureeing/pâtés | Max | Up to 30secs | 400g/14oz chopping lean meat total weight | |
| Discs - slicing/grating | Firm food items such as carrots, hard cheeses | Max | - | Do not exceed maximum capacity marked on the bowl. |
| Softer items such as cucumbers, tomatoes | Speed 3 | - | ||
| Extra fine grating disc | Parmesan cheese, potato for German potato dumplings | Max | - | |
| Citrus juicer | Citrus fruits | Speed 2 | - | - |
| Blender | All processing | Max | Up to 1 min | 1.2 litres/42 fl oz |
| Juice extractor | Hard fruits and vegetables e.g.carrots and apples | Max | - | 800g/1lb 12oz |
| Soft fruits and vegetables e.g.tomatoes and grapes | Max | - | 500g/1lb 2oz | |
| Food mincer | Meat, poultry, fish cut into 2.5cm (1") –wide strips | Max | - | - |
*Egg sizes used = medium sized (Weight 53-63g)
troubleshooting guide
| Problem | Cause | Solution |
| The machine will not operate when using mixing tools. | No power/indicator light not lit.Mixer head not locked down correctly.Outlet cover not fitted correctly.Mixer head has been lifted during operation and lowered again without resetting the speed control to ‘O’ (OFF) position. | Check machine is plugged in.Check that the mixer head is locked down correctly.Check that the outlet cover is located correctly.The machine will not work if the outlet cover is fitted incorrectly Check that the speed control is reset to ‘O’ (OFF) position. |
| Machine stops during operation. | Machine overloaded/maximumpacities exceeded.Mixer head or outlet cover has unlocked. | Switch off, unplug and allow the machine to cool down for 30 minutes.Check maximum capacities in the recommended speed chart.Check that the mixer head and outlet cover are located correctly. |
| Dual drive attachment will not operate. | Dual drive attachment is not locked on correctly.Food processor/juice extractor lid or citrus juicer sieve located incorrectly. | Check the dual drive attachment is located correctly.Check that the attachment is fitted correctly. |
| Food mincer attachment will not operate. | Attachment is not locked on correctly.Outlet cover is not fitted correctly. | Check the attachment is located correctly.Check that the outlet cover is located correctly. |
| Movement on the work surface. | Feet on the underside of the machine are dirty or wet. | Regularly check the feet are clean and dry. |
| Poor performance of tools/attachments. | Refer to hints in relevant “using the attachment” section. Check attachments are assembled correctly. | |
troubleshooting guide
| Problem | Cause | Solution |
| Power On light flashing rapidly. | Normal operation. The light will flash if one or more of the interlocks are not engaged correctly. | If using an attachment, check that it is locked into place correctly. Check the mixer head is fully in the lowered position, unless using the meat grinder attachment. Check the speed control is in the ‘O’ (OFF) position. |
| Power On light flashing slowly. | Standby mode operating. If the kitchen machine is left plugged in for over 30 minutes without being used, it will go into Standby mode to reduce energy consumption. The light will change to being constantly lit when ready to use. | The kitchen machine will return to normal operation when the speed control is turned to a speed and then turned back to the ‘O’ (OFF) position. |
| If none of the above solve the problem see “service and customer care”. | ||
Nederlands
ADVERTÉNCIAS PARA A ELIMINAGão CORRECTA DO PRODUCTO NOS TERMOS DA DIRECTIVA EUROPEIA 2002/96/EC.
He kepyTe COKOBxHmJaIKOIO 3a DOnOMOIO KpnIeKn. 3aBxKn BnKOpNCTOByTe dIy cboIrTop WbNdkoCTi/KhONKy imnylbCHOrO peKIMy.
- Y pa3i BvHnKHeHЯ dUxke CnIbHoI Bi6paCi i nId yac BvKOpNCtAHHa HacaIKn, BiDpeRyIIOIe IWBnKicTb a6o 3yUnHiTb npuIaI, BiKJIIOUcITb Ioro BiD MepeXi eJekTpONoCTaUaHn Ta IocNtTB bapa6aH BiD KoxUpn (COKOBHXImaJIka IocHnAc Bi6pyBaTu, JkIcO KoxUpa HepiBHOipHO pO3NoIJaETbcra N O bapa6aHy).
nepei nikloueHHm Do Mepeksi eIekponocTaayHn
- Пеконайтеса, син hapуге лесгтремерешу вашому дом BiДповидам покашикам, ВkaЗаним на зворотни чатни пinnаду.
Ley npiaad Biinobidae Bmormam DnpektnBn EC 2004/108/EC «EneKtpomarHITha Cymichictb» Ta noJooKeHHc EC Nge 1935/2004 BiD 27/10/2004 CTocOBHO MaTepiAniB, IIO 6e3nocepEnhbo Nob'raaHi 3 iKeHo.
peepnBukopctAHm
Bumitte Bci deTani, DnBntbcra po3dIn «Dorla Ta YuHcHn.
NOKaXuNK
① KpIMka OTbopy
② OTBip noDbiHOro npBbOy (cepei BncoKa 1sBvNkictb)
③ φikcatopn
④ BiDcik dIa 36epiraa HnHypa
⑤ peγιλίTOP Μυκόκτι/IMπηύβχην πρεχμΜ
⑥ 6IOK eJIeKtpoDBnryHa
⑦ rHizdo IHCTpyMeHTy aui
⑧ yàsha
⑨ rònóVBKa mīkcepa
10 Baxkib po36noKYBaHHr roJOBKn
① K-HacaIka
⑫ cnipalbHa HacaKa DnBmuiyBaHnTicTa
13 BiHUNK
14 3axnCT BiD 6pn3OK
HacaKn
15 KYXOHHHKOM6aHn
16 COKOBXKIMMaJka DnIaTpycoBnx
⑰ cknpaHn 6IeHep
18 COKOBUNKIMAJika
19 M'arycopy6ka
ДиВисьТаБиMupeKOMeHDoBaHnx WbNdkOcTeiДЯ KOKHOI HacaKn.
Hacadkn DnBmiiuYBaHHaTix npn3HaueHH
K-HacaKa
BVKOPnCTaHHI INCTpyMeHTiB yaw
1 HaTnCHiTb H a BaXiNb po36NoKyBaHnHa rONoBKn 1, NiDhimaTe rONoBky Mkcepa do ynopy.
2 YctahOBt bHaNy Ha nIDCTABky Ta nobepHITb npOTn rOaHHNKoBOi cTPIKIN dIЯ pIKcaJIi ②
3 O6epitb hacaiky Ta BcTaHOBITb ii y BiINOBiDHe rHiaDo knaaHaHH ③.
4 HaTnCHiB hA BaXiNb po36IkyBaHHra rOIOBKn Ta onyctiB rOIOBky mIKcepa do ynpoy.
5ПлкIOчITьdo eIeKTpOmepeKi.YBIMKnHtbpnlaad,nepecyBaOHpyeryIaTOp WbNdkoCTiy6baKaHe nIoJKeHH.ДЯВNKIOUeHHNoBpeHItbB noLoXeHH'O(BIMK).
- RaKuo roNoBka mikcepy 3haxoDnTbCBA nIiHrTOMy noLoXeHHi a60 KpNtka OTbOpy He BCTaHOBHeA, IHdkatop XIBneHHa 6yde 6nMaTN, a npictpi H 6yde npaioBaTn.
BukopncToByTe imnybChn peKIM P nHeDobrnx iHTeHCNBHX nepemiuYBaHb.
6 BiKIOUITb npIaD BiD mepexi eNekTPONoCTaHaHH.
7Плдимить rolOBky mIKcepa,уТРМУHOnIITB TAKOMY NOLOXeHHI,ВИТЯнITb HacadKy i3 OTbOpy.ybara
- Ykso y 6ydb-kynn qac Bnpoobk po60t npnnaDy Tpanntbc niiom rOBoKN, npnnaI HERaHNO 3ynHHbC. JnToro, u6n noHOBnTPO60Ty, Tpe6a onyctntn rOBoKb Mikcepy, nepecyHtu peryIaTOp wBnKocti y noJoxKeHn 'O' (BMMK), 3aekatn DekiBka cekynd ta 3HOy obpaTn Wbnkictb. MaunHa heraHno p03NoHpepo60Ty.
- ⅢKIO 36yIb-IAKIN npuHn npuHnHna cnoaJxN BJIeHHa i MICKep 3yIMNIBcA, nepeCyHBte peryIaTOp 5BnKocTi y noLoXeHHa O' (BIMK), 3aueKaIte deKiIbKa cekynTa 3HOby o6epiB notpi6Hy 5BnKicTB. MICKep HeraHo po3NoHpe p60Ty.
MaunHa He npaIOBaTmHe, kIoo KpIshKy OTBOpY BCTaHOBNeHO HnpeBaNJIbHO. - 錢卍 npinad npiragalmbovy, BmKHiTb NOro Ta BnIMt b cactky cymi, a60 36iNbHtB WBNdkicTb.
3BxJn 3HimaTHeacaIky, BCTaHOBBeHy Ha noDbHm npBID, nepu HIX niDhimaTn rONOBKy MICKepa.
-ПдчасВИКОРиСТанняпОДВиHOrO npINbOу, yашI He moKуТь 3нaxOДиTиСь iHCTpyMeHTN. KopиСни nopади - Yac BiD Yacy BmNkaTe npnIad Ta 3HImaTe 3aIIuShK INrpeiEHTiB 3i CTiHOK YaSi 3a DOnOMOROIO JONATKIN.
-ДяЗбИВанькраиЕ ВИКОПСТОВВATNЯИ КIMHAΤΗΙ Temперату. - Peru hix 36nBATn ychhi 6iKn, nepeKoHaTecra, lo Ha BInuKy Ta BCEpEnHi YaSi He Mae 3aJINsKIB Knpy Ta eHOrO JOBtka.
-Дя npiroToyBaHn3dO6HOro ticTa BnKOpNCTOBuYTe XoJOnDi iHrpeJeHTn,Якsoу peuenTax He 3a3NaYeHOiKaIe. - Pn 36BbHHi Jxpy 3 yKpOM dI pynproTyBaHcymIe IJN TICTeOK, 3aBxDn BkOpncTOByTe Kxnp KIMHaTHoi TEMpepaTpy a6o CnoVaTkpo3M'AKuItb Ioro.
Bau npucptiO mbadhanHn yHKciEo M'AKOrnycky), 0do03BOJRA npaKTNUHO YHMKHTu po36pn3kyBaHH.AIe, kUO BV yBMKHeTe MaunHy, KOJIy uawI 3hAxODntbCra rcta cyMiU, HapnKnad TicTo dnn XnI6a, BN NOMITte, 0do DnoDocarHeHnOBpaHO WBNkOcTi 3HaDo6ntbcyaBoDeKInbKa cekyHd.
Поради CTOCOBHOBINiKaHHNxI6a
ybara
Hikon He nepeBunuTe MaKcMmAbhNx noka3nKiv, 3a3NaueHnx HIXy; Ze MoKe npni3BeCTn Do nepeBaHTaxeHHaMaJHNi.
Puy roJOBKn mKcepa nID vac po60Tu HOpMaJIbHMЯBnIeM,OCo6JIbBO, nID vac BmIiSyBaHnI rCyTnx CymIeN, Jk HApnPKNaD, TiCTO dIy XnI6a.
- IHRpeiEHTN nepemiuOyIObC KpaIe, JaKIo CNoUaTky DoaTn PiDHy.
- Yac BiD yacy BmMkaIte npnIad Ta 3HimaIte 3aIIuKIN 3 rakOnoIbHOi HacaKn dJa BmIiSyBaHH TICTa.
- Pi3hi ratayHKn bopouHa notpe6bTyb pi3hoi KInbKoCTi pIDHn, a BmUyBaHHr yctIwO rTicTa notpe6ye doaTKOBx 3cynb. Pid cac 3amUyBaHHr TiCTa peKOMeHytbcrNoCTiHo HarJdaTn 3a po6toHO npnaLy; cac BmUyBaHHr He nobHeHnepeBnuByatn 6-8 XBNIH.
K KopncTyBaTnca DnCKaMn
K KOPNCTUBAATNCYCKJHNM 6JIeHdepom
1 YcTaHOBITb yuINbHIOBaJIbHe KInbIe ①do HoxKOBOrO 6nOKy E Tak, uObN BOHO npaBnIbHO yBiUJNo Do na3IB.
- YKIO yUilbHOBaM aE NOWkoJKeHHa6o NOrO 6yNo BCTaHOBHeHO HnPaBnIbHo, cE MoXe npN3BecTu Do npOTiKaHH.
2 PnKpyTtB yawy do HoxOBoro 6noka 10.
ДИВITСА МЛнOHКи Ha 3ВОпTi HOЖОВOrO 6ЛOKу:
- po36noKOBaHo
一3a6nOKoBaHo
Kaio 6nep 6ylo 3i6pao HnnpabunbHo, BIn He npauoBaTme.
3ПoknapitbihrpeiEHTNoyaasi.
4 YctahOBiBt KpnuKy Ha uay Ta Hata NCHiTb, UO6n 3aqiKcyBaTu Ha Micci. YCTAHOBiTB KOBnaOHK 3aJIINBaIbHOrO OTbOpY.
5 3HIMITb KPNUKU 3 NOBBIHORO OTBOPY, NOBEPHyBUn II pOToN rOINHHNKOBOI cTpiIKN i NiD HIMITb.
6 YctahOBiTB 6JIeHdep Ha 6JOk eNeKtpoDburHyHa Ta NOBepHiTb 3a rOuHHNKOBIO CTpiIKoHO 12 Do KnacaHH.
- Jkso npicpi6yno BCTaHOBHeNo HnpaBnIbHo y MexaH3Mi 6nokyBaHHn, npnaad He npaOBAtme.
7 OsepIt noTpi6Hy 乌BnKicTb (INBnCt Ta6nIIO peKOMeHDoBaHnx 乌BnKocTei) a6o CKOpNCtaItecA iMnyIbCHIM pexNMOM P.
Kopnci npa
-Пд ac пиrotybaHHmaOHe3y, noKnaIbYci iHrpeiEHTn Do yaSi, 3a BnHrTkOM onii. BntrHiTb KOBNaQOK 3aJIbBaIbHoro OTBOpy. Iotim yBIMKhITb npinad Ta nobIbHo dOdaIte oIIO kpi3b OTbip y KpNiUe.
-ПдчacпрiroTuBaHHryrctnxcymiшe,нанрknad,naWTeTIBa6ocoyciB,3HimaTe 3aIuKnCmUwii3i cTIOHKaU.JaKIoInrpeJeHTN IOraHO 3MiUyOtbcra,doaJIte pIDHN.
-Подрибеннылбody-ВМИКаiteТаВМИКaiteIIMnylbСнй рекин ha KopoTки quac,ДOKи HeOTPIMaTe 6akany KOHcNCTeHuI0
- He pekomeHnyeTbcrapepeo6nTn cneui, aJxete moKe nouKoDHTn pnaCTNKoBI detani.
- Jkso 6JeHep 6yNo BCtahOBHeHO HnpaBnIbHo, npuaad He npaOBOaTIme.
- 3muaTcu xihprdeiHn, nopKe ix Ha 1MaTOUKN, BNTaHITb KOBnaOH 3aIINBaIbHO OTOBPOy, a Notim yBIMKHTb npuHa Ta noCNIobHO DoabaiTe No OHOMy 1MaToOky Do qau. Pyk TpMaAte HAD OTBOPOM. IJa OTPMaHHa HauKpaIoro pe3yIbTaTy, peryIpaHOB BinopOxHraTe qauy.
- He BnKOpNCToBvIe 6IeHep dIЯ 36epirAHn npOyKtIb. BIn MaE 3aIIuWATncn nopoxHIM Do Ta nicna BnKOpNCtaHHa.
HikonHe nepemiuye Te 6ilbwe 1,2 ntipB piHNPiJ uac 3miuBaHHX XOIOHNxCyMIeHa KUtaTT MOnOuHnx KOKTeiIB,piHNn NOBHHo 6ytNZe MeHwe.
⑱ COKOBONKIMMaJIka
BukopncToBynte cokOBxmAnky nI npiroTyBaHHc oKIB i3 TbePdIX ppykTb Ta OBOvH.
A WTOBxAu
B KpuiKa COKOBxKMaJIk
C npncptiDnBvDaneHnM'akoti
⑩ 6apa6aan φinbtpa
E 乌shaCOKOBXKIMAJIKI
F HOCINK
BVKOPNCTaHHaCOKOBXIMMaJIKN
1 BcTaHOBiTb yaUy cokOBxMmaIKN ⑤ Ha OTBip NOdbHOrO pInBOy HocIKOM ⑤ JIbOpuy Ta NOBepHiTb 3a rOJHHNKOBQIO CTpiKIO, Uo6 3aΦikCyBaTn 8.
2 YctahOBITb npictpi DnBnDaneHnM'AKOTI ① Do 6aba6any fInbtpa ②. IpekeoHaItecra, zo CkO6n yBiWiNn Do rH3da, po3TaWObAHO r HnKHi qactnHi 6aba6any 16.
3 YctahOBiBb 6apa6aH pIbTpTa 16.
4 UctahOBITb KpnUkY COKOBKIMaJIKN ⑧ Ha yaUy Ta nobepHITb dny pfikcauü 16. RaIoo yawa a60 KpnUka 6yIn BCTAHOBJIeHi HnpeBaUNJbHO y BiNobiDiHi MexAhI3Mn 6NoKYBaHHa, COKOBKIMaJIKA He npauOBAtme.
5 NocTaBTe BiIDNoBiHn KOHTeHep DJIa COky niOTBOPOM.
6 PnpixTe npOdyKTn Ha HeBEnuKi ShMaToUkN, Uo6n BOHm MoTn npoxoDHTn Kpi3b HApPmHy Tpy6ky.
7 YbIMKHTb MaKcImaJIbHy WbUdKiCTb Ta nOKlaIITb npOdykTu Tpy6Ky. PIBHomipHO HATNcKaIte HaWTOBxau-He OnyckaIte NaIbci Do HAnpMaHoi Tpy6Kn. IpePe IdoBaAHm HoBOi nopii IHRpeDieHtB CnoaTky NobHicTIO o6pO6Itb nonepeHIO.
- Plicna doabaHnO octaHHbOro 6MaToUka cokOBKImaJka NOBHHa npaIOBaTN npOTrOM ue 30 cekyH, 106b3aIIuKc KcOy BmIu n3 6apa6aHa φinbtpa.
ybara
KkO COKOBKIMMAnKa NOpHe Bi6pyBaTn, BmKHiB npInaD Ta BnNopOxHItb M'KoTb 3 fIbTy. (COKOBKIMMAnKa NouHae Bi6pyBaTn, kU O'M'KoTb HepiBHomipHo p03NoDiJnEeTbc).
3aOIN pa3 MoXHa o6p06JIaTn He 6IbIe 800 rp.ФpyKtIB qN OBOYIB.
- Deяki npodykTN MOkyTB yNObiNbHnTu pyx npuIady a6o HabiT npinnHnTu Ioro po6Oy. Raio ce TpAnIOsc, BmKHiB npuaT a po36nokyTe qIbTp.
-Пид уас роботи Perуларно Вимькале пилад та Виноюжнайтete EmHICTb Дя M'яКOTI ta EmHICTb COky.
Kopnci npa
- Μύδ σθριματη γακOMORA δίνβως κόγ, προώτOBxγήθε ΜιΜΑΤΟΥΚ ΜλΕΚΟΙ τΕΚΤΡι ΠΟΒΙΝΗ.
Cik Micntb BitamHn, ane BOH uBnKO po3uHIObcr, i TOMy cKopiE BN Bn'Te cik, Tm6 biBb BitamHb BN OTPMaTe.
-ЯкwoBamnotpi6HOb36epiratn roTOBm cik npotrrom DekiNbka rOdn, nocTaBe Noro y xoIoDnIbHnK. BIn 6yde 36epiratnc Kpaue,Якwo BNdoJaTe DeKiNbKa KpaneNB JIMMOHOrO COKy. - He pekomehnyctbce Bxnbatn 6bnbe TpboxcknHOK coky n0 230 Mn 3a Deh, TiNbKn-Ho KaBOnHe MaTe npOTnIOKa3aHb i MoXeTe Bxnbatn 6bnbe.
-ДiTЯр ekOMeHnyeTbCЯ po3uHЯTи cik i3 piBHOIO KINbKICTHO BOHN.
Cik i3 TemHO - 3eneHnx (npokoi, uHHaT i T.D.) Ta TemHO - cepBOHx (6yprk, cpeBOHa Kanycta i T.D.) OBOUIB E dyKe KOHcHTpOBAHm, TOMy peKoMeHdyEcbrno p03BoDnTn.
-Фуктobи cik MICTNb 6aRaTO φpykTo3n (ФуктOBOrO uKpy),i TOMy XBopi Ha Diabet Ta IIOJN i3 Hm3bKIM pIBHem UKyP B KpOBI NOBHHI 6ByTN dUyke ObepeXHMn i He nepeBnUyBaTn MaKcMmaJIbHO DoNyCTMMy Do3y.
19 M'acopyka
BmMOKeTe BnKOpNCTOByBaTm M'acopy6ky dIy o6b6Kn M'ca, nTuCi Ta pu6n.
Araikobn Klnou
B kiIbIeBa raiKa
⑥ peuitkn: cepenHa Ta rpyba
D HiX
E UHeK
F koprnyc
⑥ HaprpmHa Tpy6ka
Taça
① WTOBxau
36npaHH
1 YctahOBiB IWeK E BCEpeDInHy KOpIyCa M'acopy6Kn F.
2 YctahOBITb HIX ① pixyM6OKom Ha3OBH.IpekeOnaiTeCra, 10 HIX 6yNo BCTaHOBNeH npabNtHo, 6o iHaKSe BiH MoKe IOnkoDnTm M'acopy6ky.
3 BCTaHObitpeWitKy ① PnHBOkaMae notpantnTo do ipp6HH
4 Hakpytib kibueBy raiky (he 3aTayTe) ⑥.
KOpncTyBaTnca M'ocopykoio
1ПiДиHIMITb rOIOBky mIKcepa.
2 BCTaHOtB M'acopy6ky y nOIOKeHHy,ЯK nOKa3aHO, nOeHaNte BVCTUyn Ha KInci UHeKY 3 Na3AMn B OTBOpi pInbOdy 16.
3 BCTaBTe M'rcopy6ky B OTbip Ta NOBepHiTb npoTN roHHHNOBOI CTpiKi, 106 3a6JokyBatn.
4 TpmaTe HaprMHy Tpy6ky Ta 3aTgHtB raKy BpyHy.
5 YctaHObitb TaHIO 19.
6 3amopoxeni npoayktn cnid peTeNbHO po3mop03nt nepe py6aHHa. Iopixte M'acO Ha cmykkn 3abwnpukn 2,5 cm.
7 YbIMKHTb MaKcImaJIbHy WbUdKiCTb. IocTyNoBO
IoDaBaIe TnpOdyKTn Do HaprMaHOI Tpy6Kn 3a
DOnOMOrIO UToBxAuA. OINH UMaTOyOK 3a pa3.
He DOKlaJaIte 3aBvX 3ycNlB, OckIbKn Ze
MoKe NpUKOJITM M'rcopy6Ky.
ybara
He BMnKaIte M'acopy6ky DoIbe HIX Ha 10 XBNJINH, OCKIbKU CE MOKE NOUKODTN ii.
M'acopyk6ka He npaObaTIme, kkuo 6yde BiKpnTa KpUsha oTbOp y noDbHOro npuBovd.
8Пилnoорбнгь,ВIMKHTb npnlaT a BiKIOHtB BID Mepexj eJekTpOncTaaHnH.
9 3Himitb m'acopy6ky. BnKOpncTOBynte raIKOBNI KIOU A, IIOB BnKpyTNTn raIKy, RaIIO BOHa HAdTo Tyro 3aTAYHTa.
DorJraTatauHennr
3aBmBIMKaiTe npilad Ta BiDKnHouaTe NOro BID eEKeTpOmepeKi nepeD uNueHHaM.
- Пера Рицением поьichtу розеріт haçaдку. 6нok eн ekтpoDВИгУнa
- PnotpiTb cnoaTk y BOnoro, a Notim cyxoh raHyipkoH.
HikonHe BIKOPcTObyTe a6pa3nBHi MaTepiAnTa He onyckaTe npnilaD y Bovdy.
- YIOnKiTb IUnyp y BiDcIK dIЯ 36epirAHnA ④ B 3aHni qactNIHmAsHH.
-Тримапеши Нжки OCHOвань мIKсеру ИСТUMM.чаша,Инструм enth,зхпстВдбрзok
- TomniTe pykami, a notim peTeIbHo npocuWitb.
HikonHe BnKOpNCTOByIte DpoTMy 1tKy, MetaIeBm BixOb a6o Bi6IIOBaNbHn 3ac6 dnyuIeHHa uoi i3 HepKaBIOOci CTaJI.ДЯ BnDaJIeHHa HAlbOTy BnKOpNCTOByIte OcET.
He bctahOBniTo Te npnilad noprd i3 dxpejAmm TeIa (KoHΦopkAmn PJIITN, eJeKTpOneAAMn, MikpoxBnIbOBmN neaM). KxOHnn KOM6aH
- HoXI taДиСКИ duXki roCTpi; TOMy 6yIbTe o6epeXhi.
-ДякnpodykTNMOkyTb3he6apBnOBAtIN pnaactNKOBI DeTalI. Ye BBaxaetbCary HopMaNBHM RAUNCEM,He npn3BOIDTb DO NOuKoDxKeHb PnaactNKOBHX DeTanei Ta He BnInBaE Ha CMAk iKi.IIO6 BnBeCTN 3he6apBnIOBaHy nIMy, NOTPIb II raHvipKOIO,3MoueHOy y pcnnHHi onii.
COKOBKIMMaKaДЯЦTpycobux
- Помп Te рукам, a NotIM peTeьно npocuyiTB. 6neHdep
1 Cnoataky BnnpoxkHtbyauy,anotim BiKpyiTb ii BiH HOxOBOrO 6JOKy.
2 POMnIte uAsy BpyHy.
3 3HIMiTb Ta NOMIte yuJIbHOBaI.
4 He Topkaiochc roctpnx Ie3, npomme ix rapaHO MmIbHO BOIOU, a Notim peTeJIbHO cnoIOCHITb II KpaHOM. He onyckaTe HOXOBu 6nok y BODy.
5Пелеверніть hoхі догори дHom ta 3aNiшTe npocnxatn.
COKOBONXIMaJIka
-Дляпгкого чишенизавдм митeti detani odpa3y nicra 3akihenno roboTN.
-ДякnpodykTN,Hanpknad MOpKBa,MoxyTb 3He6apBnIOBaTN nIaCTNKOBI detani.Io6 BnBeCTN pIMy,noTpITb II raHvipKOIO,3MoueHO y poCJINHHiOnii.
-ПоунисовдлбтзадомогюМяковиточк.
Perynphno nepeBipraTe qHe Mae pfIbTp nowkoDxKeHb. He BnKOpncTobuyTe cokOBnxMaNky, kXo fIp6yNo nowkoDxKeHo. DnBItbc po3dIn «06cnyroByBaHHa Ta peMOHT>.
m'acopy6ka
- PpomnTe Bci DeTani B MInbHiI rapaui Boi, notim peTeIbHO npocuWitb. He MnIte DeTani y nocydomnHiMi MaunH. He BnkOpncToByIte po3HH codn.
- PnOToPiB peSiItKn pocInHHIO OJIeIO, a NotIM 3aorOpHiTb y XJNPOCTiIKM Napanip IJa 3aNo6irAHHn 3He6apBNeHHo/ipXaBInHIO.
Ihwi Detani
- Поми Te BpyHy,Notim npocuWitb.
-ДоЗьясмNTи iHи DeTaniHa BepxHiI nOuIi NocydomnHoMaunH.NiB.TaBnIcUo MTTB NocydomnHiMaunHi.He peKOMeHdyETcbpo3MiCyBaTn Detani Ha HxKHi I ONUIi npA MoHaN HarpiBaJIbHmE enEmeHTom. PeKOMeHdyETcbBnKOpNCTOByBatn KopoTky npOrpaMy (MakCmym 50°C)
jlll jlll jlll jlll jlll jlll
jlll sddgssssgall
1111 1
1 1
gssall gssll sssll ssssss
aall jgaiall jilalll jii jie gail
aall all y Jull oal .
(1)
S OBC = S COD + S_ BOC
plabll j
Babill bawig baii jw Jai yolai
1.12345678901234567890
gol 1a. dai jilal gale icjicj jjj
Jyssall gagg jgjll
1
so 45
S OBC = S BOC + S_ BOC
yall lac yess yessll lglii pi kL - clllal .
...liolali jssy
jdua aclw yall jdi jdji
a
jsslll l 1
JyN JyBn nn no Jn Jn Jn Jn
..
.
aaii i 1
g()g
ySlll jll lll
1
奇及女
gic dill (jgsll) 51gall Sgic 51gall
Saaasaae ⑧ aalal alalall
- 16 jiaiill aai y jaiy jiyaiyaiyaiyaiyaiyaiyaiyaiyaiyaiyaiyaiyaiyaiyaiyaiyaiyaiyaiyaiyaiyaiyaiyaiyaiyaiyaiyaiyaiyaiyaiyaiyaiyaiyaiyaiyaiyaiyaiyai
aillalwll uS jps aLL gJauell Jaa
a aagaaa aayy bgy gall lballlg
.
aai
S OBC = S BOC + S_ BOC
yicoligall gai jgaiell aegll gajll
aIis
aaii daiyai yag jay -algall Lc
aasll jnnn nn nnnn nn nnnnnnnnnnnnnnnnnnnnnnnnnnnnnnnnnnnnnnnnnnnnnnnnnnnnnnnnnnnnnnnnnnnnnnnnnnnnnnnnnnnnnnnnnnnnnnn
aas aal 1j p jk 2g gall
aillr. 3al Jaa ayall g jil, aabj yai ai lai!
ailll jlll l 1000000000000000000000000
P
jll jjjj jjjll
e 1
.
a 1
- 1.2.3.4.5.6.7.8.9
jolal a jgi jbiabnss siaailll aabllg jai
aal jg jll jg jgl
jzj ①
④
(8)
G
P_ AOB = 12
1
i
Still - ⑤ 与 5 的 ( 0,1)
Jusu Jusu Jusu
= =
Jaaasaoa gai aalpalsalcs
y
10 1
galllllgldssasallaaasss
ylll 5golj
iill 1
Jzill
J 1
32 + 1 小 g = 0
Jus Jus Jus Jus Jus Jus Jus Jus Jus Jus Jus Jus Jus Jus Jus
aill 15b
aolj qai jzjbcjgaii jd j 0
C
aai jai ai (j)ai gall aill lal 1
a 12 clll lcc
jck jlls jll jll
Jaii
J 1
Gill 1
.
15c jall golgol Jgol, jolal jssic
yj yj yj yj jy j
Jusuui uli yolll uill lssyessall Jus
k_2 = 1
aagll liang jia kaoaiuuiuuiiui
a
Jilgall no joll
g 1
y
.5
jck jll kjj jll jll
·s + 101 - 11 = 101 + 101
1
i 1
Jusif Jusll. aessill gssy j
joo Joo oolg joo
cbaii Cbiwip
S 1
15
a a a a a a a a a a a a a
a1 = 2,b2 = 3
1
S (s) (s) (s) (s) (s)
Jrjssu 1sui -iillalll sIaall
8 aillallll 1e 3 10
jss s 4y1y j yall gaoe yall bgs
9 Lall
g jll gai i 51 gai la
S ADB = S COD + S BDO = S ADB + S COD + S BDO
alall sji jllgall jlae
g 15
Jie Lueeae Jie aie 1ie
Lc bll co Jell sio chw Ie jy
S OBC = S COD + S_ BOC
a 1000
a a a a a a a a a a a a a a a a a a
jlll llll jlll
joo joo joo oo ooo oo oo oo oo oo
y 1000
aaiyall ayll yjll
P( a,b)
aaii i 1
J 1
aably jilll lka. oJzIe baii Jsdo
aalal aai jss jll gill jzjzjzjz
1/
yulglubaiillcbwip
-sslllglalgallbail
cbaii cbiw: chaiuuiy iaiy cbaii ci
⑥
jall jlll golal ll
gill 1
jlll jll l 100
Jllg jllg Jllg
1
sablll jilbsi sbllll l
1,2,3
i
a aal llll 1
a 1
jssll slls ilg jil jus jus Juaill
aessssssssssssssssssssssssssss
cJall aew baw yauwll
a 1 a
pale ⑤
ai ≤ aj ②
Jol
(1)
Gall
Julll/duall lshll shw F
Jll/12 1
1 电
Jall Jll Jall ①
pabll jia jia jia
jucocol jcdjcbc 1
6
aaii aaii aai i 1
g jaiu g iacuul wjlaol g jalgl
⑥
aall 10 Jlll 1111 1111
.101
① Julljulldg20uJz:la
oJusgEbailloljgiplzulisb
1
Jalpalal jai gaoalgai balaal lai
a a a a a a a a a a a a a a a a a a
JJI JI 4000000000000000000000000000000
olal jlll lalalall
j_( 1) = 1
Jusill P yssll Jusill c 100
s j 1j6 j 1j6 j 1j6 j
Sailllieo le biai
jg jgl jll gis, jol jall ooe
eessss
.1J
aolla 1 aui 1 jn jai g ius pse no sui
aillll llll 1111111111111111
aaiy ailllll lglg jlll
aalll ic aill aallo
a jai jia jia jia jia jia jia jia
Jusu Juyu yu juyu uysuuiu uuuu uuuu
a
aalalal aalal alalal alalal alalal
LgTt j- (Sall Jaaal bJoo)
glll lal
baa aallll co
auiuui uuiuui
J 1 bJbJ J
Jc
2
yill gao jol jol jol jol jol jol jol
aill a 1
③ iikab 2
a
jiaai jiaai
a aalaa aalaa aalaa aalaa
S_ OBC = 12 · OB · BC = 12 × CD × 5
y
C
(2)
Jusuusudaguo yuygallacjy
在 Rt ABD 中:
Cjall slls jy jla Jl jll
K


Jol 1000000000000000000000000000
SLgSLLJgGll
G 1
j11 1
y 2004/108/EC
1935/2004
aaii iiaaaial algally aieaal y.../1./yV
gJyJzJyJzJzJzJz
aill" puee:lew yewell
.
. plo
J 1. 1 J 1 J 1 J 1 J 1 J 1 J 1 J 1 J 1 J 1
Kenwood
a
J 1
Jaua aaiu
a a a a a a a a a a a a a a a a a a a a
a
pabll jj
J 1
1g 1s
Jz
1
J 1
.
jll jll jll jll
:
yI pabll jj yJgall gll all j
/
L
.
.
.
.
.
.
.
.
.
.
.
.
.
.
.
.
.
.
.
.
.
.
.
.
.
.
.
.
.
.
.
.
.
.
.
. 10000000000000000000000000000000000000000000000000000000000000000000000000000000000000000000000000000 11111111111111111111111111111111111111111111111111111111111111111 2222222222222222222222222222222222222222222222222222222222222222222222222222222222222222222 333333333333333333333333333333333333333333333333333333333333333333333333333333333333 4444444444444444444444444444444444444444444444444444444444444444444444444444444444444444444444444444 55555555555555555555555555555555555555555555555555555555555555555555555555 666666666666666666666666666666666666666666666666666666666666666666 7777777777777777777777777777777777777777777777777 8888888888888888888888888888888888888888 9999999999999999999999999999999999999999999999999999999999999999999999 1 1 1 1 1 1 1 1 1 1 1 1 1 1 1 1 1 1 1 1 1 1 1 1 1 1 1 1 1 1 1 1 1 1 1 1 1 1 1 1 1 1 1 1 1 1 1 1 1 1 !

HEAD OFFICE: Kenwood Limited, 1-3 Kenwood Business Park, New Lane, Havant, Hampshire PO9 2NH
kenwoodworld.com