
MSP 1512 - Air-conditioner DOMETIC - Free user manual and instructions
Find the device manual for free MSP 1512 DOMETIC in PDF.
| Product type | Inverter (voltage converter) - Converts 12V DC to 230V AC |
| Brand | DOMETIC |
| Model | MSP 1512 |
| Dimensions (L x W x H) | 225 x 465 x 117 mm |
| Weight | 8.4 kg |
| Power input | 12 V DC (battery) |
| Output voltage | 230 V AC, pure sine wave |
| Output frequency | 50 Hz (switchable to 60 Hz) |
| Continuous output power | 1500 W |
| Peak power | 3000 W |
| Maximum efficiency | 90% |
| Input voltage range | 10.5 V - 15 V |
| Protections | Overvoltage, undervoltage, overtemperature, overload, short circuit |
| Power saving mode | Yes, adjustable via DIP switches |
| Operating temperature | 0°C to 40°C |
| Storage temperature | -30°C to +70°C |
| Installation | Horizontal or vertical, minimum clearance 25 cm |
| Maintenance | Clean with a damp cloth, do not use harsh detergents |
| Warranty | Statutory warranty, contact the manufacturer or retailer |
| Included accessories | Mounting brackets, 230V cables, air exhaust adapter, hex key, manual |
| Optional accessories | Remote controls MCR-7 and MCR-9 |
| Certifications | e13 |
Frequently Asked Questions - MSP 1512 DOMETIC
User questions about MSP 1512 DOMETIC
0 question about this device. Answer the ones you know or ask your own.
Ask a new question about this device
Download the instructions for your Air-conditioner in PDF format for free! Find your manual MSP 1512 - DOMETIC and take your electronic device back in hand. On this page are published all the documents necessary for the use of your device. MSP 1512 by DOMETIC.
USER MANUAL MSP 1512 DOMETIC
We will be happy to provide you with further information about Domatic WAECO products. Please order our free catalogue with no obligation to buy on our homepage: www.domatic-waeco.com

Please read this instruction manual carefully before installing and starting up the device, and store it in a safe place. If the device is passed on to another person, this manual must also be handed over with it.
Contents
1 Notes on using the manual 35
2 Safety instructions 35
3 Scope of delivery 38
4 Accessories 38
5 Target group for this manual 39
6 Intended use 39
7 Technical description 39
8 Fastening the inverter 43
9 Connecting the inverter to the exhaust system 45
10 Connecting the inverter 45
11 Using the inverter. 50
12 Cleaning and caring for the inverter. 52
13 Troubleshooting 52
14 Guarantee 53
15 Disposal 53
16 Technical data 53
1 Notes on using the manual

Caution
Safety instruction: Failure to observe this instruction can cause material damage and impair the function of the device.

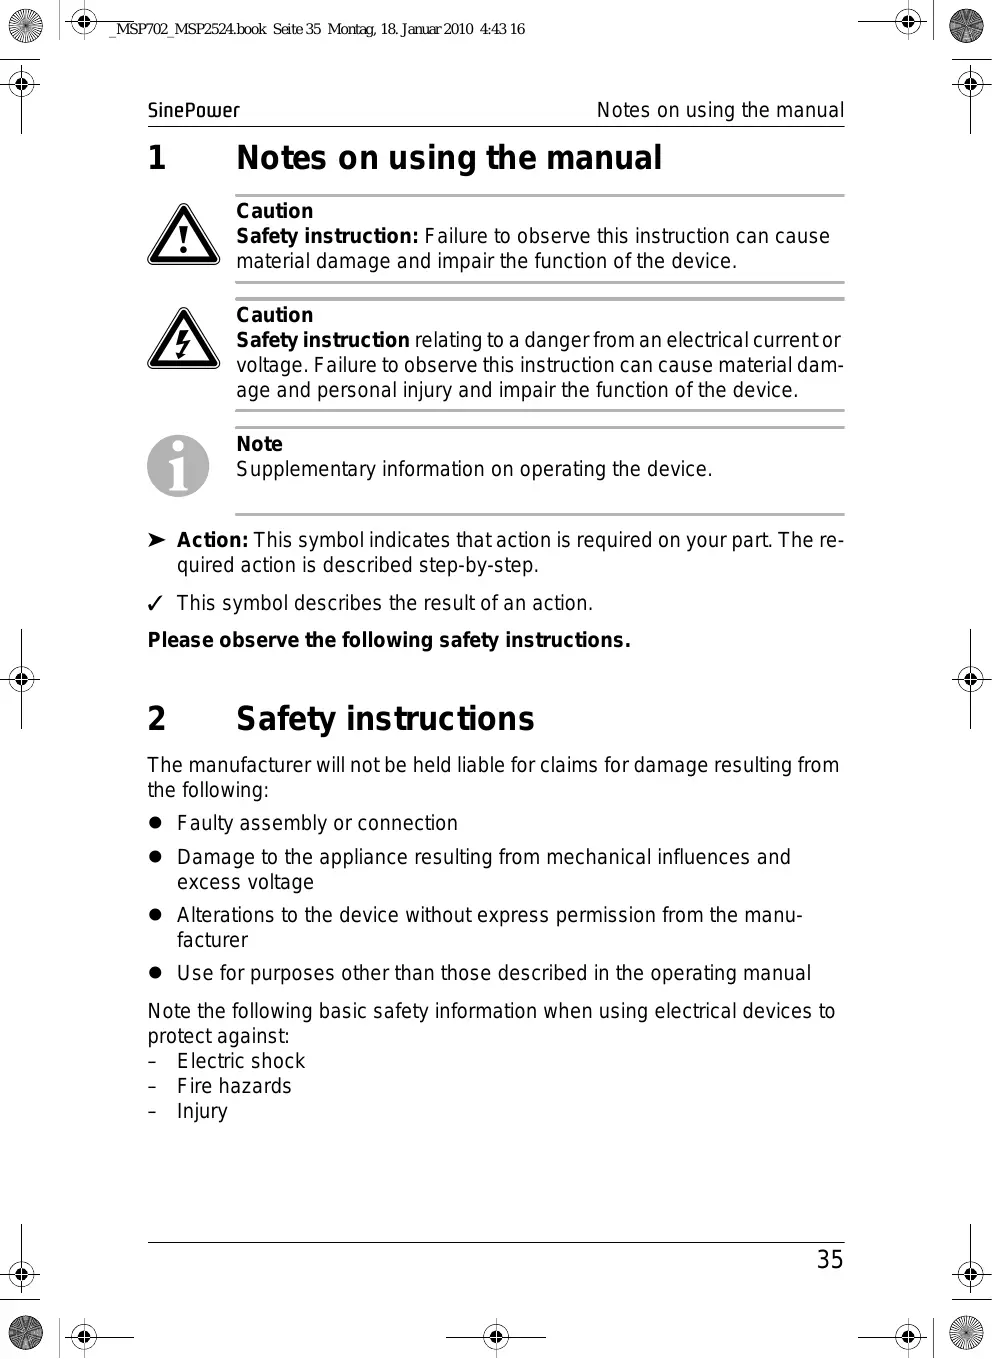
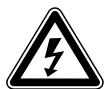
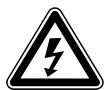
Caution
Safety instruction relating to a danger from an electrical current or voltage. Failure to observe this instruction can cause material damage and personal injury and impair the function of the device.

Note
Supplementary information on operating the device.
Action: This symbol indicates that action is required on your part. The required action is described step-by-step.
This symbol describes the result of an action.
Please observe the following safety instructions.
2 Safety instructions
The manufacturer will not be held liable for claims for damage resulting from the following:
- Faulty assembly or connection
- Damage to the appliance resulting from mechanical influences and excess voltage
- Alterations to the device without express permission from the manufacturer
- Use for purposes other than those described in the operating manual
Note the following basic safety information when using electrical devices to protect against:
Electric shock
- Fire hazards
Injury
2.1 General safety
- During construction of a 230V_AC socket distribution circuit, it is absolutely essential to have a circuit breaker (residual current circuit breaker) installed and a grounding bridge set by a trained professional, see chapter "Connect multiple appliances" on page 48.
- Electronic devices are not toys!
Keep electrical appliances out of reach from children or infirm persons. Do not let them use the appliances without supervision.
- Persons (including children) whose physical, sensory or mental capabilities or lack of experience and knowledge prevents them from using the appliance safely should not use this appliance without initial supervision or instruction by a responsible person.
- Use the device only as intended.
- Do not operate the device in a damp or wet environment.
- Do not operate the device near any flammable materials.
- Do not operate the device in areas that are potentially explosive.
- Maintenance and repair work may only be carried out by qualified personnel who are familiar with the risks involved and the relevant regulations.
2.2 Safety when installing the device
- Ensure the device is standing firmly.
The device must be set up and fastened in such a way that it cannot tip over or fall down. - Take the precautions necessary to ensure that children cannot interfere with operation. Dangerous situations may occur which cannot be recognised by children!
- Do not expose the device to a heat source (such as direct sunlight or heating). Avoid additional heating of the device in this way.
For installation on boats
- If electrical devices are incorrectly installed on boats, corrosion damage might occur. Have the inverter installed by a specialist (marine) electrician.
Electrical cables
- If cables have to be fed through metal walls or other walls with sharp edges, use ducts or wire bushings to prevent damage.
- Do not lay cables which are loose or bent next to electrically conductive material (metal).
- Do not pull on the cables.
- Do not lay the 230 ~V mains cable and the 12 / 24 ~V DC cable in the same duct.
- Fasten the cables securely.
- Lay the cables so that they cannot be tripped over or damaged.
2.3 Operating the appliance safely
- Operate the device only if you are certain that the housing and the cables are undamaged.
- Make sure the air inlets and outlets of the device are not covered.
- Ensure good ventilation.
- Do not connect the 230 ~V output of the inverter (fig. 2 4, page 4) to a different 230 ~V source.
- Even after the fuse triggers, parts of the inverter remain live.
- Always disconnect the power supply when working on the device.
3 Scope of delivery
| No. in fig. 1, page 3 | Description |
| 1 | Inverter |
| 2 | Holders MSP 702, MSP 704, MSP 1012, MSP 1024, MSP 1512, MSP 1524: 4 holders MSP 2012, MSP 2024, MSP 2512, MSP 2524: 6 holders |
| 3 | Connection cable with safety plug (for 230 VACsupply) |
| 4 | Connection cable with safety coupling (for 230 VACoutput) |
| 5 | Exhaust adapter MSP 702, MSP 704, MSP 1012, MSP 1024, MSP 1512, MSP 1524: one exhaust adapter each MSP 2012, MSP 2024, MSP 2512, MSP 2524: two exhaust adapters each. |
| 6 | Cable socket |
| 7 | Hexagon socket wrench |
| - | Fastening material |
| - | Operating instructions |
4 Accessories
| Description | Item number |
| Remote control | MCR-7 |
| Remote control | MCR-9 |
5 Target group for this manual
The „Connecting the inverter“ auf Seite 45 chapter is intended exclusively for trained professionals who are familiar with the relevant VDE (German Engineering Society) regulations.
All other chapters are intended for the users of the device.
6 Intended use
The SinePower inverters are used to convert a direct current of 12V or 24V into a 230V AC supply of 50Hz .
12V:
SinePower MSP 702, Item no. MSP700-012
SinePower MSP 1012, Item no. MSP1000-012
SinePower MSP 1512, Item no. MSP1500-012
SinePower MSP 2012, Item no. MSP2000-012
SinePower MSP 2512, Item no. MSP2500-012
24V:
SinePower MSP 704, Item no. MSP700-024
SinePower MSP 1024, Item no. MSP1000-024
SinePower MSP 1524, Item no. MSP1500-024
SinePower MSP 2024, Item no. MSP2000-024
SinePower MSP 2524, Item no. MSP2500-024

Warning!
Never use the inverter on vehicles where the positive terminal of the battery is connected to the chassis.
7 Technical description
The inverters can be operated wherever
a 12 V DC connection
(SinePower MSP 702, MSP 1012, MSP 1512, MSP 2012, MSP 2512)
a 24 V DC connection
(SinePower MSP 704, MSP 1024, MSP 1524, MSP 2024, MSP 2524)
is available. The light weight and compact construction of this device allow for easy installation in mobile homes, commercial vehicles or motor and sailing yachts.
The output voltage corresponds to the household voltage from the socket (pure sine wave).
The inverter has a 230VAC priority circuit. If an external 230VAC voltage is connected, this will have priority. If no external 230V_AC voltage is connected, then the connected battery will be used as the power supply.
Please observe the values for constant output power and peak output power as indicated in chapter "Technical data" on page 53. Never connect devices that have a higher power requirement.

Note
Note when connecting devices with an electrical drive (such as power drills and refrigerators), that they often require more power than is indicated on the type plate.
The inverter has various protective mechanisms.
- High voltage shutdown: The inverter shuts itself off when the voltage exceeds the cut-off value. It restarts when the voltage returns to the restart value.
- Low voltage shutdown: The inverter shuts itself off when the voltage sinks below the cut-off value. It restarts when the voltage rises to the restart value.
- High temperature shutdown: The inverter switches off when the temperature inside the device or the temperature on the cooling element exceeds a cut-off value. It restarts when the voltage rises to the restart value.

Note
The individual values are found in chapter "Technical data" on page 53.
The inverter can be switched into an energy saving mode (Standby), so that the battery connected to the inverter does not discharge too quickly.
The inverter can be connected to an exhaust system with the included exhaust adapter. This allows the warm exhaust to be diverted outside.
The connection cable can be attached to the back of the device via the cable socket.
The inverter can be turned on and off with an external switch (not included in package).
The manufacturer offers a remote control as an accessory for the inverter.
7.1 Description of the device
The inverter has the following connections, display and control elements:
| No. in fig. 2, page 4 | Element |
| 1 | Main switch 0 / Off: device is switched off I / On: device is switched on II / Remote: Device can be turned on and off with an external switch or control-led with a remote control (accessory) |
| 2 | The “Power Status” LED displays the operational status |
| 3 | The “Load Level” LED displays the power being supplied |
| 4 | The “Input Level” LED displays the input voltage range |
| 5 | Drill holes for securing the exhaust adapter |
| No. in fig. 3, page 4 | Element |
| 1 | DIP switch for switching to energy-saving mode |
| 2 | Fuse |
| 3 | 230 VAC input jack |
| 4 | 230 VAC output jack |
| 5 | Earth terminal |
| 6 | Remote Port II for connecting a remote control (accessory) |
| 7 | Remote Port I for connecting to an external switch, for turning the device on and off |
| 8 | DC terminal (positive pole) |
| 9 | DC terminal (negative pole) |
7.2 Status indications
"Input Level" LED (fig. 2 4, page 4)
The "Input Level" LED shows the present range of the input voltage.
| Display | Input voltage | |
| MSP 702, MSP 1012, MSP 1512, MSP 2012, MSP 2512 | MSP 704, MSP 1024, MSP 1524, MSP 2024, MSP 2524 | |
| Red, slowly flashing | 10.3 – 10.6 V | 20.5 – 21.2 V |
| Red | 10.6 – 11.0 V | 21.2 – 21.8 V |
| Orange | 11.0 – 12.1 V | 21.8 – 24.1 V |
| Green | 12.1 – 14.2 V | 24.1 – 28.6 V |
| Orange, flashing | 14.2 – 15.0 V | 28.6 – 30.0 V |
| Red, flashing | > 15.0 V | > 30.0 V |
"Load Level" LED (fig. 2 3, page 4)
The "Load Level" LED shows the power presently being supplied by the inverter.
| Display | Power | ||
| MSP 702 | MSP 1012 | MSP 1512 | |
| MSP 704 | MSP 1024 | MSP 1524 | |
| Off | 0 – 56 W | 0 – 80 W | 0 – 120 W |
| Green | 56 – 230 W | 80 – 330 W | 120 – 495 W |
| Orange | 230 – 525 W | 330 – 750 W | 495 – 1125 W |
| Red | 525 – 672 W | 750 – 960 W | 1125 – 1450 W |
| Red, flashing | > 672 W | > 960 W | > 1450 W |
| Display | Power | |
| MSP 2012 | MSP 2512 | |
| MSP 2024 | MSP 2524 | |
| Off | 0 – 160 W | 0 – 240 W |
| Green | 160 – 660 W | 240 – 990 W |
| Orange | 660 – 1500 W | 990 – 2250 W |
| Red | 1500 – 1920 W | 2250 – 2880 W |
| Red, flashing | > 1920 W | > 2880 W |
"Power Status" LED (fig. 2, page 4)
The "Power Status" LED shows the operating status of the inverter.
| Display | Input voltage |
| Orange, constantly lit | Normal operation with battery power supply |
| Orange, slowly flashing | Energy-saving mode |
| Green, constantly lit | external supply via 230 VAC voltage |
| Red, quickly flashing | Input voltage too high |
| Red, slowly flashing | Input voltage too low |
| Red, occasionally flashing | Overheating |
| Red, constantly lit | Excessive load |
8 Fastening the inverter
You can fasten the inverter using the holders supplied.
When selecting the installation location, observe the following instructions:
- The inverter can be mounted horizontally or vertically.
- The inverter must be installed in a place that is protected from moisture.
- The inverter may not be installed in the presence of flammable materials.
- The inverter may not be installed in a dusty environment.
- The place of installation must be well-ventilated. A ventilation system must be present for installations in small, closed spaces. The minimum clearance around the inverter must be at least 25~cm .
- The air intake on the underside or the air outlet on the back side of the inverter must remain clear.
- For ambient temperatures higher than 40^ (such as in engine or heating compartments, or direct sunlight), the heat from the inverter under load can lead to the automatic shut-off of the inverter.
- The installation surface must be level and sufficiently strong.
You must be able to support the weight of the inverter.
- Make sure you have adequate space for the cable connections underneath the device when choosing a mounting location.

Note
With the cable socket, you can secure the connection cable to the back side of the device. After running the cable, secure it with cable ties to the clips on the cable socket.

Caution
Before drilling any holes, ensure that no electrical cables or other parts of the vehicle can be damaged by drilling, sawing and filing.
Fastening the inverter horizontally
Clip two holders on the left bar and two on the lower right bar (fig. 4, page 5).
You can move the holders as required.
Fasten the inverter by screwing one screw through each hole in the holders.
Lay the cable socket (fig. 5 1, page 5) with the clip over the edge on the back side of the inverter (fig. 5 2, page 5).
Screw the cable socket on with one screw in each of the four holes.
Fastening the inverter vertically
Clip two holders on the left bar and two on the lower right bar (fig. 4, page 5).
You can move the holders as required.
Screw the cable socket (fig. 6 1, page 6) on to the wall with one screw in each of the four holes.
Slide the inverter (fig. 6 2, page 6) onto the cable socket, so that the edge on the back of the inverter is pinched between the wall and the clip on the cable socket.
Fasten the inverter by screwing one screw through each hole in the holder.
9 Connecting the inverter to the exhaust system
You can connect the inverter to an exhaust system. Thereby the warm exhaust is driven out of the internal chamber.
Set the exhaust adapter (fig. 7 2, page 6) on the front side of the inverter (fig. 7 1, page 6) over the fan, so that the screws fit into the screw holes.
Attach the exhaust adapter using the supplied screws.
Connect the hose support (not included, fig. 3, page 6) to the exhaust adapter.
Attach the exhaust system hose (fig. 7 4, page 6) to the hose support.

Note
SinePower MSP 2012, MSP 2024, MSP 2512 and MSP 2524 are equipped with two fans. With these devices, mount an exhaust adapter in front of each fan and attach an exhaust hose.
10 Connecting the inverter
Caution - danger of electrocution!
Incorrectly connecting the inverter can be fatal for the user. The device can only be connected by a trained professional who is familiar with the relevant VDE (German Engineering Society) regulations.
This chapter is solely intended for trained professionals who are familiar with the relevant VDE (German Engineering Society) regulations!
10.1 Notes on connecting
Warning!
Never use the inverter on vehicles where the positive terminal of the battery is connected to the chassis.
Caution - danger of electrocution!
If you wish to connect more than one user to the inverter and install a socket distributor loop, you must arrange a circuit breaker (residual current circuit breaker) and set a grounding bridge in the inverter, see chapter "Connect multiple appliances" on page 48.
- When installed in vehicles or boats, the inverter must be connected to the chassis or earth.
- Before connecting, set the main switch (fig. 2 1, page 4) to "Off".
- When setting up a socket distribution circuit (mains set-up), you must comply with VDE 0100.
- Only use copper cables.
- Keep the cables as short as possible. The cables cannot be longer than 1.8 ~m .
- After running the cable, secure it with cable ties to the clips on the cable socket.
- Keep to the required cable cross section and fit a cable fuse as close to the battery as possible on the positive cable (see table).

Warning!
If you do not fit a fuse to the positive cable, the cables can overload, which might result in a fire.
| Device | Required cable cross section | Cable fuse |
| MSP 702 | 25 mm² | 100 A |
| MSP 704 | 15 mm² | 50 A |
| MSP 1012 | 35 mm² | 200 A |
| MSP 1024 | 25 mm² | 100 A |
| MSP 1512 | 35 mm² | 200 A |
| MSP 1524 | 25 mm² | 100 A |
| MSP 2012 | 70 mm² | 250 A |
| MSP 2024 | 55 mm² | 150 A |
| MSP 2512 | 95 mm² | 400 A |
| MSP 2524 | 70 mm² | 200 A |
10.2 Connecting the inverter to the battery

Warning!
Do not reverse the polarity. Reversing the polarity of the battery connections will cause a great spark and the internal fuses will melt. The fuses should only be replaced by an electrician!

Note
Tighten the nuts and bolts to a torque of 12 - 13Nm . Loose connections may cause overheating.
Set the main switch (fig. 2 1, page 4) to "Off".
Unscrew the four fastening screws (fig. 8 2, page 7) from the back side of the device with the included hexagon socket wrench.
Take off the hood (fig. 8 1, page 7).
Guide the plus cable through the “POS (+)” opening and the minus cable through the “NEG (-)” opening in the hood.
Loosen the safety bolt slightly(fig. 8 3, page 7).
Push the cable lug (fig. 8 5, page 7) of the positive cable between the spring washer (fig. 8 4, page 7) and the positive terminal (fig. 3 6, page 4).
Screw the safety bolt back in.
Connect the negative cable to the negative terminal (fig. 3 7, page 4).
Connect the earth terminal (fig. 3 5, page 4) to the chassis with a cable having a diameter of at least 16mm^2
Replace the hood of the device and tighten the screws.
Lay the positive cable from the inverter to the positive terminal of the vehicle battery and connect it there.
Lay the negative cable from the inverter to the negative terminal of the vehicle battery and connect it there.
10.3 Connecting the 230 V power cable
Connect the 230VAC connection cable with safety coupling (fig. 1 3, page 3) to the 230VAC output jack (fig. 3 3, page 4).
Connect the safety plug to the 230 V AC mains
10.4 Connect the 230V output cables

Caution - danger of electrocution!
Before connecting the 230V_AC output cable make sure the inverter is switched off at the main switch.
Connect the 230VAC connection cable with safety coupling (fig. 1 4, page 3) to the 230VAC output jack (fig. 3 4, page 4).
10.5 Connect multiple appliances
The device is equipped at delivery with galvanic isolation. For the safe operation of multiple appliances, it is essential that a circuit breaker (residual current circuit breaker) is built into the socket distribution circuit, see sample circuit diagram in fig. 10, page 8.
Sample circuit diagram legend:
| No. in fig. 10, page 8 | Explanation |
| 1 | 230 VAC power source |
| 2 | additional devices, e.g. battery charger, refrigerator |
| 3 | DC power source (battery) |
| 4 | Inverter |
| 5 | Set grounding bridge (At delivery: not set, shown by dotted line) |
| 6 | Circuit breaker (residual current circuit breaker) |
| 7 | Socket distribution circuit for appliances |
Caution - danger of electrocution!
If you wish to connect more than one appliance to the inverter and install a socket distribution circuit, you must arrange a circuit breaker (residual current circuit breaker) and set a grounding bridge in the inverter.
Install a residual current circuit breaker in the socket distribution circuit.
Set grounding bridge
Unscrew the four fastening screws (fig. 9 2, page 7) from the back side of the device with the included hexagon socket wrench.
Take off the hood (fig. 9 1, page 7).
Unscrew the grounding screw (fig. 9 4, page 7).
Screw the screw into the pre-drilled hole to the left (fig. 9 3, page 7).
Replace the hood of the device and tighten the screws.
10.6 Install external switch to turn device on and off

Note
Connect the external switch to the inverter using a connection cable with Western telephone jack. Observe the PIN configuration on the plug for the connection cable.
Cut a connection cable to size according to the following circuit diagrams:
- external switch, voltage supply from the inverter: fig. 11, page 9
- Control unit with relay or transistor circuit (TR): fig. 12, page 9
- external switch with voltage supply from the battery (BAT) of the vehicle: fig. 13, page 9
- external switch with its own voltage supply (DC POWER) e.g. from the ignition: fig. 14, page 9
Connect the external on/off switch with the connection cable on the remote port (fig. 3 7, page 4).
10.7 Connecting the remote control (accessory)
Caution - risk of damage!
Attach the connection to the remote control only in the Remote-Port II and not in the Remote-Port I. False connections can damage the device!
Ensure that the remote control and inverter require the same input voltage!
Connect the remote control (accessory) to the Remote Port II (fig. 3 6, page 4).
11 Using the inverter
Connect your appliance to the inverter.
Switch on at the device
Set the main switch (fig. 2 1, page 4) to the "ON" position.
✓ During the self-test, the built-in speaker emits tones and the LEDs flash in various colours.
After the self-test, the "Input Level" (fig. 2 4, page 4) and "Status" (fig. 2 2, page 4) LEDs light up green.
Using an external switch or remote control (accessory).
You can also switch the inverter on and off with a connected external switch or with a remote control (accessory).
Set the main switch (fig. 2 1, page 4) to "Remote".
If the inverter is switched on via an external switch or the remote control, the green "Power Status" LED (fig. 2, page 4) lights up.
Observe the following when using the device (see also chapter "Troubleshooting" on page 52)
The inverter switches off if:
- The battery voltage falls below 10.5 ~V / 21 ~V
- The battery voltage rises above 15.3 ~V / 30.6 ~V
the inverter overheats, - there is an overload (short circuit).

Note
If the device is operated at too high a load, there may be repeated attempts to switch on. As soon as the device is correctly operated again, the inverter automatically switches on again (recovery function). If the condition is still not satisfactory after several minutes, switch off the inverter and inspect the connected consumer device.

Note
When operating the inverter at a high load for lengthy periods, it is advisable to start the engine in order to recharge the vehicle battery.
11.1 Set energy saving mode (Standby)
In energy saving mode, the inverter does not release any voltage, thereby preserving the battery. If a connected appliance requires power which is more than the pre-set power value, the inverter reverts to normal operation.
You can switch to energy-saving mode using the DIP switches S1, S2 and S3 (fig. 3 1, page 4) and set the power value.
The switch positions for your inverter can be found in the following table:
| Energy-saving mode up to | DIP switch | |||||
| MSP 702 MSP 704 | MSP 1012 MSP 1024 MSP 1512 MSP 1524 | MSP 2012 MSP 2024 MSP 2512 MSP 2524 | S1 | S2 | S3 | |
| Power | Off | Off | Off | Off | Off | Off |
| 15 W | 20 W | 40 W | On | Off | Off | |
| 25 W | 40 W | 80 W | Off | On | Off | |
| 40 W | 55 W | 125 W | On | On | Off | |
| 50 W | 75 W | 170 W | Off | Off | On | |
| 65 W | 95 W | 210 W | On | Off | On | |
| 75 W | 115 W | 245 W | Off | On | On | |
| 85 W | 135 W | 280 W | On | On | On | |
11.2 Switch between 50 Hz and 60 Hz.
The output voltage can be switched between 50Hz and 60Hz with the DIP switch S4 (fig. 3 1, page 4).

Warning!
Only adjust the S4 DIP switch when the respective frequency for the output voltage should be used.
Set the S4 DIP switch (fig. 3 1, page 4) according to the following table:
| Output voltage frequency | S4 DIP switch |
| 50 Hz | Off |
| 60 Hz | On |
12 Cleaning and caring for the inverter

Caution
Do not use sharp or hard objects or cleaning agents for cleaning as these may damage the device.
Occasionally clean the device with a damp cloth.
13 Troubleshooting

Note
If you have detailed questions on the specifications of the inverter please contact the manufacturer.
Warning!
Do not open the device. You risk sustaining an electric shock by doing this.
No output voltage
The "Power Status" LED (fig. 2, page 4) displays the fault in red:
| LED display | Cause | Remedy |
| Quick flashing | Input voltage too high | The inverter is only intended for the voltage indi-cated. |
| Slow flashing | Input voltage too low | The battery needs charging. Check the cables and connections. |
| Occasional flash-ing | Overheating | Switch off the inverter and the appliance. Wait 5 to 10 minutes and switch the inverter on again without any appliances. Reduce the load and make sure the inverter has better ventilation. Then switch the appliance back on. |
| Constantly lit | Short circuit or reversed polarity Excessive load | Switch off the inverter and remove the appliance. Then switch the inverter back on without the appliance. If no excessive load is now shown, then there is a short circuit in the appliance or the total load was higher than the power specified on the data sheet. Check the cables and connections. |
14 Guarantee
The statutory warranty period applies. If the product is defective, please contact the manufacturer's branch in your country (see the back of the instruction manual for the addresses) or your retailer.
For repair and guarantee processing, please include the following documents when you send in the device:
A copy of the receipt with purchasing date
A reason for the claim or description of the fault
15 Disposal
If possible, always take the packaging material for recycling.
If you wish to finally dispose of the device, ask your local recycling centre or specialist dealer for details about how to do this in accordance with the applicable disposal regulations.
16 Technical data
| UJAECO SinePower | ||||
| MSP 702 | MSP 704 | MSP 1012 | MSP 1024 | |
| Item no. | MSP700-012 | MSP700-024 | MSP1000-012 | MSP1000-024 |
| Rated input voltage | 12 V DC | 24 V DC | 12 V DC | 24 V DC |
| Output power | 700 W | 1000 W | ||
| Peak output power | 1400 W | 2000 W | ||
| Output voltage | 230 V AC pure sine wave | |||
| Output frequency | 50 Hz | |||
| Idle current consumption | 1.2 A | 0.6 A | 1.25 A | 0.65 A |
| Standby current consumption | 0.25 A | 0.15 A | 0.25 A | 0.15 A |
| Input voltage range | 10.5 V – 15 V | 21 V – 30 V | 10.5 V – 15 V | 21 V – 30 V |
| Efficiency up to | 90 % | 92 % | 90 % | 93 % |
| Ambient temperature for operation | 0 °C – 40 °C | |||
| Ambient temperature for storage | -30 °C – +70 °C | |||
| Dimensions W x D x H | 190 x 380 x 90 mm | 225 x 435 x 117 mm | ||
| Weight | 5.5 kg | 7.6 kg | ||
| MSP 1512 | MSP 1524 | MSP 2012 | MSP 2024 | |
| Item no. | MSP1500-012 | MSP1500-024 | MSP2000-12 | MSP2000-024 |
| Rated input voltage | 12 V DC | 24 V DC | 12 V DC | 24 V DC |
| Output power | 1500 W | 2000 W | ||
| Peak output power | 3000 W | 4000 W | ||
| Output voltage | 230 V AC pure sine wave | |||
| Output frequency | 50 Hz | |||
| Idle current consumption | 1.4 A | 0.7 A | 2.3 A | 1.1 A |
| Standby current consumption | 0.28 A | 0.15 A | 0.6 A | 0.3 A |
| Input voltage range | 10.5 V – 15 V | 21 V – 30 V | 10.5 V – 15 V | 21 V – 30 V |
| Efficiency up to | 90 % | 93 % | 90 % | 93 % |
| Ambient temperature for operation | 0 °C – 40 °C | |||
| Ambient temperature for storage | -30 °C – +70 °C | |||
| Dimensions W x D x H | 225 x 465 x 117 mm | 349 x 516 x 116 mm | ||
| Weight | 8.4 kg | 15.5 kg | ||
| UAEco SinePower | ||
| MSP 2512 | MSP 2524 | |
| Item no. | MSP2500-012 | MSP2500-024 |
| Rated input voltage | 12 V DC | 24 V DC |
| Output power | 2500 W | |
| Peek output power | 5000 W | |
| Output voltage | 230 V AC pure sine wave | |
| Output frequency | 50 Hz | |
| Idle current consumption | 2.4 A | 1.5 A |
| Standby current consumption | 0.6 A | 0.35 A |
| Input voltage range | 10.5 V – 15 V | 21 V – 30 V |
| Efficiency up to | 90 % | 93 % |
| Ambient temperature for operation | 0 °C – 40 °C | |
| Ambient temperature for storage | -30 °C – +70 °C | |
| Dimensions W x D x H | 349 x 546 x 116 mm | |
| Weight | 16.9 kg | |
High voltage shutdown
| Device | High voltage | |
| Shutdown | Restart | |
| MSP 702, MSP 1012, MSP 1512, MSP 2012, MSP 2512 | 15.3 V | 14.3 V |
| MSP 704, MSP 1024, MSP 1524, MSP 2024, MSP 2524 | 30.6 V | 28.6 V |
Low voltage shutdown
| Device | Low voltage warning | Low voltage | |
| Shutdown | Restart | ||
| MSP 702, MSP 1012, MSP 1512, MSP 2012, MSP 2512 | 11.0 V | 10.2 V | 12.7 V |
| MSP 704, MSP 1024, MSP 1524, MSP 2024, MSP 2524 | 22.0 V | 20.3 V | 25.4 V |
High temperature shutdown
| Internal temperature | Temperature on cooling element | ||
| Shutdown at | Restart at | Shutdown at | Restart at |
| 70 °C | 45 °C | 90 °C | 60 °C |
Certifications
The device has the e13 certification


Variations, technical improvements and delivery options reserved.
7 Description technique
10.1 Consignes relatives au raccordement

Avertissement !
10.5 Conectar various aparatos
Dometic Italy S.p.A.
Via Virgilio, 3
I-47100 Forli
+390543754901
+39054375
Mail: info@dometicwta.com
Overseas + Middle East

WAECO Pacific Pty. Ltd.
1 John Duncan Court
Varsity Lakes QLD 4227
+61755076000
+61755076001
Mail: sales@waeco.com.au

Dometic Switzerland AG
Riedackerstrasse 7a
CH-8153 Rümlang (Zürich)
+41448187171
+41 44 8187191
Mail: info@dometic-waeco.ch

Dometic Norway AS
Skolmar 24
N-3232 Sandefjord
+4733428450
+47 33428459
Mail: firmapost@waeco.no

WAECO Impex Ltd.
Suites 2207-2211 · 22/F · Tower 1
The Gateway · 25 Canton Road
Tsim Sha Tsui · Kowloon
Hong Kong
+852 24632750
+852 24639067
Mail: info@waeco.com.hk

Dometic Denmark A/S
Nordensvej 15, Taulov
DK-7000 Fredericia
+4575585966
+4575586307
Mail: info@waeco.dk

Domatic Benelux B.V.
Ecustraat 3
NL-4879 NP Etten-Leur
+31765029000
+31765029090
Mail: info@dometic.nl

WAECO Impex Ltd.
Taipei Office
2 FL-3 · No. 56 Tunhua South Rd, Sec 2
Taipei 106, Taiwan
+886227014090
+886227060119
Mail: marketing@waeco.com.tw

Dometic Spain S.L.
Avda. Sierra del Guadarrama, 16
E-28691 Villanueva de la Canada
Madrid
+34 902 111 042
+34 900 100 245
Mail: info@dometic.es

Dometic Scandinavia AB
Gustaf Melins gata 7
Regional Office Middle East
PO Box 74775
Dubai, United Arab Emirates
+97143212160
+97143212170
Mail: info@dometic.ae

Domicic S.N.C.
Dometic House - The Brewery
Blandford St. Mary
DorsetDT119LS
+448446260133
+448446260143
Mail: sales@dometic-waeco.co.uk

Dometic Finland OY
Mestarintie 4
FIN-01730 Vantaa
+358207413220
+35897593700
Mail: info@dometic.fi
