Heiniger Progress - Electric mower Coburn - Free user manual and instructions
Find the device manual for free Heiniger Progress Coburn in PDF.
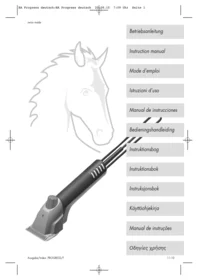


| Product type | Electric clipper for horses and livestock |
| Brand | Coburn |
| Model | Heiniger PROGRESS |
| Device length | 280 mm |
| Handle diameter | 48 mm |
| Weight (without cable) | 970 g |
| Power supply | 120 V or 230 V depending on version |
| Operating temperature | 0 °C to 40 °C |
| Relative air humidity | 10 % to 90 % |
| Sound level (LpA) | 72 dB(A) |
| Acceleration (vibrations) | Less than 2.5 m/s² |
| Intended use | Exclusive clipping of horses and livestock |
| Clipper adjustment | Adjusting screw to adjust the cutting height |
| Lubrication | Special lubricant provided, to be applied regularly |
| Maintenance and cleaning | Air filter cleaning, comb mounting and sharpening |
| Included accessories | Pair of combs, special screwdriver, lubricant vial, brush, instruction manual, carrying case |
| Safety | Anti-shock socket, cable with appropriate plug (EURO/AUS/USA) |
| Spare parts | Complete motor 120 V/240 V, PCB, air filter, screws, power cable |
| Repairability | Malfunctions and repairs covered in chapter 5 of the manual |
| Standards | Compliant with standards EN 50144-1 and EN ISO 3744 |
Frequently Asked Questions - Heiniger Progress Coburn
User questions about Heiniger Progress Coburn
0 question about this device. Answer the ones you know or ask your own.
Ask a new question about this device
Download the instructions for your Electric mower in PDF format for free! Find your manual Heiniger Progress - Coburn and take your electronic device back in hand. On this page are published all the documents necessary for the use of your device. Heiniger Progress by Coburn.
USER MANUAL Heiniger Progress Coburn
Betriebsanleitung
Instruction manual
Mode d'emploi
Istruzioni d'uso
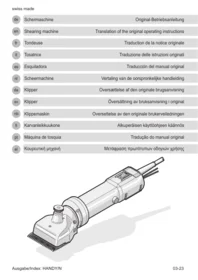
1.1 Overall View / Controls
1.2 Intended Use
1.3 Technical Data
1.4 Equipment Items
2 Safety Regulations
2.1 Introduction
2.2 Symbols and Warning Signs
2.3 Proper Use
2.4 Safety Principles
2.4.1 Power Connections
2.4.2 Servicing and Checking Requirement
2.4.3 Noise Emission / Personal Protective Equipment
2.4.4 Other Dangers
2.5 Essential Operator Skills
3 Putting into Operation
3.1 Controls and Operating Notes
3.2 Setting the Clipper Blades with the Adjusting Screw
3.3 Lubrication
3.4 Switching On / Off
3.5 Version 120V
3.6 Version 230V
4 Servicing
4.1 Cleaning
4.2 Fitting the Clipper Blades
4.3 Resharpening the Clipper Blades
4.4 Cleaning the Air Filter
4.5 Storing the Clipping Machine
5 Malfunctions and Repairs
5.1 Introduction
5.2 Malfunction Lists
6 Environmental Protection and Disposal
6.1 Introduction
6.2 Material Categories
7 Contact Addresses
Illustrations: at the end of the instructions
1 Proper Use
1.1 Overall View / Controls
Component Names

Illustr. 1
| Pos | Description | Total | Pos | Description | Total |
| 1 | Motor housing, upper PROGRESS grey | 1x | 15 | Cable grip DELTA/PROGRESS EURO/USA | 1x |
| 2 | Motor housing, lower PROGRESS grey | 1x | 16 | Circlip for shaft size 6 | 1x |
| 3 | Air filter PROGRESS Heiniger | 1x | 17 | Cogwheel Z35 DELTA/PROGRESS | 1x |
| 4 | Tension nut PROGRESS | 1x | 18 | Clipper head insert PROGRESS | 1x |
| 5 | Motor PROGRESS 240V complete | 1x | 19 | Laminated spring | 2x |
| 5 | Motor PROGRESS 120V complete | 1x | 20 | Centering bush | 2x |
| 6 | Fan wheel PROGRESS | (1x) | 21 | PH-screw M5 x 16 | 2x |
| 7 | PCB PROGRESS 240V | 1x | 22 | Pressure plate | 1x |
| 7 | PCB PROGRESS 120V | 1x | 23 | Socket head cap screw partially threaded M3 x 6 | 2x |
| 8 | Switch cover PROGRESS | 1x | 24 | Driving carrier DELTA/PROGRESS | 1x |
| 9 | Cord PROGRESS | 1x | 25 | Comb screw cattle/horse | 2x |
| 10 | PT-screw Kombitorx KA30 x 16 | 6x | 26 | Circlip for shaft size 3.73 | 1x |
| 11 | PT-screw Kombitorx KA40 x 16 | 6x | 27 | Crank drive block | 1x |
| 12 | PH-screw M4 x 10 | 1x | 28 | Crankshaft DELTA/PROGRESS | 1x |
| 13 | Anti-kink sleeve DELTA/PROGRESS EURO/AUS | 1x | 29 | Crank spindle sleeve DELTA2+3/PROGRESS | 1x |
| 13 | Anti-kink sleeve DELTA/PROGRESS USA | 1x | 30 | Pressure spring | 1x |
| 14 | DELTA/PROGRESS cable with EURO plug | 1x | 31 | Tension sleeve DELTA1/PROGRESS | 1x |
| 14 | DELTA/PROGRESS cable with AUS plug | 1x | 32 | Distance screw USV/HANDY/CORDLESS/ DELTA1/PROGRESS | 1x |
| 14 | DELTA/PROGRESS cable with USA plug | 1x | 35 | Clipper head insert PROGRESS complete without blades | 1x |
| 15 | Cable grip DELTA/PROGRESS AUS | 1x | Converter EURO/GB plug | 1x |
1.2 Intended Use
The clipping machine is exclusively intended for use on horses (and cattles).
Other uses, in particular using the machine on people, are expressly prohibited.
1.3 Technical Data
| Model Designation: | Progress |
| Mains Voltage: | see rating plate |
| Motor Output: | |
| RPM: | |
| Fuse Protection Needed: | |
| Dimensions (W/H/L): | |
| Handle diameter: | 48 mm |
| Machine length: | 280 mm |
| Weight, excluding cable: | 970 g |
| Max. Ambient Temperature: | 0°C - 40°C |
| Max. Air Humidity: | 10% - 90% (relative) |
| Noise Emission ( LpA ): | 72 dB(A) (EN 50144-1/02.96 & EN ISO 3744/11.95) |
| Acceleration ( ahw ): | < 2.5 m/sec 2 (EN 28662-1/01.93) |
We reserve the right to make technical changes and improvements without notice.
1.4 Equipment Items
1 Clipping Machine
1 Pair of Clipping Blades
1 Special Screwdriver
1 Bottle of Special Lubricating Oil
1 Cleaning Brush
1 Set of Operating Instructions
1 Transport and Storage Case
2 Safety Regulations
2.1 Introduction
This section describes the mandatory safety regulations which must be observed when using the clipping machine.
All persons undertaking work on or with the machine have an obligation to read the operating instructions.
The operating instructions must be kept safely in the storage case and accessible at all times.
2.2 Symbols and Warning Signs
Various symbols are used in the operating instructions. They refer to potential dangers or point to technical information, the non-observance of which will lead to personal injury, damage to objects or inefficient operation.
Danger Symbols
Warning
indicates a potentially dangerous situation. If preventive action is not taken, death or very serious injury could result.


Caution
indicates a potentially dangerous situation. If preventive action is not taken, the consequences could be slight or minor injuries.
Information Symbols

Note
Note, non-compliance with which can lead to operating malfunctions or damage.

Pictorial Note
This symbol, together with its number, refers to the relevant illustration at the end of the instructions.
2.3 Proper Use
The use to which the machine is intended for is described in Section 1.2.

The following applies to safe operation:
The details at Section 1.3, "Technical Data", count as mandatory operating limits and ratings.
Clipping other animals, in particular dangerous animals such as beasts of prey and the like, counts as mis-use. This could lead to circumstances dangerous to life and limb.
The appliance is not intended for use by young children or infirm persons. If used with a cord extension device or portable outlet device, ensure such devices are positioned so as not to be subjected to splashing or ingress of moisture.
2.4 Safety Principles
2.4.1 Power Connections

Only insert the plug into undamaged sockets. Defective installations can cause an electrical shock or a short circuit. Outside sockets must be equipped with a fault current breaker (FI). Observe the relevant national regulations.
Cleaning and servicing should only be done with the mains plug pulled out.
Never let a machine with its cable plugged in, lie around unsupervised. Keep children away from the working area and store the machine out of their reach.
2.4.2 Servicing and Checking Requirement
Only operate the clipping machine if it is undamaged and in a proper condition. Any defects to the housing or the electrical cable should be rectified by a repair or service agent.
2.4.3 Noise Emission / Personal Protective Equipment
Wear Ear Protectors!

Typical sound emissions when working are 72 dB(A). We recommend that ear protectors should always be worn when working.
Wear Protective Goggles and Gloves!
For your personal protection we recommend that you wear protective goggles and gloves.
Personal protective equipment is to be provided by the operator.
2.4.4 Other Dangers
Should evidence of dangers or potential dangers, not directly related to the clipping of animals, occur during operation, we would ask you to inform us. This also applies to dangerous technical deficiencies.
2.5 Essential Operator Skills
Operating the machine safely makes only small demands of the operator. However, it is essential that they are observed and carried out.
- The operator must be experienced in handling the animals to be clipped.
- The operator must have read and understood the instructions or have been instructed by an expert in the machine's use and have had the potential dangers explained.
Children are not permitted to operate the equipment.
3 Putting into operation
3.1 Controls and Operating Notes

There are dangers inherent in the improper use of electrical equipment, especially stockbreeding equipment! Therefore, before using the machine, you should observe the following accident-prevention measures:
- The mains voltage must be the same as that shown on the nameplate. The machine may only be connected to an AC supply.
- Avoid all contact with the moving clipper blades.
- Even when the machine is switched off, do not handle the area of the clipper blades as long as the machine is connected to a power source. Always disconnect the power supply first when working on the clipper blades/clipper head.
- Avoid touching any machine which is in contact with any liquids. Never clip wet animals. Any liquid which has got into the machine will lower the electrical insulation. There is then the danger of an electric shock or short circuit. Only clean the machine when dry using a brush or the cleaning brush provided.
- An electric cable lying loose on the ground for any distance can snag and become a source of danger. Before starting to clip, lay the cable out carefully and safely. Avoid any kinks in the power cable and prevent it becoming entangled. Animals must not stand on or walk across the power cable or get caught in it. Never wrap the power cable around the machine and keep it away from hot surfaces and objects. This may result in breaks and damage to the insulation. The cable should be regularly checked for damage.
- Switch the machine to OFF (Position 0: Illustration 2) before pulling out the plug.

Illustr. 2
- Wear suitable work clothes. Do not wear any loose fitting clothing or items of jewellery which could get caught up in moving machine parts. We would recommend in the strongest terms that protective goggles and ear protectors are worn.
- Never insert any object into any of the machine's apertures.
- Noise from the machine can worry animals. Considerable injury can be caused as a result of being kicked by an animal or being crushed by its body weight. Tether the animal securely, approach it from in front and switch the machine on within the animals' range of vision.
- Animals should only be clipped if unauthorised persons have been excluded from the clipping area.
- Only clip in well-ventilated spaces (dust) and never near objects or gases likely to explode.
- Generally, never plunge the clipper and clipperhead into liquids such as water, soapy water, diesel, petrol, etc. This may cause serious injury to mechanics and motor.

These safety notes must be complied with in all cases. It is recommended that a fault current safety plug always be used when working with electrical equipment.
3.2 Setting the Clipper Blades with the tension nut
Before putting into operation, make adjustments as follows:

Illustr. 3
Before clipping:
With the machine switched off, tighten the tension nut until the first resistance is noticeable. Then tighten the tension nut a further 1/4 turn.

During clipping:
The patent clipping system guarantees long-term adjustment. When the blades cease clipping adequately the tension nut should be tightened a further 1/4 turn (as in Illustration 3). If this adjustment does not produce the desired result, the clipper blades should be resharpened.
The clipping system works with much less pressure having to be applied than with traditional animal clipping machines. Care should be taken, therefore, to ensure that the blade tension is not set too high. Slightly adjust the blade tension from time to time during clipping.
Hair may collect between the clipper blades if they are insufficiently tensioned at the start of clipping. This will have an adverse effect on further clipping progress or make it quite impossible. If this happens, the clipper blades must be disassembled, cleaned, oiled and re-fitted as described at 4.2.

Illustr. 4


Illustr. 2


Illustr. 13
3.3 Lubrication
Before and During Clipping
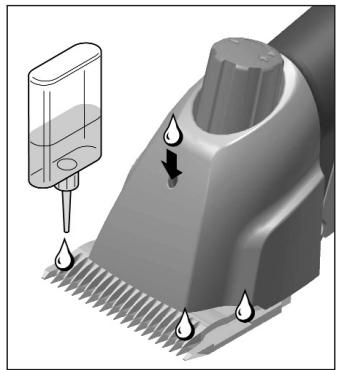
A thin layer of oil on the upper and lower blades (Illustration 4) is essential for good clipping results and so as to increase the life of the machine and its clipper blades. All other moving parts in the clipper head must also be well-oiled. Place a few drops of oil on the clipper blades and pour some into the lubricating hole provided on the clipper head (Illustration 4).
Only use our special oil or a paraffin oil meeting the ISO VG 15 specification. This oil is non-toxic and produces no irritation on contact with the skin or the mucous membranes.
Poor lubrication is the most frequent cause of unsatisfactory clipping results. Inadequately oiled clipper blades will overheat, leading to reduced blade life.
The clipper blades and clipper head must be adequately lubricated during clipping (shearing blades at least every 15 minutes) so that they do not run dry.
3.4 Switching On / Off
The switch has two positions (Fig. 2).
Position 0: Machine switched off
Position I: Machine switched on
Always use the switch (Illustration 2) when switching the machine on and off. Check the switch position before plugging in the cable.
3.5 Version 120V
If your machine features an overload protection switch (fig. 13), the motor is protected against inadmissible mechanical and thermal overloading. It may happen that this switch releases after a hard hit and must be pushed in again (fig. 13).
3.6 Version 230V
If your machine does not feature an overload protection switch (fig. 13) then your machine possesses an automatic overload electronics. If the machine in operation switches off automatically, one of the following causes may be the reason:
-
The shearing tension is too high and/or the blades are not sufficiently oiled. Reduce the shearing tension and oil them regularly so that they cannot run dry. If you should receive nevertheless no satisfying shearing result, let the clipping blades resharpen by a service centre.
-
The clipper head is blocked. Free the blockage.
If case 1 or 2 should arise, switch off the machine. After rectifying the cause, the machine can be used again as usual.
For the rectification of malfunctions, see the list of malfunctions in section 5 „Malfunctions and Repairs“.

4 Servicing
Before starting any servicing work, disconnect the power supply; pull the plug out.
Even with the machine switched off, do not handle the area round the clipper blades as long as the machine is still connected to a power source. Whenever working on the clipper blades/clipper head, always first disconnect the power supply.
4.1 Cleaning
Cleaning the Clipper Head and Clipper Blades
After clipping, remove all oil from the machine by rubbing it down with a dry cloth and carefully clean the clipper head and clipper blades with a dry brush. Then oil the parts to prevent rusting. Even the smallest rust spots on the blades can adversely affect clipping or make it completely impossible.
4.2 Fitting the Clipper Blade

Illustr. 5+6
A pair of clipper blades consists of a lower blade (Illustration 5, Item 2) and an upper blade (Illustration 5, Item 1). When fitting the blades care should be taken to ensure that the correct surfaces come to rest against each other. The blades are fitted as follows:
Loosen the pressure tension nut (Illustration 6) and place the machine on a hard surface so that the blade fixing screws lie uppermost.

Illustr. 7
Loosen the two comb screws (Illustration 7) and remove the two old blades.
Ensure that the new clipper blades are clean. Particular care should be taken to ensure that the ground surfaces are free of dirt; if not, even newly ground clipper blades will not clip satisfactorily.

Illustr. 8
Place the new upper blade in the guide points of the driving carrier; then place a few drops of oil on the ground surfaces (Illustration 8). Now push the new lower blade between the loosened screws (Illustration 9).
What is now important is that you adjust the blades against each other in such a way that the ground surface of the lower blade projects approx. 1.5 - 2.0 mm beyond the tips of the upper blade (Illustration 10).

Illustr. 9+10
Once you have adjusted the clipper blades, set the position of the lower blade and tighten up the comb screws.
4.3 Resharpening the Clipper Blades
Only work with sharp clipper blades. Replace blunt blades or those with missing teeth. Proper resharpening can only be done with a special machine and by a trained technician contactable through your service centre.

Illustr. 11+12
4.4 Cleaning the Air Filter
The air filter is to be found on the upper side of the motor section of the machine. The air filter can be removed from the machine for cleaning (Illustration 11). Regularly cleaning the air filter with a dry brush is essential. When cleaning the air filter, take care that no foreign bodies get into the machine.
The machine must never be operated without the air filter!

4.5 Storing the Clipping Machine
Only store the machine in a dry place and in the case supplied. Do not switch on the machine if you suspect any liquid has got into it. There is then a risk of an electric shock or short circuit. Hand the clipping machine into a service centre.

Illustr. 14
Make it a habit to store the machine between use, store it well-cleaned, oiled and with tension slackened off, in its storage case, in a clean, dry place, out of the reach of children.
5 Malfunctions and Repairs
This product has been developed and assembled using the best individual components available. It is designed to give longevity and high performance. If spare parts are used during the life of this product, please ensure that they are genuine Heiniger parts. Failure to use genuine Heiniger spares may reduce the performance of this precision engineered product and will void any warranty claim.
5.1 Introduction
Actions to be taken to rectify malfunctions are indicated in the "Rectification" column of the malfunction lists. Those rectification notes printed on a dark background may only be carried out by an authorised service centre.
Details of authorised service centres are to be found at the end in the "Contact Addresses" section.

5.2 Malfunction Lists
Contact an authorised service centre in the event of malfunctions not contained in these instructions.
Animal Clipper Head
| MALFUNCTION | CAUSE | RECTIFICATION |
| Upper blades move too little | Laminated springs completely broken | Replace laminated springs on both sides |
| Crank drive block and/or crankshaft are worn out (inadequate lubrication) | Replace crank drive block | |
| Have crankshaft replaced | ||
| Upper blade does not move | Faulty cogwheel | Have reducing gear replaced. |
| Pressure regulating screw jams | Thread is fouled or rusty | Have thread cleaned and oiled. |
| Pressure spring has jammed | Have pressure spring replaced | |
| There is play in the laminated springs in the head anchorage | Comb screws loose | Have comb screws tightened. |
| Driving carrier has too much play between the laminated springs | laminated springs and/or fixing screws are worn out | Have laminated springs and/or fixing screws replaced |
| Driving carrier can only be moved up and down with difficulty | Centring bush lost | Have new centring bush fitted |
| Cuts badly or not at all | Clipper blades are blunt | Have upper and lower blades resharpened by service centre |
| Clipper blades have not been correctly ground | ||
| Clipper blades are not oiled | Oil clipper blades every 15 minutes (Illustration 4) | |
| Clipping tension too low | Increase pressure by tightening the pressure tension nut screw (Illustration 3) | |
| Laminated springs are broken | Have laminated springs replaced | |
| The animals' hair is wet | Only clip when dry | |
| Hairs jammed between upper and lower blades (Illustration 5, Items 1+2) | Disassemble blades, clean well and oil; then refit and increase pressure | |
| Too much play in clipper head | Have clipper head inspected | |
| Spacing between upper and lower clipper blades incorrectly adjusted | Adjust spacing correctly (Illustration 10) |
Motor Section
| MALFUNCTION | CAUSE | RECTIFICATION |
| Motor does not run | No power | Check lead and fuse |
| Faulty cable | Have it checked and changed by service centre | |
| Faulty switch or motor | Have it repaired by service centre | |
| Electronic unit defective | Have electronic unit replaced | |
| Overload protection tripped out | Push in (Illustration 13) | |
| Overload protection always trips (Fig. 13) | Knife blocked (Fig. 5) | Free the blockage |
| Air filter blocked (Fig. 12) | Clean or replace air filter | |
| Motor defective | Have the motor replaced | |
| Overload protection defective | Have the electronics replaced | |
| Motor runs very slowly | Motor defective | Have the motor replaced. |
| Electronics defective | Have the electronics replaced. | |
| Shearing tension too high | Reduce the shearing tension. Have the blade sharpened. | |
| Motor part becomes warm | Air filter is blocked; air can no longer circulate (Item 12) | Remove air filter and clean with brush or replace filter |
| Shearing tension too high clipping | Do not tighten pressure tension nut so much (Illustration 6). If the blades still do not cut, they should be resharpened or replaced | |
| Motor bearing defective | Have the motor replaced | |
| Motor vibrates | Bearings are worn out | Have the motor replaced |
6 Environmental Protection and Disposal
6.1 Introduction
The owner has a duty to dispose of the clipper blades as well as of the clipping machine properly at the end of its service life. Please observe your relevant national regulations.
6.2 Material Categories
Please hand the machine to a service centre or to a specialist electrical dealer in your vicinity for disassembly.
| Material | contained in items from Illustration 1 |
| Rubber | 8/13/14 |
| Polyamide | 1/2/3/4/6/15 |
| Iron/Steel | 3/5/10/11/12/16/17/19/20/21/22/23/24/25/26/27/28/29/30/31/32/33/34 |
| Copper | 5/14 |
| Aluminium | 18 |
| Other materials | 9/17 |
| Electronic unit / PCB | 7 |
7 Contact Addresses
Your purchasing point or the company shown on your guarantee certificate are authorised service centres or refer to the nearest service centre in your area.
| Materiale | indeholdt i pos. fra ill. 1 |
| Gummi | 8/13/14 |
| Polyamid | 1/2/3/4/6/15 |
| Jern/stål | 3/5/10/11/12/16/17/19/20/21/22/23/24/25/26/27/28/29/30/31/32/33/34 |
| Kobber | 5/14 |
| Aluminium | 18 |
| Andre stoffer | 9/17 |
| Elektronik /PCB | 7 |
7 Kontaktadresser
2.3 Emprego adequado


2

3
4

5

6

7

8

9

10

11

12

13


14
In case of claim, please return your machine with the instruction manual and the warranty card directly to your local distributor. Please do not cut off the warranty card from the instruction manual.
- SAFETY REGULATIONS
- PUTTING INTO OPERATION
- SERVICING
- MALFUNCTIONS AND REPAIRS
- ENVIRONMENTAL PROTECTION AND DISPOSAL
- CONTACT ADDRESSES
- PROPER USE
- OVERALL VIEW / CONTROLS
- COMPONENT NAMES
- INTENDED USE
- TECHNICAL DATA
- EQUIPMENT ITEMS
- INTRODUCTION
- SYMBOLS AND WARNING SIGNS
- DANGER SYMBOLS
- WARNING
- CAUTION
- INFORMATION SYMBOLS
- NOTE
- PICTORIAL NOTE
- SAFETY PRINCIPLES
- POWER CONNECTIONS
- SERVICING AND CHECKING REQUIREMENT
- NOISE EMISSION / PERSONAL PROTECTIVE EQUIPMENT
- WEAR EAR PROTECTORS
- WEAR PROTECTIVE GOGGLES AND GLOVES
- OTHER DANGERS
- ESSENTIAL OPERATOR SKILLS
- CONTROLS AND OPERATING NOTES
- SETTING THE CLIPPER BLADES WITH THE TENSION NUT
- BEFORE CLIPPING
- DURING CLIPPING
- LUBRICATION
- BEFORE AND DURING CLIPPING
- SWITCHING ON / OFF
- VERSION 120V
- VERSION 230V
- CLEANING
- CLEANING THE CLIPPER HEAD AND CLIPPER BLADES
- FITTING THE CLIPPER BLADE
- RESHARPENING THE CLIPPER BLADES
- CLEANING THE AIR FILTER
- STORING THE CLIPPING MACHINE
- MALFUNCTION LISTS
- MATERIAL CATEGORIES
- KONTAKTADRESSER
- EMPREGO ADEQUADO
Brand : Coburn
Model : Heiniger Progress
Category : Electric mower