Heiniger Handy - Electric mower Coburn - Free user manual and instructions
Find the device manual for free Heiniger Handy Coburn in PDF.
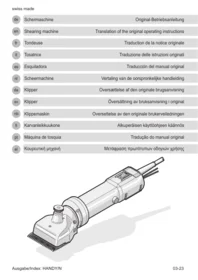


| Product type | Electric animal clipper |
| Brand | Coburn |
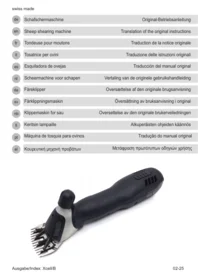
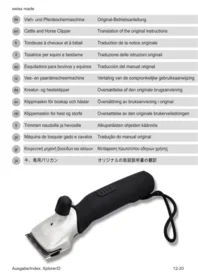
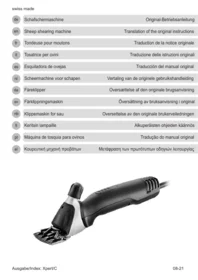
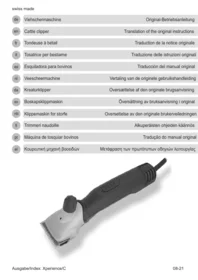
| Model | Heiniger HANDY Clipper |
| Intended use | Shearing of domestic animals (livestock, etc.), commercial use |
| Operating environment | Dry rooms only |
| Power supply | Mains, power cable |
| Cutting adjustment | By adjusting screw, adjustable before and during shearing |
| Switch | Integrated On/Off |
| Blades | Steel cutting blades, detachable and re-sharpenable |
| Air filter | Cleanable air filter |
| Lubrication | Necessary for optimal operation |
| Cleaning | Cleaning of blades and air filter |
| Maintenance | Sharpening, blade mounting, filter cleaning |
| Safety | Protection against electric shock risks, unplug before cleaning |
| Storage | Cutting head protection included for storage |
| Supervision | Do not leave plugged in unattended, keep out of reach of children |
| Restrictions | Do not use on dangerous animals, nor in a bathtub/shower |
| Cable | Do not damage the cable, keep it away from hot surfaces |
| Maintenance | Have any repair carried out by an authorized maintenance center |
| Accessories | Only use accessories specified by the manufacturer |
Frequently Asked Questions - Heiniger Handy Coburn
User questions about Heiniger Handy Coburn
0 question about this device. Answer the ones you know or ask your own.
Ask a new question about this device
Download the instructions for your Electric mower in PDF format for free! Find your manual Heiniger Handy - Coburn and take your electronic device back in hand. On this page are published all the documents necessary for the use of your device. Heiniger Handy by Coburn.
USER MANUAL Heiniger Handy Coburn
Inhaltsverzeichnis
1 Safety regulations .... 3
1.1 Introduction....3
1.2 Symbols and warning notes 3
1.3 Stipulated usage....4
1.4 Basic safety principles .... 4
1.4.1 Power supply connections.... 4
1.4.2 Maintenance and inspection obligation....6
1.4.3 Noise emission / personal protective equipment 6
1.4.4 Residual dangers....6
1.4.5 Supervision of children....6
1.5 Operator requirements 7
2 Stipulated usage 7
2.1 Component list....7
2.2 Purpose of use 8
2.3 Technical data 9
2.4 Equipment....9
3 Initial start-up 10
3.1 Controls and operating instructions 10
3.2 Shearing adjustment with adjusting screw....11
3.2.1 Before shearing 11
3.2.2 During shearing 12
3.3 Lubrication....12
3.4 ON/OFF switch 13
3.5 Malfunctions 13
4 Maintenance....13
4.1 Cleaning.... 13
4.2 Mounting the shearing blades 13
4.3 Regrinding the shearing blades 14
4.4 Cleaning the air filter (Fig. 11).... 14
4.5 Storing the shearing machine (Fig. 12)....14
5 Troubleshooting and repairs....15
5.1 Introduction.... 15
5.2 Troubleshooting.... 15
5.2.1 Cattle shearing head 15
5.2.2 Motor unit....16
6 Environmental protection and waste disposal....17
6.1 Introduction.... 17
6.2 Material groups.... 17
7 Contact address....17

IMPORTANT SAFETY INSTRUCTIONS

NOTE!
When using an electrical device, you must always observe basic precautionary measures as described below.
Read all instructions before using the device.
1 Safety regulations
1.1 Introduction
- This chapter describes the safety regulations that are to be taken into consideration as a matter of course when using the shearing machine.
- All persons who carry out work on and with the shearing machine must read the operating instructions.
- The operating instructions are to be kept in a secure place that is accessible at all times.
- Authorised service agents may only carry out service and repair work.
1.2 Symbols and warning notes
Various symbols are used in the operating instructions. These symbols indicate possible hazards or bring to the user's attention such technical information that, if not complied with, may lead to personal injury and material damage or to uneconomic operation.
Hazard symbols

WARNING!
Denotes a possibly hazardous situation. Serious injury and even death can result if such situations are not avoided.

CAUTION!
Denotes a possibly hazardous situation. Light or slight injury can result if such situations are not avoided.
Information symbols

NOTE!
A note which, if not complied with, can lead to operational stoppages or damage.
1.3 Stipulated usage
The intended purpose of use of the shearing machine is described in Chapter “2.2 Purpose of use”. Shearing of other animal species, especially dangerous ones such as predators and the like, is equivalent to abuse. This can result in dangerous situations for life and limb.
The device is intended for commercial use.
The shearing machine must only be used in dry areas.
The details contained in Chapter “2.3 Technical data”, are to be considered as legally binding limit values and characteristic data.
1.4 Basic safety principles
1.4.1 Power supply connections

DANGER!
In order to reduce the risk of electric shock:
- Do not touch the device if it falls into water. Immediately pull the plug out of the socket.
▶ Do not use when bathing or in the shower. - Do not place or store the device in such a way that it can fall or be pulled into a tub or sink. Do not place the device in water or other liquids and do not allow it to fall in.
▶ Always unplug this appliance from the electrical outlet immediately after using.
▶ Unplug the device from the mains before cleaning it.

WARNING!
In order to reduce the risk of burns, fire, electric shocks or injuries to people:
▶ A device must never be left unattended when it is plugged in.
This device is not intended to be used by persons (including children) with reduced physical, sensory or mental capabilities, or lack of experience and knowledge, unless they are supervised by a person responsible for their safety or have been given instructions by that person on how to use the device. Children should be supervised to ensure that they do not play with the equipment.
▶ Only use the device for the purpose described in these instructions. Do not use any mounting components that are not specified by the manufacturer.
▶ Never use the device if the cable or outlet are damaged or if it does not work properly after falling, sustaining damage or landing in water. Take the device to a service centre for inspection and repair.
- Keep the cable away from heated surfaces.
- Keep the air openings free of lint, hair, and similar objects.
▶ Never drop or insert objects into an opening.
- Do not use the device outdoors and do not operate it while aerosol products (sprays) are being used.
- Do not use this device with a damaged or broken comb as this may cause injury to the face.
In order to disconnect the device, switch all operating elements to the OFF position (e.g. "0") and then remove the plug from the socket.
▶ Do not leave the device in places where it is expected to:
- be exposed to damage by an animal, or
- Be exposed to weather conditions.

WARNING!
Keep the device dry.
1.4.2 Maintenance and inspection obligation
▶ Only operate the shearing machine when it is undamaged and in proper condition.
If a defect is found on the housing or on the electrical cable, it must be repaired by a repair and service centre.
1.4.3 Noise emission / personal protective equipment


The acoustic emission while operating the device is typically 75 dB(A). We recommend that ear protection, safety glasses and gloves are always worn when operating the plant.
Personal protective equipment to be provided by the operator.
1.4.4 Residual dangers

WARNING!
The blades may become hot after prolonged use.
Do not place the device where it is likely to be damaged by an animal or exposed to the weather.
Should dangers and hazards occur during operation which are not directly related to the shearing of animals, we request that you inform us of this. This also applies in the event of a technical failure that causes a hazard.
1.4.5 Supervision of children

WARNING!
Children are forbidden from operating the equipment.
Children should be supervised to ensure that they do not play with the equipment.
1.5 Operator requirements

NOTE!
The safe use of the machine places few demands on operating personnel. These must, however, be observed and maintained as a matter of course.
- The operator has experience in dealing with the animals being shorn.
- The operator has read and understood the operating instructions, or has been indoctrinated into the operation of the machine by a skilled person, and the risks and dangers have been pointed out to him.

KEEP THESE INSTRUCTIONS IN A SAFE PLACE!
2 Stipulated usage
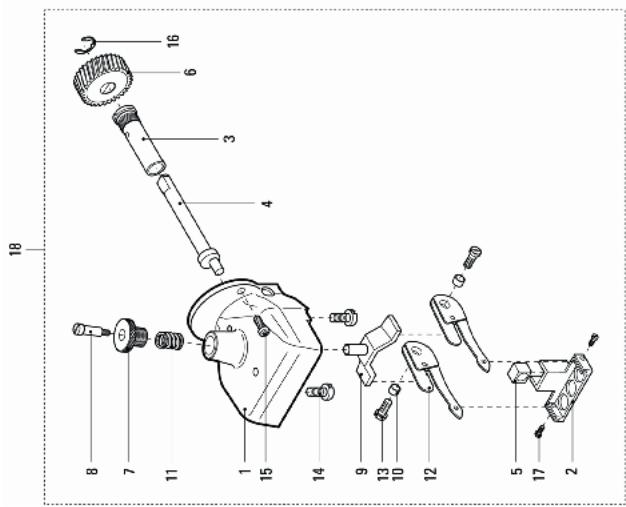
2.1 Component list
Designation of individual parts
| Pos. | Description | Qty. | Pos. | Description | Qty. |
| 1 | Clipper head caseUSV/HANDY/CORDLESS | 1 | 30 | Socket head cap screwM3 x 45 | 2 |
| 2 | Pivot lever USV/HANDY/CORDLESS | 1 | 31 | Serrated washer M3 | 2 |
| 3 | Eccentric bearing USV/HANDY/CORDLESS | 1 | 32 | Spacer sleeve HANDY | 2 |
| 4 | Eccentric shaft USV/HANDY/CORDLESS | 1 | 33 | Air flow guide HANDY | 1 |
| 5 | Eccentric square | 1 | 34 | Stator HANDY 240V | 1 |
| 6 | Gear Z31 HANDY | 1 | 34 | Stator HANDY 120V | 1 |
| 7 | Pressure regulating screwUSV/HANDY/CORDLESS | 1 | 35 | Motor housing HANDYHeiniger grey | 1 |
| 8 | Spacer screw USV/HANDY/CORDLESS/DELTA1/PROGRESS | 1 | 36 | Carbons with spring + coversleeve VS84/HANDY | 2 |
| 9 | Pressure plate | 1 | 37 | Carbon cap VS84/HANDY | 2 |
| 10 | Centring sleeve | 2 | 38 | Socket head cap screwM3.5 x 8 | 3 |
| 11 | Pressure spring | 1 | 39 | Cable VS84/HANDY withplug EURO | 1 |
| 12 | Leaf spring | 2 | 39 | Cable VS84/HANDY withplug AUS | 1 |
| 13 | PH-screw M5 x 16 | 2 | 39 | Cable VS84/HANDY with plug USA | 1 |
| 14 | Comb plate screw cattle/horse | 2 | 40 | Anti-kink sleeve VS84/HANDY EURO/AUS | 1 |
| 15 | PH-screw M4 x 10 | 2 | 40 | Anti-kink sleeve VS84/HANDY/12V USA | 1 |
| 16 | Retaining ring for shaft ∅6 | 1 | 41 | Catch loop HANDY/12V | 1 |
| 17 | Cylinder screw with shank M3 x 6 | 2 | 42 | Switch housing, top HANDY black | 1 |
| 18 | Cattle shear head HANDY with comb plates | 1 | 43 | Shoulder screw M3.5 | 1 |
| 19 | Socket head cap screw M3.5 x 6 | 4 | 44 | Main switch VS84/HANDY/12V | 1 |
| 20 | Gearbox housing HANDY black | 1 | 45 | Capacitor 0.15μF VS84/HANDY 240V | 1 |
| 21 | Seal VS84/HANDY/12V | 1 | 45 | Capacitor 0.15μF VS84/HANDY 120V | 1 |
| 22 | Centring flange VS84/HANDY | 1 | 46 | Cable clamp VS84/HANDY AUS | 1 |
| 23 | Play compensation disc 608 | 1 | 46 | Cable clamp VS84/HANDY/12V EURO/USA | 1 |
| 24 | Ball bearing 608-2Z | 1 | 47 | Clamp VS84/HANDY/12V | 1 |
| 25 | Retaining ring for bores ∅22 | 1 | 48 | Socket head cap screw M3 x 25 | 1 |
| 26 | Ventilation blade HANDY | (1) | 49 | Cover VS84/HANDY/12V | 1 |
| 27 | Rotor HANDY 240V | 1 | 50 | Switch housing, bottom VS84/HANDY/12V black | 1 |
| 27 | Rotor HANDY 120V | 1 | 51 | Countersunk screw M3 x 6 | 4 |
| 28 | Play compensation disc 626 | 1 | 52 | Filter cover complete VS84/HANDY/12V black | 1 |
| 29 | Ball bearing 626-2Z | 1 | Converter EURO/GB plug | 1 |
2.2 Purpose of use
The shearing machine is intended exclusively for shearing cattle and horses. Other uses, in particular the use of the machine on people, are expressly prohibited.
2.3 Technical data
| Product name | HC (Handy Clipper) |
| Mains voltage | see rating plate |
| Motor output | see rating plate |
| Rotary speed | see rating plate |
| Required fuse protection | see rating plate |
| Dimensions (W x H x L) | approx. 79 mm x 72 mm x 290 mm |
| Weight not including cable | 1240 g |
| Max. ambient temperature | 0° - 40°C |
| Max. humidity | 10% - 90% (relative) |
| Noise emission ( LpAm ) | 75 dB(A) (DIN-45635-1/04.84 + BG-PAS 26) |
| Acceleration ( avhw ) | 4.6 m/sec 2 (EN 28662-1/01.93) |
We reserve the right to make technical changes and improvements without notice.
2.4 Equipment
• Shearing machine with shearing head
• Pair of shearing blades
- Special screwdriver
- Bottle of special lubricating oil
- Cleaning brush
- Operating instructions
- Case for transport and storage
Options
- Diverse shearing blades
3 Initial start-up
3.1 Controls and operating instructions

WARNING!
The improper use of electrical devices, especially animal breeding devices, is associated with dangers! Therefore, before putting the machine into operation, observe the following accident-preventing measures:
- The voltage specified on the maker's plate and that of the local power supply must match. The plant may only be connected to an AC power supply.
- Avoid any contact with the moving shearing blades.
- Even with the machine switched off, do not handle the area round the shearing blades as long as the machine is still connected to a power source. Whenever working on the shearing blades/head, always first disconnect the power supply.
- Avoid contact with a machine that is in contact with liquids. Never shear wet animals. Liquid that has penetrated the machine reduces the electrical insulation. There is a danger of electric shock or short circuit. Clean the machine only when it is dry, using a brush or the cleaning brush.
- An electric cable lying loose on the floor over a long distance can get caught and become a danger. Before starting shearing, lay the cable carefully and securely. Avoid kinks or coils in the cable. Animals should not be able to stand on, walk over or get caught in the power cable. Never wrap the power cable around the machine and keep the power cable away from hot surfaces and objects. This can result in breaks and damage to the insulation. Check the cable regularly for damaged spots.
- Turn the machine switch to OFF (position 0; Fig. 2) before unplugging the machine.
- Use only original shearing blades. Do not use damaged shearing blades with blunt or broken teeth. Only work with sharp shearing blades sharpened by a specialist workshop.
- We recommend that you do not use the comb for more than one hour and the upper blade for more than 15 minutes.
- Before beginning shearing, remove foreign objects from the coat (wire, wood etc.).
- Wear suitable work clothes. Do not wear loose-fitting clothing or jewellery. These can get caught in the moving machine parts. Wearing safety glasses and hearing protection is strongly recommended.
- Never insert an object into an opening of the machine.
- The noise of the clipper can trouble animals. A kick or the body weight of the animal can cause significant injuries. Fix the animal sufficiently, approach the animal from the front and switch on the machine already in the animal's field of vision.
- Shearing of animals should only be done when unauthorised persons do not have access to the shearing site.
- Only shear in well-ventilated areas (dust) and never near explosive objects or gases.
- Caution: Danger of blocking! The machine must not be operated without the blades mounted.
- Generally, never plunge the shearing machine and shearing head into liquids such as water, soapy water, diesel, petrol, or anything else. This leads to considerable damage to the mechanics and engine.

WARNING!
These safety instructions must be followed all the time. It is recommended to always use a residual current safety plug when working with electrical devices.
3.2 Shearing adjustment with adjusting screw
Make the setting during commissioning as follows:
3.2.1 Before shearing
When the machine is switched off, tighten the regulating screw until the first noticeable resistance is felt. Then screw the adjusting screw another 1/4 turn.
▶ After each new setting, check the cutting power on the animal and only then continue turning.
3.2.2 During shearing

NOTE!
The patented shearing system ensures long-term regulation. If the blades no longer cut sufficiently, the adjusting screw must be readjusted by a further 1/4 turn (according to diagram 3). If this adjustment does not bring the desired success, the clipper blades must be reground.
The shearing system works with much less contact pressure than conventional cattle shearing machines. Thus, care must be taken that the shearing tension is not set too high. Adjust the shearing tension very slightly from time to time during shearing.
If shearing is started with insufficient shearing tension, hair can accumulate between the clipper blades. This negatively affects the further course of the shearing or even makes it impossible. If this is the case, the shearing blades must be dismantled, cleaned, oiled and refitted as described in 4.2.
3.3 Lubrication
Before and during shearing
For a good shearing result and to increase the service life of the machine and shearing blades, a thin layer of oil on the upper and lower blades (Fig. 4, item. 1+4) is essential. All other moving parts in the shearing head must also be well oiled. Drip oil onto the shearing blades and into the lubrication hole provided on the shearing head (Fig. 4, item2+3).
Only use our special oil or a paraffin oil conforming to the ISO VG 15 specification. This oil is toxin class free and does not cause any irritation on skin or mucous membranes. This paraffin oil degrades to about 20% after 21 days (CEC-L-33-T-82).

NOTE!
Lack of lubrication is the most common cause of failure for unsatisfactory shearing results.
Insufficient oiling of the shearing blades leads to heating and a reduced service life of the blades.
The shearing blades and the shearing head must be sufficiently oiled during shearing (at least every 15 minutes) so that they do not run dry.
3.4 ON/OFF switch
The switch has two positions (Fig. 2 shows position 0).
- Position 0: Machine switched off
- Position I: Machine switched on

NOTE!
Always use the slide switch (Fig. 2) to turn the machine on and off. Check the switch position before plugging in the cable.
3.5 Malfunctions
See Troubleshooting in chapter 5.2.
4 Maintenance

NOTE!
Before commencing any maintenance work disconnect the electrical power supply by pulling out the plug.
Do not handle the area round the shearing blades as long as the machine is still connected to a power source. Whenever working on the shearing blades/clipper head, always first disconnect the power supply.
4.1 Cleaning
Cleaning the shearing head and clipper blades
After finishing the shearing, remove oil from the machine by wiping with a dry cloth and carefully clean the shearing head and shearing blades with a dry brush. Then oil the parts to prevent rusting. Even the smallest rust spots on the shearing blades impair shearing or make it completely impossible.
4.2 Mounting the shearing blades
A pair of shearing blades consists of a lower blade (Fig. 5, item 2) and upper blade (Fig. 5, item 1). When mounting the blades, make sure that the correct surfaces are placed on top of each other. The blades are mounted as follows:
▶ Loosen the shearing pressure adjustment knob (Fig. 6) and place the machine on a hard surface so that the blade fixing screws (Fig.8) are facing upwards.
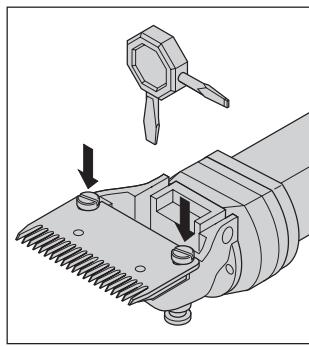
▶ Loosen the blade fixing screws (Fig. 7) and remove the two old shearing blades.
▶ Make sure that the new shearing blades are clean. In particular, make sure that the sanded surfaces are free of dirt. Otherwise, satisfactory shearing performance cannot be achieved even with newly sharpened shearing blades.
Place the new upper blade in the guide tips of the pivot lever, then put a few drops of oil on the ground surfaces (Fig. 8). Now slide the new lower blade between the loosened screws (Fig. 9).
It is now important that you place the blades on top of each other so that the ground surface of the comb blade protrudes approx. 1.5 - 2.0 mm above the tips of the upper blade (Fig. 10).
▶ Once you have adjusted the clipper blades, fix the position of the lower blade and tighten the blade fixing screws firmly.
4.3 Regrinding the shearing blades
Only work with sharp shearing blades. Replace blunt or defective blades without teeth. The correct resharpening of shearing blades is only to be done by special machines or by a specialist. In that case, contact your service centre.
4.4 Cleaning the air filter (Fig. 11)
The air filter element is located on the underside of the motor part of the machine. The air filter can be removed from the machine for cleaning. Regular cleaning of the element with a dry brush is essential. Make sure that no foreign objects get into the machine while cleaning the air filter.

WARNING!
The machine must never be operated without an air filter!
4.5 Storing the shearing machine (Fig. 12)

CAUTION!
Only store the shearing machine in dry rooms and in the case supplied. If liquid is suspected to have entered the machine, do not switch it on again. There is a danger of electric shock or short circuit. Hand over the shearing machine to a service centre.
Get into the habit of always giving the shearing machine a good clean after use, oiled and with the shearing system relaxed in the equipment case, store the device in a dry and clean location out of the reach of children.
5 Troubleshooting and repairs
This product has been developed and assembled using the best individual components available. It is designed to give longevity and high performance. If spare parts are used during the life of this product, please ensure that they are genuine Heiniger parts. Failure to use genuine Heiniger spares may reduce the performance of this precision engineered product and will void any warranty claim.
5.1 Introduction

WARNING!
The following troubleshooting guide will aid in determining problems and offer a solution.
For information on authorised service points, see chapter "7 Contact address".
An authorised service agent is to be contacted in the event of malfunctions that are not contained in this manual.
5.2 Troubleshooting
5.2.1 Cattle shearing head
| Malfunction | Cause | Rectification |
| Upper blades move too little | Eccentric square lost (Fig. 1a, item 4) | Replace eccentric square |
| Leaf springs completely broken | Notify customer service | |
| Eccentric square and/or eccentric shaft are worn out (insufficient lubrication) (Fig. 1a, item 7) | Replace eccentric square | |
| Notify customer service | ||
| Top blade does not move | Faulty gear (Fig. 1a, item 12) | Replace gear |
| Pressure regulator screw jammed | Thread dirty or rusty (Fig. 1a, item 8) | Clean and oil the thread |
| Pressure spring jammed. | Notify customer service | |
| Leaf springs in the head mount are too loose. | Loosen fixing screws | Tighten fixing screws |
| Pivot lever has play to the pivot spring lever | Leaf springs and/or cap screws are worn out | Notify customer service |
| Pivot lever difficult to move up and down. | Centring sleeve lost. | Notify customer service |
| Cuts poorly or not at all | Shearing blades are blunt | Notify customer service |
| Shearing blades have not been correctly ground as per specification | ||
| Shearing blades not oiled | Oil shearing blades every 15 minutes (Fig. 4, item 1+2+4) | |
| Shearing tension too low | Increase the pressure by screwing in the pressure regulating screw (Fig. 3) | |
| Leaf springs broken | Notify customer service | |
| Animal's hair wet | Only clip dry hair | |
| Hair clamped between upper and lower blade (Fig. 5, Pos. 1+2) | Dismantle the blades, clean them well and oil them, then mount them and increase the pressure | |
| Shearing head has too much play | Notify customer service | |
| Upper blade distance to lower blade not set correctly | Set the distance correctly (Fig. 10) |
5.2.2 Motor unit
| Malfunction | Cause | Rectification |
| Motor is not running | No power | Power supply and/or fuse faulty. |
| Cable faulty | Notify customer service | |
| Switch or motor defective | ||
| Motor runs very slowly | Carbons consumed | Notify customer service |
| Rotor or stator faulty | ||
| Motor unit becomes hot. | Air filter clogged, air can no longer circulate (Fig. 1a, item 28) | Clean air filter in dismantled state with brush or replace filter |
| Shearing tension too high | Tighten the pressure regulator screw less strongly (Fig. 7). If the blades no longer cut, they must be reground or replaced | |
| Bearing faulty (penetration of cleaning fluid) | Notify customer service | |
| Motor vibrates | Rotor runs out of round (generated by a strong impact) | Notify customer service |
| Bearings worn out |
6 Environmental protection and waste disposal
6.1 Introduction
The operator is responsible for the proper disposal of the shearing blades and the shearing machine after they are no longer in working order. Please observe the relevant regulations applicable in your country.
6.2 Material groups
Please hand this in to a service point or your local specialist electrical workshop when the machine is to be dismantled.
| Material | Contained in pos. X taken from Fig. 1a |
| Rubber | 22 / 23 |
| Polyamide | 17 / 20 |
| Iron/steel | 1 / 2 / 3 / 4 / 5 / 6 / 7 / 8 / 9 / 10 / 12 / 13 / 14 / 15 / 20 |
| Copper | 14 / 15 / 23 |
| Brass | 17 / 19 |
| Aluminium | 11 |
| other substances | 12 / 13 / 18 / 19 |
7 Contact address
The sales point or company specified on your guarantee certificate are authorised service points, or, alternatively, refer to the nearest service point in your area.
Table des matières
4.3 Afiar as lâminas de corte

1a

2

3

4

5

6
7

8

9

10

11


| garantía | Item | Artikel | |
| Artículo | Artikel | ||
| Article | Artikel | ||
| Artikel | Artikkel | ||
| Articolo | Tuote | ||
| Artico | Προϊόν | ||
| garantie | Serial no. | Serie nr. | |
| No. de serie | Serie Nr. | ||
| No. de série | Serienr. | ||
| Seriennummer | Serie nummer | ||
| No. di serie | Sarjanro | ||
| No. de série | Αριθμός σειράς | ||
| Date of purchase | Datum van aankoop | ||
| Fecha de compra | Købsdato | ||
| Date d'achat | Köpdatum | ||
| Kaufdatum | Kjøpsdato | ||
| Data di vendita | Ostopäivä | ||
| Data de compra | Ημερομηνία αγοράς | ||
| warranty | Stamp and signature | ||
| Sello y firma | |||
| Cachet et signature | |||
| Stempel und Unterschrift | |||
| Timbro e firma | |||
| Carimbo e assinatura | |||
| Stempel en handtekening | |||
| Stempel og underskrift | |||
| Stämpel och namnteckning | |||
| Stempel og underskrift fra forretningen | |||
| Myyjän leima ja allekirjoitus | |||
| Σφραγίδα και υπογραφή | |||
In case of claim, please return your machine with the instruction manual and the warranty card directly to your local distributor. Please do not cut off the warranty card from the instruction manual.
© 2023 Heiniger AG. All rights reserved.
This instruction manual may not be duplicated or distributed, neither completely nor in extracts, or by electronic or mechanical means (including photocopying), transmitted or used for the purpose of competition without authorisation from Heiniger AG.
Subject to change without notice.

Translation of the original operating instructions
- INHALTSVERZEICHNIS
- SAFETY REGULATIONS
- STIPULATED USAGE
- INITIAL START-UP
- MAINTENANCE
- TROUBLESHOOTING AND REPAIRS
- ENVIRONMENTAL PROTECTION AND WASTE DISPOSAL
- CONTACT ADDRESS
- IMPORTANT SAFETY INSTRUCTIONS
- NOTE
- INTRODUCTION
- SYMBOLS AND WARNING NOTES
- HAZARD SYMBOLS
- WARNING
- CAUTION
- INFORMATION SYMBOLS
- BASIC SAFETY PRINCIPLES
- POWER SUPPLY CONNECTIONS
- DANGER
- MAINTENANCE AND INSPECTION OBLIGATION
- NOISE EMISSION / PERSONAL PROTECTIVE EQUIPMENT
- RESIDUAL DANGERS
- SUPERVISION OF CHILDREN
- OPERATOR REQUIREMENTS
- KEEP THESE INSTRUCTIONS IN A SAFE PLACE
- COMPONENT LIST
- PURPOSE OF USE
- TECHNICAL DATA
- EQUIPMENT
- OPTIONS
- CONTROLS AND OPERATING INSTRUCTIONS
- SHEARING ADJUSTMENT WITH ADJUSTING SCREW
- BEFORE SHEARING
- DURING SHEARING
- LUBRICATION
- BEFORE AND DURING SHEARING
- ON/OFF SWITCH
- MALFUNCTIONS
- CLEANING
- CLEANING THE SHEARING HEAD AND CLIPPER BLADES
- MOUNTING THE SHEARING BLADES
- REGRINDING THE SHEARING BLADES
- CLEANING THE AIR FILTER (FIG. 11)
- STORING THE SHEARING MACHINE (FIG. 12)
- TROUBLESHOOTING
- CATTLE SHEARING HEAD
- MOTOR UNIT
- MATERIAL GROUPS
- TABLE DES MATIÈRES
- AFIAR AS LÂMINAS DE CORTE
Brand : Coburn
Model : Heiniger Handy
Category : Electric mower