
ULX-SWEEPER-O50 - Washing machine Ulsonix - Free user manual and instructions
Find the device manual for free ULX-SWEEPER-O50 Ulsonix in PDF.


User questions about ULX-SWEEPER-O50 Ulsonix
0 question about this device. Answer the ones you know or ask your own.
Ask a new question about this device
Download the instructions for your Washing machine in PDF format for free! Find your manual ULX-SWEEPER-O50 - Ulsonix and take your electronic device back in hand. On this page are published all the documents necessary for the use of your device. ULX-SWEEPER-O50 by Ulsonix.
USER MANUAL ULX-SWEEPER-O50 Ulsonix
ULX-SWEEPER-O50
Montage

WARTUNG




Röcke
WARTUNG


Lagerung
WARTUNG
This User Manual has been translated for your convenience using machine translation. Reasonable efforts have been made to provide an accurate translation; however, no automated translation is perfect nor is it intended to replace human translators. The official User Manual is the English version. Any discrepancies or differences created in the translation are not binding and have no legal effect for compliance or enforcement purposes. If any questions arise related to the accuracy of the information contained in the User Manual, please refer to the English version of those contents which is the official version.
TECHNICAL DATA
| Parameter description | Parameter value | ||
| Product name | Manual sweeper | ||
| Model | ULX-SWEEPER-O50 | ULX-SWEEPER-LOD | ULX-SWEEPER-C30 |
| Dimensions [width x depth x height; mm] | 800 x 800 x 950 | 740 x 980 x 1100 | 600 x 600 x 1140 |
| Weight [kg] | ~11.8 | ~23.4 | 5.9 |
| Brush amount | 2 | ||
| Brush diameter [mm] | 380 | 340 | 300 |
| Workpath width [mm] | 750 | 920 | 550 |
| Dirt container capacity [L] | 50 | 40 | 25 |
| Working capacity [m2/h] | 2300 | 3700 | 1800 |
| Dust filter | √ | √ | - |
NOTE:
- This Unit is designed for outdoor hard floor. Home carpet may not suitable.
- Before Using, make sure the unit is in good and safe condition.
- Heavy stone and large size tree branch may unable to be collected.
- When sweeping very fine dust, small trace may remain in the middle of the machine and a second sweeping is suggested to the best result.
- The sweeper is not suitable for sweeping up liquids. Do not sweeper up burning or glowing objects, e.g. cigarettes, matches, ash or similar.
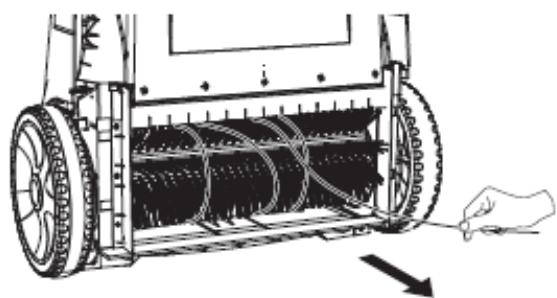
- Please avoid sweeping long rope yarn like material to avoid brushes tangling and damage:
ULX-SWEEPER-O50
Assembly
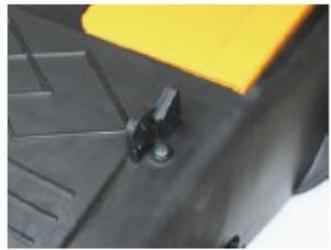
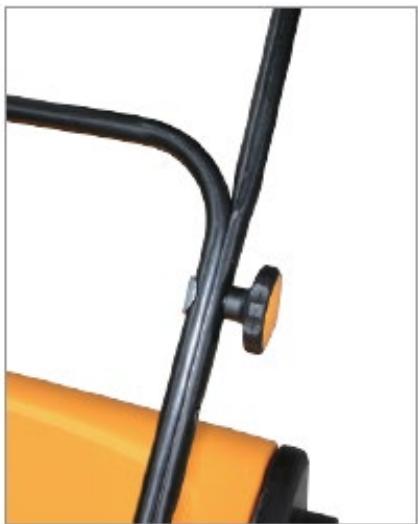
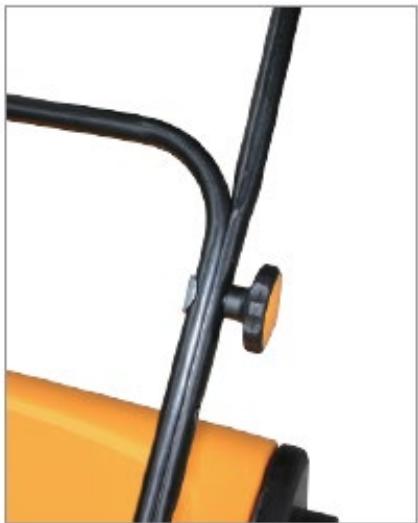
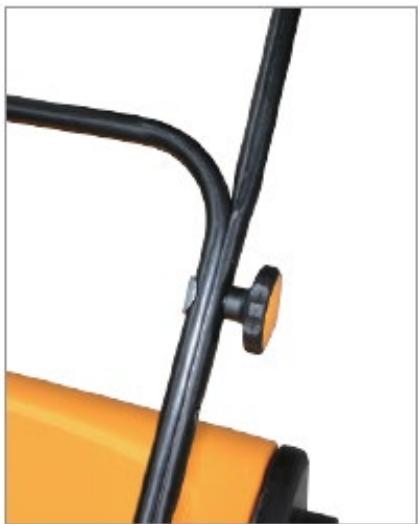
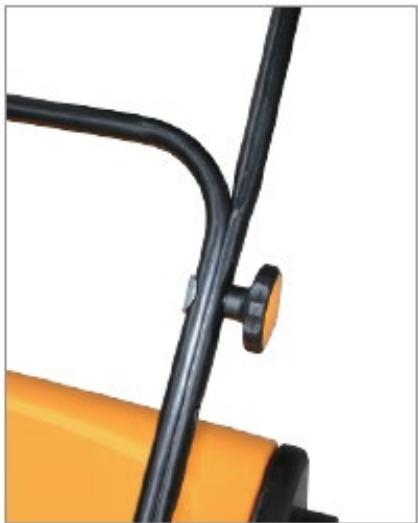
Attach the handle holder to the stand sheet. Connect the sliding handle tube to the handle holder and stand sheet with the turning knob.

Connect the adjustable handle tube with the sliding handle tube. Make sure the bolt holes on both tubes are in line. They are three holes of different height on the adjustable handle - select the height according to desired needs.
Container detaching and assembly

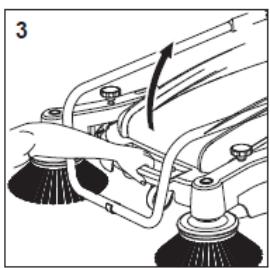
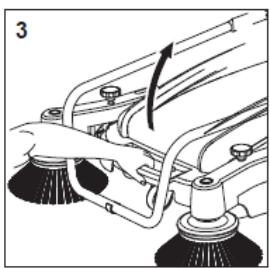
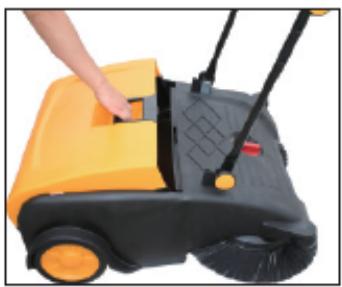
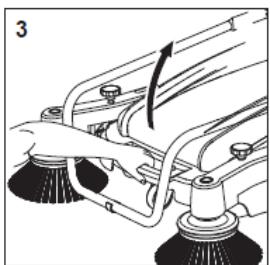
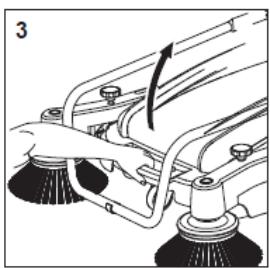
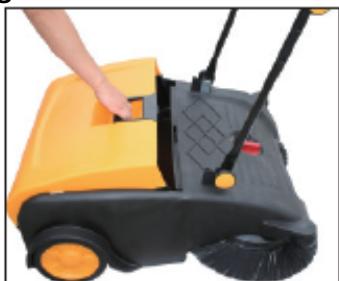
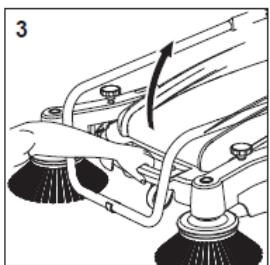
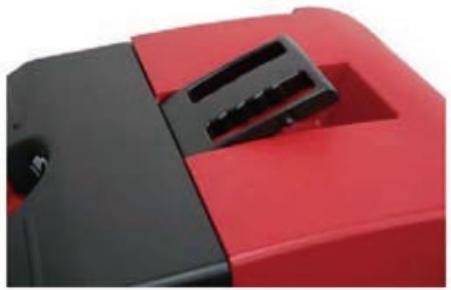
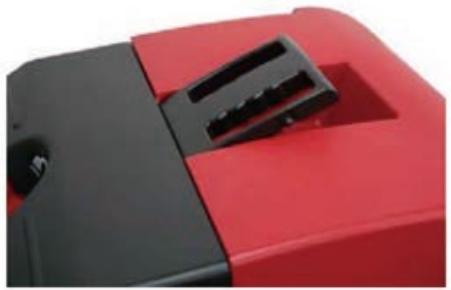
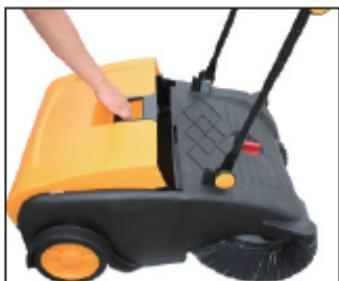
With one hand hold the handle tube, with the other the container handle. Pull and lift the container handle upward and backward.
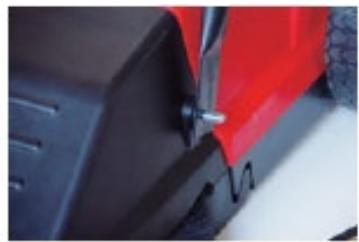
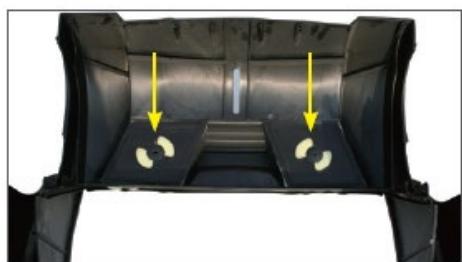
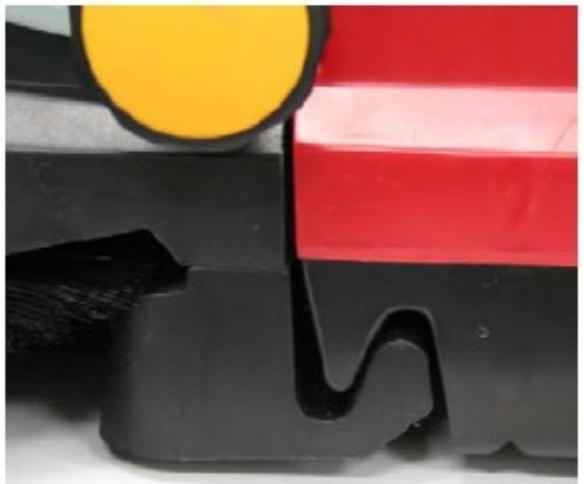
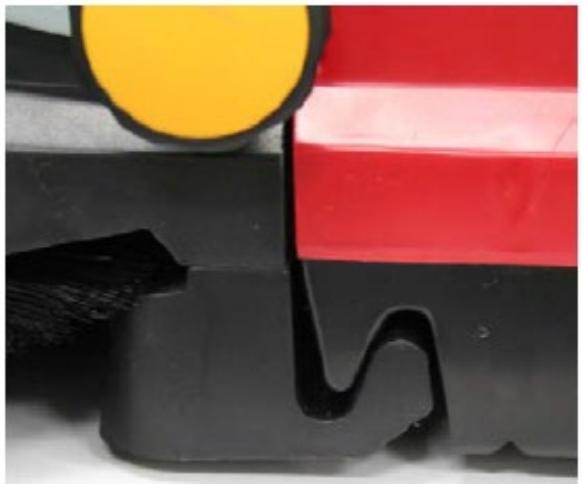
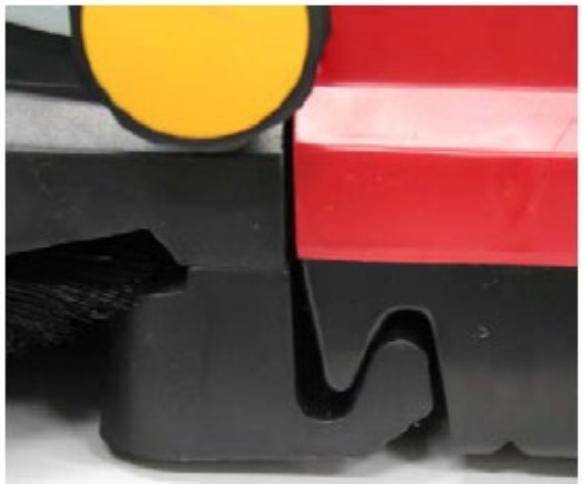
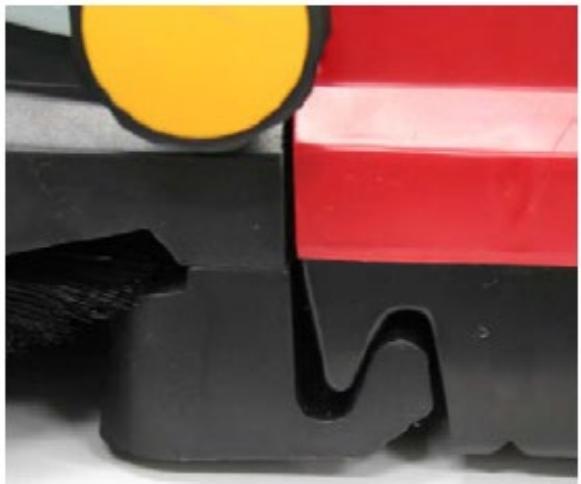
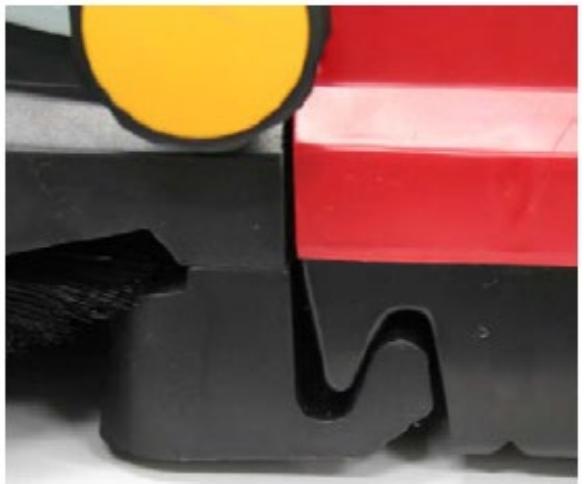
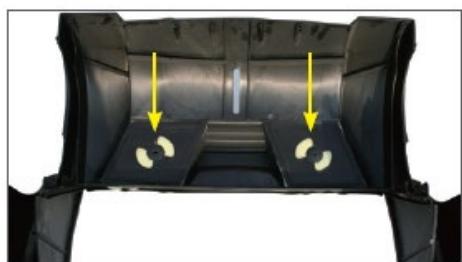
Set the container bottom in the frame, make sure the back groove of the container is in place of the step of the frame. Press the container front and lock it with the front body of the device.
Device use
- Push using both hands and remain normal walking speed.
- Suitable for wet and dry use including sawdust, metal filings, leaves, stones, cigarette butts, papers, cans, cups, broken glass, large debris, sand and dirt.
- Works on all surfaces including workshops, driveways, walkways, store fronts, patios, garages, pool side.
- While sweeping, the carrying capacity of the waste container can be maximized by lifting the front to allow the waste to fall to the back of the container.
- When sweeping, small traces of fine dust may remain in the middle of the sweeping machine. This should be cleaned regularly for best result.
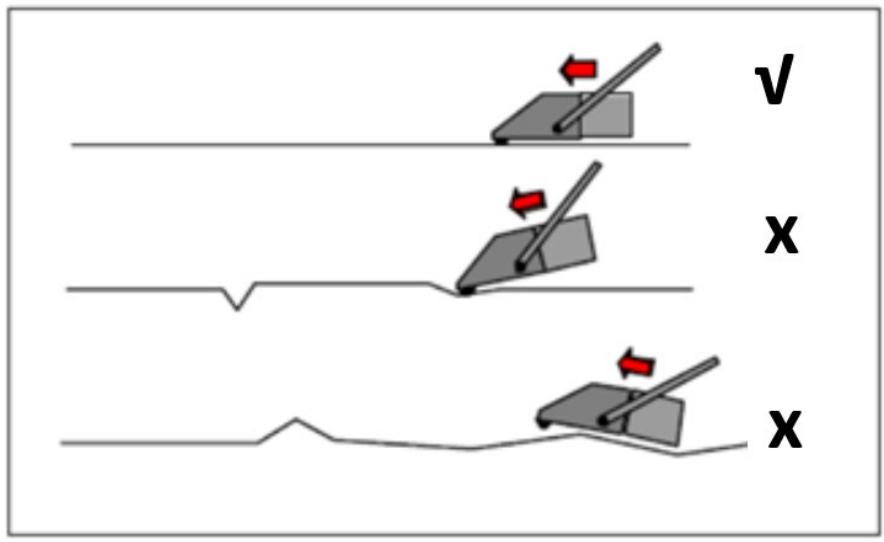
- The surface should be relatively flat with no big pit.

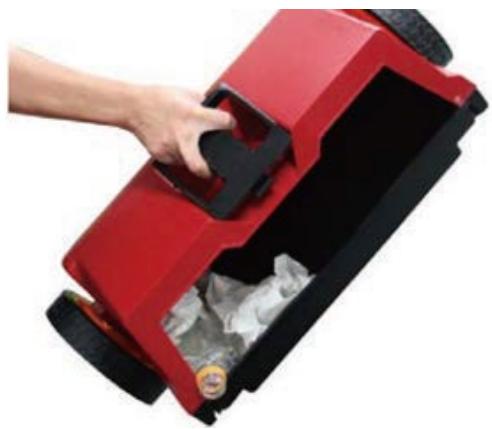
Emptying dirt container
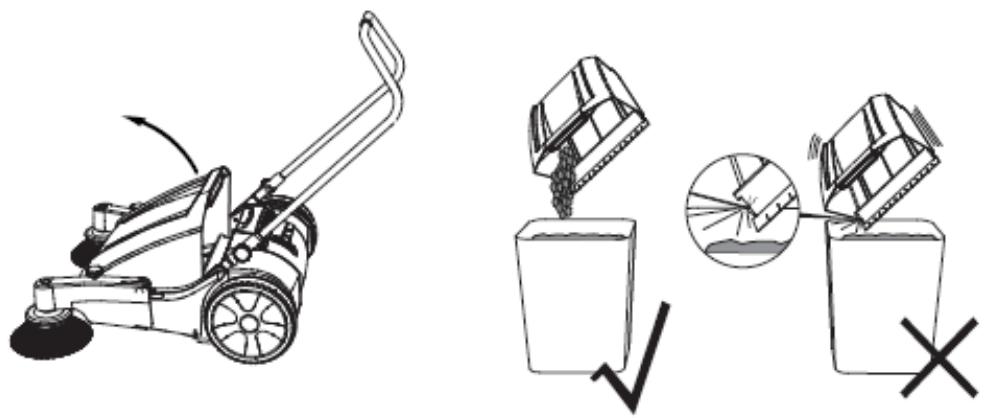
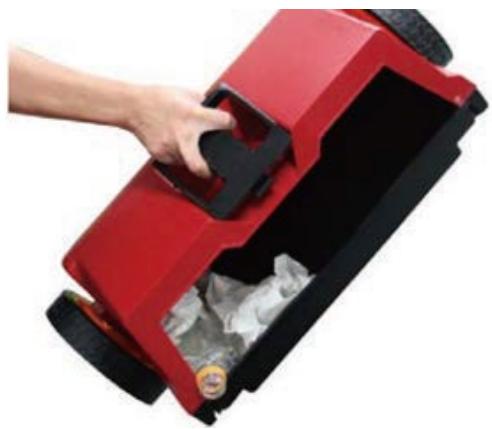
Detach the container, and empty the container waste into trash can:

Brush height adjustment
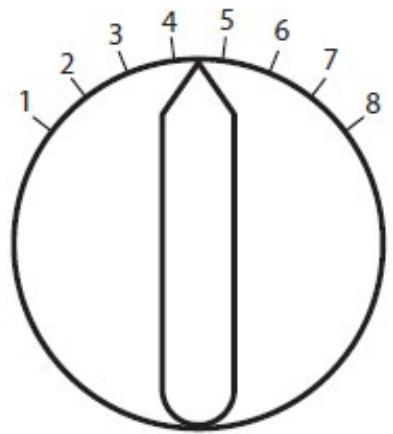
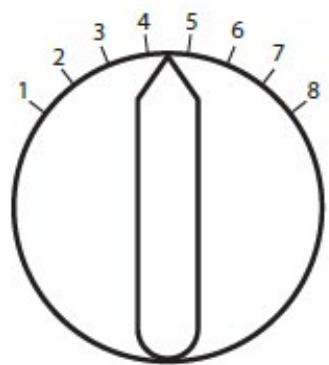
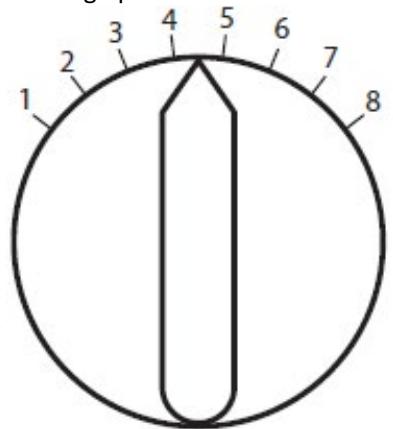
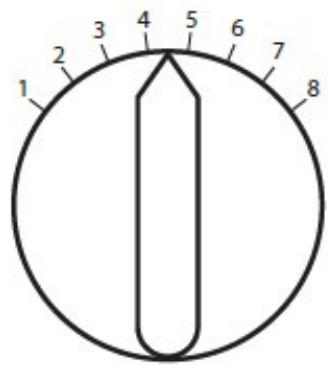
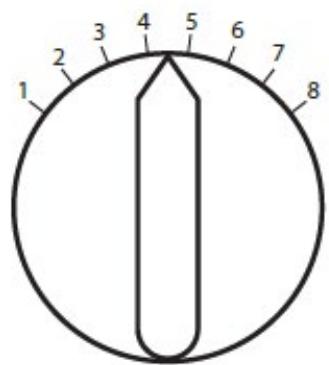
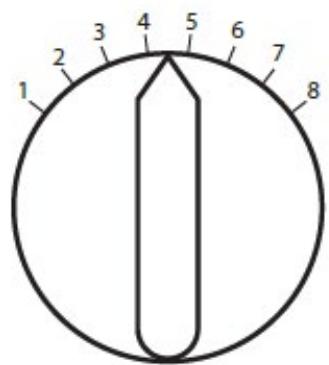
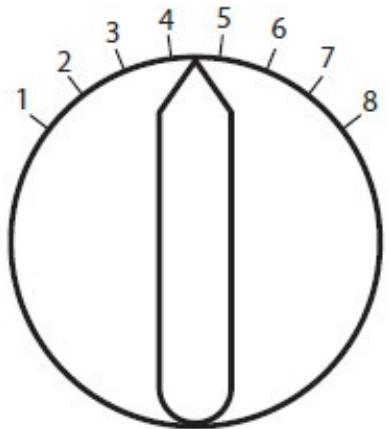
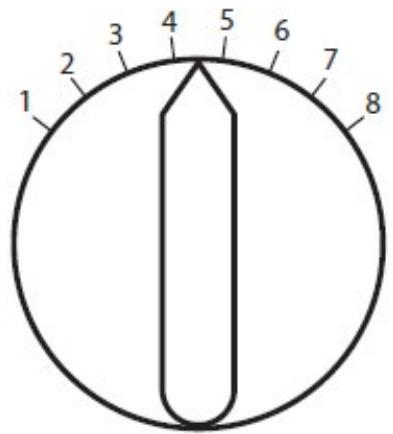
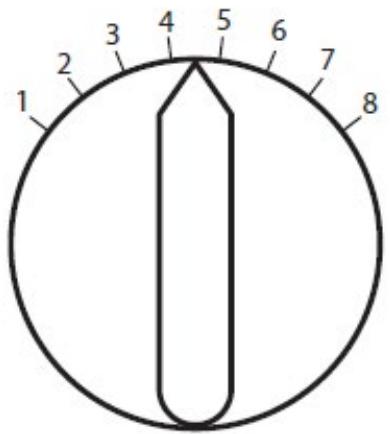
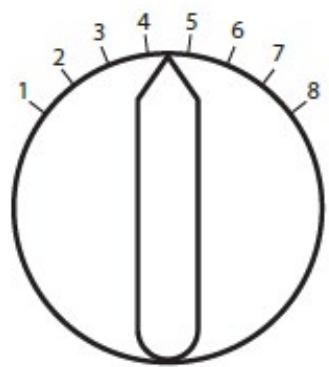
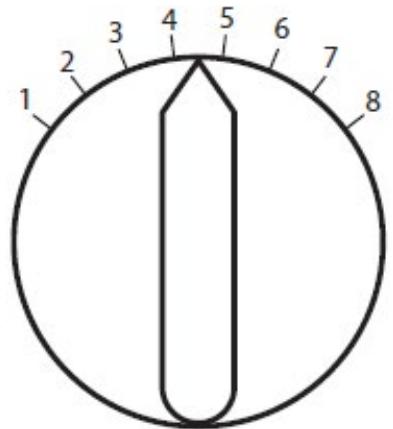
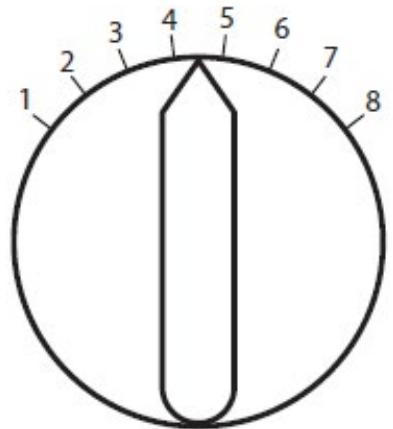
The adjustment knob for the circular broom is located on the front. Turn right to lower or left to raise the brush assembly:
- Step 1-2 for new brooms, all even, hard floors like asphalt, concrete or tiles.
- Step 3-4 for new brooms, wet leaves, sand, uneven floors like exposed aggregate or concrete tiles.
- Step 5-8 for older brooms, or very uneven ground.


Brush replacement
- Set the adjusting knob to the far right side:
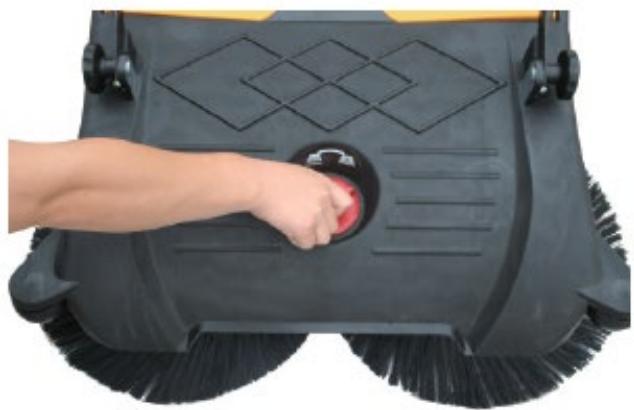
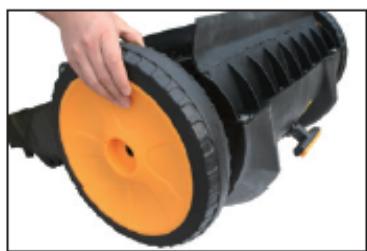
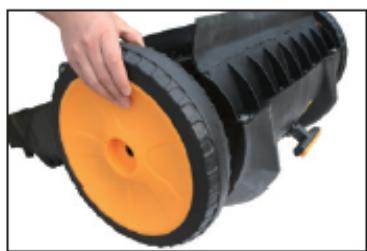
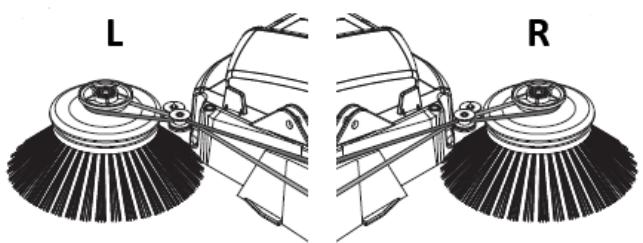
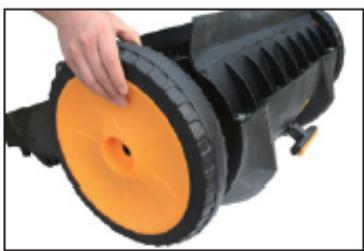
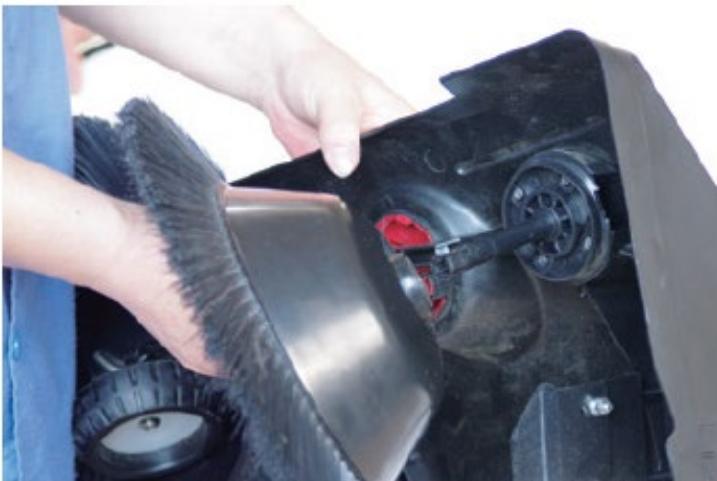
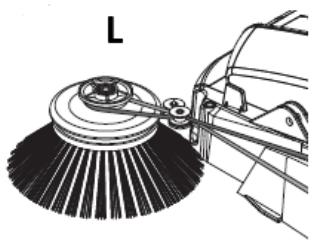
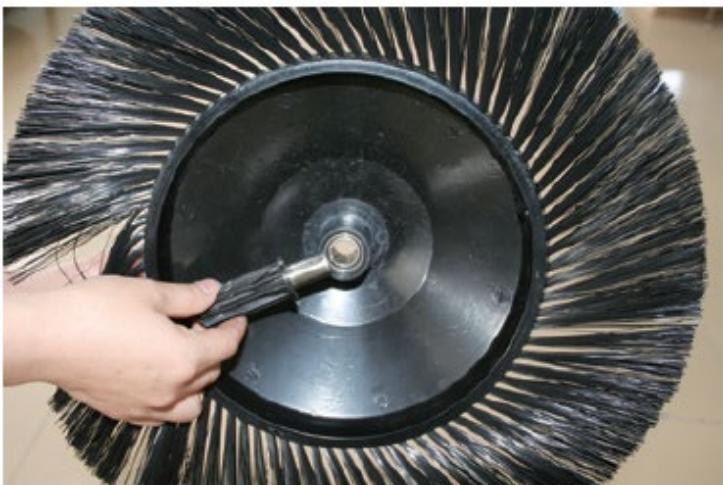
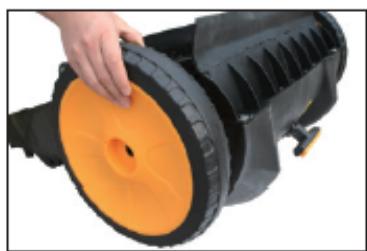
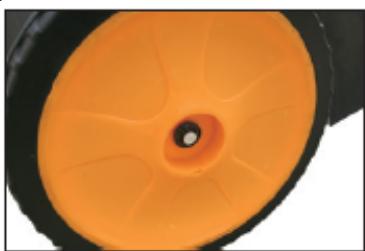
- Pull the inclined wheels strongly and remove it with the axle. Keep notice of the left and right wheel position as they must be replaced on same side for normal operation:

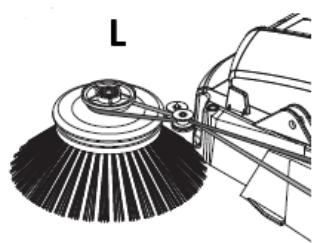
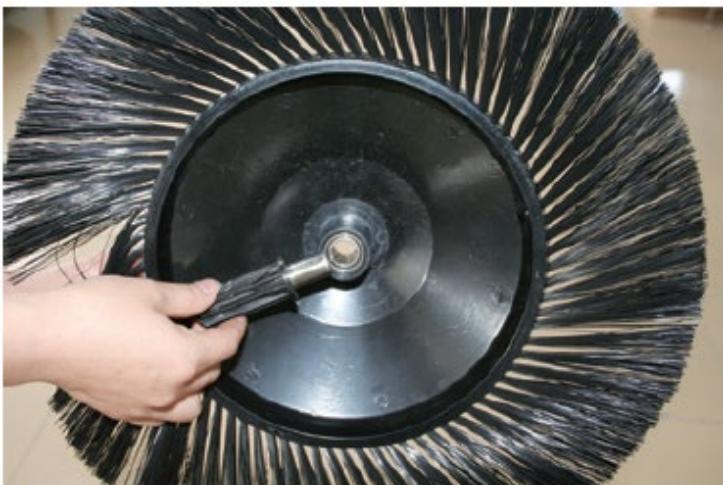
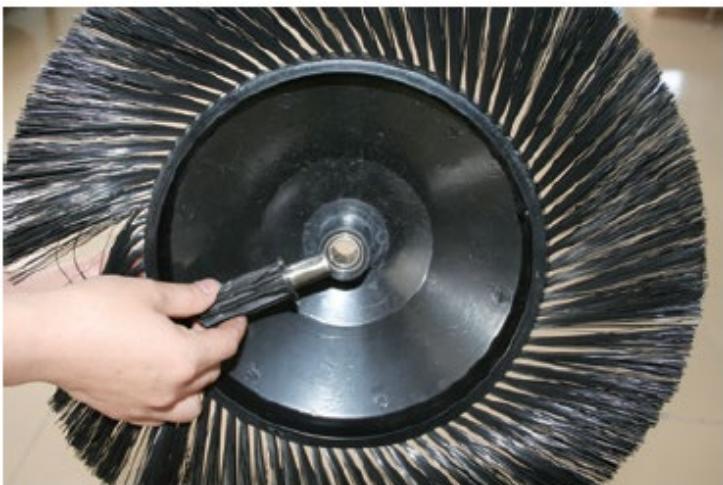
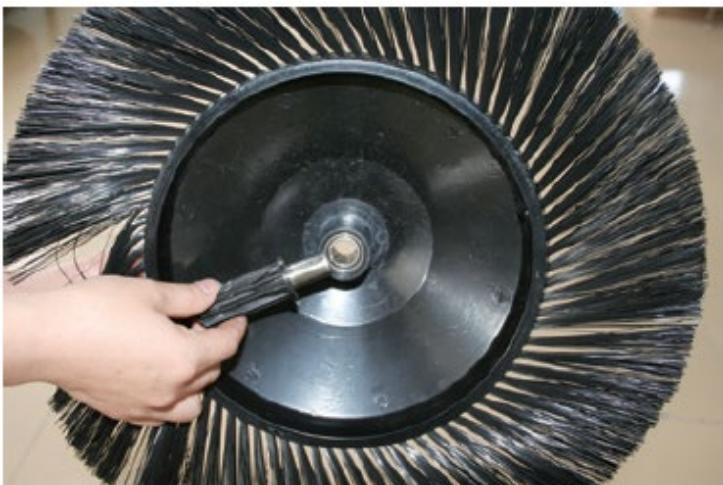
- Pull out the circular broom together with the toothed bushing:

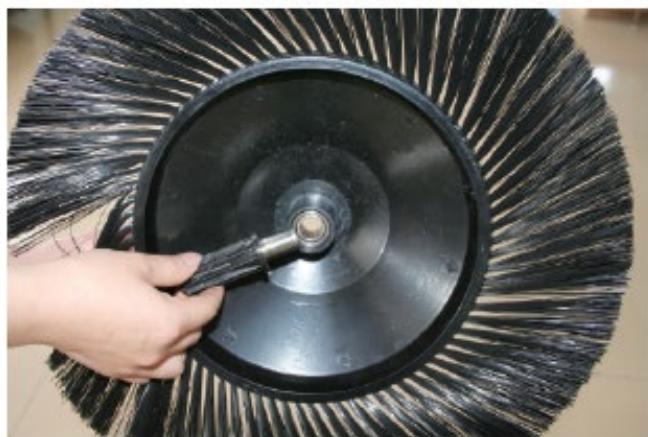
- Remove the toothed sleeve:
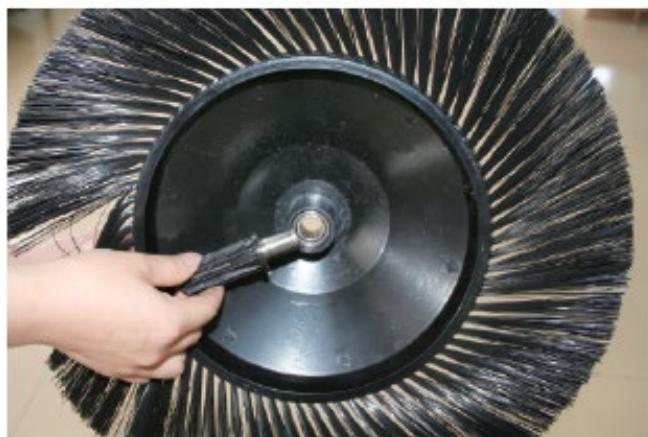
- Insert the toothed bushing into the replacement brush.
- Reinsert the brush and ensure it is completely seated into the rod housing.
- Reinsert the inclined wheel and axel into the rod. Firmly push until the assembly pops into position:

Maintenance
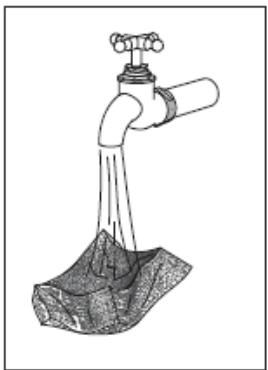
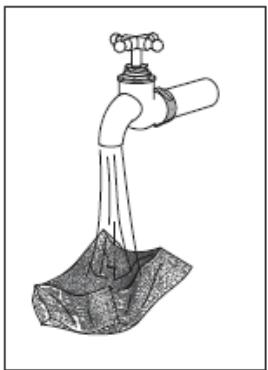
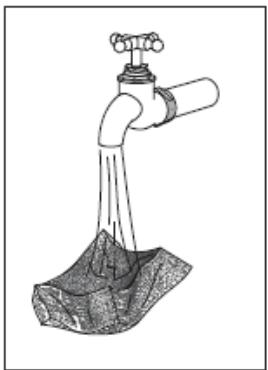
- The broom could be clean with water. Avoid hot water or heat air blowing.
• Device body could be clean with water or wet cloth. - Avoid storing it in direct sunlight for longer time.
- Remove spool, cords, thread for best cleaning result.
ULX-SWEEPER-LOD
Assembly
- Take out the brushes from the debris container and screw them on:

- Retaining screw for push handle adjustment:

- Three-position adjustable handle for operator comfort and convenience:

- Adjustable roller broom height with 6 different positions by putting adjusting lever to the required position:

- Easy to adjust front brush pressure for outstanding sweeping performance:

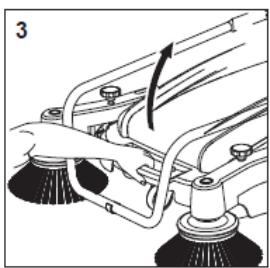
- Adjustable side broom swings out of the way when use is not required:

Emptying dirt container

- Lift the debris container handle and detach it.
- Collect the debris one side and empty the container.
- Avoid strong impacts.
Device use
- Push using both hands and remain normal walking speed.
- Ideal for cleaning paths, halls, sidewalks and warehouses quickly and conveniently.
- Suitable for fine dust and small pieces, like sand, grain, nails and bolts, iron filings, sawdust, papers.
- The cleaning surface should be competitive flat and height difference ≤2.5 cm, Walking the step in the opposite direction ≤19 cm.


Storage
Space saving foldable construction:


Main brush replacement
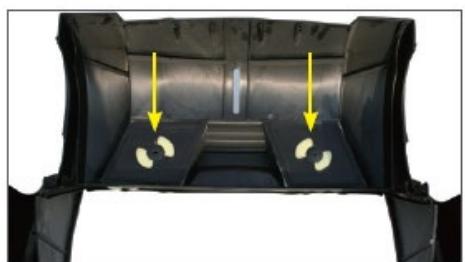
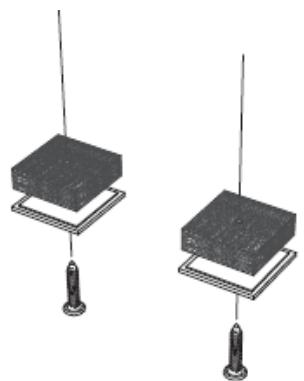
To dismantle the main brush, unscrew all 6 retaining screws. The two main brush half-shells can then be taken out:

Filter cleaning and replacement
Pull out the retaining pin and remove the fine filter for cleaning or replacement:

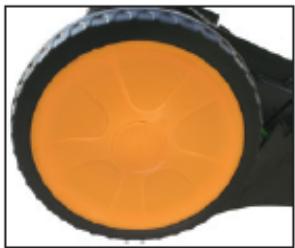
Wheel replacement
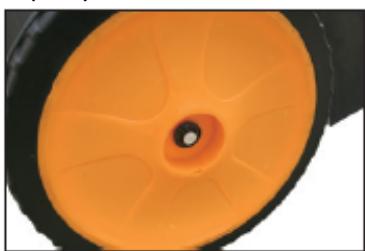
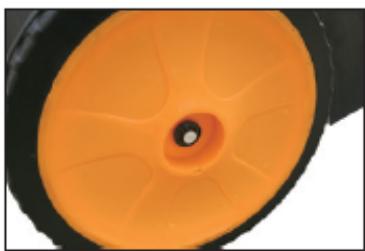
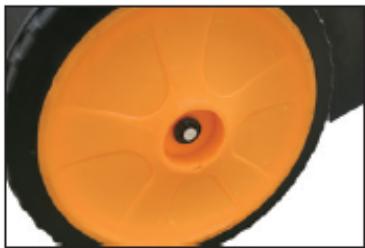
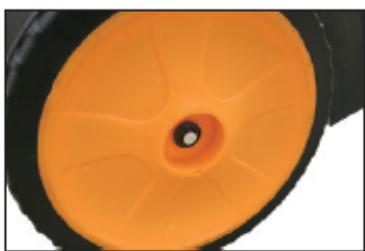
- Use a screwdriver to unclip the cap cover in the middle of the wheel.
- Use wire cutting pliers to disconnect and remove the lock washer.
- The lock washer is broken when removed. A new lock washer must be used to reinstall the wheel.
- The wheel can be pulled off the axle


Belt replacement
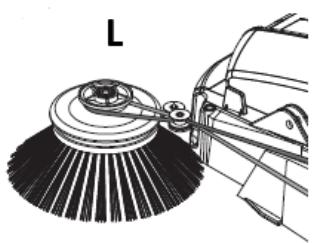
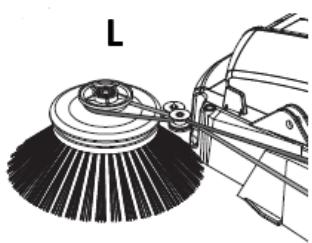
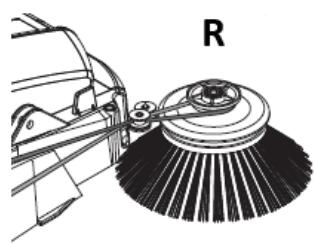
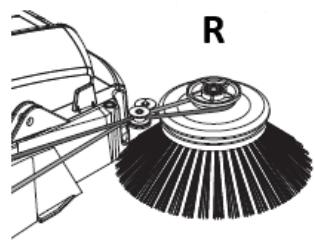
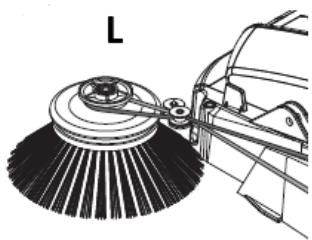
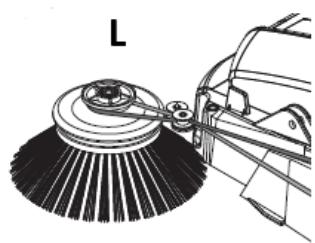
When installing the drive belt pay attention to the rotational direction of the side brush. When moving forward the side brush must rotate towards the inside.


Ground lip replacement
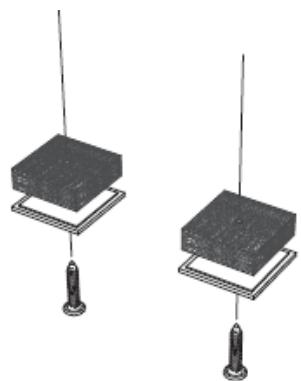
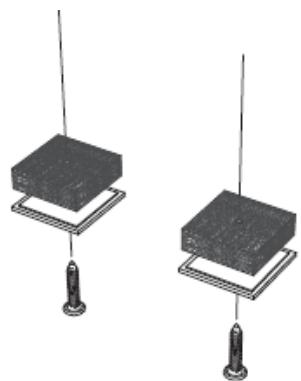
Unscrew all retaining screws. The ground lip can then be taken out.

Rear skirt replacement
Unscrew all retaining screws. The rear skirting can then be taken out.

Skirts
Unscrew all retaining screws. The rear can then be taken out.

Maintenance
- The broom could be clean with water. Avoid hot water or heat air blowing.
- Sweeper body could be clean with water or wet cloth.
- Avoid storing it in direct sunlight for longer time.
- Remove spool, cords, thread for best cleaning result.
ULX-SWEEPER-C30
Handle assembly
Insert the sliding handle into the tube adjustable handle and let the lock pin spring into aligned hole:

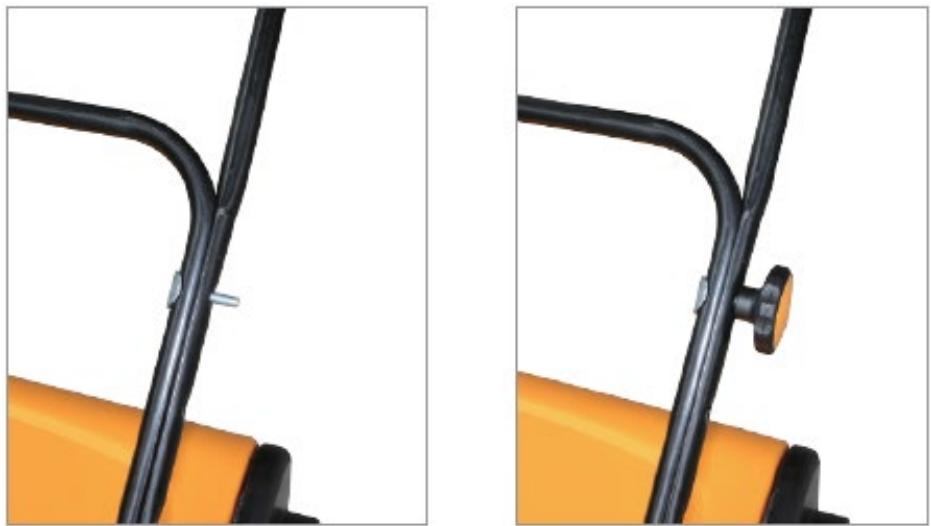
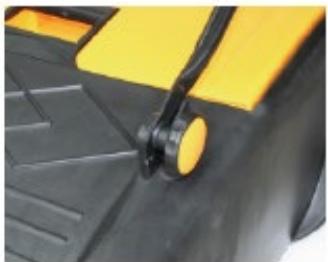
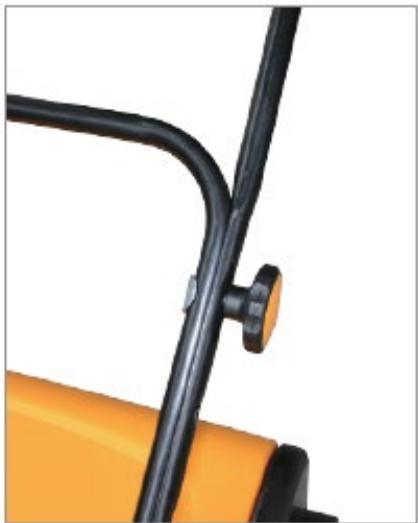
Connect the sliding handle hole to the screw on the side of the device and screw up the turning knob:

Device use
- Push using both hands and remain normal walking speed.
- Suitable for wet and dry use including sawdust, metal filings, leaves, stones, cigarette butts, papers, cans, cups, broken glass, large debris, sand and dirt.
- Works on all surfaces including workshops, driveways, walkways, store fronts, patios, garages, pool side.
- While sweeping, the carrying capacity of the waste container can be maximized by lifting the front to allow the waste to fall to the back of the container.
- When sweeping, small traces of fine dust may remain in the middle of the sweeping machine. This should be cleaned regularly for best result.
- The surface should be relatively flat with no big pit.

Emptying dirt container
Lift the container handle and release it than lightly pull it off.

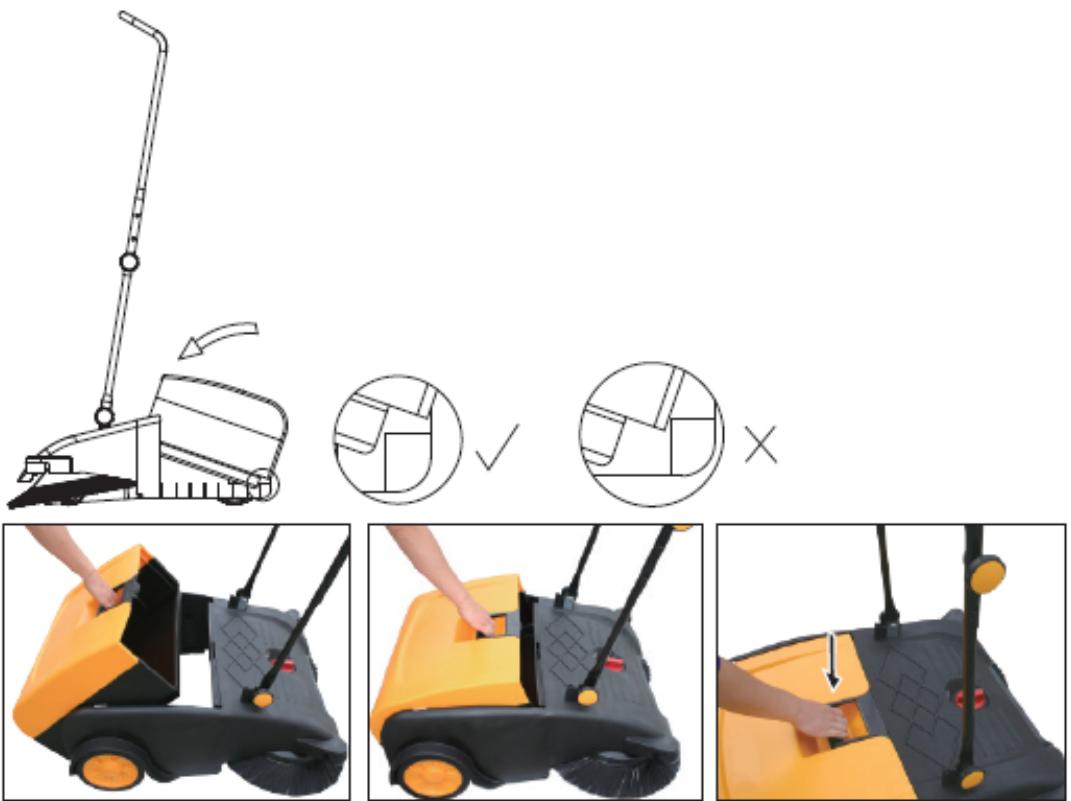
Lift the container handle and release it. Lift the front part and the container part to a certain angle and make the two parts to a V-shape:

Connect the hook parts of the front body with the groove parts of the back container body to a perfect connecting level:

Combine the front parts and the container body together. Push down the container handle to lock it:


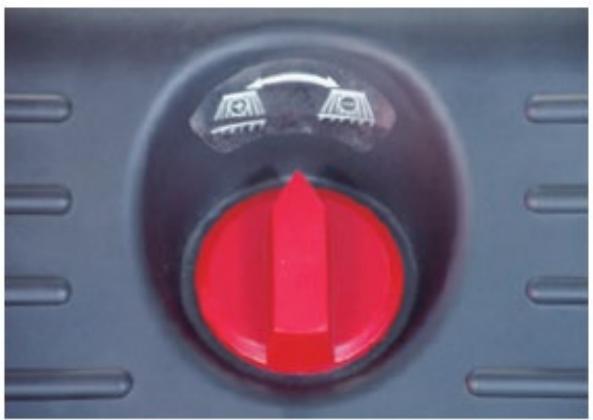
Brush assembly adjustment
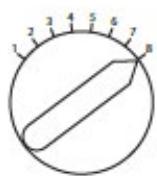
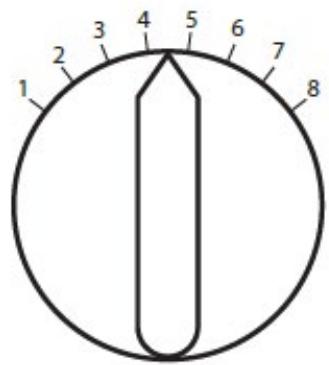
- The adjustment knob for the circular broom is located on the front.
- Turn right to lower. Turn left to raise.
- Step 1-2 for new brooms, all even, hard floors like asphalt, concrete or tiles.
- Step 3-4 for new brooms, wet leaves, sand, uneven floors like exposed aggregate or concrete tiles.
- Step 5-8 for older brooms, or very uneven ground.

Circular brush replacement
- Set the adjusting turning knob to the far right side:

- Pull the inclined wheels strongly and remove it with the axle. Keep notice that the left and right wheel must be replaced on same side for normal operation:

- Pull out the circular broom together with the toothed sleeve:

- Remove the toothed sleeve:

- Insert the toothed sleeve into the replacement brush.
- Reinsert the brush and ensure it is completely seated into the rod housing.
- Reinsert the inclined wheel and axel into the rod. Firmly push until the assembly pops into position:

Storage
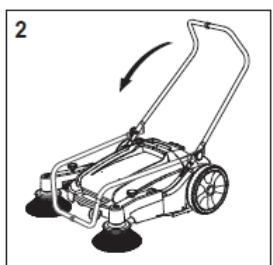
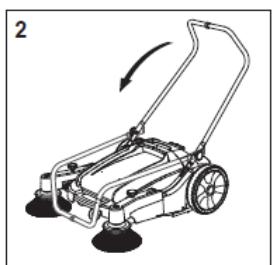
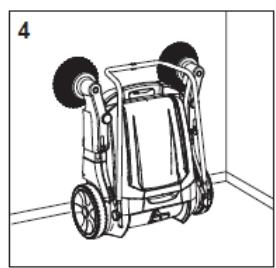
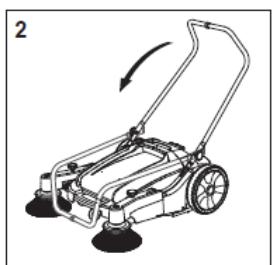
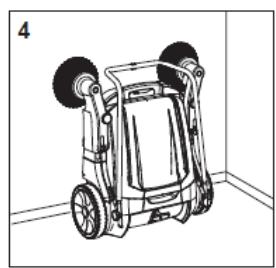
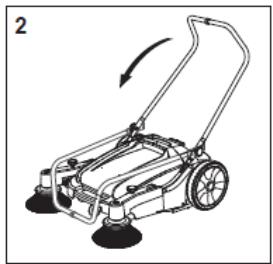
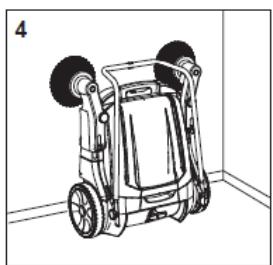
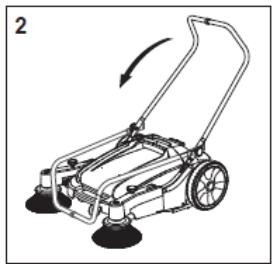
When working done, fold the tube handle flat to make the device vertical like and hang it on the wall to save storage space.
Make sure the device is well hanged and avoid dropping and hurt people, pets and other things.
When taking down the device, please do it carefully to avoid dropping the handle or device's body to the ground, causing damage.

Maintenance
- The broom could be clean with water. Avoid hot water or heat air blowing.
- Sweeper body could be clean with water or wet cloth.
- Avoid storing it in direct sunlight for longer time.
- Remove spool, cords, thread for best cleaning result.

ULX-SWEEPER-O50
Montaż


Wymiana szczotki
KONSERWACJA


Wymiana paska


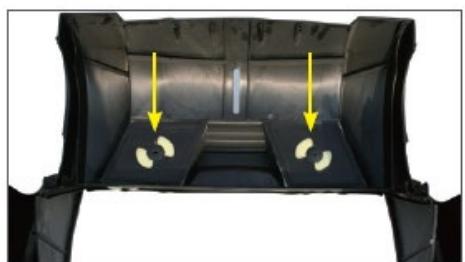
Fartuchy
KONSERWACJA
Użycie urządzenia


Przechowywanie
KONSERWACJA
ULX-SWEEPER-O50
Montáž


Výměna kartáče
ÚDRŽBA




Výměna kola

Výměna řemene


Náhrada zemního rtu
Výměna zadní sukně
Sukně
ÚDRŽBA
Použití zařízení


Skladování
ÚDRŽBA
ULX-SWEEPER-O50
Montage


ENTRETIEN



Jupes
ENTRETIEN


Stockage
ENTRETIEN
ULX-SWEEPER-O50
Montaggio
MANUTENZIONE



Gonne
MANUTENZIONE



Conservazione
MANUTENZIONE
ULX-SWEEPER-O50
Montaje



MANTENIMIENTO



Reemplazo de correa
Afueras
MANTENIMIENTO
Uso del dispositivo

- Retire el manguito dentado:
Almacenamiento
MANTENIMIENTO
ULX-SWEEPER-O50
Felszerelés

Kefe csere
KARBANTARTÁS


Főkefe csere

Ékszíj csere

Szoknyák
KARBANTARTÁS
Eszközhasználat



Körkefe csere
Tárolás
KARBANTARTÁS
ULX-SWEEPER-O50
Montering

Afmontering og samling af beholder


• Fjern den fortandede bøsning:

VEDLIGEHOLDELSE


Udskiftning af hjul


Nederdele
VEDLIGEHOLDELSE
Brug af enhed

Sæt de forreste dele og beholderens krop sammen. Tryk beholderens håndtag ned for at låse det:


Opbevaring
VEDLIGEHOLDELSE
ULX-SWEEPER-O50
Kokoonpano


Harjan vaihto
Huelto


Pääharjan vaihto

Hihnan vaihto


Huulten vaihto
Takahelman vaihto
Hameet
Huolto
Laitteen käyttö


Varastointi
Huolto
ULX-SWEEPER-O50
Montage


Container losmaken en monteren


Onderhoud
Vuilcontainer legen




Rokken
Onderhoud


Afstelling borstelmontage
Opslag
Onderhoud
ULX-SWEEPER-O50
Forsamling



Børstebytte
- Trekk ut den runde kosten sammen med tannbøssingen:

• Fjern tannhylsen:

Vedlikehold



Bytte av belte


Erstatning av jordleppe
Skru løs alle festeskruene. Jordleppen kan da tas ut.

Bytte av skjørt bak
Skjørt
Skru løs alle festeskruene. Den bakre kan da tas ut.

Vedlikehold
Koble skyvehåndtakshullet til skruen på siden av enheten og skru opp dreieknappen:

Bruk av enheten
Koble krokdelene til frontkroppen med spordelene på bakre beholderkropp til et perfekt koblingsnivå:


- Trekk ut den sirkulære kosten sammen med tannhylsen:
- Fjern tannhylsen:

Lagring
Vedlikehold
ULX-SWEEPER-O50
Montering
Byte av borstar
• Ta bort den tandade hylsan:

Underhåll


Byte av huvudborste

Hjulbyte

Byte av bälte

Byte av bakre kjol
Kjolar
Underhåll


- Ta bort den tandade hylsan:
Lagring
Underhåll
ULX-SWEEPER-O50
Conjunto


Ajuste de altura da escova

- Remova a luva dentada:

Manutenção




Saias
Manutenção
- Remova a luva dentada:

Armazenar
Manutenção
ULX-SWEEPER-O50
Montáž


Výmena kefy
• Nastavte nastavovací gombík úplne vpravo:

• Odstráňte ozubené puzdro:

Údržba
- Trojpolohová nastavitelná rukovát pre pohodlie a komfort obsluhy:

- Nastavitelná výška valcovej kefy so 6 rôznymi polohami nastavením nastavovacej páky do požadovanej polohy:

- Zdvihnite rukovat' nádoby na odpad a odpojte ju.
- Pozbierajte nečistoty na jednej strane a vyprázdnite nádobu.
- Vyhnite sa silným nárazom.


Výmena hlavnej kefy


Výmena kolesa


Výmena pásu


Výmena zadnej sukne
Sukne
Údržba


Nastavenie zostavy kefy

- Odstráňte ozubené puzdro:
Skladovanie
Údržba
ULX-SWEEPER-O50
Сглобяване


Смяна на четка
Поддръжка


Смяна на ремък

Поли
Поддръжка



Съхранение
Поддръжка
ULX-SWEEPER-O50
Συνέλευση


Συντήρηση




Αντικατάσταση ζώνης

Φούστες
Συντήρηση
Χρήση συσκευής


Αποθήκευση
Συντήρηση
ULX-SWEEPER-O50
Skupština
Odvajanje i montaža spremnika


Jednom rukom držite cijev drške, a drugom ručku posude. Povucite i podignite ručicu spremnika prema gore i prema natrag.

Podešavanje visine četke
Gumb za podešavanje kružne metle nalazi se na prednjoj strani. Okrenite desno za spuštanje ili lijevo za podizanje sklopa četkica:

Zamjena četkica
- Postavite gumb za podešavanje na krajnju desnu stranu:

- Snažno povucite nagnute kotače i uklonite ih zajedno s osovinom. Imajte na umu položaj lijevog i desnog kotača jer se moraju zamijeniti na istoj strani za normalan rad:
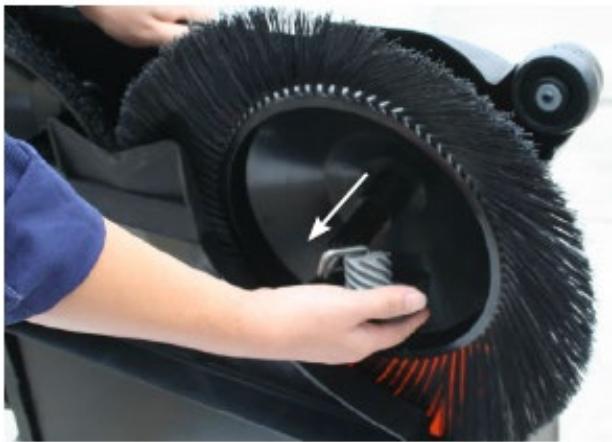
- Izvucite kružnu metlu zajedno s nazubljenom čahurom:

• Uklonite nazubljenu čahuru:
Održavanje
- Podesiva ručka u tri položaja za udobnost i praktičnost operatera:

- Podesiva visina valjkaste četke sa 6 različitih položaja postavljanjem poluge za podešavanje u željeni položaj:

- Lako podešavanje pritiska prednje četke za izvanredne performanse metenja:

- Podesiva bočna metla se sklanja s puta kada uporaba nije potrebna:

Pražnjenje spremnika za prljavštinu
- Podignite ručku spremnika za otpatke i odvojite je.
- Sakupite ostatke s jedne strane i ispraznite spremnik.
- Izbjegavajte jake udare.
Upotreba uređaja


Zamjena kotača


Zamjena remena

Zamjena zadnjeg praga
Odvijte sve pričvrsne vijke. Stražnja letvica se tada može izvaditi.

Suknje
Odvijte sve pričvrsne vijke. Stražnja se tada može izvaditi.

Održavanje
Spojite otvor za kliznu ručku na vijak na bočnoj strani uređaja i zavrnite okretni gumb:

Upotreba uređaja
• Gurajte objema rukama i ostanite pri normalnoj brzini hodanja.
- Prikladno za mokru i suhu upotrebu uključujući piljevinu, metalne strugotine, lišće, kamenje, opuške, papire, limenke, čaše, slomljeno staklo, velike krhotine, pijesak i prljavštinu.
- Djeluje na svim površinama uključujući radionice, prilaze, šetnice, izloge trgovina, terase, garaže, stranu bazena.
- Tijekom metenja, nosivost spremnika za otpad može se maksimalno povećati podizanjem prednje strane kako bi otpad mogao pasti na stražnji dio spremnika.
- Prilikom metenja mogu ostati mali tragovi fine prašine u sredini stroja za metenje. Ovo treba redovito čistiti za najbolje rezultate.
- Površina bi trebala biti relativno ravna bez velikih jama.
Pražnjenje spremnika za prljavštinu
Podignite ručicu spremnika i pustite je zatim lagano povucite.


Podignite ručicu spremnika i otpustite je. Podignite prednji dio i dio spremnika pod određenim kutom i napravite dva dijela u obliku slova V:

Podešavanje sklopa četke

- Snažno povucite nagnute kotače i uklonite ih zajedno s osovinom. Imajte na umu da se lijevi i desni kotač moraju zamijeniti na istoj strani za normalan rad:

- Izvucite kružnu metlu zajedno s nazubljenom čahurom:

- Uklonite nazubljenu čahuru:
Skladištenje
Održavanje
ULX-SWEEPER-O50
Surinkimas
Pritvirtinkite rankenos laikiklj prie stovo lapo. Prijunkite slankiojančios rankenos vamzdelj prie rankenos laikiklio ir stovo lapo su pasukimo rankenèle.


Šepetėlio keitimas
Priežiūra


Diržo keitimas


Sijonai
Priežiūra

Prijunkite priekinio korpuso kablio dalis su galinio konteinerio korpuso grioveliais iki tobulo sujungimo lygio:


Sandèliavimas
Priežiūra
ULX-SWEEPER-O50
Asamblare


Înlocuirea periei
Întreținere



Inlocuire roata


Înlocuirea curelei


Inlocuire fusta spate
Fuste
Întreținere


Depozitare
Întreținere
ULX-SWEEPER-O50
Montaža


Zamenjava krtač
• Nastavitveni gumb nastavite na skrajno desno stran:

• Odstranite zobati tulec:

Vzdrževanje
Praznjenje posode za umazanijo


Zamenjava kolesa

Zamenjava jermena


Zamenjava brušene ustnice
Krila
Vzdrževanje
Uporaba naprave
Kombinirajte sprednje dele in telo posode. Ročaj posode potisnite navzdol, da jo zaklenete:


- Odstranite zobati tulec:

Shranjevanje
Po končanem delu prepognite cevni ročaj, da bo naprava navpična, in jo obesite na steno, da prihranite prostor za shranjevanje.
Prepričajte se, da je naprava dobro obešena in preprečite, da vam pade na tla in poškodujete ljudi, hišne ljubljenčke in druge stvari.
Vzdrževanje
For the disposal of the device please consider and act according to the national and local rules and regulations.
CONTACT
expondo Polska sp. z o.o. sp. k.




- ULX-SWEEPER-O
- MONTAGE
- WARTUNG
- RÖCKE
- LAGERUNG
- NOTE
- ASSEMBLY
- DEVICE USE
- BRUSH HEIGHT ADJUSTMENT
- BRUSH REPLACEMENT
- MAINTENANCE
- ULX-SWEEPER-LOD
- STORAGE
- MAIN BRUSH REPLACEMENT
- FILTER CLEANING AND REPLACEMENT
- WHEEL REPLACEMENT
- BELT REPLACEMENT
- GROUND LIP REPLACEMENT
- REAR SKIRT REPLACEMENT
- SKIRTS
- ULX-SWEEPER-C
- HANDLE ASSEMBLY
- EMPTYING DIRT CONTAINER
- BRUSH ASSEMBLY ADJUSTMENT
- CIRCULAR BRUSH REPLACEMENT
- MONTAŻ
- WYMIANA SZCZOTKI
- KONSERWACJA
- WYMIANA PASKA
- FARTUCHY
- UŻYCIE URZĄDZENIA
- PRZECHOWYWANIE
- MONTÁŽ
- VÝMĚNA KARTÁČE
- ÚDRŽBA
- VÝMĚNA KOLA
- VÝMĚNA ŘEMENE
- NÁHRADA ZEMNÍHO RTU
- VÝMĚNA ZADNÍ SUKNĚ
- SUKNĚ
- POUŽITÍ ZAŘÍZENÍ
- SKLADOVÁNÍ
- ENTRETIEN
- JUPES
- STOCKAGE
- MONTAGGIO
- MANUTENZIONE
- GONNE
- CONSERVAZIONE
- MONTAJE
- MANTENIMIENTO
- REEMPLAZO DE CORREA
- AFUERAS
- USO DEL DISPOSITIVO
- ALMACENAMIENTO
- FELSZERELÉS
- KEFE CSERE
- KARBANTARTÁS
- FŐKEFE CSERE
- ÉKSZÍJ CSERE
- SZOKNYÁK
- ESZKÖZHASZNÁLAT
- KÖRKEFE CSERE
- TÁROLÁS
- MONTERING
- VEDLIGEHOLDELSE
- UDSKIFTNING AF HJUL
- NEDERDELE
- BRUG AF ENHED
- OPBEVARING
- KOKOONPANO
- HARJAN VAIHTO
- HUELTO
- PÄÄHARJAN VAIHTO
- HIHNAN VAIHTO
- HUULTEN VAIHTO
- TAKAHELMAN VAIHTO
- HAMEET
- HUOLTO
- LAITTEEN KÄYTTÖ
- VARASTOINTI
- ONDERHOUD
- ROKKEN
- AFSTELLING BORSTELMONTAGE
- OPSLAG
- FORSAMLING
- BØRSTEBYTTE
- VEDLIKEHOLD
- BYTTE AV BELTE
- ERSTATNING AV JORDLEPPE
- BYTTE AV SKJØRT BAK
- SKJØRT
- BRUK AV ENHETEN
- LAGRING
- BYTE AV BORSTAR
- UNDERHÅLL
- BYTE AV HUVUDBORSTE
- HJULBYTE
- BYTE AV BÄLTE
- BYTE AV BAKRE KJOL
- KJOLAR
- CONJUNTO
- AJUSTE DE ALTURA DA ESCOVA
- MANUTENÇÃO
- SAIAS
- ARMAZENAR
- VÝMENA KEFY
- VÝMENA HLAVNEJ KEFY
- VÝMENA KOLESA
- VÝMENA PÁSU
- VÝMENA ZADNEJ SUKNE
- SUKNE
- NASTAVENIE ZOSTAVY KEFY
- SKLADOVANIE
- СГЛОБЯВАНЕ
- СМЯНА НА ЧЕТКА
- ПОДДРЪЖКА
- СМЯНА НА РЕМЪК
- ПОЛИ
- СЪХРАНЕНИЕ
- ΣΥΝΈΛΕΥΣΗ
- ΣΥΝΤΉΡΗΣΗ
- ΑΝΤΙΚΑΤΆΣΤΑΣΗ ΖΏΝΗΣ
- ΦΟΎΣΤΕΣ
- ΧΡΉΣΗ ΣΥΣΚΕΥΉΣ
- ΑΠΟΘΉΚΕΥΣΗ
- SKUPŠTINA
- PODEŠAVANJE VISINE ČETKE
- ZAMJENA ČETKICA
- ODRŽAVANJE
- UPOTREBA UREĐAJA
- ZAMJENA KOTAČA
- ZAMJENA REMENA
- ZAMJENA ZADNJEG PRAGA
- SUKNJE
- PRAŽNJENJE SPREMNIKA ZA PRLJAVŠTINU
- PODEŠAVANJE SKLOPA ČETKE
- SKLADIŠTENJE
- SURINKIMAS
- ŠEPETĖLIO KEITIMAS
- PRIEŽIŪRA
- DIRŽO KEITIMAS
- SIJONAI
- SANDÈLIAVIMAS
- ASAMBLARE
- ÎNLOCUIREA PERIEI
- ÎNTREȚINERE
- INLOCUIRE ROATA
- ÎNLOCUIREA CURELEI
- INLOCUIRE FUSTA SPATE
- FUSTE
- DEPOZITARE
- MONTAŽA
- ZAMENJAVA KRTAČ
- VZDRŽEVANJE
- ZAMENJAVA KOLESA
- ZAMENJAVA JERMENA
- ZAMENJAVA BRUŠENE USTNICE
- KRILA
- UPORABA NAPRAVE
- SHRANJEVANJE
- CONTACT
Brand : Ulsonix
Model : ULX-SWEEPER-O50
Category : Washing machine