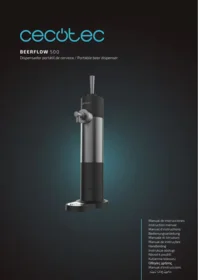
Beerflow 500 - Beer dispenser CECOTEC - Free user manual and instructions
Find the device manual for free Beerflow 500 CECOTEC in PDF.


| Type of product | Beer dispenser |
| Brand | Cecotec |
| Model | Beerflow 500 |
| Power source | 2 AA batteries (not included) |
| Compatible containers | Standard beer cans and bottles, diameter ≤ 65 mm, height ≤ 260 mm |
| Battery compartment | Located in the upper unit |
| Cooling system | Removable cooling plates, frozen for 2-3 hours before use |
| Height adjustment | Optional piece for containers taller than 180 mm |
| Foam control | Adjustable tap handle for more or less foam |
| Assembly | Requires attachment of tap handle, drip tray, and main unit |
| Included accessories | Main unit, tap handle, cooling plates, height adjustment piece, instruction manual |
| Cleaning | Clean with damp cloth; rinse internal system with water after each use |
| Cleaning restrictions | Do not immerse in water or wash in dishwasher |
| Safety features | Battery polarity warning; let product cool before cleaning |
| Intended use | Designed exclusively for beer dispensing |
| Storage conditions | Dry place, away from sunlight, 5°C - 20°C |
| Manual code | EU01_109093_BeerFlow 500 |
Frequently Asked Questions - Beerflow 500 CECOTEC
User questions about Beerflow 500 CECOTEC
0 question about this device. Answer the ones you know or ask your own.
Ask a new question about this device
Download the instructions for your Beer dispenser in PDF format for free! Find your manual Beerflow 500 - CECOTEC and take your electronic device back in hand. On this page are published all the documents necessary for the use of your device. Beerflow 500 by CECOTEC.
USER MANUAL Beerflow 500 CECOTEC
- Parts and components 12
- Before use 12
- Operation 13
- Cleaning and maintenance 15
- Troubleshooting 17
- Copyright 17
- Simplified EU Declaration of Conformity 18
SOMMAIRE
EU01_109093_BeerFlow 500
EN • The coding in this manual is generic and applies to all code variants of the appliance.
- Handle
- Upper unit
- Beer tap
- Main unit
- Drip tray
- Battery compartment cover
- Battery compartment
- Cooling plate
- Height adjustment piece
NOTE:
The graphics in this manual are schematic representations and may not exactly match the product.
2. BEFORE USE
- This appliance is packaged in a way as to protect it during transport. Take the appliance out of its box and remove all packaging materials. You can keep the original box and other packaging materials in a safe place to prevent damage to the appliance if you need to transport it in the future. If you wish to dispose of the original packaging, make sure all items are recycled properly.
- Check that all parts and components are included and in good condition. If any of them are missing or damaged, please contact the official Cecotec Technical Support Service immediately.
- Do not remove the product's serial number in order to keep proper traceability in case you need technical assistance.
- The product is designed exclusively for beer dispensing.
Box content
- Main dispenser unit
- Beer tap handle
- Cooling plates
- Height adjustment piece
- Instruction manual
3. OPERATION
First use
Checking the product and package contents.

If care is not taken when opening the packaging, the product may be damaged. Therefore, be very careful when opening it.
- Remove the product from the packaging.
- Check that all parts are included (see the "Box content" section).
- Check if the product or any of its parts are damaged. If so, do not use the product. Contact Cecotec's Official Technical Support Service.
- Remove the packaging material and all plastic wrappings.
- Clean all product parts before using it for the first time.
Preparation
- Use standard-sized beer cans and bottles with this product, with a diameter no larger than 65 mm and height no greater than 260 mm.
- Cool the beer before dispensing. If the beer is not cooled down well enough, it will produce too much foam.
Assembly
- Insert the tap handle into the designated hole in the upper unit. Fig. 2
- Fit the drip tray to the main unit by aligning the marks on both until they match. Fig. 3
Fig. 2 key
- Handle
- Upper unit
Fig. 3 key
- Main unit
- Drip tray
Fitting/replacing batteries
Danger of explosion! If batteries are inserted incorrectly, they may short circuit or charge. This can cause overheating, explosion, or fire. Always observe the correct polarity when inserting the batteries.
Warning: Improper replacement may cause explosion. Replace the batteries only with the same or equivalent type.
- Separate the upper unit from the main unit by turning the upper unit counterclockwise. Fig. 4
- Open the battery compartment through the small latch and move the battery cover upwards to open the compartment. Fig. 5.
Note: If necessary, remove the empty batteries. Dispose of the batteries properly.
- Insert 2 AA batteries (not included) according to the (+/-) markings on the battery compartment cover.
- Close the battery compartment cover and ensure it is properly secured.
- Reattach the upper unit to the main unit by turning the upper unit clockwise until the marks on the upper and main units align.
Fig. 4 key
- Upper unit
- Main unit
Fig. 5 key
- Battery compartment cover
- Battery compartment
Product setup
Placing the beer can
- Remove the main unit with the dispensing tube from the drip tray by turning the main unit counterclockwise.
- Open the chilled beer can and place it inside, in the beer can compartment. Fig. 6.
- Insert the dispensing tube into the beer can.
- Reattach the main unit to the drip tray by turning the main unit clockwise until the marks on both components align.
Fig. 6 key
- Main unit
- Dispensing tube
- Drip tray
Placing the cooling plates
- Place the cooling plates in the freezer for approximately 2-3 hours until frozen.
- Once frozen, place a cold beer can inside the dispenser. Then, place the cooling plates around the can, on the drip tray, ensuring the can base is properly aligned with the tray.
- Insert the dispensing tube into the beer can or bottle. Fig. 6.
- Reattach the main unit to the drip tray (Fig. 7) by turning the main unit clockwise until the marks on both components align.
Installing the height adjustment piece and cooling plates
If the beer can or bottle height is greater than 180 mm, a height adjustment piece can be added to the drip tray to increase the height.
To install it, follow these steps:
- Place the height adjustment piece on the drip tray, turning the piece clockwise until the marks on both components align.
- Place the frozen cooling plates in the height adjustment piece. Fig. 8
- Insert the dispensing tube into the beer can.
- Place the main unit on the height adjustment piece by turning the main unit clockwise until the marks on both components are aligned.
Fig. 7
- Drip tray
- Height adjustment piece
- Cooling plates
- Main unit
- Dispensing tube
Dispensing beer
Warning: When a new beer can is inserted, beer may not flow immediately after opening the tap. It may take up to 1 second. This is normal as internal and external air pressure are not the same.
- Place a glass under the beer tap.
- For more foam:
- Open the beer tap by pushing the handle backwards ⏰ and fill the glass (Fig. 9).
- For less foam:
- Open the beer tap by pulling the handle forward ⏻ and fill the glass.
- Once the glass is full, release the tap handle and it will automatically return to its original position.
Note: Beer may still come out from the tap after releasing the handle. Wait a few seconds until the beer stops flowing.
- Clean the product after every use.
4. CLEANING AND MAINTENANCE

Burn hazard!
The product becomes hot during operation and may cause burns.
Let it cool down completely before cleaning.

Risk of short circuit!
Water entering the housing may cause a short circuit.
- Make sure no water enters the housing.
- Never immerse the product in water or other liquids while cleaning or using it.
- Do not wash the product under running water.

Risk of damage!
Improper handling of the product may damage it.
- Do not use abrasive cleaners, harsh chemicals, or hard brushes to clean the product. These could damage the surface.
- Do not wash the product in the dishwasher.
Cleaning
Clean all parts of the product after each use.
- Remove the main unit from the drip tray by turning the main unit counterclockwise.
- Place a suitable container filled with clean water in the beer can compartment.
- Reattach the main unit to the drip tray by turning the main unit clockwise until the marks on both components align.
- Place an empty container under the beer tap.
- Push/pull the handle forward to ⏻ or ⏻ until the water from the container placed in the beer can compartment runs out.
- Clean the inside of the drip tray and grid with clean water by removing the grid using the notch. Fig. 10
- Use a damp cloth to clean the product.
- Allow all parts to dry completely.
Storage
- All parts must be completely dry before storage.
- Always store the unit in a dry place.
- Protect the product from direct sunlight.
- Store the product out of the reach of children, securely closed, at a storage temperature between 5 °C and 20 °C (room temperature).
-
Store the product in its original packaging. Use the packaging materials to ensure the product is protected and cannot move within the packaging during transport.
-
TROUBLESHOOTING
| Problem | Possible cause | Solution |
| The product does not dispense beer. | The beer can is empty. | Place a new beer can in the product. |
| The batteries are depleted. | Replace the batteries (see the “Fitting/replacing batteries” section). | |
| It is normal for some beer to remain in the can. | Due to the different shapes and thicknesses of beer cans, the dispensing tube is slightly shorter to accommodate these differences. Remaining beer can be poured into your glass. | |
| The product produces too much foam. | The beer is too warm. | Cool the beer can to 3-6 °C. |
| The beer can is almost empty. | Place a new beer can in the beer can compartment (see “Placing the beer can” section). | |
| Beer is not being dispensed correctly. | Modify your pouring method (see the “Dispensing beer” section). | |
| The glass is not held properly under the beer tap. | Hold the glass under the beer tap properly with your hand. |
6. COPYRIGHT
The intellectual property rights over the texts in this manual belong to CECOTEC INNOVACIONES, S.L. All rights reserved. The contents of this publication may not, in whole or in part, be reproduced, stored in a retrieval system, transmitted, or distributed by any means (electronic, mechanical, photocopying, recording or similar) without the prior authorization of CECOTEC INNOVACIONES, S.L.
7. SIMPLIFIED EU DECLARATION OF CONFORMITY
CE Cecotec Innovaciones hereby declares that this appliance complies with the essential requirements and other relevant provisions of the regulations applicable in the European Union. This appliance has been designed, manufactured and tested in compliance with required safety and quality standards. The full text of the EU Declaration of Conformity can be found on the following website: https://cecotec.es/es/information/declaration-of-conformity
1. PIÈCES ET COMPOSANTS
Image 1


- SOMMAIRE
- NOTE
- BEFORE USE
- BOX CONTENT
- OPERATION
- FIRST USE
- PREPARATION
- ASSEMBLY
- FIG. 2 KEY
- FIG. 3 KEY
- FITTING/REPLACING BATTERIES
- PRODUCT SETUP
- PLACING THE BEER CAN
- PLACING THE COOLING PLATES
- INSTALLING THE HEIGHT ADJUSTMENT PIECE AND COOLING PLATES
- DISPENSING BEER
- CLEANING AND MAINTENANCE
- RISK OF SHORT CIRCUIT
- RISK OF DAMAGE
- CLEANING
- STORAGE
- COPYRIGHT
- SIMPLIFIED EU DECLARATION OF CONFORMITY
- PIÈCES ET COMPOSANTS
Brand : CECOTEC
Model : Beerflow 500
Category : Beer dispenser