
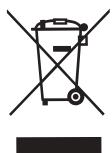
DH-10 - Dehumidifier FAGOR - Free user manual and instructions
Find the device manual for free DH-10 FAGOR in PDF.
| Product Type | Dehumidifier |
| Brand | FAGOR |
| Model | DH-10 |
| Tank Capacity | 4 L |
| Operating Temperature | 5 to 35 °C |
| Humidity Control Range | 40% to 80% RH |
| Continuous Operation Mode | Yes (position "Cont") |
| Water Drainage Types | Removable tank or continuous drainage |
| On/Off Indicator | Green |
| Tank Full Indicator | Red |
| Defrost Indicator | Yes |
| Humidistat Control | Rotary with Off (0) and Continuous |
| Air Filter | Washable with warm soapy water |
| Filter Cleaning Frequency | Once a year |
| Exterior Cleaning | Slightly damp cloth, no solvents |
| Automatic Shut-off when Tank Full | Yes |
| Safety | Do not obstruct grilles, do not use near water |
| Carrying Handle | Integrated |
| Cord Storage | Yes |
| Material | Plastic |
Frequently Asked Questions - DH-10 FAGOR
User questions about DH-10 FAGOR
0 question about this device. Answer the ones you know or ask your own.
Ask a new question about this device
Download the instructions for your Dehumidifier in PDF format for free! Find your manual DH-10 - FAGOR and take your electronic device back in hand. On this page are published all the documents necessary for the use of your device. DH-10 by FAGOR.
USER MANUAL DH-10 FAGOR
The manufacturer reserves the right to modify the models described in this User's Manual.
- Carrying handle
- Air inlet grille
- Tank float
- Water tank
- Air inlet filter
- Control panel
6.1 Green on/off pilot light
6.2 Red tank full pilot light
6.3 Defrost pilot light
6.4 Humidistat control
-
Air outlet grille
-
Cable compartment
- Continuous drain outlet
3. SAFETY WARNINGS
- Before using the appliance for the first time, read this instruction manual carefully and keep it for later reference.
- Before using the appliance, ensure that the domestic mains voltage is the same as that indicated on the plaque fixed to the appliance.
- The appliance must be installed in accordance with the national regulations for electrical installations.
- On removing the packaging, check the appliance is in perfect condition. In case of doubt, contact the nearest authorised Technical Assistance Service.
- Keep all packaging elements (plastic bags, polystyrene foam, etc.) out of the reach of children, as they could be dangerous.
-
The electrical safety of the appliance is only guaranteed if it is connected to an installation with an earth connection.
-
We do not recommend the use of adaptors, plugs and/or extension leads. If it is absolutely necessary to use such elements, use only those which comply with current safety standards, taking care not to exceed the power limit indicated on the adaptor and/or extension lead.
- This appliance is for domestic use only. Any other use is considered unsuitable and dangerous.
- In case of breakdown or malfunctioning, switch off the appliance. Do not attempt to repair it. If any repairs are necessary, they must only be made by a Technical Assistance Service authorised by the manufacturer. Insist on the use of original spare parts. Failure to comply with these points could be a safety hazard.
- The user must not replace the cable. If it is damaged or needs replacing, this must only be done by a Technical Assistance Service authorised by the manufacturer. Do not use the appliance if the cable or plug are damaged.
- The manufacturer holds no liability for any damages arising from unsuitable or improper use of the appliance or from repairs carried out by non-qualified personnel.
- IMPORTANT: Never for any reason cover the appliance during operation as this could lead to dangerous overheating.

The use of any electrical appliance requires compliance with a series of basic rules:
PARTICULARLY:
- Important: This appliance must not be used near baths, showers, sinks, etc.
- Do not install the appliance close to sources of heat, or in spaces where the air may contain gases, oil or sulphur, or in areas exposed to radiation.
- Do not spill any water or flammable liquids on the appliance.
- Do not handle the appliance with wet hands.
- Do not switch the appliance on and off by plugging it in and unplugging it.
-
Altering or modifying the appliance's functional characteristics could be dangerous.
-
Unplug the appliance when not in use, before moving it, and before carrying out any cleaning or maintenance.
- Never pull on the cable to remove the plug.
- Do not place any heavy or hot objects on the appliance.
- Do not allow children to handle or play with the appliance.
- Do not push any objects through the air inlet/outlet grilles as this could be dangerous when the fan is running at high speed.
- Do not cover the air inlet/outlet grilles.
- Do not use the appliance in narrow, sealed rooms.
4. FOR CORRECT FUNCTIONING
- Place the appliance on a flat, stable surface.
- A space of at least 50~cm must be left free around the appliance to guarantee correct functioning.
- Close the doors and windows of the room in which the appliance is to be used.
- The temperature in the room in which the appliance is to be used must be between 5^ and 35^ . If the temperature exceeds these limits the compressor will stop working.
- If the ambient temperature is lower than 5^ C, the absolute humidity will be very low and it will therefore not be necessary to use the dehumidifier.
- When the appliance stops, wait around 5 minutes before starting it up again.
- Do not place any objects or pour any liquids into the water tank.
5. CONTROL PANEL (6) (FIG. 2)
6.1 Green on/off pilot light: This lights up when the appliance is switched on, and goes off when it stops.
6.2 Red tank full pilot light: This lights up if the tank is not fitted to the appliance or if it is not fitted correctly. When this pilot light comes on the appliance will switch off.
6.3 Defrost pilot light: When this pilot light is on, it means the internal defrost system is functioning and the compressor has stopped.
6.4 Humidistat: this regulates the Relative Humidity. The adjustment values are between 40% and 80% RH.
0 = Off
Cont = Continuous functioning position. The middle position (fig. 3) corresponds to 55% -65% RH.
6. STARTING UP THE APPLIANCE
1 Ensure the humidistat (6.4) is turned to "0".
2 Plug the appliance in. Check the red tank full pilot light (6.2) is off.
3 Turn the humidistat (6.4) to "Cont" for continuous functioning. The green on/off pilot light (6.1) will come on. Keep the humidistat (6.4) in this position until the relative humidity in the atmosphere drops to the desired level. Then slowly turn the humidistat (6.4) in the opposite direction until the appliance stops and the green pilot light (6.1) goes out. In this position the appliance will start and stop automatically, maintaining the set degree of humidity. The ideal ambient conditions for wellbeing are between 50% and 60% relative humidity.
4 To stop the appliance, turn the humidistat (6.4) to "0" and unplug the appliance.
Important: If the degree of humidity set is higher than the ambient humidity, the dehumidifier will not function.
7. DRAINING OFF THE CONDENSATION WATER
The condensation water can be drained off in two ways:
Tank (4):
The condensation water is collected directly in the tank (4).
When the tank is full, the red pilot light on the control panel (6.2) will come on and the appliance will automatically switch off.
The tank must then be emptied and fitted correctly back onto the appliance (Fig. 4) so
9. TROUBLESHOOTING
that the red pilot light (6.2) goes out and the appliance starts up again. Important: Do not use the tank for starting and stopping the appliance, as starting up and stopping the compressor could damage it.
Continuous drainage (9)
The condensation water can be run off to a drain outlet down a drain tube connected to the condensation water outlet. The procedure for this is as follows:
- Take the tank out of its housing (Fig. 4).
- Use a sharp object to puncture the hole for passing the drain tube through (Fig. 6).
- Insert the end of the plastic tube through this hole and adjust it to the condensation water outlet connector (Fig. 7). Run the other end of the tube to a drain outlet.
- Fit the tank into its housing so that the red pilot light (6.2) switches off and the appliance starts up.
8. MAINTENANCE AND CLEANING
Unplug the appliance before carrying out any maintenance or cleaning. Clean the outside of the appliance with a soft damp cloth.
Do not use water, solvents or similar substances to clean the appliance. Do not use abrasive cleaning agents.
Cleaning the filter:
The filter should be cleaned once a week. Empty the tank (Fig. 4) before removing the filter from its housing.
Pull down on the filter to remove it from its housing (Fig. 5).
The dirt accumulated in the filter can be vacuumed out. If the filter is very dirty, it may be washed in warm soapy water. Rinse it and wait until it is completely dry before replacing it in its housing.
Do not expose the filter to sunlight to dry it.
Below is a list of possible causes which you should check before calling the Technical Assistance Service. Only contact the technical assistance service if you still cannot start up the appliance after having checked the indications below.
Do not manipulate the appliance in any other way, and do not attempt to replace or repair the electrical components. If you resort to the technical assistance service for any of the reasons listed below, you will be responsible for all expenses given rise to, even during the guarantee period.
The appliance does not work
Is the plug loose?
- Has the fuse blown?
- Has there been an electricity cut?
Is the water tank correctly fitted?
Is the water tank full?
The dehumidification capacity is low
Is the air filter dirty?
Is the room temperature too low?
Is the air inlet or outlet blocked?
- Have you selected a degree of humidity higher than the ambient humidity?
The appliance does not reach the degree of humidity set even after it has been working for a long time
- Have you opened the doors or windows too often?
Is there an appliance generating humidity in the room?
Is the room too large?
The appliance is functioning noisily
Is the floor uneven or too soft?
Is the appliance correctly positioned?
10. INFORMATION FOR THE CORRECT
DISPOSAL OF ELECTRICAL AND
ELECTRONIC APPLIANCES
At the end of its working life,
the product must not be
disposed of as urban waste.
It must be taken to a special
local authority differentiated
waste collection centre or to
a dealer providing this service. Disposing of
a household appliance separately avoids
possible negative consequences for the
environment and health deriving from
inappropriate disposal and enables the
constituent materials to be recovered to
obtain significant savings in energy and resources.
To remind you that you must collaborate with
a selective collection scheme, the symbol
shown appears on the product warning you
not to dispose of it in traditional refuse
containers.
For further information, contact your local
authority or the shop where you bought the
product.
FR
1. SPECIFICATIONS TECHNIQUES
Tension / Fréquence 220V-240V~50Hz
Puissance 240W
Pa6oTHn Tempepatypn 5^÷ 35^
2. OwνιCAHHe HΑ ηΥPEDΑ (Φιr. 1)
- wvepka
- PeweTka Ha BXOJa 3a Bb3dyx
- wvonnabkHa pe3epBoapa
4.BoDEN pe3epBoap
5.Bb3dnyuhenΦnITbp - KoHTpOJIeH nAHeI
6.1 3eJeh DaTUnK BKn./n3KnJ.
6.2 Yerpen DaTnK 3a PbJeH pe3epBoap
6.3 DaTuk 3a pa3Mpa3BaHe
6.4 wvpeBknIOyBaTeI 3a KOHTpOHa BlaXHOCTTa
- PeiTeTka Ha n3XoJa 3a Bb3dIyX
8.Гнзdo3a ka6ena
9. OTbOp 3a HenpeKbchat IpeHax
3. wvPABNJIA 3A CnIyPHOCT
Wvpei nIpbva ynoTppe6a Ha ypeia npOyeTe BHNMaTeHNo KHNKKaTa C INHCTpyKmnte I a 3ana3eTe 3a 6bJeu KOHCyJTTaun.
Wvpei IIpbBa ynoTppe6a Ha ypea npOBepeTe dAnHnPexKeHneTo Ha BaShaTa eNeKtpnueCeMa mpeka OTrobapHa Ot6eJr3aHOTo Bbpxy ypea.
- UpeBt Tpr6Ba Da 6bIe INHCTaIIpaH B CbOTBETCTBNE C HauMOHaJIHInTe HOPM3a eJEKTPnueCKN INHCTaJIaUIN.
CneI KaTo pa3oNakOBaTe ypeDa npOBepeTe DaJIe E B Do6po CbCTOraHHe. B CnyaH Na CbMHeHne He rN3POn3BaJTe H Ce OsbPHeTe 3a NOMOu KbM ynpabOMoUeH UeHTbp 3a TEXHnuecka NOpDpBxKa.
CbxpaHeTe OtnbKOBaunr MaTePnAn (HaiIOHOBN PIIINKOBE, CTIpONOp IN dp.II) daneOH IOCTbna Ha Deca, TbN KaTO
IpeDCTaBnBa IOTeHuaJIeH N3TOUHk Ha ONaCHOCT.
Texnueckata Cnypnoct Ha ypea ce rapaHTnpa cAmo B cnuya, Ye CbIyT e BKJIoueH KbM 3a3emHa INCTaIauIy.
He npenopbUbame ynoTpe6ata Ha aanTopn, uencei n/nnu ynbJxnte. Ako ynoTpe6ata m e hanoXnteHa n3no3BaTe camo Te3n, KOtO OTROBAPrH a CbueCTByBaunTe HOpMn 3a cnpyhOcT, KaTO BHMmaBe Ta He npebniabate MOUHOCTTa Ha aanTopa n/nn 3axpaHbua Ka6eJ.
To3n ypeE npEHa3NaeH 3a DomaHa ynoTpe6a. BcKaKbA npyra ynoTpe6a 6n 6nla HeaKeBatha nn Onacha.
B CnyaH na abapn H/INn HnnpabInHO cyHKOnHpaNe n3KIOUOte ypeDa 6e3 da ce OINTBaTe Da ro nOpabTKe. Ako e Heo6XoDima nOpnbKa Ha ypeDa o6pb7aIte Ce 3a NOMOscamO KbM ynpabOMOueH OT pOni3BOJNTeN ITexHnueckn cepBn3 n 3nCKBaTe pRn nOpnbKaTa My Da 6bDat n3No3BaHn oprHaJIHn pe3epBHN qactN. Hecna3BaHeto Ha Te3n n3nCKBaHn 6n noCTaBnIO B ONACHOC TcIpyhOCTTa Ha ypeDa.
WVOTpe6nteIaT He Tp6Ba Da ce OINTBa da Cmeha Ka6e. B clya, ye Cbunrte pa3BaIen nn Ce hAlara HerOBata CmHa ObpbuaTe Ce 3a NOMOc camo KbM ynpabOMOeH OT pOn3BODITeJI Texnueckn cepBn3.He n3PON3BaJTe ynpda B clya,ye Ka6eIbT nn IuI NcIeC9bT ca NOBpeDeHn.
Wvpon3BOIDTeIANT He HOCN OTROBOPHOCT 3a Bpei npuHHeH NT HePpabnHa, nOprseHa IIN HeaDEKbTaH yNoTpe6a Ha ypeA, KaKTo N 3a Bpei B CneDCTBHe Ha NOpipABKN I3BbPSeH NOT HeKBaInOpunpaH Niua.
BAXHO:B HnkaKbB clyaHne nokpnbAte ypeDa no BpeMe Ha pa60Ta, Tb KaTO TOBa MoKe da npedn3BnKa onaCHO nperePBAHe.
YnOTope6aTa Ha eNeKTpUeCKn ypeDn 13NcKBa Cna3BaHeto Ha ONpeDeIeHn npaBnla 3a cnryphoCT,
A UMEHHO:
BHHMaHHe:To3n ypeI He 6bBa da 6bJe H3PON3BaH B 6bn3OCT Do 6aHN, DyuKa6HNI, MOKpn NOMEeHnI INI dpyrN IPOo6HNI.
He nHCTaInpaIte ypeBa B6n3OCT Do TOIINHH N3TOUHNI INB NOMeUeHNb CbC bDbPkaUNCe BbB Bb3DyXa CTeuNCHNUHra3OBe,MacNa ININ Cpa, KaKTo N B 3OH N3IOJKeHN Ha paDAuaJIa.
BnImaBaiTe da He npbckaTe Bbpxy ypeDa BOda INI 3anaIIMM TeuHOCTN.
He n3non3baIte ypea, ako pbcTe Bn ca mokpn.
He BkIIOUbaIe/IN3KIOUbaIe ypeJa c nOCTaBraH/IN3BaXJaHe Ha KaBeJa oT MpeJxata.
- MoДиФицИраHETO ИПИ ИЗМЕнЯHETO Ha
- ФунHKЦЮHAJIHITe XapaKТерИСТУКИ Н
- у畴да мОже за довеadingо
- ВьзИнКВаHETo HA ONaCHOCTN.
- ɪn3kɪŋuɔybaɪte ypeədət O T mpejka, kʊrato He rO nɪsɪnɪ3BaTe, ppeɪn də rɒ npemeCTnte iʌn lɪpeɪn iɪsBbprɪbaHETo Ha KaKBaTo I da bɪnlo oɪepaɪnɪ nɒpɪdɒpʌkKaTa Iʌnɪ nɒchɪctBaHETo My.
He n3kJIIOUyBaIe ypea ot MPexKaTa C dIbpnaHe Ha Ka6ena.
He nocTaBnTe Bbpxy ypeDa ropeu nn TeKKn ppeDmetn.
He no3BovIbaiTe Ha deca da cn irpaT nn da n3noJ3Bat ypea.
He BkapBaIte npeImEt npe3 peWeTKIe 3a BXoN/INxOJ Ha Bb3dYxa, TbK aTO Ta e NOTeHcuaJIHO OaCHO, oc6eHO npi pa60Ta Ha BeHTnlaTopa Ha BInCOKA CKOpOCT.
He nokpmbaTe peuTKeTe 3a BxOJ/IN3XoJ Ha Bb3DyX.
- He n3pon3BaIte ypeDa B xepMeTuHn I NOMEuEHN I IIN B NOMEuEHN C MaJIbK O6em.
4.wvPABNJIA3A YwVOTPE6A
- IHHCTaIIpaIte ypeDa Bbpxy paBHa n CTa6IIHnHa NOBbpxHOCT.
3a npabunHaTa ynoTpe6a Ha ypeDa e Heo6xOIMo Da oCnrgpnte Hau-MaIko 50cm Cb6oDNo npoocTpaHCTBO OKJIO Hero.
3aTbapnTe BpATnTe nIpo3OpuTe Ha NOMeueHnETo, B KOEt O3PON3BaTe ypeDa.
- YpeIbT e npedHa3HaueH 3a pa6Ota npi TemnepaTpyn MekJy 5^ C n 35C.Ako TemnpaTpata N3Je3e OT Te3n rpaHnCi KOMnPecopa Ie npctaHe da cyHKcNoHnpa.
B Cnya, Ye Temnepaypata Ha Bb3dyxa B NOMeueHneTo e No-HNcKa OT 5^ a6coJIOTHaTBAJaxKHOCT 6n 6nMa MHoro HNcKa n yIOnTepeBaTa Ha ypeDa He 6n 6nJa Heo6xoDIma.
Wvpi N3KJIIOUBaHe Ha ypeHa e Heo6XoIMO Da n3yakate OKoI0 5 MInHyTu Ipei NiOBTOHOT My BKJIIOUBaHe.
He nocTaBaIte HnKaKbN IpeDMeTn BbB BOHN pe3epBoap, HnTO ro NbJIHETe C TeuHOCTn.
5. KOHTPOJIeH wvAHeJ (6) (ФИГ. 2)
6.1 3eJen daTnK 3a BKN./n3Kn.: To3n DaTnK CBETBa npi BkIIOUbaHeTO Ha ypeDa n 3araCBA npi HerOBOTO n3KnIOUbaHe.
6.2 Yerpen DaTnK 3a IIepe3epBoap: To3n DaTnK CBETBa npn HnpaBnHTo NOCTabRHe Ha pe3epBoapa IIN B Cnya, ye 3a6paBnTe da ro nocTabrTe. Wvpi CBETBaHeTo Ha To3n DaTnK ypeDa ce N3KJIHOyBa.
6.3ДaTчК 3a pa3Mpa3ЯBaHe: CBeTBaHTo Ha To3nДaTчK O3HaYaba, Ye BbTpEshHaTa CnCTema 3a pa3Mpa3ЯBaHe e 3aDeiCTBaHa, KOeTO OT CBOr CTpHa CnIPA deIcTBnETo Ha KOMnPecopa.
6.4 KOnTpOJHa BnJaXHoCTTa:Upe3To3n npEeBKnIOuBaTeI ce peryInpa OTHOCiTEnHaTa BnJaXHOCTB rpaHnIcTe MeJxNy 40% n 80% HR. 0 = N3kn.
Cont = HenpeKbCHaT xoI MekDnHnTa nO3nua (ФИ.3) OTROBAP Ha 55%-65% HR.
6. BKJIIOUBAHE
- Ocnyperte ce, ye npebKIOUbATEIa KOHTPOJ HA BnaxHOCCTTa (6.4) e B I03NIa N3KJI."O".
- BkIIOUeTe ypeDa B MpeKaTa. WvPoBepTe DaJIu YEpBeHnJaTtNk 3a IIbJIeH pe3ePBoap (6.2) He CBETn.
- 3aBbptete npEKBIOUbaTeIa KOHTPOHa BnaxHocCTTa (6.4)do N03uYrTa 3a HnpeKbChat XoJ "Cont". 3eENHrT DaTnK 3a BkN./n3Kn.CBeTbA. Octabete npEKBIOUbaTeIa KOHTPOHa BnaxHocCTTa (6.4)B Ta3n N03uYn, DOKaTO OTHOCInHeIHa BnaxHOCT Ha Bb3dyXa CnADHe Do JxJaHOTnHBO, CneJ KoETO 3aBbptete 6abHO npEKBIOUbaTeIa (6.4)B o6paTHata Nocoka do cnipane pa60Ta Ha ypeDa n 3aracBaHe Ha 3eJeHn DaTnK(6.1). WVPn Ta3n N03uYn Ha npEKBIOUbaTeIypeBTZe Ce BKNOuYn ABTomATNuHO, KaKTo N B NocLeDCTBne N3KIOUHy, NODlbPkaKn N36paHOTn HNOHa BnaxHocT.NdeJIHnTe YcNoBnHa Bb3dyXa B eNDo NOMueHne Ca B rpaHnUte Ha 50% - 60% OTHCINHeBAJXHOCT.
- 3a Да ИЗКЛЮЧИТЕ урEDA 3aВБРTETe празвATEЯ 3a КОТРОн Ha ВлжHOCTTA (6.4)do NO3ицЯ "0", cNeД КоЕTO ИЗКЛЮЧЕТЕ урEDA OT МржАТа. WvpeDynpexdHe: Ako ИЗбpaHOTO HINBO Ha BлжHOCHT Ha ВьзДуха e NO-BICOKO OT ВлжHOCCTTA Ha ВьзДуха B ПOMeшЕнeto a60c6aTopa Нма Да ФункUnOHIPA.
7.ИЗВЕЖДАНЕHA KOHNDEH3ИРAHATA BOДA
I3BExJaHTo Ha KOHDeH3npaHaTa BOa MoKe Da 6bDe I3BbPbBaHO NO DBA HauHa:
Pe3epBoap (4):
KoHnEh3npaHaTa BOJa ce Cb6npa DnpeKTHO B pe3epBoapa (4).
Wvpi HanbIbAHe Ha pe3epBoaapa CBeTba
YepeBHeHn DaTChK HAmipaCe Ha
KoHTpOJIHHn PAnen(6.2) N ypeJa ce
N3KJIIOUyBa ABTOMaTUnHO.
B To3n CnyaH e Heo6xOJMo Da
n3npa3HnTe pe3epBoapa, cIeKoETO da ro nOCTaBHTe OTHOBHa MACTO (ΦInr.4). YepBeHNrT DaTnK (6.2) 3aracBa u ypeDa OTHOBO 3aONuBa pa6Ota.
BhImaHHe: He n3NoJ3BaIte
n3BaXdAHeTo/NoCTaBHaTe Ho pe3epBoapa
KaTO NaHH 3a BKJIIOUBAHe NIN N3KJIIOUBAHe
Ha yPeDa, TbN KaTO TOBa MoKe Da IOBeDe Do
NoBpeKdAne Ha KOMnPecopa.
HenpeKbChat DpeHax (9)
KoHNeh3nPaHaTa BOa MoKe Da 6bJe
OTBExkDaHa DnpeKTHO B KaHala C NOMOuta
Ha dpeHaxHnMa MapKyu, KOITOn e Heo6xOJIMo
da 6bDe CBbP3aH KbM n3XoJa Ha
KoHNeh3nPaHaTa BOa. 3a Ta3n Zei
n3BbPwTe CneDHTO:
- Μιδαπετe pe3ερθοραστό ένημεις Μγεικεις (Φιν. 4)
- wvpoDyUHTe C nOmoTHa Ha OCTbP npEiMeT BxOJa Ha IpeHaxKnIa Mapkyu (Фиг.6)
- BkapaTe B To3n BXoJ KpaJ Ha Пл actMacOBm MapKyu JTO CBpJxTe Кьm N3XOJa 3a KOHdEh3nPaHaTa BOJa (Fig.7).ДргИТ КраJ Ha mapKya ВкapaTe B KaHana.
- WVOCtABeTe OTHOBo pe3epBoapa Ha MACTOTO My, 3a Da 3arache YepBHeHn I daTCHK I da 3anOHe ypeDa pa6Ota.
8. wvOuHCTBAHE N wvOДРьЖKA HA YPEDA
Wvpei Da n3BbpiuTe KaKBaTO i Da 6nlo Onpaunrno NpOdprkKaTa I NOUcTBAHeTo Ha ypea e Heo6xOIMo Da ro N3KlHouTe OT Mpejata.
WOYNCBaIte NOBbpxHOCTTa Ha ypea c Jeko HABnaxHEn MEK napcaI. He npbckaIte ypea C BOJa, pa3TBOpnti nn IpyrnoIOobHn. He n3nON3BaIte a6pa3INBn INpenapaTn pni NocHTBaHeTo.
WVOHCTBaHe Ha qnItbpa:
ФИNTbpyT TpЯ6BaДабБдЕ NOΥСТВАН ВЕДнБЖ СЕДМИЧИ.
WVPeINIaI3BaIInTeΦnITbpaI3nPa3Hepe3epBoapa (ΦnIr.4).
3a da n3BaJnte fnnIbpa O rTHe3IoTO My e Heo6xOJIMo Da ro n3IbPnate B Nocoka Haony (FInr.5).
CbpaIata ce BbB bITbpaMpbcOTnMoKe da 6bde NOCHCTBaHa C
IpaxoCMykaUka. Ako ce e cbpaIa
IpeKaJIeHO MHOrO MpcOTnMoKe da
I3MnTeΦnITbpa c BODa n canyH. Cnei
I3MnBAHeTO rN3PnAknHEte ObUNHO C BODa n
I3uKaIte Da I3CbXHe IpEdu Da rO
IOCTABNTe OTHOBO B rHe3dTo My.
He I3NaarIe FInITbPa Ha dIpeKTHa
CbHYeBaCBETnHa Czel Da rO I3CyWnte.
9. CьBETN 3A PA3PEUBAHETO HA HЯКО wVPOBJEMN
BTo3n pa3dJe MoKeJa HamePHTe
pa3peHHeHTo Ha HAKoI eBEHTaJIHO
Bb3HNKHaJIIN PpO6JIeMn, KOITo E Heo6XODIMo Da
IperIeJATA IpeDi Na Ce O6bPHeTe KbM
cepBn3a 3a TeXnHcECKa IOnIpbJxKa. AKO dopNi CneI TOBa He ycIeTe Da BKNIOHTe YpeDa BmOIM Da BnE3eTE B KOHTAOKCTCbC cepBn3a.He
H3BbPbWbAIte HNKaKBN DpyrN Opeaun NIO npPaBka Ha yPeDa OCBEN Yka3aHNTe B To3n
pa3DeI Ha Ce ONITBaIte Da CMeHrTe NIO npPaBArE eIEKTPuCeCKtte Qactn Ha ypeDa.
Ako Ce o6bPHeTe KbM TexHnCecknR cepBn3 6e3 Da cTe IPOBepNJ DaJI IN pO6JIeMa C
fHyHKUHOHpaHETo Ha ypeDa He Ce IbJxN Ha
HAKOOTPiuHHnte Yka3aHnNo-DOny
IV3BbPseHNe TPOPABKn ige 6bDat 3a Ba7a
CMETKa, DOpN n B IepNOda Ha DeiCTBVe Ha
raPAnrTa Ha ypeDa.
Upeja otka3Ba da pa6oTu
- LjencenbHe e dope noctabeh B KOHTaKaTa
- ByuohbTe en3ropan
ToKbTe cnpn
BodnHr pe3epBoaap He e Iobpe nocTaBe
BODHnT pe3epBoap e TbIeN
Hncka a6cop6aun
Bb3dyuHnTΦnTTbp e 3aMbpceH
Tempepatypata B pomeeHneTo e npeKaJIeHO HnCKa
- BLOKIPAeBxOdaIINn3XoDa3aBb3dyx
HIBOTO Ha 36paHaTbIaxHoCT Ha Bb3dya e NO-BICOKO OT BIAxHOCTTa B NOMEeHHeTO
BnaXHocCTTnHa Bb3dyxa B nOmeueHneTo He cnada do n36paHata dopn u cnei npoDbJIknteJHa pa6ota Ha ypeda
Bpata nI npo3opuTe Ha IomeueHneTo ce OTbaprI pekaneHO yeCTO
BnomeueHneTo mA npy ypei, n3ctOuHK Ha BnaxKHOCT
WVOMEeHHeTo e PpeKaJIeHO TOrIaMO
UpeBt c3daba npekaJeHO MhOro wym npn pa60ta
WVOBbpxHOCCTA BbpyX KOYTO e NOCTaBeH ypeDa e HepaBaHa nI INpeKaJIeHO MeKa
- UpeiT He e dope MOHTupaH
10. INHΦOPMAUЯ 3A ПРABUNHOTO EJIIMMHINPAHE HA EJEKTPNUCHECKN I EJEKTPOHHI DOMAKHNCKI UPEДN
B KpaHa nOle3HnJ XnBOT Ha anapata He 6nBa da ro n3XBbPJIaTe B KOHTeHepa 3a 06nKHOBeHN DOMaSHN OTnAbuM. Moxe da ce OCBO6oDInTe OT Hero, KaTo ro
OTHECETE B CNEUaJIHNTe CEHTPOBE 3a
BTOPHN CYPOBHN KbM MECTHNTe
aDMNHCTPauuIN JIN BaUNI DOCTaBvNK,
KoINTO Ca IJbXHN Da yJeCHBaT Ta3N
DeiHOCT. Pa3dEJIHOTn3XBbPnHe Ha
eJEKTPo-DOMAKINCKn UpeNi
PiPeDTBpATBA peI HeratINBn NOCLeDNi
3a OKOIHaTcpeA n 3DpaBeTo,
IPON3TNuaIOn OT HeaJeKBaTHOTo IM
n3XBbPnAE, KaKTo I No3BOJnBA
peuKNIpaHTo HO MaTePNaIHTe, OT KOINTO
e HAnpABen UpeDa, KaTO IIO TO3n HaUnH Ce
NoCTrA YyBCTBnTEJIHa INKOHOMn HA
CYPOBHN n eHepnIa.
C ueI da ce noJueptae oUe BeHbK 3aIbJIkeHHeTO 3a pa3JeIHO n3XBbPnHe Ha OTnAdbuHTe Ha BcEKN IpoDyKT e OT6eJIra3AH CneuaJEn 3HaK, KOITo BN npdeynpeXdaba NIOceua Da He ro I3XBbPnIe T B KOHTeHepa 3a O6NKHOBeh DOMaHNI OTnAdbuN.
3a NOBHe NHΦopMaζη Ce ΕOBpHeTe KbM MeCTHnTE BnACTn ΜΠ KbM MaΓa3nHa, OTKbDETo CTe KynΠn npOуKta.
RU
1. TEXHUNECKNE XAPAKTEPNUCTUKN
Ictouhnik nItaHaHJAcToTa220 B-240 B~50 T
Mouchoctb
240 Bt
06bemc6opnka KOHeHcnpoBaHHoB OBoI 4 n
Pa6o7aT emnepaTpa
5^ C ÷ 35^ C
2.ОПИСАНUE ПИБОРА (Puc.1)
- Pучka Дяп посякн
- PeWeTeKa BCaCbIbAHnI Bo3Dyxa
- WvONIIaBOK BOIOc6OpHnka
4.BoOoc6OpHnK
5.ФильТР BXOДНОВО BO3Духа
6.waheJIb ynpabIeHnI
6.1 3eJIeHbI INHdIkaTOp pa6Otbl/OCTaHOBKn
6.2 KpacHbI INdNkaTOp HanoJIHeHnB BOOc6OpHnKa
6.3 INHДИКaTOp pa3mOpaxJBaHIN
6.4 UnpaBJIeHne peRyIaTOpOM BlnaxKHOCTN
- PeuetKa BbIXoJa BO3dyxa
8.Отсекдя кабеля
9.ΟΤΒερχαιν έπερβυΒΗΟ ἀρεηλα
3. MEPbI B2E3OПАСHОCTN
WvepeI nepBbIM NcIOJIb3OBAHHeM npi6opabBNIMATEJIbHO pOHTnte HAcTOrIeepyKOBODCTBO I0 3KcNlpyaTaUIM.NcIOJIb3yIte HAcTOrIeepyKOBODCTBO DIAJaJIbHeIIuX KOnCylbTaUIM.
WvepeHNCIOB3OBAHNEM np6bopa yIOCTOBepbTecb, YTO HApJKeHne B CeTN COOTBeTCTByET yKa3aHHOMy Ha PIACTINHKe, npIKpeIeHHoN K np6bopy.
Прибор Должень установьтсв COOTBETCTBIM C HalJOHANbHbIMn npaBnAmДгл ЗЕКТРИССХ риборOB.
WVOCNEI3BJIeEHINI3yNAKOBVN yIOCTOBepbTeCb,HTOpiN6OpHAXODITcBA HaJIeXaUeM COCTOAHIN;BCJyuae BO3HNKHOBEHn COMHEHNI O6paTITeCb B 6JIuKaIShuLcHTpTexHueckOrO ObClykBaHn.
CneJyET xpaHnTb COCTaBhIe YactN yNaKOBKn (PnactNKOBbIe NaKeTbI, NeHONJaCT n T.D.) B MeCTe, HeNoCTyINHom DJI YeTei, TaK KaK OHI ABJIHOc HIOCTOHKAMM UYPo3 DJIa 3DOpOBbIa.
- Be3oIacHoe cyHKcIOHINpOBaHne npIbopa rapaHTnpyETcJIuMb B CJyue,ecnOH nOdkJIIOUeH K ICTOCHNky PNTaHnC 3a3emJIeHnEM.
He peKOMeHnyETcNcNoJIb3OBAHnne aIaIaTePOB, WTeNCeJIbHbIX BUNIOK N/INyUdIIInHITbHbIX KaBeJe. EcIn NcNoJIb3OBAHnne DaHHbIX PrICNOC6JIeHn IABJIeTcR Heo6XoIMMbIM, TO CJIeDyET NcNoJIb3OBAbT ToJbKO Te, KOTOpBle YIOBJIeTBOPAOT DeIeCTByIOUIm HOpMam 6e3OJaChocTn. CJIeDyET CJIeDNTb 3a Tem, YTO6bl IppeJIbHaJ MOUHOCTb He npEByIshaIa yKa3aHaHyU Ha aJaIaTepe N/INn Ha KaBeNe-yIinHnteJe.
-Данньприбордолженбытпрднэзнayен ДгИ NGЛьЗВангТOLьКВДомашиХуСЛВОИХ.EroИСПЛьЗВанeBЛIOБIxДуRVXуCЛВОИХЯВЯETCRHENPaBЛьHbIMИОАСнБIM.
Bcnyae nolomkn u/lin HnnpaBnIbHO npabTbI pni6bopa cJeNyET BbIKIOuHTb erO u He npedpinnMaTb NpOblTOK K erO pOuHKe. Bcnyae Heo6xOIMOCTN pOnHNk pNp6bopa cJeNyET oBaAaTbCnKJIOpHTeJIbHO B LcHtP Texnueckoro ObcnykBaHn, ceTpNPhiUPOBaHHbI pOn3BOIDTeJEM, C 3aIpc0m Ha 3ameHy opnIHaNbHbIX Detanei. B npOTNBOM cLyae pa6ota np6bopa MoKet 6bITb Hebe3OanCHOI.
WVONBJ3OBATeJIb He DoJIKeH IPOIN3BOIDNTB 3aMeHy Ka6eJI. EcIIN Ka6eJI IOBpeKJDeH IINI eCTb HEoBXODIMOCtB erO 3aMeHbl, CJIeDyET ObaaTaBcN CKJIIOHTeJIbHO B LHeTp Texnueckoro ObClykJBaHnA, cePTnQfUpOBaHbI npOI3BOIDNTeJIem. He 3KcIJIpyATnpuYteI npi6OpB v Cnyae IOBpeKJDeHr Ka6eJI NII WTeNCeJIbHO BUNKN.
WVPON3BOJNTeIb He HecET OTBETCTBEHHOCTN 3a NOBpeXJeHnA, HaHEcEHbIe BCJIeCTBVe HEnpaBInbHOrO, OUI6OuHOrO INI NHeIeNEBoIr NCIOJIb3OBAHn PrIbOpa,a TaKKe 3a peMOHT, IPOBeDeHHbI NEKBaINOpUOBaHHbIM IepCOHaJIOM.
BHHMaHHe: Hn B Koem cIyuae He

3aKpbIbA Tb IOBepXHOCt b annapata BO Bpemr erO fYHKUHOHPOBaHn, TAK KAc 3TO MOKeT PnBcTeN K ONaChOMy
neperpeby.
Wvpi NcIIOJIb3OBAHmIJIIO6O 3JIeKTpUeCKoRIO npIbOpa Tpe6yETcB BbIIOJHrTb HeCKoJIbKO OCHOBhIx IpaBnIJ.
B OCOEHHOCTN:
BHHMaHHe He cIeDyET BKNIOHaTb HACTOaUpiNpOB B6JIN3BaHNbIX KOMHaT, DyueBbIX, KOMHaT dJa MbITbIPOCyDbI INI NODo6HbIX POMEeHnI.
He yctaHaBnBaIte npi6op B6n3n NCTOCHIKOB TeJIa INI NOMEUeHIN, IeMOTy HxODITbCra3bl, MaCna INI Cepa, aTaKKe B MeCTax, POnBePKeHHbIX N3JyHeHIO.
3aPpeaaetc6pb3raTbHa npB6Op BOIOJNINBOCTIaMeHRAHOUIMMCK XIKKOCTAMN.
He doTpaIbIaIteCb K npIbOpy mokpbIMnyakuMn.
He BkIIOUaIte N He BbIKIOUaIte npIbOp B MOMENT eO IOIcOeIMHeHnN OITCOeIMHeHnOT CETN.
HapyuheHne uIN u3MeHeHne paOchx xapaKTePncTnI pInbopa MoKeT cTaB nCTOCHNKOM ONaCHOCTN.
- BbikIIOHITe npBOp, kOgDa Bbl erO He IcnoJIb3yeTe, nepeI erO nepeHOCKo I nepeI npOBeDEHEm JIO60I Opeaun I no erO YIcTKe IIN yXOy.
- OToeMnHry BnIky, HnKOrda He nepraTe 3a Ka6eIb.
- He klaadte Ha npnbop Tjxkblie nnnporayne npedmetbl.
He nO3BOJnTe DeTAM MaHnPyIpOBaTb NInIgPaTb C pnp6Opom.
He BCTaBnIte IpeDMeTbI BO BXOdHbIe / BbIXOHDhIe peUeTKn, TaK KaK 3TO MOKeT IpeDCTaBnIbY yrpo3y npi paBoTaIOuIeM Ha BbICOKI CKOpOCTN BEHTINlATope.
He 3aKpbIbaiTe peIeTKn BxOJa N BbIXOJa BO3dyxa.
He nCIOJIb3yIte npIbOp B TeChbIX 3aKpbIbIX NOMEUeHAX.
EcIn npnbop He pa6oTaet:
WVLOTHO JIN BCTABJIeHa BUNKa Bpo3eTk?
LJIINpEdoxpanHTeIb?
- Имени мосто Визаимhoe BbIKHOUcHne CBeta?
WwpaBnIbHO JIN IIOJKJIQUeH BOIOc6OpHnK?
- WOJONI BODOCBOPHNK?
EcIn MoUHocTb BODoc6opa Hn3KaA:
3aqr3HEnIINB03dyuHbIΦnJIbTp?
CINUKOMJINH3KaYTEMpepaTpyB NOMeueHn?
3a6nOKpOBaH INBxOJ ININ BbIXoD BO3dyxa?
- BbIbpaHa JIn BnAaXHoCTb, npeBbIaIoUaHn BnAaXHoCTb OKpyKaIoUe cnpebl?
EcIn yctaHOBJIeHHbI ypoBeHb BlnxHOCTn He DoCTnraETcB TeueHne DInTeJbHorO BpeMeHn pa60tI np6opa:
- OTKpbIbAeTcR JIN N3JIIMHe YAcTo DBePb NIN OKHO B NOMEueHm?
- EcTB nB nOmeueHn np6Op, rHepepyIOuN BIAxHNoCTb?
WVOMEueHneCnIuKOM6oJIbUoe?
wvpn pa6oTe np6op npon3bOuNT cnHkOM MHOrO wyma:
- RaBlaHecTcI IN IOBepxHOCTb, Ha KOTOpOY cTaHOBLeH npi6Op, HepOBHOJ nJIcNlUKOM MRAKOK?
WvpaBnIbHOJINpa3MeUeH npi6Op?
10. INHΦOPMAUЯ O NIPABUNbHOJ UTNJIIN3AUIMN 3JEKTPUeCKNX IN 3JEKTPOHHbIX PPNBOPOB

Iocne OKOHuaHn Cpoka cnXkbl,daHHbI npHbOp He dONJKeH yTNIN3NPOBaTbCBA MecTe C 6blTOBbIMN OTXoAMn. OH MOKeT 6blTb nepeDaH B CneUaNbHbIe CEHTpbI
dippepeHupoBaHHO c6opaOTXODOB, HaxOJaIeNecB B BeDOMCTBE MyHINIaJIbHBIX BlaCTei,IIaIareHTAM,pabOtaUcIMMB daHHoCpepe ycnyr.Pa3JeIbHaYtINI3aIg 6bITOBbIX 3JNeKTPOnpIbOpOB P03BOJAreT N36EkaTb BO3MOXbIX HeratNBbIX NocLeIDCTBm DnIg OKpyKaIOSe Cpebl I 3DopOBbI JIOdei, KOTOpBIE MOyT IMeTB MeTO BCLeIDCTBne HEnPaBUNbHOYtINI3aIu, a TaKxe P03BOJAre T NOBtPOH NCIOB3OBAbT MaTePnaJIbI, BXOJaIe B COCTAB 3TNX pInp6oPoB, IN DoBIbCS, TaKIM O6pa3OM,CyueCTBeHHo 3KOHOMMn 3HeprnN n pecypcoB.
YTo6bI NOpUePKHyTb HeoXOJIMOCtB
pa3dJIbHOYyTNJIN3aUH,HaDaHHOM
πριδόpe haηecen 3naK,
PpeDynpexJaIoUmO 3aIpeTe
IcIOJIb3OBAHnI TpaIaNIOHHbIX MyCOPHbIX
KOHTeiHepOB.

- SAFETY WARNINGS
- The use of any electrical appliance requires compliance with a series of basic rules:
- PARTICULARLY:
- FOR CORRECT FUNCTIONING
- CONTROL PANEL (6) (FIG. 2)
- STARTING UP THE APPLIANCE
- DRAINING OFF THE CONDENSATION WATER
- TROUBLESHOOTING
- Continuous drainage (9)
- MAINTENANCE AND CLEANING
- Cleaning the filter:
- The appliance does not work
- The dehumidification capacity is low
- The appliance does not reach the degree of humidity set even after it has been working for a long time
- The appliance is functioning noisily
- INFORMATION FOR THE CORRECT
- DISPOSAL OF ELECTRICAL AND
- ELECTRONIC APPLIANCES
- FR
- SPECIFICATIONS TECHNIQUES
- OwνιCAHHe HΑ ηΥPEDΑ (Φιr. 1)
- wvPABNJIA 3A CnIyPHOCT
- A UMEHHO:
- 4.wvPABNJIA3A YwVOTPE6A
- KOHTPOJIeH wvAHeJ (6) (ФИГ. 2)
- BKJIIOUBAHE
- 7.ИЗВЕЖДАНЕHA KOHNDEH3ИРAHATA BOДA
- wvOuHCTBAHE N wvOДРьЖKA HA YPEDA
- CьBETN 3A PA3PEUBAHETO HA HЯКО wVPOBJEMN
- Upeja otka3Ba da pa6oTu
- Hncka a6cop6aun
- UpeBt c3daba npekaJeHO MhOro wym npn pa60ta
- INHΦOPMAUЯ 3A ПРABUNHOTO EJIIMMHINPAHE HA EJEKTPNUCHECKN I EJEKTPOHHI DOMAKHNCKI UPEДN
- RU
- TEXHUNECKNE XAPAKTEPNUCTUKN
- 2.ОПИСАНUE ПИБОРА (Puc.1)
- MEPbI B2E3OПАСHОCTN
- 3aKpbIbA Tb IOBepXHOCt b annapata BO Bpemr erO fYHKUHOHPOBaHn, TAK KAc 3TO MOKeT PnBcTeN K ONaChOMy
- Wvpi NcIIOJIb3OBAHmIJIIO6O 3JIeKTpUeCKoRIO npIbOpa Tpe6yETcB BbIIOJHrTb HeCKoJIbKO OCHOBhIx IpaBnIJ.
- B OCOEHHOCTN:
- EcIn npnbop He pa6oTaet:
- EcIn MoUHocTb BODoc6opa Hn3KaA:
- EcIn yctaHOBJIeHHbI ypoBeHb BlnxHOCTn He DoCTnraETcB TeueHne DInTeJbHorO BpeMeHn pa60tI np6opa:
- wvpn pa6oTe np6op npon3bOuNT cnHkOM MHOrO wyma:
- INHΦOPMAUЯ O NIPABUNbHOJ UTNJIIN3AUIMN 3JEKTPUeCKNX IN 3JEKTPOHHbIX PPNBOPOB
Brand : FAGOR
Model : DH-10
Category : Dehumidifier