
SEC-TRANS50 - Surveillance Camera KONIG - Free user manual and instructions
Find the device manual for free SEC-TRANS50 KONIG in PDF.


| Product type | Surveillance camera |
| Brand | Konig |
| Model | SEC-TRANS50 |
| Dimensions | 10 x 6 x 6 cm |
| Weight | 300 g |
| Power supply | 12 V DC, power adapter included |
| Resolution | 1080p Full HD |
| Night vision | Infrared LEDs, range up to 15 m |
| Viewing angle | 90° |
| Motion detection | Yes, with email alerts |
| Storage | microSD card (up to 128 GB) or cloud |
| Connectivity | Wi-Fi 802.11 b/g/n, Ethernet RJ45 |
| Audio | Built-in microphone and speaker |
| Installation | Wall mount, adjustable |
| Care and cleaning | Clean with a soft, dry cloth |
| Security | Password protection, encryption |
| Spare parts and repairability | Power cable, mounting bracket |
| General information | 2-year warranty, indoor/outdoor use (IP65) |
Frequently Asked Questions - SEC-TRANS50 KONIG
User questions about SEC-TRANS50 KONIG
0 question about this device. Answer the ones you know or ask your own.
Ask a new question about this device
Download the instructions for your Surveillance Camera in PDF format for free! Find your manual SEC-TRANS50 - KONIG and take your electronic device back in hand. On this page are published all the documents necessary for the use of your device. SEC-TRANS50 by KONIG.
USER MANUAL SEC-TRANS50 KONIG
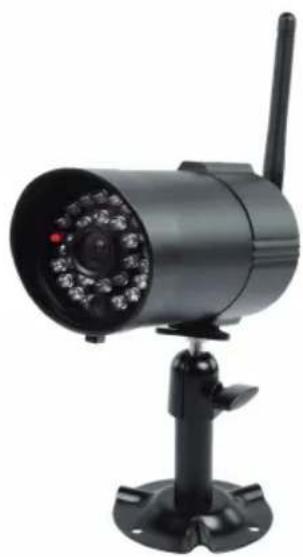
MANUAL (p. 2)
Wireless camera system
ANLEITUNG (S. 19)
Funk-Kamerasystem
MODE D'EMPLOI (p. 36)
MANUAL DE USO (p. 90)
Watch over your properties with this new 2.4 GHz digital wireless security camera. The camera offers a very sharp and stable image, and the technology used improves the image quality even further. The system uses digital wireless technology and is equipped with advanced frequency signal encryption capabilities, which reduce interference caused by other applications using the 2.4 GHz frequency band. This digital technology ensures your privacy and allows you to use it over an extra long distance.
The receiver and camera are already paired by factory default. When adding the additional SEC-TRCAM30 camera (4 cameras max.) to the system, please refer to the section PAIRING for adding cameras.
- We recommend that you read this manual before installing/using the camera system.
- Keep this manual in a safe place for future reference.
Packaging content SEC-TRANS50: Packaging content SEC-TRCAM30:
1x Camera with bracket 1x Camera with bracket
1x Receiver 1x Antenna
1x Remote control (battery included) 1x AC/DC adapter
1x Antenna for camera
1x Video playback software PC (CD ROM)
1x RCA Audio/video connection cable
2x AC/DC adapter
Technical specifications:
Camera:
Transmitting frequency: 2.408-2.474 GHz Digital
Modulation: FHSS
Range: Indoor ±50 m, open area ±150 m (depending on local conditions)
Image chip: CMOS with IR cut switch
Lens: 3.6mm
View angle: H: 60 ± 3° / V: 43 ± 3°
Infrared illumination (LED): 5 M
Protection: IP66
Microphone: mono
Working temperature: -10°C \~ 50°C
Voltage: 5 V DC/1A
Dimensions: 130x61x67 mm
Weight: 365 g (included cable)
Receiver:
Receiving frequency: 2.408-2.474 GHz Digital
Channels: 4
SD card: up to 32 GB (not included)
Video frame rate: 25 fps (max.), 16 fps (4x cameras)
Recording frame rate: 25 fps per channel
Video resolution: QVGA
Video format: ASF
Video output level: 1.2±0.2 Vp-p/75 Ohm
Audio output level: 1 Vp-p/600 Ohm, mono
Audio/video output connector: 3.5 mm Phone jack
Range: Indoor ±50 m, open area ±150 m (depending on local conditions)
Operating temperature: -10°C to +50°C
Voltage: 5 V DC/1A
Dimensions:
122×122×26
mm
Weight:
395
g
Safety precautions:
- Do not open the camera or receiver in the event of a malfunction. These products should only be opened by a qualified engineer.
- Do not submerge the camera in liquid.
- Do not expose the receiver to water or humidity.
- Do not expose the receiver or camera to high temperatures (see technical specifications)
- Do not install the system close to strong magnetic fields, such as a speaker. This may affect the quality.
Product description:
Remote control Receiver

| Monitor | Menu | Playback | REC | |
| 1 | ||||
| 2 | POWER indicator | |||
| 3 | Switch CHANNEL | Cursor UP | Fast FORWARD | |
| 4 | Volume DOWN Cursor LEFT | Volume DOWN / Switch display CHANNEL | ||
| 5 | Volume UP | Cursor RIGHT | Volume UP / Switch display CHANNEL | |
| 6 | MENU | OK / ENTER | PLAY / PAUSE | |
| 7 | Switch CHANNEL | Cursor DOWN | Fast BACKWARD | |
| 8 | ESCAPE | EXIT | PREVIOUS | |
| 9 | RECORDING / STOP | DELETE | STOP | |
| 10 | ZOOM | NEXT | ||
| 11 | ALARM | |||
| 12 | POWER on/off |
mode
LINK
Camera:

| 1 | Antenna | |
| 2 | Camera | bracket |
| 3 5V DC power input | ||
| 4 | Pairing | button |
| On front of the camera RED LED power ON | ||
| On front of the camera GREEN LED linked with receiver | ||
Installation instructions:
![graph TD A["Input Cable"] --> B["Switch"] B --> C["Composite Video Input"] D["Input Cable"] --> E["Power ON"] E --> F["Video output cable"] F --> G["Output Cable"] style A fill:#f9f,stroke:#333 style D fill:#f9f,stroke:#333 style B fill:#ccf,stroke:#333 style E fill:#ccf,stroke:#333 style F fill:#cf…](/content/2026/06/1292962/images/d0de2d2fd52d2e6f6d54f4ec77ff72ec4178b56d380ccce45c1433bdc4e5a9b7.jpg)
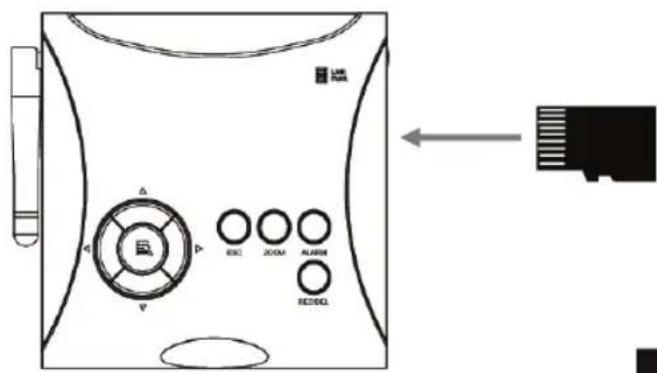
Option: insert a Micro SD card. Insert only when the receiver is powered OFF
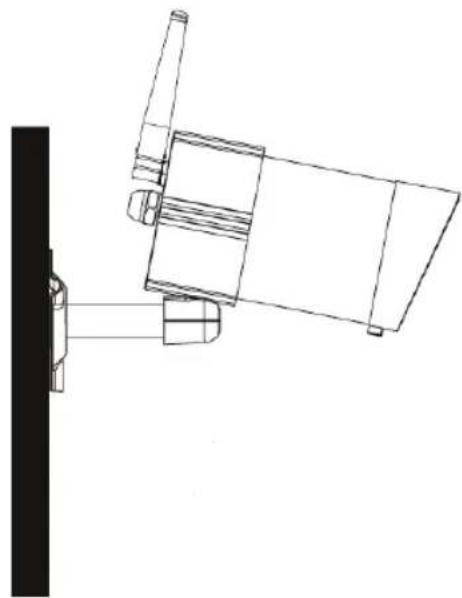
Mount the camera to a wall (or ceiling). Drill a hole of 15mm for the cable to pass through
User instructions:
On Screen Display
The following OSD icons will/can be visible in the image.
| [IMAGE] | Signal indicator |
| 1 | Channel indicator |
| Recording indicator | |
| Audio channel indicator | |
 | Quad displayScan displaySingle display |
 | Full volume1/2 volumeMute |
 | Power |
| MM DD YYYY AMhh:mm:ss | System time |
| X1X2 | 1x Zoom2x Zoom |
Overview menu
The following diagram shows the total overview of the system menu
![graph TD A["Camera Setup"] --> B["Channel 1"] A --> C["Channel 2"] A --> D["Channel 3"] A --> E["Channel 4"] B --> F["Activation"] B --> G["Brightness"] B --> H["Pairing"] I["Recorder Setup"] --> J["Schedule"] I --> K["Motion sensitivity"] I --> L["SD Card Format"] I --> M["Motion Area"] I --> N["Re…](/content/2026/06/1292962/images/877513fb2bb9216b2df24aaed89e88c4b0fc6e15ae304a4674e1d7a070c9e81f.jpg)
System menu
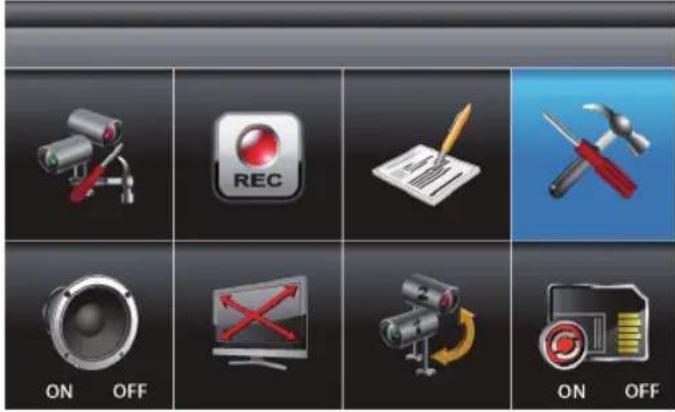
Press MENU to enter the main menu. After entering the [MAIN MENU] system, EVENT LIST will be highlighted by default. The system will idle in [MAIN MENU] for 2 minutes before exiting [MAIN MENU]. Use ▲▼◀▶ to select, Press MENU to confirm selection and to enter the sub-menu.

Camera setup
Select CAMERA SETUP, press MENU key once to enter the sub-menu.


Use ▼▲ to select the camera to set up (1-4). Use ◀▶ to select [PAIRING] [BRIGHTNESS] [CAMERA ON/OFF].
Pairing:
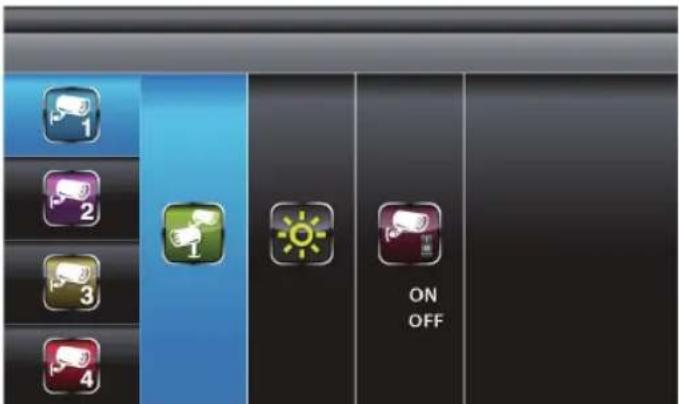
With the PAIRING section highlighted, press MENU key once to begin camera pairing. Pair and the LED on camera will blink once, followed by the LED blinking continuously, indicating data transmission is in process.
System will confirm that the pairing process is successful with "PAIRED" displaying onscreen.
System will indicate that the pairing process failed with "PAIRING FAIL" displaying onscreen.
Press ESC to return to the main menu.
Note: the camera is paired by factory default. The pairing procedure must be followed when adding additional cameras (SEC-TRCAM30).
Brightness:
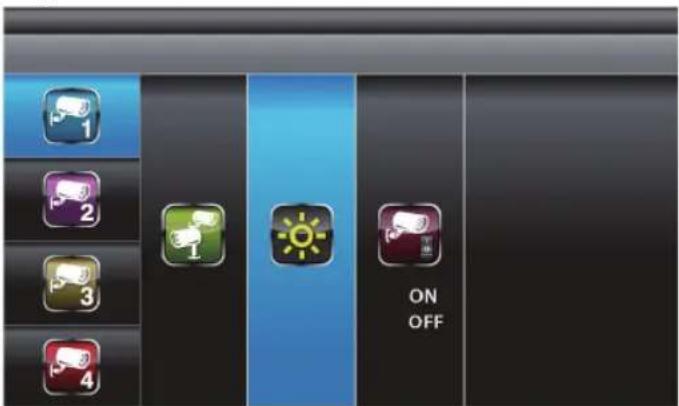
With the BRIGHTNESS section highlighted, use ▼▲ to adjust camera brightness. Press ESC to return to the main menu.
Activation:

With the ACTIVATION section highlighted, use ▼▲ to enable or disable a camera. Press ESC to return to the main menu.
Note: ensure the cameras are paired to the receiver for SCAN or QUAD to function properly. Camera "ON" can only be selected when a camera has been paired to the system.
Recorder setup
Select RECORDER SETUP, press MENU key once to enter the sub-menu.
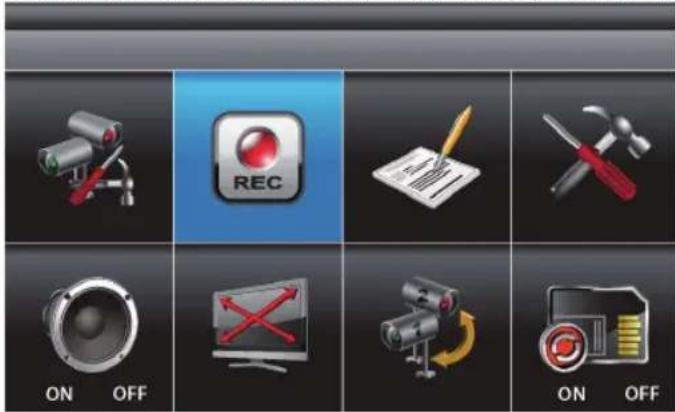
Schedule:

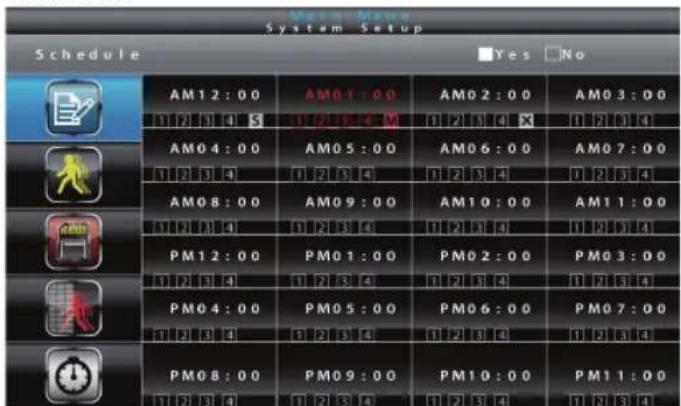
Use ▲▼◀▶ to select. There are three different recording options available to choose from. First highlight the time period and press the MENU key to switch between different recording modes.
M: MOTION (REC only when motion is detected)
S: SCHEDULE (continuous REC)
X: MANUAL (manual REC)
The system will record video from all 4 channels simultaneously with MOTION, SCHEDULE and MANUAL record modes. One of the four channels will have audio available. When the system performs MOTION record, audio will automatically switch to the channel triggered by motion.
Recording cannot be stopped until 30 seconds after recording has started. This system operation is designed to prolong the overall life of the memory card. To stop recording, press REC/DEL once. To remove the memory card, please power off the system first.
If under SCHEDULE record mode, the system will automatically resume recording 60 seconds after recording has been manually stopped. If under MOTION record mode, the system will resume motion detection function 60 seconds after recording has been manually stopped. Recording must be stopped before the user can enter the system main menu and the system will resume QUAD mode after idling for two minutes.
Press ESC to exit.
Motion detection sensitivity:

Use ▲▼ to select MOTION DETECTION SENSITIVITY section.
Use ◀▶ to highlight the camera for setup.
Use ▲▼ to adjust the sensitivity level: OFF / LV1 / LV2 / LV3 (LV3 is most sensitive).
Press ESC to exit.
Format memory card:

Use ▲▼ to select FORMAT STORAGE, press MENU to enter. Press MENU again to confirm and begin formatting the memory card.
Note: If a new memory card is used then it must be formatted here first, before use.
Press ESC to exit.
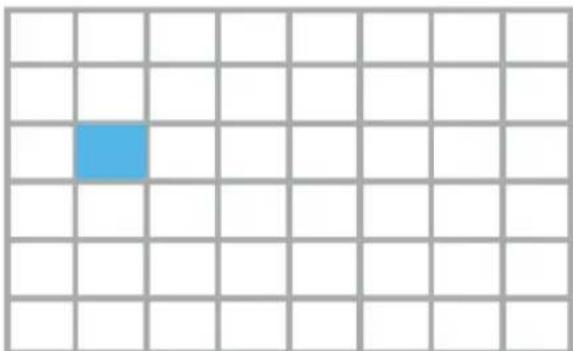
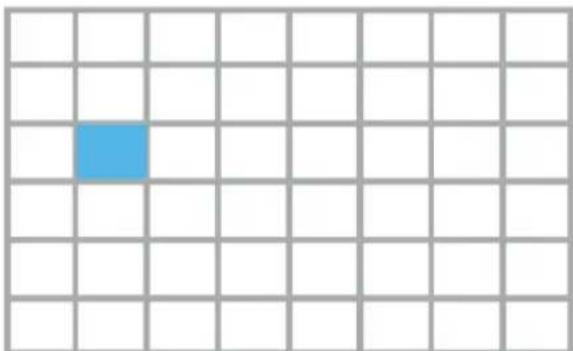
Masking area:
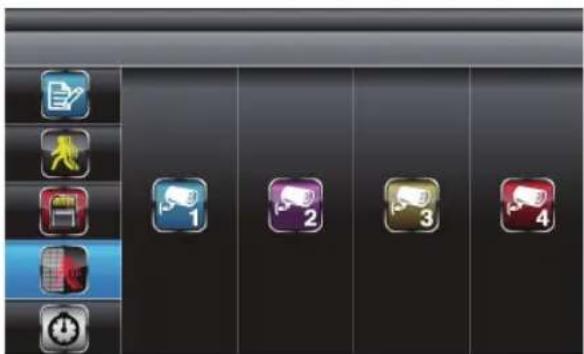

Use ▲▼ to select MASKING AREA section.
Use ◀▶ to highlight the camera for setup, press MENU to enter.
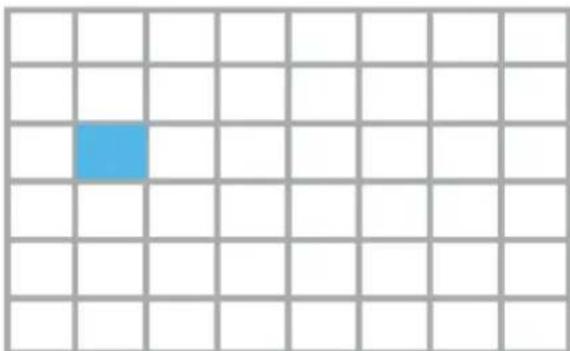
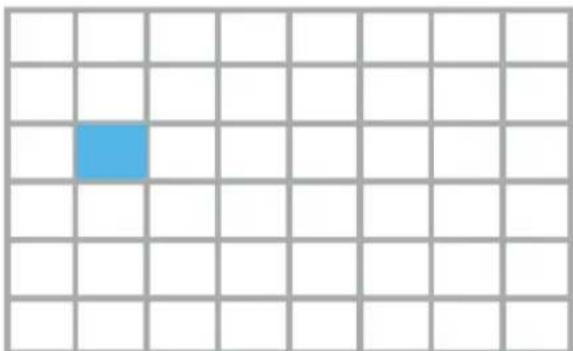
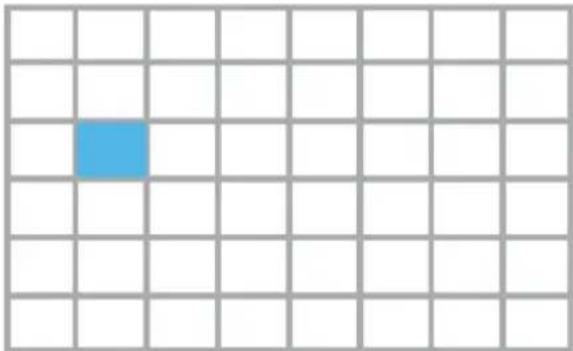
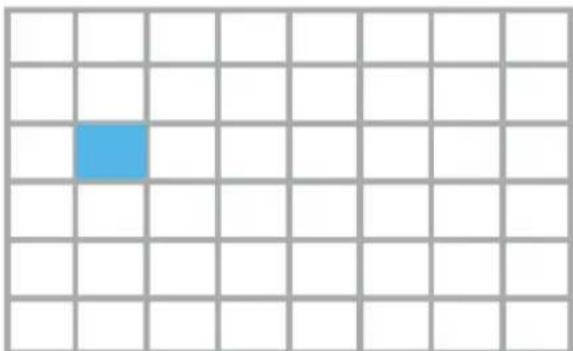
Use ◀▶ ▲▼ to highlight the grid for no motion detection in this area.
Use MENU key to mask/unmask grid(s). Movements taking place inside the masked area will be ignored.
Use ◀▶ ▲▼ to select another grid for setup or press ESC to exit.
Record time:

Use ▲▼ to select RECORD TIME section.
Use ◀▶ to highlight the recording period: 2 Min / 5 Min / 10 MIN, press MENU to confirm.
Press ESC to exit.
Event list
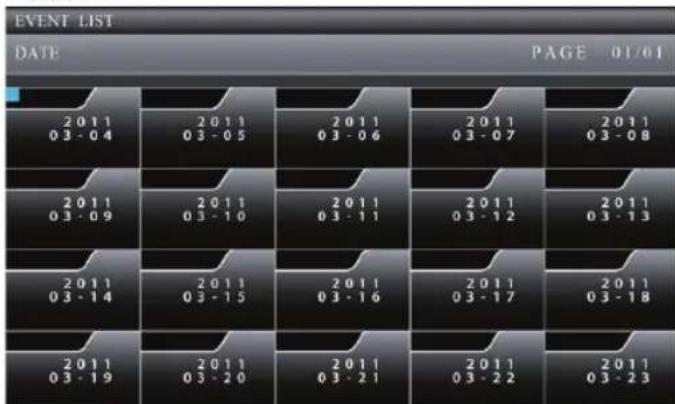
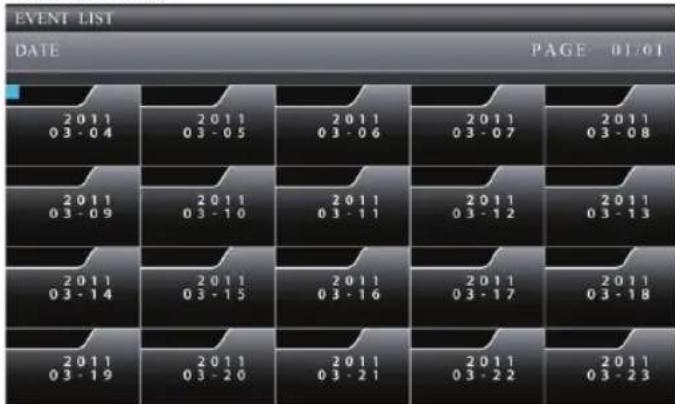
Select EVENT LIST, press MENU key once to enter the sub-menu.

Playback:
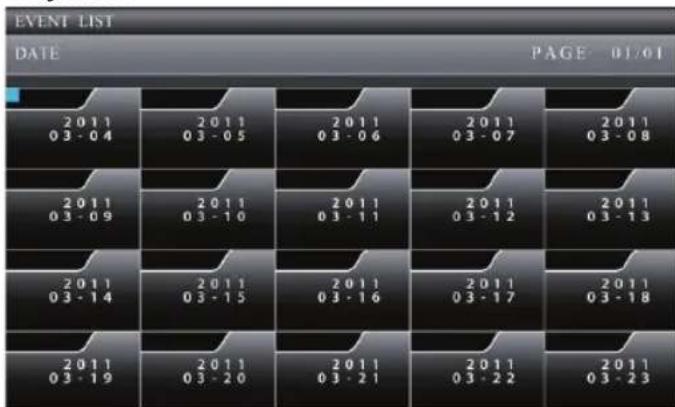
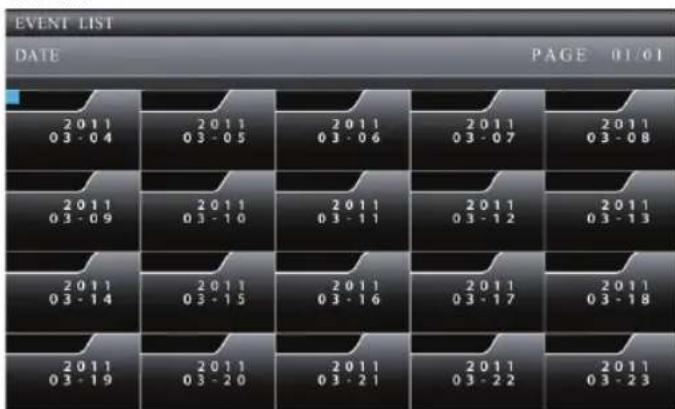
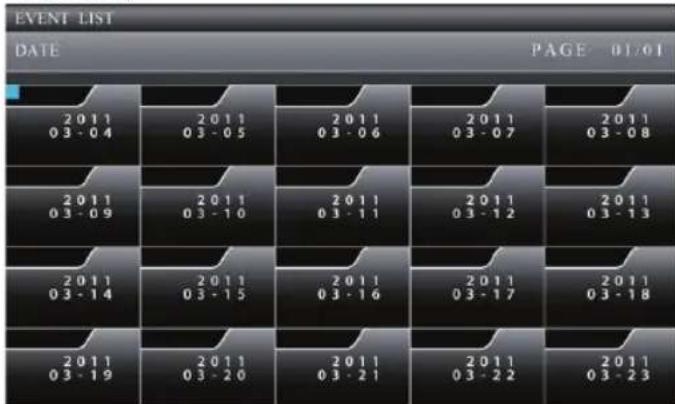
Use ◀▶▲▼ to highlight the desired DATE index for playback. Press MENU to confirm the selection and enter the selected folder.

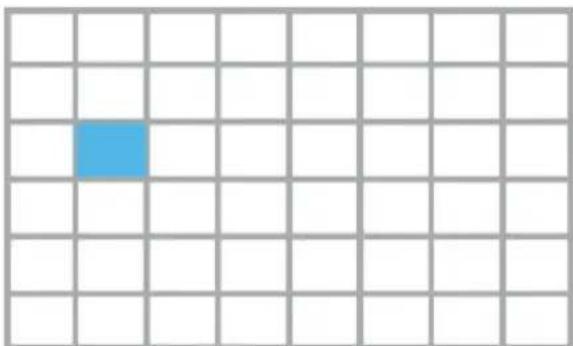
Press ◀▶▲▼ to select the Hour (each block represents one hour of time). Press MENU to enter. Use ◀▶▲▼ to highlight the desired file for playback. Press MENU to start playback.
Each RECORDED FILE folder is indicated with file start / end time and the type of file recorded.

Note: By default, playback display will be QUAD (displaying images from all of the cameras paired to the monitor). ■ 1 □1 □2 □3 □4 is all channel playback.
For single camera display, press MENU once after playback has started to PAUSE. Use ◀▶ to select from channel to channel. Channel indicator (bottom left screen) will indicate the channel number selected.
□田 ■1 □2 □3 □4 is channel 1 playback in full screen
□田 □1 ■2 □3 □4 is channel 2 playback in full screen
□1 □2 ■3 □4 is channel 3 playback in full screen
□田 □1 □2 □3 ■4 is channel 4 playback in full screen
System setup
Select SYSTEM SETUP, press MENU key once to enter the sub-menu.
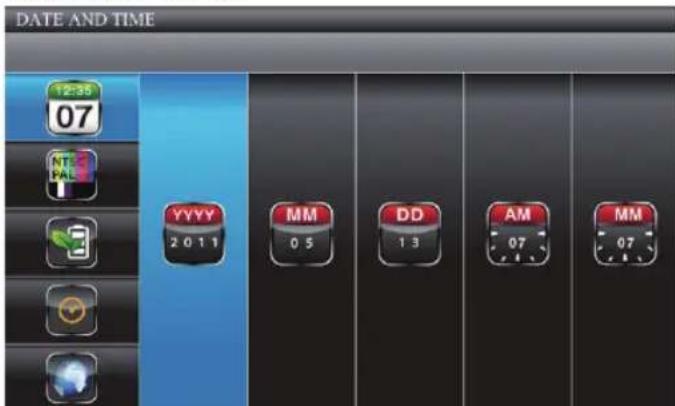
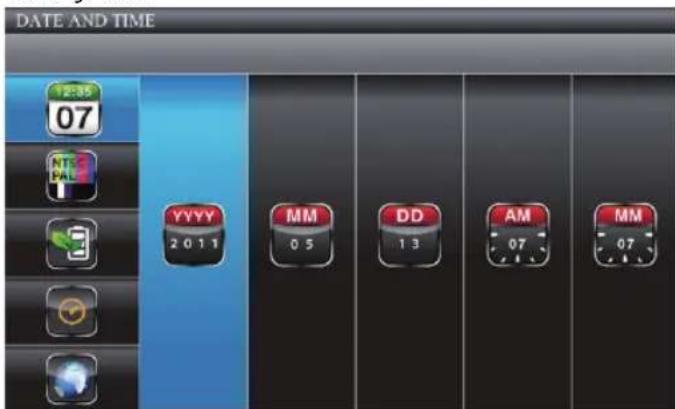
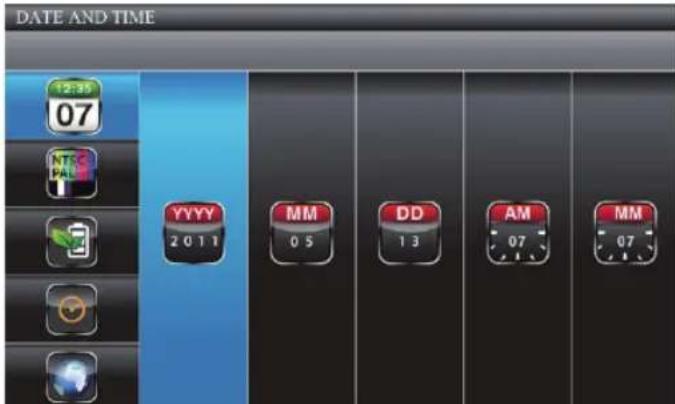
Date and time:
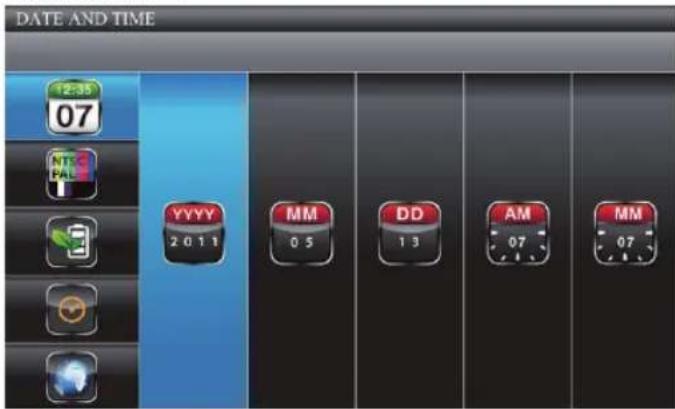
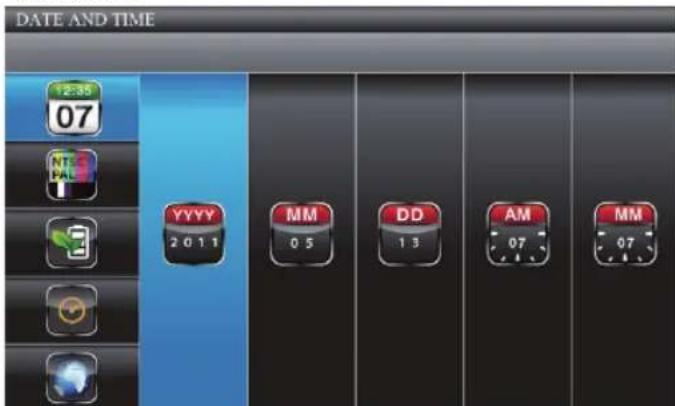
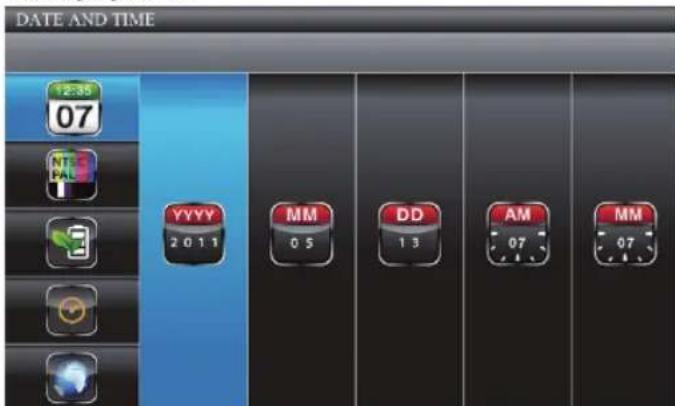
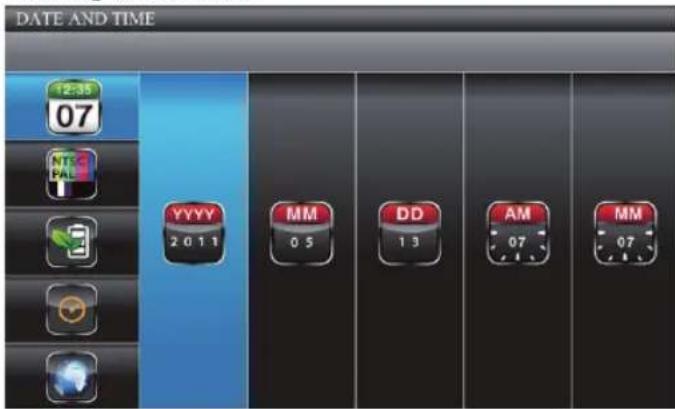
Use ▲▼ to highlight DATE AND TIME, press MENU to enter.
Use ◀▶ to highlight adjust: YEAR / MONTH / DATE / HOUR / MINUTE.
Use ▲▼ to adjust each section and press MENU to confirm the adjustment.
Press ESC to exit.
TV output:

Use ▲▼ to select TV OUTPUT. Press MENU to enter.
Use ◀▶ to highlight NTSC or PAL (for Europe), press MENU to confirm the selection.
Press ESC to exit.
Note: changing the TV system output may affect the image scale displayed.
Power saving:
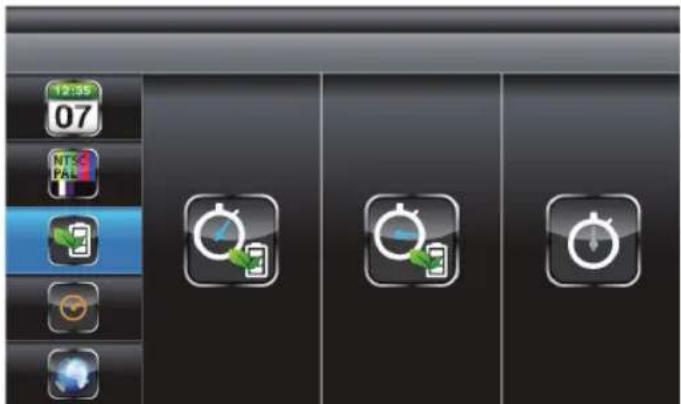
Not relevant for this model (only for LCD monitor).
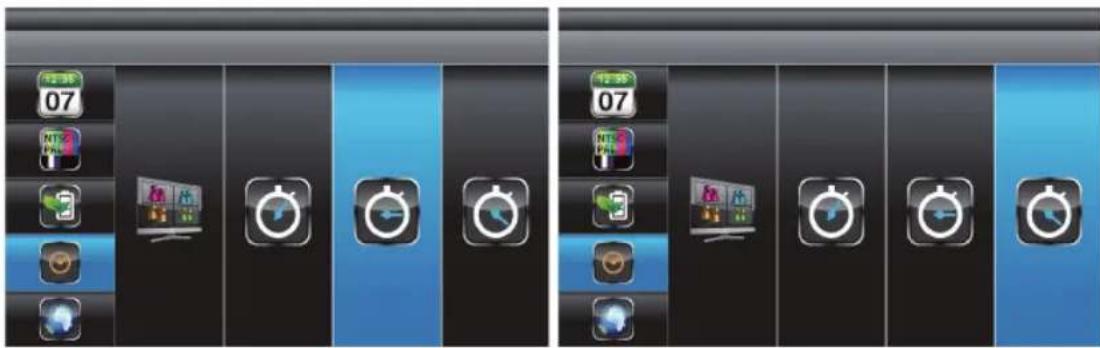
Multi channels idle display:

Use ▲▼ to select MULTI CHANNELS IDLE DISPLAY. Press MENU to enter.
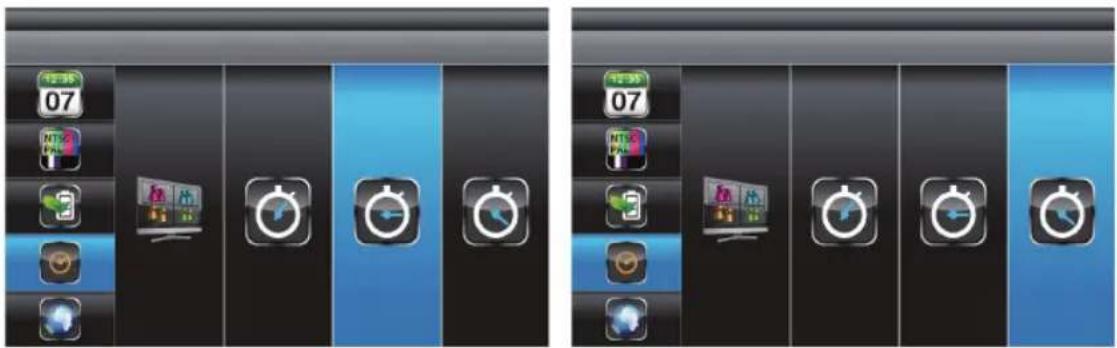
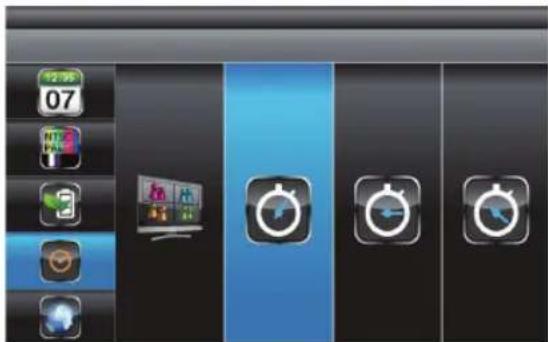
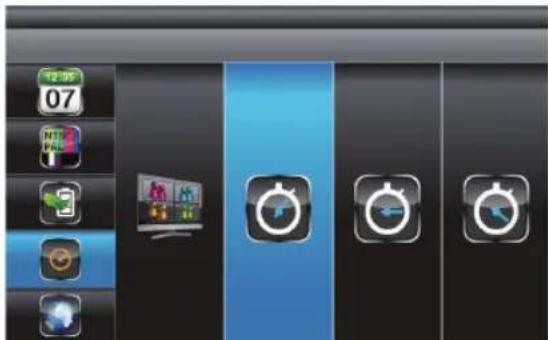
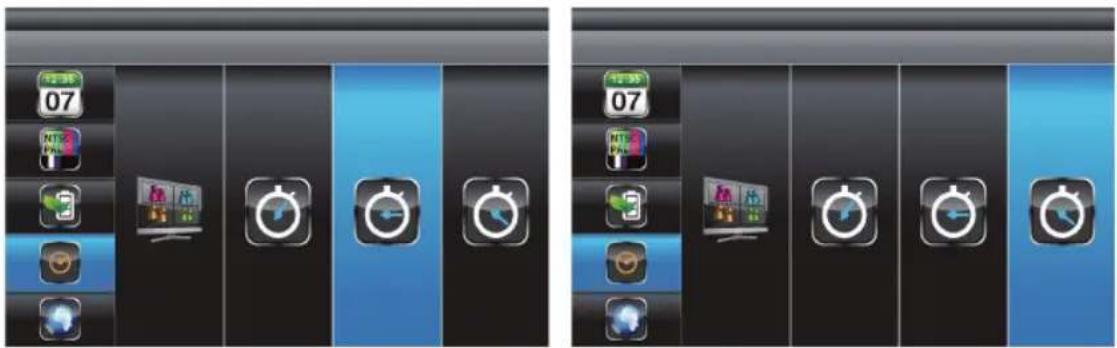
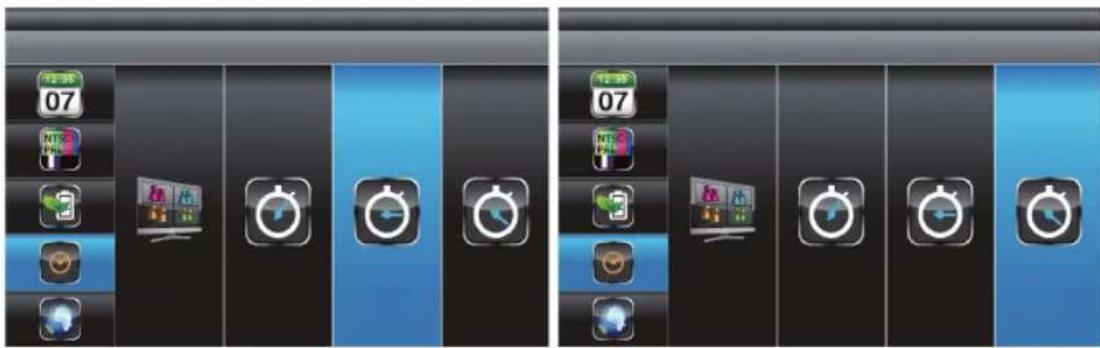
Use ◀▶ to select: DISPLAY QUAD DURING IDLE / AT 5 SEC INTERVAL / AT 10 SEC INTERVAL / AT 15 SEC INTERVAL, press MENU to confirm the selection and to exit.


Display QUAD mode 5 second interval

10 second interval 15 second interval
Note:
- Camera ON/OFF setting in CAMERA SETUP section will affect which camera(s) can be displayed during IDLE DISPLAY.
- Audio (single channel at anytime) will be available during QUAD mode (by default on channel 1 or the next available channel with a camera paired to the system), single FULL screen mode (auto switch to channel viewing at the time), or the channel triggered by motion.
- Audio channel will stay connected until the channel is switched.
- If set to 5/10/15 sec. interval then select SCAN ACTIVATED CAMERAS to achieve this display mode.
Default:

Use ▲▼ to select DEFAULT. Press MENU to enter.
Use ◀▶ to select the system language for SYSTEM RESTORE, press MENU to confirm the selection and the system will restore to factory default (only ENGLISH AVAILABLE).
Press ESC to exit.
Alarm buzzer
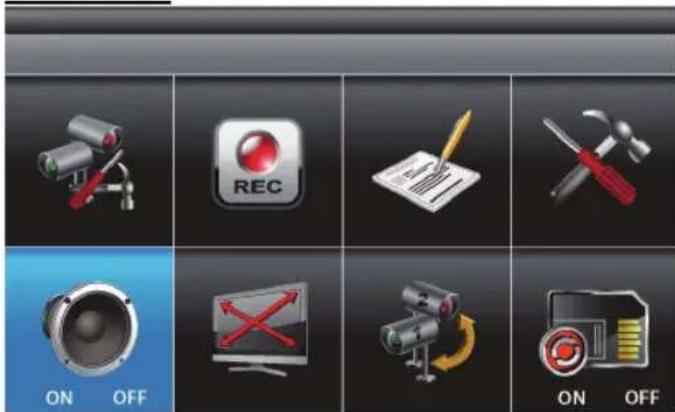
Select ALARM BUZZER, press MENU to turn the buzzer ON or OFF. When motion is detected by a camera, then a buzzer will sound via the loudspeaker of the monitor.
Pan Tilt Zoom

Select PAN TILT ZOOM, press MENU once to enter ZOOM mode, press MENU again to zoom in (2X).
When zooming in, use ▲▼◀▶ to select various view areas. Press MENU to zoom out.
In zoom out (1X), use ▲▼ to change the available channel.
Press ESC to exit.
Scan activated cameras

Select SCAN ACTIVATED CAMERAS, press MENU once to begin camera scan mode.
Note:
-
Camera ON/OFF setting in CAMERA SETUP section will affect which camera(s) can be displayed during IDLE DISPLAY. See Multi channels idle display interval setup.
-
The system will automatically activate QUAD display if the recording function is activated.
Memory card overwrite
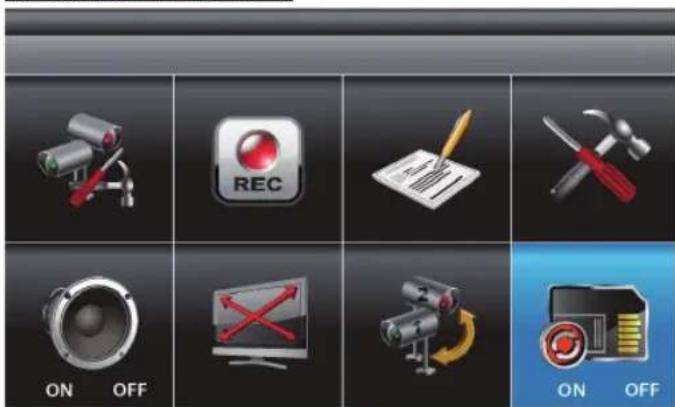
Select MEMORY CARD OVERWRITE, press MENU once to activate the overwrite function and press MENU again to de-activate.
NOTE:
- One of the following examples will appear on the display screen.
A. 1.89GB - space available on the memory card.
B. ERROR - either memory card is missing, locked or damaged.
- When the memory card is full, the system will display "MEMORY FULL PLEASE FORMAT" on the preview screen, if overwrite is not selected.
Playback software:
Sec24 Media Player is developed to play back recorded files from your wireless camera system.
Insert the CD ROM included in the packaging on your PC or notebook. A pop-up screen will appear automatically.
Open the folder and click on the .exe icon

In case the pop-up screen does not appear, then click on MY COMPUTER, and double-click on the drive where the CD-ROM assigned is by the PC or notebook (for example: E:)
Double-click to open and select Sec24 media player. Double-click to start the installation.
Follow the installation procedure for the complete installation of the software.
After installation you will find the shortcut icon on your desktop:
Note: others cannot playback recorded files without Sec24 Media Player; this is for your privacy protection.

Double-click on the shortcut to open the Sec24 Media Player. The following screen will appear.

- Channel 1 Playback Screen 7. Pause
- Channel 2 Playback Screen 8. Stop
- Channel 3 Playback Screen 9. Fast Rewind
- Channel 4 Playback Screen 10. Fast Forward
- Playback Progress Bar 11. Load Recorded File(s)
- Play 12. Channel Enable / Disable Select
For playback of the recorded files, click on "Load" to import the recorded files (SNX files).
During playback, all four channels will playback at once. For privacy concerns, the user is able to manually disable audio channel(s) and/or video channel(s).
Select Audio to turn off the sound.
Select 1 to turn off the video image from channel 1.
Select 2 to turn off the video image from channel 2.
Select 3 to turn off the video image from channel 3.
Select 4 to turn off the video image from channel 4.

Note: insert the Micro SD card in your PC or notebook before starting up the Sec24 Media Player.
Total recording time for memory cards:
| Micro SD Card capacity 640x480 (VGA) | |
| 1G | 60 |
| 2G | 110 |
| 8G | 400 |
| 16G | 950 |
| 32G | 1880 |
minutes
minutes
minutes
minutes
minutes
Maintenance:
Clean only with a dry cloth. Do not use cleaning solvents or abrasives.
Warranty:
No guarantee or liability can be accepted for any changes and modifications of the product or damage caused due to incorrect use of this product.
Disclaimer:
- Designs and specifications are subject to change without notice.
- All logos brands and product names are trademarks or registered trademarks of their respective holders and are hereby recognized as such.
- This manual was produced with care. However, no rights can be derived. König Electronic can not accept liability for any errors in this manual or their consequences.
- Keep this manual and packaging for future reference.
Disposal:

- This product is designated for separate collection at an appropriate collection point. Do not dispose of this product with household waste.
- For more information, contact the retailer or the local authority responsible for waste management.
DEUTSCH
Einführung:
Kameraeinstellungen

Zeitplan:

Wiedergabe:

Datum und Uhrzeit:
Anzeigemodus QUAD 5 Sekunden Intervall

10 Sekunden Intervall 15 Sekunden Intervall
Hinweis:
Tension: 5 V DC / 1A
Dimensions: 130 x 61 x 67 mm
Tension: 5 V DC / 1A
Dimensions: 122 x 122 x 26 mm
Poids : 395 g
Mode d'emploi:
Association (Pairing):

Programmation :

Lecture :
Date et heure :

Spanning: 5 V DC/1 A
Afmetingen: 130 x 61 x 67 mm
Spanning: 5 V DC/1 A
Afmetingen: 122 x 122 x 26 mm
Gewicht: 395 g
Gebruiksaanwijzing:
In-beeld weergave
Camera instellen

Afspelen:

Datum en tijd:


Toon QUAD-modus 5 seconden interval
10 seconden interval 15 seconden interval
Opmerking:
OSD (On Screen Display)

Programmazione:


Riproduzione:

Data e ora:
Horario:


Reproducción:

Fecha y Hora:

Utilice ▲▼ para seleccionar DATE AND TIME, pulse MENU para acceder.
Utilice ◀▶ para destacar el ajuste: YEAR / MONTH / DATE / HOUR / MINUTE.
Kamerabeállítás
Ütemezés:

Lejátszás:

Dátum és idő:

Käyttöohjeet:
Ruutunäyttö
Kameran asetukset
Aikataulu:

Toisto:
Päiväys ja aika:
Display QUAD mode 5 second interval

10 s intervalli 15 s intervallit

Huomaa:
Användaranvisningar
Sätta igång kameran

Uppspelning:
Datum och tid:

10 sekunders intervall 15 sekunders intervall
Anmärkning:
Pokyny k použití:
Nastavení kamery
Přehrávání:

Datum a čas:

Configurarea camerei video
Programare:

Redare:

Data și ora:
Modul de afişaj QUAD (CVADRUPLU) interval de 5 secunde
interval de 10 secunde interval de 15 secunde
Observatie:
Οδηγίες χρήσης:
Εικόνα οθόνης
Ρύθμιση κάμερας
Προγραμματισμός:

Αναπαραγωγή:

Ημερομηνία και ώρα:
Kameraopsætning
Vælg CAMERA SETUP, tryk på tasten MENU en gangfor at aktivere undermenuen.

X: MANUEL (manuel REC)
Afspilning:
Dato og klokkeslæt:
Brug ▲▼ til at markere DATE OG TIME, tryk på MENU for at aktivere den. Brug ◀▶ til at markere justering: YEAR / MONTH / DATE / HOUR / MINUTE. Brug ▲▼ til at justere hvert afsnit og tryk på MENU for at bekræfte justeringen. Tryk på ESC for at forlade.
TV-output:

Display FIRDELT tilstand 5 sekunders interval
10 sekunders interval 15 sekunders intervaller
Bemærk:
Vælg PAN TILT ZOOM, tryk på MENU en gang for at aktivere ZOOM tilstand, tryk på MENU igen for at zoome ind (2X).
Vælg MEMORY CARD OVERWRITE, tryk på MENU en gang for at aktivere overskrivningsfunktionen og tryk på MENU igen for at afbryde.
BEMÆRK:
Temperaturgrenser: -10 °C to +50 °C
Spenning: 5 V DC/1A
Alternativ: sett inn et mikro-SD-kort. Kun sett det inn när mottakeren er avslått.
Monter kameraet på veggen (eller i taket). Bor et 15 mm stort hull til kabelen.

Kameraoppsett
Bruk ▼▲ for å velge det aktuelle kameraet (1-4).
Bruk ◀▶ for å velge [PAIRING], [BRIGHTNESS] eller [CAMERA ON/OFF].
Sammenkobling:

Tidsplan:

Bruk ▲▼ for å velge MOTION DETECTION SENSITIVITY.

Bruk ▲▼ for å velge MASKING AREA.
Bruk ▲▼ for å velge RECORD TIME.
Avspilling:

Visning i QUAD-modus 5-sekunders intervaller
10-sekunders intervaller 15-sekunders intervaller
Merknad:
Description: Wireless camera system



- PACKAGING CONTENT SEC-TRANS50: PACKAGING CONTENT SEC-TRCAM30
- TECHNICAL SPECIFICATIONS
- CAMERA
- RECEIVER
- SAFETY PRECAUTIONS
- PRODUCT DESCRIPTION
- USER INSTRUCTIONS
- ON SCREEN DISPLAY
- OVERVIEW MENU
- SYSTEM MENU
- CAMERA SETUP
- RECORDER SETUP
- SCHEDULE
- MOTION DETECTION SENSITIVITY
- FORMAT MEMORY CARD
- MASKING AREA
- EVENT LIST
- SYSTEM SETUP
- NOTE
- PLAYBACK SOFTWARE
- MAINTENANCE
- WARRANTY
- DISCLAIMER
- DISPOSAL
- DEUTSCH
- EINFÜHRUNG
- KAMERAEINSTELLUNGEN
- WIEDERGABE
- DATUM UND UHRZEIT
- HINWEIS
- MODE D'EMPLOI
- ASSOCIATION (PAIRING)
- LECTURE
- DATE ET HEURE
- GEBRUIKSAANWIJZING
- IN-BEELD WEERGAVE
- CAMERA INSTELLEN
- AFSPELEN
- DATUM EN TIJD
- OPMERKING
- OSD (ON SCREEN DISPLAY)
- RIPRODUZIONE
- DATA E ORA
- REPRODUCCIÓN
- KAMERABEÁLLÍTÁS
- DÁTUM ÉS IDŐ
- KÄYTTÖOHJEET
- RUUTUNÄYTTÖ
- KAMERAN ASETUKSET
- PÄIVÄYS JA AIKA
- HUOMAA
- ANVÄNDARANVISNINGAR
- SÄTTA IGÅNG KAMERAN
- ANMÄRKNING
- POKYNY K POUŽITÍ
- NASTAVENÍ KAMERY
- CONFIGURAREA CAMEREI VIDEO
- REDARE
- DATA ȘI ORA
- OBSERVATIE
- ΟΔΗΓΊΕΣ ΧΡΉΣΗΣ
- ΕΙΚΌΝΑ ΟΘΌΝΗΣ
- ΡΎΘΜΙΣΗ ΚΆΜΕΡΑΣ
- KAMERAOPSÆTNING
- BEMÆRK
- KAMERAOPPSETT
- SAMMENKOBLING
- MERKNAD
Brand : KONIG
Model : SEC-TRANS50
Category : Surveillance Camera