
Twin 10000 - Water pump AL-KO - Free user manual and instructions
Find the device manual for free Twin 10000 AL-KO in PDF.


| Product Type | Water Pump |
| Brand | AL-KO |
| Model | Twin 10000 |
| Max Flow Rate | 10000 L/h |
| Max Head | 48 m |
| Power Consumption | 1100 W |
| Voltage | 230 V ~ 50 Hz |
| Inlet / Outlet | 1" (25 mm) / 1" (25 mm) |
| Protection Class | IPX4 |
| Pump Type | Twin impeller centrifugal pump |
| Body Material | Stainless steel and plastic |
| Weight | 13.5 kg |
| Dimensions (L x W x H) | 350 x 200 x 250 mm |
| Functions | Automatic shut-off, thermal protection, integrated check valve |
| Maintenance | Clean filter regularly, check seals and impeller |
| Safety | Do not run dry, use residual current device (RCD) |
| Spare Parts & Reparability | Available through AL-KO service centers |
| General Information | Suitable for garden irrigation and water transfer |
Frequently Asked Questions - Twin 10000 AL-KO
User questions about Twin 10000 AL-KO
0 question about this device. Answer the ones you know or ask your own.
Ask a new question about this device
Download the instructions for your Water pump in PDF format for free! Find your manual Twin 10000 - AL-KO and take your electronic device back in hand. On this page are published all the documents necessary for the use of your device. Twin 10000 by AL-KO.
USER MANUAL Twin 10000 AL-KO
D GB
F I
E NL
DK S
FIN CZ
SK H
PL RUS
UA SLO
HR TR
P)
INFORMATION | MANUALS | SERVICE
TWIN 10000 COMBI TWIN 14000 COMBI







Please read the operating instructions carefully before you use the submersible pump to prevent accidents and ensure the trouble-free operation of the pump.
Make sure you keep the instructions at hand for quick reference. If you resell your pump or give it to another user, please include these instructions in the sale or the gift.
The following symbols are used in the instructions:

DANGER
This symbol draws your attention to work processes or operating procedures that have to be carefully observed in order to prevent serious injury to the user or another person.

CAUTION
This symbol draws your attention to information you need to ensure that your pump is not damaged due to improper or careless use.

PLEASE NOTE
The information symbol draws your attention to essential technical requirements.
For Your Safety

The submersible pump may only be connected to an electrical device which is compliant with DIN/VDE 0100, Parts 737, 738 and 702. Make sure that fuse protection in the form of a 10 A automatic cut-out and a fault current guard circuit with a nominal fault current of 10/30 mA is installed.

The supply voltage and current specified on the type plate must be identical with the voltage and current of your electrical system.

If you need to connect your pump to an extension cord, make sure that the cable is 3 x 1.5 mm 2 that it corresponds to type H07RN-F and is compliant with DIN 57282/57245. The connector must be splash-proof. Cable drums must be completely unwound.

The submersible pump may not be operated by anyone
- who has not read or does not fully understand the operating manual or - is under the age of 16.

The submersible pump may not be used for any other than its designated use. Before putting the pump into operation, make sure that
- the submersible pump, the electric cable and the plug are not worn or damaged and - Nobody is near, touching or in the liquid to be pumped.

Do not operate the submersible pump if it is damaged. Necessary repairs must be carried out in a qualified AL-KO service centre.

Never use the electric cable to lift, carry or attach the submersible pump to another object. Do not pull on the cable when unplugging the pump.

Make sure that the pump is unplugged before beginning any maintenance, repair or cleaning work. In the event of a malfunction, immediately unplug the pump. Make sure that the plug does not get wet.

Do not attempt to make any changes or modifications to the submersible pump by yourself. You may endanger your life or invalidate the warranty.
Use
Designated use
- The submersible pump is designed for home use in your house or garden. Please observe the technical data given in the instructions before putting the pump into operation.
Your submersible pump has been designed for use in the following applications:
- emptying your cellar or house after a flood, - emptying containers or pumping liquid from one container into another, - pumping water from wells, - aerating garden ponds or artificial brooks and streams, - emptying drains or cisterns.
The submersible pump is designed to pump only the following liquids:
- clear water, - rain water,
- chlorine water (pool water),
- water for domestic use,
- waste water with no more than 5%
suspended matter and a grain size of max. 30 mm diameter (TWIN 10000 max. 20 mm).
Prohibited use
- Your submersible pump is not intended for permanent operation. The pump may not be used to pump the following liquids:
- drinking water,
- salt water,
– beverages or liquid foods, - corrosives or chemicals
– acids or combustible, explosive or gas-forming liquids,
– liquids with a temperature above 35° C - sandy water or water containing abrasives,
Description of the Pump
Submersible pump (Fig. A)
1 Swimmer switch
2 Cable clamp
3 Electric cable
4 Handle
5 Multi-size nipple
6 Elbow connector
7 Pump housing
8 Adjustable suction basket
9 Click-stop screws
Function of the pump
The submersible pump sucks the liquid to be pumped into the pump through the suction openings of the adjustable suction basket and pumps it out at the outlet. With the suction basket in "bottom" setting, clear and wastewater can be pumped, with the suction basket in "top" setting, only clear water can be pumped.
Thermal protection
Your submersible pump is equipped with a thermal protection switch, which automatically switches off the pump in case of overheating. The pump will remain off until it has cooled down. After about 15 - 20 minutes, the pump will automatically switch on.
Setting up and Operating the Pump
Assembling the pressure line
- Screw the elbow connector (6) into the pump outlet.
- Screw the multi-size nipple (5) into the elbow connector (6).
- Attach a hose to the multi-size nipple.

You can cut off the tip of the multi-size nipple to fit the diameter of the hose you are using. Using a hose with the largest possible diameter will greatly improve the performance of the pump.
- Uncoil the electric cable completely.

Make sure that any electrical connections are not exposed to water and do not lie within the outflow of the pump.

When placing the pump in the liquid, make sure to let it down slowly. You may need to tilt the pump slightly so that air trapped in the body is released through the outlet holes (air removal). Air bubbles will appear under the water. When placing the pump into water for the first time, it can take several seconds before air is released.
Pay attention to secure placement of the pump. If the base should be sandy or muddy or rocky and uneven, place the pump on a suitable hard, flat surface or suspend it from a rope attached to a secure object. Make sure to leave adequate room between the pump and the bottom so that it cannot suck up solid matter.

Make sure that the pump does not suck in solid matter. Sand or other abrasive particles suspended in the liquid will lead to increased wear and tear and may impact the performance of your pump. Before lowering the pump into a well or a cistern, attach a rope to the handle. When placing the pump inside a cistern, make sure that the shaft is large enough for the pump to fit. For min. shaft dimensions, see Figure B.

Place a cover over the cistern so that no one will fall in.
Adjusting the suction basket (Fig. D)
- Release the suction basket by turning it to the right (1), move upwards or downwards (2) and lock back in by turning it to the left (3).
Automatic operation

See technical data for cut-in on and cut-off levels.
In automatic operation, place the suction basket into the "bottom" position in order to achieve the greatest possible pumping output.
- Plug the pump into the socket and set the operation selection switch to "AUTO" (Fig. F). As soon as the pump has reached the cut-in (= START) level, the float switch will automatically switch the pump on. When the liquid has fallen below the cut-off (= STOP) level, the pump will automatically switch off, see technical data.

Take suitable measures, e.g. installation of an alarm or a back-up pump, to ensure that flooding will not occur if the pump should malfunction.

Make sure that the pump does not run on a blocked or closed pressure hose.
Manual operation

In manual operation, the water can be pumped out up to a residual water level of approx. 5 mm.
The minimum water level for operation must be 6 cm.
Pumping out remaining liquid
Before you can pump out any remaining liquid, set the suction basket to "top" position and proceed as follows:
- Plug the electric cable into the socket and set the operation selection switch to "MAN" (Fig. F). The pumping will begin.

If the water level is lower than 6 cm the pumping will be accelerated if, after 30 s of operation, you switch the pump off and back on for 1 – 2 s. Repeat this several times, if necessary.

While pumping out remaining liquid, make sure to keep the pump under constant observation and avoid allowing the pump to suck air. Upon reaching the residual water level, switch the pump off by switching the operation selection switch to "AUTO". The pump will then switch back on for automatic operation when the cut-in level is reached.

If the level of the remaining water drops below 5 mm, the pump will suck in air. Before using the pump again to drain liquid, the air trapped in the pump will have to be let out (see Setting up and Operating the Pump).
Adjusting the cut-in and cut-off levels
- The float switch cable is attached to the pump housing. You can adjust the cut-in = START and cut-off = STOP levels for operation by simply changing the height of the switch as desired. Recommended length of the float switch cable is approx. 120 mm.
Switching off the Pump
- To switch off the pump, just pull the plug of the electric cable from the socket.
Maintenance and Cleaning

Before beginning any maintenance or cleaning work, make sure that the pump has been unplugged and take precautions to ensure that it cannot be switched on during work!
Cleaning the pump
- If you have used your pump to pump chlorine water (pool water) or liquids which leave a residue, flush your pump out with clear water after use.
- Clean the suction openings of the suction basket and pump base with clear water as required.
Dismantling the suction basket (Fig. E)
- Remove click-stop screws (3) and pull the suction basket (2) off of the pump base (1).
- Clean suction basket and pump base.
- Re-mount suction basket and screw in the click-stop screws.
Protect from frost

Your pump is susceptible to low temperatures. Make sure to empty the pump of residual liquid and store it so that it is protected from frost.
Disposal
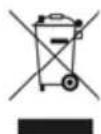
The device must not be included in household waste, but rather, it must be disposed of professionally. The appliance, its packaging and accessories are all produced from recyclable materials and must be disposed of accordingly.
Malfunctions

Before you attempt to remedy any malfunction of your pump, pull the plug to prevent injury or death due to electrocution!
What is wrong? What is the possible reason? How to remedy the malfunction:
| Motor does not run. Impeller is blocked. | Remove blockage in inlet area.Clean the impeller with a jet of water. | |
| Thermal switch has switched off. | Wait until the thermal switch has automatically turned the pump on again. Check water temperature.Have the pump checked. | |
| No power have a qualified electrician check the power supply. | ||
| Float switch does not work even though liquid is above cut-in level. Send pump to your nearest AL-KO service centre. | ||
| Submersible pump runs but is not pumping out liquid. | Air is trapped in the pump hous-ing. | Tilt the pump to let the trapped air out.Wait for a maximum of 3 minutes until the air cushion has escaped from the pump space.In flat suction operation, switch on an off briefly several times, if necessary. |
| Suction slots are blocked. | Remove blockage and clean suction slots. | |
| Pressure line is blocked. | Clear blockage in pressure line. | |
| Pressure hose is bent. | Straighten out pressure hose. | |
| Pressure blockage Clear blockage | ||
| Submersible pump is only pumping out liquid very slowly or weakly. | Hose diameter is too small. | Attach a hose with a larger diam-ter. |
| Suction slots are blocked. | Remove blockage and clean suction slots. | |
| Pumping height is too great. | Lower pumping height. | |
If you are unable to remedy a malfunction, please call the AL-KO service centre nearest you.
Introduction
Please read the operating instructions carefully before you use the submersible pump to prevent accidents and ensure the trouble-free operation of the pump.
Make sure you keep the instructions at hand for quick reference. If you resell your pump or give it to another user, please include these instructions in the sale or the gift.
The following symbols are used in the instructions:

DANGER
This symbol draws your attention to work processes or operating procedures that have to be carefully observed in order to prevent serious injury to the user or another person.

CAUTION
This symbol draws your attention to information you need to ensure that your pump is not damaged due to improper or careless use.

PLEASE NOTE
The information symbol draws your attention to essential technical requirements.
For Your Safety

The submersible pump may only be connected to an electrical device which is compliant with DIN/VDE 0100, Parts 737, 738 and 702. Make sure that fuse protection in the form of a 10 A automatic cut-out and a fault current guard circuit with a nominal fault current of 10/30 mA is installed.

The supply voltage and current specified on the type plate must be identical with the voltage and current of your electrical system.

If you need to connect your pump to an extension cord, make sure that the cable is 3 x 1.5 mm 2 that it corresponds to type H07RN-F and is compliant with DIN 57282/57245. The connector must be splash-proof. Cable drums must be completely unwound.

The submersible pump may not be operated by anyone
- who has not read or does not fully understand the operating manual or - is under the age of 16.

The submersible pump may not be used for any other than its designated use. Before putting the pump into operation, make sure that
- the submersible pump, the electric cable and the plug are not worn or damaged and - Nobody is near, touching or in the liquid to be pumped.

Do not operate the submersible pump if it is damaged. Necessary repairs must be carried out in a qualified AL-KO service centre.

Never use the electric cable to lift, carry or attach the submersible pump to another object. Do not pull on the cable when unplugging the pump.

Make sure that the pump is unplugged before beginning any maintenance, repair or cleaning work. In the event of a malfunction, immediately unplug the pump. Make sure that the plug does not get wet.

Do not attempt to make any changes or modifications to the submersible pump by yourself. You may endanger your life or invalidate the warranty.
Use
Designated use
- The submersible pump is designed for home use in your house or garden. Please observe the technical data given in the instructions before putting the pump into operation.
Your submersible pump has been designed for use in the following applications:
- emptying your cellar or house after a flood, - emptying containers or pumping liquid from one container into another, - pumping water from wells, - aerating garden ponds or artificial brooks and streams, - emptying drains or cisterns.
The submersible pump is designed to pump only the following liquids:
- clear water, - rain water,
– chlorine water (pool water),
– water for domestic use,
- waste water with no more than 5%
suspended matter and a grain size of max. 30 mm diameter (TWIN 10000 max. 20 mm).
Prohibited use
- Your submersible pump is not intended for permanent operation. The pump may not be used to pump the following liquids:
- drinking water,
- salt water,
– beverages or liquid foods,
– corrosives or chemicals
– acids or combustible, explosive or gas-forming liquids,
– liquids with a temperature above 35 °C - sandy water or water containing abrasives,
Description of the Pump
Submersible pump (Fig. A)
1 Swimmer switch
2 Cable clamp
3 Electric cable
4 Handle
5 Multi-size nipple
6 Elbow connector
7 Pump housing
8 Adjustable suction basket
9 Click-stop screws
Function of the pump
The submersible pump sucks the liquid to be pumped into the pump through the suction openings of the adjustable suction basket and pumps it out at the outlet. With the suction basket in "bottom" setting, clear and wastewater can be pumped, with the suction basket in "top" setting, only clear water can be pumped.
Thermal protection
Your submersible pump is equipped with a thermal protection switch, which automatically switches off the pump in case of overheating. The pump will remain off until it has cooled down. After about 15 - 20 minutes, the pump will automatically switch on.
Setting up and Operating the Pump
Assembling the pressure line
- Screw the elbow connector (6) into the pump outlet.
- Screw the multi-size nipple (5) into the elbow connector (6).
- Attach a hose to the multi-size nipple.

You can cut off the tip of the multi-size nipple to fit the diameter of the hose you are using. Using a hose with the largest possible diameter will greatly improve the performance of the pump.
- Uncoil the electric cable completely.

Make sure that any electrical connections are not exposed to water and do not lie within the outflow of the pump.

When placing the pump in the liquid, make sure to let it down slowly. You may need to tilt the pump slightly so that air trapped in the body is released through the outlet holes (air removal). Air bubbles will appear under the water. When placing the pump into water for the first time, it can take several seconds before air is released.
Pay attention to secure placement of the pump. If the base should be sandy or muddy or rocky and uneven, place the pump on a suitable hard, flat surface or suspend it from a rope attached to a secure object. Make sure to leave adequate room between the pump and the bottom so that it cannot suck up solid matter.

Make sure that the pump does not suck in solid matter. Sand or other abrasive particles suspended in the liquid will lead to increased wear and tear and may impact the performance of your pump. Before lowering the pump into a well or a cistern, attach a rope to the handle. When placing the pump inside a cistern, make sure that the shaft is large enough for the pump to fit. For min. shaft dimensions, see Figure B.

Place a cover over the cistern so that no one will fall in.
Adjusting the suction basket (Fig. D)
- Release the suction basket by turning it to the right (1), move upwards or downwards (2) and lock back in by turning it to the left (3).
Automatic operation

See technical data for cut-in on and cut-off levels.
In automatic operation, place the suction basket into the "bottom" position in order to achieve the greatest possible pumping output.
- Plug the pump into the socket and set the operation selection switch to "AUTO" (Fig. F). As soon as the pump has reached the cut-in (= START) level, the float switch will automatically switch the pump on. When the liquid has fallen below the cut-off (= STOP) level, the pump will automatically switch off, see technical data.

Take suitable measures, e.g. installation of an alarm or a back-up pump, to ensure that flooding will not occur if the pump should malfunction.

Make sure that the pump does not run on a blocked or closed pressure hose.
Manual operation

In manual operation, the water can be pumped out up to a residual water level of approx. 5 mm.
The minimum water level for operation must be 6 cm.
Pumping out remaining liquid
Before you can pump out any remaining liquid, set the suction basket to "top" position and proceed as follows:
- Plug the electric cable into the socket and set the operation selection switch to "MAN" (Fig. F). The pumping will begin.

If the water level is lower than 6 cm the pumping will be accelerated if, after 30 s of operation, you switch the pump off and back on for 1 – 2 s. Repeat this several times, if necessary.

While pumping out remaining liquid, make sure to keep the pump under constant observation and avoid allowing the pump to suck air. Upon reaching the residual water level, switch the pump off by switching the operation selection switch to "AUTO". The pump will then switch back on for automatic operation when the cut-in level is reached.

If the level of the remaining water drops below 5 mm, the pump will suck in air. Before using the pump again to drain liquid, the air trapped in the pump will have to be let out (see Setting up and Operating the Pump).
Adjusting the cut-in and cut-off levels
- The float switch cable is attached to the pump housing. You can adjust the cut-in = START and cut-off = STOP levels for operation by simply changing the height of the switch as desired. Recommended length of the float switch cable is approx. 120 mm.
Switching off the Pump
- To switch off the pump, just pull the plug of the electric cable from the socket.
Maintenance and Cleaning

Before beginning any maintenance or cleaning work, make sure that the pump has been unplugged and take precautions to ensure that it cannot be switched on during work!
Cleaning the pump
- If you have used your pump to pump chlorine water (pool water) or liquids which leave a residue, flush your pump out with clear water after use.
- Clean the suction openings of the suction basket and pump base with clear water as required.
Dismantling the suction basket (Fig. E)
- Remove click-stop screws (3) and pull the suction basket (2) off of the pump base (1).
- Clean suction basket and pump base.
- Re-mount suction basket and screw in the click-stop screws.
Protect from frost

Your pump is susceptible to low temperatures. Make sure to empty the pump of residual liquid and store it so that it is protected from frost.
Disposal

The device must not be included in household waste, but rather, it must be disposed of professionally. The appliance, its packaging and accessories are all produced from recyclable materials and must be disposed of accordingly.
Malfunctions

Before you attempt to remedy any malfunction of your pump, pull the plug to prevent injury or death due to electrocution!
What is wrong? What is the possible reason? How to remedy the malfunction:
| Motor does not run. Impeller is blocked. | Remove blockage in inlet area.Clean the impeller with a jet of water. | |
| Thermal switch has switched off. | Wait until the thermal switch has automatically turned the pump on again. Check water temperature.Have the pump checked. | |
| No | power have a qualified electrician check the power supply. | |
| Float switch does not work even though liquid is above cut-in level. | Send pump to your nearest AL-KO service centre. | |
| Submersible pump runs but is not pumping out liquid. | Air is trapped in the pump hous-ing. | Tilt the pump to let the trapped air out.Wait for a maximum of 3 minutes until the air cushion has escaped from the pump space.In flat suction operation, switch on an off briefly several times, if necessary. |
| Suction slots are blocked. | Remove blockage and clean suction slots. | |
| Pressure line is blocked. | Clear blockage in pressure line. | |
| Pressure hose is bent. | Straighten out pressure hose. | |
| Pressure blockage Clear blockage | ||
| Submersible pump is only pumping out liquid very slowly or weakly. | Hose diameter is too small. | Attach a hose with a larger diameter. |
| Suction slots are blocked. | Remove blockage and clean suction slots. | |
| Pumping height is too great. | Lower pumping height. | |
If you are unable to remedy a malfunction, please call the AL-KO service centre nearest you.
Introduzione
Antonio De Filippo, Managing Director
Garantie
EC declaration of conformity
We hereby declare that this product, in the form in which it is marketed, meets the requirements of the harmonised EU guidelines, EU safety standards, and the product-specific standards.
Product
Submersible pump, electric
Serial number
G3023025
Model
TWIN 10000 COMBI
TWIN 14000 COMBI
Manufacturer
AL-KO Geräte GmbH
Ichenhauser Str. 14
89359 KOETZ
DEUTSCHLAND
EU directives
2006/95/EG
2004/108/EG
Executive Officer
Anton Eberle
Ichenhauser Str. 14
89359 KOETZ
DEUTSCHLAND
Harmonised standards
EN 60335-1; VDE 0700-1:2007-02
EN 60335-2-41; VDE 0700-41:2004-12
EN 60335-2-41/A2; VDE 0700-41/A2:2009-02
EN 55014-1; VDE 0875-14-1:2007-06
EN 55014-1/A1; VDE 0875-14-1/A1:2008-12
EN 55014-2; VDE 0875-14-2:2009-06
EN 61000-3-2; VDE 0838-2:2006-10
EN 61000-3-2/A1; VDE 0838-2/A1:2007-05
EN 61000-3-2/A7; VDE0838-2/A7:2007-06
EN 61000-3-2/A4; VDE 0838-2/A4:2007-06
EN 61000-3-3; VDE 0838-3:2009-06
Kötz, 2009-10-22
Antonio De Filippo, Managing Director
Warranty
If any material or manufacturing defects are found during the statutory customer protection period, we will either repair or replace the equipment, whichever we consider the more appropriate. This statutory period may vary according to the legislation in force in the country where the equipment was purchased.
Our warranty is valid only if: The warranty is no longer valid if:
The equipment has been used properly ■
The operating instructions have been followed ■
Genuine replacement parts have been used ■
The equipment has been tampered with ■
Technical modifications have been made ■
The trimmer was not used for its intended purpose (for example, used for commercial or communal applications)
The following are not covered by warranty:
Paint damage due to normal wear ■
Wear parts identified by a border ■ XXX (X) on the spare parts list
Combustion motors – these are covered by a separate warranty from the manufacturer concerned
To make a claim under warranty, please take this statement of warranty and proof of purchase to the nearest authorised customer service centre. This warranty does not affect the usual statutory rights of the customer relative to the seller.
Antonio De Filippo, Managing Director
Garantie
Antonio De Filippo, Managing Director
Garanzia
Antonio De Filippo, Managing Director
Garantía
Antonio De Filippo, Managing Director
Garantie
Antonio De Filippo, Managing Director
Garanti
Antonio De Filippo, Managing Director
Garanti
Antonio De Filippo, Managing Director
Takuu
Antonio De Filippo, Managing Director
Záruka
Antonio De Filippo, Managing Director
Záruka
Antonio De Filippo, Managing Director
Garancia
Antonio De Filippo, Managing Director
Gwarancja
Antonio De Filippo, Managing Director
Гарантия
Antonio De Filippo, Managing Director
Гарантія
Antonio De Filippo, Managing Director
Garancija
Antonio De Filippo, Managing Director
Jamstvo
Eventualne greške na materijalu ili greške pri proizvodnji koje se pojave na uređaju otklanjamo za vrijeme zakonskog jamstvenog roka za zahtjeve u slučaju nedostatak po našem izboru u vidu popravke ili zamjenske isporuke. Jamstveni rok određuje se prema zakonu zemlje u kojoj je uređaj kupljen.
Naše jamstvo vrijedi samo u slučaju: Pravo na jamstvo gubi se u slučaju:
Antonio De Filippo, Managing Director
Garanti
Antonio De Filippo, Managing Director
Garantia
Country Company Telephone Fax
| A | AL-KO Kober Ges.m.b.H. | (+43) 3578/2515227 | (+43) 3578/251538 |
| AUS | AL-KO International PTY. LTD | (+61) 3/9767-3700 | (+61) 3/9767-3799 |
| B/L | Eurogarden NV | (+32) 16/805427 | (+32) 16/805425 |
| BG | Valerii S&M Group SJ | (+359) 2 942 34 02 | (+359) 2 942 34 10 |
| CH | AL-KO Kober AG | (+41) 56/4183150 | (+41) 56/4183160 |
| CZ | AL-KO Kober Spol.sr.o. | (+420) 382/210381 | (+420) 382/212782 |
| D | AL-KO Geräte GmbH | (+49) 8221/203-0 | (+49) 8221/203-138 |
| DK | AL-KO Ginge A/S | (+45) 98821000 | (+45) 98825454 |
| EST/LT/LV | AL-KO Kober SIA | (+371) 67409330 | (+371) 67807018 |
| F | AL-KO S.A.S. | (+33) 3/85-763540 | (+33) 3/85-763588 |
| GB | Rochford Garden Machinery Ltd. | (+44) 1963/828050 | (+44) 1963/828052 |
| H | AL-KO KFT | (+36) 29/537050 | (+36) 29/537051 |
| HR | Brun.ko.-prom d.o.o. | (+385) 1 3096 567 | (+385) 1 3096 567 |
| I | AL-KO Kober GmbH / SRL | (+39) 039/9329311 | (+39) 039/9329390 |
| IN | AGRO-COMMERCIAL | (+91) 3322874206 | (+91) 3322874139 |
| IQ | Gulistan Com | (+946) 750 450 80 64 | |
| IRL | Cyril Johnston & Co. Ltd. | (+44) 2890813121 | (+44) 2890914220 |
| LY | ASHOFAN FOR AGRICULT. ACC. | (+218) 512660209 | (+218) 512660209 |
| MA | BADRA Sarl | (+212) 022447128 | (+212) 022447130 |
| MK | Techno Geneks | (+389) 2 2551801 | (+389) 2 2520175 |
| N | AL-KO GINGE A/S | (+47) 64862550 | (+47) 64862554 |
| NL | O.DE LEEUW GROENTECHNIEK | (+31) 38/444 6160 | (+31) 38/444 6358 |
| PL | AL-KO Kober z.o.o. | (+48) 61/816 1925 | (+48) 61/816 1980 |
| RO | OMNITECH Technology SRL | (+4) 021 326 36 72 | (+4) 021 326 36 79 |
| RUS | OOO AL-KO Kober | (+7) 499/168 8718 | (+7) 499/96600-00 |
| RUS | AL-KO St. Petersburg GmbH | (+7) 812/4461075 | (+7) 812/4461075 |
| S | AL-KO Ginge Svenska AB | (+46) (0) 31573580 | (+46) (0) 31575620 |
| SK | AL-KO Kober Slovakia Spol.s.r.o. | (+421) 2/45994112 | (+421) 2/45648117 |
| SLO | DARKO OPARA S.P. | (+386) 17225858 | (+386) 17225851 |
| SRB | Agromarket doo | (+381) 34/300765 | (+381) 34/354327 |
| TR | ZIMAS A.S. | (+90) 232 4580586 | (+90) 232 4572697 |
| UA | TOV AL-KO Kober | (+380) 44/4923396 | (+380) 44/4923397 |


- TWIN 10000 COMBI TWIN 14000 COMBI
- DANGER
- CAUTION
- PLEASE NOTE
- FOR YOUR SAFETY
- USE
- DESIGNATED USE
- PROHIBITED USE
- DESCRIPTION OF THE PUMP
- FUNCTION OF THE PUMP
- THERMAL PROTECTION
- SETTING UP AND OPERATING THE PUMP
- ASSEMBLING THE PRESSURE LINE
- ADJUSTING THE SUCTION BASKET (FIG. D)
- AUTOMATIC OPERATION
- MANUAL OPERATION
- PUMPING OUT REMAINING LIQUID
- ADJUSTING THE CUT-IN AND CUT-OFF LEVELS
- SWITCHING OFF THE PUMP
- MAINTENANCE AND CLEANING
- CLEANING THE PUMP
- DISMANTLING THE SUCTION BASKET (FIG. E)
- PROTECT FROM FROST
- DISPOSAL
- MALFUNCTIONS
- INTRODUCTION
- INTRODUZIONE
- GARANTIE
- EC DECLARATION OF CONFORMITY
- PRODUCT
- SERIAL NUMBER
- MODEL
- MANUFACTURER
- EU DIRECTIVES
- EXECUTIVE OFFICER
- HARMONISED STANDARDS
- WARRANTY
- GARANZIA
- GARANTÍA
- GARANTI
- TAKUU
- ZÁRUKA
- GARANCIA
- GWARANCJA
- ГАРАНТИЯ
- ГАРАНТІЯ
- GARANCIJA
- JAMSTVO
- GARANTIA
Brand : AL-KO
Model : Twin 10000
Category : Water pump