
EWS-165 - Weather Station HAMA - Free user manual and instructions
Find the device manual for free EWS-165 HAMA in PDF.


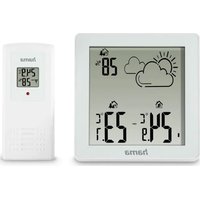
| Product type | Weather station with outdoor sensor |
| Brand | Hama |
| Model | EWS-165 |
| Dimensions (base station) | Approx. 130 x 80 x 20 mm |
| Weight (base station) | Approx. 150 g |
| Dimensions (outdoor sensor) | Approx. 65 x 95 x 25 mm |
| Base station power supply | 3 AA batteries (not included) |
| Outdoor sensor power supply | 2 AA batteries (not included) |
| Radio range | Up to 100 m in open field |
| Indoor temperature | Display from -5°C to +50°C |
| Indoor humidity | Display from 20% to 95% RH |
| Outdoor temperature | Display from -20°C to +60°C |
| Atmospheric pressure | Display in hPa with trend |
| Main functions | Indoor/outdoor temperature, humidity, pressure, weather trends, alarm, DCF-77 radio-controlled time |
| Display | LCD screen with backlight |
| Care and cleaning | Clean with a soft, dry cloth. Do not use harsh chemicals. |
| Safety | Do not expose to moisture, use quality alkaline batteries. |
| Spare parts and repairability | Outdoor sensor available as an option. For repairs, contact Hama customer service. |
| General information | Wireless weather station for domestic use. |
Frequently Asked Questions - EWS-165 HAMA
User questions about EWS-165 HAMA
0 question about this device. Answer the ones you know or ask your own.
Ask a new question about this device
Download the instructions for your Weather Station in PDF format for free! Find your manual EWS-165 - HAMA and take your electronic device back in hand. On this page are published all the documents necessary for the use of your device. EWS-165 by HAMA.
USER MANUAL EWS-165 HAMA
OperatingInstructions
Bedienungsanleitung
Moded'emploi
Instruccionesdeuso
Gebruiksaanwijzing
Istruzioniperl'uso
Instrukcjaobsługi
Használatiútmutató
Manualdeutilizare
Návodkpoužití
Návodnapoužitie
Manualdeinstruções
Bruksanvisning
natural_image
Technical line drawing of a mobile phone casing and its internal components (no text or symbols)ControlsandDisplays
ABasestation
-
Measuringstationwirelesssymbol
-
Channeldisplay
-
Outdoor temperature
-
Room temperature
5.Wirelesssymbol
6.Timezone
7.Day
- Outdoor temperature trend
9.Roomtemperaturetrend
10.Time
11.Weekday/seconds
- Alarmsymbol
13.Month
14.▼button
=reducingthecurrentsetting/manuallysearchingforthe signalfromthemeasuringstation
15.CHANNELbutton
=channelselection
16.▲button
=increasing the current setting/activating/deactivating manual radiosignal reception
17.MODEbutton
=Settings/confirmationofthesettingvalue/switching betweenseconds,dayoftheweekandtimezonedisplay
18.ALARMON/OFFbutton
=display/settingalarmmodes
19.MEMbutton
=accessing/resettingthestoredmaximum/minimumvalues
20.SNOOZEbutton
=stopsthealarm
21.Openingforwallmounting
22.Base
23.Batterycompartment
BMeasuringstation
- Batterycompartment
ThankyouforchoosingaHamaproduct.
Takeyourtimeandreadthefollowinginstructionsand informationcompletely.Pleasekeeptheseinstructionsina safeplaceforfuturereference.Ifyousellthedevice,please passtheseoperatinginstructionsontothenewowner.
1. ExplanationofWarningSymbolsandNotes
Warning
This symbol is used to indicate safety instructions to draw your attention to specific hazards and risks.

Note
This symbol is used to indicate additional information or important notes.

2.PackageContents
- WeatherstationEWS-165 (basestationforindoor/outdoormeasuringstation)
- Base
- 2xAAAbatteries
- 2xAAbatteries
• Theseoperatinginstructions
3. SafetyInstructions
• The product is intended for private, non-commercial use only.
- Donotoperatetheproductoutsidethepowerlimitsgivenin thespecifications.
- Donotusetheproductinmoistenvironmentsandavoid splashes.
- Donotusetheproductintheimmediatevicinityofheatersor otherheatsourcesorindirectsunlight.
- Donotusetheproductinareaswheretheuseofelectronic devicesisnotpermitted.
- Donotplacetheproductnearinterferencefields, metalframes, computers, TVs, etc. Electronicdevicesandwindowframescan negatively affect the product's functionality.
- Donotdroptheproductanddonotexposeittoanymajor shocks.
- Donotopenthe deviceorcontinuetooperateitifitbecomes damaged.
- Donotattempttoserviceorrepairtheproductyourself.Leave anyandallserviceworktoqualifiedexperts.
- Keep the packaging material out of thereach of child rendueto therisk of suffocation.
- Disposeofpackagingmaterialimmediatelyaccordingtolocally applicableregulations.
- Donotmodifytheproductinanyway.Doingsovoidsthe warranty.
- Usetheproductforitsintendedpurposeonly.
- Protect the product from dirt, moisture and overheating, and only use it in a dry environment.
- Keep this product, as all electrical products, out of there each of children!
- Use the item only in moderate climatic conditions.
Warning-Batteries

- Wheninsertingbatteries, notethecorrectpolarity(+and-markings) and insertthebatteries accordingly. Failuretodoso could result in the batteries leakingorexploding.
- Onlyusebatteries(orrechargeablebatteries)thatmatchthe specifiedtype.
- Before you insert the batteries, clean the battery contacts and the polar contacts.
- Donotallowchildrentochangebatterieswithoutsupervision.
- Donotmixoldandnewbatteriesorbatteriesofadifferent typeormake.
- Removethebatteriesfromproductsthatarenotbeingused foranextendedperiod(unlessthesarebeingkeptreadyfor anemergency).
- Donotshort-circuitbatteries.
- Donotchargebatteries.
- Donotthrowbatteriesinafire.
- Keepbatteriesoutofthereachofchildren.
- Neveropen, damageorswallowbatteriesorallowthemto entertheenvironment. They can containtoxic, environmentally harmful heavymetals.
- Immediately remove and dispose of dead batteries from the product.
- Avoidstoring, chargingorusingthedeviceinextreme temperaturesandextremelylowatmosphericpressure(for example,athighaltitudes).
4. Getting Started
4.1. Inserting the batteries
Measuringstation
- Openthebatterycompartment(24)andremovethecontact breaker.Replacethebatterycompartmentcover.
Basestation
- Openthebatterycompartment(23)andremovethecontact breaker.Replacethebatterycompartmentcover.
4.2.Replacingthebatteries
Measuringstation
- Openthebatterycompartment(24), remove and properly dispose of the dead batteries and insert twonew AA Abatteries with the correct polarity. Replace the battery compartment cover.
Basestation
- Openthebatterycompartment(23), remove and properly dispose of the dead batteries and insert twonew A Abatteries with the correct polarity. Replace the battery compartment cover.
Note

Beforeuse, ensure you insert the batteries in theme measuring station first and then in the basestation.
5. Installation

Note-Installation
- Were recommend initially placing the base and measuring stations in the intended locations without installing them and making all these settings described in
6.Operation—todo.
- Onlyinstallthestationsoncetheappropriatesettingshave beenmadeandastablewirelessconnectionisestablished.

Note
- Thewirelesstransmissionrangebetweenthemeasuringandbasestationsisupto30minopenspaces.
- Beforeinstallation,ensurethatwirelesstransmissionwillnot bedisruptedbyinterferenceorobstacleslikebuildings,trees,vehicles,high-voltagelines,etc.
- Before the final installation, ensure that there is sufficient reception between the intended installation locations.
- When installing themeasuring station, ensure that it is protected from direct sunlight and rain.
• The international standard height for measuring air temperature is 1.25m(4ft) above ground.

Warning
- Buyspecialorsuitableinstallationmaterialfromaspecialised dealerforwall-mounting.
- Ensure that no faultyordamagedpartsareinstalled.
- Neverapplyforceduringinstallation. This could damage the product.
- Beforeinstallation,ensurethatthechosenwallissuitablefor theweighttobemounted,andmakesurethatthereareno electricalwires,water,gasorotherlinesattheinstallation siteonthewall.
- Donotmounttheproductabovelocationswherepersons mightlinger.
5.1.Basestation
- Usethebase(22)topositionthebasestationonalevelsurface.
• Alternatively, you can install the basestation on a wall using the opening (21) on the back.
5.2. Measuringstation
- Youcanalsopositionthemeasuringstationonaleveloutdoor surface.
- Were recommend installing themeasuring station securely on an outdoor wall using therecess.
6.Operation
Note-Input
Holddownthe ▲button(16)orthe▼button(14)to selectthevaluesfaster.

6.1. Connectiontothemeasuringstation
- Afteryouinsertthebatteries, thebasestationautomatically searchesforaconnectiontothemeasuringstationandperforms initialsetup.

Note
- Initialsetuptakesapprox.2minutes.
- Duringconnection, thewirelesssymbolonthemeasuring stationwillflash(1).
- Donotpressanybuttonsduringsetup. Otherwise, valuesmay notbetransmittedcorrectlyandthereisariskofvalueerrors andinaccuracies.
- Thesetupprocessiscompletedwhentheindoor(4)and outdoor(3)measurementdataisdisplayed.
- Themeasuredvalueisautomaticallyupdatedbythebase deviceaboutevery45seconds.
- If the temperature is outside of the measuring range, --.-(lower than minimum temperature) or --.-(higher than maximum temperature) will appear on the temperature display.
- If the basestation still does not receive a signal from the measuring station, press and hold the button (14) for approx. 3 second to start the manual search forth
| Display | Searchforasignalfromthe measuringstation |
| Displayflashing | Active |
| Displayedcontinuously | Successful–signalisbeingreceived |
| Displayedcontinuously | Inactive–nosignalreception |
Note—Faultytransferofmeasuredvalues
- Inisolated cases, interference-e.g. fromaWLAN network, a computer or at television set-can cause the transfer of measured values between theme measuring station and the base station to fail.
- Inthiscase, you must resynchronis thestations by briefly removing the batteries from both stations and reinserting them.
- Ifthemeasuredvaluesarenottransferredagainoncethe batteriesareinserted,replacethebatterieswithnewones.
- If necessary, select anewlocation for the basestation in order to avoid possible interference in the future.

6.2. Selecting the channel/other measuring stations
Note
- Youcaninstalltwomoremeasuringstationsinadditionto theincludedmeasuringstation.Ensurethatthebaseand measuringstationsaresettothesamechannel. Visitwww.hama.comforsuitablemeasuringstations.
- Thetransmissionchannelonthesuppliedmeasuringstation cannotbechanged/set(CH1).
- PresstheCHANNELbutton(15)repeatedlytosetthechannel tothatsetontherespectivemeasuringstation.CH1, CH2 or CH3(2)isdisplayed.
- SelectCH1 if you are only using themeasuring stations supplied.
- Thebasestationnowshowsthedatameasured(3)onthe selectedmeasuringstation(2).
6.3.Basicandmanualsettings
AutomaticsettingusingtheDCFsignal
Afterthefirsttimethebasestationisswitchedonand successfultransmissionisestablishedbetweenthebase stationandthemeasuringstation, theclockwillautomatically searchforaDCFsignal. Duringthesearch, thewireless symbol(5)willflash.
| DisplaySearchingfortheDCFsignal | |
 Displayflashing Displayflashing | Active |
| Nodisplay/Displayedcontinuously | Inactive-nosignalreception |
 Displayedcontinuously Displayedcontinuously | Successful-signalisbeingreceived |
- Ifthestationstilldoesnotreceiveasignal,pressandholdthe ▲button(16)forapprox.3secondstostartthemanualsearch fortheDCFsignal.Thewirelesssymbol(5)willstarttoflash.

Note—Timesettings
- Thesearchprocesstakesabout3-10minutes.Ifthesearch fails, itendsandisrepeatedatthenextclockhour.
- Inthemeantimeyoucan, however, setthetime and the datemanually.
- TheclockautomaticallycontinuestosearchfortheDCFsignal everyhour.Ifthesignalisreceivedsuccessfully, themanually settimeanddateareoverwritten.Theclockautomatically continuestosearchfortheDCFsignaleveryhour.Ifthesignal isreceivedsuccessfully, themanually settimeanddateare overwritten.
- Pressandholdthe ▲ button(16)againforapprox.3seconds tostopthemanualsearch.Thewirelesssymbol(5)willgoout.

Note—Summertime
• Theclockautomaticallyswitchestosummertime.
- PlesenotethatDCFsignalreceptionisrequiredfor automaticsummertimeswitch-over. If necessary, start the DCFsignalsearchmanually.
Manuallysettingthedate/time

Note-Timeandtimezone
- InpresstheMODEbutton(17)repeatedlytotogglebetween the followingdifferentdisplays:
- Timewithsecondsdisplay, timewithweekdaydisplay, time adjustedaccordingtotimezonewithweekdaydisplay, time adjustedaccordingtotimezonewithsecondsdisplay
- Thetimezonesymbol(6)isdisplayedwhenthetimehasbeen adjustedaccordingtothetimezone.
- PressandholdtheMODEbutton(17)forapprox.3secondsto makethefollowingsettingsoneaftertheother:
• Year(10)
• Month(13)
• Day(7)
• D/M—M/D(7/13)display
• 12/24hourformat(10)
• Hours(10)
- Minutes(10)
- Weekday(11)
• Timezone(6)
- Toselecttheindividualvalues, pressthe ▲ button(16)or the ▼ button(14)andconfirmeachselectionbypassingthe MODEbutton(17).
- PresstheMODEbutton(17)toadoptthesetvaluedisplayed andtoskip.
- If you donot make an entry for 2 minutes, you automatically exit the setup mode.

Note-Weekday
You can choose from German (DE), English (EN), Swedish (SW), Dutch (DU), Spanish (SP), Italian (IT) or French (FR) forth the weekday display.
Settingthetimezone

Note-Timezone
- The DCF signal can be received over long distances, but always transmits the current Central European Time in Germany. Makes sure you account for the time difference in countries with another time zone.
- If you are in Moscow, the time is 3 hours later than in Germany. This means that you should set + 3 for the time zone. The clock then automatically set the time to 3 hours after the DCF signal received or relativeto them manually set time.
Alarm
• InrepeatedlypresstheALARMON/OFFbutton(18)todi thedifferentialarms. Therespectivealarmsymbols(12)

- /a PREM correspondingalarmtime/timeinterval and/orOFFaredisplayed.
- PressandholdtheALARMON/OFFbutton(18)forapprox.3 secondstosetthealarmtimeofthealarmdisplayed.Thehours display/timeintervalstartstoflash.
- Pressthe ▲button(16)orthe ▼button(14)toselectthehour forthealarmtime/timeintervalandconfirmyourselectionby pressingtheALARMON/OFFbutton(18). Theminutesdisplaybeginstoflash.Theearlyalarmisalready activatedafterconfirmingthetimeinterval.
- Repeat the process to set them minutes for the alarm time.
- PresstheALARMON/OFFbutton(18)repeatedlytoalsosetthe otheralarmmodeorreturntothetimedisplay(10).
- If you donot make an entry for 2 minutes, you automatically exit the setup mode.
Note-Alarm

- Whenactivated, the weekday alarmonly triggers an alarm on weekdays (Monday to Friday). The alarmsymbol(12) displayed if this alarm is activated.
- Whenactivated, the once-only alarm only triggers an alarm once. The alarmsymbol(12) is displayed if this alarm is activated. This alarm is automatically deactivated after the alarm has sounded.
- When activated and when the outside temperature is < 0^ C / 32^ F , the early alarm triggers an alarm 15, 30, 45, 60 or 90 minutes before the actual alarm (W and/or) is alarm symbol(12) PRE-AL is displayed if this alarm is activated.
- Todeterminewhetherthealarmshouldbetriggered, the setalarmtimeiscomparedtothecurrentlydisplayedtime (whethernormalortimezone-shifted).
- In the corresponding display, pressthe ▲ button(16)orthe ▼ button(14)toactivate/deactivatethe corresponding alarm. The alarmsymbol(12)willappear/notappear.
Note—Earlyalarm
The early alarm can only be activated if at least one of the two alarm functions ( w/has already been activated.

- If the alarmist riggered, the alarmsymbol(12) will begintoflash and an alarmwill sound.
- PresstheALARMON/OFFbutton(18)tostopthealarm. Otherwise, itwillstopautomaticallyafter2minutes. Otherwise, aftertwominutessnoozemodeisactivatedautomatically.
Note-Snoozefunction
- Whilethealarmsignalissounding, presstheSNOOZEbutton (20)toactivatethesnoozefunction.Thealarmsymbol(12) beginstoflashinthedisplay.Thealarmsignalisstoppedfor 8minutes,afterwhichitwillsoundagain.
- Thesnoozefunctioncanbeactivatedthreeconsecutivetimes.

6.4.Weather
- The weather station indicates atrendasthow the values for the outdoor temperature (8), room temperature (9) are likely to develop over the next few hours.
| DisplayTrend | |
| Increasing | |
| Constant | |
| Decreasing |
6.5. Maximum and minimum temperature values
- Thebasestationautomaticallystoresthemaximumand minimumoutdoor/indoortemperature.
- RepeatedlypresstheMEMbutton(19)toswitchbetween the currenttemperature,minimumtemperature(MIN)andmaximum temperature(MAX).Themaximumandminimumtemperatures aredisplayedfor10seconds.
- PressandholdtheMEMbutton(19)forapprox.3secondsto resetthestoredmaximumandminimumvalues.
6.6 Low battery capacity
Measuringstation
Ifthebatteriesneedtobereplaced,thesymbolforlow batterycharge 🔍 willappearnexttotheoutdoor temperaturedisplayonthebasedevice.Replacethebatteries immediately.
Basestation
If the batteries need to be replaced, the symbol for low battery charge will appear next to the time displayed on the based device. Replace the batteries immediately.
Note-Replacingthebatteries

- Notethatthestationshavetoberesynchronisedeachtime afteryouchangethebatteriesinthemeasuringorbase station.
- Todothis, removethebatteries from the other station and then reinsert them, or changethemas required.
7. Care and Maintenance
Onlycleanthisproductwithaslightlydamp,lint-freecloth anddonotuseaggressivecleaningagents.Makesurethat waterdoesnotgetintotheproduct.
8.WarrantyDisclaimer
HamaGmbH&CoKGassumesnoliabilityandprovidesno warrantyfordamageresultingfromimproperinstallation/mounting,improperuseoftheproductorfromfailureto observetheoperatinginstructionsand/orsafetynotes.
9.TechnicalData
| Basestation | Measuringstation | |
| Powersupply | 3,0V2xAAbatteries | 3,0V2xAAbatteries |
| Measuringrange Temperature | 0°C-+50°C/32°F-122°F | -20°C-+60°C/-4°F-140°F |
| Measurement increments Temperature | 0,1°C/0,2°F0,1°C/0,2°F | |
| Temperature measurementcycle | ~45s~45s | |
| Radio-controlled DCFclock | YesNo | |
| Max.numberof measuringstations | 3 | |
| Range≤30m | ||
10. Declaration of Conformity

Hereby, HamaGmbH&CoKGdeclaresthattheradio
equipmenttype[00186313]isincompliancewith
Directive2014/53/EU. The full text of the EU
declarationofconformityisavailableatthefollowinginternet
address:www.hama.com->00186313->Downloads.
| Frequencyband(s)433MHz | |
| Maximumradio-frequency powertransmitted | 0,021mW |
18.ALARMON/OFF-Faste
=UnterbrechungdesWecksignals
18.ToucheALARMON/OFF
=affichage/réglagedesmodesd'alarme
19.ToucheMEM
=consultation/réinitialisationdesvaleursmaximales/minimalesenmémoire
20.ToucheSNOOZE
=interruptiondelasonneriederéveil
21.Fentepourinstallationmurale
22.Pied
- Compartimentàpiles
BStationdemesure
- Compartimentàpiles
www.hama.com->00186313->Downloads.
www.hama.com->00186313->Downloads.
-
Dagvandeweek/seconde
-
Alarmsymbol
13.Maand
- ▼-toets
19.ALARMON/OFFF-toets
=weergave/instellingalarm-modi
20.MEM-toets
www.hama.com->00186313->Downloads.
| Frequentieband(en)433MHz | |
| Maximaalradiofrequentvermogen0,021mW |
- Przycisk ALARMON/OFF
• KijelzőD/M–M/D(7/13)

www.hama.com->00186313->Downloads.
Az(ok)afrekvenciasáv(ok)433MHz
18.ALARMON/OFFF-knapp
www.hama.com->00186313->Downloads.
18.ALARMON/OFFF-painike
www.hama.com->00186313->Downloads.
86652Monheim/Germany
Service&Support

www.hama.com

+499091502-0


CE


PAP
RaccoltaCarta



- ControlsandDisplays
- ABasestation
- BMeasuringstation
- ExplanationofWarningSymbolsandNotes
- Warning
- Note
- 2.PackageContents
- SafetyInstructions
- Warning-Batteries
- Getting Started
- Inserting the batteries
- Measuringstation
- Basestation
- 4.2.Replacingthebatteries
- Installation
- Note-Installation
- 6.Operation—todo.
- 5.1.Basestation
- Measuringstation
- 6.Operation
- Note-Input
- Connectiontothemeasuringstation
- Note—Faultytransferofmeasuredvalues
- Selecting the channel/other measuring stations
- 6.3.Basicandmanualsettings
- AutomaticsettingusingtheDCFsignal
- Note—Timesettings
- Note—Summertime
- Manuallysettingthedate/time
- Note-Timeandtimezone
- Note-Weekday
- Settingthetimezone
- Note-Timezone
- Alarm
- Note-Alarm
- Note—Earlyalarm
- Note-Snoozefunction
- 6.4.Weather
- Maximum and minimum temperature values
- Low battery capacity
- Note-Replacingthebatteries
- Care and Maintenance
- 8.WarrantyDisclaimer
- 9.TechnicalData
- Declaration of Conformity
- BStationdemesure
- 86652Monheim/Germany
- Service&Support
Brand : HAMA
Model : EWS-165
Category : Weather Station