
STE 75 Quick - Saw METABO - Free user manual and instructions
Find the device manual for free STE 75 Quick METABO in PDF.


| Product Type | Jigsaw |
| Brand | Metabo |
| Model | STE 75 Quick |
| Rated Input Power | 600 W |
| Useful Power | 360 W |
| No-Load Speed | 1000 - 3000 rpm (continuous adjustment) |
| Max. Material Thickness (Wood) | 75 mm |
| Max. Material Thickness (Non-ferrous metals) | 25 mm |
| Max. Material Thickness (Steel sheet) | 8 mm |
| Weight | 2.3 kg |
| Sound Pressure Level (L_pA) | 89 dB(A) |
| Sound Power Level (L_WA) | 100 dB(A) |
| Vibration Emission Value (Wood cutting) | 5 m/s² (uncertainty K=1.5 m/s²) |
| Vibration Emission Value (Sheet cutting) | 12 m/s² (uncertainty K=2.5 m/s²) |
| Blade Clamping System | Quick clamping without tool |
| Pendulum Stroke | 4 positions (0 to 3), adjustable |
| Bevel Cuts | Up to 45° with notches at 15°, 30°, 45° |
| Power Supply | Single phase, 230 V / 50 Hz (according to rating plate) |
| Included Accessories | Anti-splinter insert, anti-scratch plate, hex key |
| Maintenance | Clean air outlet; oil the support roller; brush replacement by a professional |
| Environmental Protection | Recyclable packaging; do not dispose with household waste (WEEE) |
Frequently Asked Questions - STE 75 Quick METABO
User questions about STE 75 Quick METABO
0 question about this device. Answer the ones you know or ask your own.
Ask a new question about this device
Download the instructions for your Saw in PDF format for free! Find your manual STE 75 Quick - METABO and take your electronic device back in hand. On this page are published all the documents necessary for the use of your device. STE 75 Quick by METABO.
USER MANUAL STE 75 Quick METABO
natural_image
Three black-and-white photo of a J-shaped solar power shaver with visible circuit breakers and metal components (no text or symbols)
D Gebrauchsanleitung .....Seite 5
(ENG) Operating Instructions .....page 13
(F) Mode d'emploi .....page 21
NL Gebruiksaanwijzing .....bladzijde 29
IT Istruzioni d'uso ......pagina 37
ES Instrucciones de manejo ....página 45
PT Instruções de serviço .....página 54
SV Bruksanvisning ....sida 62
FIN Käyttöohje . . . . . . . . . . . . . . . . . . . . . . . . . . . . . . . . . . . . . . . . . . . . . sivu 70
NO Bruksanvisning . . . . . . . . . . side 78
① DA Betjeningsvejledning . . . . . . side 86
POL Instrukcja obsługi .....strona 94
EL Οδηγίες χρήσεως .....Σελίδα 103
HU Kezelési utasítás ....oldal 112
RU Инструкция по использованию ..с. 120
 |  | ||
| 6 |  | 1-3 |  |
| 6 |  | 0-3 |  |
| 5-6 |  | 0-3 | 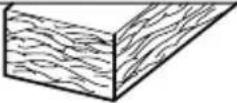 |
| 3-4 |  | 0-2 | 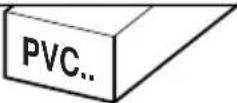 |
| 4-6 | 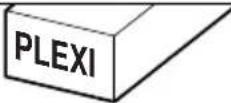 | 1-2 |  |
| 2-4 |  | 0 |  |
| 3-5 |  | 0-1 | 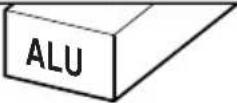 |
| 3-4 |  | 0-1 |  |
| 5-6 |  | 0 |  |
CE EN 60745 98/37/EG (→28.12.09), 2006/42/EG (29.12.09→), 2004/108/EG
natural_image
Black rectangular object with white connectors and a small white symbol on the side, labeled '6.23664' below (no other text or symbols)C
D

E

natural_image
Coiled black and gray hose with connector ends, no visible text or symbolsF

natural_image
Pure mechanical component diagram without any text, numbers, or symbolsG

H
natural_image
Two identical mechanical clamps with black handles and metal brackets, no visible text or symbols|

natural_image
Pure electrical circuit lines without any symbolsGebrauchsanleitung
natural_image
Illustration of a person wearing glasses, hands covering the face, and headphones (no text or symbols)natural_image
Exterior view of a metallo tool with attached cable and base (no visible text or symbols)Operating Instructions
Dear Customer,
Many thanks for the confidence you have shown in us with the purchase of your new Metabo power tool. Every Metabo power tool is carefully tested and is subjected to the strict quality controls of the Metabo Quality Assurance section. However, the service life of any power tool is to a great degree dependent on yourself as the user. Please take account of the information contained in these Operating Instructions and the accompanying documents. The more care you exercise in handling your Metabo power tool, the longer will be the reliable service it provides for you.
Contents
1 Declaration of Compliance
2 Proper Use
3 General Safety Instructions
4 Special Safety Instructions
5 Overview
6 Initial Use
7 Operation
8 Hints and Tips
9 Maintenance
10 Accessories
10.1 Fitting the circle-cutting and rip guide
10.2 Bevel cuts with the rip guide
11 Repairs
12 Environmental Protection
13 Technical Specifications
1 Declaration of Compliance
Under our own responsibility, we hereby declare that this product complies with the standards or standard-setting documents listed on page 2.
2 Proper Use
The jig saw is designed for sawing non-ferrous metals and sheet steel, wood and similar materials, and plastics and similar materials. Use for any other purpose is prohibited.
The operator bears sole responsibility for any damage caused by inappropriate use.
The generally recognised accident prevention regulations and the accompanying safety instructions must be observed.
3 General Safety Instructions

WARNING – Reading the operating instructions will reduce the risk of injury.

WARNING Read all safety warnings and all instructions. Failure to follow the warnings and instructions may result in electric shock, fire and/or serious injury.
Save all warnings and instructions for future reference.
Before using this power tool, carefully read through and familiarise yourself with all the enclosed safety information and the instructions. Keep all enclosed documentation for future reference, and pass on your power tool only together with this documentation.
4 Special Safety Instructions

Pay particular attention to the parts of the text marked with this symbol for your own safety and the protection of your power tool.
Hold the power tool only on the insulated gripping surfaces when performing tasks where the cutting accessory could hit concealed power lines. Cutting accessory contacting a "live" wire may also energise metal parts of the power tool, resulting in an electric shock.
natural_image
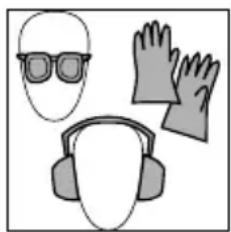
Illustration of a person wearing safety goggles, a helmet, and gloves (no text or symbols)Always wear safety goggles, ear protectors, protective gloves and heavy-duty footwear when working with your power tool.
Dust from material such as paint containing lead, some wood species, minerals and metal may be harmful. Contact with or inhalation of the dust may cause allergic reactions and/or respiratory diseases to the operator or bystanders.
Certain kinds of dust are classified as carcinogenic such as oak and beech dust especially in conjunction with additives for wood conditioning (chromate, wood preservative). Material containing asbestos must only be treated by specialists.
- Where the use of a dust extraction device is possible it shall be used.
- To achieve a high level of dust collection, use a suitable Metabo vacuum cleaner together with this tool.
- The work place must be well ventilated.
- The use of a dust mask of filter class P2 is recommended.
Follow national requirements for the materials you want to work with.
5 Overview
Refer to page 3.
1 Locking button for locking the switch trigger on for continuous operation
2 Switch trigger
3 Knurled wheel for pre-setting and changing the stroke rate
4 Saw-blade clamping device
(only with ST 50 Pendix, STE 65 and STE 70)
5 Guard loop
6 Jig-saw blade
7 Anti-splintering footplate insert
8 Guard cover (not ST 50 Pendix)
9 Saw-blade rapid-change feature
(only with STE 75 Quick, STE 80 Quick)
10 Footplate
a hexagon socket-head key holder
11 Adjuster knob for setting orbital saw-blade movement
12 Clip-on plastic plate
(only with STE 75 Quick, STE 80 Quick)
13 Hexagon socket-head key
6 Initial Use
Before initial use, check that the mains voltage and mains frequency stated on the rating plate match the figures for your own mains supply.
Do not run the tool without a saw blade fitted.
Disconnect the mains plug before changing a saw blade.
Fitting the jig-saw blade (ST 50 Pendix, STE 65 and STE 70)

Push the guard cover (8) upwards. Slacken off the hexagonal socket-head screw (14).
Push the saw blade (6) fully home into the saw-blade clamping device (4). The saw blade must be properly seated in the grooved blade-support roller (15). Retighten the hexagonal socket-head screw (14).
Fitting the jig-saw blade (STE 75 Quick, STE 80 Quick)

Turn the clamping lever (16) on the saw-blade rapid-change feature (9) all the way round. Push the saw blade (6) fully home into the saw-blade rapid-change feature (9). The saw blade must be properly seated in the grooved blade-support roller (15). Release the clamping lever (16).
7 Operation
Fitting the anti-splintering footplate insert
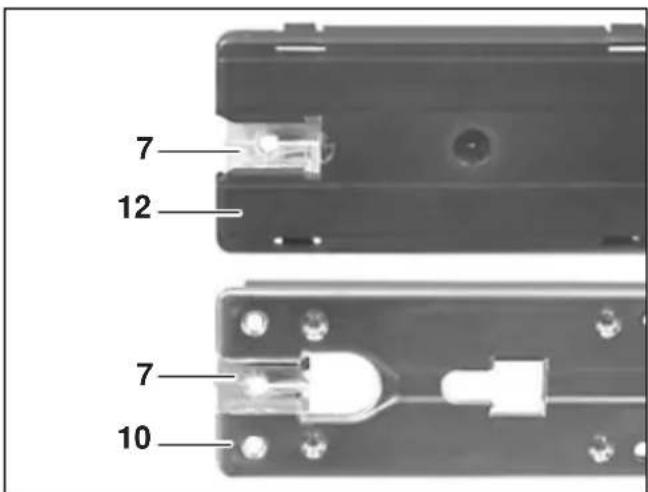
Push the anti-splintering footplate insert (7) fully home into the clip-on plastic plate (12) or the footplate (10).
Sawing in a restricted space

Remove the guard cover (8) and the anti-splintering footplate insert (7). Slacken off the hexagonal socket-head screw (17) in the footplate (10) and locate the footplate in the front seating recess (18). Retighten the hexagonal socket-head screw (17).
Sawdust extraction

natural_image
Exterior view of a melabo manual push tool with visible components and base plate (no text or symbols on the device itself)For optimum vacuum extraction results, use along with the guard cover (8) (for the ST 50 Pendix, the guard cover is available as an accessory, if required). For sawdust extraction, connect up a suitable suction device to the vacuum extraction nozzle.
Sawing without sawdust extraction
Remove the guard cover (8).
Flap down the guard loop (5).
Setting the stroke rate
Refer to page 2 for recommended settings.
Setting the orbital saw-blade movement
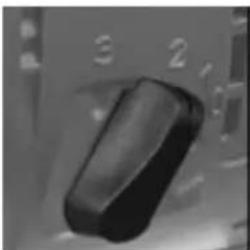
Turn the adjuster knob (11): 0 = orbital saw-blade movement off 3 = maximum orbital movement
Refer to page 2 for recommended settings.
Continuous operation
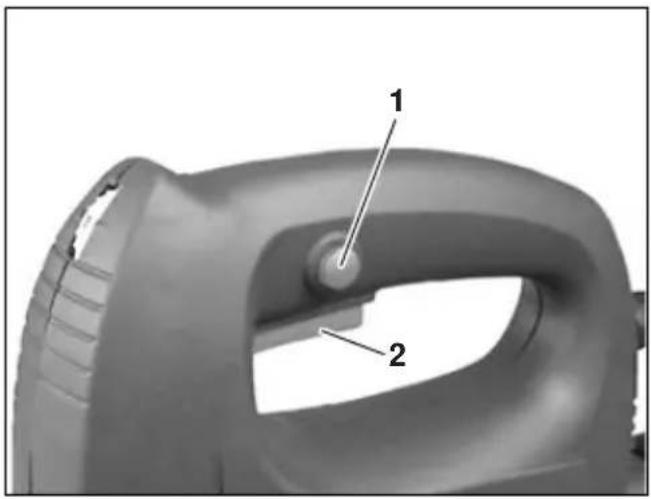
Press the switch trigger (2) in fully and hold down.
Press the locking button (1) in and hold down. Release the switch trigger (2) and then the locking button (1), in that order.
To release, press the switch trigger (2) in fully and release.
Bevel cuts
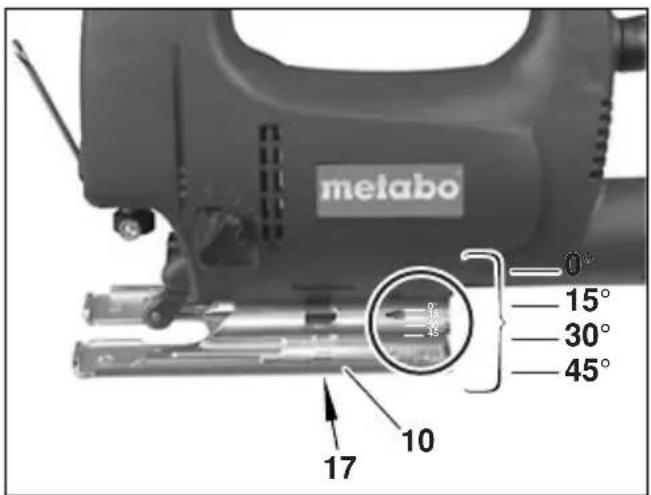
Remove the guard cover (8), the anti-splintering footplate insert (7) and the vacuum extraction hose (E).
Slacken off the hexagonal socket-head screw (17) in the footplate (10).
Slide the foot-plate (10) forward, twist round and push backwards or forwards into one of the notches. Retighten the hexagonal socket-screw (17).
The angle currently set can be read off from the number on the footplate base.
Preset bevel angles of 15^ , 30^ and 45^ are achieved by engaging the relevant notches. For very exact bevel cuts, first carry out a test cut and check with a protractor.
8 Hints and Tips
Sawing various materials
When sawing metal, first lubricate the saw blade with a Metabo lubricating stick. When sawing perspex, wet the area of the cut with water.
Saw sheet metal less than 1 mm thick supported on a wooden backing plate.
Penetrating the material surface
When working with thin workpieces, it is possible to penetrate the workpiece surface with the jig-saw blade without first having to drill a hole.
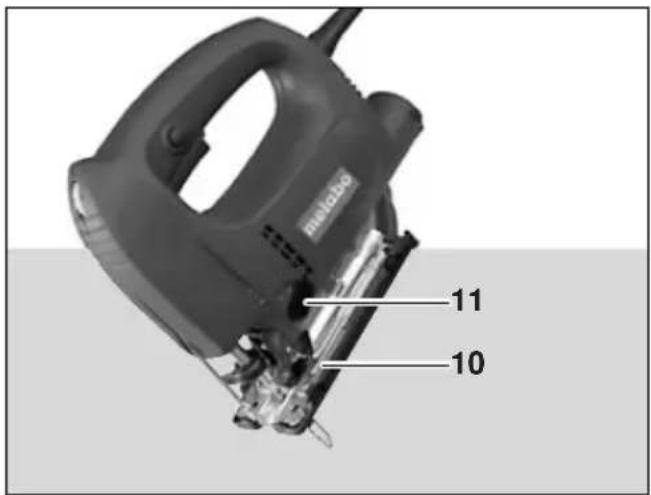
Set the adjuster knob (11) to position "0".
Present the jig saw to the workpiece, with the leading edge of the footplate (10) resting on the workpiece.
Switch the jig saw on and hold it firmly, slowly guiding it downwards.
When the jig saw has cut a free path, the orbital saw blade movement can be switched on.
With thicker workpieces, it is necessary to drill a hole first and then insert the saw blade through it.
9 Maintenance

Be aware of the danger of injury represented by the sharp saw blade.
All maintenance operations must be carried out with the saw blade at rest. Switch off the jig saw and disconnect from the mains supply.
Clean the air intake aperture behind the grooved roller supporting the saw blade. From time to time lubricate the roller with a drop of oil.
Have the carbon brushes replaced by the manufacturer or in an appropriate specialist workshop only.
10 Accessories
Use original Metabo accessories only.
Your Metabo dealer will supply you with any accessories you may require.
To assist in selecting the correct accessories, make sure that you take a note of the exact model of your tool for your dealer.
Accessories available (page 4):
A Jig-saw blade
B Clip-on plastic plate for fitting to the footplate of the jig saws to protect delicate workpiece surfaces from scratching.
C Spare anti-splintering footplate inserts
D Circle-cutting and rip guide
E 35 mm dia. vacuum extraction hose
F Jig-saw guide for using jig saws in conjunction with the guide rail
G Guide rail, 1500 mm long
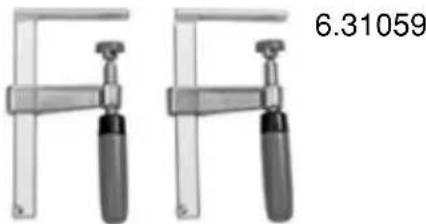
H G-clamps
I Jig-saw bench-mounting plate,
255 x 183 mm with clamp for fixing the
plate to the workbench
10.1 Fitting the circle-cutting and rip guide
For sawing circles of between 100 mm and 360 mm dia. and for cuts parallel to an edge (max. 210 mm).
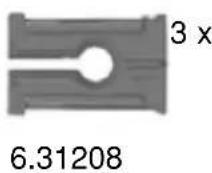
Fit clamps
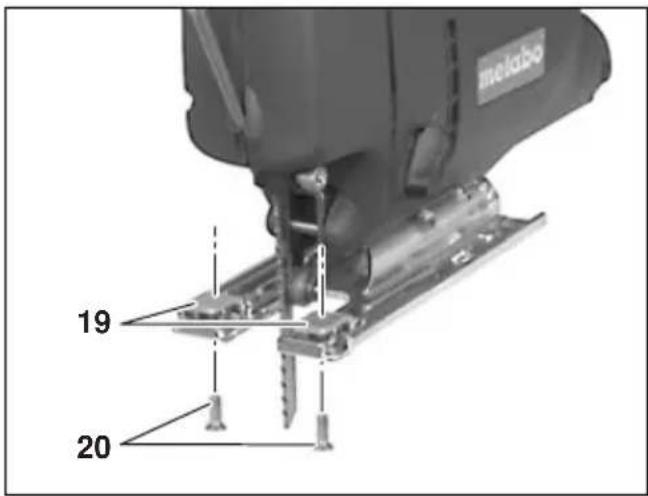
Locate the clamps (19) with the opening to the front and the thread hole to the top on the footplate (10) and tighten the screws (20), turning from the underside.

Ensure that you remove the clamps holding the circle-cutting and rip guide after use, as otherwise the saw-blade clamping device may be damaged when making bevel cuts.
Fitting the circle-cutting guide

Slide the circle-cutting and rip guide (21) into the clamps (19) on the footplate (10). Set dimension (a). Turn the screws (20) tight.
Fitting the rip guide

Slacken off the screws (20) and slide the circle-cutting and rip guide (21) into the clamps (19) on the footplate (10). Set dimension (b). Turn the screws (20) tight. Remove the arbour (c).
10.2 Bevel cuts with the rip guide
Remove the guard cover (8), the anti-splintering footplate insert (7) and the vacuum extraction hose (E).
Slacken off the hexagon socket-head screw (17) in the footplate (10). Slide the footplate (10) forward, twist round and push backwards or forwards, engaging in one of the notches for 15^ and 30^ bevel angles.
For a 45^ bevel angle, swivel the jig saw round to the left and slide the footplate (10) forwards, engaging in the rearmost notch. The jig saw must not be swivelled to the right for a 45^ bevel angle, as otherwise the saw-blade clamping device may be damaged.
Retighten the hexagon socket-head screw (17).

Remember to remove the clamps after use!
11 Repairs

Repairs to power tools must be carried out by a qualified electrician only.
Any Metabo power tool in need of repair can be sent to one of the addresses listed in the spare parts list.
Please accompany the tool for repair with a brief description of the fault identified.
12 Environmental Protection
Metabo packaging is 100% suitable for recycling.
Power tools and accessories at the end of their service life still contain large amounts of valuable raw materials and plastics which can likewise be fed back into a recycling process.
These Operating Instructions are printed on paper produced in a chlorine-free bleaching process.

Only for EU countries: Never dispose of power tools in your household waste! In accordance with European Guideline 2002/96/EC on used electronic and electric equipment and its implementation in national legal systems, used power tools must be collected separately and handed in for environmentally compatible recycling.
13 Technical Specifications
| ST 50 STE 65 STE 70 STE 75 STE 80 Pendix Quick Quick | |||||
| Max. material thickness in mm (in): | |||||
| - wood 50 (2") 65 (2 | ^5/8 " 70 | (2 ^3/4 ") | 75 (3") | 80 ( ^3/16 ") | |
| - non-ferrous metals 10 (- sheet steel | ^3/8 ") 20 | ( ^3/4 ") 20 | ( ^3/4 ") | 25 (1") | 25 (1") |
| 3 ( ^1/8 ") | 6 ( ^1/4 ") | 6 ( ^1/4 ") | 8 ( ^5/16 ") 8 (- ^5/16 ") | ^5/16 ") | |
| Stroke rate at idling rpm | 3000 | 1000-3000* | 1000-3000* | 1000-3000* | 1000-3000* |
| Rated input (W) | 400 | 550 | 570 | 600 | 610 |
| Output power (W) | 240 | 340 | 340 | 360 | 360 |
| Weight (kg) (lbs) | 2,2 (4,9) | 2,2 (4,9) | 2,2 (4,9) | 2,3 (5,1) | 2,3 (5,1) |
| Typical A-rated acoustic level: | |||||
| Acoustic pressure level L_pA in dB (A) | 86 | 89 | 88 | 89 | 88 |
| Acoustic power level L_WA in dB (A) | 97 | 100 | 99 | 100 | 99 |
| Uncertainty K_pA, K_WA in dB (A) | 3 | 3 | 3 | 3 | 3 |
| Vibration total value (vector sum of three directions) determined in accordance with EN 60745: | |||||
| Vibration emission value (Sawing sheet metal) a_h, CM (m/s^2) | 5 | 5 | 5 | 5 | 12 |
| Unsafe (vibration) K_h, CM (m/s^2) | 1,5 | 1,5 | 1,5 | 1,5 | 2,5 |
| Vibration emission value (Sawing in wood) a_h, CW (m/s^2) | 7 | 10 | 10 | 11 | 5 |
| Unsafe (vibration) K_h, CW (m/s^2) | 1,5 | 1,5 | 1,5 | 1,5 | 1,5 |

Wear ear protectors!
The vibration emission level given in this information sheet has been measured in accordance with a standardised test given in EN 60745 and may be used to compare one tool with another. It may be used for a preliminary assessment of exposure.
The declared vibration emission level represents the main applications of the tool. However if the tool is used for different applications, with different accessories or poorly maintained, the vibration emission may differ. This may significantly increase the exposure level over the total working period.
An estimation of the level of exposure to vibration should also take into account the times when the tool is switched off or when it is running but not actually doing the job. This may significantly reduce the exposure level over the total working period.
Identify additional safety measures to protect the operator from the effects of vibration such as: maintain the tool and the accessories, keep the hands warm, organisation of work patterns.
* High energy and high frequency disturbances can cause deviations in working speed of up to 20%. These disappear however as soon as the disturbance has eased off.
We reserve the right to undertake modifications to reflect technical advances.
Measured values established according to EN 60745.
The stated technical specifications are subject to tolerances (as specified in the respective current standards).
Mode d'emploi
Cher client,
natural_image
Illustration of three safety gear components: a face with glasses, a hooded head with gloves, and a pair of gloves (no text or symbols)natural_image
Exterior view of a melabo f三角形 tool with attached cable and base plate (no text or symbols visible)natural_image
Illustration of a person wearing safety goggles, a helmet, and gloves (no text or symbols)natural_image
Exterior view of a melabo f三角形 tool with attached cable and base plate (no text or symbols visible)natural_image
Illustration of three safety gear components: a face with glasses, a hooded head with protective gear, and a pair of gloves (no text or symbols)natural_image
Exterior view of a melabo f三角 manual tool with visible components and base plate (no text or symbols on the device itself)natural_image
Illustration of three basic safety gear symbols: a face with glasses, a pair of gloves, and a helmet (no text or labels)natural_image
Exterior view of a metallo tool with attached cable and base plate (no text or symbols visible)natural_image
Illustration of three safety gear components: a face with glasses, a helmet with headphones, and a pair of gloves (no text or symbols)natural_image
Exterior view of a Mefabo fum with attached cable and base plate (no text or symbols visible)natural_image
Illustration of a person wearing glasses, hands, and headphones (no text or symbols)natural_image
Exterior view of a Melebo f三角形 tool with visible components and base plate (no text or symbols)natural_image
Illustration of a person wearing glasses, hands covering the hood, and headphones (no text or symbols)natural_image
Exterior view of a Melebo f三角形 tool with attached cable and base plate (no text or symbols visible)natural_image
Illustration of a person wearing glasses, a helmet, and gloves (no text or symbols)natural_image
Exterior view of a Melebo manual push tool with visible components and base plate (no text or symbols on the device itself)Optimale avsugresultater oppnår man i forbindelse med beskyttelseskappen (8) (for ST 50 Pendix kan beskyttelseskappen om nødvendig fås som tilbehør).
natural_image
Illustration of a person wearing glasses, hands in protective gear, and a helmet (no text or symbols)natural_image
Exterior view of a melabo f三角形 tool with visible components and base plate (no text or symbols)natural_image
Illustration of a person wearing glasses, a helmet, and a glove (no text or symbols)natural_image
Exterior view of a melabo f三角形 tool with visible components and base plate (no text or symbols on the device itself)natural_image
Illustration of three safety gear components: helmet, hood, and gloves (no text or symbols)natural_image
Exterior view of a metallo tool with attached cable and base plate (no text or symbols visible)natural_image
Illustration of three basic safety gear symbols: helmet, hand, and hood (no text or labels)natural_image
Exterior view of a metallo tool with attached cable and base plate (no text or symbols visible)natural_image
Illustration of three basic safety gear symbols: a face with glasses, a hooded head with earphones, and a pair of gloves (no text or labels)natural_image
Exterior view of a melabo f三角形 tool with attached cable and base plate (no text or symbols visible)72622 Nürtingen, Germany
www.metabo.com


- Gebrauchsanleitung
- Operating Instructions
- Contents
- Declaration of Compliance
- Proper Use
- General Safety Instructions
- Save all warnings and instructions for future reference.
- Special Safety Instructions
- Overview
- Initial Use
- Operation
- Sawing without sawdust extraction
- Setting the stroke rate
- Setting the orbital saw-blade movement
- Continuous operation
- Bevel cuts
- Hints and Tips
- Sawing various materials
- Penetrating the material surface
- Maintenance
- Accessories
- Fitting the circle-cutting and rip guide
- Fit clamps
- Fitting the circle-cutting guide
- Fitting the rip guide
- Bevel cuts with the rip guide
- Remember to remove the clamps after use!
- Repairs
- Environmental Protection
- Wear ear protectors!
- Mode d'emploi
Brand : METABO
Model : STE 75 Quick
Category : Saw