
Thermal - Home Automation Evolveo - Free user manual and instructions
Find the device manual for free Thermal Evolveo in PDF.


| Product Type | Wireless thermostat system (transmitter + receiver) |
| Brand | Evolveo |
| Model | Thermal |
| Transmitter Dimensions | 125 × 98 × 23.5 mm |
| Receiver Dimensions | 90 × 90 × 26 mm |
| Transmitter Power Supply | 2×AA alkaline batteries or USB 5.0 V / 1.0 A |
| Receiver Power Supply | AC 230 V, 50/60 Hz |
| Temperature Setting Range | 5 °C to 35 °C (0.5 °C increments) |
| Temperature Accuracy | ±0.5 °C |
| Wireless Frequency | 868 MHz |
| Maximum Load (ohmic) | AC 250 V, 10 A |
| Switching Contacts | NO and NC |
| Programmable Schedules | 7 days, 4 periods per day |
| Open Window Detection | Yes (2 °C drop in 15 min, auto-off for 30 min) |
| Child Lock | Yes (button lock when backlight off) |
| Absence Mode | Yes (set custom energy-saving temperature) |
| App Compatibility | Smart Life (Tuya) via Bluetooth or Wi-Fi |
| Installation Options | Wall mount or table stand (transmitter), wall mount (receiver) |
| Degree of Protection | IP20 |
| Safety Class | Class II (double insulation) |
| Backup Storage | EEPROM |
| Display | LCD with backlight (adjustable brightness) |
Frequently Asked Questions - Thermal Evolveo
User questions about Thermal Evolveo
0 question about this device. Answer the ones you know or ask your own.
Ask a new question about this device
Download the instructions for your Home Automation in PDF format for free! Find your manual Thermal - Evolveo and take your electronic device back in hand. On this page are published all the documents necessary for the use of your device. Thermal by Evolveo.
USER MANUAL Thermal Evolveo
natural_image
White EVOLVEO device with three ports and ventilation slots (no readable text or symbols beyond branding)CZ
SK
EN
HU
RO
DE
IT
SI
BEZPECNOSTNI UPOZORNENI A POKYNY
PROPOJENÍ S APLIKACÍ
Smart Life

Tuya
INSTALACE TERMOSTATU NA STĚNU
natural_image
Diagram of a device inside a rectangular housing with an arrow indicating a component or connection (no text or symbols present)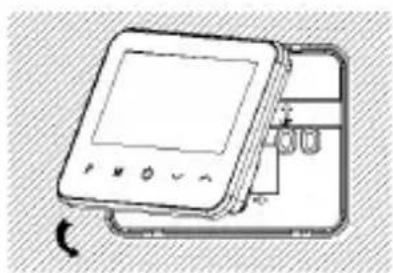
natural_image
Illustration of a handheld electronic device with a screen and internal components, no visible text or symbols.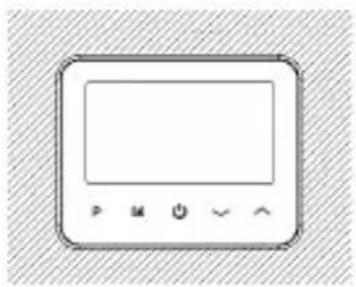
natural_image
Simple icon of a digital device with control buttons (no text or symbols)INSTALACE TERMOSTATU NA STUL
natural_image
Line drawing of a handheld electronic device with two ports and directional arrows indicating rotation (no text or symbols)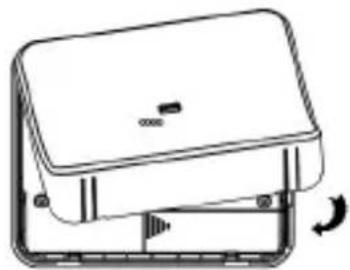
natural_image
Line drawing of a mechanical device with a lid and base, showing a rotating mechanism (no text or symbols)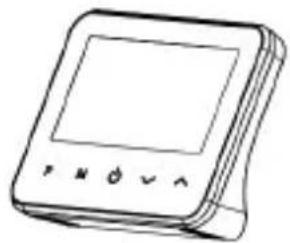
natural_image
Line drawing of a handheld electronic device with control buttons (no text or symbols)INSTALACE PRIJIMACE NA STENU
natural_image
Simple line drawing of a rectangular electronic component with three pins (no text or symbols)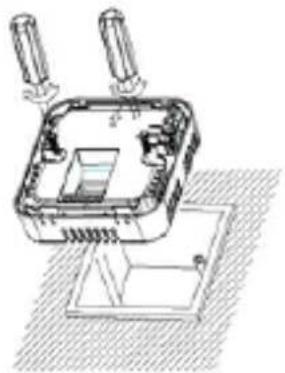
natural_image
Technical line drawing of a mechanical housing with two cylindrical components and a base plate (no text or symbols)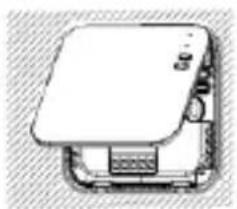
natural_image
Illustration of a flat-screen printer or scanner device (no text or symbols visible)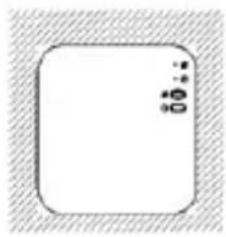
natural_image
Blank rounded square with hatched border and small dotted line at bottom (no text or symbols)ZÁRUČNÍ A POZÁRUČNÍ SERVIS
Copyright © Abacus Electric, s.r.o.
www.evolveo.com
www.facebook.com/EvolveoCZ
BEZPECNOSTNE UPOZORNENIA A POKYNY
Smart Life

Tuya
natural_image
Diagram of a device inside a rectangular housing with an arrow indicating a component or connection (no text or symbols present)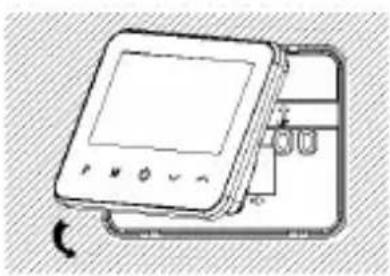
natural_image
Illustration of a handheld electronic device with a screen and keypad, showing internal components (no text or symbols)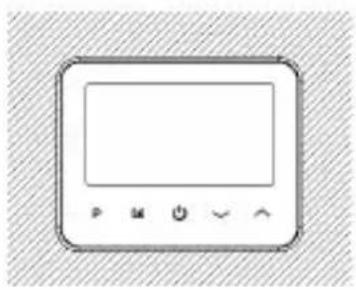
natural_image
Simple line drawing of a rectangular device with control buttons (no text or symbols)INŠTALÁCIA TERMOSTATU NA STÓL
natural_image
Line drawing of a handheld electronic device with two USB cable connectors and a screen displaying the same body (no text or symbols)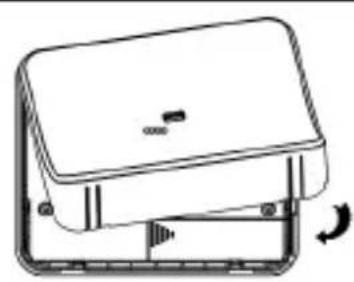
natural_image
Diagram of a device with a lid and internal components, showing a rotating arrow (no text or symbols)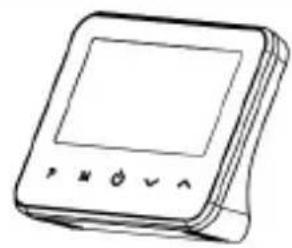
natural_image
Line drawing of a handheld electronic device with a screen and control buttons (no text or symbols)INŠTALÁCIA PRIJÍMAČA NA STENU
natural_image
Simple line drawing of a rectangular electronic component with two side tabs and a spring-like base (no text or symbols)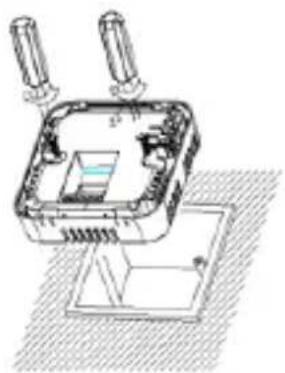
natural_image
Technical line drawing of a mechanical or electronic component with two protruding pins and internal components (no text or symbols)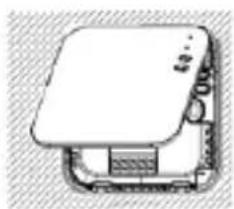
natural_image
Simple line drawing of a closed book or notebook device with no visible text or symbols
natural_image
Blank rounded rectangle with diagonal hatching, no text or symbols visibleZÁRUČNY A POZÁRUČNY SERVIS
Copyright © Abacus Electric, s.r.o.
www.evolveo.com
www.facebook.com/EvolveoCZ
SAFETY WARNINGS AND INSTRUCTIONS.... 33
PACKAGING CONTENT.... 34
SPECIFICATIONS 34
DEGREE OF PROTECTION AGAINST ELECTRIC SHOCK ...... 35
DESCRIPTION OF INDIVIDUAL PARTS 35
WIRING DIAGRAM.... 36
SERVICE 37
INSTALLATION 42
WARRANTY AND POST-WARRANTY SERVICE.... 44
INTRODUCTION
The Thermal thermostat is designed for efficient control of heating or air conditioning systems. Unlike standard home thermostats, Thermal features an innovative design where the control unit (transmitter) and switching unit (receiver) are separated and connected by a wireless link. The switching unit is designed to connect and control the heating/air conditioning system, while the portable control unit is used for convenient operation and temperature adjustment. These units communicate with each other via a reliable radio signal. The key advantage of this system is its variability and easy access to temperature control, ensuring comfortable and efficient climate control in your premises.
WELCOME TO THE EVOLVEO FAMILY OF PRODUCTS
- Read the operating instructions for the thermostat and the boiler or air conditioner carefully before using it for the first time.
- Keep this user manual for future reference
- Make sure that others who will be using this thermostat read this user manual.
- We recommend keeping the original product packaging for the duration of the warranty
THE MOST UP-TO-DATE VERSION OF THE USER MANUAL
Due to the ongoing innovation of EVOLVEO products and changes in legislation, you can always find the most up-to-date version of this user manual on the website www.evolveo.com or by simply scanning the QR code shown below with your mobile phone:

SAFETY WARNINGS AND INSTRUCTIONS
Warning: This appliance must only be installed by a qualified person. WARNING! There is a risk of injury or damage to the appliance if not installed correctly.
(A) GENERAL NOTICES
- Read the operating instructions for the thermostat and the boiler or air conditioner carefully before using it for the first time.
- Turn off the power before installing the thermostat.
- We recommend that installation is carried out by a qualified person.
-
Follow the prescribed standards for installation.
-
Use the thermostat only as specified in this user manual.
- Unpack the thermostat carefully, taking care not to throw away any part of the packaging material before you have found all the components of the product.
- Exercise extra caution if the thermostat will be used around children. Always place the thermostat out of their reach. Children should be supervised to ensure that they do not play with the product.
- Do not allow the thermostat to be used as a toy.
- Do not shake the product and make sure it does not fall to the ground.
- The manufacturer is not liable for damages caused by improper use of the thermostat and its accessories.
(B) THE LOCATION OF THE EQUIPMENT
- Place the thermostat on a horizontal surface or add to the wall
- Use and store the thermostat away from explosive gases, flammable, combustible and volatile substances (solvents, varnishes, adhesives, etc.).
- Do not use the thermostat within the range of a strong electromagnetic field (e.g. microwave oven).
- Do not place the thermostat or its accessories on or near an electric or gas cooker or on the edge of a table or kitchen worktop.
- Do not expose the thermostat to dripping or splashing water. Do not spray or rinse it with water or any other liquid. Do not immerse it in water or any other liquid, even partially.
PACKAGING CONTENT
- Thermal thermostat receiver
- Wall mounting frame
- Table stand
- Power cable
- Power adapter
- Manual
- 4× screw (4 × 22 mm)
- 4× screw (3.5 × 22 mm)
- Thermal thermostat transmitter
SPECIFICATIONS
Power supply: 2×AA alkaline batteries | USB: 5.0 V / 1.0 A
Backup storage: EEPROM
Receiver operating voltage: AC 230 V, 50/60 Hz
Maximum voltage / (ohmic) load: AC 250 V, 10.0 A
Frequency: 868 MHz
Channel selection: Programming the thermostat and receiver
Switching options: 7 days / 4 periods every day
Receiver switch contacts: NO and NC
Temperature setting: 5 °C \~ 35 °C, in 0.5 °C increments.
Accuracy: +/- 0.5°C
Thermostat dimensions: 125 × 98 × 23.5 mm
Receiver dimensions: 90 × 90 × 26 mm
Degree of protection IP: IP20
DEGREE OF PROTECTION AGAINST ELECTRIC SHOCK
Class II - Protection against electric shock is provided by double or reinforced insulation.
DESCRIPTION OF INDIVIDUAL PARTS
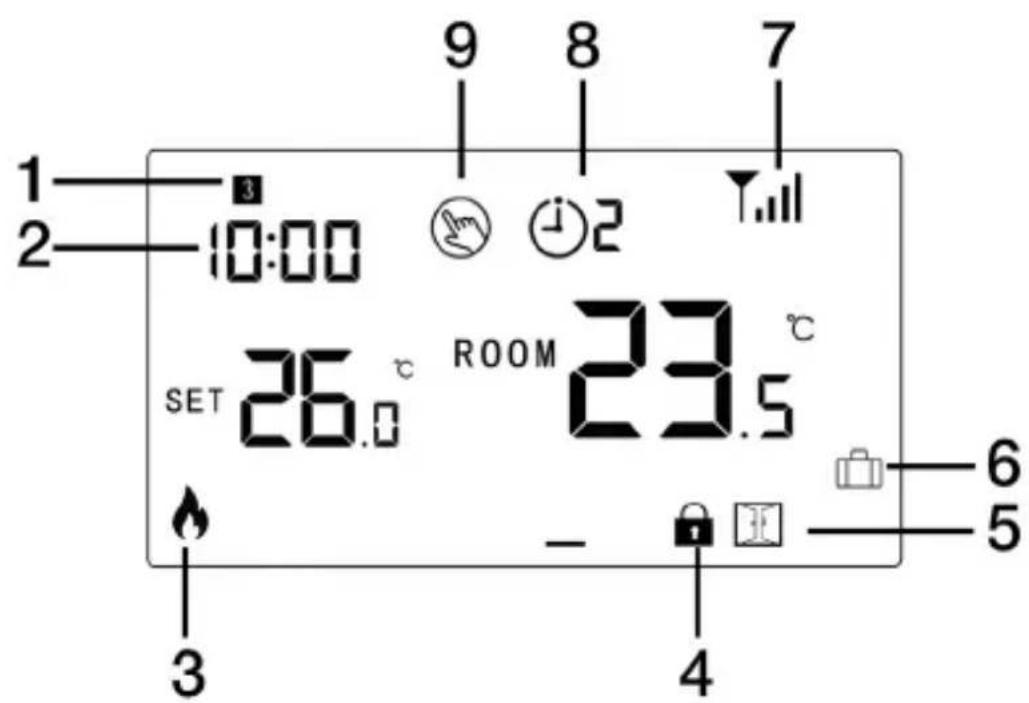
1) Day of the week
2) Hodiny
3) Heating on
4) Child lock
5) Open Window Mode
6) Absence mode
7) Signal icon
8) Current PRG period
9) Manual mode
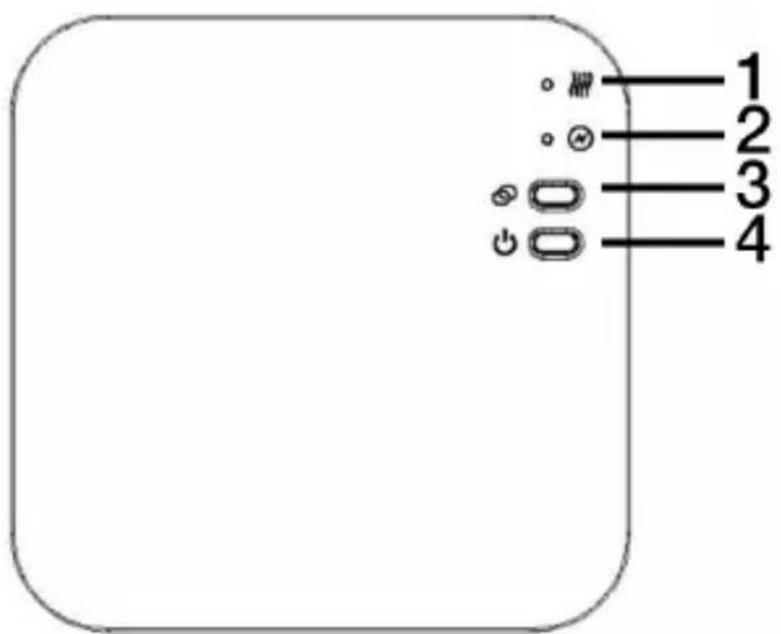
1) Heating on indicator LED1
3) Pairing button
2) Power indicator LED2
4) On/Off button
WIRING DIAGRAM
For voltage-free boiler/heat pump control
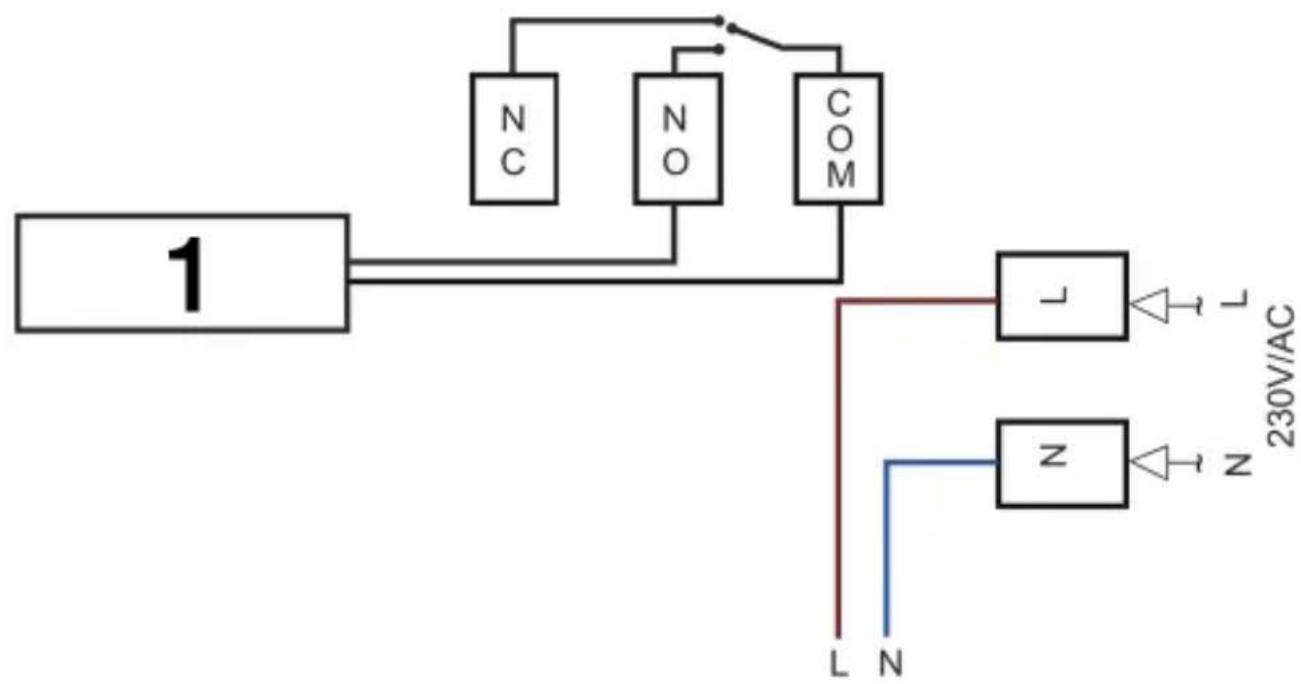
flowchart
graph TD
    A["1"] --> B["N C"]
    A --> C["N O"]
    A --> D["COM"]
    B --> E["L"]
    C --> F["z"]
    D --> G["230V/AC"]
    H["L"] --> I["↔"]
    J["N"] --> K["↔"]
    L["N"] --> M["↔"]
1) Boiler / Heat pump
For controlling an electric heater/heat drive with 230 V AC output (COM & L cable)
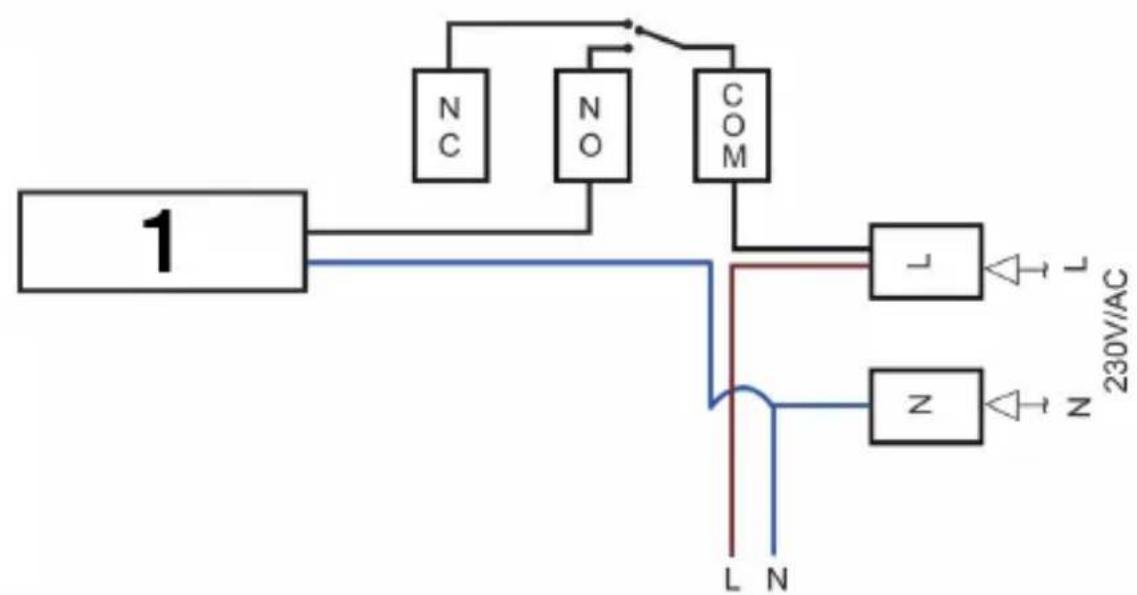
flowchart
graph TD
    A["1"] --> B["N C"]
    A --> C["NO"]
    A --> D["COM"]
    B --> E["L"]
    C --> F["z"]
    D --> G["230V/AC"]
    H["L"] --> I["N"]
    J["N"] --> K["COM"]
    style A fill:#f9f,stroke:#333
    style H fill:#ccf,stroke:#333
    style J fill:#ccf,stroke:#333
1) Electric Heater / Thermal Drive
SERVICE
CLOCK SETTINGS
The date and time settings are automatically updated when the thermostat is connected to a Wi-Fi network via the app. If this does not happen, follow the procedure below:
Press and hold the M button for 3 seconds, set the clock and preset temperature
for each mode by pressing the ^ and √ buttons, each press of the M button will move to the next item setting.
| Offer | Description | Offer | Description |
| 01 | Settings - Minutes | 03 | Settings - weekday |
| 02 | Settings - Clock | 04 | Preset mode temperature |
CHILDREN'S LOCK
When the child lock is activated (see function 11 in parameter settings), the buttons will be locked when the backlight is switched off. To temporarily set them,
unlock them by pressing the and buttons simultaneously for 5 seconds.
MODE SELECTION
Press the M button to switch from PRG mode ⏻ to absent mode or manual mode 📂.
Notes:
Absence mode: a thermostat temperature setting that replaces the pre-programmed temperature with a temperature of your choice, making it easy to save energy when you're away from home for extended periods of time. When you are away from home, you can select the absence mode by pressing the
M button , then the thermostat will operate according to the preset energy saving temperature (7°C recommended), you can change the temperature by
pressing ^ and .
PRG SETUP
(Recommended option) After pairing the thermostat and controller and connecting the system to Wi-Fi, program everything through the app.
(Alternative option without using the app) Press and hold the P button for 3 seconds to enter the program settings.
Press the ^ and √ buttons to set the schedule (day of the week-period-start time-temperature), each press of the P button moves to the next setting item.
Default settings:
| Period | 1 | 2 | 3 | 4 | ||||
| Time | Temperature | Time | Temperature | Time | Temperature | Time | Temperature | |
| 12345(Mo-Fr) | 7:00 | 22 °C | 8:30 | 19 °C | 17:00 | 22 °C | 22:00 | 19 °C |
| 6(Saturday) | 8:00 | 22 °C | 8:30 | 22 °C | 17:00 | 22 °C | 22:00 | 19 °C |
| 7(Sunday) | 8:00 | 22 °C | 8:30 | 22 °C | 17:00 | 22 °C | 22:00 | 19 °C |
OPEN WINDOW DETECTION (OWD) FUNCTION
If the open window detection function is enabled in the parameter settings, the system will automatically stop heating when it detects a sudden drop in room temperature (normally 2 °C in 15 minutes). This is usually caused by opening a window or door without turning off the heating device.
After 30 minutes, the device will return to the previous operating mode and the

light will disappear. Press any button to exit the OWD function during the heating off period.
DEVICE PAIRING
1) Long press the pairing button on the receiver until LED1 flashes rapidly.
2) Turn off the control unit and long press the M button until the code appears on
the screen, then press the button.
3) Wait for a while until LED1 stops flashing - the pairing was successful.
CONNECTION TO THE APPLICATION
Download the "Smart life" app (Tuya) from Google play or the App Store. Once downloaded, the app will prompt you to register your device. Enter your email, select your country, and create a password for your "Smart life" (Tuya) account.

Smart Life

Tuya
Bluetooth connection method
- Enable Bluetooth on your phone
- Press the "+" button in the top right corner to add a device.
- Long press the pairing button on the receiver to enter connection mode, the LED will flash rapidly.
-
After the app finds a nearby Bluetooth device, press the "Add" button.
-
Select Wi-Fi and enter your password
- Wait for the device to successfully add
Wi-Fi connection method
- Press the "+" button in the top right corner to add a device
- Go to "Small Home Appliances" and select "Thermostat (BLE+Wi-Fi)" from the list.
- Select the 2.4Ghz Wi-Fi network, enter the password and press the "Next" button
- Long press the pairing button on the receiver to enter connection mode, the LED will flash rapidly
- Press the "Next" button in the app, check the "LED flashes fast" box on your phone and add the device
- Wait for a while until the connection is complete. The LED on the receiver stops flashing. Connection to WiFi was successful
If the LED still flashes slowly, the connection has failed, try again from step 5
Remark: If the device is connected and remains online when you want to make a new connection, remove the device from the app or clear all pairings on the receiver.
PARAMETER SETTINGS
Turn off the thermostat, press and hold the M button and the button for 6 seconds to enter the parameter settings. Press the M button each time to move to
the next item setting. Set the value by pressing ^ or . √
| Offer | Description | Scope | Default value |
| 01 | Temperature calibration of the internal sensor | -8 °C - 8 °C | 0°C |
| 02 | Set point Max. | 5 °C - 35 °C | 35 °C |
| 03 | Set Point Min. | 5 °C - 35 °C | 5 °C |
| 05 | Frost protection settings | Disable: ×Allow: 5 °C - 15 °C | 5 °C |
| 09 | Switching differential | 0 - 3 °C | 0 °C |
| 11 | Children's castle | 1: Enable 0: Disable | 0 |
| 12 | Open window detection function | 1: Enable0: Disable | 0 |
| 13 | OWD detection time | 2 - 30 minutes | 15minutes |
| 14 | OWD temperature drop (atthe time of detection) | 2, 3, 4 °C | 2 °C |
| 15 | OWD delay time selection (Return to previous working state) | 10 - 60min | 30minutes |
| 17 | Restore factory settings | 0: No | 0 |
| 1: Yes, then press the on/off button for 5 seconds, wait for the thermostat to restart | |||
| 32 | Setting the brightness in standby mode (only when powered via USB) | 0 - 100% | 40% |
DESCRIPTION OF OPTIONAL SETTINGS
- Function 01: This function is used to calibrate the temperature of the air sensor if necessary
- Feature 02/03: Max. and min. temperature
- Function 05: Frost protection Temperature setting: This temperature is maintained when the thermostat is in frost protection mode
- Function 09: Switching Differential - This function allows you to increase the switching differential of the thermostat. The default value is 0^ , which means that if the temperature is set to 20^ , the thermostat will switch the heating on at 19.5^ and off at 20.5^ . With a difference of 0.5^ , the heater switches on at 19^ and off at 21^
- Function 11: This function is used to lock the buttons. Once activated, the buttons will lock when the backlight is turned off, you can long press the

and

buttons to temporarily unlock them.
- Function 12: This feature allows you to save energy. If you enable the open window detection function, the system will automatically stop heating when it detects a sudden drop in room temperature (normally 2 °C in 15 minutes). This is usually caused by opening a window or door without turning off the heating device
- Function 13: set the room temperature drop detection time between 2-15 minutes (15 minutes is the default setting)
- Function 14: temperature drop during detection time. Settings between 2-4 °C (default setting is 2 °C)
- Function 15: Select the time to exit OWD mode. Setting between 10-60 min (30 min is the default setting)
- Function 17: Factory reset. If factory reset is required, set menu 17 to 1 and then long press the on/off button until the thermostat restarts.
- Function 32: Setting the backlight brightness in standby mode: When powered by a 5.0 V/1.0 A thermostat, the backlight brightness can be set from 0-100%, 0% means the backlight is off. If the thermostat is powered by an AA battery, the backlight will be switched off to save energy.
INSTALLATION
INSTALLING THE THERMOSTAT ON THE WALL
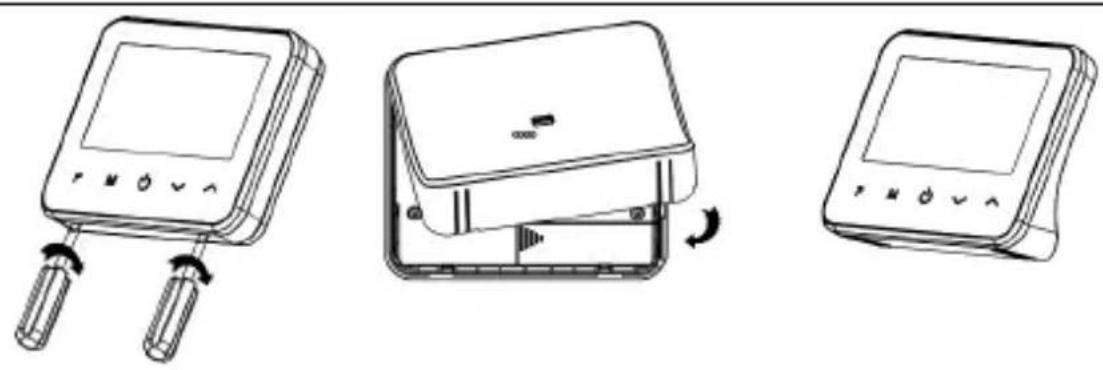
- Carefully separate the front of the thermostat from the back plate by inserting a small flathead screwdriver into the grooves on the bottom of the thermostat.
- Use the back plate as a positioning template to mark the 2 hole positions on the wall. Drill holes at the marked locations and insert a dowel into each hole. Screw the back plate of the thermostat firmly to the wall.
- Remove the battery cover and insert the batteries.
- Attach the front of the thermostat back to the back plate of the thermostat.
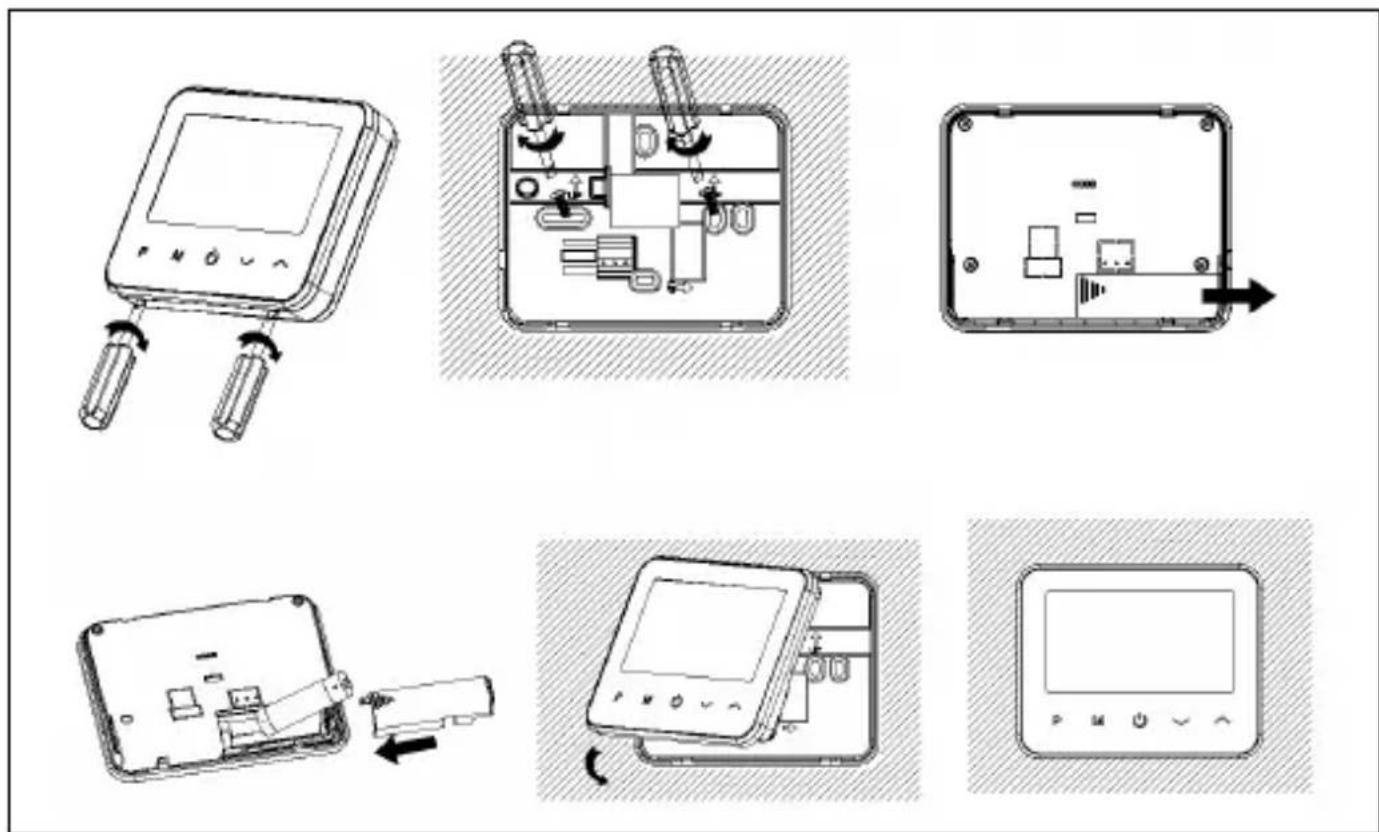
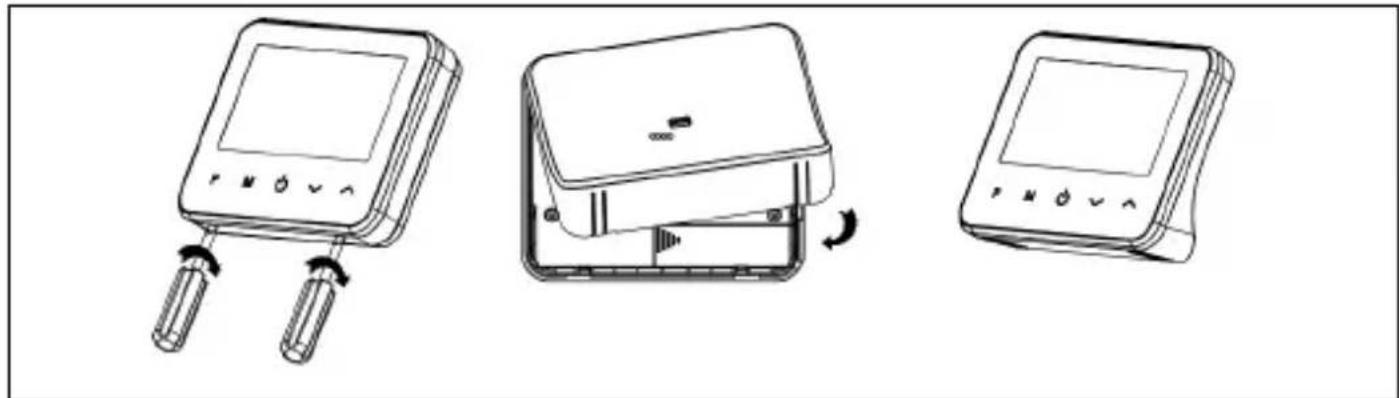
INSTALLING A THERMOSTAT ON THE TABLE
- Carefully separate the front of the thermostat from the back plate by inserting a small flathead screwdriver into the grooves on the bottom of the thermostat
- Attach the front of the thermostat to the table stand provided.
natural_image
Three line drawings of electronic devices with buttons and adjustment knobs, showing mechanical assembly (no text or symbols)INSTALLATION OF THE RECEIVER ON THE WALL
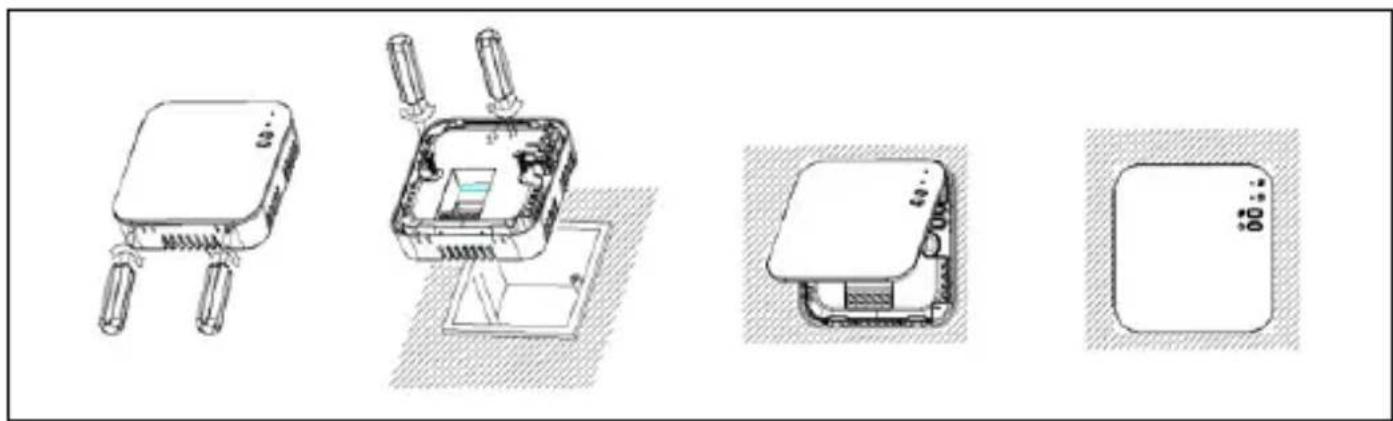
- Using a small screwdriver, slightly loosen the screw located on the base of the RF switch. You can then carefully separate the front panel from the back panel.
- Place the back plate of the RF-receiver on the wall and fix it with the screws provided.
- Connect the cables to the RF receiver according to the wiring diagram.
- Mount the front panel on the back plate and tighten the fixing screw.
- Turn on the power - the power light will come on.
natural_image
Four technical illustrations of electronic devices with no visible text or symbolsWARRANTY AND POST-WARRANTY SERVICE
Repairs and servicing can only be carried out at an authorized service point for EVOLVEO products (more at www.evolveo.com), otherwise you may damage the product and lose the warranty.
| Power Adapter Specifications | Unit | |
| Name address and business registration number of the equipment manufacturer | Abacus Electric s.r.o. Cukrovarská 987, 196 00 Prague 9 | - |
| Manufacturer's name or trademark, registration number and address of the AC adapter manufacturer | SHENZHEN TIANYIN ELECTRONICS CO., LTD Building 13, 3rd of Tangtou Nangang Industrial Park, Shiyan Street, Baoan, Shenzhen, China 518100 | - |
| Model identifier | TPA-46050100VU | - |
| Input voltage | 100-240 | V |
| AC input frequency | 50/60 | Hz |
| Output voltage | 5 | V |
| Output current | 1 | A |
| Output power | 5 | W |
| Average active efficiency | 73,63% | % |
| No-load power consumption | <= 0.1 | W |

Disposal: The crossed-out container symbol on the product, in the accompanying documentation or on the packaging means that in EU countries, all electrical and electronic equipment, batteries and accumulators must be disposed of separately at the end of their useful life as separated waste. Do not dispose of these products in unsorted municipal waste.
CE DECLARATION OF CONFORMITY
The company Abacus Electric, s.r.o. hereby declares that the EVOLVEO Thermal phone meets the requirements of the standards and regulations that are relevant for this type of equipment.
The full text of the Declaration of Conformity can be found at http://ftp.evolveo.com/ce/
Importer / Manufacturer
Abacus Electric, s.r.o.
Planá 2, 370 01, Czech Republic
Made in China
Copyright © Abacus Electric, s.r.o.
www.evolveo.com
www.facebook.com/EvolveoCZ
All rights reserved. The appearance and technical specifications of the product are subject to change without notice.
Tartalomjegyzék
BEVEZETÉS.... 47
ÜDVÖZÖLJÜK AZ EVOLVEO TERMÉKCSALÁDBAN.... 47
A FELHASZNÁLÓI KÉZIKÖNYV LEGFRISSEBB VERZIÓJA ...... 47
BIZTONSÁGI FIGYELMEZTETÉSEK ÉS UTASÍTÁSOK ...... 47
CSOMAGOLÁSI TARTALOM 49
SPECIFIKÁCIÓK 49
AZ ÁRAMÜTÉS ELLENI VÉDELEM MÉRTÉKE...... 49
AZ EGYES ALKATRÉSZEK LEÍRÁSA.... 50
KÁBELEZÉSI DIAGRAM.... 51
SZOLGÁLTATÁS....52
BEÁLLÍTÁS....57
Smart Life

Tuya
natural_image
Diagram of a device inside a rectangular housing with an arrow indicating a transformation or assembly (no text or symbols present)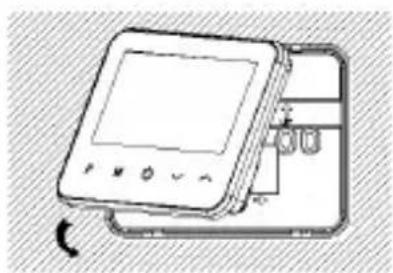
natural_image
Illustration of a handheld electronic device with a screen and internal components, no visible text or symbols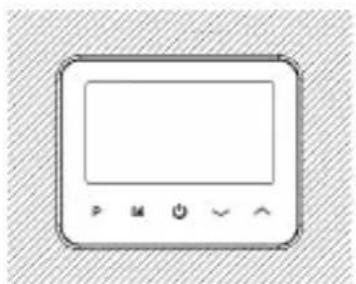
natural_image
Front view of a rectangular electronic device with control buttons (no text or symbols visible)TERMOSZTAT TELEPITESE AZ ASZTALRA
natural_image
Line drawing of a handheld electronic device with two ports and directional arrows indicating rotation (no text or symbols)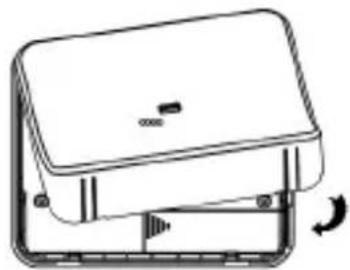
natural_image
Line drawing of a mechanical device with a lid and base, showing a rotating mechanism (no text or symbols)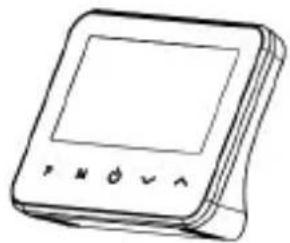
natural_image
Line drawing of a handheld electronic device with control buttons (no text or symbols)A VEVOEGYSEG FALRA SZERELESE
natural_image
Simple line drawing of a rectangular electronic component with three leads (no text or symbols)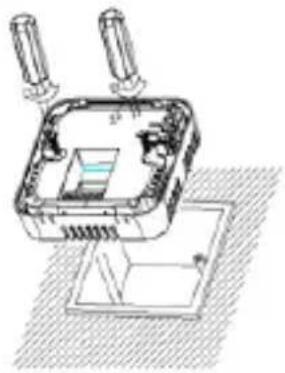
natural_image
Technical line drawing of a mechanical assembly with two cylindrical components and a base plate (no text or symbols)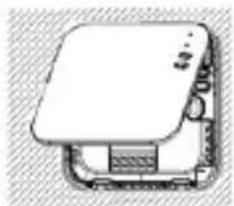
natural_image
Simple line drawing of a computer monitor with a lid and front panel (no text or symbols)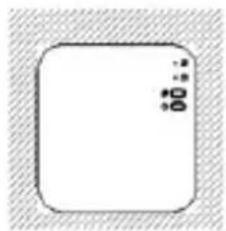
natural_image
Blank white rounded rectangle with hatched background (no text or symbols)Copyright © Abacus Electric, s.r.o.
www.evolveo.com
www.facebook.com/EvolveoCZ
AVERTISMENTE ŞI INSTRUCTIUNI DE SIGURANȚA
Smart Life

Tuya
Metoda de conectare Bluetooth
natural_image
Simple line drawing of a rectangular electronic component with two side connectors (no text or symbols)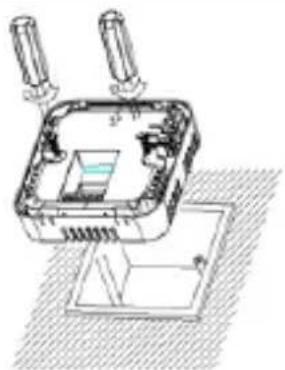
natural_image
Technical line drawing of an electrical enclosure with two terminals and a base plate (no text or symbols)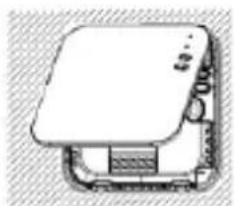
natural_image
Simple line drawing of a mechanical device with no text or symbols
natural_image
Blank rounded rectangle with diagonal hatching, no text or symbols visibleGARANTIE ŞI SERVICE POST-GARANTIE
Copyright © Abacus Electric, s.r.o.
www.evolveo.com
www.facebook.com/EvolveoCZ
Smart Life

Tuya

natural_image
Line drawing of a handheld electronic device with two ports and a screen, no text or symbols present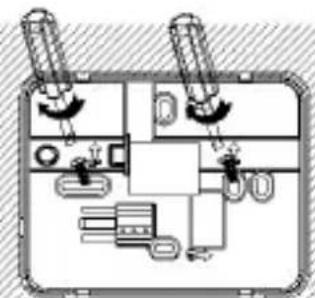
natural_image
Pure electrical circuit lines without any symbols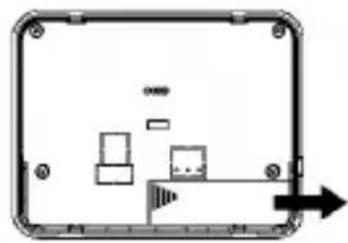
natural_image
Diagram of a rectangular device with internal components and directional arrows, no readable text or symbols present.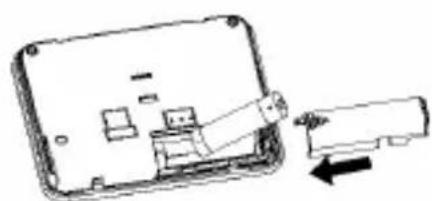
natural_image
Diagram of a device inside a rectangular housing with an arrow indicating a component or connection (no text or symbols present)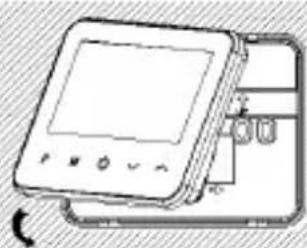
natural_image
Illustration of a handheld electronic device with a screen and keypad, partially enclosed in a rectangular frame (no text or symbols visible)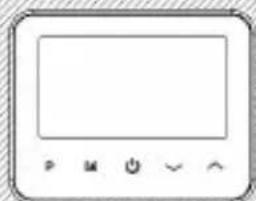
natural_image
Simple icon of a monitor with control buttons below (no text or symbols)INSTALLATION EINES THERMOSTATS AUF DEM TISCH
natural_image
Three line drawings of a device with buttons and a scroll, showing mechanical adjustment (no text or symbols)MONTAGE DES EMPFÄNGERS AN DER WAND
natural_image
Simple line drawing of a rectangular electronic component with three leads (no text or symbols)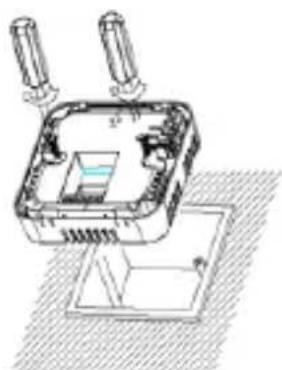
natural_image
Technical line drawing of an electrical enclosure with two probes and a base plate (no text or symbols)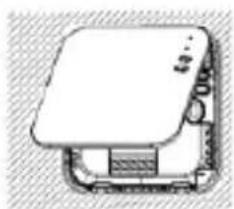
natural_image
Simple line drawing of a computer monitor with no text or symbols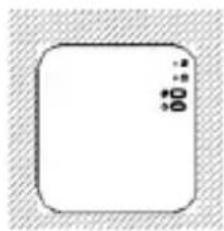
natural_image
Blank rounded rectangle with diagonal hatching on the left (no text or symbols)GARANTIE UND NACHGARANTIESERVICE
Copyright © Abacus Electric, s.r.o.
www.evolveo.com
www.facebook.com/EvolveoCZ
Smart Life

Tuya
natural_image
Line drawing of a handheld electronic device with two ports and a screen (no text or symbols)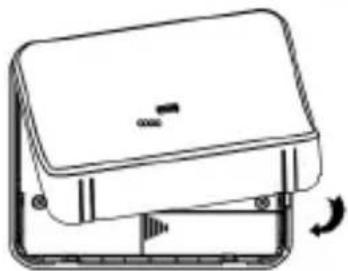
natural_image
Diagram of a device with a lid and base, showing a rotating arrow (no text or symbols)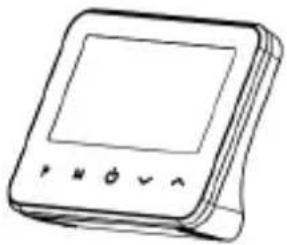
natural_image
Line drawing of a handheld electronic device with a screen and control buttons (no text or symbols)natural_image
Four technical illustrations of electronic components with no visible text or symbolsGARANZIA E ASSISTENZA POST-GARANZIA
Copyright © Abacus Electric, s.r.o.
www.evolveo.com
www.facebook.com/EvolveoCZ
VARNOSTNA OPOZORILA IN NAVODILA
Pametno življenje

Tuya
Način povezave Bluetooth
natural_image
Simple icon of a digital display with control buttons (no text or symbols)NAMESTITEV TERMOSTATA NA MIZO
- Previdno ločite sprednji del termostata od zadnje plošče tako, da v utore na dnu termostata vstavite majhen izvijač z ravno glavo.
- Sprednji del termostata pritrdite na priloženo namizno stojalo.
NAMESTITEV SPREJEMNIKA NA STENO
natural_image
Simple line drawing of a rectangular electronic component with two side handles (no text or symbols)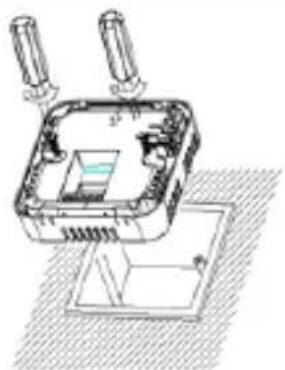
natural_image
Technical line drawing of a mechanical assembly with two cylindrical components and a base plate (no text or symbols)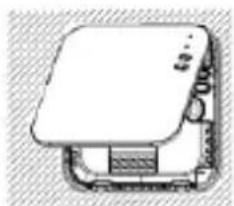
natural_image
Simple line drawing of a mechanical device with no text or symbols
natural_image
Blank rounded square with diagonal hatching, no text or symbols visibleGARANCIJSKI IN POGARANCIJSKI SERVIS
Copyright © Abacus Electric, s.r.o.
www.evolveo.com
www.facebook.com/EvolveoCZ


- BEZPECNOSTNI UPOZORNENI A POKYNY
- PROPOJENÍ S APLIKACÍ
- INSTALACE TERMOSTATU NA STĚNU
- INSTALACE TERMOSTATU NA STUL
- INSTALACE PRIJIMACE NA STENU
- ZÁRUČNÍ A POZÁRUČNÍ SERVIS
- BEZPECNOSTNE UPOZORNENIA A POKYNY
- INŠTALÁCIA TERMOSTATU NA STÓL
- INŠTALÁCIA PRIJÍMAČA NA STENU
- ZÁRUČNY A POZÁRUČNY SERVIS
- INTRODUCTION
- WELCOME TO THE EVOLVEO FAMILY OF PRODUCTS
- THE MOST UP-TO-DATE VERSION OF THE USER MANUAL
- SAFETY WARNINGS AND INSTRUCTIONS
- GENERAL NOTICES
- THE LOCATION OF THE EQUIPMENT
- PACKAGING CONTENT
- SPECIFICATIONS
- DEGREE OF PROTECTION AGAINST ELECTRIC SHOCK
- DESCRIPTION OF INDIVIDUAL PARTS
- WIRING DIAGRAM
- SERVICE
- CLOCK SETTINGS
- CHILDREN'S LOCK
- MODE SELECTION
- Notes:
- PRG SETUP
- OPEN WINDOW DETECTION (OWD) FUNCTION
- DEVICE PAIRING
- CONNECTION TO THE APPLICATION
- Bluetooth connection method
- Wi-Fi connection method
- PARAMETER SETTINGS
- DESCRIPTION OF OPTIONAL SETTINGS
- INSTALLATION
- INSTALLING THE THERMOSTAT ON THE WALL
- INSTALLING A THERMOSTAT ON THE TABLE
- INSTALLATION OF THE RECEIVER ON THE WALL
- WARRANTY AND POST-WARRANTY SERVICE
- CE DECLARATION OF CONFORMITY
- Tartalomjegyzék
- TERMOSZTAT TELEPITESE AZ ASZTALRA
- A VEVOEGYSEG FALRA SZERELESE
- AVERTISMENTE ŞI INSTRUCTIUNI DE SIGURANȚA
- Metoda de conectare Bluetooth
- GARANTIE ŞI SERVICE POST-GARANTIE
- INSTALLATION EINES THERMOSTATS AUF DEM TISCH
- MONTAGE DES EMPFÄNGERS AN DER WAND
- GARANTIE UND NACHGARANTIESERVICE
- GARANZIA E ASSISTENZA POST-GARANZIA
- VARNOSTNA OPOZORILA IN NAVODILA
- Način povezave Bluetooth
- NAMESTITEV TERMOSTATA NA MIZO
- NAMESTITEV SPREJEMNIKA NA STENO
- GARANCIJSKI IN POGARANCIJSKI SERVIS
Brand : Evolveo
Model : Thermal
Category : Home Automation