
BXWSH2000E - Water heater BLACK & DECKER - Free user manual and instructions
Find the device manual for free BXWSH2000E BLACK & DECKER in PDF.

| Product Type | Wall-Mounted Electric Heater |
| Brand | Black & Decker |
| Model | BXWSH2000E |
| Power | 2000 W (Low: 1000 W, High: 2000 W) |
| Voltage | 220-240 V ~ 50/60 Hz |
| Heating Elements | PTC ceramic |
| Fan Speeds | 2 heat levels + fan-only mode |
| Timer | 1-12 hours (manual and remote) |
| Temperature Range | 10-49 °C |
| Control | Touch panel on unit + remote control |
| Remote Control | Yes (included) |
| Oscillation | Yes |
| Weekly Program | Yes (6 programs per day, 7 days) |
| Open-Window Detection | Yes (automatically stops heating if temperature drops rapidly) |
| Safety Features | Overheat protection, thermal cut-out, child lock (via remote), IP24 splash-proof |
| Installation Height | Minimum 1.8 m above floor |
| Clearance from Combustibles | Minimum 50 cm |
| Dimensions (approx.) | 60 x 15 x 30 cm (L x W x H) |
| Weight (approx.) | 2.5 kg |
| Cleaning | Wipe with damp cloth; do not use solvents or immerse |
| Warranty | 2 years (legal guarantee) |
Frequently Asked Questions - BXWSH2000E BLACK & DECKER
User questions about BXWSH2000E BLACK & DECKER
0 question about this device. Answer the ones you know or ask your own.
Ask a new question about this device
Download the instructions for your Water heater in PDF format for free! Find your manual BXWSH2000E - BLACK & DECKER and take your electronic device back in hand. On this page are published all the documents necessary for the use of your device. BXWSH2000E by BLACK & DECKER.
USER MANUAL BXWSH2000E BLACK & DECKER
EN: This product is only suitable for well insulated spaces or occasional use.
natural_image
Diagram of a brick wall with a rectangular opening and two small arrows pointing inward (no text or symbols)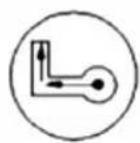

ENGLISH
(Original instructions)
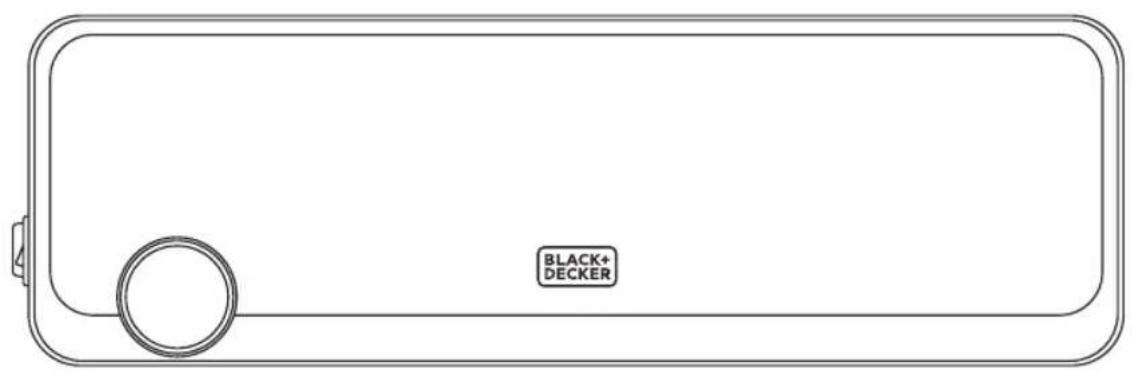
Wall Mounted Heater BXWSH2000E
Dear customer,
Many thanks for choosing to purchase a BLACK+DECKER brand product.
Thanks to its technology, design and operation and the fact that it exceeds the strictest quality standards, a fully satisfactory use and long product life can be assured.
Read these instructions carefully before switching on the appliance and keep them for future reference. Failure to follow and observe these instructions could lead to an accident.
SAFETY ADVICE AND WARNINGS
♦ CAUTION: Some parts of this product can become very hot and cause burns. Particular attention has to be given where children and vulnerable people are present.
◆ The appliance must not be placed below a power socket.
◆ Children of less than 3 years should be kept away unless continuously supervised.
◆ Children aged from 3 years and less than 8 years shall only switch on/off the appliance provided that it has been placed or installed in its intended normal operating position and they have been given supervision or instruction concerning use of the appliance in a safe way and understand the hazards involved.
◆ This appliance can be used by chil-
dren aged from 8 years and above and persons with reduced physical, sensory or mental capabilities or lack of experience and knowledge if they have been given supervision or instruction concerning use of the appliance in a safe way and understand the hazards involved.
◆ Cleaning and user maintenance shall not be made by children unless they are supervised.
◆ Children aged from 3 years and less than 8 years shall not plug in, regulate and clean the appliance or perform user maintenance.
- This appliance is not a toy. Children should be supervised to ensure that they do not play with the appliance.
If the connection to the mains has been damaged, it must be replaced, take the appliance to an authorised technical support service. Do not attempt to disassemble or repair the appliance by yourself in order to avoid a hazard.
◆ This appliance is for household use only, not professional, industrial use.
- Ensure that the voltage indicated on the rating label matches the mains voltage before plugging in the appliance.
◆ Connect the appliance to a socket that can supply a minimum of 10 amperes. - The appliance's plug must fit into the mains socket properly. Do not alter the plug. Do not use plug adaptors.
◆ Use the appliance in a well-ventilated area.
- Keep the appliance away from flammable material such as textiles, cardboard or paper, etc.
(Original instructions)
ENGLISH
- Ensure that neither the air access nor exit become either totally or partially covered by drapery, clothing, etc., as this increases the risk of fire.
Do not use the appliance in association with a programmer, timer or other device that automatically switches it on. - Do not use the appliance if the cable or plug is damaged.
If any of the appliance casings breaks, immediately disconnect the appliance from the mains to prevent the possibility of an electric shock.
♦ CAUTION: Maintain the appliance dry.
♦ CAUTION: Do not use the appliance near water. - Do not force the power cord. Never use the power cord to lift up, carry or unplug the appliance.
◆ Do not wrap the power cord around the appliance.
◆ Do not clip or crease the power cord. - Do not allow the power cord to come into contact with the appliance's hot surfaces.
◆ Check the state of the power cord. Damaged or tangled cables increase the risk of electric shock.
◆ The appliance is not suitable for outdoor use.
Supply cord should be regularly examined for signs of damage, and if the cord is damaged, the appliance must not be used.
As an additional protection to the electrical supply for the appliance, it is advisable to have a differential current device with a maximum sensitivity of 30 mA. Ask for advice from a competent installer.
◆ Do not use or store the appliance outdoors.
Do not leave the appliance out in the rain or exposed to moisture. If water gets into the appliance, this will increase the risk of electric shock.
◆ Do not touch the plug with wet hands. - Do not use the appliance in the case of persons insensitive to heat (the appliance has heated surfaces).
- Do not touch the heated parts of the appliance, as it may cause serious burns.
Use and care:
◆ Fully extend the appliance's power cable before each use.
- Do not use the appliance if the on/off switch does not work.
If you use the appliance in a bathroom or similar place, unplug the appliance from the mains when it is not in use, even if it is only for a short while, as proximity to water involves a risk, even if the appliance is disconnected.
◆ Disconnect the appliance from the mains when not in use and before undertaking any cleaning task.
◆ Store this appliance out of reach of children and/or persons with physical, sensory or reduced mental or lack of experience and knowledge.
◆ Make sure that dust, dirt or other foreign objects do not block the fan grill on the appliance.
- Never leave the appliance connected and unattended if is not in use. This saves energy and prolongs the life of the appliance.
♦ Do not use the appliance to dry textiles of any kind.
Service:
Make sure that the appliance is serviced only by specialist personnel, and that only original spare parts or accessories are used to replace existing parts/accessories.
♦ CAUTION: There is a risk of fire if the appliance’s cleaning is not done according to these instructions.
◆ Any misuse or failure to follow the instructions for use renders the guarantee and the manufacturer's liability null and void.
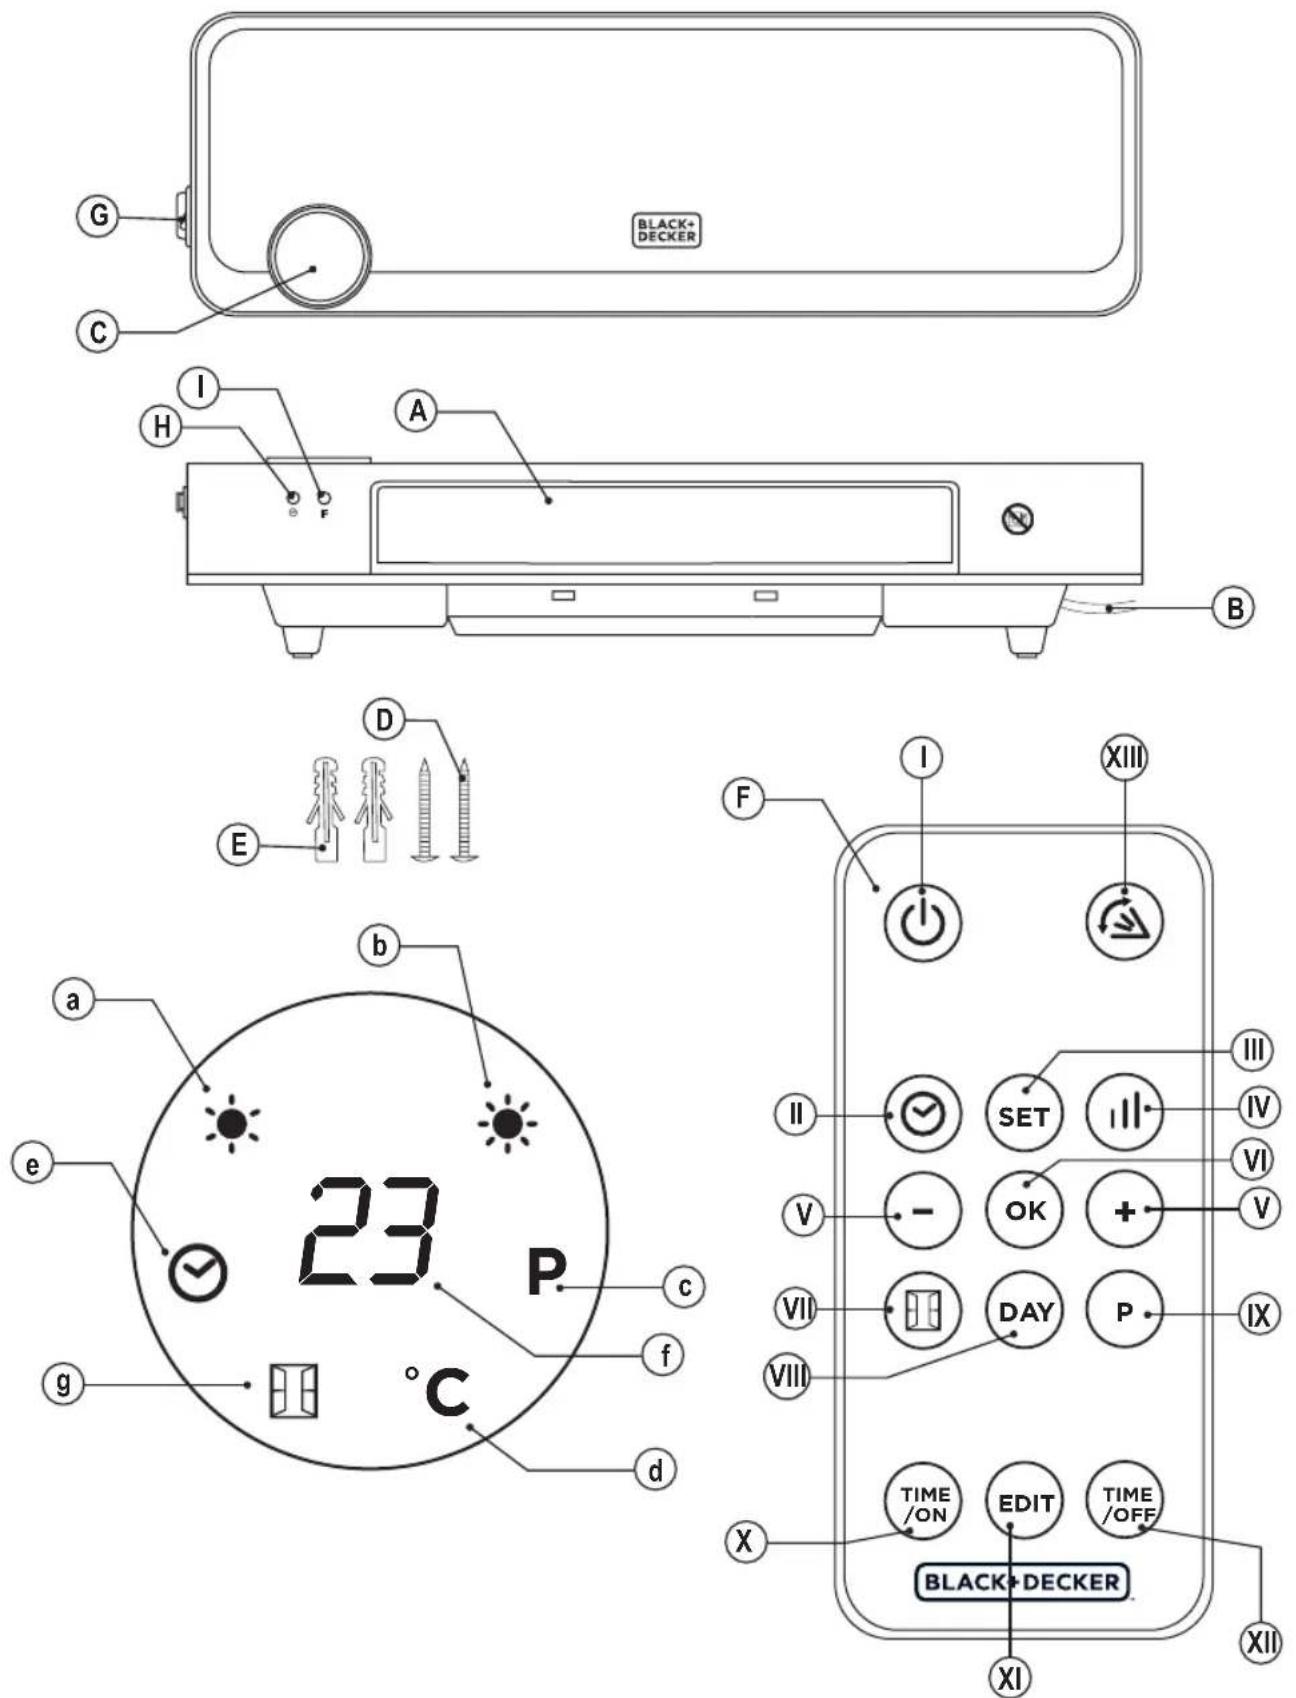
DESCRIPTION
A Louvers
B Power cord
C Screen
D Screws
E Expansion pipe
F Remote control
G On/off switch
H Timer button
| Modes button
SCREEN
a. Heat intensity I
b. Heat intensity II
c. Weekly program
d. Temperature
e. Timer
f. Degrees (°C)
g. Open-window function
REMOTE CONTROL
- On/off button
II. Timer button
III. Settings button
IV. Heat intensity button
V. +/- buttons
ENGLISH
(Original instructions)
VI. OK
VII. Open-window detection button
VIII. Day setting button
IX. Program button
X. Time ON button
XI. Edit button
XII. Time OFF button
XIII. Oscillation button
If the model of your appliance does not have the accessories described above, they can also be bought separately from the Technical Assistance Service.
INSTALLATION
- Be sure to remove all packaging material from inside the appliance.
◆ Install the appliance away from flammable material such as textiles, cardboard or paper, etc.
◆ Install the appliance a minimum distance of 50cm away from combustible materials, such as curtains, furniture ...
◆ Ensure that neither the air access nor exit become either totally or partially covered by drapery, clothing, etc., as this increases the risk of fire.
◆ Appliance must be installed at least 1,8 m above the floor.
In the event that the appliance is mounted on a bathroom wall, position it in such a way that the socket, power supply cable, switches or other controls are not within the reach a person in the bath, shower or at the wash-hand basin.
◆ The plug must be easily accessible so it can be disconnected in an emergency.
◆ Ensure that the appliance is properly and safely fixed in his working position with screws. To avoid damaging the appliance, on recommend to use only the holes specifically made by the manufacturer.
ASSEMBLING THE WALL BRACKET:
◆ Securing to the wall (Fig.1): Drill two holes in wall keeping a distance of 2,05m from the ground.
◆ Fix the pothook on the expansion pipes with the screws provided (D).
◆ Make sure the hooks are firm and place the appliance.
INSTRUCTIONS FOR USE
Before use:
◆ Make sure that all products' packaging has been removed.
Some parts of the appliance have been lightly greased. Consequently, the first time the appliance is used a light smoke may be detected. After a short time, this smoke will disappear.
To eliminate the smell given off by the appliance when used for the first time, it is recommended to have it on at full power for 2 hours in a well-ventilated room.
Use:
◆ Unroll the cable completely before plugging it in.
◆ Connect the appliance to the mains.
- Turn the appliance on, by using the on/off switch (G). The appliance enter into standby mode and displays shows "S".
FUNCTIONS (MANUAL AND REMOTE CONTROL):
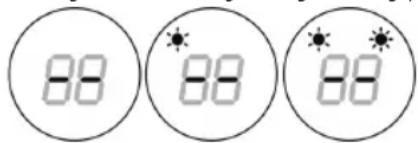
♦ Turn the appliance on, by using the ⏻ button. It will enter into fan mode and display will show “--”.
◆ Press the Ⓕ/ ⏻ button for one time, the appliance will work with low heating (1000W).
◆ Press again, it will change to high heating (2000W).
Timer:
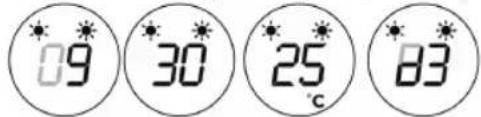
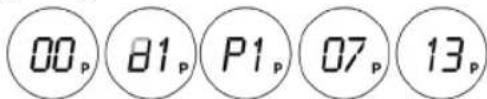
◆ Press the Ⓞ button to set the timer (1-12 hours). Pressing the button one time increases one hour. After setting the time, the display will show the current setting for 5 seconds, then it will resume to the previous display.
Meanwhile the light of ⓒ will be on.
TURN ON AT A SPECIFIC TIME:
In standby mode "S", press Ⓞ button for setting the appointment turn-on time (1-12 hours). After the setting is completed, the display will show the appointment turn-on.
- When the appointment power-on time arrives, the product will automatically turn on.
◆ The default temperature will be 23^ C.

Function operation (only remote control) Set the current time/day:
◆ Press SET button for one time and the display will show "12" as default. Press "+/-" to set the current hour.
◆ Press SET again, the display will show "30" as default. Press "+/-" to set the current minute.
◆ Press SET again, the display will show "d7" as default. Press "+/-" to set the current day (Monday-Sunday: d1-d7).
- Then press OK to confirm the setting.
SET THE TEMPERATURE:
During working status, press +/- buttons. The display will show 23°C as default.
◆ Press +/- to set the desired temperature (10-49°C) and then press OK to confirm it.
Example: Wednesday, 9:30 AM, 25°C, II heating.
◆ To cancel the setting temperature just press ⏻ button to choose heating I or II. The display will go off and it will show “- -”.
NOTE:
- When setting the temperature, it will use a SMART working way.
| Setting temperature – ambient temperature > 2°C | 2000W |
| 0°C < Setting temperature – ambient temperature < 2°C | 1000W |
| Setting temperature – ambient temperature = 0°C | Fan |
◆ The fan will work for 30 seconds and the it will stop. The appliance will inter into standby mode.
Set weekly program:
◆ Set the weekly program after setting the current time/day.
◆ If the product is not in working staus, press ⏻ button.
◆ Press Ⓟ button. The appliance is ready to set the weekly program.
◆ Press DAY button and the display will show d1-d7.
◆ Press EDIT button and the display will show P1-P6.
◆ To set the program 1 (P1), press TIME /OFF button and the display will show "00" as default. Press this button continuously to set the turn-on time.
◆ Press TIME OFF and the display will show the previous step turn-on time by default. Press this button continuously to set the turn-off time.
◆ Press +/- to set the temperature.
◆ Repeat these steps for the whole weekly program. Then press OK to confirm.
◆ To cancel the weekly function, press the Ⓞ button and "P" light will go off.
OPEN-WINDOW DETECTION FUNCTION:
◆ If the product is not in working staus, press ⏻ button.
◆ Press 📄 and the appliance will show 23°C as default. Press +/- to set the temperature.
When the ambient temperature drops 5-10°C within 10 minutes, the product will stop working for 30min and it will enter into standby mode.
◆ Press 📄 again to turn off the open-window detection function.
Once you have finished using the appli- ance:
◆ Turn the appliance off, using the on/off switch.
◆ Unplug the appliance from the mains.
◆ Clean the appliance.
Safety thermal protector:
- The appliance has a safety device, which protects the appliance from overheating.
When the appliance switches itself on and off repeatedly, for reasons other than the thermostat control, check to ensure that there are no obstacles that impede correct air entry or expulsion.
If the appliance turns itself off and does not switch itself on again, disconnect it from the mains supply, and wait for approximately 15 minutes before reconnecting. If the machine does not start again seek authorised technical assistance.
CLEANING
◆ Disconnect the appliance from the mains and allow it to

ENGLISH
(Original instructions)
cool before undertaking any cleaning task.
◆ Clean the equipment with a damp cloth with a few drops of washing-up liquid and then dry.
Do not use solvents, or products with an acid or base pH such as bleach, or abrasive products, for cleaning the appliance.
Do not let water or any other liquid get into the air vents to avoid damage to the inner parts of the appliance.
- Never submerge the appliance in water or any other liquid or place it under running water.
If the appliance is not in good condition of cleanliness, its surface may degrade and inexorably affect the duration of the appliance's useful life and could become unsafe to use.
Remark: When the appliance is used as a heater after long periods in storage or after having been used solely as a fan a small amount of smoke may be produced. This is not important and is due to the heater burning dust deposits which have accumulated on the heating element. This phenomenon may be avoided by cleaning the inside of the appliance beforehand through the grill with a vacuum cleaner or pressurised air.
ANOMALIES AND REPAIR
Take the appliance to an authorised technical support service if product is damaged or other problems arise. Do not attempt to disassemble or repair the appliance yourself as this may be dangerous.
For EU product versions and/or in case that it is requested in your country:
Ecology and recyclability of the product
The materials of which the packaging of this appliance consists are included in a collection, classification and recycling system. Should you wish to dispose of them, use the appropriate public recycling bins for each type of material.
- The product does not contain concentrations of substances that could be considered harmful to the environment.
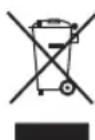
This symbol means that in case you wish to dispose of the product once its working life has ended; take it to an authorised waste agent for the selective collection of Waste from Electric and Electronic Equipment (WEEE).
This appliance complies with Directive 2014/35/EU on Low Voltage, Directive 2014/30/EU on Electromagnetic Compatibility, Directive 2011/65/EU on the restrictions of the use of certain hazardous substances in electrical and electronic equipment and Directive 2009/125/EC on the ecodesign requirements for energy-related products.
WARRANTY AND TECHNICAL ASSISTANCE
This product enjoys the recognition and protection of the legal guarantee in accordance with current legislation. To enforce your rights or interests you must go to any of our official technical assistance services.
◆ You can find the closest one by accessing the following web link: http://www.2helpu.com/.
- You can also request related information, by contacting us (see the last page of the manual).
- You can download this instruction manual and its updates at http://www.2helpu.com/.
The following information details the features related to ecodesign.
| Model: BXWSH2000E | |
| Heat Output | |
| Nominal heat output Pnom 2,0 kW | |
| Minimum heat output (indicative) Pmin N/A | |
| Maximum continuous heat output Pmax 2,0 kW | |
| Auxiliary electricity consumption | |
| At nominal heat output elmax 0 kW | |
| At minimum heat output elmin 0 kW | |
| In standby mode eISB 0,001 kW | |
| Type of heat input, for electric storage local space heaters only | |
| Manual heat charge control, with integrated thermostat No | |
| Manual heat charge control with room and/or outdoor temperature feedback No | |
| Electronic heat charge control with room and/or outdoor temperature feedback No | |
| Fan assisted heat output | No |
| Type of heat output/room temperature control | |
| Single stage heat output and no room temperature control No | |
| Two or more manual stages, no room temperature control No | |
| With mechanical thermostat room temperature control No | |
| With electronic room temperature control No | |
| Electronic room temperature control plus day timer No | |
| Electronic room temperature control plus week timer Yes | |
| Other control options | |
| Room temperature control, with presence detection | No |
| Room temperature control, with open window detection | Yes |
| With distance control option | No |
| With adaptive start control | No |
| With working time limitation | Yes |
| With black bulb sensor | No |
| Contact details: Engineering and Technology for Life, S.L., Avda. Barcelona, s/n, Oliana, 25790, Spain | |