USER MANUAL TRB 5W A1 TRONIC
Operation and safety notes
FR BE
GB/IE Operation and safety notes Page 26
Dynamic Range Control (DRC)
Warnings and symbols used 28
Introduction 29
Intended use. 29
Scope of delivery. 29
Trademark notice 29
Description of parts 29
Technical data 30
Safety notes. 31
Before first use 32
Unpacking the product. 32
Requirements for the set-up location. 33
Connecting the mains supply. 33
Aerial. 33
Operation - first steps 33
Switching the product on/off. 33
Adjusting the volume. 33
FM radio operation. 34
Automatic station scan with station storage (AMS) 34
Selecting stations 34
Manual station scan. 34
Selecting stations manually. 34
Scan setting 34
Saving your favourite stations. 34
Station information. 35
DAB+ radio operation (DAB) 35
Full scan. 35
Selecting stations 35
Selecting stations manually 35
Saving your favourite stations. 36
36
Dynamic Range Control (DRC) 36
Station information. 36
Playback via Bluetooth®. Page 36
Connecting external playback devices (AUX IN mode) 37
Connecting headphones 38
Nap timer (NAP function) 38
Automatic switch-off (Sleep function) 39
Alarm 39
Time/date 40
Automatic update. 40
12h/24h display. Page 40
Date format 40
Backlight 40
Language. 41
Factory settings 41
Software version 41
Troubleshooting. 41
Cleaning and care 42
Storage 42
Glossary 42
Disposal 43
Warranty 43
Warranty claim procedure. 44
Service. 44
| Warnings and symbols used
The following warnings are used in the user manual, short manual, on the packaging, and on the product: |
| Read the user manual | III | Protection class III
The product (excluding the mains adaptor 15) is to be supplied from a safety extra-low voltage (SELV) power source. |
| DANGER! - Designating a hazard with high risk, which will result in death or severe injury if not avoided (e.g. risk of suffocation) | | Symbol for a Protection Class II product |
| WARNING! - Designating a hazard with moderate risk, which can result in death or severe injury if not avoided (e.g. risk of electric shock) | | This mandatory sign indicates to wear suitable protective gloves! Follow the instructions of this warning to avoid hand injuries caused by objects or contact with hot or chemical materials. |
| CAUTION! - Designating a hazard with low risk, which could result in minor or moderate injury if not avoided (e.g. risk of scalding) | | This symbol refers to the special rules of conduct associated with children. |
| NOTICE! - Warns of possible damage to property/the product if not avoided (e.g. risk of short circuit) | | Use the product in dry indoor spaces only. |
| INFO: This symbol with the "Info" signal word offers additional useful information. | | Polarity of barrel connector |
| Alternating current/voltage Direct current | Voltage | |
| CE mark indicates conformity with relevant EU directives applicable for this product. | | Safety information
Instructions for use |
We congratulate you on the purchase of your new product. You have chosen a high quality product. The instructions for use are part of the product. They contain important information concerning safety, use and disposal. Before using the product, please familiarise yourself with all of the safety information and instructions for use. Only use the product as described and for the specified applications. If you pass the product on to anyone else, please ensure that you also pass on all the documentation with it.
Intended use
The DAB+ radio (hereinafter called "product") is a consumer electronics product.
The product is used for the reception and playback of analogue and digital radio programs.
The product can also be used to play back audio files that can be played via Bluetooth® or a 3.5 mm jack cable from an external playback device.
This product may only be used privately and not for industrial or commercial purposes.
This product may not be used in tropical climates.
Any other use is considered improper. Any claims resulting from improper use or due to unauthorised modification of the product will be considered un-warranted. Any such use is at your own risk.
Scope of delivery
After unpacking the product, check if the delivery is complete and if all parts are in good condition. Remove all packing materials before use.
1 DAB+ BLUETOOTH RADIO
1 AUX cable
1 Mains adaptor
1 Short manual
1 Quick start guide
If you notice any damage or missing parts, contact the dealer from which you have purchased this product.
Trademark notice
The Bluetooth word mark and logos are registered trademarks owned by Bluetooth SIG, Inc. and any use of such marks by OWIM GmbH & Co. KG is under license.
The Tronic trademark and trade name is the property of their respective owners.
Any other names and products are trademarks or registered trademarks of their respective owners.
Description of parts
(Fig. A)
| 1 | Display |
| 2 | ○ | (On/off button) |
| 3 | SOURCE/× | (Audio source/Bluetooth® button) |
| 4 | TUNE + | (Menu navigation forwards/change station/track change) |
| 5 | TUNE - | (Menu navigation back/change station/track change) |
| 6 | Control dial | (VOLUME▶/II|ENTER/SCAN control dial (with button function)) |
| 7 | INFO/MENU | (Info/menu button) |
| 8 | PRESENT | (Preset button) |
| 9 | Speaker |
(Fig. B)
| 10 | Telescopic aerial |
| 11 | Bass reflex opening |
| 12 | AUX IN socket (Socket for 3.5 mm jack socket) |
| 13 | Headphone socket (3.5 mm jack socket) |
| 14 | DC IN socket (Mains adaptor connection) |
| (Fig. C) |
| 15 | Mains adaptor |
| 16 | DC IN plug |
| 17 | AUX IN plug |
Technical data
Radio
| Input voltage/current: 9 V /1 A | --- |
| DAB reception range: 174.928 MHz to 239.2 MHz |
| FM reception range: 87.5 MHz to 108 MHz |
| Stations: DAB+, FM | |
| Station memory: 40 (DAB+), 40 (FM) | |
| Audio output power: 1 × 5 W RMS | |
| Wireless standard Bluetooth®: 5.3 | |
| Supported profile: A2DP, AVRCP | |
| Frequency band: | 2402 MHz to 2480 MHz |
| Max. transmitted power: | < 10 mW |
| Range: | approx. 10 m |
| Operating conditions: +10 °C to +35 °C | 40 % to 85 % (rel. humidity) |
| Storage temperature: | -20 °C to +60 °C |
| Dimensions (W × H × D): | approx. 22.5 cm × 13.8 cm × 14.4 cm |
| Weight: | approx. 1040 g (DAB+ BLUETOOTH® RADIO only) |
| Protection class (radio): | III/◇ |
Mains adaptor
| Description Value | |
| Distributor: OWIM GmbH & Co. KG | District court Stuttgart: HRA 721742Stiftsbergstraße 174167 NeckarsulmGermany |
| Manufacturer's name: Xiamen Innov Electron | cs. Tech Co., Ltd. |
| Model identifier: EU version: IVP0900-1000 | WG |
| Input voltage: 100-240 V~ | |
| Input AC frequency: 50/60 Hz | |
| Input current: 0.5 A | |
| Output voltage: 9.0 V | --- |
| Output current: 1.0 A | |
| Output power: 9.0 W | |
| Average active efficiency: 81.34 % | |
| No-load power consumption: 0.05 W | |
| Polarity of barrel connector at output: | ◇◇◇ |
| Protection class: | II/□ |

Safety notes
In the case of damage resulting from noncompliance with these operating instructions the guarantee claim becomes invalid!
No liability is accepted for consequential damage! In the case of material damage or personal injury caused by incorrect handling or non-compliance with the safety instructions, no liability is accepted!
Inspect the product for visible damage before use. Never use a damaged product.
The frequency ranges specified in the "Technical data" chapter represent the technical possibilities of the product. Different regulations may exist for freely available frequencies in different countries. Receiving and/or using of the information may be illegal and possibly punishable.

DANGER! RISK OF DEATH AND ACCIDENTS FOR TODDLERS AND CHILDREN!
Packaging materials are not a toy. Never leave children unsupervised with the packaging material. The packaging material represents a danger of suffocation. Children frequently underestimate the dangers. Always keep children away from the packaging material.
This product can be used by children aged from 8 years and above and persons with reduced physical, sensory or mental capabilities, or lack of experience and knowledge if they have been given supervision or instruction concerning use of the product in a safe way and understand the hazards involved. Cleaning and user maintenance shall not be made by children without supervision. Children shall not play with the product. The product is not a toy.
Risk of electric shock!
WARNING! Risk of electric shock!
Never open the housing of the product or of the mains adaptor. In case of malfunction, repairs are to be conducted by qualified personnel only.
WARNING! Protect the product and the mains adaptor from dripping and splashing water. Do not place containers filled with liquids (such as vases or drinks) on or near the product or the mains adaptor. Do not immerse any product components in liquids. Never hold the product under running water.
To avoid fire, do not place burning candles on or near the product.
WARNING! Do not touch the mains adaptor with wet hands.
CAUTION! Never use a damaged product. If you notice any damage, disconnect the mains adaptor immediately from the mains network. Contact your retailer if the product is damaged.
Always turn the product off before disconnecting it from the mains supply.
Only use this product with the supplied mains adaptor. Contact your retailer if the mains adaptor is damaged. Refer to the technical data of this product.
Only use the supplied mains adaptor with this product.
To avoid damaging the cord, do not place any objects on it or chafe it on sharp edges. Keep it away from hot surfaces and open flames as well.
Lay out the cord in such a way that no unintentional pulling or tripping over is possible. Keep the mains adaptor and its cord out of reach of children.
When disconnecting the mains adaptor from the electrical outlet, do not pull by the connection cord but by the mains adaptor.
- Do not wrap the connection cord around the product.
Connect the mains adaptor to an electrical outlet that is always easily reachable so that in case of an emergency the plug can be unplugged immediately.
Pull the mains adaptor out of the mains supply to completely disconnect the product from the mains network.
The mains adaptor continues to draw a small amount of electricity, even without the radio being operated, as long as the mains adaptor is connected to the mains supply. To completely switch off the mains adaptor, it must be disconnected from the mains network.
Do not subject the product to physical shock or strong vibrations.
If smoke or unusual sounds are observed, immediately unplug the mains adaptor from the mains supply.
The mains adaptor shall not be covered.
- Disconnect the mains adaptor from the mains supply when the product is not in use and before cleaning.
Let the product dry completely before connecting it to the mains supply and before storage. Allow the product to cool down completely before storage.
1 INFO: This product is equipped with rubber feet to protect delicate surfaces. It cannot be ruled out that furniture care agents will attack or damage the rubber feet.
Before first use
Unpacking the product
- Take the product out of the packaging and remove all packaging materials and plastic wrappings.
- Check to make sure that all listed parts are included (see "Scope of delivery").
- Check whether the product and all parts are in good condition, if any damage or defect is detected, do not use the product, but follow the procedure described in chapter "Warranty".
- Requirements for the set-up location
1 INFO: Do not place the product directly onto varnished furniture. The rubber feet of the product contain chemical softeners that may attack varnished surfaces. Furniture care agents could attack or damage the rubber feet. Use a mat if you want to place the product on a varnished piece of furniture.
For safe and trouble-free operation of the product, the set-up location must fulfil the following requirements:
Place the product on a firm, flat and level surface.
Position the product so that the speed 9 and the bass reflex opening 11 are not covered.
Do not operate the product in a hot or very wet environment or in the vicinity of combustible materials.
The mains socket must be easily accessible so that the plug of the mains adaptor can be easily disconnected in an emergency.
- Connecting the mains supply
#
ATTENTION! Risk of product damage!
Before connecting the product, compare the connection data on the nameplate of the mains adaptor [15] (voltage and frequency) with those of your mains supply. These data must match to prevent damage to the product.
- Connect the DC IN plug 16 of the mains adaptor 15 to the DC IN socket 14.
- Connect the mains plug of the mains adaptor [15] with a mains outlet. The product is in standby mode.
Aerial
Pull out the telescopic aerial 10 completely for DAB+ and FM reception.
Operation - first steps
- Switching the product on/off
① INFO:
During first use: The product starts in DAB+ radio mode. The station list of available DAB+ stations is created automatically. The display 1 shows Scanning...
When switching the product on from standby mode:
- The product is in the last selected mode (DAB, FM, Bluetooth® or AUX IN).
- The DAB+ station list is created or updated automatically. The display 1 shows
Scanning...
Depending on the quality of the DAB+ radio reception, this process can take several minutes.
-
Switching on the product: Press 2. The product starts automatically in DAB+ radio mode the first time it is switched on.
-
Selecting a mode: Press SOURCE/ 串 3 several times.
| SOURCE/3 | Mode |
| 1× | DAB+ radio mode |
| 2× | FM radio mode |
| 3× | Bluetooth® mode |
| 4× | AUX IN |
- Switch off the product and put it into standby mode: Press 2
Adjusting the volume
Increasing the volume: Turn the control dial to the right.
- Reduce the volume: Turn the control dial to the left.
FM radio operation
Automatic station scan with station storage (AMS)
① INFO:
The automatic station scan with station memory scans the entire frequency band once and automatically saves the found FM stations as a station list.
An automatic station scan with station saving may overwrite an existing station list.
- Switch on the product.
- Briefly press SOURCE/ 串 several times if necessary until the display 1 shows the FM radio mode FM.
- Starting the automatic station scan: Press and hold the control dial 6 for approx. 2 seconds.
The display 1 shows Auto scanning... and the ascending radio frequency to indicate the progress of the scan.
The display shows the number of stations found.
The FM stations found are automatically stored in the station list on order of increasing frequency.
When the scan is finished, the first station in the station list is automatically played.
Selecting stations
- Press PRESET 8. The display 1 shows Preset Recall.
- Selecting an FM station from the station list: Press TUNE + 4 or TUNE - 5 or turn the control dial 6 to the right or left.
- Confirming the selection: Press the control dial 6.
- Manual station scan
① INFO:
The display 1 shows the frequency of the station.
The speaker is switched off during station scan.
- Selecting stations manually
- Changing the FM frequency in steps of 0.05 MHz: Press TUNE + 4 or TUNE - 5.
The display 1 shows the current FM frequency.
Scan setting
1 INFO: The Scan setting function allows you to set whether all receivable FM stations should be found during a scan or only stations with a strong reception signal.
- In FM radio mode, press INFO/MENU 7 for approx. 2 seconds.
The display 1 shows Scan setting.
- Confirming the selection: Press the control dial 6.
- Press TUNE + 4 or TUNE - 5 several times or turn the control dial 6 until the display 1 shows Strong stations only or All stations.
- Confirming the selection: Press the control dial 6.
Saving your favourite stations
1 INFO: Stored stations are overwritten if you store other stations in station presets that are already occupied.
- Storing the current station manually: Press and hold PRESET 8 for approx. 2 seconds.
If stations have already been stored: The display 1 shows the preset with the last selected station.
If no stations have yet been stored: The display 1 shows Preset Store 1: (Empty).
- Selecting the desired preset: Press
TUNE + 4 or TUNE - 5 several times if necessary or turn the control dial 6.
- Storing the station in the selected preset: Press the control dial 6.
The display 1 shows Preset (1-40) stored.
- Select the stored station (see "Selecting stations").
i INFO: In FM radio mode, you can show additional station information on the display 1.
Press INFO/MENU 7 several times to display the following station information:
- Scrolling text (radio text)
- Signal strength
Programme type
- Stereo/mono reception
Time
-Date
1 INFO:
The amount of station information available may vary depending on the selected station.
The stereo/mono reception setting is automatic depending on the selected station and its reception quality and cannot be changed manually.
Stereo playback is only possible via the headphone socket 13. The speaker 9 of the product can only deliver mono sound.
DAB+ radio operation (DAB)
Full scan
① INFO:
The automatic station search with station memory searches the entire frequency band once and automatically saves the DAB+ stations found as a station list.
An automatic station search with station storage may overwrite an existing station list.
- Switch on the product.
- Select the DAB+ radio mode. The display shows DAB.
- Press and hold INFO/MENU 7 for approx. 2 seconds. The display 1 shows Full scan.
-
Starting automatic station search with station preset: Press the control dial 6.
-
The displa 1 shows Scanning... as well as the number of stations found.
-
The search progress is displayed as a bar graph.
-
The DAB+ stations found are automatically saved in the station list.
- After completing the search: The first station in the station list is played automatically.
Selecting stations
- Selecting a DAB+ station in the station list: In DAB+ radio mode, press TUNE + 4 or TUNE - 5.
- Alternatively: Press TUNE + 4 or TUNE - 5. Use the control dial 6 to select a station from the station list.
- Press the control dial 6 to play the selected station.
Selecting stations manually
① INFO:
Use this function to set the signal strength and thus the reception quality of a DAB+ station.
To set stations manually, you need to know the multiplex number or the frequency of the DAB+ station you want to tune in, so that you can select it from the station list.
Improving the signal strength of a station: Move the telescopic aerial [10] or change the location of the product. Pay attention to the bars showing the signal strength. For optimum signal strength, the bars should be as high as possible.
- Opening the DAB settings menu: In DAB+ radio mode, press and hold INFO/ MENU 7 for approx. 2 seconds.
- Press TUNE + 4 or TUNE - 5 several times or turn the control dial 6 until the display 1 shows Manual tune.
- Confirming the selection: Press the control dial 6.
The display 1 shows the multiplex numbers and frequencies of the DAB+ stations.
The station name of receivable DAB+ stations is displayed next to the frequency.
- Selecting a station: Press TUNE + 4 or TUNE - 5.
- Confirming the selection: Press the control dial 6.
The display shows the station signal strength as a bar graph.
Saving your favourite stations 3.
① INFO: Stored stations are overwritten if you store other stations in station presets that are already occupied.
- Selecting a DAB+ station from the station list: In DAB+ radio mode, press TUNE + 4 or TUNE - 5.
- Confirming the selection: Press the control dial 6
- Press and hold PRESET 8 for approx. 2 seconds.
If stations have already been stored, the display 1 shows the preset with the last station selected.
If no stations have yet been stored: The display shows Preset Store 1: (Empty).
- Selecting the desired preset: Press TUNE + 4 or TUNE - 5 several times if necessary or turn the control dial 6.
- Storing the station in the selected preset: Press the control dial 6.
The display 1 shows Preset (1-40) stored.
- Calling up saved stations
□ Calling up the stored DAB+ stations: In DAB+ radio mode, press PRESET 8. The display 1 shows Preset Recall.
□ Selecting stored stations: Press TUNE + 4 or TUNE - 5 several times or turn the control dial 6.
□ Playing the selected station: Press the control dial 6.
Dynamic Range Control (DRC)
① INFO: When the product is used in a noisy environment: The DRC function ensures that quieter passages are better heard when playing DAB+ stations.
1. Calling up the DAB settings menu: Press and hold INFO/MENU 7 for approx. 2 seconds.
- Press TUNE + 4 or TUNE - 5 several times or turn the control dial 6 until the display 1 shows DRC.
- Confirming the selection: Press the control dial 6.
4.If necessary,press TUNE ^+ 4 or TUNE-5 or turn the control dial 6 to select the following modes: DRC high DRC low DRC off
-
Confirming the selection: Press the control dial 6.
-
Station information
① INFO:
In DAB+ radio mode, you can show additional station information on the display 1.
The amount of station information available may vary depending on the selected station.
- Briefly press INFO/MENU 7 several times to display the following station information:
- Scrolling text (radio text)
- Signal strength (bar)
Programme type
Frequency
- Ensemble
- Signal error
Bitrate and Codec
Time
-Date
Playback via Bluetooth
Pairing
1 INFO:
Before you start using the radio for music playback via Bluetooth® you must pair it with a Bluetooth®-compatible external playback device.
You can now use the radio to listen to music from your external playback device wirelessly via the speaker 9.
In Bluetooth mode, the product switches itself off automatically after 15 minutes if no Bluetooth connection is established.
The next time you turn on the product, it will connect automatically to the last-connected external playback device.
If your external playback device does not automatically reconnect to the product, you have to re-establish the connection manually. You can find a detailed description of how to do this in the operating instructions for your external playback device.
- Switching on the product: Press 2
- Activating the Bluetooth® function: Briefly press SOURCE/3 several times if necessary.
A signal tone sounds and the display shows Bluetooth Connecting (if connections have been already saved).
- Set the external playback device so that it scans for Bluetooth® products. You can find a detailed description of how to do this in the operating instructions for your external playback device.
- From the list of discovered Bluetooth devices in the settings menu of your external playback, select the entry TRB 5W A1. The external playback device automatically connects to the product via Bluetooth®.
Another signal tone sounds when the connection has been successfully established.
The display shows
Bluetooth Connected.
Unpairing
① INFO:
If you want to connect the product to another external playback device: Unpair the currently connected playback device first.
Alternatively, you can unpair via the currently connected external playback device.
Depending on the external playback device being used and the operating system, the volume on the product and on the external playback device can be adjusted independently of each other.
Example: The volume of the product is set to maximum and the volume of the external playback device is set to minimum: You cannot hear anything through the product.
Depending on the external playback device being used and the operating system, it is possible that not all functions are supported.
In an environment with high-frequency interference, you may experience noise interference during music playback in Bluetooth® mode. As soon as the interference has ceased, music playback should automatically continue in Bluetooth® mode without any further problems.
Press and hold SOURCE/3 for approx. 2 seconds. A signal tone sounds.
The display shows Bluetooth Pairing.
Button functions during playback via Bluetooth®
| Button Press | | Function |
| 6 Control dial | | × Start/stop playback
Turn to increase/reduce the volume |
| 4 TUNE + | 1× | Move to the next track |
| 5 TUNE - | 1× | Go to the beginning of the current track |
| 2× | Go back to the previous track |
| 3 SOURCE/✗ | Approx. 2 seconds | Unpair the external playback device from the product |
- Connecting external playback devices (AUX IN mode)
① INFO:
In AUX IN mode, you can connect external playback devices such as a smartphone or an MP3 player to use them as the playback source for the product.
- Switch the product and the external playback device off before connecting them. Note also the user manual for the device that you want to connect to the product.
- Connect the external playback device with the AUX IN plug [17] to the AUX IN socket [12] of the product.
- Switching on the product: Press 2
- Briefly press SOURCE/ 串 several times if necessary until the display 1 shows AUX IN.
- Switch on the external playback device.
- Start the playback.
- Use the control dial to set the desired volume on the product.
Alternatively, you can increase the volume on the external playback device.
- Exiting AUX IN mode: Switch off the product and the external playback device. Remove the AUX IN plug 17 from the AUX IN socket 12 of the product.
Alternatively, press SOURCE/ 3 to switch directly from AUX IN mode to radio mode or Bluetooth mode.
- Connecting headphones
CAUTION! Risk of hearing damage!
Listening to music on headphones for long periods and at high volume levels can lead to hearing damage.
Always start by setting a low volume and then adjust it to a comfortable level.
Always use headphones in such a way that you can still hear ambient noise.
- Turn the control dial 6 to the left to the lowest volume level.
- Plug the jack plug of the headphones into the headphone socket 13 on the rear of the product. The sound playback now takes place only via the connected headphones.
- Set the desired volume using the control dial 6
① INFO:
The system menu can be called up during operation and also in standby mode.
If no setting is made in the system menu within 15 seconds, the system menu is exited.
1. Press and hold INFO/MENU 7 for approx. 2 seconds.
2. Press TUNE + 4 or TUNE - 5 several times if necessary or turn the control dial 6 until the display 1 shows System.
3. Confirming the selection: Press the control dial 6.
Nap timer (NAP function)
① INFO:
Use the NAP function to set a timer alarm that wakes you up with an alarm signal after 1 to 120 minutes.
The alarm time is set in 1-minute increments.
Setting the nap timer
- Call up the system menu. The first menu item to appear is the NAP timer.
- Confirming the selection: Press the control dial 6.
- Press TUNE + 4 or TUNE - 5 several times or turn the control dial 6 to set the alarm time between 001 and 120 minutes.
- Confirming the selection and starting the nap timer: Press the control dial 6.
After exiting the system menu: The display shows N , followed by the remaining minutes or seconds.
- When the nap time has elapsed: An increasingly loud alarm sounds. NAP flashes on the display 1 and the set alarm time is shown.
Deactivating the nap timer
1 INFO: To turn off the timer before the end of the alarm time:
- Call up the NAP function (see „Setting the nap timer").
- Set the alarm time to 000.
- Confirming the selection: Press the control dial 6. The nap timer is now deactivated.
When the alarm goes off: Press any button to end the timer.
Automatic switch-off (Sleep function)
1 INFO: Use the sleep function to automatically switch the product off after 15 to 120 minutes.
-
Select the desired setting: Sleep
-
Switch-off time:
-Off
15 minutes
- 30 minutes
- 45 minutes
- 60 minutes
- 90 minutes
- 120 minutes
- After exiting the system menu: The display shows S. Afterwards the remaining minutes or seconds are shown.
- After the set time has elapsed, the product switches off automatically.
- Disabling the sleep function: Select the setting Off.
- Confirming the selection: Press the control dial 6.
Alarm
① INFO:
- Program the playback of the last station listened to or a saved station (DAB+ and FM) or an alarm tone at a specific time on specific days.
The alarm settings are only saved if you then confirm your settings under the menu option Alarm on or Alarm off by pressing the control dial 6.
As soon as Alarm 1 and/or Alarm 2 are active, an alarm symbol is shown on the left and/or right of the display for each active alarm.
Setting the alarm
Select the desired settings:
Alarm
- Alarm 1
- Alarm 2
-
Alarm (1/2) Setup
-
Alarm (1/2) Wizard
Hours
- Minutes
-
Alarm (1/2) Duration
-
15 minutes
- 30 minutes
- 45 minutes
- 60 minutes
- 90 minutes
Alarm (1/2) Source
- Buzzer(alarm tone)
- DAB/FM
last listed DAB+/FM station
-stored DAB+/FM station
Daily
- Once
Weekends
Weekdays
Volume
Alarm on/off
The display 1 shows Alarm Saved. The alarm is activated.
Switching off the alarm
When the alarm goes off at the set time: Press 2. The alarm stops and remain off for 24 hours or until the next programmed alarm time.
Pausing the alarm (Snoopze function)
- When the alarm goes off at the set time: Press the control dial to pause the alarm for 10 minutes. The display shows the message Snooze and the remaining time until the alarm goes off again.
Switching the alarm on/off
Select the desired settings:
- Alarm
- Alarm 1 or Alarm 2
Alarm Off
Alarm On
Time/date
1 INFO: If an RDS signal (radio data system) is available, the date and time are automatically set via the stations. If no RDS signal is available, you can also set the date and time manually.
Setting the date and time
1 INFO: In standby mode: The display 1 shows the time and date.
Select the desired settings:
- Set time
Hours
- Minutes
- AM/PM (in 12-hour format)
- Set date
Day
Month
Year
Automatic update
1 INFO:
Function Auto update: Set whether the date and time are set automatically via the stations' RDS signal (radio data system) or manually.
If Update from Any is set, the date and time are set automatically via the RDS signal from the stations.
If Update from DAB and Update from FM are set, the date and time are set automatically via the RDS signal of the DAB+ or FM stations.
If No update is set, the date and time are not set automatically, but must be set manually.
The standard setting of the function Auto update is Update from Any.
Select the desired settings:
Time
-
Auto Update
-
Update from Any
- No update
- Update from FM
Update from DAB
12h/24h display
① INFO:
If the 12h display is set:
From 12:00 at noon until 11:59 at night the display shows PM after the time.
From 12:00 at night until 11:59 at noon the display shows AM after the time.
The default setting for the time is 24 h display.
Select the desired settings:
Time
- Set 12/24 hour
- Set 12 hour
- Set 24 hour
Select the desired settings:
Time
- Date format
- DD-MM-YYYY
- MM-DD-YYYY
Backlight
On level
① INFO: The On level function allows you to adjust the brightness level of the display backlight during operation.
Select the desired settings:
-Backlight
Low
Medium
High
Night dimmer
① INFO: The Night dimmer function allows you to adjust the dimming level of the display backlight for a period from 23:00 to 05:00.
Select the desired settings:
Night dimmer
-Yes
- No
Language
1 INFO: In the system menu, you can select between different languages.
Select the desired settings:
Language
- English
- German
-French
- Nederlands
- Danish
Polish
Czech
Slovakia
Factory settings
1 INFO: If you reset the product to the factory defaults using the Factory Reset function, all stored settings such as stored stations, date, time and alarm times will be deleted.
Select the desired settings:
Factory Reset
- Yes (the product is reset to the factory settings)
- No (the product is not reset to the factory settings)
If the product is reset to the factory settings: The display 1 shows Restarting... The product restarts and then automatically switches to standby mode.
Software version
- Press TUNE + 4 or TUNE - 5 several times if necessary or turn the control dial 6 until the display 1 shows SW version.
- Display the software version of the product: Press the control dial 6.
Troubleshooting
If you cannot connect the product to a compatible Bluetooth® playback device, proceed as follows:
- Make sure that the Bluetooth® function is activated on the playback device.
- Make sure that the Bluetooth® function is activated and the product is switched on.
- If you use several external playback devices, ensure that any previously made connection is disconnected. There may be a previously paired playback device still within range.
- Make sure that the product is no more than 10 metres from the external playback device and that no obstacles or electronic devices are placed between them.
The following table helps to identify and rectify further possible faults:
| Fault Possible cause Remedy | | |
| There is nothing on the display 1. | The mains adaptor 15 is not correctly connected. | Make sure that the mains adaptor 15 is connected with a mains socket.
Make sure that the DC IN plug 16 is correctly connected with DC IN socket 14. |
| The mains socket is not supplying any power. | Check the house fuses. |
| Fault Possible cause Remedy | |
| No sound. | The product is not switched on. | Switch on the product by pressing 2. |
| The volume is set to minimum. | Increase the playback volume with the control dial 6. |
| In AUX IN mode, the external playback device is not turned on. | Switch on the external playback device. |
| In AUX IN mode, the external playback device is muted. | Unmute the external playback device. |
| In AUX IN mode, the AUX IN plug 17 is not properly connected to the AUX IN socket 12. | Make sure the AUX IN plug 17 is correctly connected to the AUX IN socket 12. |
| Interference with the radio reception. | Radio reception is too weak. | Pull out the telescopic aerial 10 completely. Try to improve reception by moving the telescopic aerial or by moving the radio to another location. |
| No automatic setting of time and date. | The RDS signal is not available. | Pull out the telescopic aerial 10 completely. Try to improve reception by moving the telescopic aerial or by moving the radio to another location. |
- Cleaning and care

WARNING! Never immerse the product nor the mains adaptor [15] in water or other liquids for cleaning purposes. Never immerse any of the product's components under running water.
Before cleaning: Unplug the product from the mains supply.
Do not allow any water or other liquids enter the product's interior.
Do not use solvent-based cleaning agents, abrasives, harsh cleaning solutions or hard brushes for cleaning.
- Clean the product with a slightly moistened cloth.
- Let all parts dry afterwards.
Storage
Store the product in its original packaging.
Store the product in a dry, secure location away from children.
Glossary
Multiplex: In DAB and DAB + several radio programmes can be transmitted on each frequency. These stations are combined in a so-called multiplex. In this multiplex, additional services, such as pictures and text information, can also be transmitted.
Signal error: The greater the number of signal errors, the more distorted the audio signal arrives at the product. The built-in error protection can compensate for this to a certain extent without deteriorating the audio quality. Displaying the number of signal errors can be helpful in finding a better location to place the product.
OWIM GmbH & Co. KG, Stiftsbergstraße 1, 74167 Neckarsulm, GERMANY hereby declares that the product DAB+ BLUETOOTH® RADIO, HG11294A/HG11294B conforms to the directives 2014/53/EU and 2011/65/EU. The full text of the EU declaration of conformity is available at the following internet address: www.owim.com

Disposal
Packaging:
The packaging is made of environmentally friendly materials, which you be disposed through your local recycling facilities.

Observe the marking of the packaging materials for waste separation, which are marked with abbreviations (a) and numbers (b) with following meaning: 1-7: plastics/20-22: paper and fibreboard/80-98: composite materials.
Product:

Contact your local refuse disposal authority for more details of how to dispose of your worn-out product. The adjacent symbol of a crossed out dustbin on wheels indicates this product is subject to directive 2012/19/EU. This directive states at the end of the life this product must not be disposed of through regular household refuse but must be returned to special collection sites, recycling depots or waste management companies.
This disposal is free of charge to you.
Protect the environment and dispose of properly.
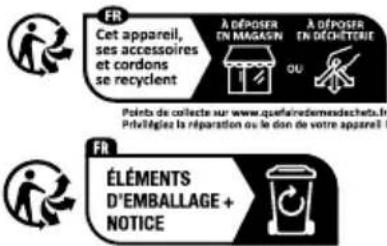
The product incl. accessories and packaging materials are recyclable and are subject to extended producer responsibility. Dispose them separately, following the illustrated Info-tri (sorting information), for better waste treatment. The Triman logo is valid in France only.
Warranty
The product has been manufactured to strict quality guidelines and meticulously examined before delivery. In the event of material or manufacturing defects you have legal rights against the retailer of this product. Your legal rights are not limited in any way by our warranty detailed below.
The warranty for this product is 3 years from the date of purchase. The warranty period begins on the date of purchase. Keep the original sales receipt in a safe location as this document is required as proof of purchase.
Any damage or defects already present at the time of purchase must be reported without delay after unpacking the product.
Should the product show any fault in materials or manufacture within 3 years from the date of purchase, we will repair or replace it - at our choice - free of charge to you. The warranty period is not extended as a result of a claim being granted. This also applies to replaced and repaired parts.
This warranty becomes void if the product has been damaged, or used or maintained improperly.
The warranty covers material or manufacturing defects. This warranty does not cover product parts subject to normal wear and tear, thus considered consumables (e.g. batteries, rechargeable batteries, tubes, cartridges), nor damage to fragile parts, e.g. switches or glass parts.
Warranty claim procedure
To ensure quick processing of your claim, observe the following instructions:
Make sure to have the original sales receipt and the item number (IAN 480142_2410) available as proof of purchase.
You can find the item number on the rating plate, an engraving on the product, on the front page of the instruction manual (bottom left), or as a sticker on the rear or bottom of the product.
If functional or other defects occur, contact the service department listed below either by telephone or by e-mail.
Once the product has been recorded as defective you can return it free of charge to the service address that will be provided to you. Ensure to enclose the proof of purchase (sales receipt) and a short, written description outlining the details of the defect and when it occurred.
Service
GB
Service Great Britain
Tel.:08000569216
E-Mail: owim@lidl.co.uk
IE
Service Ireland
Tel.: 1800200736
E-Mail: owim@lidl.ie
Dynamic Range Control (DRC)
- Réveil 1
-
Réveil 2
-
Réveils (1/2) Config
-
Réveils (1/2) Assistant
Heures
- Minutes
-
Réveils (1/2) Durée
-
15 minutes
- 30 minutes
- 45 minutes
- 60 minutes
-
90 minutes
-
Réveils (1/2) Source
Buzzer (Sonnerie)
DAB/FM
Dynamic Range Control (DRC)
Kookwekker (NAP-function)
① INFO:
= 0
= 0
= 0
= 0
= 0
= 0
= 0
= 0
= 0
= 0
= 0
= 0
= 0
= 0
= 0
= 0
= 0
= 0
= 0
= 0
= 0
= 0
= 0
= 0
= 0
= 0
Dynamic Range Control (DRC)
Dynamic Range Control (DRC)
INFORMÁCIA: Ked'sa produit používa v hlučnom prostredi: Funkcia DRC zabezpecuje, aby boli pri prehravani stanić DAB+ tiché pasáze lepsie počuf.
- Spustenie menu nastaveni DAB: INFO/MENU 7 podržte stlacné asi 2 sekundy.
- Stlacajte TUNE + 4, prip. TUNE - 5 alebo otacajte otochny regulator 6, až kym sa na displeji 1 nezobrazj DRC.
- Potvr'de vol'bu: Stla'te otocny regulator 6
-
Stlacanim TUNE + 4, prip. TUNE - 5 alebo otacanim otochného reguladora 6 si zvolte z nasledovnych rezimov:
-
DRC vysoké
-
DRC nizke
DRC vyp
-
Potvr'de vol'bu: Stlačte otočný regulátor 6.
Dynamic Range Control (DRC)
Alarm (1/2) Wizard (Asistente alarma (1/2))
-Horas
- Minutos
Alarm (1/2) Source (Fuente alarma (1/2))
-
Buzzer (Zumbador) (Tono de alarma)
DAB/FM
-
ultima emisora DAB+ o FM eschuchada
-ultima emisora DAB+ o FM guardada
-
Days (Días)
-
Daily (A diario)
Once (Una vez)
- Weekends (Fines de semana)
Weekdays (Días laborables)
Volume (Volumen)
Alarm on/off (Alarm)
encendida/apagada)
Manuel scanning. 173
Manuel indstilling of station. Side 173
Scan Indstilling. 173
Gem foretrukne stationer. Side 173
Stationsoplysninger 174
Fuld Scanning. Side 174
Valg of station 174
Manuel indstilling of station. Side 174
Gem foretrukne stationer. Side 175
Dynamic Range Control (DRC) Side 175
Stationsoppliesninger 175
Afpilnng via Bluetooth® Side 175
- Manuel indstilling of station
□ Andering af FM-frekvensen i trin pa 0,05 MHz: Tryk pa TUNE + 4 ell er TUNE - 5.
Den aktuelle FM-frekvens vises i displayet 1.
Scan Indstilling
Dynamic Range Control (DRC)
Taend/sluk for alarmen
Vaelg de onskede indstlinger:
- Alarmer
- Alarmer 1 aller Alarmer 2
- Alarmerfra
- Alarmer til
Tid/dato
Alarm (1/2) Setup (Sveglia (1/2) Impost)
Alarm (1/2) Wizard (Sveglia
(1/2) Assistente)
Alarm (1/2) Duration (Sveglia (1/2) Durata)
- 15 minutes (15 minutij)
- 30 minutes (30 minutij)
- 45 minutes (45 minuti)
- 60 minutes (60 minuti)
-90 minutes (90 minuti)
Alarm (1/2) Source (Sveglia (1/2) Fonte)
Buzzer (Cicalino) (Allarme)
DAB/FM
Volume (Volume)
Alarm on/off (Sveglia ON/OFF)
Alarm (1/2) Duration
(Ebresztó (1/2) idöartam)
- 15 minutes (15 perc)
- 30 minutes (30 perc)
-45 minutes (45 perc)
- 60 minutes (60 perc)
- 90 minutes (90 perc)
Alarm (1/2) Source

