PDST 20 A1 - Air hose reel PARKSIDE - Free user manual and instructions
Find the device manual for free PDST 20 A1 PARKSIDE in PDF.

User questions about PDST 20 A1 PARKSIDE
0 question about this device. Answer the ones you know or ask your own.
Ask a new question about this device
Download the instructions for your Air hose reel in PDF format for free! Find your manual PDST 20 A1 - PARKSIDE and take your electronic device back in hand. On this page are published all the documents necessary for the use of your device. PDST 20 A1 by PARKSIDE.
USER MANUAL PDST 20 A1 PARKSIDE
Operating and Safety Instructions
BEFR CH
ENROULEUR DE TUYAU PNEUMATIQUE
Before reading, fold out the page with the images and familiarise yourself with all the features of the device.
DE AT CH
GB/IE/NI/CY/MT Operation and Safety Instructions Page 5
- Introduction ...6.
1.1 Intended use...6
1.2 Included items 6
1.3 Features and fittings...6.....
1.4 Technical data 6 - Safety instructions .....7.....
2.1 Specific safety instructions ... 9 - Operation ...10
- Maintenance, Cleaning and Storage....10....
- Disposal .....1.1.....
- ROWI Germany GmbH Warranty....1.1....
- Service ...12....
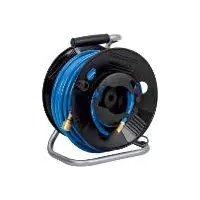
COMPRESSED AIR HOSE REEL PDST 20 A1
1. Introduction
We congratulate you on the purchase of your new device. You have chosen a high quality product. The operating instructions are part of the product. They contain important information concerning safety, use and disposal. Before using the product, familiarise yourself with all of the operating instructions and safety instructions. Use the product only as described and for the specified applications. If you pass the product on to anyone else, please ensure that you also pass on all the documentation with it.
1.1 Intended use
The air hose reel is designed and constructed according to the state of the art and the recognised safety regulations. Nevertheless if it is improperly used or not used as intended there may be dangers to life and limb for the users or third parties as well as damage to the equipment itself and/or to other property.
The air hose reel is designed for the distribution of compressed air and is suitable for universal use in almost all spheres of compressed air technology. This device is not suitable for the transport of oxygen or other gases. Any other use or use outside these conditions is not use for the purpose intended. The user carries the risk. Use for the purpose intended includes the observance of the operating and installation instructions as well as the observance of the servicing conditions. This compressed air hose reel is for private use only and must not be used commercially or industrially.
1.2 Included items
1 Compressed Air Hose Reel
1 Air hose 20 m
1 Manual
1.3 Features and fittings
1 Carrying handle
2 Rotating handle
3 Fast coupling
4 Hose
5 Hose guide
6 Holder
1.4 Technical data
Article number: PDST 20 A1
Maximum
working pressure: 16 bar (at 23 °C)
11 bar (at 60 °C)
Type of hose: Type C (heavy service)
Hose inside diameter: ∅ 11,3 mm
Hose outer diameter: ∅ 6,3 mm
Wall thickness: 2,5 mm
Coupling: DN 7,2/6 mm
Length: 20 m
Applicable
temperature range: -10 °C to + 60 °C

text_image
2,5 mm Ø 6,3 mm 2,5 mm 20 m Type C Ø 11,3 mm2. Safety instructions

Read all the safety advice and instruction.

Failure to observe the safety advice and instructions could result in serious injury and/or damage to property.
Please retain all safety notes and instructions for future reference!
In addition to the information in this operating manual, the general safety and accident prevention regulations of the legislator must be taken into account.
■ Pass on these operating Instructions to third parties.
Take care third parties only use this product after they have received the necessary instructions.
- Keep children away from the equipment and prevent it being used by other people.
Do not leave the equipment unattended when it is ready to use. Under no circumstances allow children to get close to it. It is forbidden for children to use the product. Protect the product from unauthorised use.
■ Always be alert and watch what you are doing.
Do not do any work on this product, if you are inattentive or are under the influence of drugs, alcohol or medication. Just a moment of inattention when using this product can lead to serious accidents and injuries.
- Watch out for damage.
Check the equipment before putting it into service for damage. If the equipment has defects it must definitely not be used.
Do not use pointed objects.
Never insert points and/or metallic objects inside the equipment.
- Do not use the equipment in a way that it was not intended to be used.
Only use the equipment for the purposes intended in these Operating Instructions.
- Check it regularly.
The use of this device can lead to wear in certain parts. So check it regularly for any damage and defects.
■ Only use original spare parts.
For your own safety only use accessories and additional equipment which are specifically mentioned in the operating instructions or are recommended by the manufacturer.
- Do not use in explosive areas.
Do not use the equipment in places where there is a risk of explosion, in which there are substances such as combustible liquids, gases and, in particular, areas where there is paint and dust fog.
2.1 Specific safety instructions
- Changes as a result of technical progress can be introduced by the manufacturer without prior notice and may not be included in the operating instructions.
- Check the equipment before putting it into service to see that it is complete, functions properly and is air tight!
- Never put a defective or non-functional piece of equipment into service. Contact the manufacturer or get the equipment checked by a qualified technician.
■ Never stand on the equipment! - Hold the hose when unrolling and rolling up so that the hose cannot injure anyone while swinging about!
- Pay attention to the maximum working pressure of the hose. Only operate the hose within the given parameters (see Technical data).
- At very low temperatures the hose may become inflexible and stiff. This can lead to problems when rolling up!
Take care when the hose is moved it is not damaged by sharp edges and objects! - Never store or put the hose in a place where there is direct sunlight!
- Never use the hose to carry dangerous liquids (chemicals, acids, alkaline solutions, etc).
■ Turn off the air flow before rolling up the hose!
■ Always work cautiously and with the necessary care!
■ Never use excessive force!
3. Operation
-
Hold the hose 4 when unrolling and rolling up so that the hose 4 cannot injure anyone while swinging about.
Pay attention to the maximum working pressure of the hose 4. Only operate the hose 4 within the given parameters (see Technical data). -
Slowly unroll the desired length of hose through the hose guide 5.
- Plug the hose 4 into the compressor.
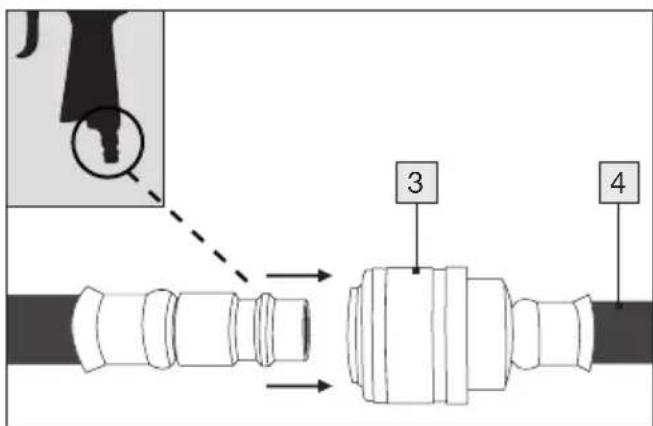
- Connect the compressed air tool by means of the fast coupling 3 .
text_image
Technical diagram showing a mechanical assembly with labeled parts 3 and 4, including an inset image of a tool or component.- Remove the tool from the hose 4 after the work has been completed by pulling the coupling 3 backwards hard.

natural_image
Pure mechanical component diagram without any text, numbers, or symbolsRoll up the hose 4 again when the job is done.
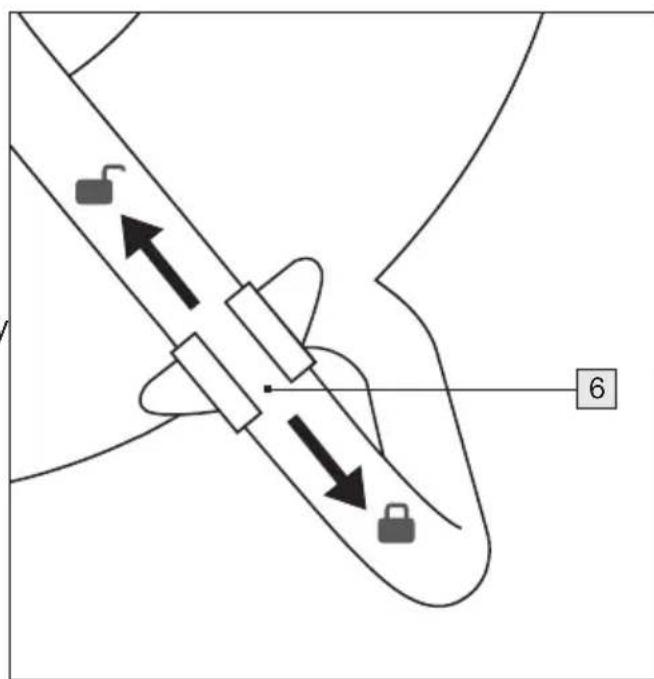
- Adjust holder
Theholder 6 for the air hose reel is on the back of the device. To apply the holder pull the plastic downwards and to release pull the plastic up again.
text_image
Diagram showing aircraft wing movement with directional arrows and a numbered marker '6'4. Maintenance, Cleaning and Storage
Disconnect the hose reel from the compressed air source before you begin to maintain it.
If the hose 4 is dirty, clean it before you roll it up again. Never use aggressive cleaning materials!
■ Regularly check that the hose 4 is airtight.
■ Regularly lubricate the moving parts of the hose drum.
Immediately change defective and damaged parts.
- When not in use, roll up the hose 4 completely and store it in a dry, clean and frost-proof place.
5. Disposal

The packaging is made of environmentally friendly materials that you can dispose of at your local recycling centres.
Further information on how to dispose of the discarded device can be obtained from your local authority or city council.
is dependent on you presenting the defective appliance and the proof of purchase (receipt) and a short written description of the fault and its time of occurrence.
If the defect is covered by the warranty, your product will either be repaired or replaced by us. The repair or replacement of a product does not signify the beginning of a new warranty period.

text_image
FR LE TRI + FACILE ÉLÉMENTS D'EMBALLAGE BAC DE TRIThe Triman logo is valid in France only.
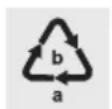
Observe the labelling of the packaging materials when separating waste; these are marked with abbreviations (a) and numbers (b) with the following meaning: 1–7: Plastics/20–22: Paper and cardboard/80-98: Composites.
Warranty period and statutory claims for defects
The warranty period is not prolonged by repairs effected under the warranty. This also applies to replaced and repaired components. Any damage and defects present at the time of purchase must be reported immediately after unpacking. Repairs carried out after expiry of the warranty period shall be subject to a fee.
Scope of the warranty
This appliance has been manufactured in accordance with strict quality guidelines and inspected meticulously prior to delivery.
6. ROWI Germany GmbH Warranty
Dear Customer,
This appliance has a 3-year warranty valid from the date of purchase. If this product has any faults, you, the buyer, have certain statutory rights. Your statutory rights are not restricted in any way by the warranty described below.
Warranty conditions
The validity period of the warranty starts from the date of purchase. Please keep your original receipt in a safe place. This document will be required as proof of purchase.
If any material or production fault occurs within three years of the date of purchase of the product, we will either repair or replace the product for you or refund the purchase price at our discretion. This warranty service
The warranty covers material faults or production faults. The warranty does not extend to product parts subject to normal wear and tear or fragile parts such as switches, batteries or those made of glass.
The warranty does not apply if the product has been damaged, improperly used or improperly maintained. The directions in the operating instructions for the product regarding proper use of the product are to be strictly followed. Uses and actions that are discouraged in the operating instructions or which are warned against must be avoided.
This product is intended solely for private use and not for commercial purposes. The warranty shall be deemed void in cases of misuse or improper handling, use of force and modifications/repairs which have not been carried out by one of our authorised Service centres.
Warranty claim procedure
To ensure quick processing of your case, please observe the following instructions:
- For all enquiries, please have the receipt and item number (IAN 465617_2404) ready as proof of purchase.
Please refer to the type plate on the product, an engraving on the product, the title page of your instructions (bottom left) or the sticker on the back or underside of the product for the article number. - Should functional faults or other defects occur, please first contact the service department named below by telephone or e-mail.
- You can then send a product recorded as defective to the service address provided to you free of charge, enclosing the proof of purchase (receipt) and stating what the defect is and when it occurred.

text_image
PDF ONLINE parkside-diy.comYou can view and download these and many other manuals at parkside-diy.com. This QR code will take you directly to parkside-diy.com. Select your country and search for the manuals using the search mask. Entering the article number (IAN) 465617_2404 will take you to the operating instructions for your article.
7. Service
If any problems occur during use of your ROWI Germany product, please proceed as follows:
Contact us
You can contact the service team of ROWI Germany at:
ROWI Germany GmbH
(free call from a German landline)
IAN 465617_2404
Most problems can be resolved with the skil-led technical support of our Service Team.
text_image
Technical diagram showing a mechanical assembly with labeled parts 3 and 4, including an inset image of a tool or component.natural_image
Pure mechanical component diagram without any text, numbers, or symbolstext_image
Diagram showing aircraft flight with directional arrows and a numbered marker '6' pointing to a specific aircraft.text_image
Technical diagram showing a mechanical assembly with labeled parts 3 and 4, including an inset image of a tool or component.natural_image
Pure mechanical component diagram without any text, numbers, or symbolstext_image
Diagram showing aircraft landing gear movement with labeled components and directional arrowstext_image
Technical diagram showing a mechanical assembly with labeled parts 3 and 4, including an inset image of a tool or component.natural_image
Pure mechanical component diagram without any text, numbers, or symbolstext_image
Diagram showing aircraft flight with labeled components and directional arrows, including a numbered marker '6'text_image
Technical diagram showing a mechanical assembly with labeled parts 3 and 4, including an inset image of a tool or component.natural_image
Pure mechanical component diagram without any text, numbers, or symbolstext_image
Diagram showing aircraft landing gear movement with labeled components and directional arrowstext_image
QR code image containing encoded data, with a central logo or watermark embedded in the pattern.PDF ONLINE parkside-diy.com