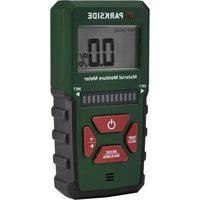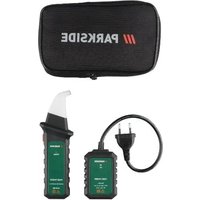
PFF 20 A1 - Measuring equipment PARKSIDE - Free user manual and instructions
Find the device manual for free PFF 20 A1 PARKSIDE in PDF.


User questions about PFF 20 A1 PARKSIDE
0 question about this device. Answer the ones you know or ask your own.
Ask a new question about this device
Download the instructions for your Measuring equipment in PDF format for free! Find your manual PFF 20 A1 - PARKSIDE and take your electronic device back in hand. On this page are published all the documents necessary for the use of your device. PFF 20 A1 by PARKSIDE.
USER MANUAL PFF 20 A1 PARKSIDE
GB/IE User manual Page 38
List of pictograms used ..... Page 39
Introduction ...... Page 41
Intended use..... Page 41
Scope of delivery .... Page 42
Parts list ...... Page 42
Technical data. . . . . . . . . . . . . . . . . . . . . . . . . . . . . . . . . . . . . . . . . . . . . . . . . . . . . . . . . . . . . . . . Page 43
General safety instructions ..... Page 45
Safety instructions for batteries/rechargeable batteries.... Page 53
First set-up of the product..... Page 55
Unpacking the product. . . . . . . . . . . . . Page 55
Attaching the belt pouch . . . . . . . . . Page 56
Inserting/replacing the battery in the receiver.... Page 56
Operation...... Page 57
Switching the product on/off and performing a functionality test ..... Page 57
Searching the overcurrent protection.... Page 59 Work hints.... Page 62
Cleaning Page 62
Storage Page 63
Disposal Page 63
Warranty Page 65
Warranty claim procedure. . . . . . . . Page 66
Service Page 67
| List of pictograms used | |
 | Read the user manual. |
 | DANGER! – Designating a hazard with high risk, which will result in death or severe injury if not avoided (e.g. risk of suffocation) |
 | WARNING! – Designating a hazard with moderate risk, which can result in death or severe injury if not avoided (e.g. risk of electric shock) |
 | CAUTION! – Designating a hazard with low risk, which could result in minor or moderate injury if not avoided (e.g. risk of scalding) |
 | NOTICE! – Warns of possible damage to property/the product if not avoided (e.g. risk of short circuit) |
 | INFO: This symbol with the “Info” signal word offers additional useful information. |
 | Danger – risk of electric shock! |
 | Danger – risk of explosion! |
 | Wear protective gloves! |
 | Protection class II (double insulation) |
 | Alternating current/voltage |
 | Direct current/voltage |
 | Battery included |
 | Use the product in dry indoor spaces only. |
| CAT III | Overvoltage category III for measuring in building installation (e.g. outlets or subdistribution). |
 | Safety information Instructions for use |
 | CE mark indicates conformity with relevant EU directives applicable for this product. |
FUSE FINDER KIT
● Introduction
We congratulate you on the purchase of your new product. You have chosen a high quality product.
The instructions for use are part of the product.
They contain important information concerning safety, use and disposal. Before using the product, please familiarise yourself with all of the safety information and instructions for use. Only use the product as described and for the specified applications. If you pass the product on to anyone else, please ensure that you also pass on all the documentation with it.
Intended use
This product is designed to find the correct overcurrent protection * that supplies power to a mains socket.
The allocation of the overcurrent protection by this product is only intended as an indication. If there is any doubt in the electrical system, e.g. as to whether the fuse found has actually broken the correct circuit, a qualified electrician must be consulted.
■ After switching off the overcurrent protection, additional checks must be carried out to ensure that there is no voltage in the circuit or mains socket concerned.
The product may only be used as intended. Intended use includes correct use under correct ambient conditions. The operating safety is not guaranteed in the event of modifications or conversions.
■ Any other use or product modification shall be considered improper use and holds considerable safety hazards.
The manufacturer assumes no liability for damages due to improper use.
This product is only intended for private household use, not for commercial purposes.
This product is designed for use in dry indoor spaces only.
■ Always observe the regulations and laws in the country of use.
- Scope of delivery
1 Receiver
1 Transmitter
1 Battery (9 V ——, 6LR61)
1 Belt pouch
1 User manual
Parts list
Before reading, unfold the pages containing the illustrations and familiarise yourself with all functions of the product.
| Receiver (Fig. A) |
| 1 Probe |
| 2 Scan LED (red) |
| 3 LED indicator light (green) |
| 4 button |
| 5 POWER LED |
| 6 Receiver |
| Transmitter (Fig. B) |
| 7 Mains cord with mains plug |
| 8 ON LED |
| 9 Transmitter |
| Receiver (Fig. C) |
| 10 Battery compartment cover |
| 11 Battery compartment |
| 12 Screw of the battery compartment cover |
| 13 Battery |
| (Fig. F) |
| 14 Belt pouch |
● Technical data
| Transmitter | |
| Model number:– with VDE plug: HG10539– with CH plug: HG10539-CH | |
| Input voltage: 230 V~, 50 Hz, < 20 mA | |
| Dimensions: 85 mm × 57 mm × 29 mm | |
| Weight: - HG10539: approx. 103 g - HG10539-CH: approx. 116 g | |
| Protection class: | II/☐ (double insulation) |
| Over voltage category: 250 V~, CAT III | |
| Receiver | |
| Battery: 1×9 V | ---, 6LR61 or equivalent |
| Dimensions: 188 mm × 58 mm × 36 mm | |
| Weight (with battery): approx. 138 g | |
| Ambient temperature: - Operating environment: 0 to +40 °C - Storage environment: 0 to +50 °C | |
| Relative humidity: - Operating environment: < 80 % - Storage environment: < 95 % | |
| General characteristics | |
| Pollution level: 2 | |
| Measurement category: CAT III 250 V | |
| Max. operating altitude: 2000 m | |

General safety instructions
BEFORE USING THE PRODUCT, FAMILIARISE YOURSELF WITH ALL OF THE SAFETY INFORMATION AND INSTRUCTIONS FOR USE! WHEN PASSING THIS PRODUCT ON TO OTHERS, ALSO INCLUDE ALL THE DOCUMENTS!
In the case of damage resulting from non-compliance with these operating instructions the warranty claim becomes invalid! No liability is accepted for consequential damage! In the case of material damage or personal injury caused by incorrect handling or non-compliance with the safety instructions, no liability is accepted!
Children and persons with disabilities
⚠ WARNING! RISK OF LOSS OF LIFE OR ACCIDENT TO INFANTS AND CHILDREN!
Never leave children unsupervised with the packaging material.
The packaging material represents a danger of suffocation.
Children frequently underestimate the dangers.
Always keep children away from the packaging material.
This product can not be used by children and persons with reduced physical, sensory or mental capabilities or lack of experience and knowledge.
■ Children shall not play with the product.
- Be careful when using the product around children and pets.
The product is not a toy. Keep the product out of the reach of children and pets.
⚠ WARNING! Risk of electric shock! Do not immerse the product’s electrical components in water or other liquids. Never hold the product under running water.
⚠ WARNING! Risk of electric shock! Never use a damaged product. Disconnect the product from the power supply and contact your retailer if it is damaged.
The mains plug must fit the mains socket. Never modify the mains plug in any way. Do not use adapter plugs with earthing.
- Avoid body contact with earthed surfaces such as pipes, radiators, cookers and refrigerators. There is an increased risk of electric shock if your body is earthed.
- Do not attempt to modify or disassemble the product in any way.
The product may not be used for verification of voltage absence. The absence of voltage may only be verified by a bipolar voltage tester according to EN 61243-3.
The audio signal heard, when voltage is checked, provides no reliable indications as to type and level of the voltage. - Only touch the product by the handle areas provided for that purpose. Do not cover indicator elements.
Take particular care when dealing with voltages exceeding 230 V\~ or 230 V ---! Even at these voltages, there is a danger of fatal electric shock if you touch electric conductors.
If a safe operation can no longer be assumed, the product must be put out of operation and secured against unintended operation. Safe operation can no longer be assumed if:
- the product exhibits visible damage
- the product does not function any longer
- the product was stored under unfavourable conditions for a long period of time
– the product has been subjected to considerable stress in transit
- Regularly check the technical safety of the product, e.g. for damage to the casing or pinching of the cables.
- Do not use in the immediate vicinity of:
– strong magnetic fields
-electromagnetic fields
-transmitting aerials
-high frequency generators (HF generators)
■ Never switch the product on immediately after having taken it from a cold to a warm environment. The condensation that forms might destroy the product. Allow the product to reach room temperature before switching it on.
- Handle the product with care. The product can be damaged if crushed, struck or dropped, even from a low height.
The product is intended for dry indoor use only. Do not use the product outdoors. Avoid contact with moisture, e.g. in bathrooms.
■ Protect the product from:
- extreme temperatures
- direct sunlight
– strong vibrations
– high humidity
- moisture
- flammable gases
- flammable vapours
- solvents
- dust
- Do not subject the product to mechanical stress.
- Do not pull the mains plug out of the mains socket by the mains cord. Do not wrap the mains cord around the product.
■ Switch the product off and disconnect it from the power supply before cleaning work and when not in use.
■ Unplug the product during a thunderstorm.
■ Protect the mains cord against damages. Do not let it hang over sharp edges, do not squeeze or bend it.
Keep the mains cord away from hot surfaces and open flames and ensure that nobody can pull on or trip over it unintentionally.
■ Regularly check the mains plug and the mains cord for damages.
If the mains cord is damaged, it must be replaced by the manufacturer, its service agent or similarly qualified persons in order to avoid a hazard.
- Do not operate the product with wet hands or while standing on a wet floor. Do not touch the mains plug with wet hands.
■ Measurements made dangerously close to electrical systems are only to be performed under the instructions of qualified personnel and not alone.
This product is only allowed to be used at the nominal voltages stated in the technical data.
If the product is exposed to an extremely high electromagnetic field, its function may be affected.
■ Maintenance, modifications and repairs must only be carried out by qualified personnel.

Safety instructions for batteries/rechargeable batteries
⚠️ DANGER TO LIFE! Keep
batteries/rechargeable batteries out of reach of children. If accidentally swallowed seek immediate medical attention.
■ Swallowing may lead to burns, perforation of soft tissue, and death. Severe burns can occur within 2 hours of ingestion.
DANGER OF EXPLOSION!

Never recharge non- rechargeable batteries. Do not short-circuit batteries/rechargeable batteries and/or open them. Overheating, fire or bursting can be the result.
■ Never throw batteries/rechargeable batteries into fire or water.
- Do not exert mechanical loads to batteries/rechargeable batteries.
- Do not short-circuit the terminals.
Risk of leakage of batteries/rechargeable batteries
- Avoid extreme environmental conditions and temperatures, which could affect batteries/rechargeable batteries, e.g. radiators/direct sunlight.
If batteries/rechargeable batteries have leaked, avoid contact with skin, eyes and mucous membranes with the chemicals! Flush immediately the affected areas with fresh water and seek medical attention!
WEAR PROTECTIVE GLOVES! Leaked or damaged batteries/
rechargeable batteries can cause burns on contact with the skin. Wear suitable protective gloves at all times if such an event occurs.
In the event of a leakage of batteries/rechargeable batteries, immediately remove them from the product to prevent damage.
■ Remove batteries/rechargeable batteries if the product will not be used for a longer period.
Risk of damage of the product
■ Only use the specified type of battery/rechargeable battery!
- Insert batteries/rechargeable batteries according to polarity marks (+) and (−) on the battery/rechargeable battery and the product.
Use a dry, lint-free cloth to clean the contacts on the battery/rechargeable battery and in the battery compartment before inserting!
■ Remove exhausted batteries/rechargeable batteries from the product and safely dispose of.
■ Non-rechargeable batteries are not to be recharged.
● First set-up of the product
- Unpacking the product
-
Take the product out of the packaging and remove all packaging materials and plastic wrappings.
-
Check to make sure that all listed parts are included (see "Scope of delivery").
- Check whether the product and all parts are in good condition, if any damage or defect is detected, do not use the product, but follow the procedure described in chapter “Warranty”.
- Attaching the belt pouch
(Fig. F)
i INFO: Store the product in the belt pouch 14 when not in use.
☐ Slide a belt through the loop on the belt pouch 14.
- Inserting/replacing the battery in the receiver
(Fig. C)
i INFO:
☐ When the battery 13 is low, the POWER LED 5 flashes at regular intervals. Replace the battery.
☐ The receiver 6 switches off automatically after 3 acoustic signal tones as soon as the battery 13 is completely empty.
☐ The test result may be falsified if the battery 13 is empty.
1. Switching off the receiver 6: Press and hold the button 4 for approx. 2 seconds.
The buzzer of the receiver sounds 3 times.
2. Remove the screw of the battery compartment cover 12.
3. Open the battery compartment cover 10.
- If necessary, remove the used battery 13 from the battery compartment 11.
- Plug the contacts of the battery 13 onto the contacts of the profiled plug. Pay attention to the correct polarity of the battery. The polarity is given by the profiled shape of the contacts.
- Insert the battery 13 into the battery compartment 11.
- Place the battery compartment cover 10 on the battery compartment 11.
- Insert the screw of the battery compartment cover 12.
- Tighten the screw of the battery compartment cover 12.
Operation
⚠ WARNING! Risk of electric shock!
- Disconnect the circuit before replacing a defective overcurrent protection.
- Do not come into contact with live parts.
- Never touch bare conductors, open cables or live parts with bare hands or skin.
- Switching the product on/off and performing a functionality test
(Fig. D, E)
i INFO: If the ⏻ button 4 is not pressed, the receiver 6 switches off after approx. 3 minutes.
- Move the receiver 6 at least 1 m away:
- from the transmitter 9;
-
from the circuit to which the transmitter is connected.
-
Insert the mains plug 7 into the mains socket of the circuit where the overcurrent protection is located (Fig. D). The ON LED 8 lights up.
- Switching on the receiver 6: Press the ⏻ button 4. The receiver searches for the signal of the transmitter 9. The receiver emits the following signals:
| Receiver 6 | Function |
| Scan LED 2 Lights red | |
| LED indicator light 3 | Lights green for1 second and goes out |
| POWER LED 5 Lights up | |
| Buzzer Sounds at regular | intervals |
- Bring the probe 1 of the receiver 6 close to the transmitter 9 (Fig. E).
When the receiver is working and the socket is live, the receiver emits the following signals:
| Receiver 6 | Function |
| Scan LED 2 | Goes out |
| LED indicator light 3 | Lights green |
| Buzzer Sounds continuously | |
- Switching off the receiver 6: Press and hold the ⏻ button 4 for approx. 2 seconds. The buzzer of the receiver sounds 3 times.
- Remove the mains plug 7 from the mains socket.
- Searching the overcurrent protection
Resetting the receiver
i INFO:
☐ Reset the receiver 6:
– before searching the overcurrent protection
– after a failed search
– after replacing the mains socket
☐ Resetting helps to detect the signal with the highest intensity.
- Move the receiver 6 at least 1 m away:
– from the transmitter 9;
– from the circuit to which the transmitter is connected.
- Press the ⏻ button 4.
The receiver emits the following signals:
| Receiver 6 | Function |
| Scan LED 2 Lights red | |
| LED indicator light 3 Goes out | |
| POWER LED 5 Lights up | |
| Buzzer 2 consecutive acoustic signal tones |
Identifying the position of the overcurrent protection
(Fig. G)
i INFO:
☐ The detection or assignment of an overcurrent protection largely depends on the routing of the wires.
☐ Remove the cover of the fuse box to get the most accurate result.
☐ If you do not have specialist knowledge, do not remove the cover of the fuse box yourself, but commission qualified personnel (e.g. an electrician) to do so.
☐ If the power supply is interrupted due to a defective overcurrent protection, the product cannot be used.
- Insert the mains plug 7 into the mains socket of the circuit where the overcurrent protection is located. The ON LED 8 lights up.
- Switch on the receiver 6 (see “Switching the product on/off and performing a functionality test”).
- Move the receiver 6 close to the overcurrent protection. Hold the probe 1 vertically against the overcurrent protection.
- Turn the receiver 6 so that the bottom side points in the direction of the transmitter 9. The tip of the probe 1 points to the upper part of the overcurrent protection under test.
- Slowly guide the tip of the probe 1 along the overcurrent protection. During the first scan, the scan LED 2 and the LED indicator light 3 may be on or off. The buzzer sounds long or intermittently. Test results are not represented at this time.
Checking the position of the overcurrent protection
- Repeat step 3 (see “Identifying the position of the overcurrent protection”).
Once the receiver 6 detects a strong signal from the overcurrent protection, the receiver emits the following signals:
| Receiver 6 | Function |
| Scan LED 2 | Goes out |
| LED indicator light 3 | Lights green |
| Buzzer Sounds continuously | |
- Switch off the corresponding overcurrent protection.
Checking the correctness of the overcurrent protection
- Use the ON LED 8 to check whether the correct overcurrent protection has been selected:
| ON LED 8 | Overcurrent protection |
| Switched on * Incorrect | * |
| Switched off Correct | |
| * Perform the above steps again (see “Searching the overcurrent protection”). | |
- Switch off the receiver 6 (see “Switching the product on/off and performing a functionality test”).
Work hints
⚠ WARNING! Risk of electric shock!
- Do not touch bare conductors with your hand or skin to avoid electric shock and injury.
- Do not apply more than the rated voltage to the product.
☐ Malfunctions or false alarms may occur. Always additionally check visually whether the overcurrent protection actually looks defective.
☐ Keep cell phones and other noise sources away from the product during use.
☐ In overcurrent protection products from different manufacturers the solenoid coils may be located in different positions. If no clear signal is found with the receiver 6: Turn the receiver by 90° to the left or right.
☐ In certain cases, 2 adjacent overcurrent protection products can cause the receiver 6 to display a signal. The reason for this is the routing of the wires. Perform the search for the overcurrent protection again (see “Searching the overcurrent protection”).
- Cleaning
⚠ WARNING! Risk of electric shock! Before you clean or maintain the product: Remove the mains plug 7 from the mains socket.
WARNING!
Before cleaning, remove the battery ^13 from the battery compartment ^11 .
- Do not immerse the electrical parts of the product in water or other liquids. Never hold the product under running water.
- Do not allow water or other liquids to get inside the product.
- Do not use abrasive, aggressive cleaning agents or hard brushes for cleaning.
i INFO:
☐ The product is maintenance-free. No components need to be maintained inside the product.
□ Clean the product with a lint-free, dry cloth.
Storage
☐ Remove the battery 13 if the product is not used for a long time.
☐ Store the product in the belt pouch 14 when not in use.
☐ Store the product in a dry, dust-free place out of the reach of children.
- Disposal
The packaging is made entirely of recyclable materials, which you may dispose of at local recycling facilities.
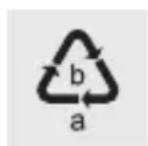
Observe the marking of the packaging materials for waste separation, which are marked with abbreviations (a) and numbers (b) with following meaning: 1–7: plastics/20–22: paper and fibreboard/80–98: composite materials.
Product:
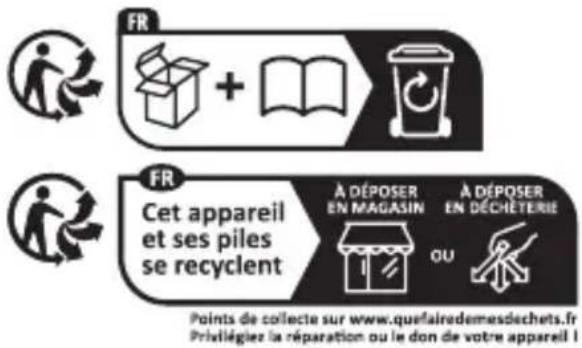
The product incl. accessories and packaging materials are recyclable and are subject to extended producer responsibility.
Dispose them separately, following the illustrated Info-tri (sorting information), for better waste treatment.
The Triman logo is valid in France only.

Contact your local refuse disposal authority for more details of how to dispose of your worn-out product.
To help protect the environment, please dispose of the product properly when it has reached the end of its useful life and not in the household waste. Information on collection points and their opening hours can be obtained from your local authority.
Manufactured by:
OWIM GmbH & Co. KG
Stiftsbergstraße 1
74167 Neckarsulm
E-mail: battery-service@lidl.com
www.owim.com
Warranty
The product has been manufactured to strict quality guidelines and meticulously examined before delivery. In the event of material or manufacturing defects you have legal rights against the retailer of this product. Your legal rights are not limited in any way by our warranty detailed below.
The warranty for this product is 3 years from the date of purchase. The warranty period begins on the date of purchase. Keep the original sales receipt in a safe location as this document is required as proof of purchase.
Any damage or defects already present at the time of purchase must be reported without delay after unpacking the product.
Should the product show any fault in materials or manufacture within 3 years from the date of purchase, we will repair or replace it – at our choice – free of charge to you. The warranty period is not extended as a result of a claim being granted. This also applies to replaced and repaired parts.
This warranty becomes void if the product has been damaged, or used or maintained improperly.
The warranty covers material or manufacturing defects. This warranty does not cover product parts subject to normal wear and tear, thus considered consumables (e.g. batteries, rechargeable batteries, tubes, cartridges), nor damage to fragile parts, e.g. switches or glass parts.
● Warranty claim procedure
So that your request can be processed quickly, please observe the following instructions:
For all inquiries, please have the receipt and item number (IAN 465692_2404) ready as proof of purchase.
The article number can be taken from the identification label on the product, engraving on the product, the front cover of your manual (at the bottom left), or the sticker on the back or bottom of the product.
If malfunctions or other defects arise, first contact the service department indicated below by phone or email.
You can then send a product recorded as defective to the communicated service address postage-free, making sure to enclose proof of purchase (receipt) and information on the details of the defect and when it occurred.
text_image
PDF ONLINE parkside-diy.comYou can download and view this and numerous other manuals at parkside-diy.com. This QR code takes you directly to parkside-diy.com. Choose your country and use the search screen to search for the operating instructions. Entering the item number (IAN) 465692_2404 takes you to the operating instructions for your item.
Service
GB Service Great Britain
Tel.: 0800 0569216
E-Mail: owim@lidl.co.uk
IE Service Ireland
Tel.: 1800 200736
E-Mail: owim@lidl.ie
CE
Gooi batterijen/accu's nooit in vuur of water.