
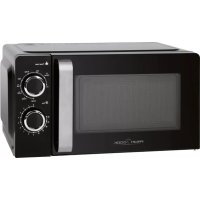
PC-MWG 1319 - Microwave Oven PROFICOOK - Free user manual and instructions
Find the device manual for free PC-MWG 1319 PROFICOOK in PDF.

| Product Type | Microwave oven with grill |
| Brand | ProfiCook |
| Model | PC-MWG 1319 |
| Cavity volume | 20 liters |
| Net weight | approx. 10.7 kg |
| Microwave power | 700 W |
| Grill power | 800 W |
| Power supply | 230 V ~ 50 Hz |
| Power consumption (microwave) | 1150 W |
| Standby consumption | ≤ 0.8 W |
| Microwave frequency | 2450 MHz |
| Protection class | I (grounded) |
| Main functions | Microwave, grill, combined, defrosting, automatic programs, multi-stage cooking, timer, child lock |
| Delivery contents | Oven, glass turntable, guide ring, grill rack, manual |
| Maintenance and cleaning | Clean the interior with a damp cloth and mild detergent; do not use abrasive or metal utensils; clean the rack with warm soapy water |
| Safety | Child lock, automatic stop when door is opened, grounded plug, do not operate empty |
| Spare parts and repairability | Oven lamp replaceable by a professional; contact customer service in case of defect |
| General information | Use only to heat food and beverages; do not heat animals or sealed containers; observe installation distances (10 cm rear/sides, 30 cm above) |
Frequently Asked Questions - PC-MWG 1319 PROFICOOK
User questions about PC-MWG 1319 PROFICOOK
0 question about this device. Answer the ones you know or ask your own.
Ask a new question about this device
Download the instructions for your Microwave Oven in PDF format for free! Find your manual PC-MWG 1319 - PROFICOOK and take your electronic device back in hand. On this page are published all the documents necessary for the use of your device. PC-MWG 1319 by PROFICOOK.
USER MANUAL PC-MWG 1319 PROFICOOK
natural_image
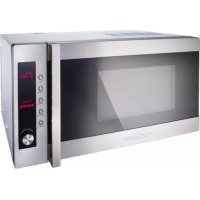
Black PROF COOK microwave oven with digital display and control buttons (no visible text beyond branding)△ ACHTUNG:
- Do not remove any assembled parts from the cooking cabinet and the inside of the door!
- Do not remove the plastic film on the inside of the door under any circumstances!
△ LET OP:
Auto Cooking | Time / Weight
Be sure to read the separately enclosed safety instructions first.
Instruction Manual
Thank you for choosing our product. We hope you will enjoy using the appliance.
Read the instruction manual and the separately enclosed safety instructions very carefully before using this appliance. Keep these documents, including the warranty certificate, receipt and, if possible, the box with the inner packaging in a safe place. If you pass the appliance on to a third party, always include all the relevant documents.
Symbols in this Instruction Manual
Important information for your safety is specially marked. It is essential to comply with these instructions in order to avoid accidents and prevent damage to the appliance:
WARNING:
This warns you of dangers to your health and indicates possible injury risks.
△ CAUTION:
This refers to possible hazards to the appliance or other objects.
Content
Overview of the Components....3
Signs and Symbols on the Appliance 14
Warnings for the Use of the Appliance 14
Overview of the Components/Scope of Delivery....15
Buttons and Controls on the Control Panel....15
Notes on Grill and Combi Mode....15
Suitable Microwave Crockery....15
Notes on the Function and Use of the Appliance 16
Things to Know about Microwave Operation....16
Notes on the Function of this Appliance....16
Putting into Operation....16
Installation Instructions....16
Preparation....16
Setting the Time 16
Operating the Microwave Oven....16
Interrupting or Cancelling the Cooking Process 17
Quick Start....17
Heating....17
Heating Table....17
Cooking....18
Practical Tips for Cooking 18
Cooking Table....18
Grilling....19
Combination of Microwave and Grill Mode ....19
Tips for combined operation....19
Automatic Programmes....19
Automatic Programmes Table 19
Defrosting 20
Cooking in Several Steps 20
Special Functions....20
Automatic Start (Timer Function) 20
Locking (Child Lock)....21
Enquiry Function....21
Cleaning....21
Interior....21
Outer Walls 21
Accessories 21
Odour 21
Oven Light 21
Troubleshooting....21
Technical Data....22
Disposal 22
Meaning of the "Dustbin" Symbol....22
Signs and Symbols on the Appliance

WARNING

1: MICROWAVE AND HIGH VOLTAGE INSIDE. BESURE NOT TO REMOVE THEENCLOSURE.
2:THISAPPLIANCEISEQUIPPEDWITH AGROUNDEDPLUGFORYOUR PROTECTIONAGAINSTPOSSIBLE SHOCKHAZARDSANDSHOULD BECONNECTEDTOAPPROPERLY GROUNDEDOUTLET.
3:THISDEVICEISTOBESERVICED ONLY BY PROPERLY QUALIFIED SERVICEPERSONNEL.
4: DISCONNECTPOWERPLUG
BEFORESERVICING.REMOVALOF
THEENCLOSUREWITHPRODUCT
ENERGIZEDCOULDEXPOSE
SERVICEMENTOHAZARDOUSHIGH
VOLTAGEPOTENTIAL.
WARNING
MICROWAVE ENERGY DO NOT REMOVE
THIS COVER
Warnings for the Use of the Appliance
WARNING:
- Do not place the microwave in a cupboard.
- Never operate the microwave when it is empty!
- Only use utensils that are suitable for use in microwave ovens. Observe the notes in the chapter "Suitable Microwave Crockery".
- Metal containers for food and drinks are not permitted when heating food in the appliance.
- Microwave oven is intended for heating food and beverages. Drying of food or clothing and heating of warming pads, slippers, sponges, damp cloth and similar may lead to risk of injury, ignition or fire.
WARNING:
- The microwave oven is not intended for heating/warming living animals.
- Do not heat liquids or other food in closed containers. Risk of explosion!
- Contents of feeding bottles and baby food jars shall be stirred or shaken and the temperature checked before consumption, in order to avoid burns.
- Food with a bowl or skin, such as eggs, sausage, sealed glass jars, etc., should not be heated in the appliance.
- Use oven mitts or kitchen gloves when removing containers. Risk of burns!
- Clean the microwave oven regularly and remove food deposits from the interior.
WARNING: Boiling Delay!
- When cooking, especially when reheating liquids (water), it can happen that the boiling temperature is reached but the typical vapour bubbles do not yet rise. The liquid boils unevenly. This so-called boiling delay can lead to the sudden formation of vapour bubbles and thus to boiling over when the container is removed by gently shaking it. Risk of scalding!
- To achieve an even boil, place a glass rod or similar non-metallic object in the container.
CAUTION:
- Do not remove any assembled parts from the cooking cabinet and the inside of the door!
- Do not remove the plastic film on the inside of the door under any circumstances!
Overview of the Components / Scope of Delivery
1 Display
2 Control panel
3 Rotary knob
4 Door opener
5 Drive shaft
6 Guide ring
7 Glass rotating plate
8 Grill heating
9 Grill grate
10 Door lock
11 Viewing window
12 Mica sheet
Buttons and Controls on the Control Panel
Micro Power
Microwave: Selection of the microwave power levels
Defrost
Defrost: In conjunction with the rotary knob for defrosting by weight
STOP/Cancel
Reset: Press once to cancel the programme entry
Stop: Press once to stop the cooking process
Delete: Press twice to delete the programme
Child lock: Press the button for 3 seconds to lock the control panel (child lock) or to unlock it again
Grill/Combi
Grill: For grilling and gratinating
Combinations: Grill, and microwave work alternately
Preset/Clock
Clock: In conjunction with the rotary knob to set the time
Timer: In conjunction with the rotary knob for setting the timer
Instant/Start- Quick start of the microwave (always
60 seconds at 100 % power)
- Start the programme
- Extension of the cooking time by 10, 30 or 60 seconds during operation, depending on the set cooking time (except for defrosting programmes and automatic programmes)
- Confirmation of an entry
Auto Cooking | Time / Weight
Rotary knob: For setting the time, the cooking time of the automatic programmes or the weight values
Notes on Grill and Combi Mode
- As radiant heat is used in grill and combi mode, only use heat-resistant crockery. Plastic containers are not suitable.
- The use of metal or aluminium crockery is permitted for grill mode only, but not for combi mode or microwave mode.
- Do not place anything on the top of the appliance! The housing gets hot! Always leave the ventilation slots free!
- Use the grill grate to bring the food closer to the heating element.
Suitable Microwave Crockery
- An ideal material for use in the microwave is transparent, so that the microwave radiation can heat the food evenly.
- Round / oval bowls and plates are more suitable than square ones, as the food could overcook in the corners.
CAUTION:
Risk of explosion from tightly closed cookware.
- Open sealed containers before cooking or heating.
- Prick plastic protective film several times with a fork.
CAUTION: Risk of Sparks and Fire!
- Microwave radiation cannot penetrate metal. For this reason, do not use containers or plates made of metal or the grill grate included in the scope of delivery.
- Do not use paper trays made of recycled material, as these may contain small amounts of metal, which can lead to sparks or fires.
The list below will make it easier for you to select suitable microwave dishes:
* Combinations of microwave with grill
| Material | Suitable for Microwave Grill Combination* | ||
| Heat-resistant glass container | yes yes | yes | |
| Non-heat-resistant glass container | no | no | no |
| Material | Suitable for | ||
| Microwave | Grill Combination* | ||
| Heat-resistant ceramic container / plate | yes yes | yes | |
| Microwave-safe plastic container | yes no no | ||
| Kitchen paper no no no | |||
| Metal or aluminium utensils | no yes no | ||
| Grill grate no yes no | |||
| Aluminium foil and foil container | no yes no | ||
Notes on the Function and Use of the Appliance
Things to Know about Microwave Operation
- Your appliance works with microwave radiation, which heats water particles in food in a very short time. There is no heat radiation and therefore hardly any browning.
- Only heat food with this appliance.
- The appliance is not suitable for baking in floating fat.
- Only heat 1–2 portions at a time. Otherwise the appliance will lose efficiency.
- Microwaves deliver full energy immediately. Preheating is therefore not necessary.
- Never run the appliance empty in microwave mode.
- The microwave oven does not replace your conventional cooker. It is mainly used for:
- Defrosting frozen / deep-frozen food.
- Quickly heating / warming up food or drinks.
- Cooking food.
Notes on the Function of this Appliance
- Your selection by pressing the buttons is confirmed by an acoustic signal. If this is not the case, you have not pressed the button correctly or have made the wrong selection.
- If a programme has been selected and the INSTANT/START button is not pressed within 2 minutes, the setting is cancelled. The current time appears on the display again.
- After starting a programme, the remaining running time is displayed. A countdown starts.
- 3 signals sound to indicate the end of a programme. "E nd" appears on the display. The appliance then switches off automatically. These beeps are repeated every 3 minutes until you have opened the door or pressed the STOP/CANCEL button.
- The lighting in the oven lights up continuously. Close the door to switch off the lighting.
Putting into Operation
Installation Instructions
- Place the appliance with the back against a wall.
- Maintain the following safety distances:
- 10 cm at the rear
- 10 cm on both sides
- 30 cm on the top of the microwave oven
- To prevent other appliances from being disturbed by operation, do not place the microwave in the immediate vicinity of other electronic devices.
Preparation
- To open the microwave door, press the door opener. The door swings open.
- Remove all the accessories in the cooking compartment and unpack them.
CAUTION:
- Do not remove any assembled parts from the cooking cabinet or from the inside of the door!
-
The mica sheet (12) is also part of the appliance and must not be removed. It protects the electronic component located behind it from dirt.
-
If not yet done: Place the drive shaft on the centre of the bottom inside the oven.
- Install the guide ring in the centre.
- Position the glass rotating plate in such a way that its lower recesses lock onto the centre of the drive shaft.
- Check the appliance for visible damage, especially around the door. If there is damage of any kind, the appliance must not be put into operation under any circumstances.
- Check that the mains voltage you intend to use matches that of the appliance. You will find the relevant information on the rating plate.
- Insert the mains plug into a correctly installed earthed socket. As soon as the appliance is connected to the mains, all segments will light up three times. A signal then sounds and “*” flashes on the display.
- If there are production or oil residues on the housing or the heating element, smoke or odours may initially develop.
This is a normal process that no longer occurs after repeated use. We strongly advise you to proceed as follows: - Start up the appliance in the grill function. Let the appliance run through this function a few times without food.
- Ensure that there is sufficient ventilation.
Setting the Time
- Press the PRESET/CLOCK button once. The clock symbol "⑨" appears on the display and the hours start to flash.
- Set the desired hour with the rotary knob.
- Confirm your setting with the PRESET/CLOCK button.
- Set the desired minutes with the rotary knob.
- Press the PRESET/CLOCK button again. The time is now set. The separator for the digital time display “*” flashes in the display. The “○” symbol lights up continuously.
Operating the Microwave Oven
- Place the food to be heated in suitable crockery.
- Open the door and place the vessel in the middle of the glass plate. Close the door. (For safety reasons, the appliance only works with the door firmly closed.)
- Select the desired microwave power by pressing the MICRO POWER button once / several times.
| Power in the Display as selected in % | Power in Watts (approx.) | Scope of Application |
| 100P | 700 | Quick heating |
| 80P | 560 Cooking | |
| 60P | 420 Simmering | |
| 40P | 280 Defrosting frozen food | |
| 20P | 140 Melting cheese etc. |
- Set the desired cooking time between 10 seconds and 60 minutes with the rotary knob.
- Press the INSTANT/START button to start. The cooking time depends on the quantity and consistency of the contents. With a little practice, you will quickly learn to estimate the cooking time.
-
Each additional press of the INSTANT/START button extends the operating time.
-
Up to 5 minutes by 10 seconds.
• From 5 minutes to 10 minutes by 30 seconds.
• From 10 minutes by 60 seconds. -
After starting, the operating time can also be increased or decreased with the rotary knob.
- Cooking in the microwave oven is much faster than in the oven. If you are not sure, set the cooking time low and repeat the cooking process if necessary.
- Please note: When using the appliance in microwave mode only, place a cover over the food.
Interrupting or Cancelling the Cooking Process
- If you want to interrupt the cooking process, press the STOP/CANCEL button once or simply open the door.
- If you want to continue cooking, close the door and press the INSTANT/START button again.
- To cancel the process completely, press the STOP/CANCEL button twice. This will reset all settings.
Quick Start
Do you want to heat food or a drink briefly at maximum microwave power?
Start the microwave by pressing the INSTANT/START button directly. The cooking process starts immediately, with each further press of the button extending the cooking time by 10, 30 or 60 seconds (see chapter "Operating the Microwave Oven").
The power of the microwave is 100 %.
Heating
Warming and heating is a particular strength of the microwave. Refrigerator-cold liquids and food can easily be brought to room or eating temperature without having to use a lot of pots and pans.
The heating times given in the following table are only guidelines, as the time depends very much on the initial temperature and the composition of the food. It is therefore advisable to check from time to time whether the dish is hot enough.
Heating Table
| Food/Dish Quantity | Power in % | Approx. Time in Minutes | Cover | |
| Liquids | ||||
| 1 cup | 150 g | 100 P | 0.5–1 | no |
| 0.5 l | 500 g | 100 P | 3.5–5 | no |
| 0.75 l | 750 g | 100 P | 5–7 | no |
| Tip: Place a glass rod or similar item (nothing metal) into the vessel in order to prevent delayed boiling. Stir well before drinking. | ||||
| Plated Meals | ||||
| Schnitzel + potatoes and veg- etables | 450 g | 10 OP | 2.5–3.5 | yes |
| Goulash with noodles | 450 g 2–2.50 OP | yes | ||
| Meat + dumpling and sauce | 450 g | 10 OP | 2.5–3.5 | yes |
| Tip: Moisten slightly beforehand, stir from time to time. | ||||
| Meat | ||||
| Schnitzel, coated with breadcrumbs | 200 g | 100 P | 1-2 | no |
| Meatballs, 4 in total | 500 g | 100 P | 3-4 | no |
| Joint | 250 g | 100 P | 2-3 | no |
| Tip: Brush with oil so that the breadcrumbs or crust do not become soft. |
| Poultry | ||||
| Half a chicken | 450 g | 100 P | 3.5–5 | no |
| Chicken fricassee | 400 g | 100 P | 3–4.5 | yes |
| Tip: Brush with oil, stir from time to time. | ||||
| Extras | ||||
| Noodles, rice1 portion | 150 g | 100 P | 1–2 | yes |
| 2 portions | 300 g | 100 P | 2.5–3.5 | yes |
| Potatoes | 500 g | 100 P | 3–4 | yes |
| Tip: Moisten slightly beforehand. | ||||
| Soups/Sauces | ||||
| Clear soup, 1 plate | 250 g | 100 P | 1–1.5 | yes |
| Soup with garnish | 250 g | 100 P | 1.5–2 | yes |
| Sauce | 250 g | 100 P | 1–2 | yes |
| Infant Food | ||||
| Milk | 100 ml | 60P | 0.5–1 | no |
| Mash 200 g 1–1.5 | no | 60P | ||
| Tip: Shake well or stir. Check the temperature! |
Cooking
Practical Tips for Cooking
Follow the guide values in the cooking table and recipes. Keep an eye on the cooking process until you have had a lot of practice.
You can open the appliance door at any time. The appliance switches off automatically.
It will not work again until the door is closed and the INSTANT/START button has been pressed again.
Food from the refrigerator requires a slightly longer cooking time than food at room temperature.
The more compact a dish is, the longer the cooking time. For example, a larger piece of meat will take longer to cook than cut meat of the same quantity. It is advisable to cook larger quantities at maximum power and continue cooking at medium power for even cooking.
Flat food cooks faster than high food, so spread the food as flat as possible. Place thinner pieces, e. g. chicken thighs or fish fillets, on the inside or allow them to overlap.
Smaller quantities cook faster than large ones. The rule of thumb is:
Double the quantity = almost double the time Half the quantity = half the time
If you cannot find a suitable time for a dish, the following rule applies:
approx. 1 minute cooking time per 100 g
All food that is covered on the hob should also be covered in the microwave oven.
A lid prevents the food from drying out. An inverted plate, parchment paper or microwave foil are suitable for covering. Cook food that needs a crust uncovered.
* Pre-cooked food
Cooking Table
| Food/Dish Quantity | Power in % | Approx. Time in Minutes | Cover | |
| Vegetables | ||||
| Aubergines 500 g 7–10yes | 80P | |||
| Cauliflower 500 g 13–15yes | 80P | |||
| Broccoli 500 g 6–9 | yes | 80P | ||
| Chicory | 500 g | 80P | 6–7 | yes |
| Peas | 500 g | 80P | 6–7 | yes |
| Fennel | 500 g | 80P | 8–11 | yes |
| Green beans | 300 g | 80P | 13–15 | yes |
| Potatoes | 500 g | 80P | 9–12 | yes |
| Turnip cabbage | 500 g | 80P | 8–10 | yes |
| Leek | 500 g | 80P | 7–9 | yes |
| Maize cob | 250 g | 80P | 7–9 | yes |
| Carrots | 500 g | 80P | 8–10 | yes |
| Bell pepper | 500 g | 80P | 6–9 | yes |
| Brussels sprouts | 300 g | 80P | 7–10 | yes |
| Asparagus | 300 g | 80P | 6–9 | yes |
| Tomatoes | 500 g | 80P | 6–7 | yes |
| Courgettes | 500 g | 80P | 9–10 | yes |
| Tip: Cut the vegetables into small pieces and cook with 2–3 tablespoons of liquid, stir from time to time, continue cooking for 3–5 minutes, season just before serving. | ||||
| Fruit | ||||
| Stewed apple, pear | 500 g | 80P | 5–8 | yes |
| Plum jam | 250 g | 80P | 4–6 | no |
| 4 baked apples | 500 g | 80P | 7–9 | yes |
| Tip: Add 125 ml water. Lemon juice prevents the fruit from changing colour. Cook for a further 3–5 minutes. | ||||
| Meat* | ||||
| Meat with sauce | 400 g | 80P | 10–12 | yes |
| Goulash, stewed strips of meat | 500 g 10–15yes | |||
| Roulade of beef | 250 g | 80P | 7–8 | yes |
| Tip: Stir from time to time, allow to stand for 3–5 minutes. | ||||
| Poultry* | ||||
| Chicken fricassee | 250 g | 80P | 6–7 | yes |
| Poultry soup | 200 g | 80P | 5–6 | yes |
| Tip: Stir from time to time, allow to stand for 3–5 minutes. | ||||
| Fish | ||||
| Fish fillet | 300 g 7–880P | yes | ||
| 400 g 8–980P | yes | |||
| Tip: Turn halfway through, continue cooking for 3–5 minutes. | ||||
| Defrosting and Cooking Vegetables | ||||
| Apple and red cabbage | 450 g 14-16yes | |||
| Leaf spinach 300 g 11-13yes | 80P | |||
| Cauliflower 200 g 7-9yes | 80P | |||
| French beans | 200 g | 80P | 8-10 | yes |
| Broccoli | 300 g | 80P | 8-9 | yes |
| Peas | 300 g 7-8yes | |||
| Turnip cabbage | 300 g | 80P | 13-15 | yes |
| Leek | 200 g | 80P | 10-11 | yes |
| Maize | 200 g | 80P | 4-6 | yes |
| Carrots | 200 g | 80P | 5-6 | yes |
| Brussels sprouts | 300 g | 80P | 7-8 | yes |
| Spinach | 450 g 12-18yes | |||
| 600 g 15-17yes | ||||
| Tip: Cook in 1-2 tablespoons of liquid, stir from time to time or divide carefully into pieces. Continue cooking for 2-3 minutes and season just before serving. | ||||
| Soups/Stews* | ||||
| Stew | 500 g 13-16yes | |||
| Soup with garnish | 300 g | 80P | 7-18 | yes |
| Crème soup | 500 g | 80P | 13-15 | yes |
| Tip: Stir from time to time, allow to stand for 3-5 minutes. | ||||
Grilling
Place the grill rack onto the supplied glass plate. Use suitable heat-resistant crockery or place the food to be grilled directly on the grill grate.
It is not necessary to "preheat" the grill, as the grill generates radiant heat immediately.
To grill and gratinate, proceed as follows:
- Press the GRILL/COMBI button. "6." appears in the display.
- Set the desired grilling time between 10 seconds and 60 minutes with the rotary knob.
- Press the INSTANT/START button to start.
- We recommend turning the food (e.g. meat, sausage) after about half the time.
| Food/Dish | Quantity | Time approx. min. | Cover |
| Toast gratinated with cheese | 2–3 slices | 3–4 | no |
| Soups au gratin, e.g. onion soup | 2–3 cups | 10–15 | no |
Combination of Microwave and Grill Mode
With this programme selection, the microwave and grill work alternately within the set time.
- Select the desired combination by pressing the GRILL/COMBI button several times.
| Code | Microwave | Grill |
| C.1 | 30% | 70% |
| C.2 | 55% | 45% |
- Set the desired cooking time between 10 seconds and 60 minutes with the rotary knob.
- Press the INSTANT/START button.
Tips for combined operation
If you are preparing food in combined microwave/grill mode, please note the following:
For large, thick food, such as roast pork, the microwave time is correspondingly longer than for small, flat food. However, the opposite is true for grilled food. The closer the food is to the grill, the quicker it will brown. This means that if you prepare large roasts in combi mode, the grilling time may be shorter than for smaller roasts.
Automatic Programmes
With the automatic programme, you can have certain quantities of food cooked automatically. To do this, proceed as follows:
- Turn the control knob clockwise and select the desired automatic programme. Please refer to the table below for the possible settings.
- Once you have selected the automatic programme, press the INSTANT/START button. Now set the weight with the rotary knob.
- Press the INSTANT/START button to start the programme.
Automatic Programmes Table
| Code | Function Quantity | Time in | Minutes |
| R.1 | Rice | 0.1 kg | 18:00 |
| 0.2 kg | 24:00 | ||
| 0.3 kg | 27:00 | ||
| R.2 | Meat | 0.15 kg | 3:00 |
| 0.3 kg | 4:30 | ||
| 0.45 kg | 6:30 | ||
| 0.6 kg | 8:30 | ||
| R.3 | Vegetables | 0.2 kg | 3:30 |
| 0.3 kg | 4:30 | ||
| 0.4 kg | 5:30 | ||
| 0.5 kg | 6:30 | ||
| 0.6 kg | 7:30 | ||
| 0.7 kg | 8:30 | ||
| 0.8 kg | 9:30 | ||
| R.4 | Popcorn | 0.1 kg | 3:00 |
| R.5 | Beverages | 1 cup | 1:40 |
| 2 cups | 3:00 | ||
| R.6 | Potatoes | 0.45 kg | 8:00 |
| 0.65 kg | 18:00 | ||
| Code Function Quantity Time in Minutes | |||
| R.7 | Pizza(Warming up) | 0.2 kg 1:30 | |
| 0.3 kg 3:00 | |||
| 0.4 kg 4:00 | |||
| R.B | Fish | 0.2 kg 3:00 | |
| 0.3 kg 4:20 | |||
| 0.4 kg 5:40 | |||
| 0.5 kg 7:00 | |||
| 0.6 kg 8:20 | |||
| 0.7 kg 9:40 | |||
Defrosting
- The power of the microwave is 40 % (280 W) when defrosting.
- As the microwaves always penetrate the food from the outside in, larger pieces cannot be defrosted to the centre. The outer layers could already be cooked.
- Turn food such as meat, sausage and bread once after about half the defrosting time. Close the door and press the INSTANT/START button to continue.
- After the defrosting programme, an equalisation time must be scheduled. This is a standing time during which the temperature is equalised by heat conduction from the outside (defrosted) to the inside (frozen). During the equalisation time, you can leave the food in the appliance switched off or outside the appliance. The equalisation time is at least as long as the defrosting time in the microwave. It depends on the nature of the food.
- You can shorten the equalisation time by, for example, cutting small pieces of meat apart after the defrosting time or crumbling the remaining ice core of minced meat. For sliced bread or cold cuts, separate the slices during the equalisation time.
- Defrost the fruit in a bowl with a lid. After about half the defrosting time, carefully stir the fruit once.
- Cakes or tarts with a chocolate coating are not suitable for defrosting in the microwave.
- Defrosted food should be eaten as soon as possible, it is not advisable to put it back in the fridge and freeze it again.
There are two options for defrosting frozen food:
-
Select with the MICRO POWER button. Set the desired defrosting time with the rotary knob.
• To use the defrosting programme, proceed as follows: -
Determine the weight of the food.
- Remove the food from its packaging. If it is difficult to remove from the packaging, defrost it for 30 seconds at maximum microwave power (see 'Quick Start').
- Place the defrosted food on a plate (fruit in a bowl). Place the meat on an upturned saucer so that the meat juices can drip off. This should not be used under any circumstances and should not come into contact with other food.
- Press the DEFROST button repeatedly to select one of the defrosting programmes:
| Food | Defrosting Programme | Weight | Defrosting Time |
| Meat 0.1–2.0kg2:30+52:52 | |||
| Poultry | d·2 | 0.2–3.0kg5:00–66:25 | |
| Fish | d·3 | 0.1–0.9kg2:34–23:04 | |
- Set the desired weight with the rotary knob.
- Press the INSTANT/START button to start.
Cooking in Several Steps
You can set the programmes so that up to 4 different functions are carried out in succession.
Let's assume you select the following programmes:
Microwave

Grill
- Select the 1st function: Select the desired microwave power with the MICRO POWER button by pressing it several times.
- Set the desired cooking time between 10 seconds and 60 minutes with the rotary knob.
- Select the 2nd function: Press the GRILL/COMBI button. "S" appears in the display.
- Set the desired grilling time between 10 seconds and 60 minutes with the rotary knob.
- Press the INSTANT/START button to start the programme.
- You will be notified of the programme change by an acoustic signal.
- This function is not available for the automatic and defrost programmes.
Special Functions
Automatic Start (Timer Function)
You can delay the start time by a maximum of 23 hours and 59 minutes.
- Set the time first! Otherwise you will not be able to use this function.
- The defrost function cannot be selected for automatic start. A quick start is not possible with this programme setting.
Example:
It is 10:45 am. You want to programme the microwave to work at 2:20 pm with maximum power for 7 12 minutes. To start the microwave oven automatically, proceed as follows:
| Step | Button | Display | |
| 1 | MICRO POWER | 10 0P | (Power) |
| 2 |  | 7:30 | (Cooking time) |
| 3 | Press and hold PRESET /CLOCK for 3 seconds | 10:45 | (Current time) |
| 4 |  | 14:45 | (Set hour) |
| 5 | PRESET/CLOCK | 14:45 | (Confirm hour) |
| 6 |  | 14:20 | (Set minutes) |
| 7 | PRESET/CLOCK | 10:45 | (Current time) |
- The timer function is activated when the “ ⭕” symbol flashes on the display. A long signal tone confirms the end of the settings.
-
During this programmed setting, the function of the operating elements is blocked (except: PRESET/CLOCK, STOP/CANCEL and INSTANT/START).
-
If you want to look at the start time again, press the PRESET/CLOCK button.
- If you want to deactivate the automatic start time, press the STOP/CANCEL button.
- The microwave oven will start operating at the preset time. A signal tone announces the start.
- If you want to start the programme early, press the INSTANT/START button. The programme starts with the previously selected settings.

CAUTION: Fire Hazard!
- Only operate the appliance under supervision!
- When cooking with a time delay, always set the time so that the appliance is under suitable supervision during operation.
- Do not operate the microwave oven when empty! If you remove the food prematurely, you must deactivate the programme by pressing the STOP/CANCEL button.
Locking (Child Lock)
- Press and hold the STOP/CANCEL button for 3 seconds to lock the appliance. You will hear a signal tone. Locking is indicated on the display with "0"FThe function of the operating elements is blocked.
- Press and hold the STOP/CANCEL button again for 3 seconds to cancel the lock. A signal tone sounds.
Enquiry Function
Pressing the MICRO POWER button during operation displays the operating mode for 1 – 2 seconds or the set power for microwave operation.
Cleaning

WARNING:
Switch off the microwave oven and disconnect the mains plug.

CAUTION:
- Do not use a wire brush or other abrasive objects.
- Do not use harsh or abrasive cleaning agents.
- Do not use a metal scraper to clean the viewing window. The surface could be scratched and the glass may break
Interior
- Keep the inside of the oven clean. Splashes and spillages on the oven walls can be removed with a damp cloth. If the oven is very dirty, a mild cleaning agent can also be used.
- Wipe the inside and outside of the viewing window with a damp cloth. Regularly remove splashes and stains from spilled liquids.
Outer Walls
- The outer walls of the housing should only be cleaned with a damp cloth. Make sure that no water gets into the housing openings and thus into the inside of the appliance.
- To clean the control panel, open the microwave oven door beforehand to avoid accidentally switching on the appliance.
Accessories
Clean the grill grate after each use in hot dishwater with a little washing-up liquid.
Odour
Does the inside of the microwave oven smell unpleasant?
Place a microwave-safe bowl with water and lemon juice in the oven. Heat the mixture for approx. 5 minutes. Then wipe out the interior with a soft cloth.
Oven Light
To replace the oven light, please contact a specialist workshop near you.
Troubleshooting
| Problem Possible Cause Remedy | ||
| Your radio or TV reception is disrupted when the microwave is working. | The electromagnetic fields of this appliance can affect the image and sound of specific frequencies. | This is normal and not a fault. Move the appliances further apart. |
| The appliance is not receiving power and the display is black. | Faulty mains socket Try a different socket. | |
| Check the house fuse. | ||
| “:” flashes on the display. | There has been a power failure. | Reset the time. |
| The appliance does not start. The display shows something other than the current time. | The door was not closed properly. | Check whether food residues or foreign objects are stuck in the door. |
| The INSTANT/START button was not pressed after programme selection. | Press the INSTANT/START button to start or continue the process. Cancel the programme with the STOP/CANCEL button. | |
| All controls are blocked. The childproof lock is activated. The display shows “OFF” | Press and hold the STOP/CANCEL button for 3 seconds to cancel the lock. You will hear a signal tone. | |
| The current time is shown on the display. The “G” symbol flashes. | An automatic start mode is programmed. Press the PRESET/CLOCK button to see the start time. To cancel the programme, press the STOP/CANCEL button. | |
| Abnormal noises can be heard during microwave operation. You see sparks in the cooking cabinet. | The cookware contains metal. Stop the programme immediately!Replace the crockery. Please refer to the chapter “Suitable Microwave Crockery”. | |
| Operation is cancelled for no apparent reason. | The appliance is defective. Please contact our service department. | |
Technical Data
Model: PC-MWG 1319
Rated voltage/frequency: 230 V\~, 50 Hz
Rated power output:
Microwave: 700 W
Grill: 800 W
Rated input power microwave: 1150 W
Microwave frequency: 2450 MHz
Power consumption in standby mode: ....≤0.8 W
Cooking chamber volume:......ca. 20 litres
Protection class: I
Net weight: ca. 10.7 kg
The right to make technical and design modifications in the course of continuous product development remains reserved.
This appliance has been tested according to all applicable, current
CE directives and built according to the latest safety regulations.
Disposal
Meaning of the "Dustbin" Symbol


Protect our environment: do not dispose of electrical equipment in the domestic waste.
Please return any electrical equipment that you will no longer use to the collection points provided for their disposal.
This helps avoid the potential effects of incorrect disposal on the environment and human health.
This will contribute to the recycling and other forms of re-utilisation of electrical and electronic equipment.
Information concerning where the equipment can be disposed of can be obtained from your local authority. Your dealer and contractual partner is also obliged to take back the old appliance free of charge.
BELANGRIJK:
⚠ WAARSCHUWING: Kookvertraging!
Auto Cooking | Time / Weight
| Code | Magnetron | Grill |
| C.1 | 30% | 70% |
| C.2 | 55% | 45% |
Auto Cooking | Time / Weight
| Code | Micro-ondes | Gril |
| C.1 | 30% | 70% |
| C.2 | 55% | 45% |
2:THISAPPLIANCEISEQUIPPEDWITH AGROUNDEDPLUGFORYOUR PROTECTIONAGAINSTPOSSIBLE SHOCKHAZARDSANDSHOULD BECONNECTEDTOAPPROPERLY GROUNDEDOUTLET.
3:THISDEVICEISTOBESERVICED ONLY BY PROPERLY QUALIFIED SERVICEPERSONNEL.
4: DISCONNECTPOWERPLUG BEFORESERVICING.REMOVALOF THEENCLOSUREWITHPRODUCT ENERGIZEDCOULDEXPOSE SERVICEMENTOHAZARDOUSHIGH VOLTAGEPOTENTIAL.
WARNING
MICROWAVE ENERGY DO NOT REMOVE THIS COVER
Traducción:

Aviso

Auto Cooking | Time / Weight
Auto Cooking | Time / Weight
2:THISAPPLIANCEISEQUIPPEDWITH AGROUNDEDPLUGFORYOUR PROTECTIONAGAINSTPOSSIBLE SHOCKHAZARDSANDSHOULD BECONNECTEDTOAPPROPERLY GROUNDEDOUTLET.
3:THISDEVICEISTOBESERVICED ONLY BY PROPERLY QUALIFIED SERVICEPERSONNEL.
4: DISCONNECTPOWERPLUG BEFORESERVICING.REMOVALOF THEENCLOSUREWITHPRODUCT ENERGIZEDCOULDEXPOSE SERVICEMENTOHAZARDOUSHIGH VOLTAGEPOTENTIAL.
WARNING
MICROWAVE ENERGY DO NOT REMOVE THIS COVER
Tłumaczenie:

Auto Cooking | Time / Weight
CTC Clatronic Sp. z o.o
Ul. Brzeska 1
45-960 Opole
Usuwanie
Auto Cooking | Time / Weight
Auto Cooking | Time / Weight
ال Sho Initiative: للشوي وال Shoاء
Auto Cooking | Time / Weight

- △ ACHTUNG:
- △ LET OP:
- Instruction Manual
- Symbols in this Instruction Manual
- WARNING:
- △ CAUTION:
- Content
- Signs and Symbols on the Appliance
- WARNING
- Warnings for the Use of the Appliance
- WARNING: Boiling Delay!
- CAUTION:
- Overview of the Components / Scope of Delivery
- Buttons and Controls on the Control Panel
- Micro Power
- Defrost
- STOP/Cancel
- Grill/Combi
- Preset/Clock
- Auto Cooking | Time / Weight
- Notes on Grill and Combi Mode
- Suitable Microwave Crockery
- CAUTION: Risk of Sparks and Fire!
- Notes on the Function and Use of the Appliance
- Things to Know about Microwave Operation
- Notes on the Function of this Appliance
- Putting into Operation
- Installation Instructions
- Preparation
- Setting the Time
- Operating the Microwave Oven
- Interrupting or Cancelling the Cooking Process
- Quick Start
- Heating
- Cooking
- Practical Tips for Cooking
- Double the quantity = almost double the time Half the quantity = half the time
- approx. 1 minute cooking time per 100 g
- Grilling
- Combination of Microwave and Grill Mode
- Tips for combined operation
- Automatic Programmes
- Defrosting
- Cooking in Several Steps
- Microwave
- Special Functions
- Automatic Start (Timer Function)
- Example:
- CAUTION: Fire Hazard!
- Locking (Child Lock)
- Enquiry Function
- Cleaning
- Interior
- Outer Walls
- Accessories
- Odour
- Oven Light
- Technical Data
- Disposal
- Meaning of the "Dustbin" Symbol
- BELANGRIJK:
- ⚠ WAARSCHUWING: Kookvertraging!
- Traducción:
- Aviso
- Tłumaczenie:
- Usuwanie
Brand : PROFICOOK
Model : PC-MWG 1319
Category : Microwave Oven