
2006-UV9X2 - Air purifier Vevor - Free user manual and instructions
Find the device manual for free 2006-UV9X2 Vevor in PDF.
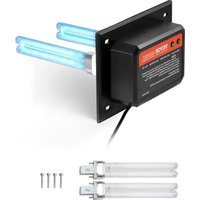


| Product Type | UV Air Purifier for HVAC System |
| Brand | Vevor |
| Model | 2006-UV9X2 |
| Power | 18 W |
| Supply Voltage | 120 V AC / 230 V AC (selectable) |
| Frequency | 60 Hz / 50 Hz |
| UV Wavelength | 254 nm |
| UV Lamp Life | 13,000 hours |
| Effective Coverage Area | 600 sq ft (approx. 55.7 m²) |
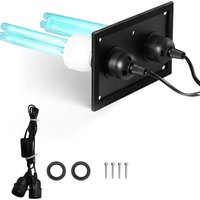
| Number of UV Lamps Included | 4 (2 installed + 2 spare) |
| Tube Length | 145 mm |
| Installation Type | HVAC Duct Mount |
| Power Cord | 1.5 m (4.92 ft) |
| Fuse | 2 A (not replaceable on this model) |
| Protection Rating | Not waterproof |
| Housing Material | Metal |
| Included Accessories | Positioning template, mounting screws, spare UV lamps |
| Maintenance | Clean lamps with a soft cloth and glass cleaner |
| Lamp Replacement | Every 13,000 hours or as needed |
| Safety | Harmful UV rays - do not look directly; disconnect before maintenance; do not use in humid or flammable environments |
| Warranty | Electronic warranty certificate available at vevor.com/support |
| Approximate Weight | 1.5 kg |
| Approximate Dimensions | 250 x 100 x 100 mm |
Frequently Asked Questions - 2006-UV9X2 Vevor
User questions about 2006-UV9X2 Vevor
0 question about this device. Answer the ones you know or ask your own.
Ask a new question about this device
Download the instructions for your Air purifier in PDF format for free! Find your manual 2006-UV9X2 - Vevor and take your electronic device back in hand. On this page are published all the documents necessary for the use of your device. 2006-UV9X2 by Vevor.
USER MANUAL 2006-UV9X2 Vevor
Technical Support and E-Warranty Certificate www.vevor.com/support
HVAC AIR PURIFIER
MODEL: 2112-UV36 / 2006-UV9X2 / 2112-UV36X2
We continue to be committed to providing you with tools at competitive prices. "Save Half", "Half Price", or any other similar expressions used by us only represent an estimate of savings you might benefit from buying certain tools with us compared to the major top brands and do not necessarily mean to cover all categories of tools offered by us. You are kindly reminded to verify carefully when placing an order with us if you are actually saving half in comparison with the top major brands.
VEVOR®
TOUGH TOOLS, HALF PRICE
HVAC AIR PURIFIER
Model: 2112-UV36 / 2006-UV9X2 / 2112-UV36X2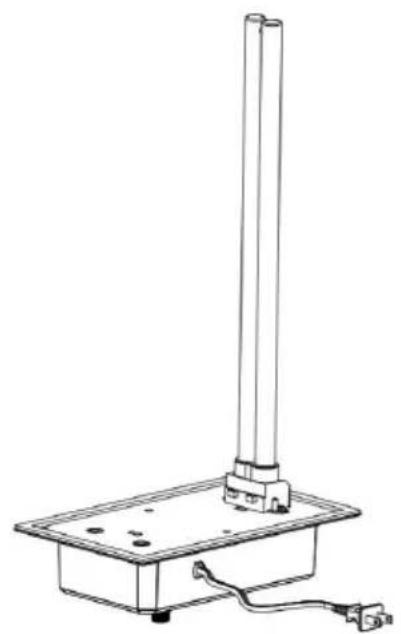
2112-UV36
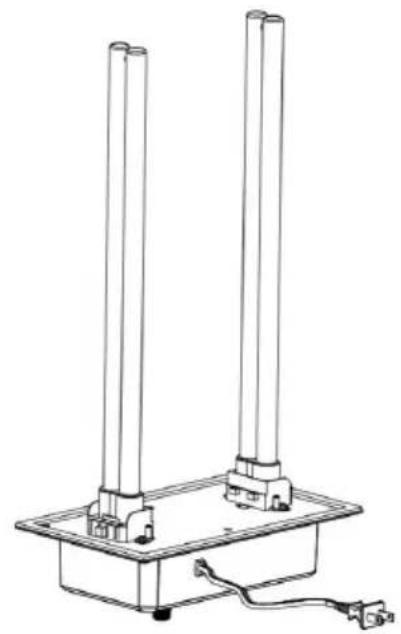
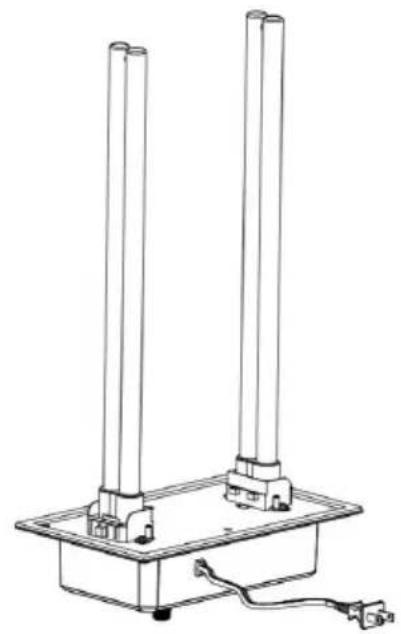
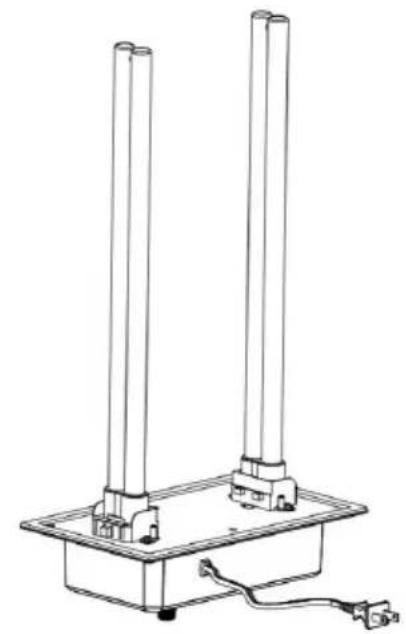
2006-UV9X2 and 2112-UV36X2
NEED HELP? CONTACT US!
Have product questions? Need technical support? Please feel free to contact us:
Technical Support and E-Warranty Certificate www.vevor.com/support
This is the original instruction. Please read all manual instructions carefully before operating. VEVOR reserves a clear interpretation of the user manual. The appearance of the product shall be subject to the product you received. Please forgive us that we won't inform you again if there are any technology or software updates on our product.
SAFETY INSTRUCTIONS
- Please read and understand this manual carefully before using the Air Purifier.
- The installation should be done by an adult, and children should not use it without supervision.
- UV lights are harmful to exposed skin and eyes, causing temporary or permanent blindness. Never look directly at the UV light.
- Disconnect the power before installing or replacing the UV bulb, otherwise it may cause shock and death.
- Please wear gloves and install the HVAC Air Purifier to avoid cuts during installation.
- Transportation Attention: During transportation, the package should be upright, handled with care, and protected from strong impact, vibration, and extrusion.
- Do not modify the unit in any way. Any modification could damage the device or render it dangerous to others.
- Repair or maintenance should only be carried out by a qualified person.
- Only the rated voltage specified in this manual can be used.
- Do not use this product in the kitchen, where oily fumes may reduce the lifetime of the lamps.
- Do not use this product in acidic, alkaline, or other organic gas environments where it may cause fire.
- Do not use this product in flammable and explosive places, otherwise it will cause fire.
- The product can only be disassembled after the product is closed for minutes.
- The lamp tube contains mercury and must be properly handled.
- Do not clean up broken lamps with a vacuum cleaner.
- The product is not waterproof and cannot be installed in a humidifier or other wet environment.
List of kit parts
| Model | 2112-UV36 | 2006-UV9X2 | 2112-UV36X2 |
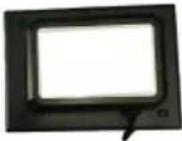 UV Unit UV Unit | 1pc | 1pc | 1pc |
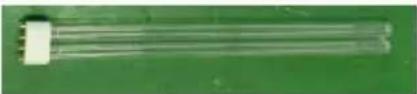 UV lamp bulb UV lamp bulb | 2pcs | 4pcs | 4pcs |
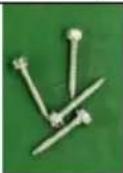 screw screw | 4pcs | 4pcs | 4pcs |
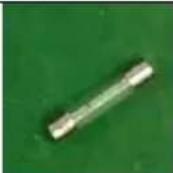 Spare the 2A fuse Spare the 2A fuse | 1pc | / | 1pc |
| Positioning template | 1pc | 1pc | 1pc |
PARAMETER LIST
| Model | 2112-UV36 | 2006-UV9X2 | 2112-UV36X2 |
| Power | 36W | 18W | 72 |
| Lights tube length | 411mm | 145mm | 411mm |
| Light wavelength | 254nm | 254nm | 254nm |
| UV lifetime | 13000hours | 13000hours | 13000hours |
| Assembly lamp tube | 1pc | 2pcs | 2pcs |
| Standby lamp tube | 1pc | 2pcs | 2pcs |
| American-Standard Input | AC120V 60Hz | AC120V 60Hz | AC120V 60Hz |
| European version Input | AC230V 50Hz | AC230V 50Hz | AC230V 50Hz |
| Effective area | 1500 ft2 | 600 ft2 | 2400 ft2 |
Note: Each model of rated power supply has AC120V and AC230V. The voltage and frequency information is on the product nameplate.
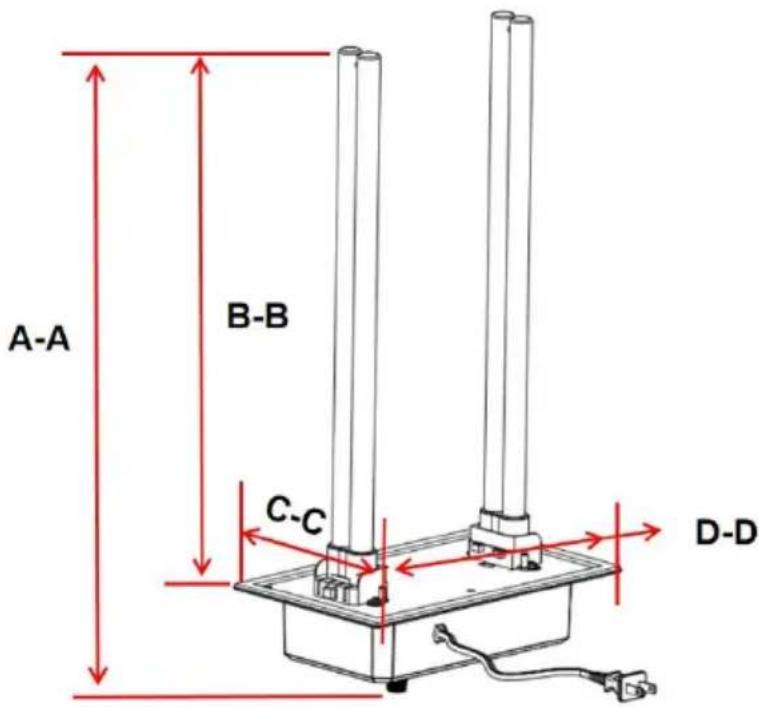
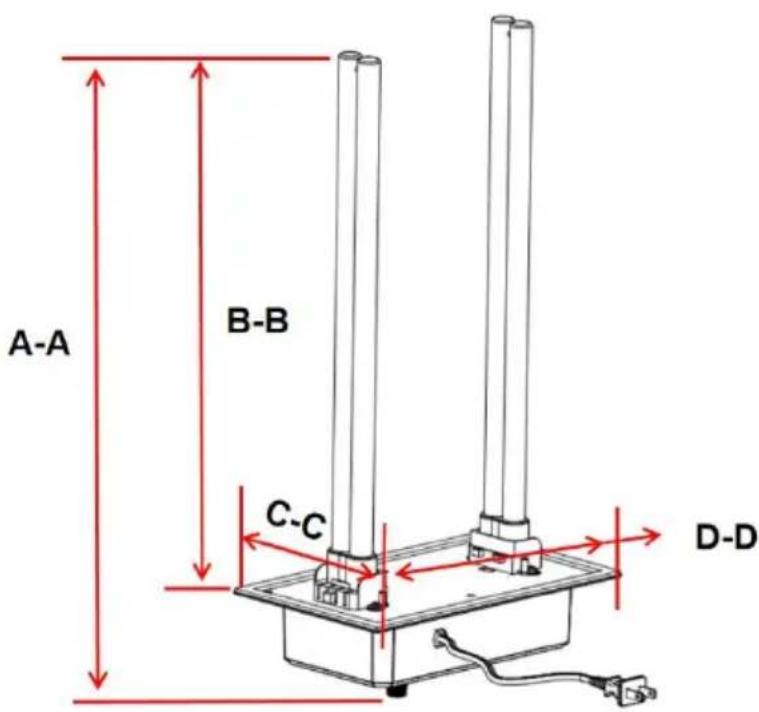
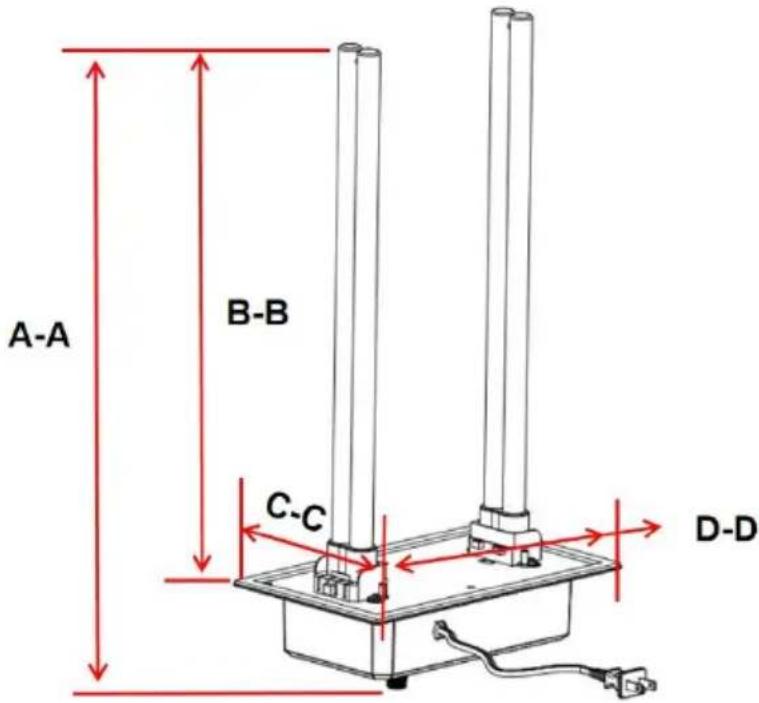
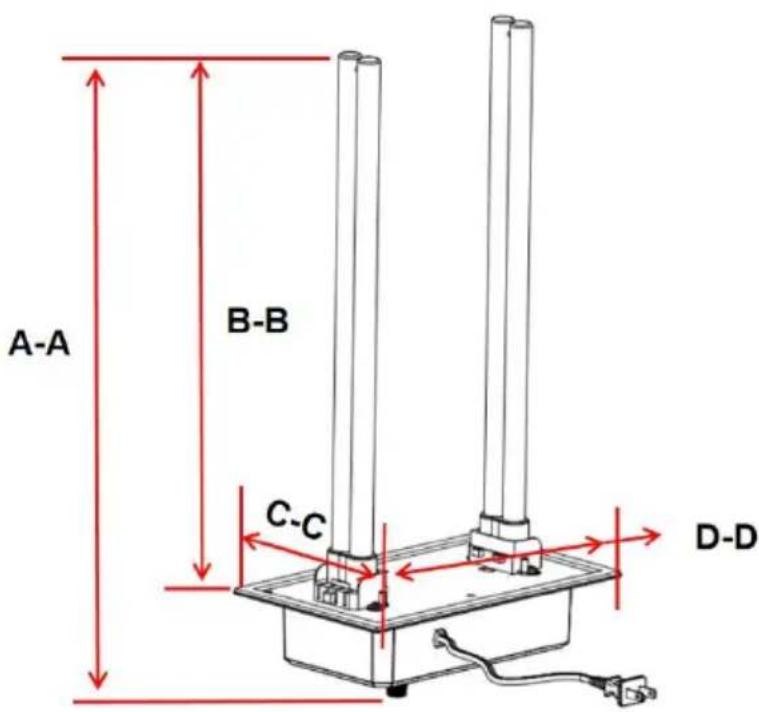
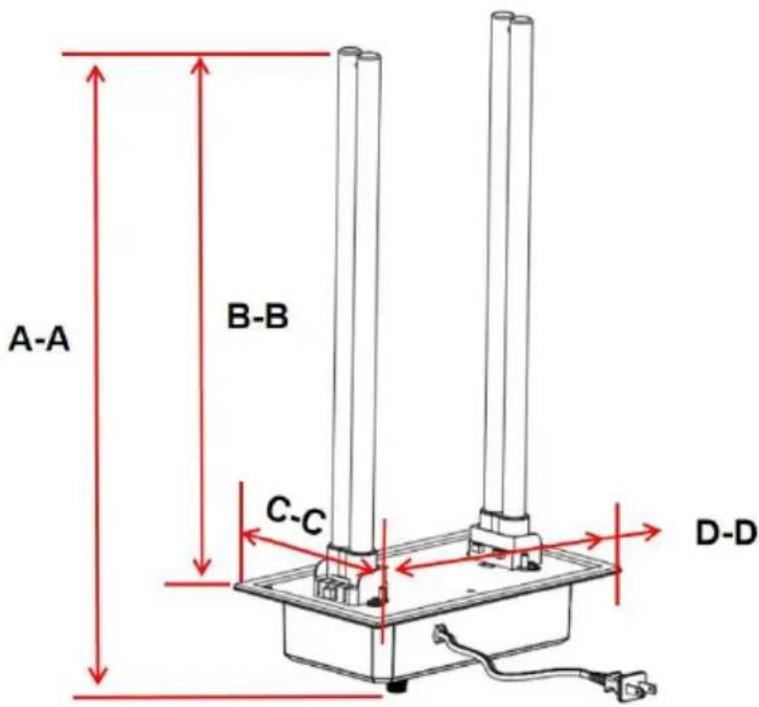
Product size
| Model | 2112-UV36 | 2006-UV9X2 | 2112-UV36X2 |
| A-A | 492mm | 217mm | 498mm |
| B-B | About 411mm | About 145mm | About 411mm |
| C-C | 156mm | 126mm | 156nm |
| D-D | 258mm | 175mm | 258mm |

Note: Please note whether the interior space of the HVAC pipe can accommodate the product.
Installation Instructions
How To Install Your UV Air Treatment System
If your heating/cooling (HVAC) system is equipped with air conditioning, it is recommended that the UV Air Treatment System (unit) be mounted directly above the cooling coil. The unit can prevent the growth of a percentage of micro-organisms such as mold, bacteria, and viruses on surfaces such as cooling coils, drain pans, and duct work.
Selecting Mounting Location
- The unit can be mounted in any orientation, but should be mounted in a way that the indicator light can be seen.
- Choose a location that will make changing/cleaning of the UV bulb easy.
- Install the unit on a flat surface of the duct work ABOVE the air conditioning cooling coil ("A Coil") if your HVAC system has air conditioning. If you
HVAC system does not have air conditioning, the unit should be installed on the supply air duct if possible. The unit can be installed on a reduct if necessary.
CAUTION: Do not install the unit in the "A coil" or under a hur as damage may occur.
If you are unsure if you have chosen a correct mounting location, refer to your HVAC system's owner's manual or call a qualified professional for assistance.
- Be sure to locate the unit away from any plastic or rubber components that may be damaged by UV light. If mounting options are limited, plastic and rubber may be covered with aluminum foil duct tape in order to protect them from the UV light.
- The unit has a 4.92 foot power cord that must be installed in a grounded power outlet; if there is no power outlet within the reach of the power cord, ask a qualified professional to install a properly grounded power outlet.
Product voltage reference product nameplate.
Installation steps
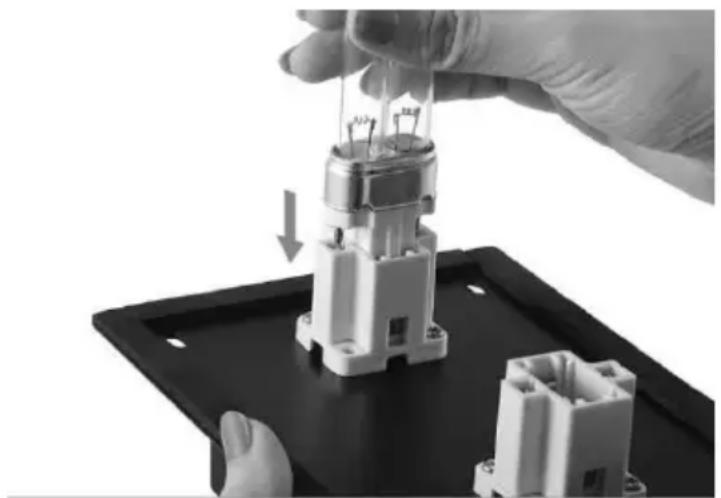
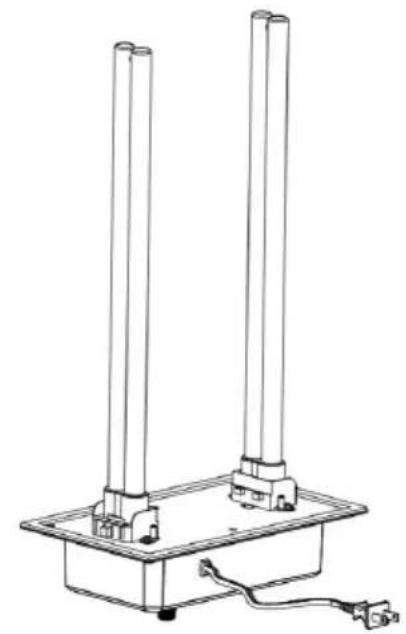
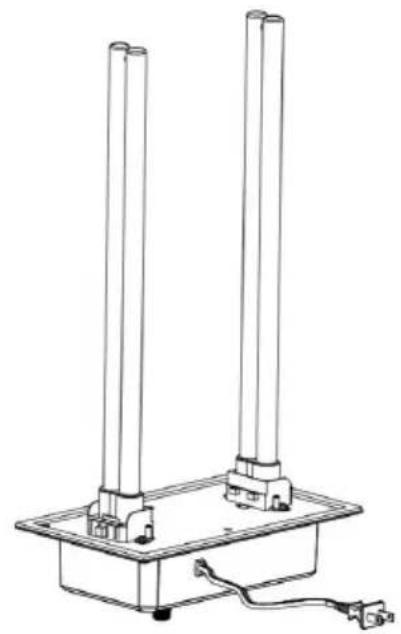
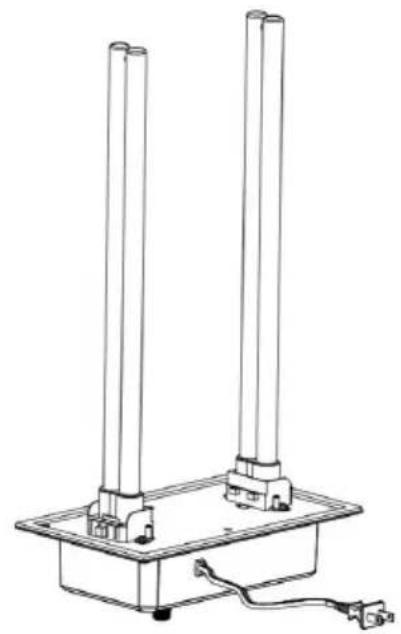
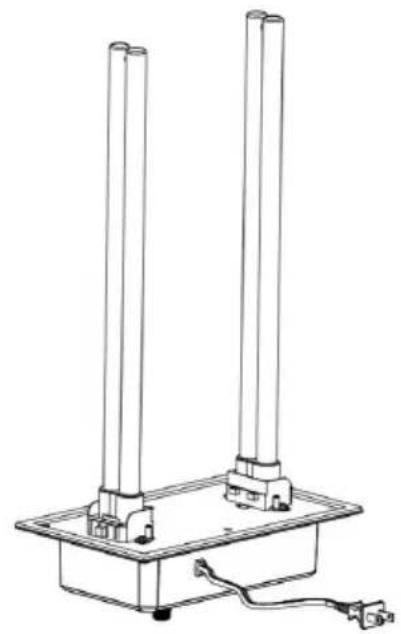
- Install bulbs by sliding them in from the side until bulb snaps in. Note: The 2112-UV36 is a bulb, the 2006-UV9X2 and the 2112-UV36X2 have two bulbs.
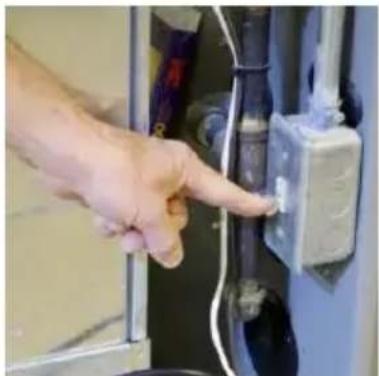
- Disconnect power to the HVAC system before installing the unit.
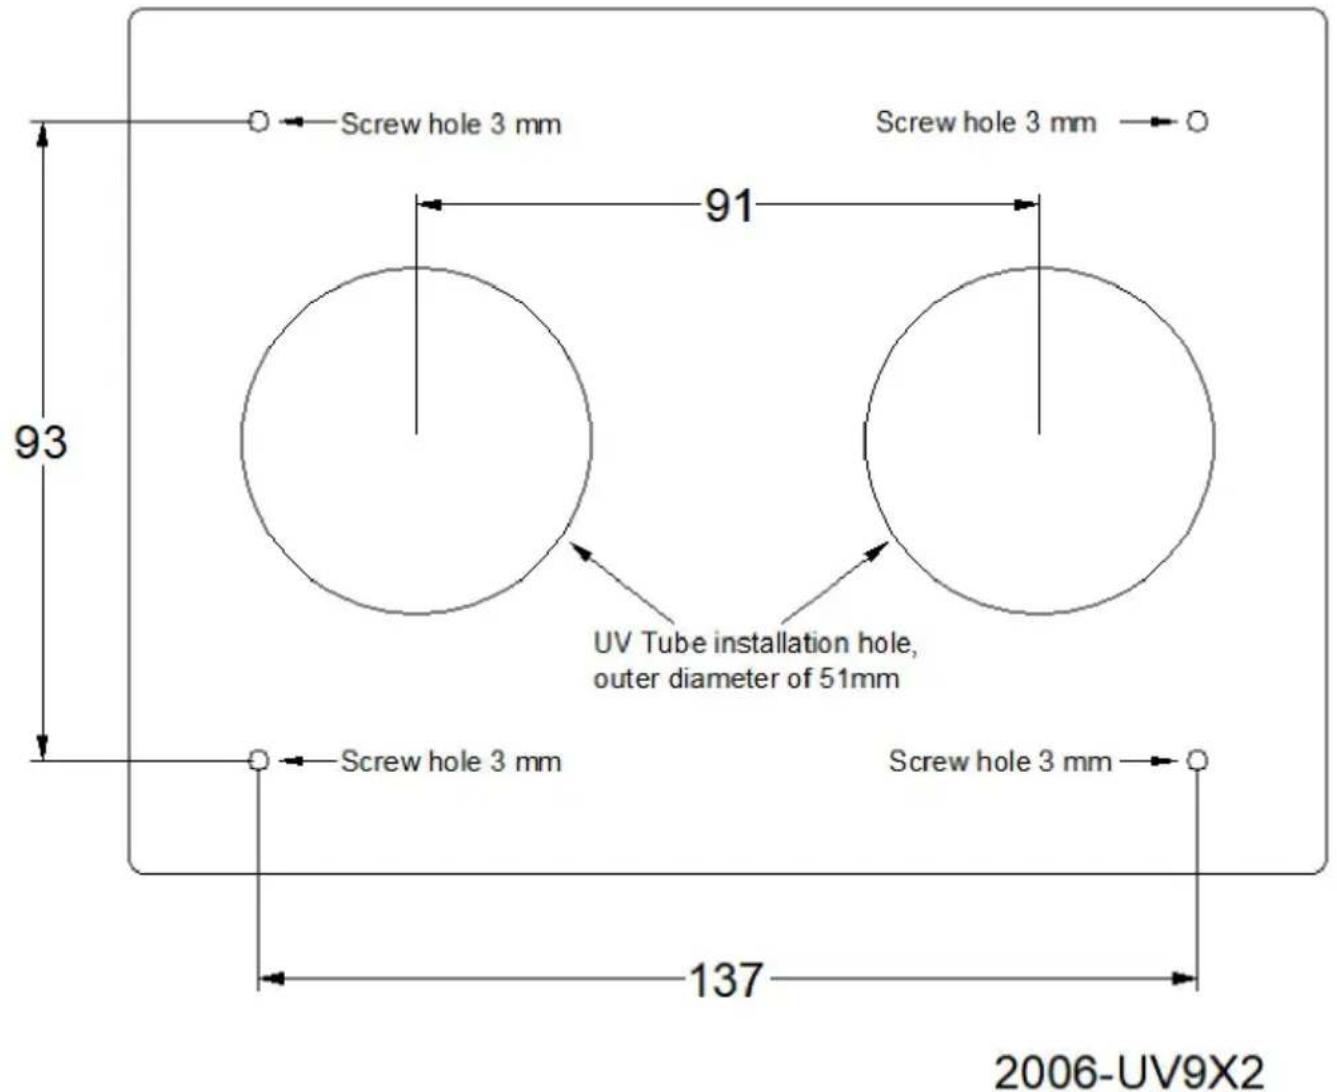
3A. Refer to the 2006-UV9X2 positioning template, first draw the position of the installation hole with a stroke on the outer wall of the pipe, including 2 lamp pipe holes with an outer diameter of 51 mm and 4 screw holes of 3 mm; process holes using a cutting machine and a 3 mm drill.
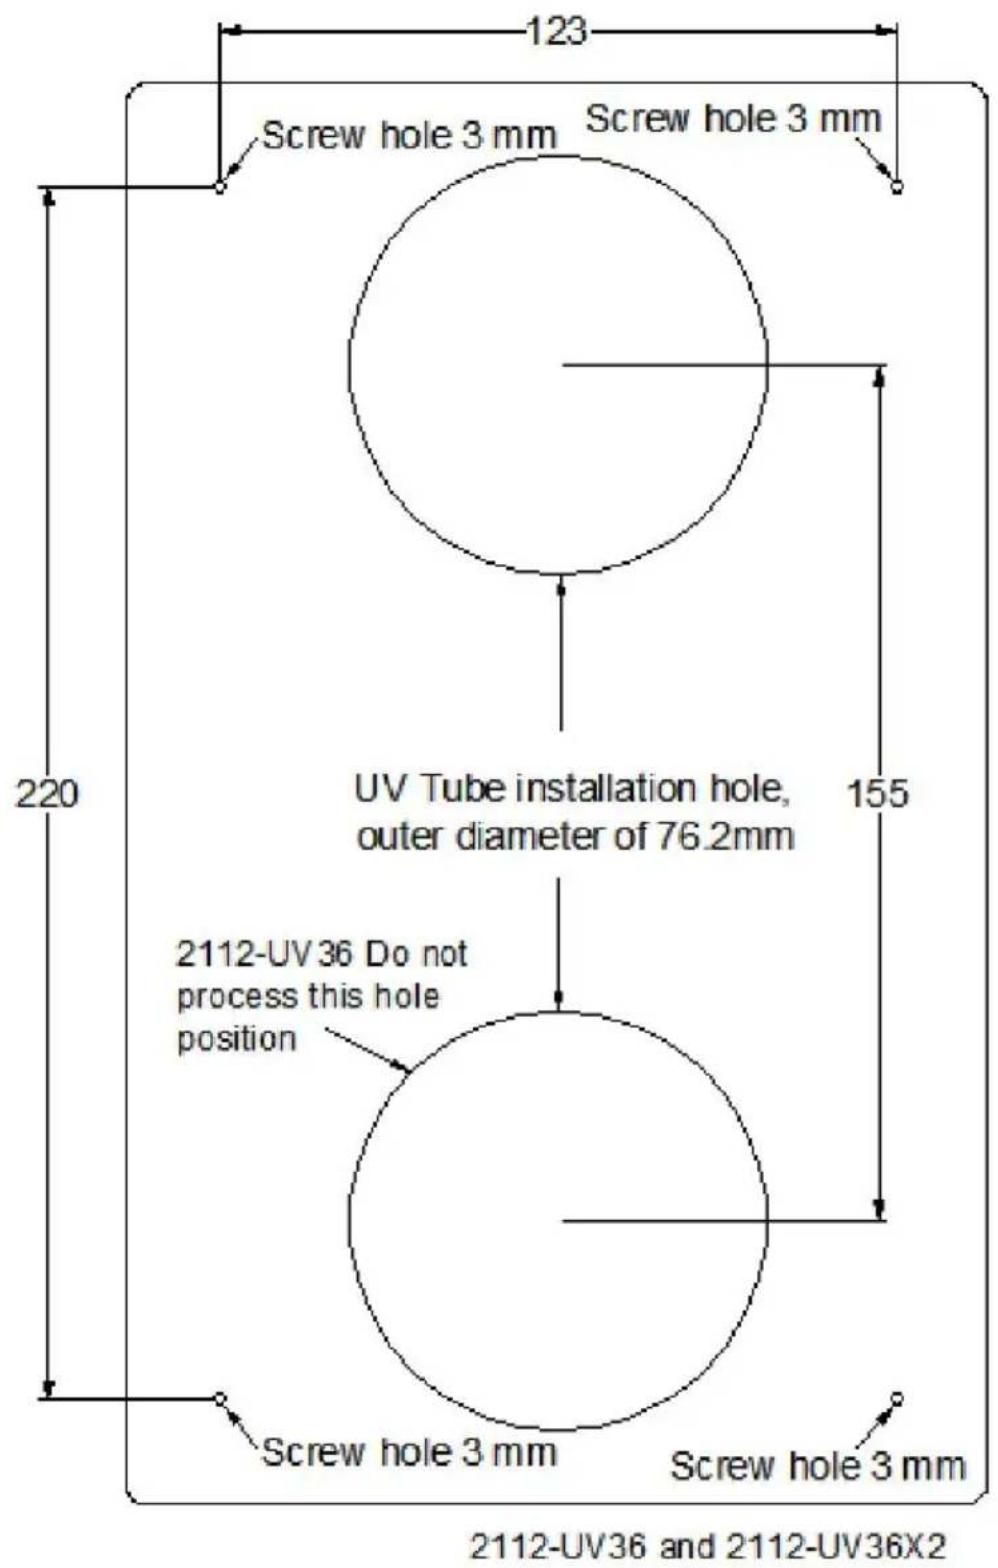
3B. Refer to the 2112-UV36X2 positioning template, first draw the position of the installation hole with a stroke on the outer wall of the pipe, including 2 lamp pipe holes with an outer diameter of 76.2 mm and 4 screw holes of 3 mm; process holes using a cutting machine and a 3 mm drill.
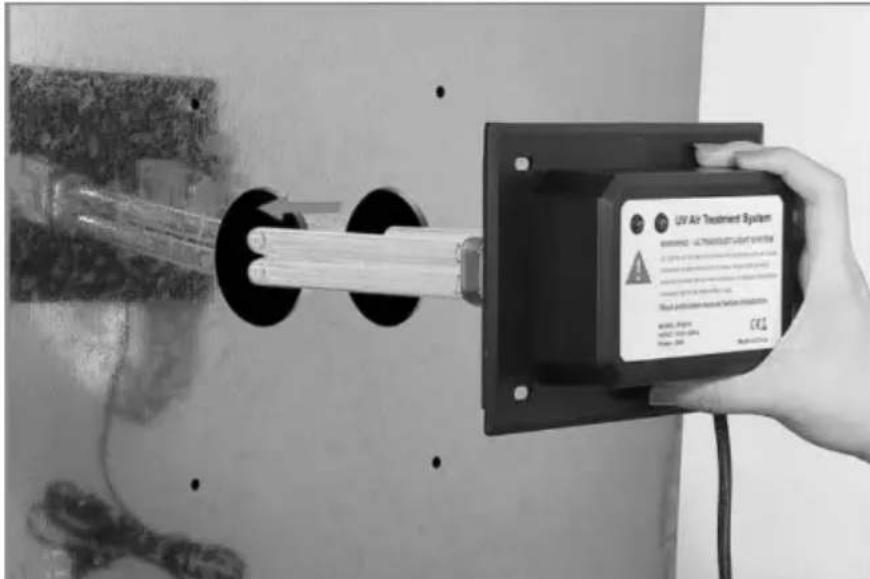
- Insert the UV lamp into the pre-drilled hole to install the UV lamp.
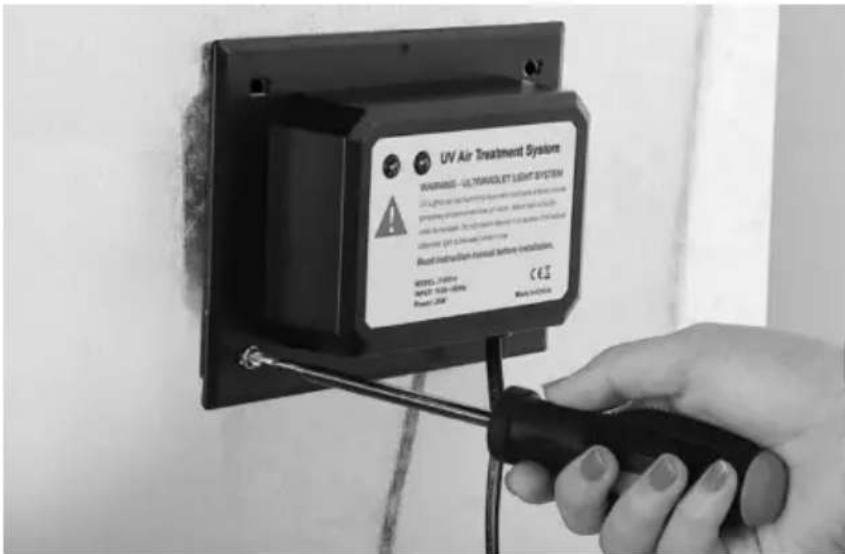
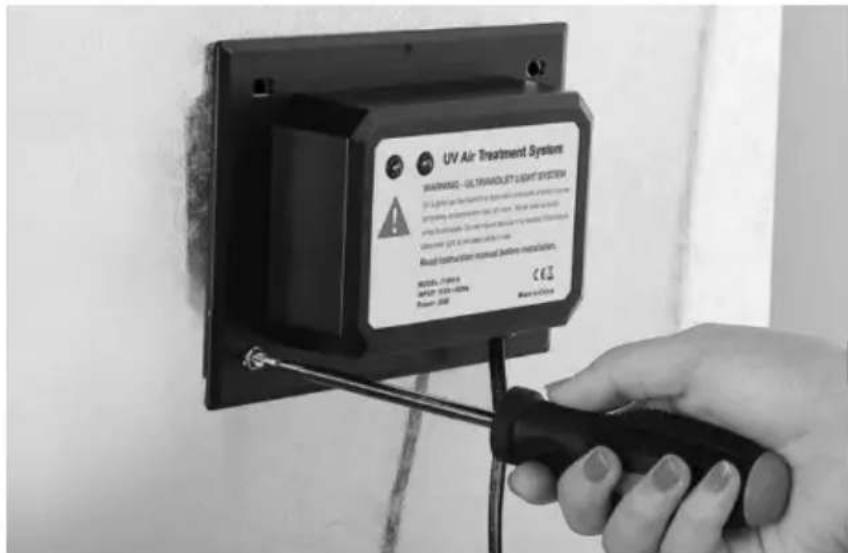
- Install the UV lamp on the surface of the HVAC pipe with 4 screws.
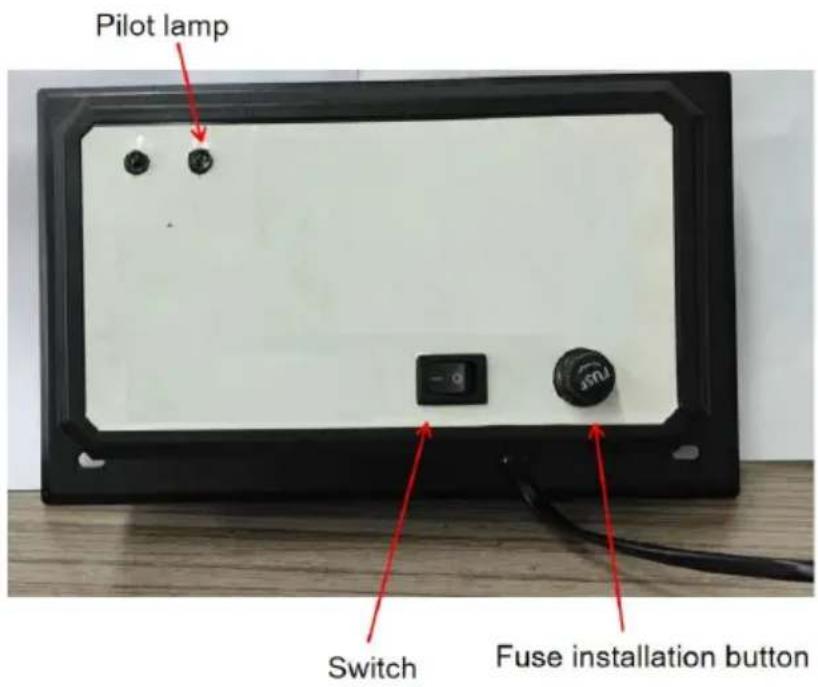
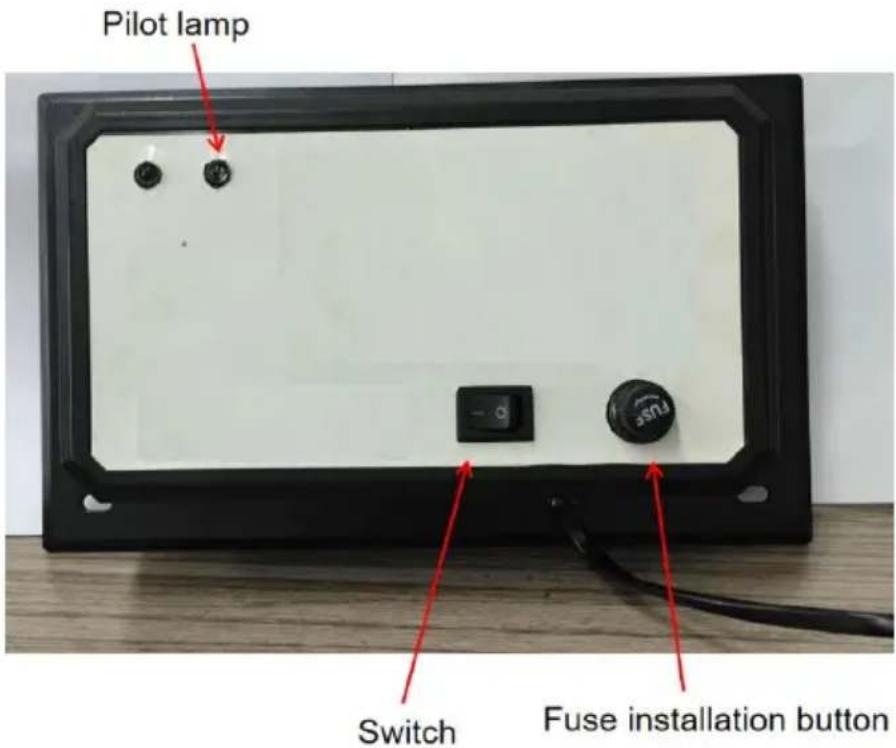
- Connect the power plug to the AC power supply, turn on the UV switch, and the light on the machine indicator light. The machine begins working.
- Pull out the power plug, unscrew the fuse knob to replace the 2A fuse. Each model of rated power supply has AC120V and AC230V. Note the voltage and frequency information on the product nameplate.
Note: 2006-UV9X2 has no switch, the access power supply starts operation and the fuse cannot be replaced.
Bulb Cleaning and Replacement
- Disconnect the power to the HVAC system, unplug the unit, and allow the UV bulb(s) to cool for at least 15 minutes before attempting to remove the unit.
- Remove the 4 sheet metal screws and slide the unit out of the duct work.
3a. To Clean: Hold the unit securely and wipe the UV bulb(s) with a soft cloth dampened with glass cleaner. If you touch the glass with your hand, be sure to wipe away any fingerprints or dirt with a soft cloth. Make sure the bulb is clean and dry before installing the unit back into the duct.
3b. To Replace: Use of any bulb not approved for the unit will void the warranty and could cause serious injury or damage. Hold the unit securely and push the bulb release button to remove the UV bulb. Install the new bulb into the unit by sliding the bulb in from the outside until the bulb snaps into place. If you touch the bulb with your hand, be sure to wipe away any fingerprints or dirt with a soft cloth.
Make sure the bulb(s) is/are clean and dry before installing the unit back into the duct.
- Re-install the unit into the duct work and re-install the 4 sheet metal screws. Tighten the screws evenly until the unit is securely in place. DO NOT OVERTIGHTEN SCREWS.
- Reconnect the power to the HVAC system and plug the unit into a grounded power outlet.
Manufacturer: Shanghaimuxinmuyeyouxiangongsi
Address: Shuangchenglu 803nong11hao1602A-1609shi, baoshanqu, shanghai 200000 CN.
Imported to AUS: SIHAO PTY LTD. 1 ROKEVA STREETEASTWOOD NSW 2122 Australia
Imported to USA: Sanven Technology Ltd. Suite 250, 9166 Anaheim Place, Rancho Cucamonga, CA 91730
| UK | REP |
YH CONSULTING LIMITED. C/O YH Consulting Limited Office 147, Centurion House, London Road, Staines-upon-Thames, Surrey, TW18 4A>
| EC | REP |
Technical Support and E-Warranty Certificate www.vevor.com/support
VEVOR®
TOUGH TOOLS, HALF PRICE
2112-UV36
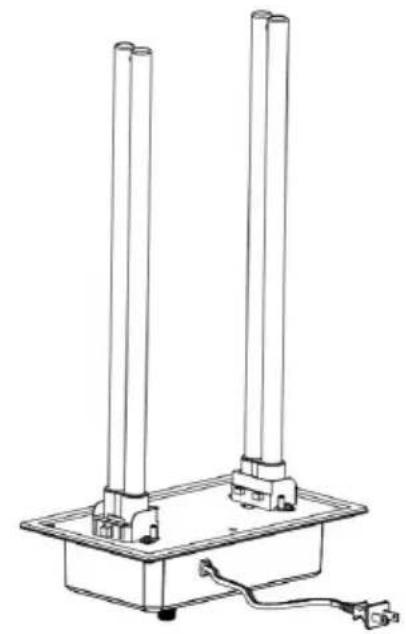
2006-UV9X2 and 2112-UV36X2
NEED HELP? CONTACT US!
Product size
| Modèle | 2112-UV36 | 2006-UV9X2 | 2112-UV36X2 |
| AA | 492 mm | 217 mm | 498 mm |
| BB | Environ 411 mn | Environ 145 mm | Environ 411 mm |
| CC | 156 mm | 126 mm | 156 nm |
| DD | 258 mm | 175 mm | 258 mm |
2112-UV36 and 2112-UV36X2
Location, Rancho Cucamonga, CA 91730
| UK | REP |
YH CONSULTING LIMITED. C/O YH Consulting Limited Office 147, Centurion House, London Road, Staines-upon-Thames, Surrey, TW18 4A>
| EC | REP |
2112-UV36
2006-UV9X2 and 2112-UV36X2
Product size
| Modell | 2112-UV36 | 2006-UV9X2 | 2112-UV36X2 |
| AA | 492 mm | 217 mm | 498 mm |
| BB | Etwa 411mm | Etwa 145mm | Etwa 411mm |
| CC | 156 mm | 126 mm | 156 nm |
| DD | 258 mm | 175 mm | 258 mm |
2112-UV36 and 2112-UV36X2
YH CONSULTING LIMITED. C/O YH Consulting Limited Office 147, Centurion House, London Road, Staines-upon-Thames, Surrey, TW18 4A>
| EC | REP |
www.vevor.com/support
VEVOR®
TOUGH TOOLS, HALF PRICE
2112-UV36
2006-UV9X2 and 2112-UV36X2
2112-UV36 and 2112-UV36X2
- Install the UV lamp on the surface of the HVAC tube with 4 v
YH CONSULTING LIMITED. C/O YH Consulting Limited Office 147, Centurion House, London Road, Staines-upon-Thames, Surrey, TW18 4A>
| EC | REP |
2112-UV36
2006-UV9X2 and 2112-UV36X2
Product size
| Modelo | 2112-UV36 | 2006-UV9X2 | 2112-UV36X2 |
| Automóvil club | 492 mm | 217 mm | 498 mm |
| británico | |||
| CAMA Y DESAYUNO | Aproximadamente 411 mm | Aproximadamente 145 mm | Aproximadamente 411 mm |
| C.C. | 156 mm | 126 mm | 156 nm |
| DD | 258 mm | 175 mm | 258 mm |
2112-UV36 and 2112-UV36X2
YH CONSULTING LIMITED. C/O YH Consulting Limited Office 147, Centurion House, London Road, Staines-upon-Thames, Surrey, TW18 4A>
| EC | REP |
www.vevor.com/support
VEVOR®
TOUGH TOOLS, HALF PRICE
2112-UV36
2006-UV9X2 and 2112-UV36X2
NEED HELP? CONTACT US!
Product size
| Model | 2112-UV36 | 2006-UV9X2 | 2112-UV36X2 |
| AA | 492 mm | 217 mm | 498 mm |
| nocleg ze śniadanier | Około 411mm | Około 145 mm | Około 411mm |
| DK | 156 mm | 126 mm | 156nm |
| DD | 258 mm | 175 mm | 258 mm |
2112-UV36 and 2112-UV36X2
YH CONSULTING LIMITED. C/O YH Consultin Limited Office 147, Centurion House, London Road, Staines-upon-Thames, Surrey, TW18 4A>
| EC | REP |
www.vevor.com/support
VEVOR®
TOUGH TOOLS, HALF PRICE
Technical Support and E-warranty certificate www.vevor.com/support
HVAC AIR PURIFIER
MODEL: 2112-UV36/ 2006-UV9X2/2112-UV36X2
2112-UV36
2006-UV9X2 and 2112-UV36X2
NEED HELP? CONTACT US!
Product size
| Model | 2112-UV36 | 2006-UV9X2 | 2112-UV36X2 |
| AA | 492mm | 217mm | 498mm |
| BB | Ongeveer 411mm | Ongeveer 145mm | Ongeveer 411mm |
| CC | 156mm | 126mm | 156nm |
| DD | 258mm | 175mm | 258mm |

2112-UV36 and 2112-UV36X2
Cleaning and replacing lamps
YH CONSULTING LIMITED. C/O YH Consultin Limited Office 147, Centurion House, London Road, Staines-upon-Thames, Surrey, TW18 4A>
| EC | REP |
2112-UV36
2006-UV9X2 and 2112-UV36X2
NEED HELP? CONTACT US!
Product size
| Modell | 2112-UV36 | 2006-UV9X2 | 2112-UV36X2 |
| AA | 492 mm | 217 mm | 498 mm |
| BB | Cirka 411 mm | Cirka 145 mr | Cirka 411 mr |
| CC | 156 mm | 126 mm | 156 nm |
| DD | 258 mm | 175 mm | 258 mm |
YH CONSULTING LIMITED. C/O YH Consultin Limited Office 147, Centurion House, London Road, Staines-upon-Thames, Surrey, TW18 4A>
| EC | REP |
www.vevor.com/support
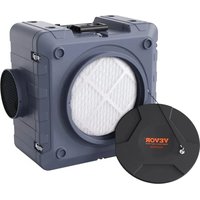
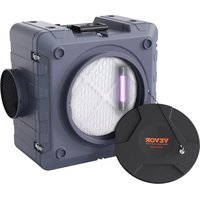
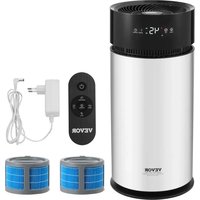
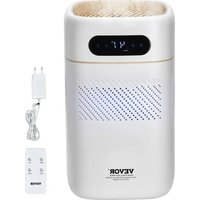
- HVAC AIR PURIFIER
- VEVOR®
- NEED HELP? CONTACT US
- TECHNICAL SUPPORT AND E-WARRANTY CERTIFICATE WWW.VEVOR.COM/SUPPORT
- SAFETY INSTRUCTIONS
- LIST OF KIT PARTS
- PARAMETER LIST
- INSTALLATION INSTRUCTIONS
- HOW TO INSTALL YOUR UV AIR TREATMENT SYSTEM
- SELECTING MOUNTING LOCATION
- CAUTION: DO NOT INSTALL THE UNIT IN THE "A COIL" OR UNDER A HUR AS DAMAGE MAY OCCUR
- INSTALLATION STEPS
- BULB CLEANING AND REPLACEMENT
- TOUGH TOOLS, HALF PRICE
- CLEANING AND REPLACING LAMPS
Brand : Vevor
Model : 2006-UV9X2
Category : Air purifier