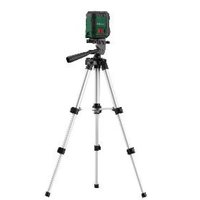
USER MANUAL PKLL 10 B4 PARKSIDE
KREUZLINIENLASER MIT STATIVCROSS LINE LASER WITH TRIPOD/NIVEAU LASER EN CROIX AVEC TRÉPIED PKLL 10 B4
DE AT CH
Translation of the original instructions
NL BE
KRUISLIJNLASER MET STATIEF
GB/IE Translation of the original instructions Page 22
Intended use Page 24
Description of parts ......Page 25
Scope of delivery ......Page 25
Technical data Page 26
Safety notes ......Page 26
Safety instructions for batteries/rechargeable
batteries Page 28
Initial use ......Page 29
Inserting/Changing batteries......Page 29
Switching on/off Page 29
Use automatic levelling system ......Page 30
Using individual lines and crossed lines ......Page 30
Working without the automatic levelling system...Page 31
Practical guidance ......Page 31
Working with the tripod......Page 31
Maintenance and cleaning ......Page 32
Storage Page 33
Disposal Page 33
Warranty......Page 34
Warranty claim procedure......Page 35
Service Page 36
| List of pictograms used |
 | Please read the instructions for use. |
 | Danger of explosion! |
 | Wear safety gloves! |
 | Attention! |
 | Protect yourself from laser radiation! |
 | Do not stare into the laser beam! |
 | Direct current/voltage |
 | Including batteries |
| [CDYX] | Safety notesInstructions for use |
 | CE mark indicates conformity with relevant EU directives applicable for this product. |
| [40W7] | Keep out of reach of children |
 | Do not throw into fire! |
| [38SW] | Do not insert the wrong way round - note the polarity (+/-)! |
[08Z4] | Do not use force!Do not disassemble/open! |
 | Do not mix different types or brands |
 | Never mix new and used batteries! |
 | Do not recharge |
 | Do not throw into water! |
 | Do not short-circuit! - Batteries may explode or leak. |
 | Insert correctly! - Note the polarity (+/-) |
Cross Line Laser with Tripod
- Introduction

We congratulate you on the purchase of your new product. You have chosen a high quality product. The instructions for use are part of the product.
They contain important information concerning safety, use and disposal. Before using the product, please familiarise yourself with all of the safety information and instructions for use. Only use the product as described and for the specified applications. If you pass the product on to anyone else, please ensure that you also pass on all the documentation with it.
- Intended use
The product is suitable for the determination and verification of horizontal and vertical lines. The product is exclusively suitable for use in enclosed operating sites. Any other use or modification of the product shall be considered improper
use and may result in serious accidents. The manufacturer assumes no liability for damages due to improper use. Not intended for commercial purposes.
• Description of parts
1 H-button to switch on/off horizontal line
2 LED indicator (red: levelling off, green levelling on)
3 V-button to switch on/off vertical line
4 LOCK switch
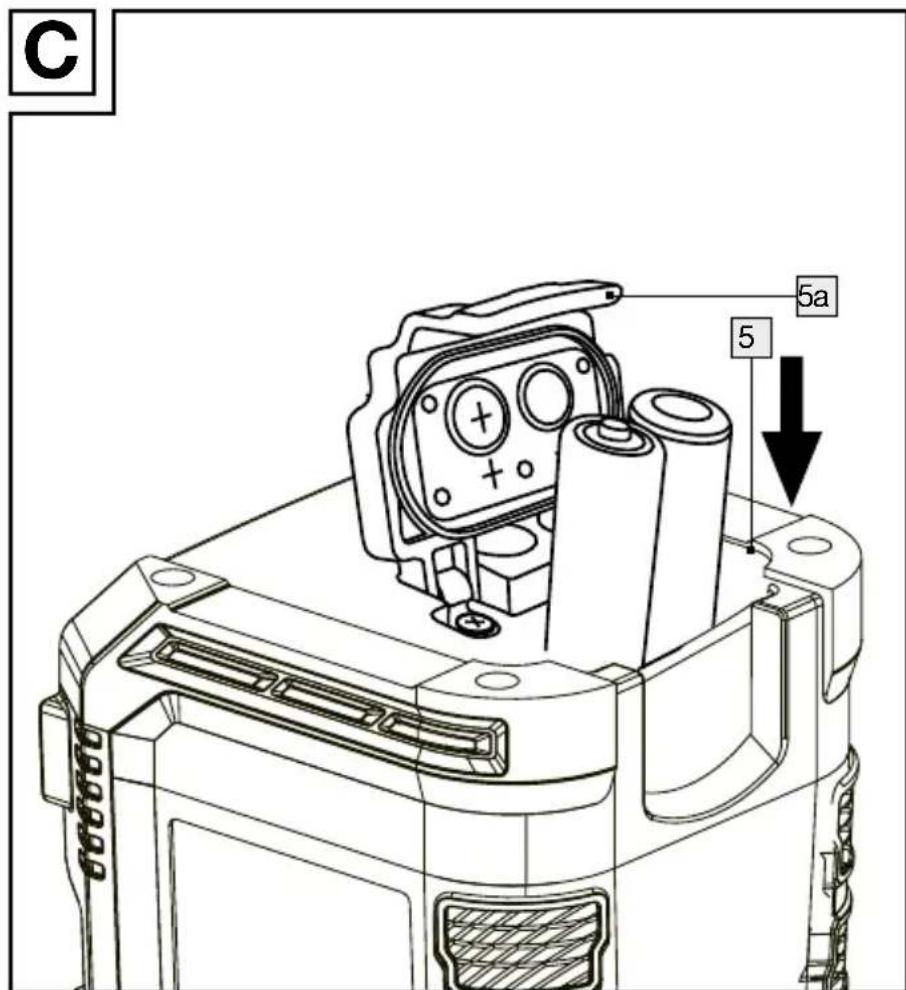
5 Battery compartment
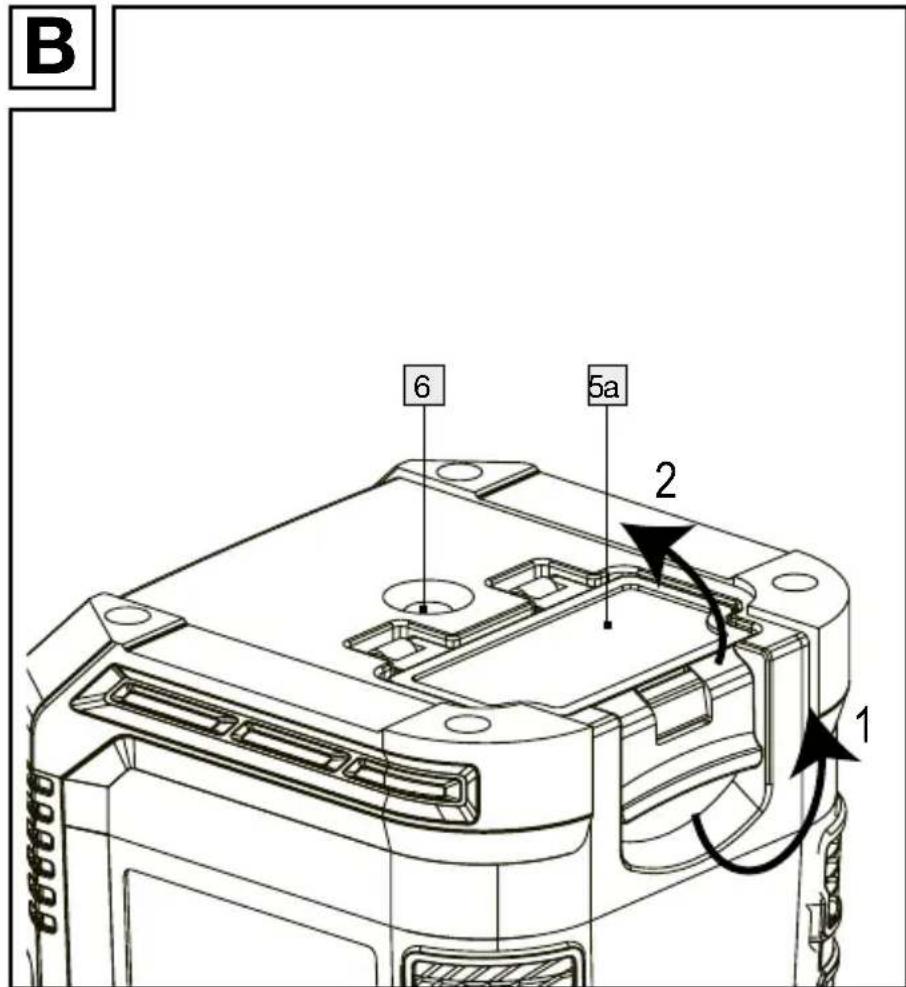
5a Battery compartment cover
6 1/4 Tripod thread (underneath)
7 Laser beam opening
8 1/4 " - quick-release fixing screw (to align with 1/4 " tripod thread of cross line laser)
9 Metal bracket (to adjust 1/4 screw on the quick shoe)
10 Locking screw (to adjust the angle of tripod flat head to up to 90 degree)
11 Bubble level
11a Lever (to fix the quick shoe)
12 Long Handle
13 Locking screw (to rotate the tripod flat head up to 360 degree horizontally)
14 Locking screw (to adjust the height of the centre column)
15 Plastic ring
16 Blocking lever (to adjust the height of the legs)
17 Legs of the tripod
18 Tripod flat head
19 Quick shoe
- Scope of delivery
1 Cross line laser
1 Tripod
2 1.5V-Batteries, Type (LR6) AA
1 Set of instructions for use
- Technical data
Operating voltage: 3V ---
Working area at least 1) : 10m
Levelling accuracy: +/- 0.5 mm/m
Typical self-levelling range: ± 4°
Typical levelling time: approx. 4 seconds
Operating temperature: +5°C–35°C
Max. relative humidity: ≤ 90%
Laser class: 2
Wave length ( λ ): 620-690nm
Maximum performance
P max: 1mW
Tripod mount: 6.35mm ( 1/4 )
Batteries: 2 x 1.5V-Batteries, Type (LR6) AA
Product weight: 260g (without batteries)
Tripod weight: 320g
Product dimensions: approx. 70 x 61 x 90mm
Tripod dimensions: 65cm
1) The operating range can be reduced by unfavourable environmental conditions (e.g. direct sunlight).

Safety notes
■ DANGER OF SUFFOCATION! Packaging materials (e.g. films or polystyrene) can not be used as toys. Always keep children away from the packaging material. The packaging material is not a toy.
- Do not work with the measuring tool in an environment where there is a danger of explosion, where there are flammable liquids, gasses or dusts. Sparks can be created in the product, which could ignite dust or fumes.
This product may be used by children from the age of 8, by persons of reduced physical, sensory or mental abilities or a lack of experience and/or knowledge if they are supervised or instructed with regard to the safe use of the product and have understood the risks resulting from use. Do not allow children to play with the product. Cleaning and user maintenance may not be carried out by children unless they are supervised.
- Do not leave the switched-on product unattended and switch the product off after use. Others could be blinded by the laser beam. Risk of eye injury.
- Do not expose the product to moisture or direct sunlight.
Do not expose the product to extremely high temperatures or temperature fluctuations. For example, do not leave it in your car for a long time. In the case of large temperature fluctuations, let the product acclimatise before using it. In extreme temperatures or temperature fluctuations, the precision of the product can be impaired.
- Avoid strong impacts against the measuring tool. Damage to the measuring tool can impair its accuracy. After a strong impact compare the laser line with a known vertical or horizontal reference line to check it.
■ Turn the measuring tool off when you transport it. When it is switched off the pendulum unit is locked, which otherwise can be damaged in strong movements.
Do not bring the measuring tool near to heart pacemakers. The magnet inside the measuring tool creates a field that can impair the function of pacemakers.
- Keep the measuring tool away from magnetic data carriers and devices that are sensitive to magnetic influences. The effects of the magnet can lead to irreversible data losses.
WARNING! Protect yourself from laser radiation!
WARNING!
radiation!
Protect yourself from laser

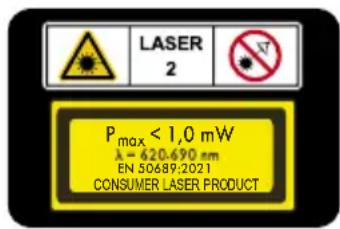
Do not look directly into the laser beam or the laser beam opening 7.
WARNING! Viewing the laser beam with optical instruments (e.g. loupe, magnifying glass etc.) is associated with risk injury to the eyes.
⚠️ CAUTION! If operating or adjusting devices than other than those described here are used or other procedures are carried out, this can lead to dangerous radiation effects.
■ Never direct the laser beam at people, animals or reflective surfaces. Even looking briefly into the laser beam can cause damage to the eyes.

Safety instructions for batteries/rechargeable batteries
■ DANGER TO LIFE! Keep batteries/rechargeable batteries out of reach of children. If accidentally swallowed seek immediate medical attention.
■ Swallowing may lead to burns, perforation of soft tissue, and death. Severe burns can occur within 2 hours of ingestion.
DANGER OF EXPLOSION! Never recharge
non-rechargeable batteries. Do not short-circuit batteries/rechargeable batteries and/or open
them. Overheating, fire or bursting can be the result.
- Never throw batteries/rechargeable batteries into fire or water.
Do not exert mechanical loads to batteries/rechargeable batteries.
Risk of leakage of batteries/rechargeable batteries
- Avoid extreme environmental conditions and temperatures, which could affect batteries/rechargeable batteries, e.g. radiators/direct sunlight.
If batteries/rechargeable batteries have leaked, avoid contact with skin, eyes and mucous membranes with the chemicals! Flush immediately the affected areas with fresh water and seek medical attention!
WEAR PROTECTIVE GLOVES! Leaked or
damaged batteries/rechargeable batteries can cause burns on contact with the skin. Wear
suitable protective gloves at all times if such an event occurs.
In the event of a leakage of batteries/rechargeable batteries, immediately remove them from the product to prevent damage.
Only use the same type of batteries/rechargeable batteries. Do not mix used and new batteries/rechargeable batteries.
■ Remove batteries/rechargeable batteries if the product will not be used for a longer period.
Risk of damage of the product
■ Only use the specified type of battery/rechargeable battery!
- Insert batteries/rechargeable batteries according to polarity marks (+) and (-) on the battery/rechargeable battery and the product.
Use a dry lint-free cloth or cotton swab to clean the contacts on the battery/rechargeable battery and in the battery compartment before inserting!
■ Remove exhausted batteries/rechargeable batteries from the product immediately.
- Initial use
☐ Check that the delivery is complete and that there is no visible damage.
Remove the packaging material from the product.
- Inserting/Changing batteries
Open the battery compartment cover (see fig. B).
☐ Insert batteries into the battery compartment (see fig. C). Make sure that the batteries are inserted in a correct polarity (see fig. C) before closing back the battery compartment cover 5a.
Note: When the battery is low, the LED indicator blinks. Always replace all batteries at the same time. Only use batteries from the same manufacturer and with the same capacity.
Remove the batteries from the product if it will not be in use for a prolonged period of time. In long periods of storage the batteries can corrode and can run themselves down.
- Switching on/off
To switch the product on, push the LOCK switch to the position 🔍. Immediately after being switched on, the product releases two laser lines from the laser beam opening 7.
To switch the product off, push the LOCK switch to the position 🔒. When switched off, the pendulum unit is locked.
- Use automatic levelling system
To work with automatic levelling, place the product on a level, firm surface, or fasten it with the 1/4 "- tripod thread 6 to the tripod.
☐ When it is switched on, the automatic levelling system automatically corrects irregularities of ±4° within the self levelling area. The levelling is concluded when the laser lines stop moving and the LED indicator 2 goes green.
☐ If automatic levelling is not possible, e.g. because the base of the measuring tool deviates by more than 4° from the horizontal or because the product is being freely hand-held, the LED indicator 2 will go red and the horizontal and vertical laser lines will be switched off.
Note: operation without automatic levelling will always be indicated via the red LED indicator 2.
Note: if the product is agitated or its position is changed during operation, the product will automatically re-level. After re-levelling check the positions of the horizontal and vertical laser lines against reference points to avoid errors.
● Using individual lines and crossed lines
When the product is performing automatic levelling and the base of the measurement device deviates from the horizontal by less than 4° (green LED on), carefully press the H-button 1 to turn the horizontal line on or off.
Or correspondingly press the V-button to turn the vertical line on or off.
Crossed lines can be locked with this product:
When the product is performing automatic levelling and the base of the measurement device deviates from the horizontal by less than 4° (green LED on) hold down the H-button 1 until the LED indicator 2 goes red. Now automatic levelling is switched off and the crossed lines are permanently switched on - even if the base of the measurement device deviates from the horizontal by more than 4° .
☐ You can turn this mode off again by pressing and holding down the H-button 1 until the LED indicator 2 goes green again. The automatic levelling system has been switched on again.
The crossed lines will be flashing as soon as the base of the measuring tool deviates from the horizontal by more than 4° , and the LED indicator 2 will turn red again.
- Working without the automatic levelling system
Put the LOCK switch into the position
☐ Hold down the H-button until the red LED indicator 2 comes on. Now the product will release two laser lines from the laser beam opening 7 that are not levelled. Operation without automatic levelling will always be indicated via the red LED indicator 2.
☐ Individual lines can be turned off or on at this mode as well. Press H-button 1 briefly to turn off or on horizontal line. Similarly, press V-button 3 briefly to turn off or on vertical line.
To switch-off the product at this mode, hold down the H-button 1 until the red LED indicator 2 is turned off.
Practical guidance
□ Always use only the middle of the laser line for markings. The width of the line depends on the distance.
- Working with the tripod
Setup and alignment
-
Pull all the three legs 17 of the tripod apart. The plastic ring 15 , which is connecting all the three cross hinges will be moved to the end of the middle column.
-
Release the blocking levers 16 and extend the legs until you get your desired height.
-
Then, fold-back all those blocking levers 16.
-
Check the straight positioning by using the bubble level 11. If the tripod is straight, the air bubble will be positioned in the centre of the circle. If necessary, readjust the length of the legs 17.
-
If additional height is necessary, loosen the locking screw 14 and extend the centre column to desired height. Once reached the desired height, tighten the locking screw 14.
-
For a horizontal alignment of the tripod flat head 18 , loosen the long handle 12 by turning anti-clockwise and move the handle up or down as desired. If the air bubble of the spirit level 11 is located exactly in the middle of the circle, the tripod flat head is aligned horizontally. Then, tighten the long handle 12 by turning it clockwise.
- If necessary, loosen the locking screw 13 to rotate the tripod flat head 18 up to 360 degree horizontally to get desired side. Once reached the desired side, tighten the locking screw 13.
- If necessary, loosen the locking screw 10 to adjust the angle of the tripod flat head 18 up to 90 degree vertically to get desired angle. Once reached the desired angle, tighten the locking screw 10.
Securing the Cross Line Laser
Align 1/4 "-thread 6 of cross line laser with the 1/4 " quick-release fixing screw 8 of the quick shoe and make sure to tighten the screw well by screwing the metal bracket 9 clockwise. The metal bracket 9 is on the bottom side of the quick shoe 19.
Removing quick shoe from tripod:
User can just remove the cross line laser together with quick shoe 19 from tripod by following below steps:
- Pull the lever 11a on the tripod flat head 18 along the side.
- Remove the quick shoe 19.
- If want to put back the cross line laser on the tripod again, pull the lever 11a on the tripod flat head 18 and place the quick shoe 19 back firmly on the tripod flat head 18. Then, release the lever 11a to bring back to original position and to firmly hold the quick shoe 19 (see fig. A).
- Check the tight fitting of the quick shoe 19 within the tripod flat head 18.
● Maintenance and cleaning
The product requires no maintenance.
■ ATTENTION! Never submerge the product in water or other liquids. Do not allow water to enter into the product during cleaning.
- Keep the product clean to ensure good, secure work.
☐ Use a dry cloth to clean the outside.
☐ Clean the laser beam opening with a soft air jet. In cases of heavy contamination, remove the dirt with a slightly damp Q-tip. Do not exert any strong pressure!
WARNING! For repair purposes the product may only be opened by a professional.
- Have the measuring tool repaired by qualified professionals and only with original replacement parts. This ensures that the safety of the measuring tool is maintained.
- Storage
☐ If you will not be using the product for a prolonged period of time, remove the batteries and store it in a clean, dry place that is not exposed to direct sunlight.
●Disposal
The packaging is made entirely of recyclable materials, which you may dispose of at local recycling facilities.

Observe the marking of the packaging materials for waste separation, which are marked with abbreviations (a) and numbers (b) with following meaning: 1–7: plastics/20–22: paper and fibreboard/80–98: composite materials.

Contact your local refuse disposal authority for more details of how to dispose of your worn-out product.
To help protect the environment, please dispose of the product properly when it has reached the end of its useful life and not in the household waste. Information on collection points and their opening hours can be obtained from your local authority.
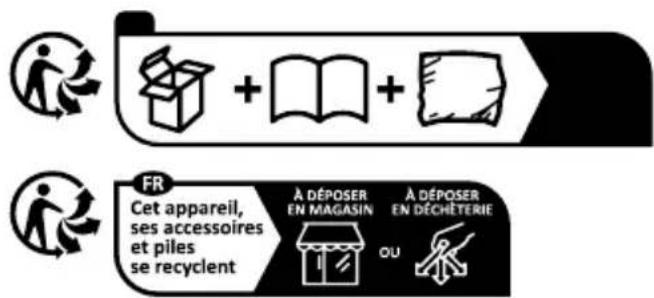
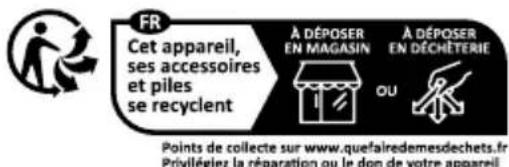
The product incl. accessories and packaging materials are recyclable and are subject to extended producer responsibility. Dispose them separately, following the illustrated Info-tri (sorting information), for better waste treatment. The Triman logo is valid in France only.
Faulty or used batteries/rechargeable batteries must be recycled. Return the batteries/rechargeable batteries and the product to the available collection points.
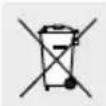
Environmental damage through incorrect disposal of the batteries/rechargeable batteries!
Batteries/rechargeable batteries may not be disposed of with the usual domestic waste. They may contain toxic heavy metals and are subject to hazardous waste treatment rules and regulations. The chemical symbols for heavy metals are as follows: Cd = cadmium, Hg = mercury, Pb = lead. That is why you should dispose of used batteries/rechargeable batteries at a local collection point.
- Warranty
The product has been manufactured to strict quality guidelines and meticulously examined before delivery. In the event of material or manufacturing defects you have legal rights against the retailer of this product. Your legal rights are not limited in any way by our warranty detailed below.
The warranty for this product is 3 years from the date of purchase. The warranty period begins on the date of purchase. Keep the original sales receipt in a safe location as this document is required as proof of purchase.
Any damage or defects already present at the time of purchase must be reported without delay after unpacking the product.
Should the product show any fault in materials or manufacture within 3 years from the date of purchase, we will repair or replace it – at our choice – free of charge to you. The warranty period is not extended as a result of a claim being granted. This also applies to replaced and repaired parts.
This warranty becomes void if the product has been damaged, or used or maintained improperly.
The warranty covers material or manufacturing defects. This warranty does not cover product parts subject to normal wear and tear, thus considered consumables (e.g. batteries, rechargeable batteries, tubes, cartridges), nor damage to fragile parts, e.g. switches or glass parts.
● Warranty claim procedure
So that your request can be processed quickly, please observe the following instructions:
o For all inquiries, please have the receipt and item number (IAN 458681_2401) ready as proof of purchase.
o The article number can be taken from the identification label on the product, engraving on the product, the front cover of your manual (at the bottom left), or the sticker on the back or bottom of the product.
o If malfunctions or other defects arise, first contact the service department indicated below by phone or email.
o You can then send a product recorded as defective to the communicated service address postage-free, making sure to enclose proof of purchase (receipt) and information on the details of the defect and when it occurred.
0

You can download and view this and numerous other manuals at parkside-diy.com. This QR code takes you directly to parkside-diy.com. Choose your country and use the search screen to search for the operating instructions. Entering the item number (IAN) 458681_2401 takes you to the operating instructions for your item.
Service
GB Service Great Britain
Tel.: 0800 0569216
E-Mail: owim@lidl.co.uk
IE Service Ireland
Tel.:1800200736
E-Mail: owim@lidl.ie

NOSTE OCHRANNÉ RUKAVICE! Vytečené
![graph LR A["Recycle Symbol"] --> B["Box Icon"] B --> C["+ Box Icon"] C --> D["+ Box Icon"]](/content/2026/04/726602/images/167407e349524b29f0decb3708f06792c120458f84d21064702d36f99b2e773a.jpg)
PDF ONLINE
parkside-diy.com