SS-8970 - Portable speaker Sogo - Free user manual and instructions
Find the device manual for free SS-8970 Sogo in PDF.

User questions about SS-8970 Sogo
0 question about this device. Answer the ones you know or ask your own.
Ask a new question about this device
Download the instructions for your Portable speaker in PDF format for free! Find your manual SS-8970 - Sogo and take your electronic device back in hand. On this page are published all the documents necessary for the use of your device. SS-8970 by Sogo.
USER MANUAL SS-8970 Sogo
natural_image
Top-down view of a black electronic device with two blue circular fans and glowing yellow-orange rings (no text or symbols visible)
Descarga tu manual
Download your manual
Téléchargez votre manuel
Baixe seu manual
Laden Sie Ihr Handbuch herunter
Scarica il tuo manuale
Stáhněte si manuál
Download din manual
Prenesite svoj priročnik
Preuzmite svoj priručnik
Pobierz swoją instrukcję
Descârcați manualul dvs
Завантажте посібник
Descàrrega el teu manual
ALTAVOZ PORTÁTIL PARA FIESTAS 2X12"
2X12" PORTABLE PARTY SPEAKER
ENCEINTE PORTABLE POUR LA FÊTE 2X12"
Altifalante de festa portátil 2X12"
2X12" TRAGBARER PARTY-LAUTSPRECHER
2X12" DIFFUSORE PORTATILE PER PARTY
2X12" PŘENOSNÝ PARTY SPEAKER
2X12" BÆRBAR FESTH∅JTALER
2X12" PRENOSNI PARTY SPEAKER
2X12" PRIJENOSNI ZVUČNIK ZA ZABAVKU
2X12" PRZENOŚNY GŁOŚNIK IMPREZOWY
2X12" SPEAKER PORTABIL PENTRU PARTY
Declaration of conformity, Responsibility of Electronic products disposal, Importers Details and After-sales service on the last pages.
• Always read the instruction book carefully before using.
- This manual can be downloaded from our web page www.sogo.es
- Keep these instructions for future reference.
2. SYMBOL DEFINITIONS

1

2

3
1- DANGER: Indicates an imminently dangerous situation.
2- WARNING: Indicates a potentially dangerous situation.
3- CAUTION: Indicates a potentially dangerous situation. Also warns against unsafe practices.
3. SAFETY INSTRUCTIONS FOR THE USER
General precautions during the use of electrical equipment
- Do not use the appliance for any other purpose than described in this manual.
- Do not use or store the appliance outdoors.
- Do not place or operate the Bluetooth speaker near water sources.
• Always place the appliance on to the flat and even surface. - The unit must be used only for the intended purposes. No liability is accepted for damages arising from improper use or wrong handling. Misuse or improper handling may cause problems in the appliance and cause injury to the user.
- This appliance is intended to be use used in household and similar applications.
- Ensure that the voltage indicated on the nameplate matches the mains voltage before plugging in the appliance.
• Always remove the plug from the power socket when the appliance is not in use. Do not leave the appliance unattended when switched on. - Close supervision is necessary when any appliance is being used by or near children.
- Before cleaning or storing your appliance, always unplug the appliance from the power supply and let it cool down.
- The device is not completely disconnected from the power source, even after it has been turned off. To disconnect it completely, disconnect it from the mains plug.
- The appliances are not intended to be operated by means of an external timer or separate remote-control system.
Restrictions on use to avoid personal injury
- Do not place or operate this appliance near water sources.
- Do not place or operate the appliance and its power cord on or near hot surfaces (e.g., stove plates, Ovens or Electric burners) or open flames.
- Do not leave the power cord hanging from sharp edges and keep away from hot objects and flames. Do not wind the cord around the appliance and do not bend it.
- Never use accessories that are not recommended by the manufacturer.
- The use of accessories not recommended or sold by the appliance manufacturer may result in fire, electric shock or injury to persons.
- When you want to remove the plug from the wall contact, please do this at the plug itself and not by pulling on the cable or the appliance itself.
- To avoid electric shock, make sure your hands are dry before plugging or unplugging.
- Do not use the device with wet hands, on damp floors or when the atmosphere is humid, there is a risk of electric shock.
- Never immerse the appliance or the plugin water or any other liquid. In the event of the appliance falling in water, disconnect immediately from the mains supply and take it to an authorized service agent for repair before reusing.
- Do not use the appliance if it has fallen on the floor, if there are visible signs of damage or if it has a leak.
- Do not use the appliance if the cable or plug is damaged. In case of the cord be damaged, it must be replaced only by the manufacturer, its service agent or similarly qualified persons in order to avoid Hazard.
- In case of appliance malfunction, or if it has been damaged in any manner, return the appliance to the nearest authorized service facility for examination, repair or adjustment.
Restrictions on use when used with children and elders
- Children should be supervised to ensure that they do not play with the appliance.
- Keep the appliance and its cord out of the reach of the children.
• Children shall not play with the appliance. - Cleaning and user maintenance shall not be made by children without supervision.
- Do not allow the children to use the appliance.
- Appliances can be used by children aged from 8 years and above and persons with reduced physical, sensory or mental capabilities or lack of experience and knowledge if they have been given supervision or instructions concerning use of the appliance in a safe way and understand the hazards involved.
Instructions to follow when using the appliance
- Do not leave the speaker charging longer than recommended by the manufacturer, as this may damage the battery or the speaker itself.
- Do not use the speaker while in charge, otherwise it may also damage the speaker.
- This product has no user-serviceable parts. Do not attempt to repair this product yourself. Only qualified service personnel should perform servicing. Take the product to the electronics repair shop of your choice for inspection and repair.
- NEVER let anyone, especially children, push anything into holes, slots or any other openings in the unit's casing as this could result in a fatal electric shock.
- Don't mount this product on a wall or ceiling.
- Do not place the unit near TVs, speakers and other objects that generate strong magnetic fields.
- Do not leave the unit unattended when it is in use.
NOTE: To disconnect the system completely if it not to be used for a long time, remove the AC power plug from the wall outlet.
- Do not drop, disassemble, deform, modify or insert any objects into holes of the speaker as it may result the product damage.
- Do not clean the product with alcohol, ammonia-based cleaners and abrasive cleaners.
- Do not place this product in to contact with any sharp objects as this may cause scratches and operating damage.
- Do not attempt to replace the product battery, it is built-in and is not user changeable.
- In case of speaker malfunction, or if it has been damaged in any manner, return it to the nearest authorized service facility for examination, repair or adjustment. Keep the speaker away from direct sunlight, fire, or other high voltage equipment.
WARNING: the device might get warm during charging. Always ensure the speaker is turned off when you plug and unplug the
device. If the device is not turned off you might damage the speaker or injure yourself.
- Place the unit where there is good ventilation. Place the system on a flat, hard and stable surface. Do not expose to temperatures above 40°C. Allow at least 30 cm clearance from the rear and the top of the unit and 5 cm from each side.
- Press the buttons of the unit gently. Pressing them too hard can damage the unit.
• Always ensure that the product is unplugged from the electrical outlet before moving or cleaning. Clean it with dry cloth only. - Unplug the product during lightning, storms or when it will not be used for long periods of time.
- Observe all signs and displays that require an electrical device or RF radio product to be switch off in designated areas.
- Dispose of the product and the product's battery in accordance with local laws and regulations.
- Dispose of used batteries in an environmental-responsible manner.
4. TECHNICAL SPECIFICATIONS:
| Output power: | 100W x 2! MAX |
| Sound sensibility: | ≤95dB |
| Frequency response | 87.5 – 108MHz |
| Distortion | ≤10% |
| Bluetooth version | V5.3 |
| Bluetooth range | ≤10m |
| Bluetooth pairing name | SOGO SS-8970 |
| USB & TF max. memory supported | 32 GB |
| Power adaptor | AC 100-240V ~ 50/60Hz. |
| Slot | USB and Dual microphone input |
| Connection | Bluetooth / Auxiliary input |
5. PRODUCT AND ACCESSORIES INFORMATION:
The box of this product contains, Speaker, Power cable, Instructions manual, Microphone, Warranty card.
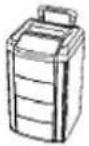
Speaker
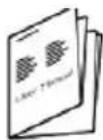
Instruction Manual

Microphone
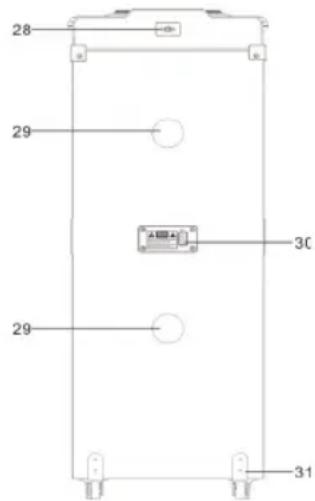
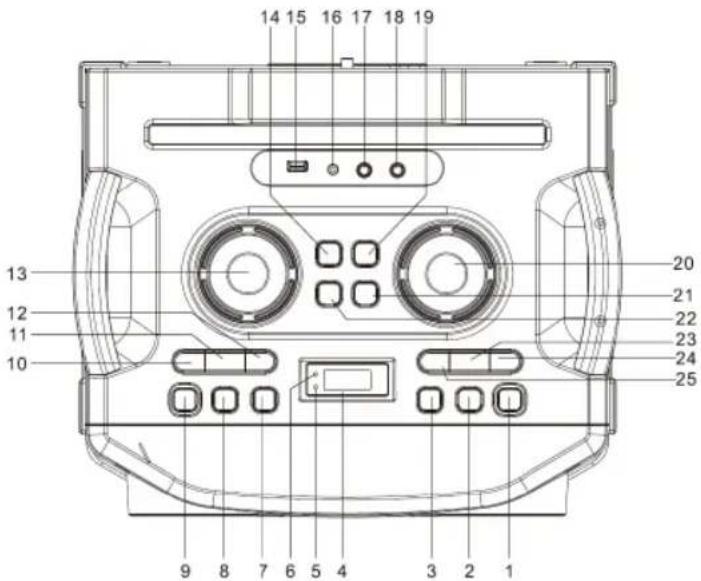
6. PRODUCT AND PANEL OVERVIEW:
Top view:
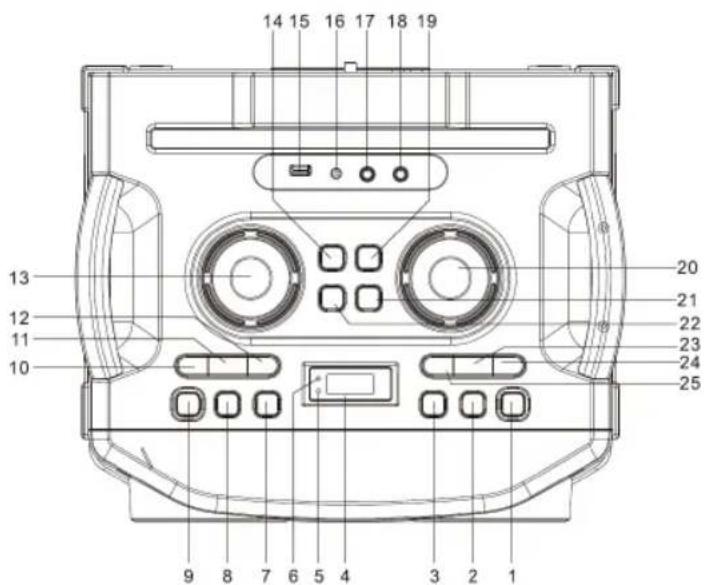
This panel is located on the top part of the speaker, with multiple buttons and functions we can manage multiple things from here.
1- ⏻/Standby Button: This button is to switch on the speaker after connecting the power source.
2- Function Button: This button is provided to change the function modes. Press this button repeatedly to choose between BLUETOOTH / RADIO / AUX / USB function.
3- Pair/TWS button: If you have two units of this model, you can connect two units by TWS function to get stereo output.
4- LCD Display: The LCD display is provided to show multiple informations regarding Modes, Frequency, Preset Memory, etc.
5- Pair Indicator: This indicator is provided to indicate the Bluetooth pairing connection.
6- Standby Indicator: This indicator is provided to inform about the power supply connection.
7- Light button: Light button is provided to select the between the different light modes or to turn the light OFF.
8- EQ/ECHO button: This button is provided to select between the different equalizer modes from FLAT, POP, CLASSIC, JAZZ and ROCK.
9- EX Bas button: Press this button to get the Extra bass effect.
10- 10/Fold / M- button: This botton is provided to switch to Previous Preset Radio stations and also to switch to Previous Preset Memory modes. This button is also used to skip backwards 10 tracks.
11- MEM/P-mode button: This button is provided to save the station as a Preset Memory. This button is also used to repeat the track or to repeat the folder. It is used for Random track play as well.
12- 10/Fold / M+ button: This button is provided to switch to Next Preset Radio stations and also to switch to Next Preset Memory modes. This button is also used to skip forward 10 tracks.
13- MIC VOL. Control: Rotate the MIC VOL. knob on the unit to increase or decrease the microphone volume.
14- BASS- Button: This button is provided to reduce the Bass effect.
15- USB Port: This port is provided to insert the USB device.
16- 3.5mm AUX IN Jack: This jack is provided to plug in AUX cable for input.
17- 6.3mm MIC Jack 1: This jack slot is provided to plug in Microphone 1.
18- 6.3mm MIC Jack 2: This jack slot is provided to plug in Microphone 2.
19- BASS+ button: This button is provided to increase the Bass effect.
20- Vol. Control: This knob is provided to adjust the music volume.
21- TREBLE + Button: This button is provided to increase the Treble.
22- TREBLE - Button: This button is provided to decrease the Treble.
23- PLAY/PAUSE/SCAN BUTTON: This button is provided to scan and save the radio stations and also to Pause / Play the music.
24- 🖼/ TUN.+ Button: This button is provided to Tune to a next radio station. It is also provided to move forward to a track. This is also used to move forward to a specific desired point(Passage) in a current playing track and also is used to select a desired track from a different folder(if the USB contains more than 1 folder).
25-▶/TUN. – Button: This button is provided to Tune to a previous radio station. It is also provided to move backward to a track. This is also used to move backward to a specific desired point(Passage) in a current playing track and also is used to select a desired track from a different folder(if the USB contains more than 1 folder).

26- Tweeter: The tweeter is provided for the best audio experience.
27- Speaker: It is provided for main audio output.
28- FM socket and FM wired antenna: FM socket and wired antenna are provided for best reception of radio frequency.
29- Ventilation Holes: These holes are provided for the proper ventilation of the speaker.
30- AC Socket: This socket is provided to connect the power supply cable to the speaker.
31- Wheel: Wheels are provided for easy movement of the speaker device.
Bluetooth Speaker Functions:
Power Source: This unit is AC operation unit. For power supply, please connect the power cable at AC socket.
Turning ON/OFF: After connecting the power, the standby indicator will turn into RED. Press the / STANDBY button to switch ON / OFF the unit.
How to connect the device with the Bluetooth speaker?
Press the FUNC. Button on the unit to switch to BLUETOOTH function. The LCD will display "bt" and the pair indicator will flash at high speed. To connect your electronic device, make sure it is visible to all the nearby devices. Search for the Bluetooth pairing name SOGO SS-8970 on your device screen and once it appears, press it to connect with the speaker and wait until connected. If the password is required, enter "0000" as password. The Bluetooth works best within 10 meters in open air.
TWS functioning:
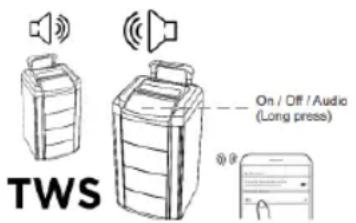
This speaker model has a function known as TWS (True wireless function). In this function, we can connect 2 speakers at the same time with the same device without any wired connection. This function helps to enhance the sound level and also helps to cover a big area for parties and functions. If you have 2 speakers, connect your electronic device with one of the units by Bluetooth function. This unit will become the master unit.
Turn on the second unit and switch to Bluetooth mode. Press and hold the "PAIR/TWS" button on the master unit, then these two units will connect automatically with a sound indicating that the connection is done and these two units will become as a stereo output.
Now you can enjoy the music and sound with more enhanced quality.
NOTE: To make the use of TWS function make sure the both of the speaker must be of same models and also need to have same Bluetooth pairing name.
Aux-In / Line-in :
With the help of Aux-In input you can connect all the musical devices such as Radios, Laptops, Televisions, and all the devices, which doesn't have Bluetooth connection function. Press the FUNC. Button on the unit to select the AUX" mode. Connect your audio device to the AUX IN jack on the top panel of the unit with an AUX IN cable.(audio cable is not included). Rotate the VOL. knob on the unit or adjust the volume on the external device to increase or decrease the music volume to your desired level. With the help of device, you can play the music and songs of your choice. You can control the playback with your audio device.
Music with the help of USB operation:
This speaker has USB slot with the help of which, you can listen the music saved in your pen drive. To play the speaker in the USB mode, press the FUNC. Button on the unit to select USB mode. Plug the USB pen drive to the USB port on the top of the unit. Playback will start automatically from Track 1. In this mode, with the help of PLAY/PAUSE/SCAN button, music can be played or paused at any time and with the ◀◀/TUN.+ or ▶▶/ TUN. – buttons, you can switch between the tracks until the desired track is appeared on the display. To search for a particular passage of your choice in the currently playing track, press and hold ◀◀/TUN.+ or ▶▶/ TUN. – button to scan the current track till your desired passage duration is appeared in the display.
If your desired track is more than 10 tracks ahead or back from the current track, press the 10/
FÖLD./M.+ or 10/FOLD./M.- button to move 10 tracks forward or backward respectively. Then press 🐎/TUN.+ or 🐎/TUN. – to select the desired track. If the USB contains more than 1 folder, press and hold 10/FOLD./M.+ or 10/FOLD./M.- button each time to skip forward / backward a folder, then press 🐎/TUN.+ or 🐎/TUN. – to select the desired track.
Note: Make sure while you insert the USB drive, the speaker must be in USB mode.
FM mode:
After turning the Bluetooth speaker ON, press FUNC. Button to switch to the FM mode. The display reads FM and the radio frequency.
Note: The wired antenna is packed with the power cord as a separated accessory, insert the wired antenna into the FM socket on the rear cabinet when listening to the radio and extend the wired antenna to its full length to get the best reception.
Tuning to a Radio Station:
If you know the radio station frequency that you want to tune to directly, Tune a station by pressing /TUN.+ or /TUN.- button repeatedly. The station frequency will be shown on the display.
To tune to a Pre-set station: Press 10/FOLD. / M.+ button to tune to the next preset station and Press 10/FOLD. / M.- to tune to the previous preset station.
Auto Preset Memory / Scan:
Press and hold PLAY/PAUSE/SCAN button to scan for the stations within reception range and save them to preset memory automatically. After the unit has finished scanning, the unit will automatically tune to preset number 1(P01).
Manual Preset Memory Operation:
1- Use the ◀◀/TUN.+ or ▶◀/TUN.- button to tune the station that you want to save as a preset (e.g, 93.1).
2- Then press the MEM./P-Mode button. "P01" will flash on the display to indicate that you are saving the station as Preset Memory 01. To change the preset memory number, press 10/FOLD./M+ or 10/FOLD.M- buttons).
3- Press MEM./P-Mode button to finish saving the station(e.g., P01 is now set to 93.1)
4- To save another station, repeat steps 1 to 3. You may save up to 30 FM stations.
RGB Light modes:
This speaker comes with 7 modes for the DISCO LED lightening. Press the LIGHT button to choose the light modes.
Mode 1-6 color light flashing follow the music.
Mode 2- Blue light will be on flashing mode.
Mode 3- Blue light will be ON constantly.
Mode 4- RED light will be on flashing mode.
Mode 5- Red light will be ON constantly.
Mode 6- Green light will be on flashing mode.
Mode 7- Green light will be ON constantly.
Press the LIGHT button until "LOFF" shown on the display to turn off the light.
Microphone connection:
This speaker has 2 microphones inputs available and with the help of these you can connect microphones provided with the speaker unit.
Turn the device ON by pressing the Ⓑ/STANDBY button. Plug in the microphone's jack in the port of 6.3mm microphone jack. With the help of MIC VOL. knob, you can increase or decrease the volume of the microphone.
Power Supply:
This unit is an AC operation unit and comes with a Power Cable included inside the box. Plug the power supply cable in AC socket provided at the back side of the speaker.
8. CLEANING AND MAINTENANCE
While cleaning the product, just use soft or dry cloth and in case of severe stains use the damp cloth. Do not use abrasive cleaners, as it can damage the paint, plastic or even the speaker itself. Keep it away from sun light and do not keep it in hot and humid atmosphere. Make sure to remove the power adaptor cable and keep it in cool and dry place.
In use, please pay attention to the following items:


1. IMPORTANT :
Funzionamento TWS:
TWS funguje:
TWS-funktion:
natural_image
Simple line drawing of a cloud with a cross symbol in the bottom right corner (no text or labels)
natural_image
Simple line drawing of a explosion with a starburst and a cross symbol (no text or labels)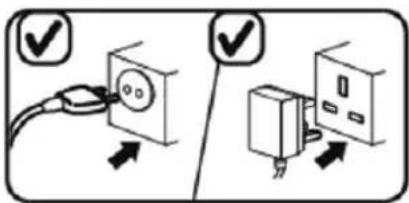
natural_image
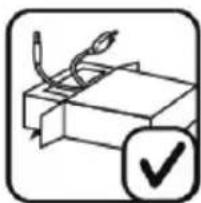
Simple line drawing of a box with a pen and a checkmark icon (no text or symbols)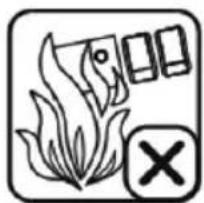
natural_image
Simple line drawing of a flame with a water bottle and a 'X' symbol (no text or labels)
natural_image
Weather icon showing cloud over rain with a 'X' symbol (no text or labels)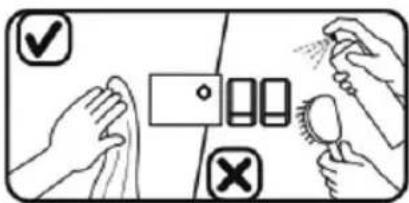

natural_image
Simple line drawing of a sun with rays and a checkmark (no text or symbols)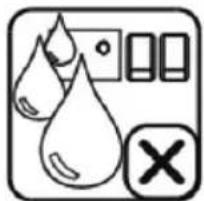


natural_image
Icon depicting a device with three ports and a glowing light source, no text or symbols present.
natural_image
Symbolic icon of a person assembling a large mechanical component, enclosed in a circular frame (no text or symbols)

1. R0MEMBNO:
TWS funkcioniranje:
Ovaj model zvučnika ima funkciju poznatu kao TWS (true wireless function). U ovoj funkciji možemo spojiti 2 zvučnika u isto vrijeme s istim uređajem bez žičane veze. Ova funkcija pomaže poboljšati razinu zvuka i također pomaže pokriti veliko područje za zabave i zabave. Ako imate 2 zvučnika, povežite svoj elektronički uređaj s jednom od jedinica putem Bluetooth funkcije. Ova jedinica će postati glavna jedinica. Uključite drugu jedinicu i prebacite se na Bluetooth mod. Pritisnite i držite tipku “PAIR/TWS” na glavnoj jedinici, tada će se ove dvije jedinice automatski povezati uz zvuk koji označava da je veza obavljena i ove dvije jedinice će postati stereo izlaz. Sada možete uživati u glazbi i zvuku poboljšane kvalitete.
NAPOMENA: Da biste koristili TWS funkciju, provjerite moraju li oba zvučnika biti istog modela i također moraju imati isti Bluetooth naziv za uparivanje.
Działanie TWS:
Functionare TWS:
ФУНКЦІОНУВАННЯ TWS
6. RESUM DE PRODUCTES I PANELLS:
Vista superior:
FUNCIONAMENT TWS
DÉCLARATION DE CONFORMITÉ
DECLARATION OF CONFORMITY
This device complies with EU RED Directive 2014/53/EU related to Health and Safety from usage of Radio spectrum in household electronic equipment. Low Voltage Directive 2014/35/EC. Electromagnetic Compatibility Directive 2014/30/EU. Directive 2015/863/EU on the restriction of the use of certain hazardous substances in electrical. Directive 2009/125/EC on the eco-design requirements applicable to energy-related products.

This symbol on the product or on the packaging indicates that this product can't be disposed as normal rubbish or household waste. All the electrical, electronic equipment's and battery-operated units must recycle in proper manner and according to the local municipal laws. You can recycle them by taking them to government authorized disposal centres or specialized bins which you can find in any nearby big super markets, electronics or electro domestics products stores or malls who have these types of facilities available.
Designed by: SOGO based on European quality standards Imported by: Sanysan Appliances S.L, NIF: B98753056, C/ Barcas 2, 2, 46002 Valencia, Spain Product manufactured in CHINA. After-sales service: www.sogosat.com sogosat@sogosat.com / 0034 902 222 161