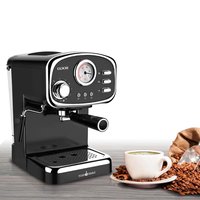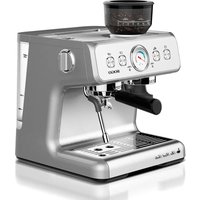
SS-5690 - Coffee machine Sogo - Free user manual and instructions
Find the device manual for free SS-5690 Sogo in PDF.


User questions about SS-5690 Sogo
0 question about this device. Answer the ones you know or ask your own.
Ask a new question about this device
Download the instructions for your Coffee machine in PDF format for free! Find your manual SS-5690 - Sogo and take your electronic device back in hand. On this page are published all the documents necessary for the use of your device. SS-5690 by Sogo.
USER MANUAL SS-5690 Sogo
natural_image
Exterior view of a SOGO coffee machine (no text or symbols on the device body)
CAFETERA COFFE MAKER MACHINE À CAFÉ MÁQUINA DE CAFÉ KAFFEEMASCHINE MACCHINA PER CAFFÈ
Caution: please read and preserve these important instructions
natural_image
Line drawing of a standard microwave oven with control panel and instrument (no text or symbols)NO 1
natural_image
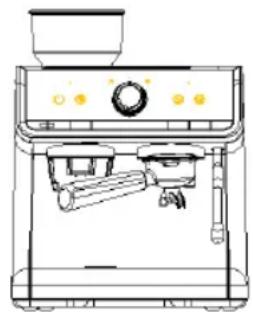
Line drawing of a standard microwave oven with control panel and instrument (no text or symbols)NO 2
natural_image
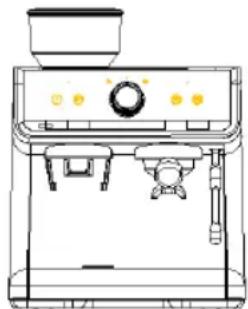
Line drawing of a standard coffee machine with no text or symbolsNO 3
natural_image
Technical line drawing of a mechanical assembly with no visible text or symbolsnatural_image
Technical line drawing of a mechanical component with no visible text or symbolsnatural_image
Simple line drawing of a cup on a stand with a red circle highlighting the cup (no text or symbols)Fig.4
natural_image
Line drawing of a mechanical component with a pipe inserted into a housing (no text or symbols)Fig.5
Grind Single cup Double cup
Default setting:92°C

Grind Single cup Double cup
2°C will be decreased after every press of "Grind" button, 2°C will be increased after every press of "Double cup" button.
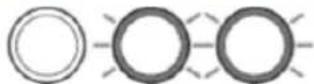
Grind Single cup Double cup
Temperature: 94°C

Grind Single cup Double cup
Temperature: 96°C

Grind Single cup Double cup
Temperature: 90°C

Grind Single cup Double cup
Temperature: 88°C
natural_image
Simple line drawing of a bottle and a square container with a lid, no text or symbols present.natural_image
Technical line drawing of a mechanical component with a flanged top and central base (no text or symbols)Fig.7 Fig.8
Cepillo de limpieza
natural_image
Technical line drawing of a mechanical assembly with a handle and housing (no text or symbols)Fig.9
natural_image
Technical line drawing of a mechanical component with concentric rings and a handle (no text or symbols)Fig.10
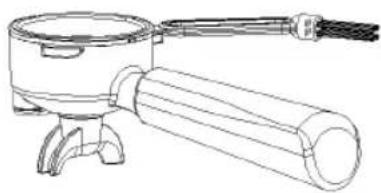
natural_image
Line drawing of a mechanical device with a cylindrical body and handle (no text or symbols)Fig.11
text_image
Technical diagram showing two views of a device with labeled parts and directional arrows indicating flow or movement.Coloque un recipiente
This instruction manual can also be downloaded from our web page www.sogo.es
IMPORTANT SAFEGUARDS
Before using the electrical appliance, the following basic precautions should always be followed including the following:
- Read all instructions.
- Before using, check that the voltage of wall outlet corresponds to rated voltage marked on the rating plate.
- To protect against fire, electric shock and injury to person, do not immerse cord or plug, in water or other liquid.
- The appliance must not be immersed.
- Remove plug from wall outlet before cleaning and when not in use. Allow appliance cool down completely before taking out, attaching components or before cleaning.
- Do not operate any appliance with a damaged cord or plug or after the appliance malfunctions, or when dropped or damaged in any manner. Return appliance to the nearest authorized service facility for examination, repair or electrical or mechanical adjustment.
- If the supply cord is damaged, it must be replaced by the manufacturer, its service agent or similarly qualified persons in order to avoid a hazard.
- The use of accessory attachments not recommended by the appliance
manufacturer may result in fire, electric shock or injury to persons.
-
Place appliance on flat surface or table, do not hang power cord over the edge of table or counter.
-
Ensure the power cord do not touch hot surface of appliance.
-
Do not place the coffee machine on hot surface or beside fire in order to avoid to be damaged.
-
To disconnect, remove plug from wall outlet, always hold the plug, but never pull the cord.
-
Do not use appliance for other than intended use and place it in a dry environment.
-
Be careful not to get burned by the steam.
-
The temperature for operating or storing the coffee machine shall be higher than 0°C.
-
Do not operate the coffee machine at an environment with high temperature, strong magnetic field and moist air.
-
Do not touch the hot surface of appliance (such as steam wand, and the steel mesh just boiling). Use handle or knobs.
-
Do not let the coffee maker operate without water.
-
Connect plug to wall outlet before using and turn any switch off before plug is removed from wall outlet.
-
This appliance can be used by children aged from 8 years and above under supervision or given instruction concerning use of the appliance in a safe way and if they understand the hazards involved. Cleaning and user maintenance shall not be done by
children unless they are older than 8 and supervised. Keep the appliance and its cord out of reach of children aged less than 8 years.
-
Appliances can be used by persons with reduced physical, sensory or mental capabilities or lack of experience and knowledge if they have been given supervision or instruction concerning use of the appliance in a safe way and understand the hazards involved.
-
Children shall not play with the appliance.
-
This appliance is intended to be used in household and similar applications such as: – staff kitchen areas in shops, offices and other working environments; – farm houses; – by clients in hotels, motels and other residential type environments; – bed and breakfast type environments.
-
Save these instructions
Warning: pressure
In order to prevent hot steam and hot water from scalding the body or causing other personal injuries, and to prevent damage to this product, when the machine brews coffee or foams, do not remove the water tank or funnel. Before you remove the funnel to brew another cup of coffee, make sure that the coffee machine is in standby mode. If you want to add more water into the water tank, please turn off the machine by pressing the Power button ⏻ When four indicators are off, the product is turned off. When extracting coffee, make sure that the funnel is turned to the specified position to avoid it getting loosen due to pressure reason during use, which may easily cause human injury.
High temperature
When the machine is working, do not extend your hands and other body parts into the bottom of the funnel or steam tube to prevent burns; at any time, it is not allowed to touch the steam tube with your hands or other body parts. You can only turn the steam tube by touching silicone sleeve that wraps the steam tube.
KNOW YOUR COFFEE MACHINE
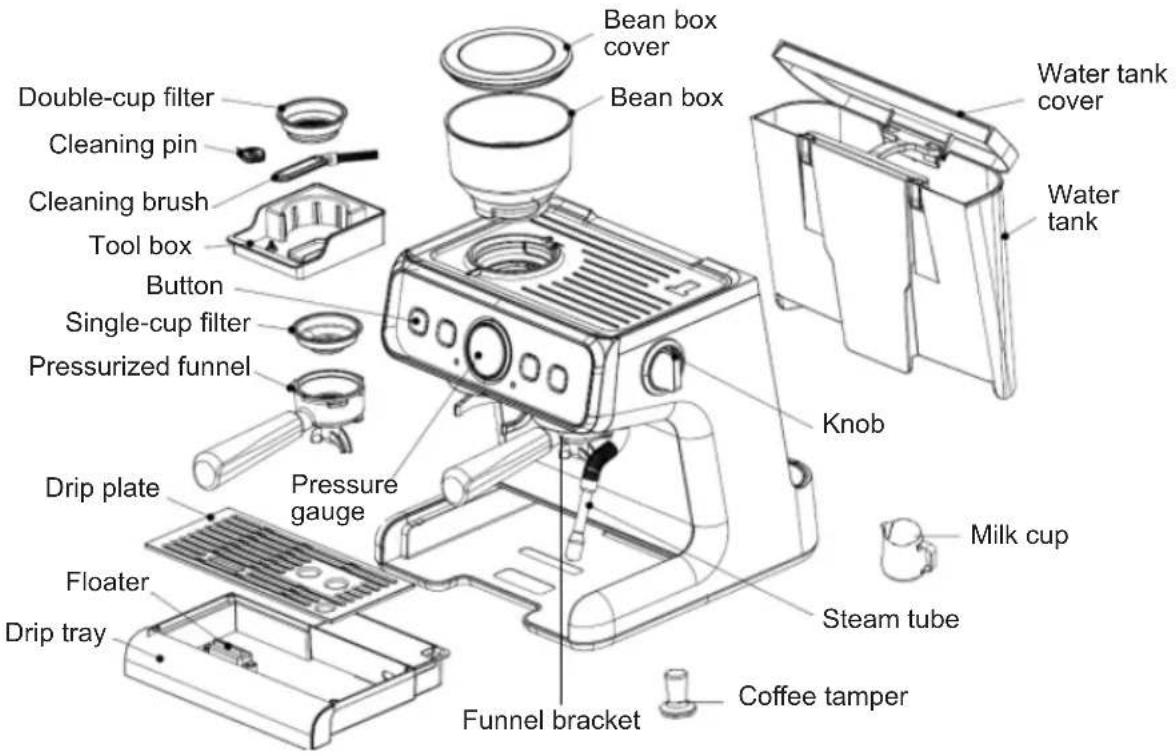
text_image
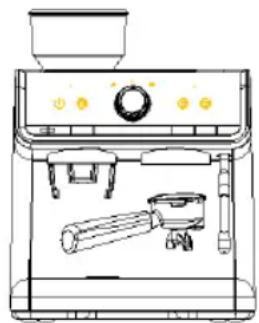
Double-cup filter Cleaning pin Cleaning brush Tool box Button Single-cup filter Pressurized funnel Drip plate Floater Drip tray Pressure gauge Bean box cover Bean box Water tank cover Water tank Knob Milk cup Steam tube Funnel bracket Coffee tamperCONTROL PANEL
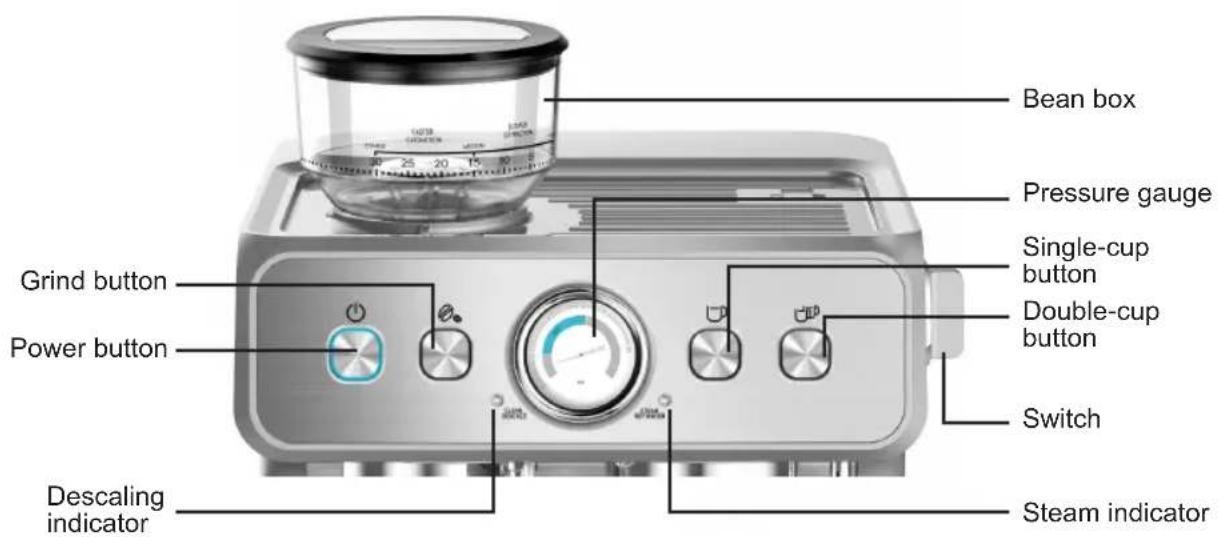
text_image
Bean box Pressure gauge Single-cup button Double-cup button Switch Power button Grind button Power button Descaling indicator Steam indicator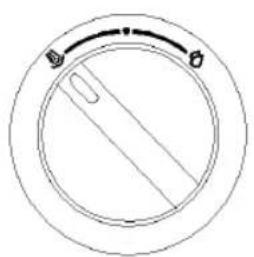
natural_image
Simple circular diagram with a central diagonal line and two small symbols at the top (no text or labels)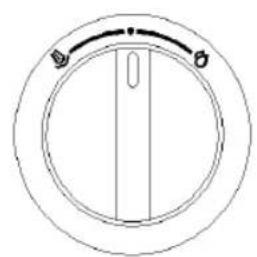
natural_image
Simple line drawing of a circular mechanical component with a central vertical slot and two mounting holes (no text or symbols)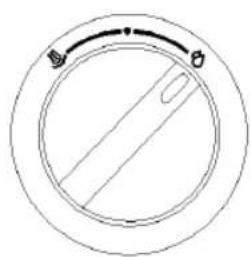
natural_image
Simple circular diagram with a diagonal line and two small symbols at the top (no text or labels)BEFORE THE FIRST USE
Before the first use or the machine has not been used for a long time, you should follow below steps to rinse and warm up the internal pipes of the machine.
-
Check and ensure that all accessories are complete and not damaged.
-
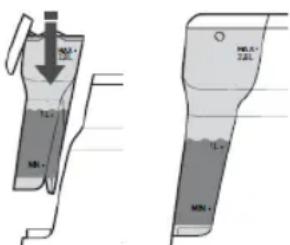
Fill the water tank with clean water, and water level should not exceed the "MAX" position.
-
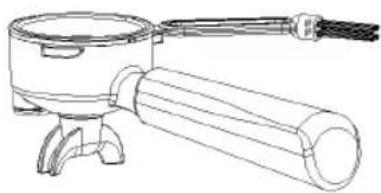
Align the pressurized funnel with funnel bracket (no coffee powder is placed at this moment), and rotate the funnel counterclockwise to lock it tightly (put in a single-cup or double-cup filter as needed).
-
Put a cup onto drip plate, plug in the appliance and press Power button, the machine enters into the preheating mode. And the machine will enter into the standby mode after finish preheating.
-
Turn the knob to hot water position _00 , after a while, hot water will flow out from steam tube. Align the steam tube to drip tray or use a cup to collect the hot water.
-
Press "☐" or "☐" to clean the pipes in machine, hot water will come out from funnel. Use the drip tray or use a cup to collect the hot water.
NOTE: Do not extend any parts of your body closed to funnel and steam tube to avoid scalding during brewing hot water.
-
After water stops flowing, pour away the water in drip tray or in the cup.
-
Thoroughly clean the detachable parts of the whole machine with warm water.
NOTE: There may be noise when pumping water for the first time, it is normal.
CHOOSE THE RIGHT COFFEE POWDER
Coffee powder
The coffee should be freshly ground and subjected to deep roasting. You may need to use French or espresso roasted coffee powder for espresso coffee. Pre-ground coffee powder can only keep the aroma for 7 to 8 days unless it is stored in a sealed container, and place it in a cool place. Do not store coffee in the refrigerator or freezer. In general, it is not recommended to use pre-ground coffee powder. The coffee beans freshly ground are more easily to retain the aroma of the coffee and obtain higher coffee quality.
Grind
If you are making coffee, this step is a key step in the espresso making process and requires more practice.
• The correct powder should look like salt.
- If the powder is too finely ground, it may cause the coffee to flow intermittently or fail to brew coffee.
- If the powder is too coarse, the water will flow through the coffee too quickly, which will affect aroma and taste of the extracted coffee
- You can adjust the thickness of the ground coffee powder by adjusting the coffee bean box, which will vary depending on the type and quality of the coffee beans you use, so you need to make appropriate adjustments to achieve the best results.
- Fresh roasted coffee beans (within 1 month), the grinding position is set between 10-15, the double-cup grinder produces about 19g of powder and the single-cup of 13g, this will bring relatively good coffee extraction effect.
- In order to prevent the coffee beans from getting wet, affecting the grinding and the final coffee taste and effect, please do not put too much coffee beans in the bean box.
In order to obtain a uniform and consistent coffee powder, be sure to adjust the grinding degree according to the type and quality of coffee beans to obtain a cup of high-quality coffee.
I. Brewing coffee, function of hot water and steam
-
Fill the water tank with drinking water, the water level should not exceed the "MAX" position.
-
Plug in the power and press the Power button (make sure the knob is at ⚙ position), then the machine enters into the preheating mode. The specific operation is as follows:
The functional buttons are of their corresponding indicators, and there are two functional indicators on the left and right separately. Indicators in different states show various working modes of the machine. Coffee brewing, hot water and steam function cannot work at the same time, only one function can work in one time.
Warm up: Press the “☐” once, the whole machine enters into warm-up mode, the power indicator flashes, and “☐” lights up at the same time.
Standby state: When the whole machine is warmed up, it enters into standby mode. At that time, the indicators of Power button, Grind button, Single-cup button and Double-cup button light solidly, and the coffee machine can be used normally.
Brew a single-cup of coffee: In the standby mode, install the single-cup filter into the funnel, load about 13 grams of coffee powder, use the coffee tamper and press the coffee powder with a force of about 12.5Kg, then align the funnel to the funnel bracket, turn the funnel counterclockwise to lock it. Put
a coffee cup on the drip plate, press SINGLE button, the machine starts to brew a single-cup of coffee. When the set coffee dose is reached (about 30ML), the machine will stop working automatically and enter into the standby mode.
Brew a double-cup of coffee: In the standby mode, install the double-cup filter into the funnel, load about 19 grams of coffee powder, use the coffee tamper and press the coffee powder with a force of about 12.5Kg, then align the funnel to the funnel bracket, turn the funnel counterclockwise to lock it. Put a coffee cup on the drip plate, press DOUBLE button, the machine starts to brew a single-cup of coffee. When the set coffee dose is reached (about 60ML), the machine will stop working automatically and enter into the standby mode.
Customized setting:
- Coffee dose of Single-cup and double-cup, you can adjust the specific coffee dose according to your needs, operation is as follows:
Hold and press the Single-cup button “☐ or Double-cup button “” and its corresponding indicator flashes, and release the Single-cup button or Double-cup button when coffee starts to flow out. When coffee dose reaches the desired amount, press the Single-cup button “☐” or Double-cup button “” the coffee stops dispensing, the buzzer sounds, and the machine will record the coffee dose. When you brew coffee next time, the machine will brew the coffee amount as per your setting (adjustable coffee amount ranges between 20ml-400ml.).
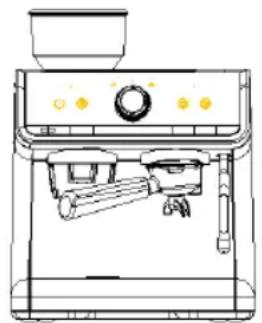
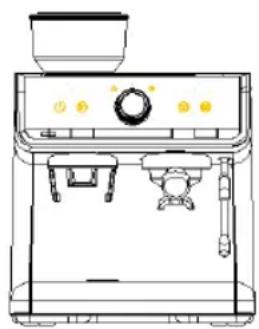
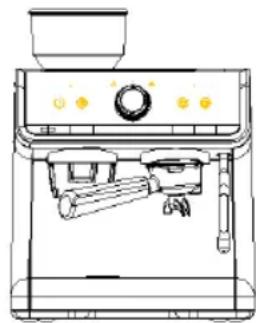
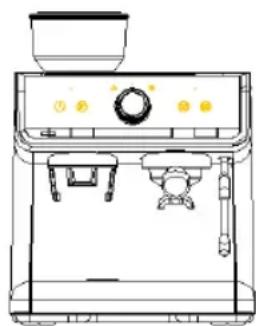
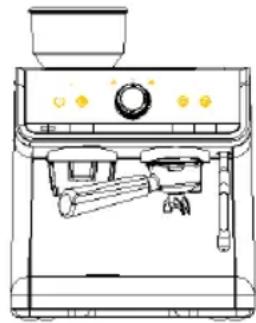
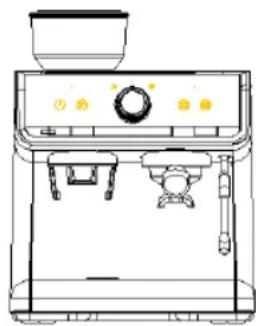
- Hold and press Power button “☐”, Single-cup button “☐” and Double-cup button “” will restore coffee dose of single and double-cup to factory settings. When extracting coffee, make sure that the funnel is turned counterclockwise into the correct position as shown in the Figure below.
natural_image
Line drawing of a standard 3D coffee machine with no text or symbolsNO 1
natural_image
Line drawing of a standard espresso machine with control panel and lever (no text or symbols)NO 2
natural_image
Line drawing of a coffee maker with control panel and side table (no text or symbols)NO 3
Boil hot water: In the standby mode, turn the knob to hot water indicator 00 , the machine enters into hot water mode, at that time, the Steam/Hot water indicator lights solidly, the indicators of Power button “(1)” and Grind button “(2)”, illuminate, while the indicators of Single-cup button “(3)” or Double-cup button “(4)” are off, the steam nozzle dispenses hot water. Turn the knob to knob indicator “●” position, the machine stops brewing hot water and enters into standby mode.
NOTE: The maximum water output of hot water function is 180-220ml, it's important to use a container which is big enough to collect the hot water or there must be someone to guard it when in use. After hot water function is finished, please turn the knob to the twelve o'clock position in time, if not, the indicator will flash as an alarm, other functions will not be available.
Steam preheating and steam function: In standby mode, turn the knob to “” position. At that time, the Steam/Hot water indicator flashes, both the indicators of single-cup button “” and double-cup button “” extinguish, which means the steam function is warming up. Wait until Steam/Hot water indicator flashes, the steam function is finished preheating, and the machine enters into the steam mode, and then the Steam/Hot water indicator lights solidly and the steam outlet starts to release steam.
NOTES:
- The steam function will generate high-temperature steam, please pay attention to avoid scalding when using it.
- To ensure good foaming effect of milk, wait the steam runs for 3-5 seconds, and then turn the knob to the “●” position, extend the steam tube into the milk, and turn the knob to “○” position to froth the milk.
- The maximum time for steam function is 5 minutes.
- After milk frothing, please turn the knob to the “●” position in time. If it is not turned back, the steam indicator “●” will flash as an alarm. Other functions will be unavailable.
Sleep state: The machine will automatically enter into the sleep mode after 20 minutes of no operation during the standby mode. You can activate the machine again by pressing Power button “☐”, the machine will re-enter into warm-up state.
Suggestion: SWe suggest that you should preheat the appliance, including the funnel, filters and cup
before brewing coffee, so that the coffee will not be affected by the coldness of appliance. The specific operation is as below: Put the filter into the funnel and then install the funnel onto the funnel bracket, put a cup well in position and press Single-cup button "☐" or Double-cup button "☐" to make the appliance work. After the appliance stops working, the coffee-brewing can be activated.
II. Grind Coffee Beans
This product has a function of grinding coffee bean, before using this function, please make sure that all devices are installed in accordance with the requirements. The details are as follows:
natural_image
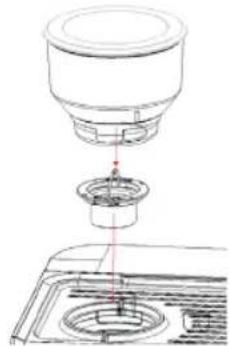
Technical line drawing of a mechanical assembly with no visible text or symbolsFig. 1: Install the cutter head (2) and tighten it clockwise, then install the bean box (1) and screw it as shown in Fig. 2.
natural_image
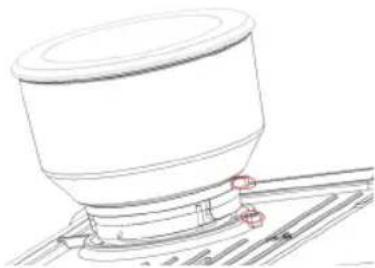
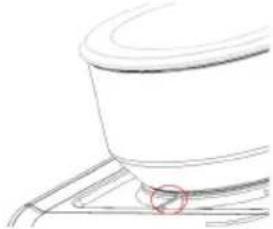
Technical line drawing of a mechanical component with a cylindrical top and base (no text or symbols)There are markings to show the coffee coarseness on bean box, see Fig. 3. To make the coffee coarseness you prefer, make sure the coffee coarseness setting you want on bean box is aligned with the mark position on the top cover (as shown in Fig. 4).

text_image
FASTER EXTRACTION MEDIUM SLOWER EXTRACTION FINE 30 25 20 15 10 5 0Fig. 3: From 0 to 30, coffee power is from fine to coarse. Bigger number for coarser coffee powder.
natural_image
Simple line drawing of a cylindrical object with a red circular mark on the base (no text or symbols)Fig.4
- Make sure the bean box is installed in place. When the Grind button " 🔊" indicator turns to blue from red, the grinder is ready for use.
- Add appropriate amount of coffee beans in the bean box. To prevent coffee beans from getting wet, affecting the grinding and the final coffee taste and effect, please do not put too much of coffee beans in the bean box.
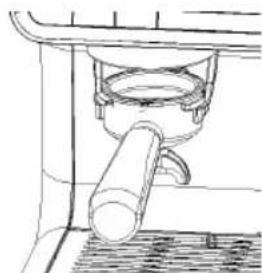
- As shown in Fig. 5, put the funnel with single-cup filter or double-cup filter into the powder receiving bracket, as shown in Fig. 5.
- Press Grind button "to start grinding. And the grinder will automatically stop after reaching the set grinding amount. You can also press Grind button "to stop halfway.
natural_image
Line drawing of a mechanical component with a cylindrical shaft inserted into a housing (no text or symbols)Fig.5
NOTE: The default grinding time is time required for double-cup dose. And the grinder will produce about 19g (about 13 seconds) of powder at the grinding settings of 10-15, which has a relatively good coffee extraction effect.
If you use a single-cup filter, you need to manually control the amount of beans or reset the grinding amount to ensure that the amount of powder is about 13g (about 10 seconds)
NOTE: Baking degree and freshness of coffee beans will affect the coffee taste, you may need to fine-tune the grinding setting.
-
Take out the funnel, tap the funnel on the desktop, and add the coffee powder in the filter.
-
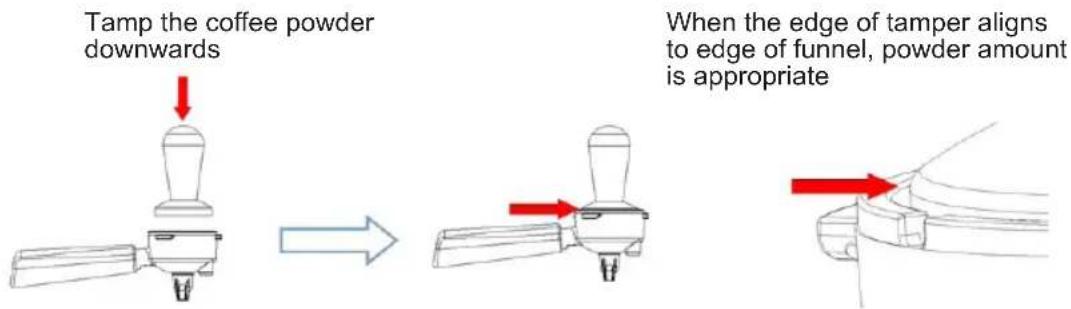
Use the coffee tamper and apply it with a force of about 12.5kg to compact the coffee powder.
text_image
Tamp the coffee powder downwards When the edge of tamper aligns to edge of funnel, powder amount is appropriate- Turn the funnel counterclockwise into the funnel bracket, and select the corresponding SINGLE or DOUBLE button according to the filter size.
NOTES:
- When the bean box is not installed, the indicator of Grind button "∅" will illuminate in red solidly.
- When the grinding function cannot be used normally, the indicator of Grind button "∅" will flash in red with three beeps can be heard.
- When the grinder works continuously for 3 minutes and the intermediate rest time is less than 6 minutes, the machine will limit the use of grinding function. After the rest time reaches 6 minutes, the machine will automatically release the limitation and the grinder can resume to work again.
- When the grinder is limited to use, press the GRIND button " ", the buzzer will sound one time, and the indicator of Grind button " will flash in red.
Grinding time adjustment: You can set the grinding time as per your need. Press & hold the GRIND button "∅", the indicator of Grind button "∅" will flash quickly and the grinder will start working. When it runs to the time you want, release the Grind button "∅", the buzzer will sound, the machine will record the time. Next time you grind, the grinder will run for the set time. The machine could only record the grinding time over 6 seconds. If the grinding time is less than 6 seconds, the machine cannot record it.
NOTE: Hold and press Power button "💡" and Grind button "💡" at the same time until one the buzzer sounds once, and you can restore the grinder to factory setting.
III. Customized setting for coffee-extracting temperature
This machine has a PID control function, which can monitor the heating block for heating water, so that the coffee can be extracted at a temperature of 92^ C. You can adjust the coffee-extracting temperature, and the adjustable temperature ranges between 88-96°C. 2^ C can be changed each time, which can meet different taste requirements.
-The bitterness will be increased and the acidity will be decreased when the temperautre is higher. -The bitterness will be decreased and the acidity will be increased when the temperautre is lower.
To enter the mode for setting the coffee-extracting temperature
Hold and press the Power button “☐” and the Single-cup button “☐” at the same time for 4 seconds, the machine will beep and the indicator of Power button “☐” will start to flash.
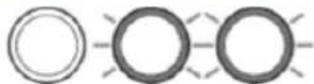
Definition of temperature indication:
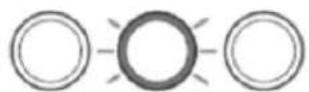
Grind Single cup Double cup
Default setting:92°C

Grind Single cup Double cup
2°C will be decreased after every press of "Grind" button, 2°C will be increased after every press of "Double cup" button.

Grind Single cup Double cup Temperature: 94°C

Grind Single cup Double cup Temperature: 96°C

Grind Single cup Double cup Temperature: 90°C

Grind Single cup Double cup Temperature: 88°C
NOTE: The indicator of Power button “⏻” will continue to flash, indicating that it is in customized setting mode. IMPORTANT: After entering the customized setting mode, the appliance will exit from the mode and return to the standby state if no button is pressed within 1 minute.
IV. Restore to factory settings
In the case of wrong settings, the user can press and hold the four buttons of POWER, GRIND, SINGLE and DOUBLE at the same time. The machine will beep and all the indicators will flash together 3 times. Then the machine will return to the factory settings.
V. Tool box and cleaning accessories
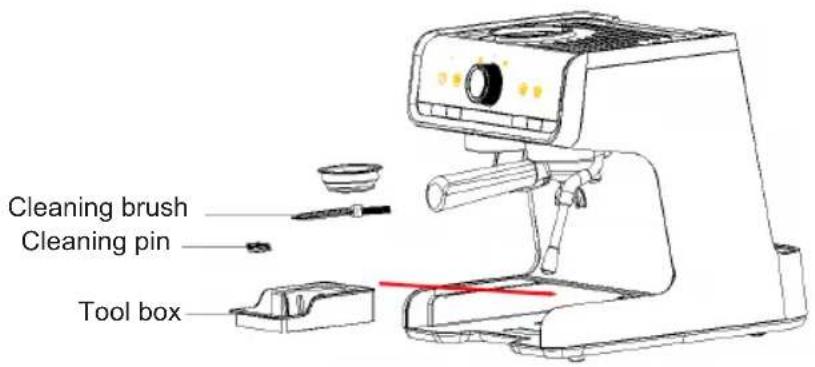
The machine is equipped with a tool box which is used for storing cleaning pin and cleaning brush. Single-cup filter and double-cup filter can be stored in the tool box as well. The tool box is placed at the left lower part of appliance, where you can pull it out when you remove drip tray from the machine (Fig. 6).
text_image
Cleaning brush Cleaning pin Tool boxFig.6
Cleaning pin
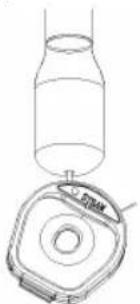
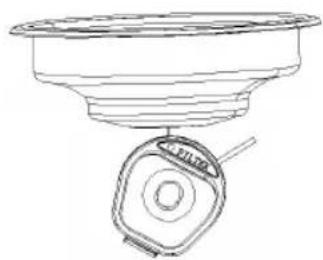
The cleaning pin is used for cleaning steam spout and filters. The thicker pin is for cleaning steam tube (Fig. 7), and thinner one is for filters (Fig.8).
Clean the steam tube with thicker pin
natural_image
Technical line drawing of a bottle and a mechanical component (no text or symbols)Clean the filters with thinner pin
natural_image
Technical line drawing of a mechanical component with a flanged top and central housing (no text or symbols)Fig.7 Fig.8
Cleaning brush
The cleaning brush is used for cleaning the grinding system. Following "V Clean the grinder", after taking out bean box and grinding wheel, you can use the cleaning brush to clean the grinder chamber and the powder channel.
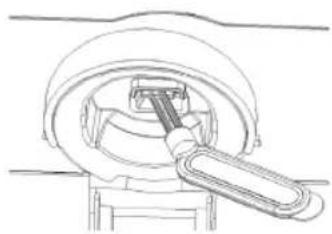
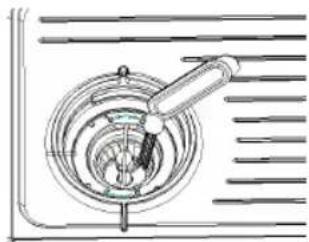
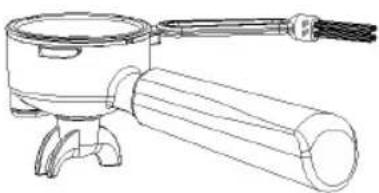
Clean the anti-static device and coffee power outlet (if coffee powder coming out slower than usual or coffee powder floats, clean the anti-static device and the coffee powder outlet with attached cleaning brush as Fig.9)
Clean the grinder chamber and the powder channel with attached cleaning brush as Fig.10.
natural_image
Technical line drawing of a mechanical assembly with a handle and central component (no text or symbols)Fig.9
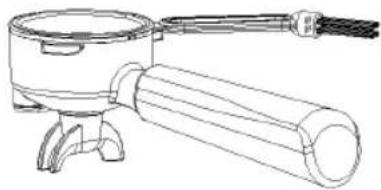
The rear end of cleaning brush could be used to detach filter from funnel as Fig.11
natural_image
Technical line drawing of a mechanical component with concentric rings and a handle (no text or symbols)Fig.10
natural_image
Line drawing of a mechanical device with a cylindrical shaft and base mount (no text or symbols)Fig.11
VI. Clean the grinder
The grinder may be influenced by coffee beans and some other factors during operation to make the powder outlet channel be blocked. Please clean the powder outlet channel in time when the following conditions occur:
- Clean the powder outlet and grinder at least once every two weeks.
- When there's reduction in powder amount, please clean the powder passage and grinding wheel.
- When the coffee grinder is used to grind fine coffee powder, please clean the powder channel in time.
- The machine is equipped with an anti-static system which could prevent coffee powder from spreading outside in grinding. When coffee powder floats out from funnel, please use the cleaning brush to clean the the powder entrance area in time.
VII. Clean the grinder
NOTE: When cleaning the grinder, please make sure there are no beans in bean box, and when the GRIND button "Z" is pressed, the grinder can work properly and no coffee powder flows out from powder outlet.
- Rotate the bean box counterclockwise to remove the bean box.
- Turn the internal grinding wheel counterclockwise and take it out. Use the attached cleaning brush to clean the grinding wheel and remove the coffee powder in the gears. Please note that the grinding wheel cannot be directly rinsed with water.
- Use the attached cleaning brush to clean the grinding chamber and the powder channel.
- Do not install the grinding wheel at this time, re-install the empty bean box, press the GRIND button "∅", let the grinder run to sweep out the powder residue in the grinding chamber. (If powder inside is not removed completely, please repeat step 3 and 4)
- Remove the bean box counterclockwise and install the grinding wheel well in position. Cleaning is completed.
Descaling
This product has a descaling reminder function and a descaling program, which needs your operation as following steps. Descaling process takes about 10 minutes.
NOTE: When starting the descaling program, please make sure:
- Ensure that there is at least 1 liter of water in the water tank.
- Empty the drip tray and install it in place.
- Turn on the machine and make it stay in standby mode.
- Place double-cup filter into the funnel.
- Turn the funnel into the funnel bracket.
- You can exit the cleaning function at any time by pressing the Power button "
- When the cleaning starts, the indicator of Power button "☐" and the descaling indicator flash. And they will keep flashing during the whole cleaning process.
- If the descaling does not start within 1 minute, the appliance will exit from the descaling cycle and return to standby mode.
VIII. Descaling instructions
It is recommended to descale every 4-6 months.
Descaling can be selected:
A. Coffee machine descaling tablets
B. Descale liquid
C. White vinegar and warm water
Descaling cycle
The descaling cycle takes about 10 minutes.
NOTE: After the descaling reminder starts or before the user starts the descaling program, please complete the following descaling preparations before running the descaling program!
Descaling preparation
Add the solution to the water tank (choose one of three methods)
A. Fill the water tank with 1 liter of water. Add the descaling tablets and wait for the descaling tablets to dissolve.
B. Add half a cup of liquid descaling agent into the water tank, then add 1-liter warm water to allow the solution to mix thoroughly.
C. Add 1.5 scoops of white vinegar into the water tank, then add 1-liter warm water to allow the solution to mix thoroughly.
Insert the water tank into place.
text_image
MIL-1 MIL-2 MIL-3 MIL-4 MIL-5 MIL-6 MIL-7 MIL-8 MIL-9 MIL-10 MIL-11 MIL-12 MIL-13 MIL-14 MIL-15 MIL-16 MIL-17 MIL-18 MIL-19 MIL-20 MIL-21 MIL-22 MIL-23 MIL-24 MIL-25 MIL-26 MIL-27 MIL-28 MIL-29 MIL-30 MIL-31 MIL-32 MIL-33 MIL-34 MIL-35 MIL-36 MIL-37 MIL-38 MIL-39 MIL-40 MIL-41 MIL-42 MIL-43 MIL-44 MIL-45 MIL-46 MIL-47 MIL-48 MIL-49 MIL-50 MIL-51 MIL-52 MIL-53 MIL-54 MIL-55 MIL-56 MIL-57 MIL-58 MIL-59 MIL-60 MIL-61 MIL-62 MIL-63 MIL-64 MIL-65 MIL-66 MIL-67 MIL-68 MIL-69 MIL-70 MIL-71 MIL-72 MIL-73 MIL-74 MIL-75 MIL-76 MIL-77 MIL-78 MIL-79 MIL-80 MIL-81 MIL-82 MIL-83 MIL-84 MIL-85 MIL-86 MIL-87 MIL-88 MIL-89 MIL-90 MIL-91 MIL-92 MIL-93 MIL-94 MIL-95 MIL-96 MIL-97 MIL-98 MIL-99 MIL-100Place a container
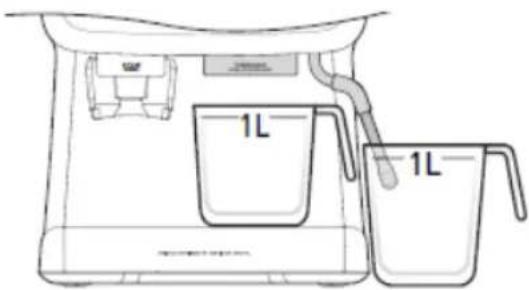
Place a 1 liter of container under the brewing head and another 1 liter of container under the steam tube.
text_image
1L 1LAfter completing the above steps, you can start the cleaning process as following:
-
When the system detects that the flow amount of the whole machine reaches 1.5 liters, the descaling function will start and the machine will automatically enter the descaling program.
-
In standby mode, hold and press the Power button "⏻" and Double-cup button "⏻" for 5 seconds, the machine will start the descaling process. When the indicator of Power button "⏻ turns on and the descaling indicator flashes quickly, follow the steps as below.
Step 1: Start the descaling cycle
Turn the knob to " 🔍" position.
The descaling indicator turns to flash slowly, the pump starts to work, the hot water dispenses from the brewing head and steam tube, and the pump will make different noises after 2 minutes. When the hot water stops coming out from brewing head and steam tube, turn the knob to “●” position.
The indicator of "☐" button lights solidly while the clean indicator flashes.
Please perform the step 2.
Step 2: Prepare to clean up
Important: A maximum of 5 minutes is allowed to take to complete the following steps before exiting from the descaling cycle.
The steam tube and brewing head need to be cleaned with fresh water for removing the descaling solution.
Clean the water tank
Fill the water tank with water
Empty the containers
Step 3: Start cleanup
Turn the knob to the "△" position,
At that time, the indicator of Power button "⏻" and the descaling indicator flash.
The pump starts to work, the hot water will dispense from the brewing head and steam tube, and the pump will make different noises after 2 minutes.
When hot water stops coming out from brewing head and steam tube, the descaling is complete.
Descaling cycle completed
The indicator stops illuminating and knob indicator “●” starts flashing, which means the machine completes this step.
Turn the knob to steam "●", position, the indicators of all buttons will illuminate.
When the descaling cycle is finished, the buzzer will sound and the indicator of Power button "will stop flashing.
Turn the knob back to the vertical position
The machine returns to standby mode.
IX. Water shortage reminder
When the water tank is short of water, the machine will remind the user to refill the water tank with water. At this time, the indicators of Power button, Grind button, Single-cup button and Double-cup button flash flash, accompanied with a buzzer sound.
NOTES:
-
The reminder will appear when coffee powder is too fine and the machine cannot brew coffee.
-
The buzzer sounds only 5 times and will not sound for a long time.
-
If there is no operation one minute after reminding, the machine will enter into standby mode.
CLEANING AND MAINTENANCE
WARNING: Please unplug before cleaning to allow the coffee machine to cool down sufficiently to prevent scalding. Do not immerse the coffee machine or the power cord plug in water or other liquids to avoid danger.
- After each use, put all detachable parts into water for cleaning, add cleaning liquid if necessary, and then rinse with clean water.
- Often use a moisture-proof sponge to scrub the external surface of the coffee machine to remove dirt.
NOTE: Do not use alcohol or detergent, and do not immerse the machine in water for cleaning. - Turn clockwise to remove the metal funnel to remove the coffee grounds, then you can use a detergent to clean the funnel and metal filter accessories, but you must rinse them with clean water after.
- After cleaning all the detachable parts, wipe all parts to dry.
NOTE: The detachable water tank cannot be washed in the dishwasher.
TROUBLESHOOTING
| Malfunction Reason Solution | ||
| No display Check that the plug is in place and Power button is pressed. | Insert the power plug, make sure you press the Power button. | |
| The indicator on the front panel of the machine is red | The bean box is not installed. | Install bean box |
| There are water marks on the bottom of the machine | The water tank or the water tray is not installed in place. The drip tray is full | Make sure that the water tank and the drip tray are installed in place, and the drip tray is empty.If the issue is not solved, please don't disassemble the machine on your own, but send it to local authorized maintenance center for reparation. |
| You will hear a ticking sound after starting the machine and a hissing sound after the coffee is dispensed. | This is a normal phenomenon and the sound is produced by the normal operation of the pressure control valve. | |
| No coffee comes out from funnel, or coffee does not come out from funnel smoothly, or the funnel cannot be installed in funnel bracket properly. | Excessive amount of coffee powder, too fine coffee powder or excessive pressure | The amount of powder should not exceed the standard amount. Adjust the grinding setting of the grinder appropriately until it is suitable. It should not be pressed repeatedly with excessive force when pressing the powder. |
| Coffee without crema The coffee beans are damp or the coffee powder is too coarse. | Choose fresh coffee beans and powder with moderate grinding thickness to make coffee. | |
| No steam The steam function is not preheated;The steam nozzle is blocked. | The machine can only produce steam after the machine is preheated in steam mode; the machine needs to be descaled and use a cleaning needle to clean the steam nozzle. | |
| Can't make coffee or hot water immediately after the steam comes out and the machine will automatically pump water. | After steaming is completed, the pressure needs to be released to reduce the temperature. At this time, other operations cannot be performed. The water pumping is used for cooling down the heating element quickly. | It takes 20-30s to release the pressure and cool down. After the pressure is released and the cooling down is finished, the indicators on the control panel will work properly, then you can brew coffee and hot water normally. |
If you do not find the cause of the problem, please do not disassemble the machine and you should contact your local maintenance agency.
Avertissement: pressure
natural_image
Line drawing of a coffee maker with handle, coffee pan, and stand (no text or labels)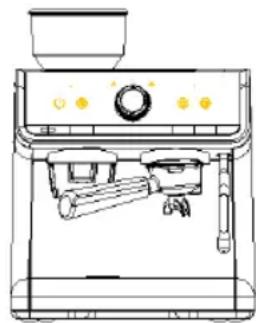
natural_image
Line drawing of a standard espresso machine with control panel and lever (no text or symbols)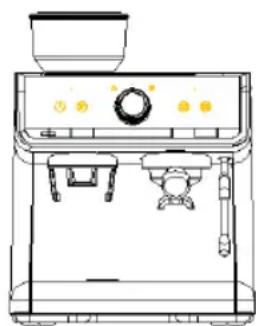
natural_image
Line drawing of a standard 3D coffee machine with control panel and side arm (no text or symbols)NO.1
NO 2
NO..3
natural_image
Technical line drawing of a mechanical assembly with no visible text or symbolsnatural_image
Technical line drawing of a mechanical component with no visible text or symbolsnatural_image
Simple line drawing of a cup on a stand with a red circle highlighting the base (no text or symbols)Fig.4
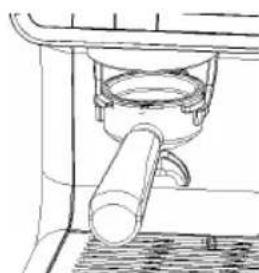
natural_image
Technical line drawing of a mechanical component with a cylindrical shaft and circular housing (no text or symbols)Fig.5
Grind Single cup Double cup
Default setting:92°C

Grind Single cup Double cup
2°C will be decreased after every press of "Grind" button, 2°C will be increased after every press of "Double cup" button.

Grind Single cup Double cup
Temperature: 94°C

Grind Single cup Double cup
Temperature: 96°C

Grind Single cup Double cup
Temperature: 90°C

Grind Single cup Double cup
Temperature: 88°C
natural_image
Simple line drawing of a bottle and a container with a lid, no text or symbols present.natural_image
Technical line drawing of a mechanical component with a flanged top and central base (no text or symbols)Fig.7 Fig.8
Brosse de nettoyage
natural_image
Technical line drawing of a mechanical assembly with a handle and housing (no text or symbols)Fig.9
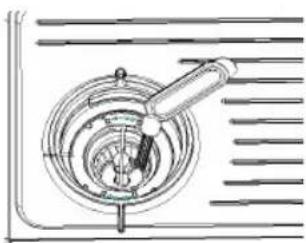
natural_image
Technical line drawing of a mechanical component with concentric rings and a handle (no text or symbols)Fig.10
natural_image
Line drawing of a mechanical device with a cylindrical body and handle (no text or symbols)Fig.11
natural_image
Line drawing of a coffee maker with a hand mixer and control panel (no text or symbols)NO 1
natural_image
Line drawing of a standard espresso machine with control panel and lever (no text or symbols)NO 2
natural_image
Line drawing of a standard coffee maker with control panel and side table (no text or labels)NO 3
natural_image
Technical line drawing of a mechanical assembly with no visible text or symbolsnatural_image
Line drawing of a cylindrical object with a base and two small protrusions, placed on a surface (no text or symbols)natural_image
Simple line drawing of a cup on a stand (no text or symbols)Fig.4
natural_image
Technical line drawing of a mechanical component with a cylindrical shaft and circular housing (no text or symbols)Fig.5
Grind Single cup Double cup
Default setting:92°C

Grind Single cup Double cup
2°C will be decreased after every press of "Grind" button, 2°C
will be increased after every press of "Double cup" button.

Grind Single cup Double cup
Temperature: 94°C

Grind Single cup Double cup
Temperature: 96°C

Grind Single cup Double cup
Temperature: 90°C

Grind Single cup Double cup
Temperature: 88°C
natural_image
Simple line drawing of a bottle and a square container with a handle, no text or symbols present.natural_image
Technical line drawing of a mechanical component with a flanged top and central base (no text or symbols)Fig.7 Fig.8
Escova de limpeza
natural_image
Technical line drawing of a mechanical assembly with a handle and housing (no text or symbols)Fig.9
natural_image
Technical line drawing of a mechanical component with concentric rings and a handle (no text or symbols)Fig.10
natural_image
Line drawing of a mechanical device with a cylindrical body and handle (no text or symbols)Fig.11
VI. Limpe o moedor
text_image
Technical diagram showing two views of a device with labeled parts and directional arrows indicating flow or movement.natural_image
Simple circular diagram with a central diagonal line and two curved arrows pointing outward (no text or symbols)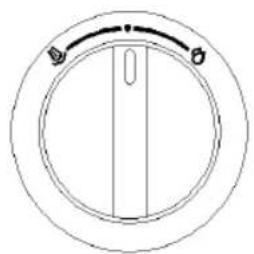
natural_image
Simple line drawing of a circular mechanical component with a central vertical slot and two small protrusions on the top (no text or symbols)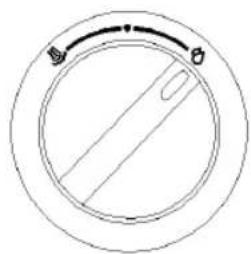
natural_image
Simple circular diagram with a diagonal line and two curved arrows pointing outward (no text or symbols)natural_image
Line drawing of a coffee maker with handle, coffee pan, and stand (no text or labels)NO 1
natural_image
Line drawing of a coffee maker with control panel and side arm (no text or symbols)NO 2
natural_image
Line drawing of a standard coffee maker with control panel and side arm (no text or symbols)NO 3
natural_image
Technical diagram of a mechanical assembly with a cylindrical component inserted into a housing (no text or symbols visible)natural_image
Technical line drawing of a mechanical component with a cylindrical top and base, no visible text or symbolsnatural_image
Simple line drawing of a cup on a tray with a red circular mark at the base (no text or symbols)Abb.4
natural_image
Technical line drawing of a mechanical component with a pipe and base (no text or symbols)Abb.5
Grind Single cup Double cup
Default setting:92°C

Grind Single cup Double cup
2°C will be decreased after every press of "Grind" button, 2°C will be increased after every press of "Double cup" button.
Grind Single cup Double cup
Temperature: 94°C

Grind Single cup Double cup
Temperature: 96°C

Grind Single cup Double cup
Temperature: 90°C

Grind Single cup Double cup
Temperature: 88°C
natural_image
Simple line drawing of a bottle and a square container with a lid, no text or symbols present.natural_image
Technical line drawing of a mechanical component with a flanged top and central base (no text or symbols)Abb.7 Abb.8
Reinigungsbürste
natural_image
Technical line drawing of a mechanical assembly with a curved component and lever (no text or symbols)Abb.9
natural_image
Technical line drawing of a mechanical component with concentric rings and a handle (no text or symbols)Abb.10

natural_image
Line drawing of a mechanical device with a cylindrical body and handle (no text or symbols)Abb.11
natural_image
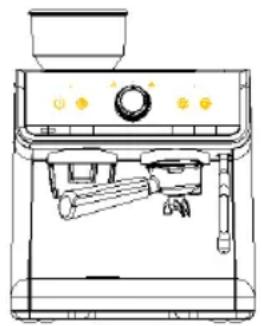
Line drawing of a coffee maker with handle, stand, and comb (no text or labels)NO 1
natural_image
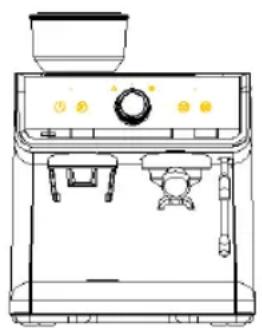
Line drawing of a monomethane<|im_start|> Puerto Rico microwave oven (no text or labels)NO 2
natural_image
Line drawing of a standard masonist machine with control panel and side table (no text or symbols)NO 3
natural_image
Technical line drawing of a mechanical assembly with no visible text or symbolsnatural_image
Technical line drawing of a mechanical component with a cylindrical top and base (no text or symbols)natural_image
Simple line drawing of a cup on a base with a red circle highlighting the cup (no text or symbols)Fig.4
natural_image
Simple line drawing of a mechanical component with a cylindrical shaft and circular housing (no text or symbols)Fig.5
Grind Single cup Double cup
Default setting:92°C

Grind Single cup Double cup
2°C will be decreased after every press of "Grind" button, 2°C will be increased after every press of "Double cup" button.

Grind Single cup Double cup
Temperature: 94°C

Grind Single cup Double cup
Temperature: 96°C

Grind Single cup Double cup
Temperature: 90°C

Grind Single cup Double cup
Temperature: 88°C
natural_image
Simple line drawing of a bottle and a square container with a handle (no text or symbols)natural_image
Technical line drawing of a mechanical component with a flanged top and central base (no text or symbols)Fig.7 Fig.8
natural_image
Technical line drawing of a mechanical component with a handle and central shaft (no text or symbols)Fig.9
natural_image
Diagram of a mechanical device with concentric rings and a handle, no visible text or symbolsFig.10
natural_image
Line drawing of a mechanical device with a cylindrical body and handle (no text or symbols)Fig.11
VI. Pulire la smerigliatrice
DECLARATION OF CONFORMITY
This device complies with Low Voltage Directive 2014/35/EC, Electromagnetic Compatibility Directive 2014/30/EU, Directive 2015/863/EU on the restriction of the use of certain hazardous substances in electrical and electronic equipment and Directive 2009/125/EC on the eco-design requirements applicable to energy-related products.
DÉCLARATION DE CONFORMITÉ
This symbol means that in case you wish to dispose of the product once its working life has ended, take it to an authorised waste agent for the selective collection of waste electrical and electronic equipment (WEEE).

Imported by:
Sanysan Appliances S.L, NIF: B98753056, C/ Barcas 2, 2 46002 Valencia, Spain Product made in P.R.C. – Designed by SOGO based on the European Quality Standards Customer Service: www.sogosat.com / sogosat@sogosat.com / 0034 902 222 161