
CD1100B - Dishwarmer drawer AEG - Free user manual and instructions
Find the device manual for free CD1100B AEG in PDF.

| Product type | Warming drawer |
| Brand | AEG |
| Model | CD1100B |
| Maximum capacity | 15 kg |
| Temperature range | 30 to 85 °C (in 5 °C increments) |
| Drawer height | 14 cm (for low-temperature cooking) |
| Functions | Proofing/fermentation, defrosting, glass warming, keep warm, dehydrating, low-temperature cooking |
| Programming | End cooking (30 min to 24 h), delayed start (1 h to 24 h) |
| Sabbath mode | Yes (80 h at 45 °C, keys deactivated) |
| Power supply | 230 V ~ 50 Hz |
| Standby power consumption (display on) | 0.8 W |
| Power consumption in off mode | 0.3 W |
| Safety | Auto shut-off after 10 h if temperature >65 °C, child lock, glass surface |
| Cleaning | Damp cloth, do not use steam cleaner or abrasive products |
| Included accessories | Non-slip base, support grid (depending on model) |
| Repairability | Original parts, authorized after-sales service |
Frequently Asked Questions - CD1100B AEG
User questions about CD1100B AEG
0 question about this device. Answer the ones you know or ask your own.
Ask a new question about this device
Download the instructions for your Dishwarmer drawer in PDF format for free! Find your manual CD1100B - AEG and take your electronic device back in hand. On this page are published all the documents necessary for the use of your device. CD1100B by AEG.
USER MANUAL CD1100B AEG
EN User manual | Warming Drawer
Welcome to AEG! Thank you for choosing our appliance.

Get usage advice, trouble shooter, service and repair information at:
aeg.com/support
Subject to change without notice.
CONTENTS
- SAFETY INFORMATION......2
- SAFETY INSTRUCTIONS .... 4
- PRODUCT DESCRIPTION....6
- CONTROL PANEL....6
- BEFORE FIRST USE ....7
- DAILY USE 7
- TIME FUNCTIONS ....7
- WARMING FUNCTIONS ....8
- CARE AND CLEANING....12
- TROUBLESHOOTING....13
- ENVIRONMENTAL CONCERN 13
- ENERGY EFFICIENCY....13
1. SAFETY INFORMATION

WARNING!
This appliance is intended to be used in household and similar applications such as:
- staff kitchen areas in shops, offices and other working environments;
- farm houses;
- by clients in hotels, motels and other residential type environments;
- bed and breakfast type environments
Before the installation and use of the appliance, carefully read the supplied instructions. The manufacturer is not responsible if an incorrect installation and use causes injuries and damages. Always keep the instructions with the appliance for future reference.
1.1 Children and vulnerable people safety
Risk of suffocation, injury or permanent disability.
- This appliance can be used by children aged from 8 years and above and persons with reduced physical, sensory or mental capabilities or lack of experience and knowledge if they have been given supervision or instruction concerning use of the appliance in a safe way and understand the hazards involved.
- Do not let children play with the appliance.
-
Keep all packaging away from children
-
Keep children and pets away from the appliance when it operates or when it cools down. Accessible parts are hot.
- Cleaning and user maintenance shall not be made by children without supervision.
- Children of less than 3 years should be kept away unless continuously supervised.
1.2 General Safety
- Only a qualified person must install this appliance and re-place the cable.
- During use, the appliance becomes hot. Care should be taken to avoid touching heating elements inside the device. Always use oven gloves to insert or remove accessories or oven proof cookware.
- Before maintenance cut the power supply.
- Do not use steam cleaners to clean the appliance.
- Do not use harsh abrasive cleaners or sharp metal scrapers to clean the glass door since they can scratch the surface, which may result in shattering of the glass.
- Do not let children play with the appliance.
- Depending on the temperature and operating time selected, the temperature inside the appliance may reach 85°C. When taking crockery out of the crockery warmer, protect your hands using oven gloves or a tea towel.
- Do not sit or hang on the drawer – the telescopic runners would be damaged. The maximum load capacity of the drawer is 15 kg.
- Do not store synthetic containers or flammable objects inside the crockery warmer. When you switch on the appliance such containers and objects may melt or catch fire. Fire hazard!
- Do not use the appliance as a space heater. The high temperatures reached could cause flammable objects close to the appliance to catch fire.
- When you stop using the appliance at the end of its working life, disconnect it from the power supply and render the electrical cable unusable so that it is not a hazard to children, for example.
2. SAFETY INSTRUCTIONS
2.1 Installation

WARNING!
Only a qualified person must install this appliance.
Remove all the packaging.
- Do not install or use a damaged appliance.
- Obey the installation instruction supplied with the appliance.
• Always be careful when you move the appliance. Always wear safety gloves. - Do not pull the appliance by the handle (if present).
- The kitchen cabinet and the recess must have suitable dimensions.
- Keep the minimum distance from the other appliances and units.
- Make sure that the appliance is installed below and adjacent safe structures.
- Parts of the appliance carry current. Close the appliance with furniture to prevent touching the dangerous parts.
- The sides of the appliance must stay adjacent to appliances or to units with the same height.
2.2 Electrical connection

WARNING!
Risk of injury, burns and electrical shock or explosion.
- All the electrical connections should be made by a qualified electrician.
- The appliance must be earthed.
- Make sure that the electrical information on the rating plate agrees with the power supply. If not, contact an electrician.
- Always use a correctly installed shock-proof socket.
-
Do not use a multi-plug adapters and extension cables.
-
Make sure not to cause damage to the mains plug and to the mains cable. Should the mains cable need to be replaced, this must be carried out by our Authorised Service Centre.
- The shock protection of live and insulated parts must be fastened in such a way that it cannot be removed without tools.
- Connect the mains plug to the mains socket only at the end of the installation. Make sure that there is access to the mains plug after the installation.
- If the mains socket is loose, do not connect the mains plug.
- Do not pull the mains cable to disconnect the appliance. Always pull the mains plug.
- Use only correct isolation devices: line protecting cut-outs, fuses (screw type fuses removed from the holder), earth leakage trips and contactors.
- The electrical installation must have an isolation device which lets you disconnect the appliance from the mains at all poles. The isolation device must have a contact opening width of minimum 3 mm.
- This appliance complies with E.E.C. directives.
- Connect the mains plug to the mains socket only at the end of the installation. Make sure that there is access to the mains plug after the installation.
- If the mains socket is loose, do not connect the mains plug.
2.3 Use

WARNING!
Risk of injury, fire, or damage to the appliance.
- Use this appliance in a household only.
- Do not change the specification of this appliance.
- Make sure that the ventilation openings are not blocked.
- Do not let the appliance stay unattended during operation.
- Deactivate the appliance after each use.
- Do not operate the appliance with wet hands or when it has contact with water.
- Do not use the appliance as a work surface or as a storage surface.
- Open the appliance door carefully. The use of ingredients with alcohol cause a mixture of alcohol and air.
- Do not let sparks or open flames to come in contact with the appliance when you open the door. Do not put flammable products or items that are wet with flammable products in, near or on the appliance.
- Do not put food in direct contact with glass.
2.4 Care and cleaning

WARNING!
Risk of injury, fire, or damage to the appliance.
- Do not use harsh abrasive cleaners or metal scrapers/scourers to clean the appliance since they can scratch the surface.
- Do not use steam cleaners to clean the appliance.
- Do not use high pressure or steam jet cleaning appliances. The steam may affect electrical components and cause a short circuit. The steam pressure may also cause damage to the appliance's surfaces and components in the long time
2.5 Disposal

WARNING!
Risk of damage to the appliance.
- Disconnect the appliance from the mains supply.
- Cut off the mains cable and discard it.
- Disconnect the appliance from the mains supply.
- Cut off the mains cable and discard it.
2.6 Service
• To repair the appliance contact an Authorised Service Centre.
- Use original spare parts only.
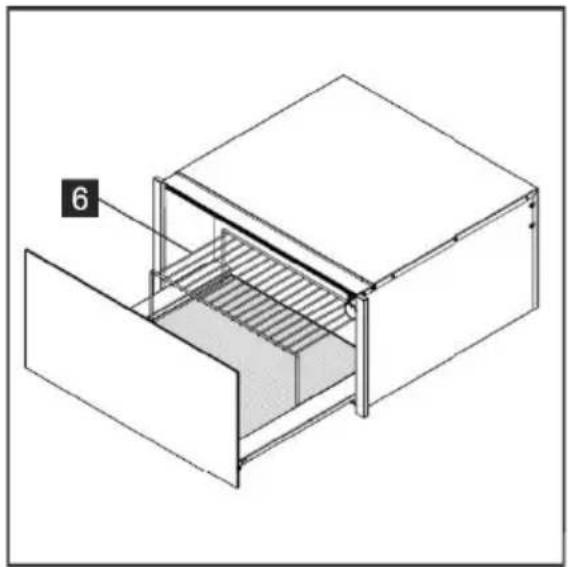
3. PRODUCT DESCRIPTION
3.1 General overview

1 Control panel.
2 Non-slip base.
3 Glass (on models selected).
natural_image
Isometric line drawing of a modular kitchen or storage unit with a door and slatted interior (no text or symbols)4 Pilot Light (on models selected).
5 Front panel with push-push mechanism or handle
6 Support rack (depending on the model).
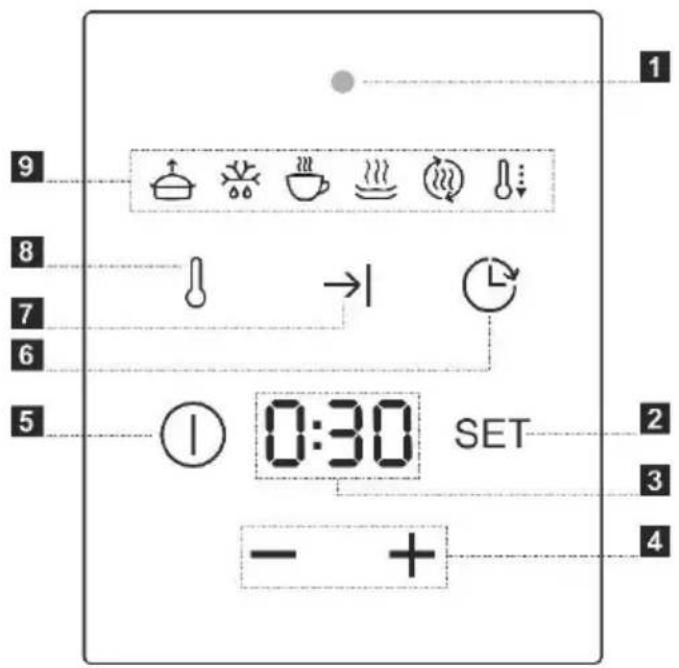
4. CONTROL PANEL
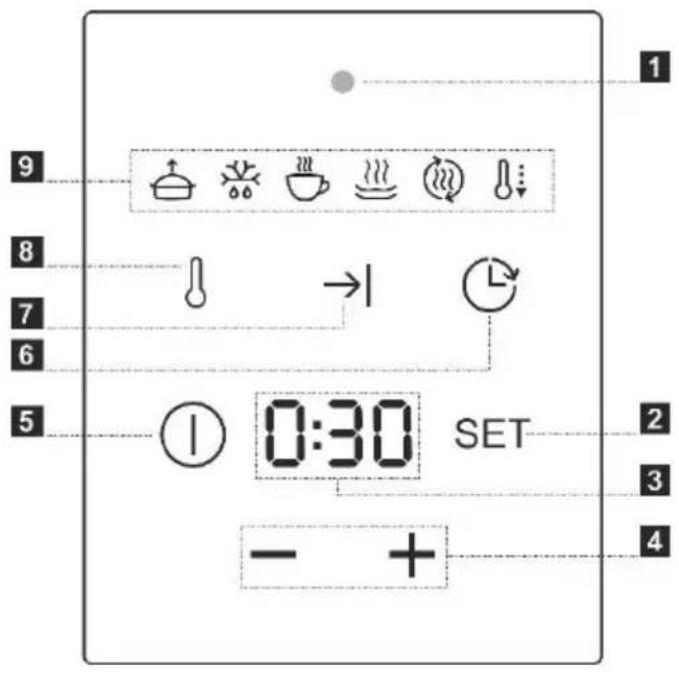
4.1 Electronic programmer
1 Pilot light.
2 Menu settings. To adjust temperature, end of cooking and delay start.
3 Display.
4 Increase/decrease the value selected.
5 ON/OFF button.
To turn on or off the drawer.
6 Delay start icon.
7 End of cooking icon.
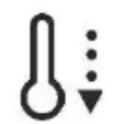
8 Temperature icon (30-85°C).
9 Function icon.
5. BEFORE FIRST USE
5.1 Initial Cleaning
Remove all interior parts, clean gently with a soaked warm cloth and heat it up for 2 hours at 85°C. Ensure the room is well ventilated.
i Refer to "Care and cleaning" chapter.
Clean the appliance before first use.
6. DAILY USE
6.1 Using the warming drawer
To use the warming drawer, proceed as follows:
- Place the food over a plate or crockery.
- Leave the ventilation slots free. The warm air should fully escape from the slots. This would allow a perfect heat distribution.
- Turn on the drawer and select function/temperature and duration. Is it possible to have a delay till 24 hours.
- Close the drawer.
- Be careful not to use too much force when closing the drawer, since it may open up again.
6.2 Power on
Touch ⚠ a single beep is emitted.
6.3 Temperature setting
To set the temperature, press SET and — + The temperature can be adjusted between 30° and 85°C with steps of 5°C.
7. TIME FUNCTIONS
7.1 End of cooking setting
Once the temperature is set the end of cooking time can be selected pressing the
SET till the icon → we will turns on. It is possible to set the end of cooking time from 30 minutes to 24 hours with steps of 15 minutes. At the end of the timer the drawer turns off automatically.
In case of temperature selection above 65^ C the drawer will switch off after 10 hours for safety reasons.
7.2 Delay start setting
It is possible to set the delay start from 1 hour to 24 hours with steps of 1 hour.
When the appliance is switched on, the SET button is pressed and when the icon lights up, the start time can be set, using +-. At the end of the timer the drawer starts with the temperature selected automatically. The delay start can only be set when the appliance is switched on.
7.3 Changing parameters during heating
During the heating phase, the temperature and cooking time parameters can be changed by touching the SET button. When the corresponding icon lights up, the parameter can be changed.
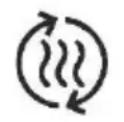
8. WARMING FUNCTIONS
| Symbol | °C | Function | Hints & tips |
 | 30°C35°C | Dough proving - Fermentation | Refer to paragraph 8.6 |
 | 40°C45°C | Defrosting | Refer to paragraph 8.6 |
 | 50°C55°C | Warming cups and glasses | - |
 | 60°C65°C | Warming plates - Dehydrating | Refer to paragraph 8.6 |
 | 70°C75°C | Keep warming | Cover the food |
 | 80°C85°C | Low temperature cooking (only for 14 cm high drawer) | Refer to paragraph 8.7 |
8.1 Heating time
Various factors affect heating times:
- The material and thickness of the crockery;
- Load size;
• How the crockery is arranged;
• Temperature setting; - Repeated opening and closing of the drawer. It is therefore not possible to give precise heating times.
As you use the warming drawer regularly, you will learn the best settings for your crockery.
Suggestions for the warming - dehydrating and keep warming functions:
Preheat the warming drawer for 15 minutes to ensure it is at the required internal temperature.
8.2 Start of heating
Heating begins 10 seconds after no actions are performed on the interface.
The operation led 1 lights up.
Note:
If no settings are made, the drawer automatically starts heating 10 seconds after switching on with the objective being the default values (30°C and 30 minutes).
8.3 Display during heating
When the delay function has been set, the icon lights up, the operation led starts flashing and the display shows the countdown to the start of the heating.
During heating phase the icon is on and the operation led 1 turns steady, while the display shows the temperature for the cooking.
8.4 Switching off
It is automatic at the end of the heating (three long beeps are emitted) or by touching Ⓘ
8.5 Sabbath mode
With this feature, the drawer will heat at 45^ (it cannot be modified) for 80 hours, during this phase all keys are disabled and the drawer will turn off automatically after 80 hours, or manually by pressing Ⓙ
To activate the Sabbath mode, turn on the drawer with the ON/OFF key and simultaneously touch SET until the display shows SAB
The function can only be set when the appliance is switched on.
8.6 Hints and tips
| Purpose | Food | Quantity | Function Symbol | Temperatures | Notes | Cooking time* |
| Dough proving | Flatbread | 500g |  | 30-35°C | Place the flatbread on silver paper. | 1,5 h |
| Fermentation | Yoghurt | Fat milk 1,5L Milk yoghurt 375g 9 glass bowls |  | 35°C | In a bowl, pour the milk and yoghurt, blend well with an immersion blender and pour it everything into glass bowls (max 9)Close them with the caps and place them inside the drawer. | 8 h |
| Dehydrating | Herbs | 200g rosemary, parsley, sage |  | 40-45°C | Use paper sheets in direct contact with the glass. | 24 h |
| Dehydrating | Tomatoes | 250g |  | 60-65°C | Use paper sheets in direct contact with the glass.Cut the tomatoes in two, add salt.Turn the tomatoes upside down every 3 hours. | 12-14 h |
| Dehydrating | Apple | 1 apple, 1⁄2 lemon, water | 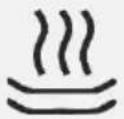 | 60-65°C | Use paper sheets in direct contact with the glass.Cut thin apple slices, leave them with water and lemon in a bowl for 5 minutes. | 8-10 h |
* cooking time varies depending on the cooking grade preferred
8.7 Low temperature cooking (only for 14 cm high drawer)
The setting is suitable for cooking at a low temperature and prolonging the cooking of fine cuts of browned beef, veal, pork and lamb. With an extended cooking time at a low temperature, the meat remains juicy and tender. It is recommended to use only fresh and quality meat. Do not use cuts over 6 cm in diameter. For larger cuts we recommend preparation in a combined oven or steamer. However, the cooking time depends on the size of the piece of meat.
Preparation:
The meat must be browned before cooking at low temperatures.
- Pre-heat the drawer with the dishes inside for 15 minutes.
- Heat some oil or butter in a pan and brown the meat over high heat.
- Ensure that the whole surface of the meat is roasted in the pan.
Recommended dishes
- Use suitable glass, porcelain or ceramic dishes.
- For best results, place the plate in the centre of the drawer.
The following searing duration refers to searing the meat in a pan with pre-heated butter or oil.
Reference times (only for 14cm high drawer)
| Food | Quantity | Roast gently before on a cooking pan | Cooking time* |
| Beef fillet steaks | 250g (medallion) | 3 minutes | 2/3 h |
| Beef fillet steaks | 500g (chateaubriand) | 6 minutes | 3/4 h |
| Roastbeef | 500g | 10 minutes | 3/4 h |
| Beef fillet | 500g(2 pieces: 250g + 250g) | 6 minutes | 3/4 h |
| Veal loin steaks | 250g (2cm height) | 3 minutes | 2/3 h |
| Venison Loin/Deer Loin | 500g | 12 minutes | 3/4 h |
| Lamb loin | 500g | 12 minutes | 3/4 h |
| Pork tenderloin (Filet) | 400g | 12 minutes | 5/6h |
| Trout | 400g | 2/3 minutes | 4/5 h |
* cooking time varies depending on the cooking grade preferred
With this cooking system, the meat is not as hot as traditionally cooked meat. If you want to keep the cooked meat warm, set the temperature back to 60^ C.
9. CARE AND CLEANING
Cleaning is the only maintenance activity that is generally required.

WARNING!
The warming drawer must be disconnected from the power supply before cleaning.
Unplug the device from the socket or isolate its power supply circuit. Do not use harsh or abrasive cleaning products, scouring pads/sponges or sharp objects, since this could cause stains or scratches.
Never use high pressure or steam jet cleaning appliances.
9.1 Appliance front and control panel
The warming drawer can be cleaned using just a damp cloth. If it is very dirty, add few drops of washing-up liquid to the water.
Wipe the surfaces dry using a dry cloth. For stainless-steel fronted warming drawers, special products for stainless-steel surfaces can be used.
These products prevent the build-up of dirt on such surfaces. Apply a thin layer of this product on the surface using a soft cloth.
On aluminium fronted warming drawers, use a delicate glass cleaning product and soft, lint-free cloth. Wipe horizontally without applying.
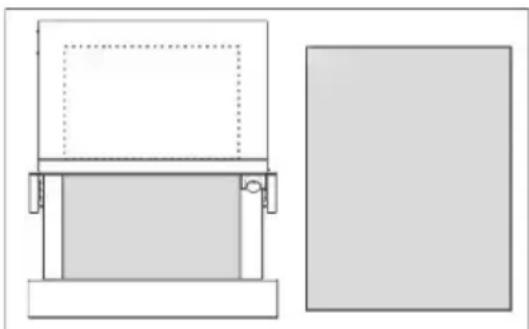
9.2 Interior of the warming drawer
Cleaning the interior of the warming drawer regularly using a damp cloth. If it is very dirty, add few drops of washing-up liquid to the water. Wipe the surfaces dry using a dry cloth. Avoid water entering the air circulation opening. Only use the warming drawer again when it is completely dry.
Glass removal
(on models selected)
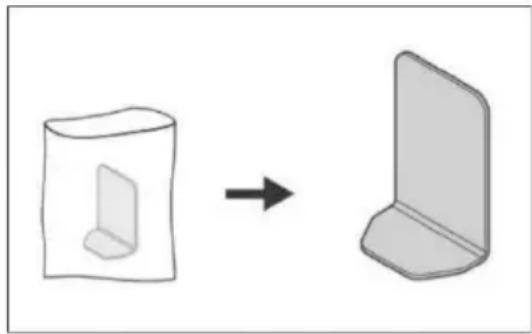
natural_image
Diagram showing a 3D object transforming into a 2D geometric shape, with no text or symbols present.
natural_image
Illustration of a hand holding a small object with an arrow pointing upward (no text or symbols)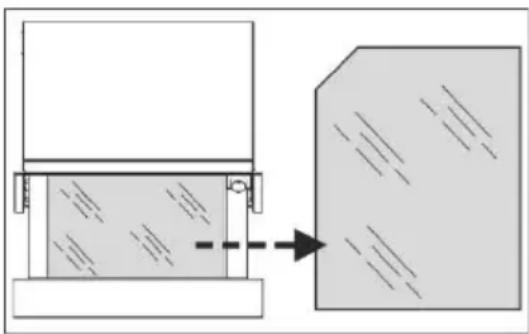
natural_image
Diagram showing a mechanical assembly with a piston and block, connected by an arrow indicating direction (no text or symbols present)Non-slip base
The non-slip surface mat can be removed to facilitate cleaning of the drawer.
The mat can be cleaned by hand using hot water with a few drops of washing-up liquid. Dry thoroughly.
The non-slip mat should only be repositioned when it is completely dry.
natural_image
Technical line drawing of a mechanical assembly with a rectangular block and a side view (no text or symbols)10. TROUBLESHOOTING

WARNING!
Any repairs must only be performed by a specialized technician.
Any repair performed by a person not authorized by the manufacturer is potentially dangerous. However, the following faults can be resolved by the user without calling Technical Assistance.
Before contacting Technical Assistance, check on the following:
- The crockery does not warm up sufficiently. Check whether:
- The appliance is on;
- The appropriate temperature has been selected;
- The air circulation orifices are not blocked by the crockery;
-
The crockery was left to warm up for sufficient time.
-
Heating time depends on several factors, such as, for example:
- The material and thickness of the crockery;
- Load size;
- How the crockery is arranged;
- The crockery does not heat up at all. Check whether:
- You can hear the noise of the fan if the fan is running, this means that the heating element is defective. If the fan is not running, this means that it is faulty.
- The fuse has blown or the circuit breaker has tripped.
• The crockery is too hot:
- The temperature selector is not working
- The on/off switch indicator light does not light up:
- The indicator light has blown.
11. ENVIRONMENTAL CONCERNS

Recycle materials with the following symbol.
Place the packaging in the corresponding containers for recycling.
Help protect the environment and human health and to recycle waste from electrical and electronic appliances.

Do not dispose of appliances marked with the following symbol with general household waste. Take the product to
your local recycling facility or contact your local council.
12. ENERGY EFFICIENCY
12.1 Product Information for power consumption
| Power consumption if off mode | 0.3 W |
| Power consumption in standby with display on | 0.8 W |
natural_image
Isometric line drawing of a modular storage unit with a lid and internal structure (no text or symbols)natural_image
Diagram showing a 3D object transforming into a 2D geometric shape, with no text or symbols present.
natural_image
Illustration of a hand holding a small object with an arrow pointing upward (no text or symbols)
natural_image
Diagram showing a mechanical assembly with a piston and block, connected by an arrow indicating direction (no text or symbols present)Antirutschauflage
natural_image
Technical line drawing of a mechanical assembly with a side view (no text or symbols)natural_image
Isometric line drawing of a modular storage unit with a lid and internal structure (no text or symbols)natural_image
Diagram showing a 3D object transforming into a 2D geometric shape, with no text or symbols present.
natural_image
Illustration of a hand holding a small object with an arrow pointing upward (no text or symbols)
natural_image
Diagram showing a mechanical assembly with a piston and block, connected by an arrow indicating direction (no text or symbols present)Base antidérapante
natural_image
Technical line drawing of a mechanical assembly with a side view (no text or symbols)10. RÉSOLUTION DES PROBLÈMES

ATTENTION !
natural_image
Isometric line drawing of a modular kitchen or storage unit with a door and slatted interior (no text or symbols)natural_image
Diagram showing a 3D object transforming into a 2D geometric shape, with no text or symbols present.
natural_image
Illustration of a hand holding a small object with an arrow pointing upward (no text or symbols)
natural_image
Diagram showing a mechanical assembly with a piston and block, connected by an arrow indicating direction (no text or symbols present)Base antiscivolo
natural_image
Technical line drawing of a mechanical assembly with a rectangular block and a side view (no text or symbols)natural_image
Isometric line drawing of a modular storage unit with a door and slatted base (no text or symbols)natural_image
Diagram showing a 3D object transforming into a 2D geometric shape, with no text or symbols present.
natural_image
Illustration of a hand holding a small object with an arrow pointing upward (no text or symbols)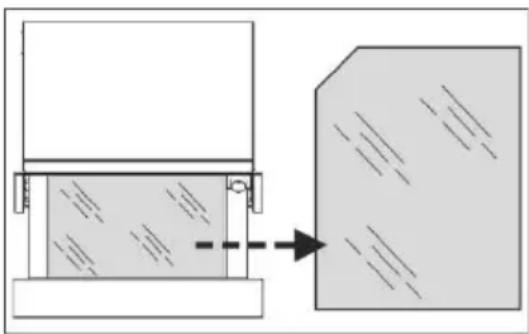
natural_image
Diagram showing a mechanical assembly with a piston and block, connected by an arrow indicating direction (no text or symbols present)Antislipbodem
natural_image
Simple line drawing of a mechanical device with a side view showing a rectangular block (no text or symbols)10. PROBLEEMOPLOSSING

LET OP!
natural_image
Isometric line drawing of a modular kitchen or storage unit with a door and slatted base (no text or symbols)natural_image
Diagram showing a 3D object transforming into a 2D geometric shape, with no text or symbols present.
natural_image
Illustration of a hand holding a small object with an arrow pointing upward (no text or symbols)
natural_image
Diagram showing a mechanical assembly with a piston and block, connected by an arrow indicating direction (no text or symbols present)Base antideslizante
natural_image
Technical line drawing of a mechanical assembly with a rectangular block and a side view (no text or symbols)natural_image
Isometric line drawing of a modular kitchen or storage unit with a door and slatted base (no text or symbols)natural_image
Diagram showing a 3D object transforming into a 2D geometric shape, with no text or symbols present.
natural_image
Illustration of a hand holding a small object with an arrow pointing upward (no text or symbols)
natural_image
Diagram showing a mechanical assembly with a piston and block, connected by an arrow indicating direction (no text or symbols present)Base antilliscant
natural_image
Simple line drawing of a mechanical device with a rectangular block and a separate gray rectangle, no text or symbols present.
ATENCIÓ!
Remova todas as embalagens.
natural_image
Isometric line drawing of a modular kitchen or storage unit with a door and slatted base (no text or symbols)4 Luz piloto (em modelos selecionados).
5 Painel frontal com mecanismo de encaixe ou pega.
6 Grelha de apoio (conforme o modelo).
4. PAINEL DE COMANDOS
natural_image
Diagram showing a 3D object transforming into a 2D geometric shape, with no text or symbols present.
natural_image
Illustration of a hand holding a small object with an arrow pointing upward (no text or symbols)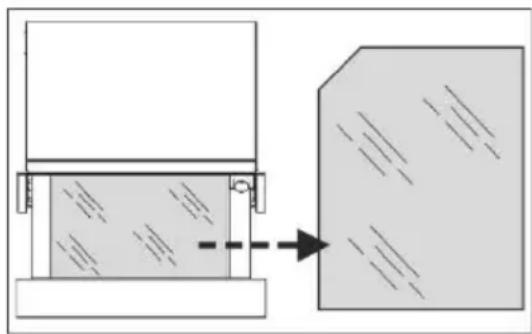
natural_image
Diagram showing a mechanical assembly with a piston and block, connected by an arrow indicating direction (no text or symbols present)natural_image
Technical line drawing of a mechanical assembly with a rectangular block and a side view (no text or symbols)natural_image
Isometric line drawing of a modular kitchen or storage unit with a door and slatted base (no text or symbols)natural_image
Diagram showing a 3D object transforming into a 2D geometric shape, with no text or symbols present.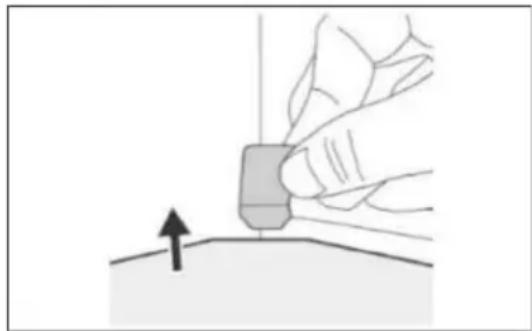
natural_image
Illustration of a hand holding a small object with an arrow pointing upward (no text or symbols)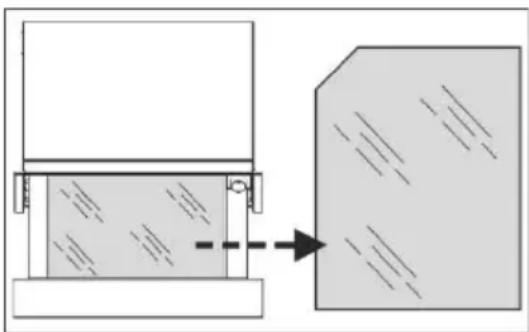
natural_image
Diagram showing a mechanical assembly with a piston and block, connected by an arrow indicating direction (no text or symbols present)Glidesikker dug
natural_image
Technical line drawing of a mechanical assembly with a rectangular block and a side view (no text or symbols)10. AFHJÆLPNING AF PROBLEMER

ADVARSEL:
natural_image
Isometric line drawing of a modular kitchen or storage unit with a door and slatted base (no text or symbols)8. LÄMMITYSTOIMINNOT
natural_image
Diagram showing a 3D object transforming into a 2D geometric shape, with no text or symbols present.
natural_image
Illustration of a hand holding a small object with an arrow pointing upward (no text or symbols)
natural_image
Diagram showing a mechanical assembly with a piston and block, connected by an arrow indicating direction (no text or symbols present)Liukuestematto
natural_image
Technical line drawing of a mechanical assembly with a rectangular block and a side view (no text or symbols)10. VIANETSINTÄ

VAROITUS!
natural_image
Isometric line drawing of a modular kitchen or storage unit with a door and slatted interior (no text or symbols)natural_image
Diagram showing a 3D object transforming into a 2D geometric shape, with no text or symbols present.
natural_image
Illustration of a hand holding a small object with an arrow pointing upward (no text or symbols)
natural_image
Diagram showing a mechanical assembly with a piston and block, connected by an arrow indicating direction (no text or symbols present)Glidsäker matta
natural_image
Technical line drawing of a mechanical assembly with a rectangular block and a side view (no text or symbols)10. FELSÖKNING

OBSERVERA!
natural_image
Isometric line drawing of a modular kitchen or storage unit with a door and slatted base (no text or symbols)natural_image
Diagram showing a 3D object transforming into a 2D geometric shape, with no text or symbols present.
natural_image
Illustration of a hand holding a small object with an arrow pointing upward (no text or symbols)
natural_image
Diagram showing a mechanical assembly with a piston and block, connected by an arrow indicating direction (no text or symbols present)natural_image
Technical line drawing of a mechanical assembly with a rectangular block and a side view (no text or symbols)10. FEILS∅KING

OBS!
natural_image
Isometric line drawing of a modular storage unit with a door and slatted base (no text or symbols)natural_image
Diagram showing a 3D object transforming into a 2D geometric shape, with no text or symbols present.
natural_image
Illustration of a hand holding a small object with an arrow pointing upward (no text or symbols)
natural_image
Diagram showing a mechanical assembly with a piston and block, connected by an arrow indicating direction (no text or symbols present)natural_image
Simple line drawing of a mechanical device with a side view showing a rectangular block (no text or symbols)10. ROZWIĄZYWANIE PROBLEMÓW

UWAGA!
natural_image
Three black-and-white icons: a person recycling with arrows, a document, and a trash can (no text or symbols)EAC UK CA CE