Fidi Free Simple - Breast pump Lionelo - Free user manual and instructions
Find the device manual for free Fidi Free Simple Lionelo in PDF.

User questions about Fidi Free Simple Lionelo
0 question about this device. Answer the ones you know or ask your own.
Ask a new question about this device
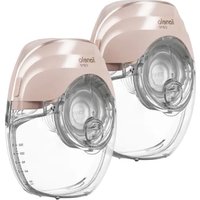
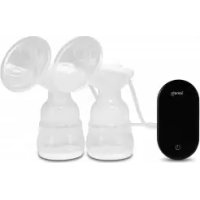
Download the instructions for your Breast pump in PDF format for free! Find your manual Fidi Free Simple - Lionelo and take your electronic device back in hand. On this page are published all the documents necessary for the use of your device. Fidi Free Simple by Lionelo.
USER MANUAL Fidi Free Simple Lionelo
If you have any comments or questions about the product you have purchased,
please contact us: help@lionelo.com
Manufacturer:
BrandLine Group Sp. z o.o.
A. Kriegewskiego 1, 61-248 Poznan, Poland
IMPORTANT INFORMATION
Please read this manual before using the product to familiarize yourself with its functions and use it as intended.
Failure to follow the safety instructions and use not in accordance with the instructions may cause harm to health.
Keep this instruction manual for future reference.
- The device may be used by children at least 8 years old and persons with reduced physical, sensory or mental capabilities, as well as persons without relevant knowledge and experience in the use of the device, if they are supervised or have been previously instructed in the safe use of the device and the risks involved.
- This device is not a toy. Do not allow children to play with it. Keep the device out of the reach of children. Cleaning and maintenance should not be performed by children without adult supervision.
- Do not repair or modify the device. These operations can only be performed by an authorized service center. Use only original spare parts.
- Do not start the device if you notice any damage. This applies both to the device itself and its accessories, such as the USB cable.
- Do not use the device if it begins to malfunction, has been dropped or submerged in water, becomes excessively hot, discoloration or bulging appears, or if other abnormal phenomena occur. Contact the manufacturer's authorized service center.
-
Never leave the device plugged into a power outlet unattended.
-
The device is not resistant to high temperatures. Use the device away from heat sources, high temperatures, hot surfaces, direct sunlight, sources of sparking, open flames, oils and sharp edges.
- Do not use chemicals to clean the device. Do not wash the main motor unit with water.
- Turn off the device after each use.
- Do not immerse the entire device in water or other liquids. Do not use near water.
- Do not use the device improperly.
- Do not use the device or touch the power supply with wet or damp hands. Make sure all breast pump components are dry before assembling the device.
- Before cleaning or moving the device, turn it off and disconnect it from the power source.
- Before and after each use, wash and disinfect all parts that will adhere to the body and come into direct contact with milk.
- Thoroughly dry each item before use and storage.
- For hygienic reasons, the device should be used by one person.
- If using the breast pump causes discomfort or pain, stop using the device immediately.
- Do not use the device throughout your pregnancy.
- Do not use the device if you are tired or while sleeping.
- Special care is required when using the device near children.
- Do not use the device while lying down or while engaged in strenuous exercise or activities that could cause injury.
- If breast milk does not appear for more than 5 minutes while using the device, stop using the breast pump and consult a doctor.
- If you have an implanted pacemaker or other electrical device, it is recommended that you consult your doctor before using the device.
- If you use the device at the highest permissible ambient temperature (30^) for 30 minutes, the silicone insert can reach 45^ .
-
It is recommended to replace the components in contact with milk every about 3-6 months, depending on the frequency of use, and when the device is not used for a long time.
-
Do not expose the device and its batteries to extreme temperatures. The acceptable temperature range for charging the battery is 5^ - 35^ .
- After the battery is fully charged, immediately unplug the device from the power outlet.
- Do not use milk from bottles or containers that have signs of damage on them.
- The batteries used in this device are non-replaceable.

The product complies with the requirements of European Union directives.
In accordance with Directive 2012/19/EU, this product is subject to separate collection. The product should not be disposed of with municipal waste as it may pose
a risk to the environment and human health. Return the used product to the recycling centre for electrical and electronic equipment.
Device diagram (fig. A)
- Silicone funnel (24 mm)
- Nipple tunnel
- Silicone diaphragm
- T-piece of the breast pump
- Suction valve
-
Milk container
-
Spout
- Main body
- USB cable
- Bra clasp
- Funnel (21 mm)
- Funnel (17 mm)
Main body diagram (fig. B)
- On/off switch
- Pause/start button
-
Increase of intensity level
-
Reduction of intensity level
- Switching the operating mode
Touch screen diagram (fig. C)
- Mode intensity level indicator
- Operating time indicator
-
Battery level indicator
-
Milk pumping mode
- Massage mode
- Operating time unit
Breast pump modes
- Massage mode - 9 levels. Massage simulates the initial sucking phase of the baby during breastfeeding.
- Pumping mode - 9 levels. This mode simulates the deeper sucking phase of the baby during breastfeeding.
Installation of the breast pump (fig. D) NOTE
Make sure that all parts of the device in contact with milk are washed and disinfected. To avoid damage to the device, all parts must be completely dry. Wash your hands before assembly. Avoid touching with your hands the inner surfaces of the device and its parts that come into contact with milk and your body.
- Place the silicone membrane (3, g.A) on the breast pump T-piece (4, g.A). Make sure that the collar of the diaphragm is properly hooked and does not slip when using the breast pump (1, g.D).
- Insert the suction valve (5, g. A) into the lower opening of the breast pump T-piece (4, g. A). Make sure the valve is inserted all the way in and facing the right direction (2, g. D).
- Insert the assembled breast pump T-piece into the milk container (6, g. A), so that its part with "wings" is placed inside the tabs on the back wall of the container. Press with both hands the part of the T-piece with the silicone membrane to the opening on the main body so as to ensure a complete seal. Make sure the T-piece is properly installed (3, g. D).
- Install the silicone funnel (1, A) into the milk container (6, A). Fit the deector of the silicone funnel to the spout (7, A) on the milk container (6, A). Make sure that the funnel collar and the nipple tunnel (2, A) are properly hooked (4, D). You can also choose one of the two 21 or 17mm funnels (11 or 12, respectively, A) to insert into the silicone funnel (1, A).
- Connect the main body (8, A) to the milk container (6, A). Make sure that the body is installed correctly (5, D).
Fitting the device (fig. E)
- Make sure the selected funnel is a snug fit and the nipple is in the nipple tunnel (2, fig. A) and centered. Place the device in the bra (1, fig. E). Taking milk should not be painful. If using the breast pump causes discomfort or pain, stop using the device immediately.
- Make sure that the device is well-fitted to the breast, and that there is no free space between the breast and the silicone funnel. A poor fit will affect the amount of breast milk pumped.
The device can be worn with a standard nursing bra, either sitting or standing. Be careful that the position of the device does not change during operation. This may cause the device to stop working. Do not bend over while using the device. For rigid and inflexible bras, use the included bra clasp (10, fig. A). To do this, unfasten the bra strap, then attach the clasp and adjust the length according to your preference (2, fig. E).
Method of use (fig. F)
NOTE
Charge the device for 2 hours before first use.
Wash your hands before use. Make sure that all parts of the breast pump are properly installed according to the installation instructions, and that the device itself is properly fitted to your body.
Do not use too high an intensity level, causing discomfort or pain.
- To turn the device on, press the on/off switch (1, fig. F). The device will turn on in the last mode in which it operated in the previous session.
- To change the mode during use, press the mode switch button (2, fig. F).
- Press the pause/start button to stop the device (pause mode). Press again to resume its operation (3, fig. F). If the pause mode is maintained for a longer time, the device will automatically turn off after 5 minutes.
- The mode intensity level indicator displays the current operating level of the device. Press the decrease and increase intensity level buttons to toggle mode intensity levels from 1 to 9 (4, fig. F).
- To turn off the device, briefly press the on/off switch (1, fig. F).
The device will automatically turn off after 30 minutes of operation and no action taken.
The product has a memory function. When you turn off or change the mode, the device automatically remembers the intensity level of the mode from the previous use.
The time indicator (2, fig. C) displays the current usage time of the device. If the device is stopped (pause mode), the current usage time will be displayed until the device resumes operation or is turned off. If you want to start a new pumping session, turn the device off and on by pressing the on/off switch twice. To adjust the appropriate intensity level of a particular mode, increase it until you feel mild discomfort (not pain!), then decrease the level by one.
Pouring milk (fig. G)
- While the device is running, gently lean forward to make sure all milk from the nipple tunnel has drained into the container (1, fig. G). Turn off the device.
- Gently remove the device from the bra and disconnect the main body from it (2, fig. G).
- Tilt the milk container so that its rounded part is at the bottom. Then, using the spout (7, fig. A), pour the milk into the bottle or container in which it will be stored (3, fig. G).
NOTE
Do not use the device to store milk. Do not store the device in the refrigerator.
Storage and heating of milk
Storage
- At room temperature (16-25°C), milk can be stored for up to 4 hours (up to 6 hours under very clean collection conditions).
- In the refrigerator (4^) , milk can be stored for up to 3 days (up to 5 days in case of very clean intake conditions).
- In the freezer (-18^) , milk can be stored for up to 6 months (up to 9 months under very clean intake conditions).
- Do not store milk on the refrigerator door.
Defrosting and reheating
- Freeze milk in food-grade plastic bottles or milk storage bags.
- To freeze milk, fill the container 34 full, as milk expands in volume when frozen.
- To preserve the nutritional value of milk, thaw it naturally in the refrigerator (up to 24 hours) or at room temperature (up to 2 hours). You can also thaw milk under warm running water with a maximum temperature of 37^ . Milk should then be used immediately after thawing.
- Before feeding, shake the milk container gently to mix the milk evenly.
NOTE
Always check the temperature of the milk before serving it.
Do not defrost frozen milk in the microwave or boiling water to avoid losing nutritional value and burning your baby.
Never re-freeze milk that has already been defrosted once and store it either at room temperature or in the refrigerator.
Charging (fig. H)
- Connect the plug of the USB-C cable to the device's power socket on the side of the main body (1, fig. H), and the other end with the USB plug to the USB adapter (not included).
- During charging, the battery level indicator flashes (2, fig. C). When it stops flashing, it means that the device is fully charged (2, fig. H).
NOTE
Charge the device for 2 hours before first use.
You can use the breast pump while the battery is charging, but extreme caution is recommended. However, please note that frequent use of the device while it is charging may result in reduced battery life.
To preserve long battery life, store the device in a cool place, charge it before the battery runs out to zero, and fully charge the device before storing it. Use a 5V DC 1A adapter for charging.
Removing the device (fig. 1)
- After removing the main body, open the milk container from the bottom by pulling the silicone funnel (1, fig. l).
- Pulling the silicone funnel, pull out the assembled breast pump T-piece (2, fig. 1) from the container.
- Separate the silicone funnel, silicone diaphragm and suction valve from the breast pump T-piece (3, fig. I).
Cleaning and disinfection of the device NOTE
Do not clean or disinfect the main body or power cord of the device. These parts do not come into contact with food.
Wash all parts in contact with the body and milk separately immediately after use to avoid drying out food residue and prevent bacterial growth. Do not wash any parts of the device in the dishwasher.
Before the first use
Before using the device for the first time, wash with detergent and then sterilize with boiling water all its parts that will come into contact with milk (milk container, T-piece, valve, diaphragm, and funnels), except the main body. Follow the cleaning and disinfection instructions below.
After each use
- After use, disassemble the main body and clean it with a dry and soft cloth (fig. J).
- After each use, disassemble the device into its individual parts and rinse with cool water all separated parts in contact with the body and milk to remove food residues.
- Wash all separated parts in warm water with mild detergent, then rinse thoroughly under clean running water.
- To disinfect, place all items in boiling water for at least 10 minutes. Make sure all parts are immersed in the water and none is directly touching the bottom of the pot.
-
Leave all parts of the device to dry on a clean towel or paper towel.
-
Store the device parts in a clean bag, container or other clean place until the next use. If the parts are still wet, do not store them in a tightly sealed container.
NOTE
Clean the parts that have been in contact with the body once a day and after each use. Be careful not to damage the device when cleaning it.
Do not use sharp tools to clean silicone components, as this may result in damage to them.
Be careful not to damage the suction valve and silicone diaphragm when cleaning. If they are damaged, the device will not work properly.
Remove the suction valve from the device carefully. When cleaning it, rinse in clean water without inserting your finger or any objects into it, as this may result in damage.
Do not use disinfectants to clean the device.
If you notice a white deposit on the parts of the device after sterilization in water, it may mean that the water used is hard. Wipe off the residue using a clean towel and let the parts dry on their own.
Troubleshooting
Problem Solution
The device does not switch on
- The device's battery may have discharged or entered a protective state caused by long storage. Connect the device to the adapter to activate the battery.
- Fully charge the battery before using the device for the first time and after long-term storage.
- Contact the authorized service of the device.
Operating time is not counted down when the pause/start button is pressed
| Problem Solution | |
| The device stopped pumping (main body does not work) after pressing the pause / start button | Make sure that the device is turned on. Contact the authorized service of the device. |
| Insufficient strength or no suction | Check that all parts of the device are clean, dry, properly and fully installed. Especially pay attention to the correct direction of installation of the suction valve. Check that the T-piece is properly seated in the container and the diaphragm is tightly tied to the top opening of the container. Check that the silicone funnel of the device fits snugly to the breast. If the suction power has not improved, contact an authorized service center for the device. Check the parts of the device for cracks and defects. |
| Pain or discomfort | Adjust the intensity level or change the mode of operation. Change the position or alignment of the breast. In the event of unremitting pain or discomfort, consult a doctor. |
The photos are for reference only, the actual look of the products may differ from the ones shown in the pictures.
PL
Drogi Kliencie!
BrandLine Group Sp. z o.o.
A. Kriegewskiego 1, 61-248 Poznań, Polska
WAZNEINFORMACJE
BrandLine Group Sp. z o.o.
A. Kriegewskiego 1, 61-248 Poznań, Polen
WICHTIGE INFORMATIONEN
- YcTpoIcTBo MoKeT IcNoJIb3OBaTbcra DeTbMn B Bo3paCTe He MeHee 8 JeT NJIuCaMn C OrpaHnueHHbIMN I3NueCKIMN, CeHCOPHbIMN IJIY UmCTBeHHbIMN BO3MOxHOCTaMn, a TaKJKe JIncaMn, He IMeIoUIMN COOTBcETCTByOuX 3HaHn IOnbITa IcNoJIb3OBaHnry UcTPOIcTBA, PpN YcIOBnI, YTO 3a HmN YcTaHOBJeKoHTpoJIb IJIn Jx e OHN 6bln
IpnHCTpyKtnpOBaHbIO 6e30nacHom nCNoJb3OBaHn yCTpoNCTBa N CBraHHbIX C Hm pNcKaX.
2. ΘTO yCTpoIcTBo He nrgyUka. He nO3BOJnTe DeTAM nIgpaTb c Hm. XpaHInTe yCTpoIcTBo B HeIOCTyINHom dJa DeTei MeCTe. YnCTKa n TexHnueckoe o6CJIyXnBaHne He dOJIxHbI BblIOJNHaTbcr DeTbMn 6e3 npncMoTpa.
3. He pemontnyte n He moiu npyte yctpoCTBO. DaHbIe DeIcTBnA MoKeT BbIOJIHrToB ToIbKO aBTOpN3OBaHHbI CepBnCHbI zuHTp. IcnoJb3yTe ToIbKO opINHaJIbHbIe 3aNaChbIe qactn.
4. He Bклюаite yctpoicTBO, ecIn 3aMeTnIn KaKne-ll6o nobpejdeHnia. 3To kacaetcKaK caMOrO yctpoicTBA, TaK n erO akceccyapOB, Hanpimep USB-ka6eJia.
5. He nCloIb3yIte yCTpoIcTBO, eCIn OHO haUaIoo pa6OtaTb co c6oAMn, erO poHJIu IIN IORpyKAI IN B VOdy, OHO CINbHO HaRpeBaIocB, oBeCuBceuIBaIocB, IONBJIaIOCb B3dYtne IIN BO3HnKaII npyTne Heo6bIuHbIe YBLeHnI. O6paTITecb B aBTOpN3OBaHHbI cepBnCHbI ueHTp npOn3BOIDnteJI.
6.国民党a He octablan Te yctpoicTBO, BKJIuOyeHHoe B po3eTKy, 6e3 npncMOtpa.
7. YcTpoIcTBO He yCTOuHnBO K BbICOKIM TeMnepaTypam. NcNoJIb3yIte UcTPOIcTBO BdJIIN OT NcTOUHnKOB TeJIa, BbICOKIX TeMnepaTyp, TOpAUX IOBepXHOCTeN, PpAByX COJIHeuHbIX LyueN, NcTOUHnKOB NCKP, OTKpbITOrO OrHra, Macla N OcTpblx KpaEB.
8. He nCnoJIb3yIe XIMnueckne BeIeCTBa IJRA OUInCTK N yCTpoIcTBA. He moTe OCHOBHO 6JOK DBrIaTeJI BODoJ.
9. BbiklnoaTe yctpoiCTBO nocLe KaKdoTo IcNoIb3OBaHnI.
10. He norgykaite Bce yctpoicTBo B Bodyu nn dpytne KndkoCTn. He nCnoIb3ynte B6n3n BoDbl.
11. He nccnoJIb3yIte ycIpoIcTBo He no Ha3NaueHnIO.
12. He nCloIb3yIte ycTpoIcTBo n He npKacaiTeCb K nCTOuHnky PtTaHnMa MOKpbIMn IJI N BlaJXHbIMn pyKaMn. Ipeed c6OpkoI ycTpoIcTBa y6eIITecB, YTO BCE JeTaJI MOnOkooTcoCa cyXHe.
13. Пераюстков ил посяшем устroduства Вькlioшито ergи OTcoeHHnte ot nctouHnka nItaHna.
- До и посте кадую Исповая мочи и Deэнфицуп Te Bce заимétы, КOTOPьг Будун пинларь К Телу И Вступь в Рразмой KOHTaKT C MONOKOM.
- TцаTeьно ВbICyшITE кждьI npeДмET пepeД nCNoIb3OBaHnem n xpaHeHnem.
- Из соображени Гинень устюством должен польба Ться Oдин человек.
- Ecnn nCnoJb3OBaHne MoIokOOTcoCa Bbl3bIBaet nnCKOMΦopT nll 6oJIb, HeMeIJIeHHo IpeKpaTHTe nCnoJb3OBaHne yCTpO'CTBa.
- He nCloIb3yIte npI6op Ha npOtaKeHn Bcei 6epeMeHHocTn.
- He nCloIb3yIte yCTpoIcTBO, KOrda Bbl yCTaII nn cPiTe.
- Oco6a oCtOpoxHocTb Heo6xoDIma npi nCpOJIb3OBaHn yCTpoIcTba pIOM c DeTbMn.
- He nscnoIb3yIte ycIpoIcTBo IeJka, a TaKJke Bo BpeMЯ NaIpIaJKeHHbIX φn3Nuecknx ynpaJxHNeHn IJI N DeIcTBrN, KOToPbIe MOrγT npINBeCTn K TpaBMe.
- EcII B O BpeM nCnoIb3OBaHnY uCTpoNCTBa rpydHoe MOnOkO He noctynaet 6oJIee 5 MnHyT, npeKpaTnTe nCnoIb3OBaHnE MoJOKooTcoCa n o6paTnTeCb K BpaCy.
23.ЕсиуВас ecTь karдноctmmyЯтор nllpyroe эл ektrpueckoe yCTpoIcTBO,пepe,IncnoIb3OBaHnem yCTpoIcTba peKOMeHnyeTc npOKOHcYlbTnPoBaTbcS CBpaqom. - EcIIyUcTpoIcTBo IcNoJIb3YeTeC npi cAmO BbICOKoI TeMpepaType OkpykaIoUeI cpeIbI (30^) B TeueHne 30 MInHyT, TempepaTypa cnIKHOBOI BCTaBKn MoKeT DoCTnHy 45^
- PekomehnyetcnaMeHb 3aMeHb, KOHTaKtnpUoIne cMOJOKOM, npimepHo pa3 B 3-6 MecaeB, B 3aBnCmOCTN OTyactOTb INcNoJIb3OBaHnYcTpoiCTBa, a TaKxe B Clyuae, ecInycTpoiCTBO He nCnoJIb3yETcB TeueHne dIInTeIbHOro BpeMeHn.
- He noDBepraTe ycTpoiCTBO n erO aKKyMylrTOpbI BO3JeICTBnIO 3KcTpeMaJIbHbIX TeMnepaTyp. OOnycTmbln Dnana3OH TemnepaTyp, PpN KOTOpOM MOxH0 3apJXaTb aKKyMylrTOp, coCTabJIeT 5-35 ^ C
-
KaK Tobilko aKKymyIaTOp nolHocTbIO 3apJNTcR, HeMeIeHHO OTKIIuHTe yCTpO'CTBO OT p03eTKN.
-
He nCnoIb3yIte MoIOko I3 6yTbIIOueK IJI N KOHTeHepOB c npn3HaKaMn IOBpeJKeHna.
29.Батар,在спобземыь ATOM yCTpoIcTBe,He noДлжКТЗamHe.


ПрдукТ COOTBeTCTByeT Tpe6OBaHЯm ДиpeKТИВЕрпсКOrO CoI03a.
B cootBcTbHn c DnpeKTHBOI 2012/19/EC aTOT npOdyKT nOdJIeJNt OTdJIbHOy Tynl3aun. N3deJIne HeIb3a Bbl6paCbIBaT BMeCTe C 6blTOBbIMN OTXoJaMn,
Tak KaK OHO MOKeT PpeIcTaBnIbY Urpo3y IJRA OKpyKaIOUeI CpeIbI N 3DopOBBa YelOBeKa. IVcNoJIb3OBAHnblI PpOdyKT CLeIyET BepHyTb B NyHKT Nepepa6OTkn 3JIeKTPnueCKOrO I 3JIeKTPoHnOro 06OpyIDOBaHnI.
Cxema yctpoiCTBa (pnc. A)
- CnlnkoHOBaB BOpOHka (24 MM)
- HinnneIbHbI TyHHeIb
3.Сишиковая мембрана - TpoHnK dIy MoIokOOTcoca
- BcacbBaIOUsn KlaPaN
-
KoHTeINHeP dIy MoIoka
-
Hocnik
- OCHOBHa YacTb
- USB-ka6eJb
- 3acteKka 6ocTgalebTepa
- BopoHka (21 MM)
- BopoHka (17 MM)
Cxema ochobhoro kopnyca (pnc. B)
1.ПepeKJIHouaTeIb BkJIHoyeHn/ByIKJIHoueHnI.
2. Khonka nay3bl/ctapTa.
3. YBéniuèHne ypOBnY nHTeHCNBHOCTN
YcTaHOBka yCTpoiCtBa (pnc. E)
- Y6eIITecb, yTO Bbl6paHna BOpOHka IJRA rpydN pIoTHo npInleraet n yTO COcOK paCNoLOXKeH B COCKOBOM TUnHeJe (2, PnC. A) n no ceHTpy. Iomecntte ycTpoiCTBO B 6IOCTraJIbTeP (1, PnC. E). Iprnem Niu n He JOnJKeH 6blb 6OJIe3HeHHbIM. EcIn NcNoJIb3OBaHne MoIokooTcoCa Bbl3bIBaEt DnCKOMΦOpT nII 6OJIb, HeMeJLeHNO ppeKpaTnte NcNoJIb3OBaHne ycTpoiCTBa.
- Y6eIITecb, yTo yCTpOiCtBO xOpoI npINeAeT K rpyI IN yTo MeJky rpyIbIO n CnJIkoHOBo BOpOHKO HET 3a3Opa. ILOXoe npINeRanHe IOBIIReT Ha KOJInuEcTBO cUeKINBaEMoTO MOlOKa.
UcTpoIcTBo MOxHObHTb CO cTaHdApTHbIM 6IOCTraJIbTePOM dJa KOpMJIeHn KaK B IIOJoxKeHn CnIa, TaK N CToI. ByIbTe OCTopoJXhbl N He MeHnTe IIOJoxKeHne ycTpoIcTBA BO BpeMa erO pa6Otbl. 3TO MoKet npepBaTb pa6OToY ycTpoIcTBA. He NaKIoHnItecB Bo BpeMa nCNoJIb3OBaHnry UcTpoIcTBA.
B clyuae jecTkoro n Hei6kofo 6octraIbTepa nCnoIb3yIte 3acTeKky dJa 6oCTraIbTepa, BxOJaUyIO B KOMnJIeKT (10, pnc. A).ДЯ eTOrO paCCTeHnIte 6peTeIbKy 6oCTraIbTepa, 3aTeM npIKpeNITe 3acTeKky i OtpereYlnpyIte dInHy nO CBOeMy yCMOTpeHnIO (2, pnc. E).
Kak nCloNoB3OBA Tb (pnc. F) BHIMAHNE
Ipei nepBbIM nCnoJIb3OBaHHe m 3apJdnte yCTpoiCTBO B TeueHne 2 qacob. MoTe pyKn nepei nCnoJIb3OBaHHe m. Y6eIInTecb, YTO BCE JeTaII MOnOkOOTcOCA npaBnIbHO co6paHb I B COOTBeTCTBn C INHCTpyKzneI no c6OpKe, a camo yCTpoiCTBO npaBnIbHO NOIOrHaHO K TeIy.
He nCnoJb3yIte cIiShKOM BblcOKn yPoBeHb INHTeHCNBHOCTN, KOTOpbIM MOKeT Bbl3BaTb dNcKOMΦOpT nll 60JIb.
- YTo6bI BKJIIOuHTb yCTpoiCtBO, HaxKMITE KHOJKNy BKJIIOUeHnY/ BbIKJIIOUeHnY (1, pnc. F). YCTpoiCtBO BKJIIOUHTcB IocJIeHNem peKIme, B KOTOpOM OHO pa6OtaIb V npEdbIyUeM ceaHce.
-
Дяизмени рекима pa60ы BO Время Испльбовни нажмITE Kногку пereknюецни рекима pa60ы (2, рис. F).
-
Haxmte KhoNky nay3bI/nycka, yTo6bl OCTaHOBnTB MaunHy (peKIM nay3bl). Haxmte eue pa3, yTo6bl BO3o6HOBnTB pa6Oty (3, Pnc. F). Ecln nay3a B pa6Ote coXpaHareTcB TeueHne 60Jee dInTeJbHoro nepnoDa BpemeHn, yCTpoIcTBO aBTOMaTnueckn BbIKJIouHTcraYepe3 5 MInHyT.
- Инданкатор уровая InteHcNBHocTи ржима оTo6paJkaet Tekyшу уровенba pa6Otbl yctpoiCtBa. HabimaiTe KhoIKN yMeNbIeHn I yBeJIuHEnNЯ InteHcNBHocTи дЯпepeKJIuOYeHnЯ уровен InteHcNBHocTи ржима ot 1do9(4,pnc.F).
- YTo6bI BbIKJIIOHTb yCTpoIcTBO, KpaTKOBpeMeHHO HaKMITE KHOJky BKJIIOUeHn/ByIKJIIOUeHn (1, pnc. F).
YcTpoIcTBo aBTOMaTnueckn BbIKJIouHTcR nocLe 30 MInHyr pa6oTbI 6e3 KaKnx- li6o DeiCTBn.
I3dJIe IImeT yHKUIO nAmrTI. KoIa Bbl BbIKHouaTe IIN MeHReTe peKIM, YcTPOIcTBO aBTOMaTnueckN 3aONMHaet yPoBeHb INHTehCnBHOCTN daHHOrOpexKIMa I3 npEdbIDyUeTo NcNoJIb3OBaHnJ.
Pa3Mop03ka n pa3orpeB
- 3amopaxnBaITe MoLOKOB NIIeBbIX PIACTNKOBbIX 6yTbIKaX nIIN paKeTaX dIy XpaHeHry MoLOKa.
2.Чтобл за морозь молоко, за палнITE koHTeHep Ha 3 / 4 ,поскoly Ку молоко пи за морожиBaHи расиряетс. - YTO6bI coXpaHnTb NiUeByu ZeHHocTb MoLoKa, pa3MopaxnBaIte erO eCTeCTBeHHbIM nyTeM B XoIoJnlbHnke (do 24 yacob) nII npi KOMHaTHNoI TeMpepatype (do 2 yacob). Bbl TaKHe moKHe pa3Mop03ntb MoLOKO IOd TepNoI npToUHOBODoI npi TeMpepatype He BblSe 37^. MoLOkO cIeDyET nCpOJIb3OBaTb cpa3y nOcIe pa3MopaxnBaHnIa.
- Перед Кормленим octopожно BCстянite emkoctb c MOLOKOM, утобъ оно paBHomepo nepemeшалocb.
BHIMAHNE
Bcerda npobepaTe tempeatypy moloKa nepei noaey Ha cToJ.
He pa3mopaxnBaIte 3amopoxKeHHoe MOnoKOB MmKpOBoHOBo Neu nII B KInPaeB ODe, YTo6bI He NOpTePbEro PnIeByU cEHHOCTb I He o6KeYb pe6eHa.
HnkOrda He 3aMopaxkBaIte NOBTOpHO pa3MOpOKeHHoe MOJOKo N HNKoIda He xpaHnte erO npN KOMHaTHOH TemnepaType IIN B XOJOnNbHNke.
3apraKa (pnc. H)
- Пдклочи Te BnIky ka6eЯ USB-C K po3eTke PHTaHna yCTpoNcTba, paCNoJIOxKeHHoC6OKy Ha ochOBHom KOpnyce (1, pnc. H), a pyroK KOHeC c BnIKoY USB - K USB-aДaNTepy (He BXOINT B KOMJIeKT).
- Bo Bpem 3apJIKMnraeT HndnKaTOp yPOBHa 3apJa 6aTapei (2, pnc. B).Korda OH IpeCTaHET MnraTb,yCTpoNCTBO NIOJIHOCTbIO 3apJKeHo (2,pnc.3).
BHIMAHNE
Ipeid IepBbIM HcIOJIb3OBaHHeM 3apJITe yCTPOICTBO B TeueHne 2 YacOB.
BbIMoKTe HcIOJIb3OBaTb MOIOKOTCOC BO BpeM 3apAKn aKKymJITopa, HO peKOMeHdyeTcra CObJIHOaTb KpaHIOU OCTOpOXHocTb. OHaKO IOMHHTe, YTO qactoe HcIOJIb3OBaHHe yCTPOINCTBa BO BpeM 3apAkn MoKET COKpaTHTb cPOK cIyX6bl aKKymJITopa.
UTo6bI IpoJInTb CpOK cIyX6bI aKKymyIaTOPa, XpaHnTe yCTPOINCTBO B IpoXJaIHOM MeCTe, 3apJkaIte eI0 Do TOrO, KaK aKKymyIaTOP pa3PraITcA Do Hyl, N POJIHOCTbIO 3apJkaIte yCTPOINCTBO IIpeE xpaHeHNEm.
NOCYJOMOeHOn MaSHInHe.
Ipeed nepBbIM nCnoJb3ObaHneM
IpeD npBbIM nCnoJb3OBAHnem yCTpoiCtBa npOMoIte erO qNCTaIcM cpeIcTBOM, a 3aTeM npocTeepuIN3yIe KInIaTKOM BCE erO qAcTn, KOToPbIe 6yDt KoHTaKTIpOBaTb C MOLOKOM (KOHTeHep dJa MOLOKa, TPOHnK, KlaPaH, Mem6paHa i BOPOHKn), KpOME oChOBHOrO KopnyCa. IOnKaIyIcTa, cJeDuYIte INHCTpyKzIyM NO OUNCtKe i De3INHΦekZnn, pPiVeIeHHbIM HIXKe.
PocJIe KaJIOrO nCNoJIb3OBaHnIa
BrandLine Group Sp. z o.o.
A. Kreglewskiego 1, 61-248 Poznan, Polonia
BrandLine Group Sp. z o.o.
A. Kriegewskiego 1, 61-248 Poznań, Pologne
INFORMATIONS IMPORTANTES
BrandLine Group Sp. z o.o.
BrandLine Group Sp. z o.o.
A. Krieglewskiego 1, 61-248 Poznań (Poznané), Lenkija
SVARBI INFORMACIJA:
BrandLine Group Sp. z o.o.
BrandLine Group Sp. z o.o.
A. Kreglewskiego 1, 61-248 Poznan, Polen
VIKTIG INFORMASJON
BrandLine Group Sp. z o.o.
BrandLine Group Sp. z o.o.
A. Kriegewskiego 1, 61-248 Poznań, Puola
TÄRKEITÄ TIETOJA
Detailed warranty conditions are available on the website: