RCSL 2/15 - Ice machine Royal Catering - Free user manual and instructions
Find the device manual for free RCSL 2/15 Royal Catering in PDF.
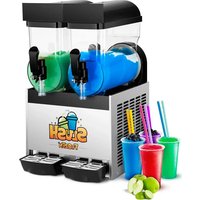


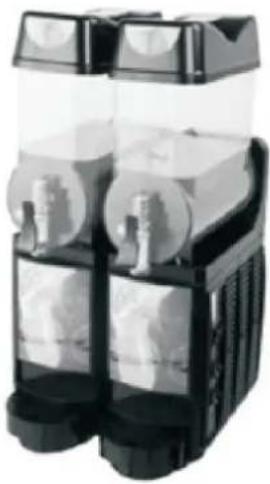
| Product type | Slush machine |
| Brand | Royal Catering |
| Model | RCSL 2/15 |
| Nominal voltage | 230 V / 50 Hz |
| Nominal power | 770 W |
| Refrigerant | R290 / 185 g |
| Cooling temperature | -2 °C to -3 °C |
| Number of tanks | 2 |
| Maximum capacity per tank | 15 liters |
| Loading capacity per tank | 7 to 12 liters |
| Weight | 41 kg |
| Main functions | Production of slush and cold drinks, hardness adjustment, night mode (cold drink), tank lighting |
| Maintenance and cleaning | Daily cleaning, disassembly of tanks, stirrers, taps, drip trays; lubrication of seals with food-grade lubricant |
| Safety | Overload protection, automatic shut-off in case of blockage, check plug and cable, use of RCD recommended |
| Spare parts and repairability | Original spare parts available; repair by authorized service only |
| General information | User manual included (369 pages, PDF); recommended ambient temperature 25-32 °C; minimum distance from walls 35 cm |
Frequently Asked Questions - RCSL 2/15 Royal Catering
User questions about RCSL 2/15 Royal Catering
0 question about this device. Answer the ones you know or ask your own.
Ask a new question about this device
Download the instructions for your Ice machine in PDF format for free! Find your manual RCSL 2/15 - Royal Catering and take your electronic device back in hand. On this page are published all the documents necessary for the use of your device. RCSL 2/15 by Royal Catering.
USER MANUAL RCSL 2/15 Royal Catering
| DE Produktname Slush eismaschine | ||
| EN Product name Slush machine | ||
| PL Nazwa produktu Granitor | ||
| CZ | Název výrobku | Stroj na ledovou tříšť |
| FR Nom du produit Machine à granité | ||
| IT Nome del prodotto Macchina per granita | ||
| ES Nombre del producto Máquina de granizado | ||
| HU Termék neve Slush gép | ||
| DA Produktnavn Slushmaskine | ||
| FI Tuotteen nimi Slush-kone | ||
| NL | Productnaam | Slushmachine |
| NO | Produktnavn | Slushmaskin |
| SE Produktnamn Slushmaskin | ||
| PT Nome do produto Máquina de granizado | ||
| SK Názov produktu Stroj na slush | ||
| BG | Име на продукта | Машина за сльш |
| EL | Όνομα προϊόντος | Μηχάνημα Slush |
| HR | Naziv proizvoda | Stroj za slush |
| LT | Produkto pavadinimas | Slush mašina |
| RO | Numele produsului | Maşină de slush |
| SL | Ime izdelka | Naprava za slush |
| DE Modell | EN Product model | PL Model produktu | CZ Model výrobku | FR Modèle | IT Modello | ES Modelo | HU Modell | DA Model | FI Tuotteen malli | NL Productmodel | NO Produktmodell | SE Produktmodell | PT Modelo do produto | SK Model | BG Модел на продукт | EL Movtéλο προϊόντος | HR Model proizvoda | LT: Gaminio modelis | RO: Model de produs | SL: Model izdelka | RCSL 2/12RCSL 3/12RCSL 2/15RCSL 3/15RCSL 2/10RCSL 3/10RCSL 2/3 | |
| DE Hersteller | EN Manufacturer | PL Producent | CZ Výrobce | FR Fabricant | IT Produttore | ES Fabricante | HU Termelő | DA Producent | FI Valmistaja | NL Producent | NO Produsent | SE Tillverkare | PT Fabricante | SK Výrobca | BG Производител | EL Κατασκευαστής | HR Proizvođač | LT Gamintojas | RO Producător | SL Proizvajalec | expondo Polska sp. z o.o. sp. k. | |
| DE Anschrift des Herstellers | EN Manufacturer Address | PL Adres producenta | CZ Adresa výrobce | FR Adresse du fabricant | IT Indirizzo del produttore | ES Dirección del fabricante | HU A gyártó címe | DA Producentens adresse | FI Valmistajan osoite | NL Adres producent | NO Produsentens adresse | SE Tillverkarens adress | PT Endereço do fabricante | SK Adresa výrobcu | BG Адрес на производителя | EL: Διεύθυνση κατασκευαστή | HR Adresa proizvođača | LT Gamintojo adresas | RO Adresa producătorului | SL Naslov proizvajalca | ul. Nowy Kisielin – Innowacyjna 7, 66-002 Zielona Góra | Poland, EU | |

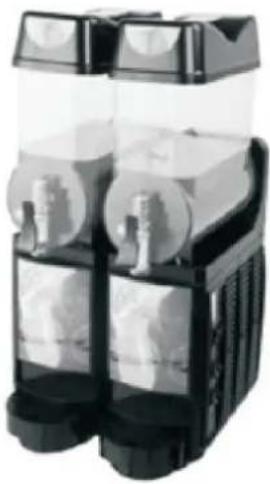
1) Tap lever
2) Tapping
3) Drip tray
4) Device cover
5) Device tank
6) Stirrer
7) Control panel
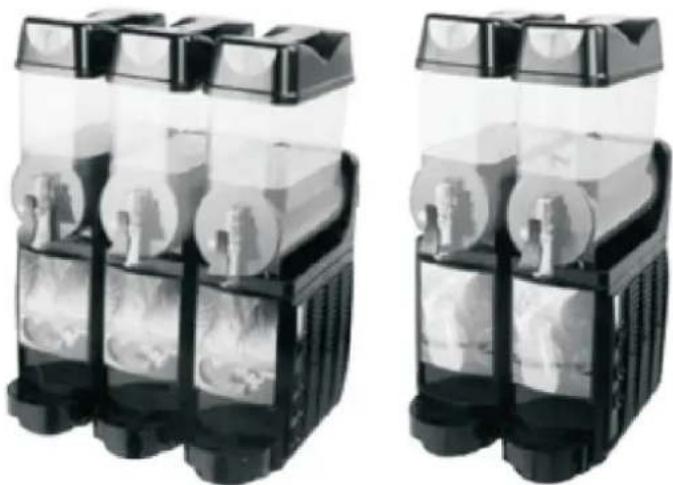
RCSL 2/12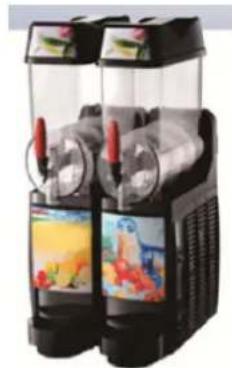
RCSL 3/12
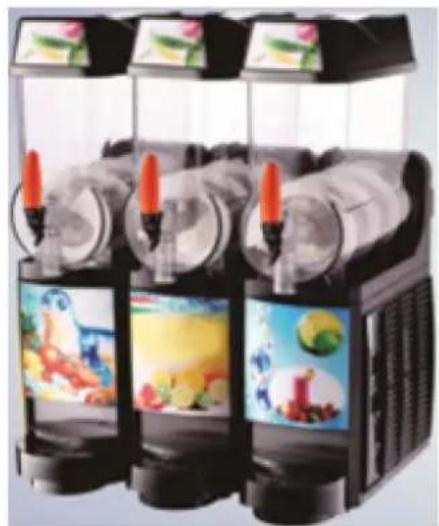
RCSL 3/10 RCSL 2/10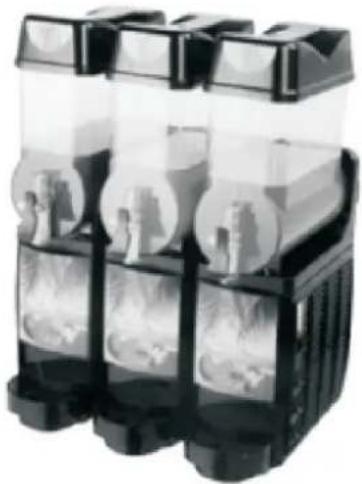
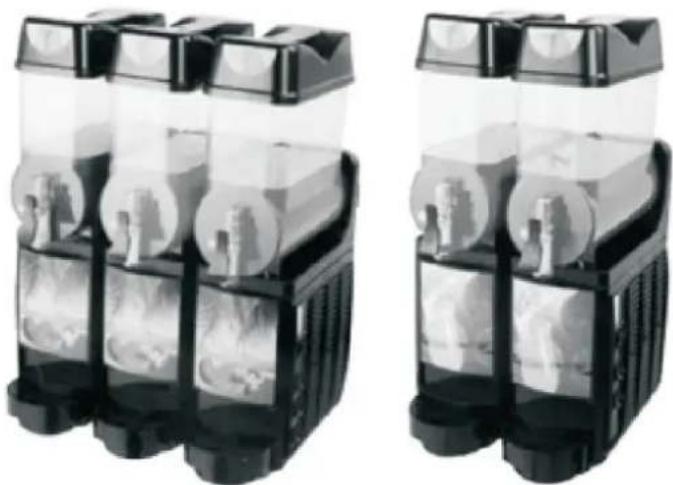
RCSL 2/3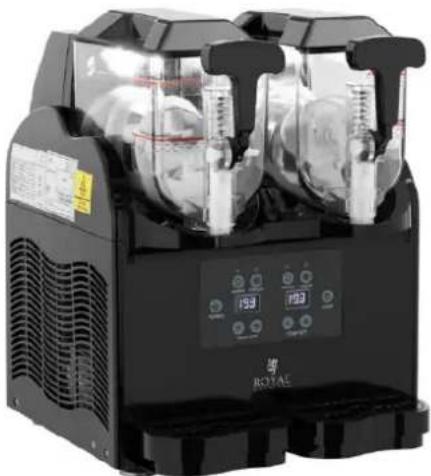
RCSL 2/15, RCSL 3/15
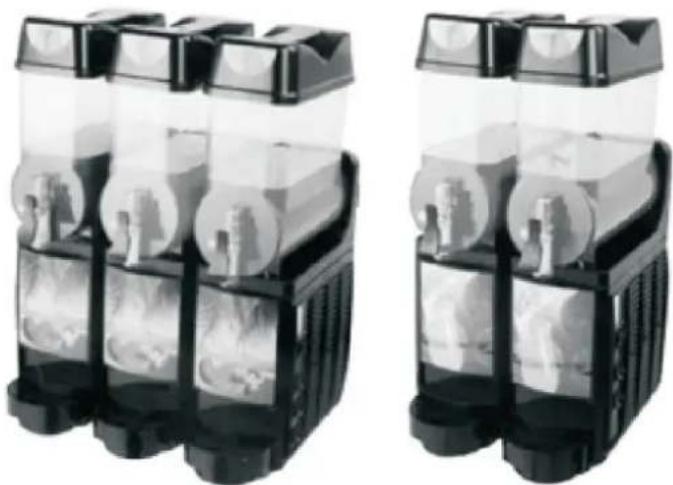
RCSL 2/12, RCSL 2/10, RCSL 3/12, RCSL 3/10
This User Manual has been translated using machine translation. We have made every effort to ensure the translation is accurate, but please note that automated translations are not perfect and are not meant to replace human translators. The official version of the User Manual is in English. Any differences between the translated version and the original English are not legally binding. If you have any questions about the accuracy of the translation, please refer to the English version, which is the official reference. More language versions are available upon request via info@expondo.com.
1. Technical data
Table 1: Technical data of the product
| Parameter description Parameter value | ||||
| Product name Slush Machine | ||||
| Model | RCSL 2/12 | RCSL 3/12 | RCSL 2/15 | RCSL 3/15 |
| Rated voltage [V~] / frequency [Hz] | 230/50 | |||
| Rated power | [W] | 600 | 980 | |
| Cooling temperature [°C] -2 ~ -3 | ||||
| Refrigerant/ Refrigerant Amount | R290/185g | R290/210g | R290/185g | R290/210g |
| Number of tanks 2 3 2 3 | ||||
| Maximum capacity of each tank / Loading capacity[l] | 14 / 5-10 15 / 7-12 | |||
| Weight [kg] | 42 | 63 | 41 | |
770
61
| Parameter description Parameter value | |||
| Product name Slush Machine | |||
| Model | RCSL 3/10 | RCSL 2/10 | RCSL 2/3 |
| Rated voltage [V~] / frequency [Hz] | 230/50 | ||
| Rated power [W] 800 | 600 | 380 | |
| Cooling temperature [°C] | -2 ~ 3 | -1 ~ -3 | |
| Refrigerant/ Refrigerant Amount | R290/210g | R290/185g | R290/70g |
| Number of tanks | 3 | 2 | 2 |
| Maximum capacity of each tank / Loading capacity[l] | 12 / 6-10 | 2.6 / 1.2-1.7 | |
| Weight [kg] | 59 | 42.5 | 22 |
2. General description
The user manual is designed to assist in the safe and trouble-free use of the device. The product is designed and manufactured in accordance with strict technical guidelines, using state-of-the-art technologies and components. Additionally, it is produced in compliance with the most stringent quality standards.
DO NOT USE THE DEVICE UNLESS YOU HAVE THOROUGHLY READ AND UNDERSTOOD THIS USER MANUAL.
To increase the product life of the device and to ensure trouble-free operation, use it in accordance with this user manual and regularly perform maintenance tasks. The technical data and specifications in this user manual are up to date. The manufacturer reserves the right to make changes associated with quality improvement. The device is designed to reduce noise emission risks to a minimum, taking into account technological progress and noise reduction opportunities.
2.1. Legend
| Icon | Description |
 | The product satisfies the relevant safety standards. |
 | Read instructions before use. |
 | The product must be recycled. |
 | WARNING! or CAUTION! or REMEMBER! Applicable to the given situation.(general warning sign) |
 | |
 | ATTENTION! Electric shock warning! |
 | Only use indoors. |

PLEASE NOTE! DRAWINGS IN THIS MANUAL ARE FOR ILLUSTRATION PURPOSES ONLY AND IN SOME DETAILS MAY DIFFER FROM THE ACTUAL PRODUCT.
3. Usage safety

ATTENTION! READ ALL SAFETY WARNINGS AND ALL INSTRUCTIONS. FAILURE TO FOLLOW THE WARNINGS AND INSTRUCTIONS MAY RESULT IN ELECTRIC SHOCK, FIRE AND/OR SERIOUS INJURY OR EVEN DEATH.
The terms "device" or "product" are used in the warnings and instructions to refer to:
Slush machine
Do not use in very humid environments or in the direct vicinity of water tanks. Prevent the device from getting wet. Risk of electric shock! Do not cover air inlets / outlets. When in use, do not put your hands or other items inside the device!
3.1. Electrical safety
a) The plug must fit the socket. Do not modify the plug in any way. Using original plugs and matching sockets reduces the risk of electric shock. b) Avoid touching earthed elements such as pipes, heaters, boilers and refrigerators. There is an increased risk of electric shock if the earthed device is exposed to rain, comes into direct contact with a wet surface or is operating in a damp environment. Water getting into the device increases the risk of damage to the device and of electric shock. c) Use the cable only for its designated use. Never use it to carry the device or to pull the plug out of a socket. Keep the cable away from heat sources, oil, sharp edges or moving parts. Damaged or tangled cables increase the risk of electric shock. d) If using the device in a damp environment cannot be avoided, a residual current device (RCD) should be applied. The use of an RCD reduces the risk of electric shock.
3.2. Safety in the workplace
a) Make sure the workplace is clean and well lit. A messy or poorly lit workplace may lead to accidents. Try to think ahead, observe what is going on and use common sense when working with the device. b) If you discover damage or irregular operation, immediately switch the device off and report it to a supervisor without delay. c) If you are unsure about whether the product is operating correctly or if you find damage, please contact the manufacturer's service centre. d) Only the manufacturer's service centre may make repairs to the product. Do not attempt to make repairs yourself! e) In case of fire, use a powder or carbon dioxide (CO2) fire extinguisher (one intended for use on live electrical devices) to put it out. f) Children or unauthorised persons are forbidden to enter a work station. A distraction may result in loss of control over the device.

REMEMBER! WHEN USING THE DEVICE, PROTECT CHILDREN AND OTHER BYSTANDERS.
3.3. Personal safety
a) Do not use the device when tired, ill or under the influence of alcohol, narcotics or medication which can significantly impair the ability to operate the device. b) When working with the device, use common sense and stay alert. Temporary loss of concentration while using the device may lead to serious injuries.
c) To prevent the device from accidentally switching on, make sure the switch is on the OFF position before connecting to a power source. d) Remove all adjusting tools or spanners before turning the device on. A tool or spanner left in the revolving part of the device may cause injury.
3.4. Safe device use
a) Do not overload the device. Use the appropriate tools for the given task. A correctly-selected device will perform the task for which it was designed better and in a safer manner. b) Do not use the device if the “ON/OFF” switch does not function properly (does not switch the device on and off). Devices which cannot be switched on and off using the “ON/OFF” switch are hazardous, should not be operated and must be repaired. c) Make sure the plug is disconnected from the socket before attempting any adjustments, accessory replacements or before putting the device aside. Such precautions will reduce the risk of accidentally activating the device. d) When not in use, store in a safe place, away from children and people not familiar with the device who have not read the user manual. The device may pose a hazard in the hands of inexperienced users. e) Keep the device in perfect technical condition. Before each use check for general damage, especially check moving components for cracked parts or elements, and for any other conditions which may impact the safe operation of the device. If damage is discovered, hand over the device for repair before use. f) Keep the device out of the reach of children. g) Device repair or maintenance should be carried out by qualified persons, only using original spare parts. This will ensure safe use. h) To ensure the operational integrity of the device, do not remove factory-fitted guards and do not loosen any screws. i) When transporting and handling the device between the warehouse and the destination, observe the occupational health and safety principles for manual transport operations which apply in the country where the device will be used. j) Avoid situations where the device stops working during use due to excessive loading. This may result in overheating of the drive elements and damage to the device. k) Do not touch articulated parts or accessories unless the device has been disconnected from the power source. l) It is necessary to pay attention so that the device will not produce too much ice which prevents the agitator from rotating. Then it is necessary to turn off the device and wait for the ice to melt. Otherwise, the device may be damaged. m) When transporting the device, it is not allowed to hold it with containers, dispensers or other parts. The device must be transported by holding it with the base.
n) Do not move or transport the device while it is in operation. o) The device must not be cleaned with a pressure washer and must not be sprayed with a water jet. p) The surface on which the device will be set may not be deviated from the level more than 10 degrees. q) Do not insert anything into the tap of the device. r) It is not allowed to exceed the maximum capacity of tanks and attention should be paid to the phenomenon of increasing the volume of liquid after freezing.

ATTENTION! DESPITE THE SAFE DESIGN OF THE DEVICE AND ITS PROTECTIVE FEATURES, AND DESPITE THE USE OF ADDITIONAL ELEMENTS PROTECTING THE OPERATOR, THERE IS STILL A SLIGHT RISK OF ACCIDENT OR INJURY WHEN USING THE DEVICE. USE COMMON SENSE WHEN USING THE DEVICE.
4. Use guidelines
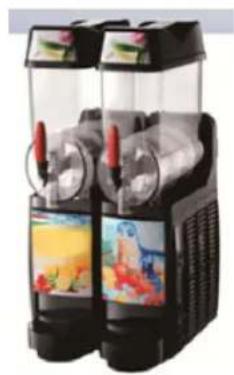
The Slush Machine is intended for the production of granita and cold drinks, such as iced coffee, frozen cappuccino, frozen yogurt, and frozen alcoholic beverages.
The user is liable for any damage resulting from unintended use of the device.
NOTE! As a cooling product operating with a compressor, some noise and occasional "click" sounds (from the solenoid valve) may occur during operation. This is normal and not a cause for concern.
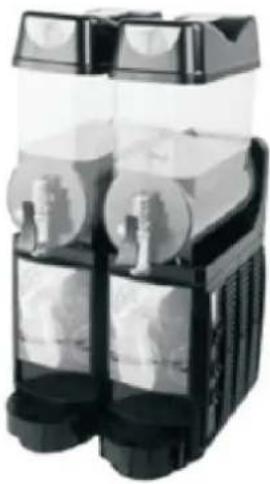
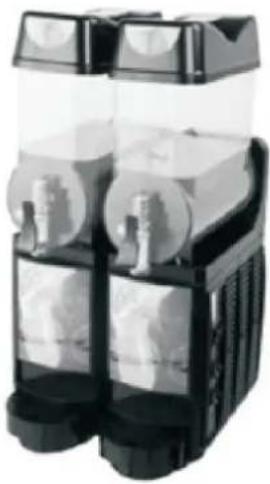
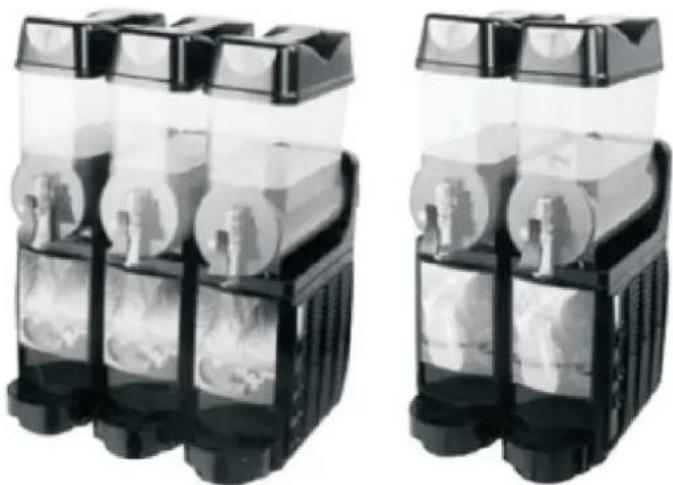
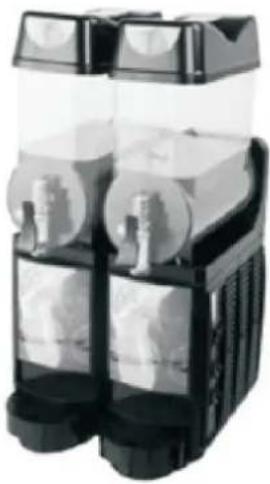
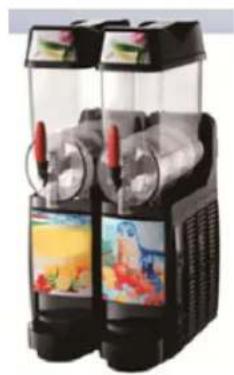
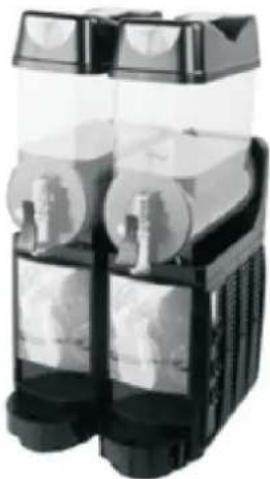
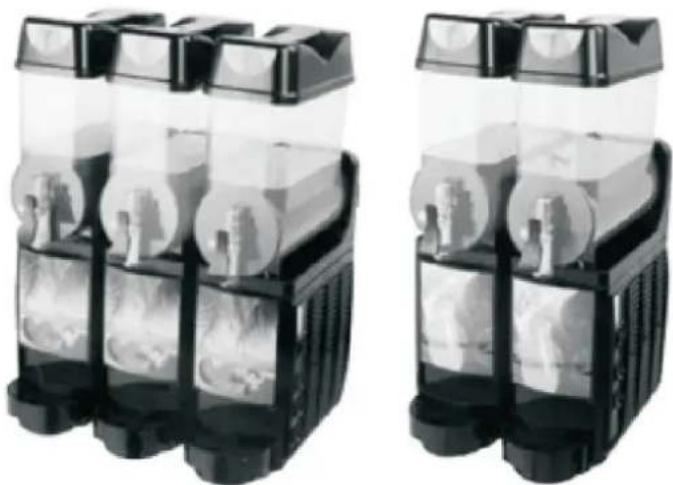
4.1. Device description
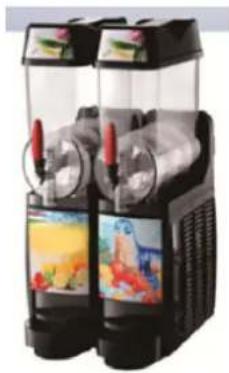
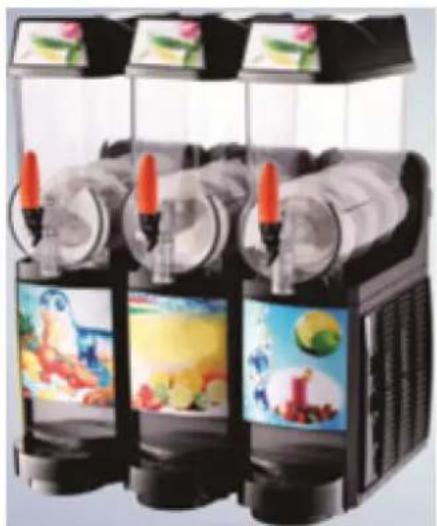
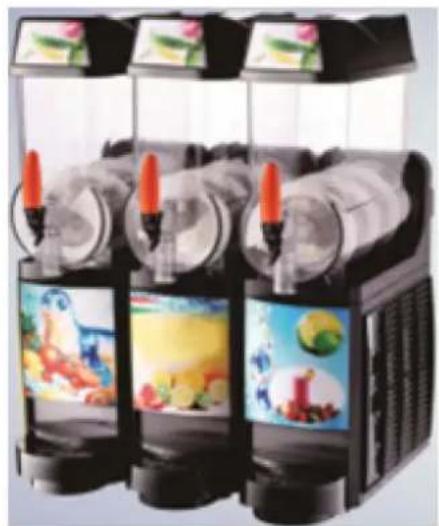
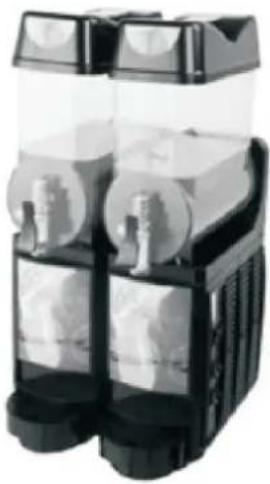
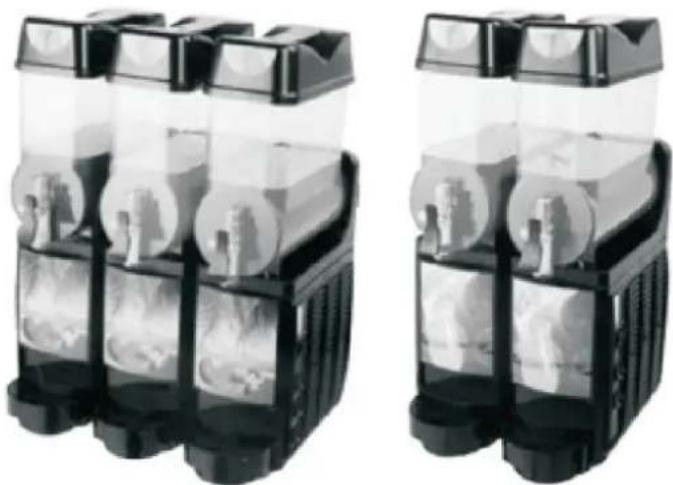
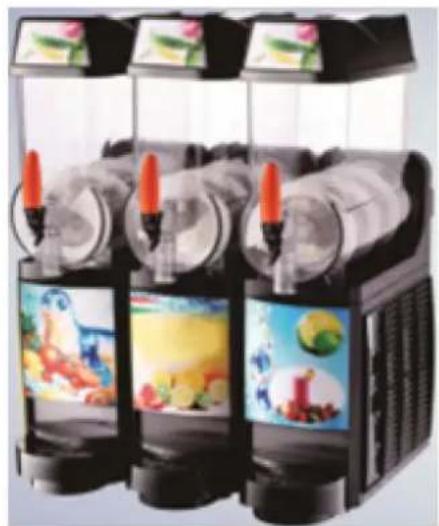
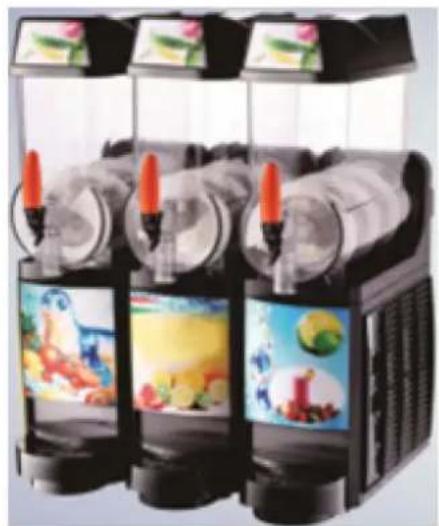
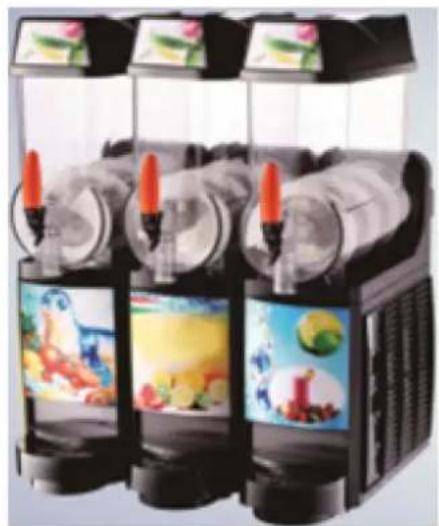
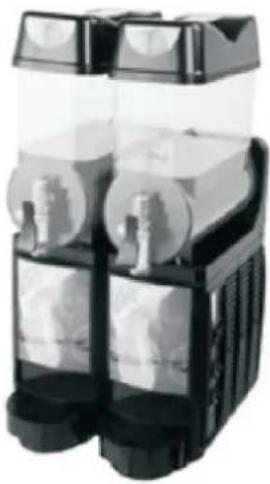
The following description applies to RGSd2/15, the other models have a similar design.
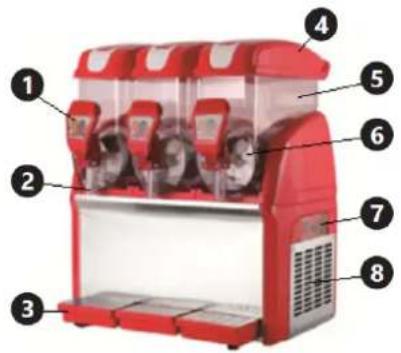
1) Tap lever
2) Tap
3) Drip tray
4) Device cover
5) Device tank
6) Device agitator
7) Control panel
8) Ventilation openings

4.2. Preparing for use
4.2.1. Appliance location
The optimum ambient temperature should be 25-32°C, and the relative humidity should not exceed 85%. Ensure good ventilation in the room in which the device is used. The distance between each side of the device and the wall or other objects should be at least 35 cm. Keep the device away from hot surfaces. Operate the device on flat, stable, clean, refractory, and dry surfaces out of the reach of children and people with mental disabilities. Install the device making sure that constant access to the main plug is ensured. The power cord connected to the appliance must be properly grounded and correspond to the technical details. Before the first use, remove all elements and clean them along with the entire device. The device is intended for use inside rooms at a temperature above 0°C. The surface on which the device will be set must be strong enough to keep the device with its contents.
NOTE! Never immerse the device in a stream of water or pour it with a stream of water.
NOTE! Do not turn on the empty device.
NOTE! Regularly clean the device in order to prevent permanent deposition of impurities.
4.3. Assembling the device
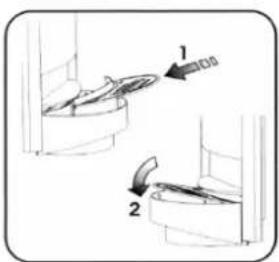
1) Unpack the entire device. 2) Wash the entire device before each use. 3) Set the device on the appropriate surface. 4) Mount the drip tray to the device.
4.4. Device use
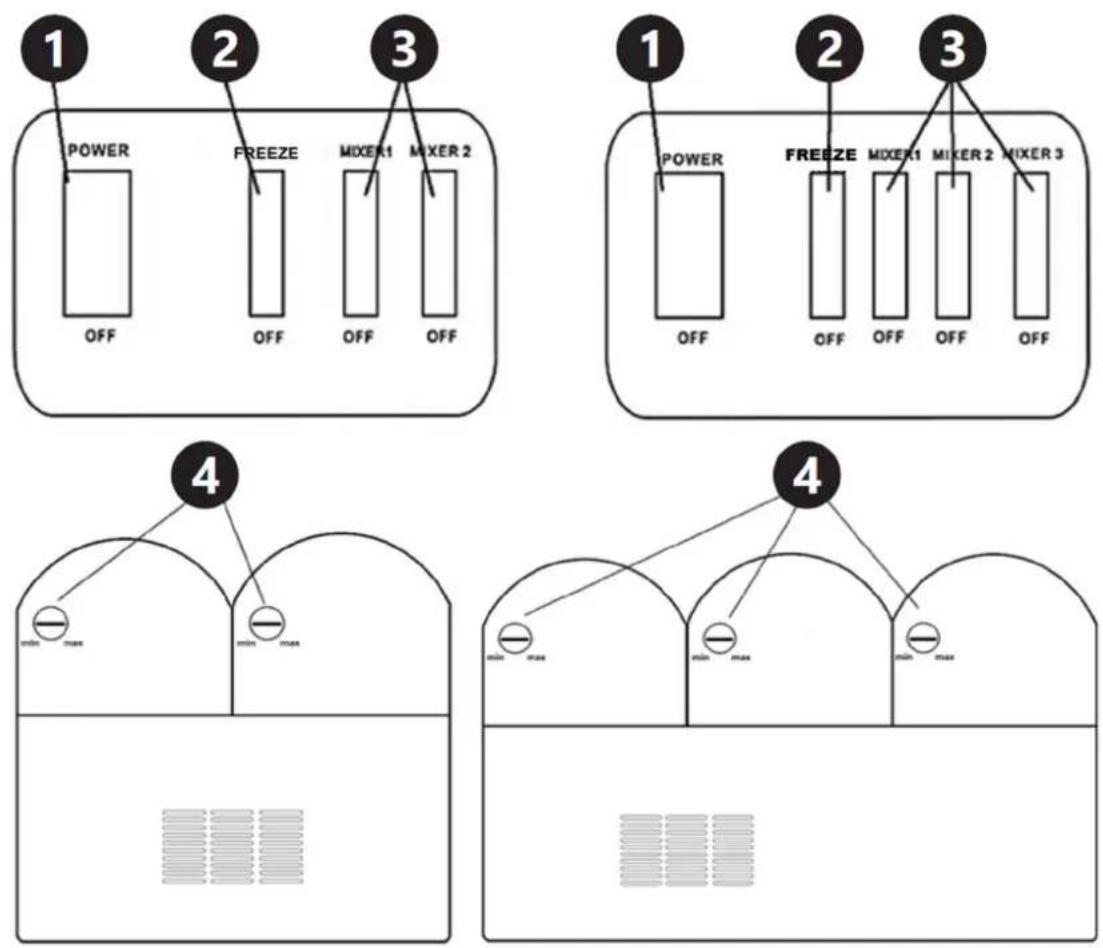
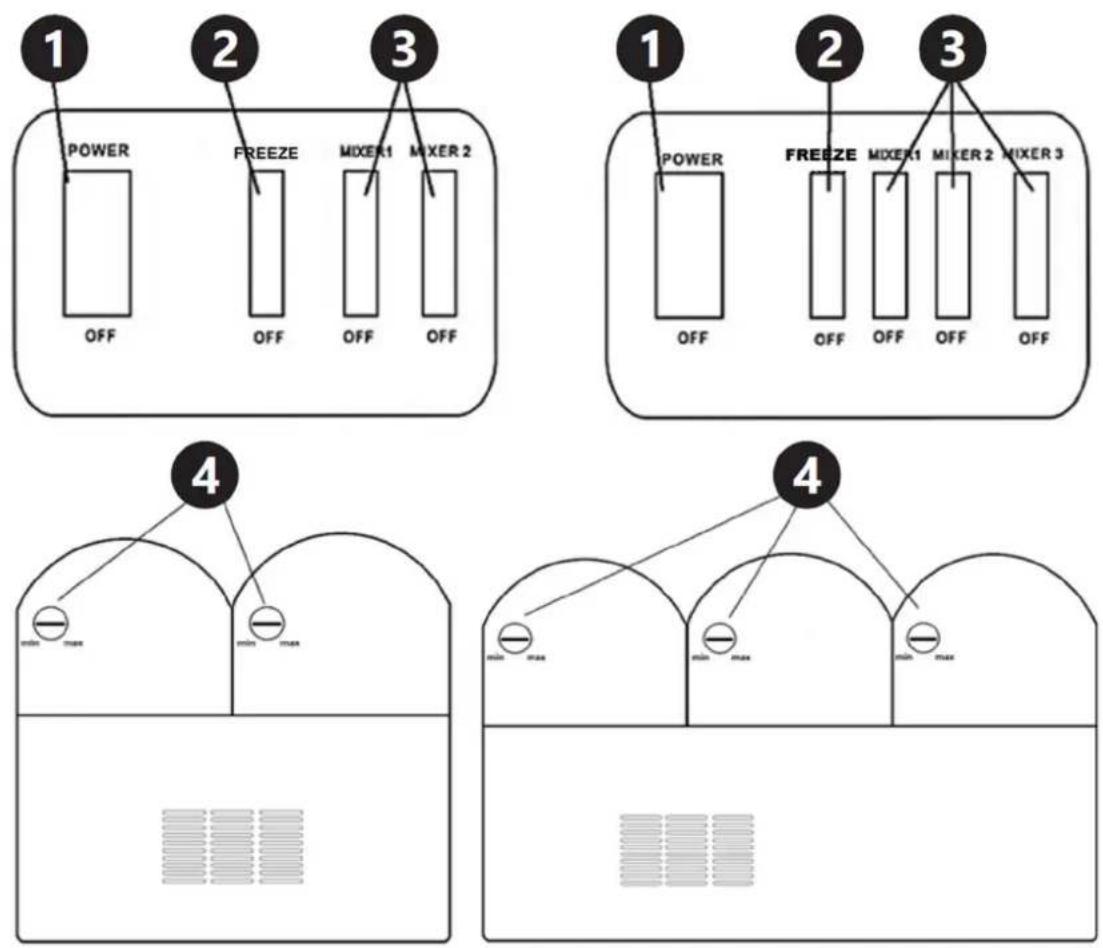
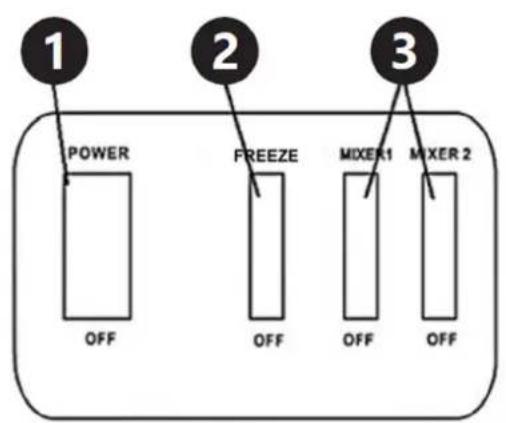
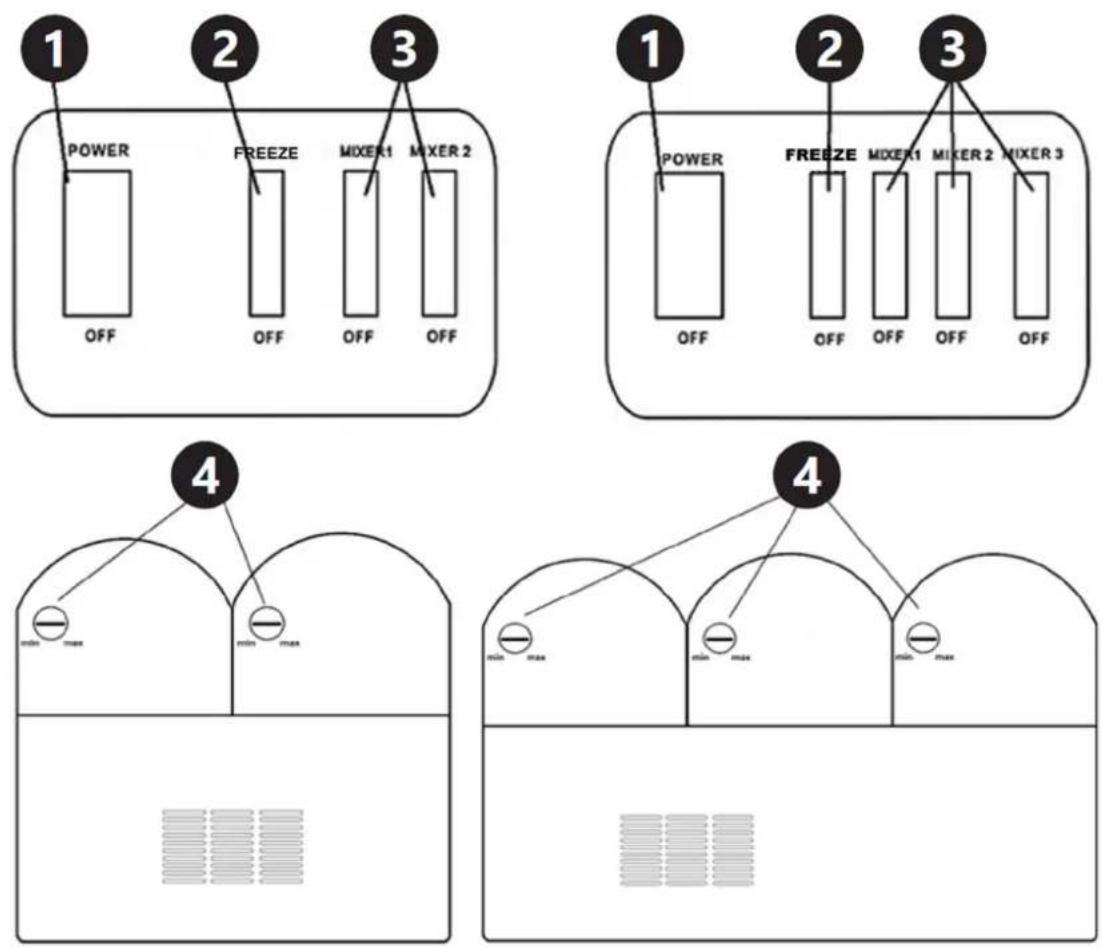
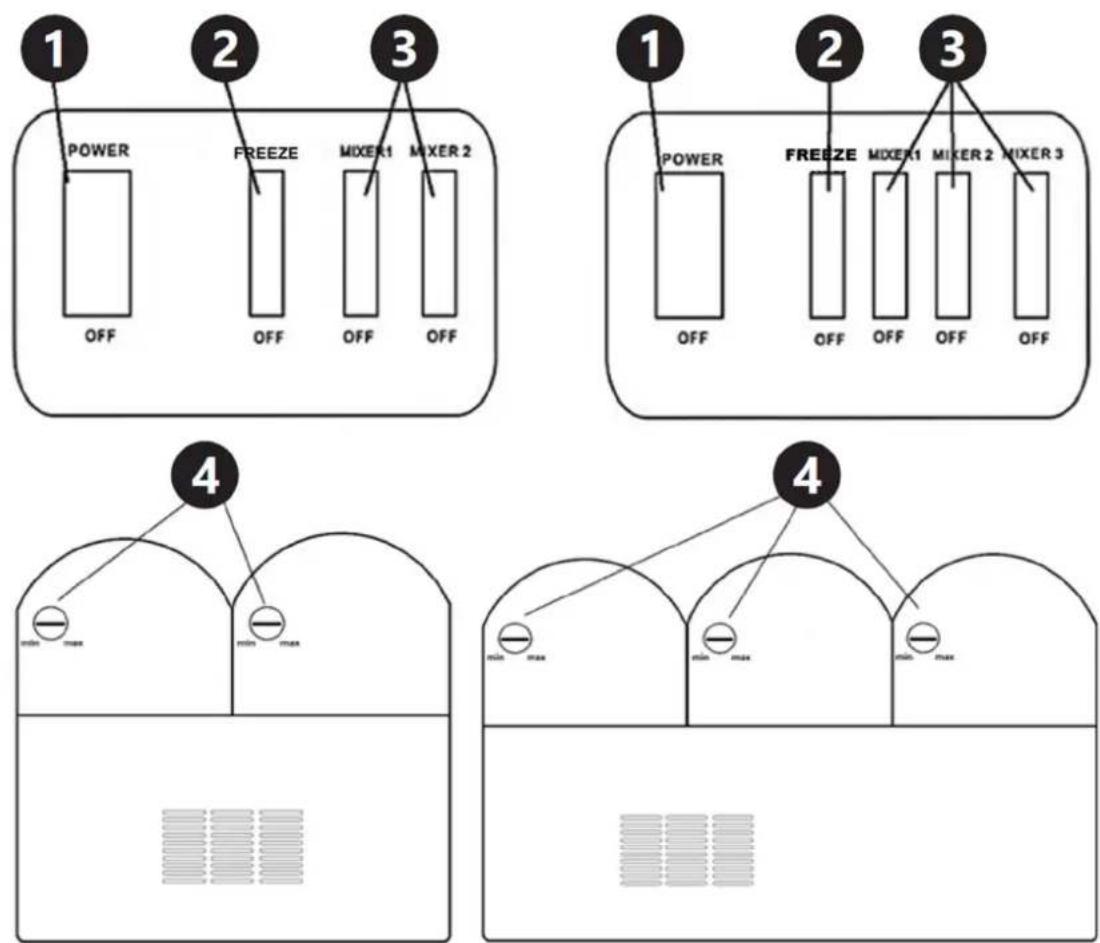
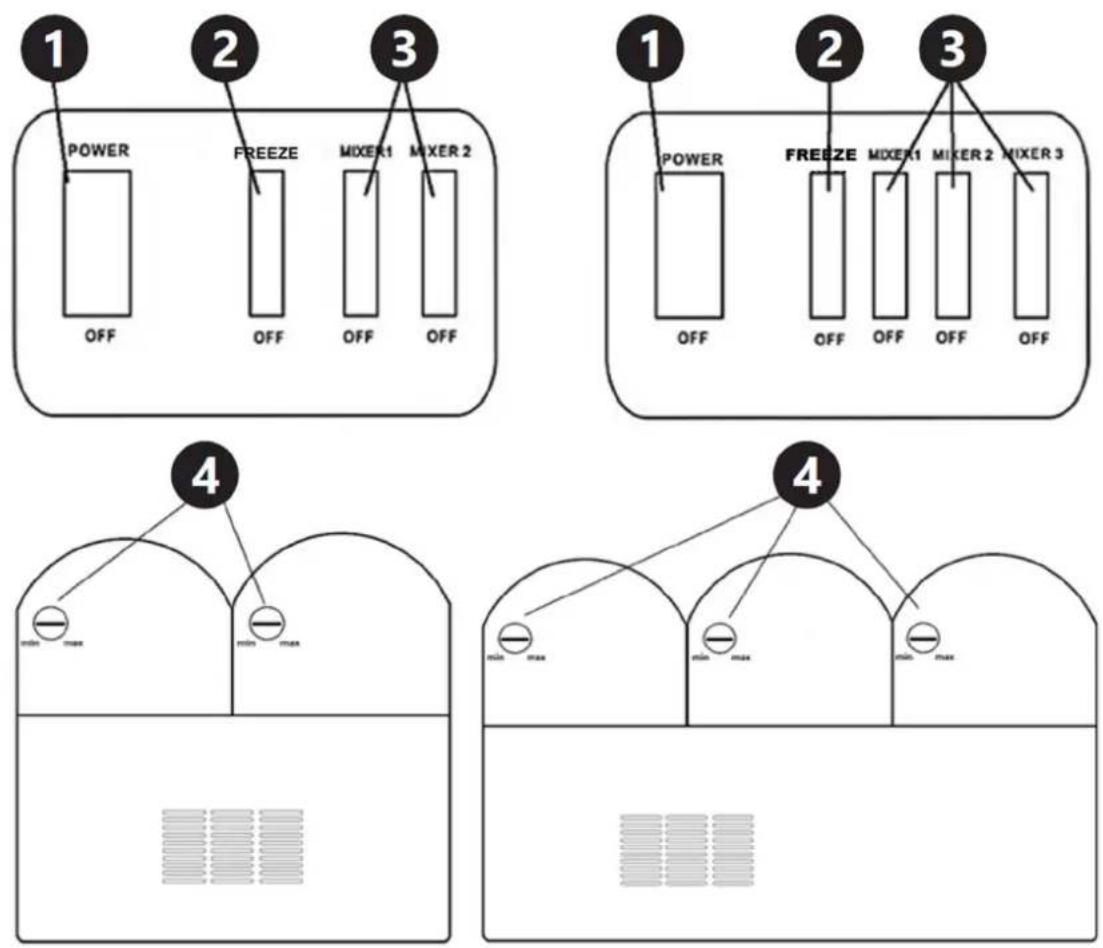
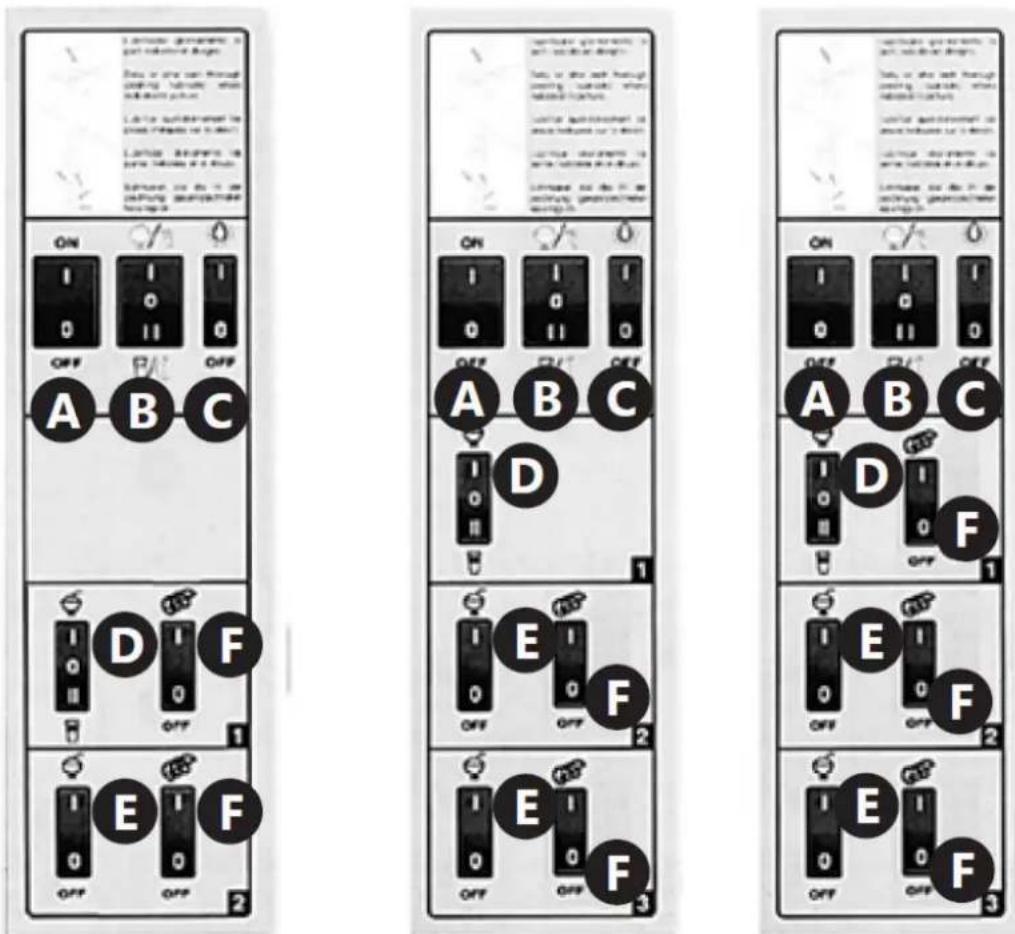
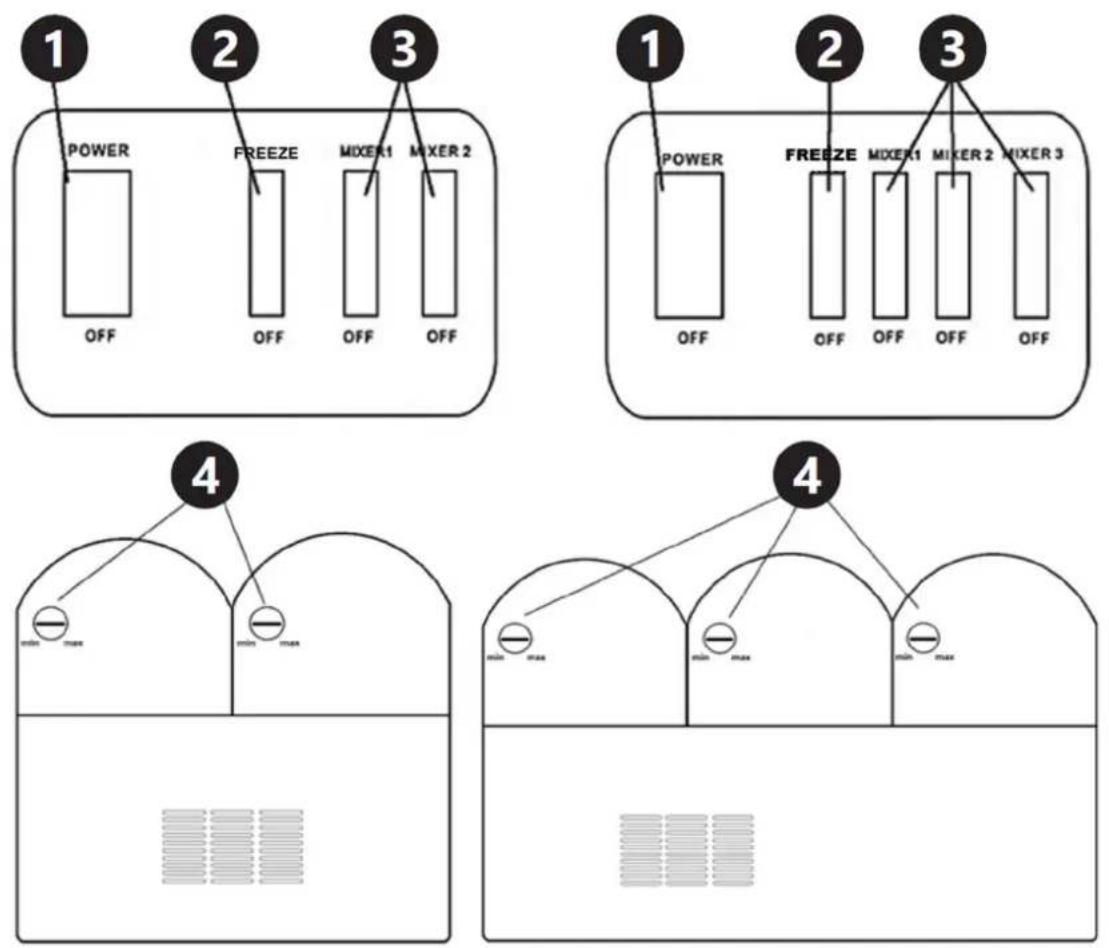
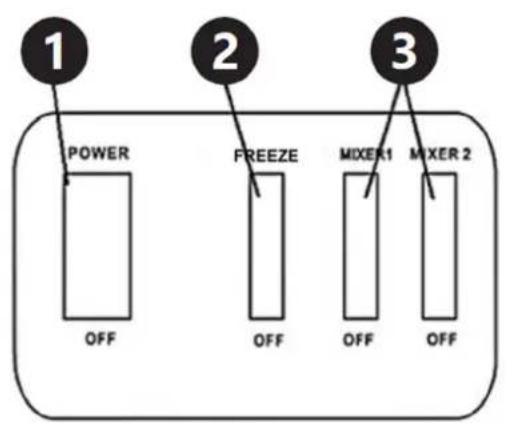
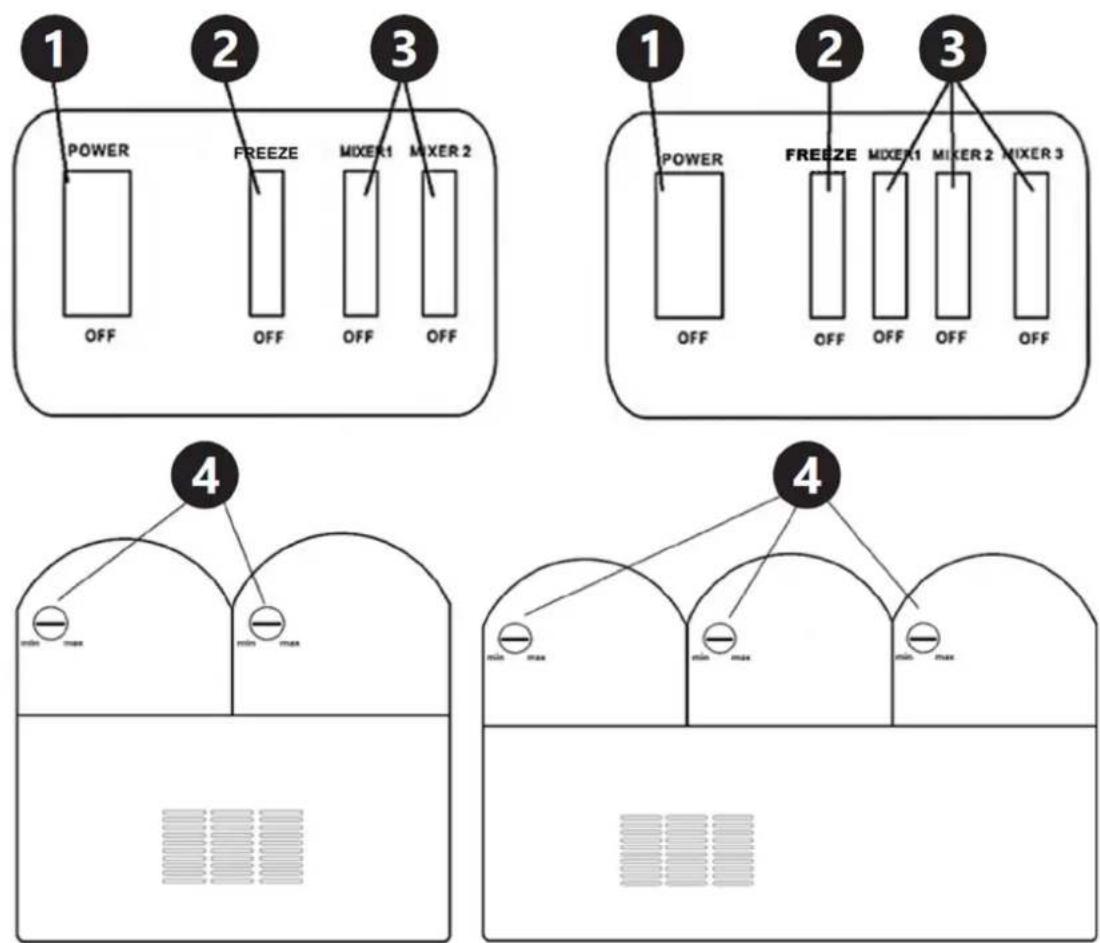
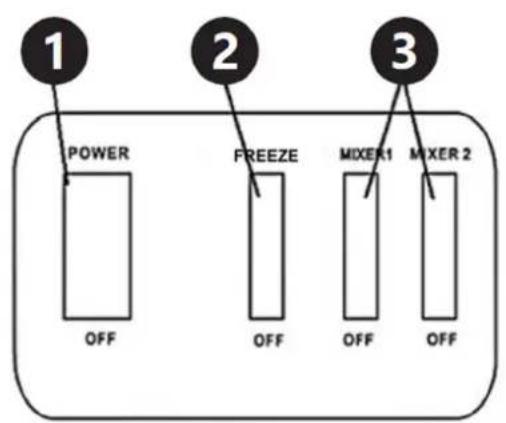
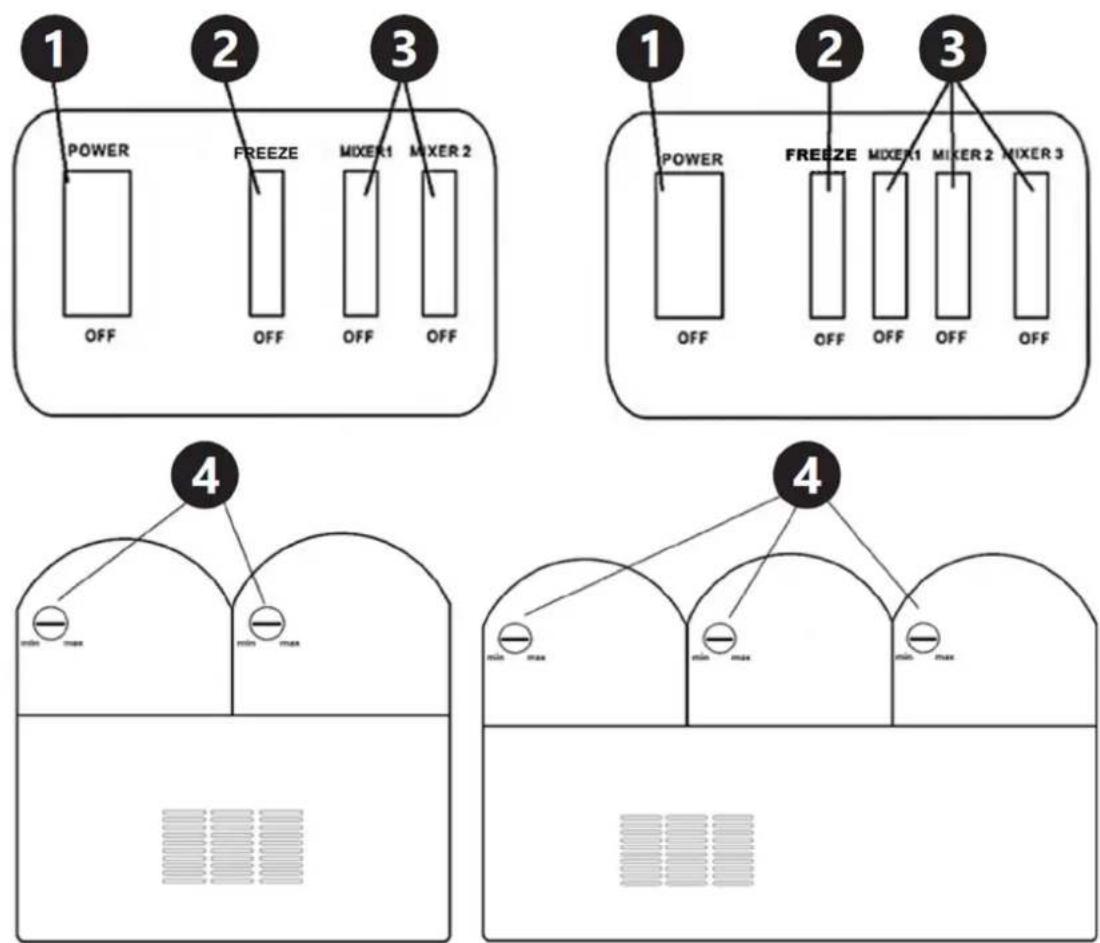
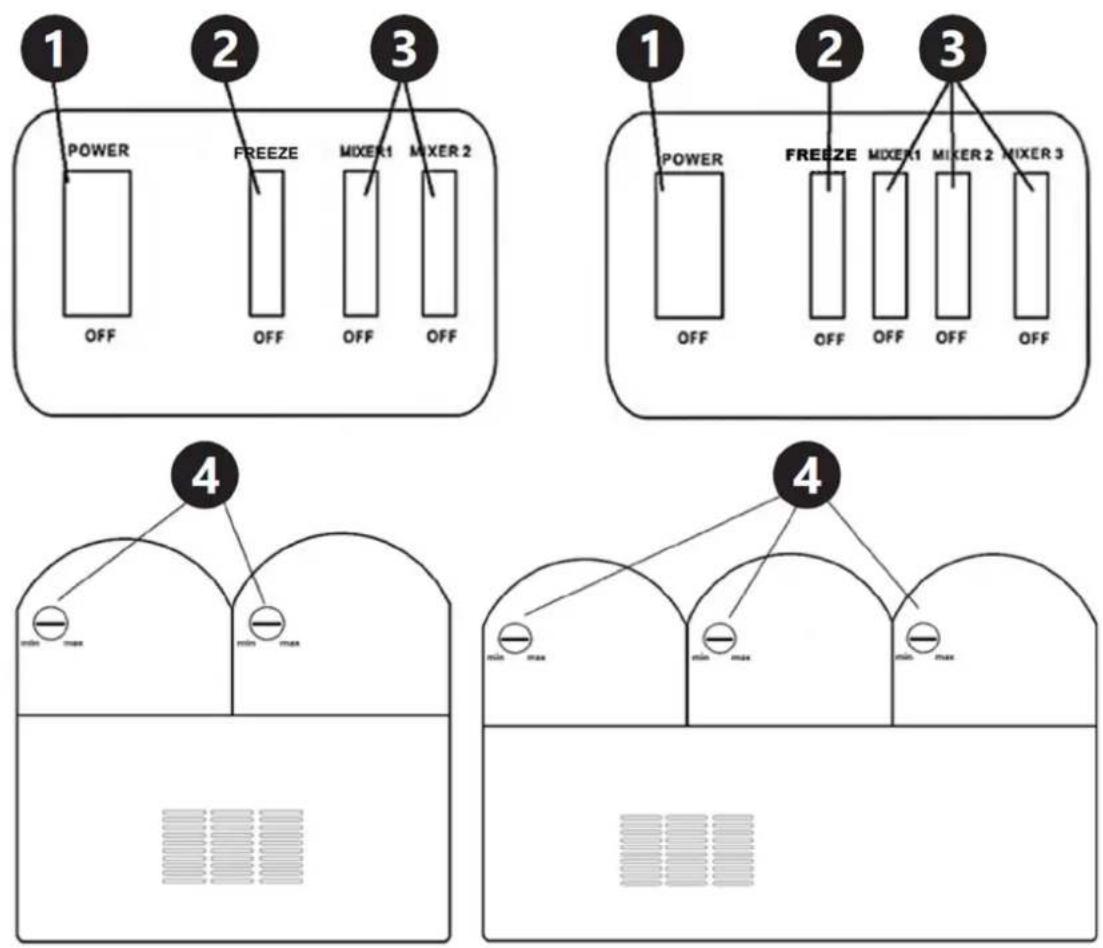
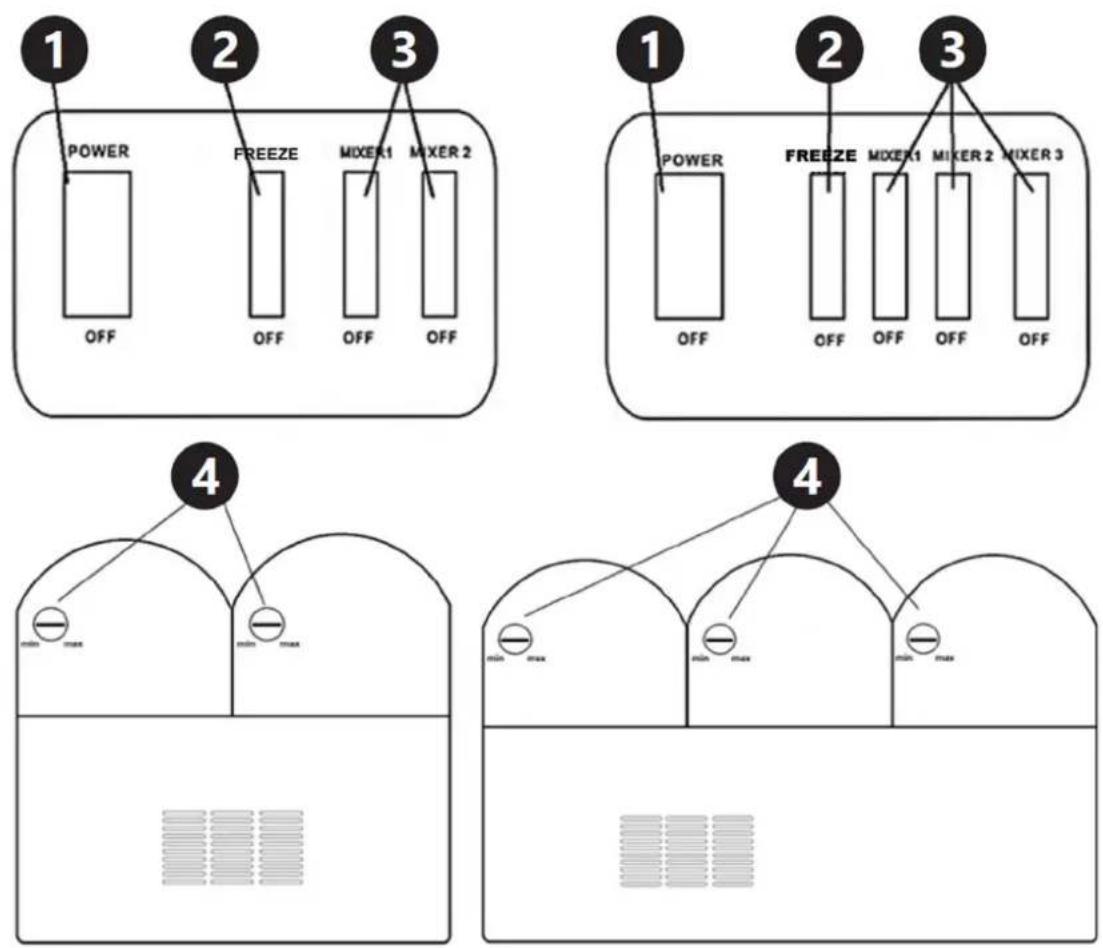
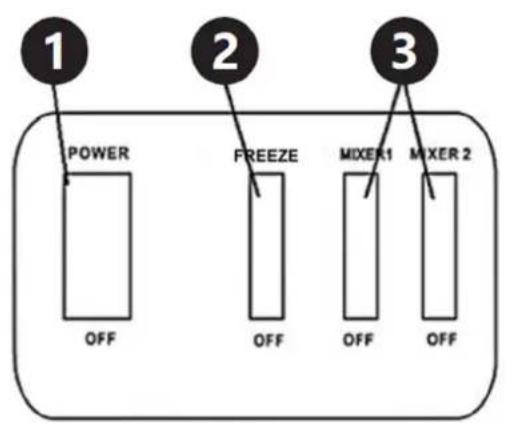
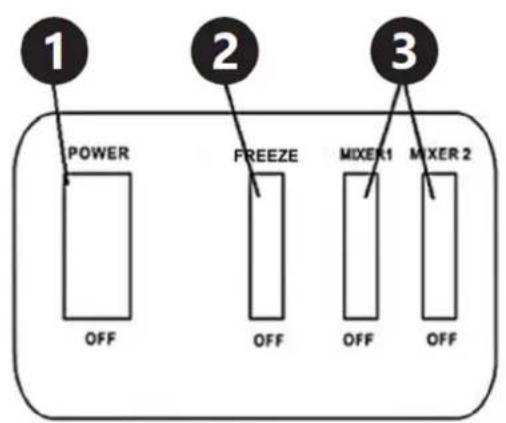
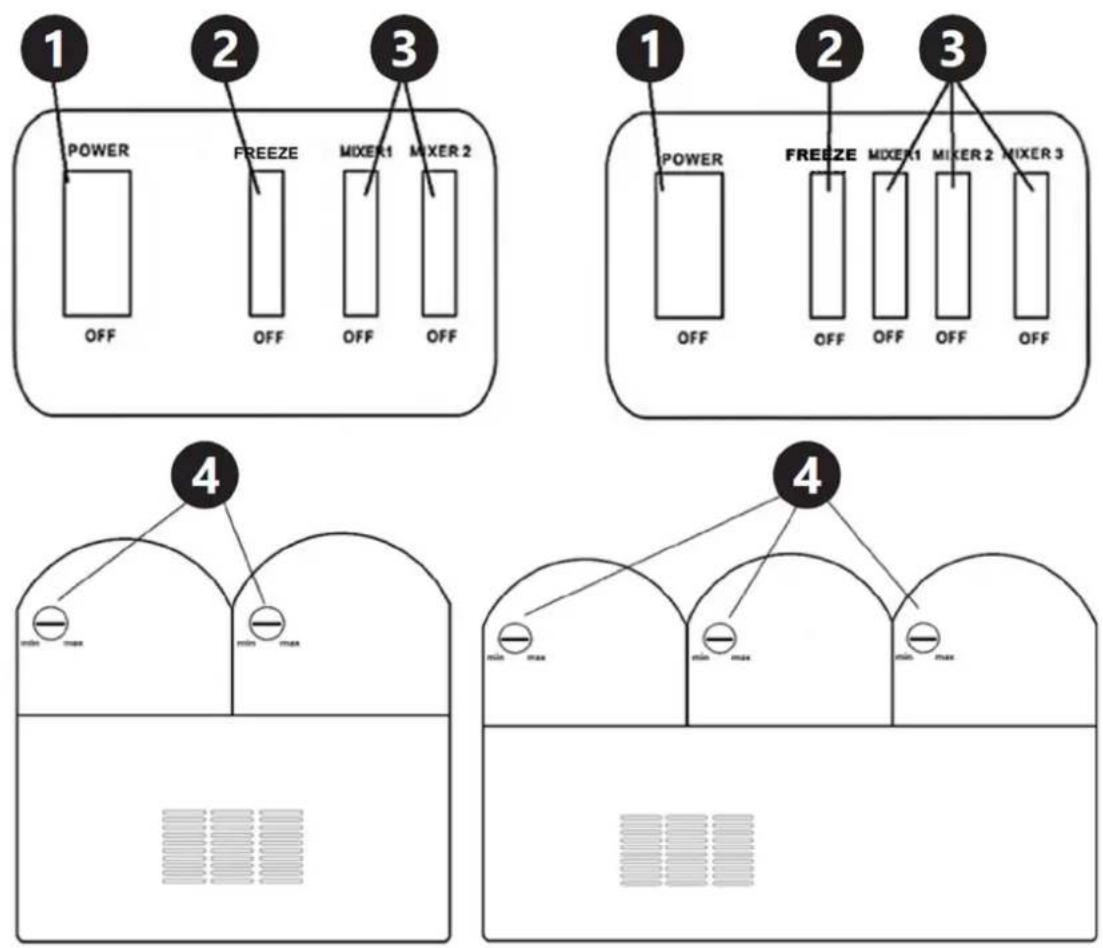
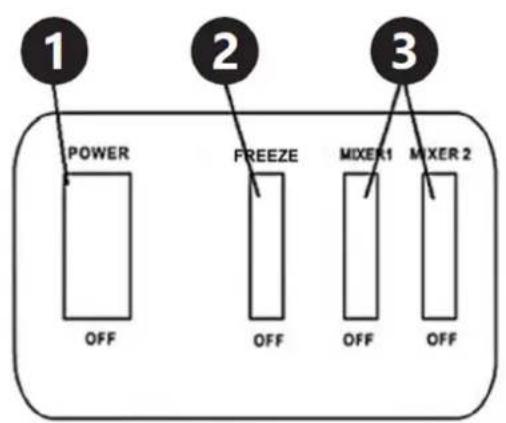
4.4.1. Description of the button functions RCSL 2/15, RCSL 3/15
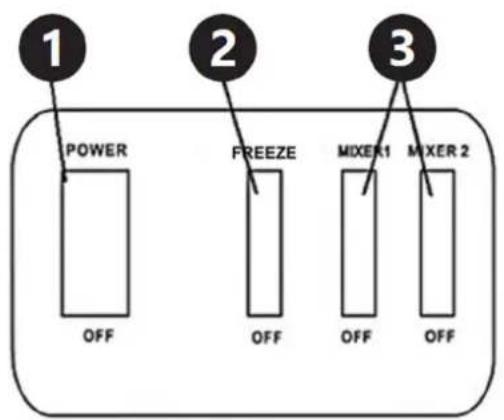
1) On/off switch 2) On/off switch for freezing 3) On/off switch of the agitator in the tank 1/2/3
4) Hardness adjustment knob in the 1/2/3 tank. The knobs are located on the back of the device.
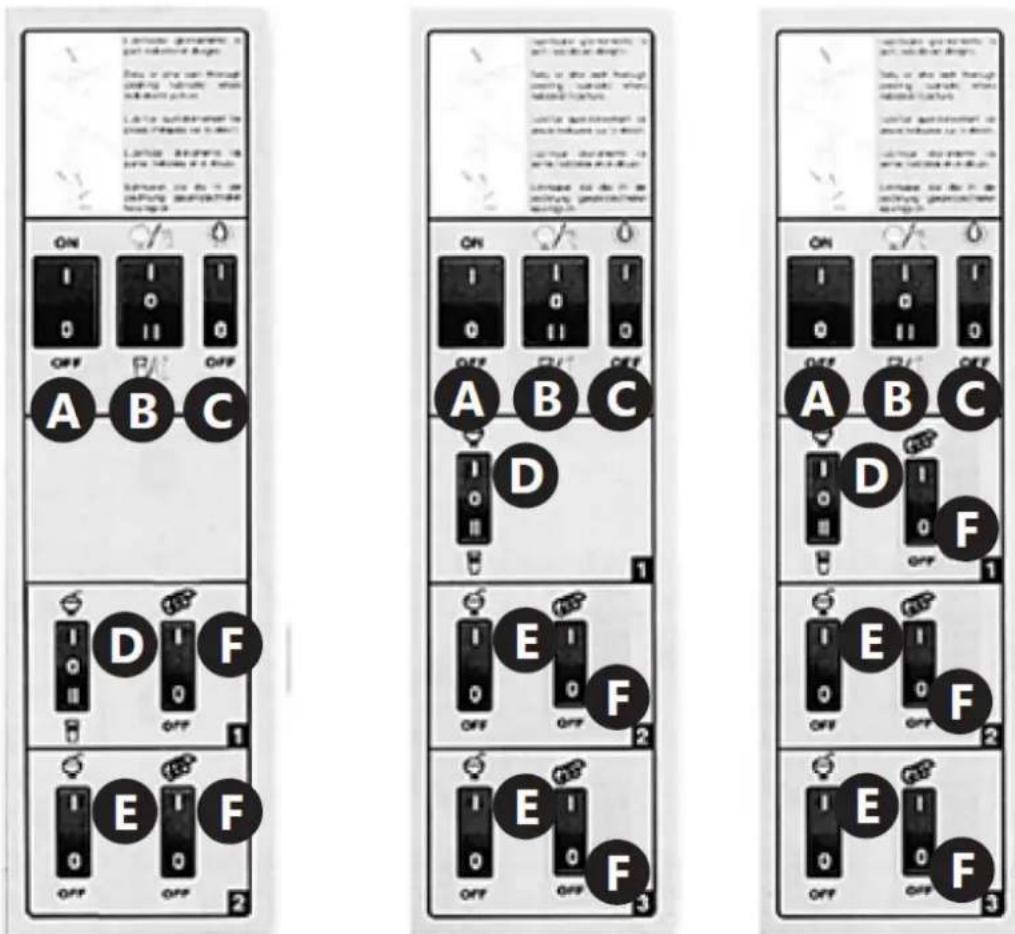
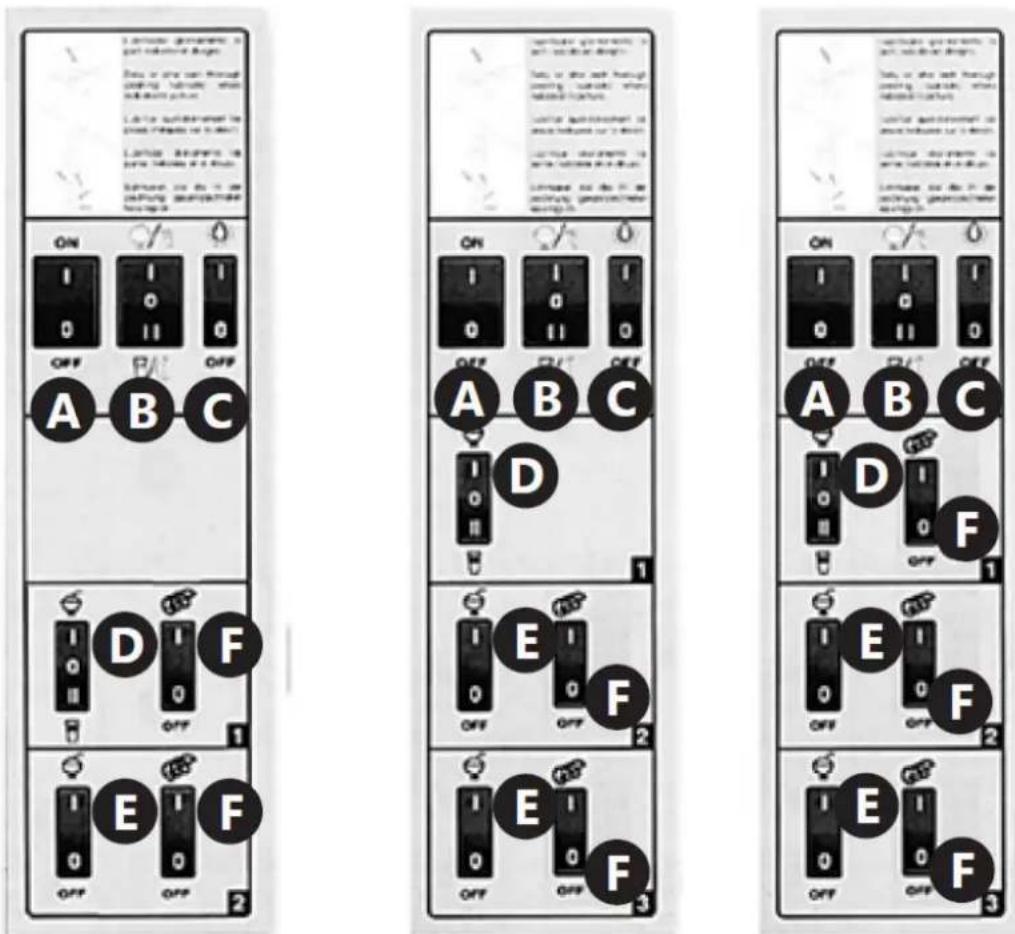
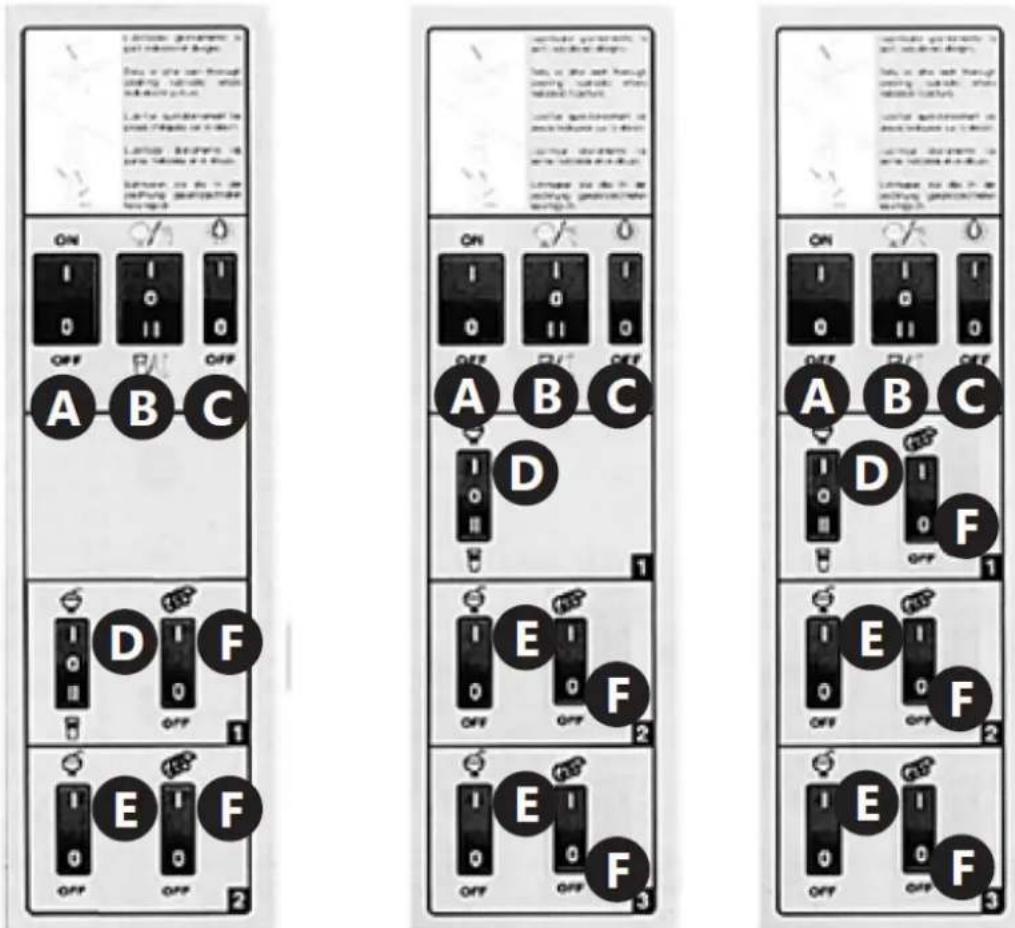
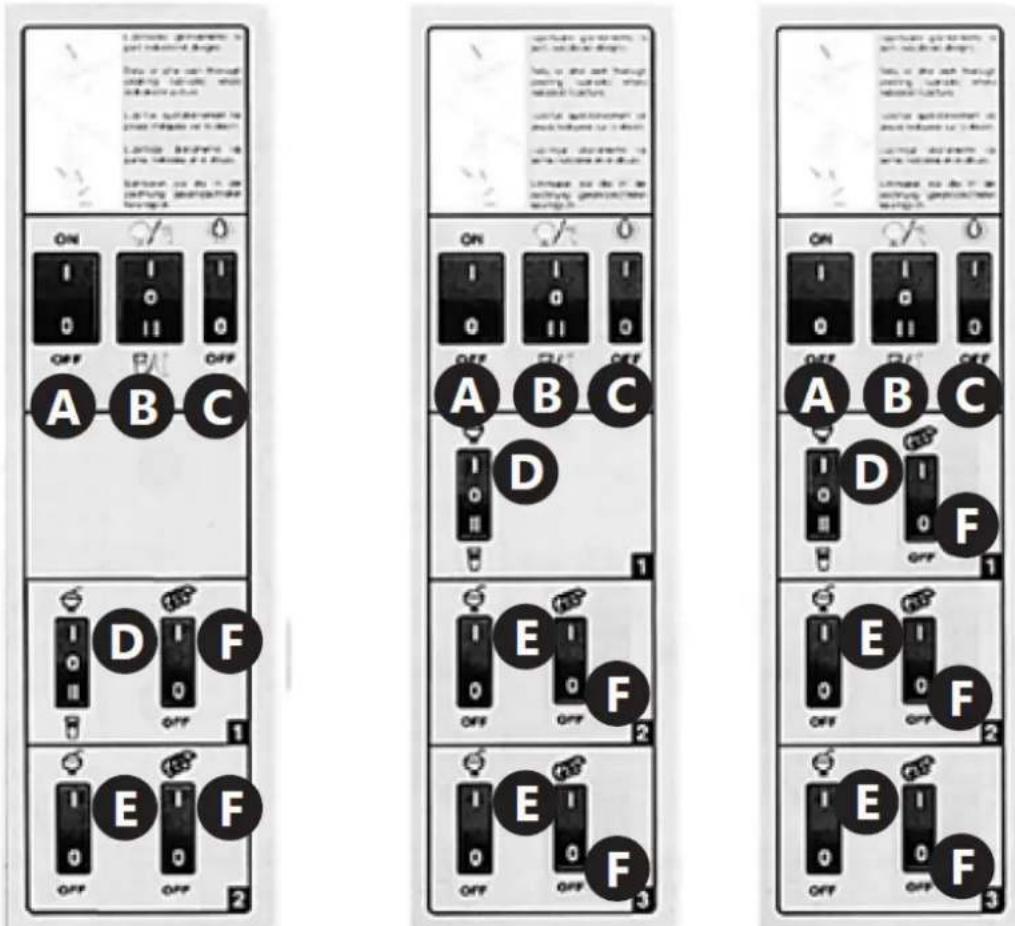
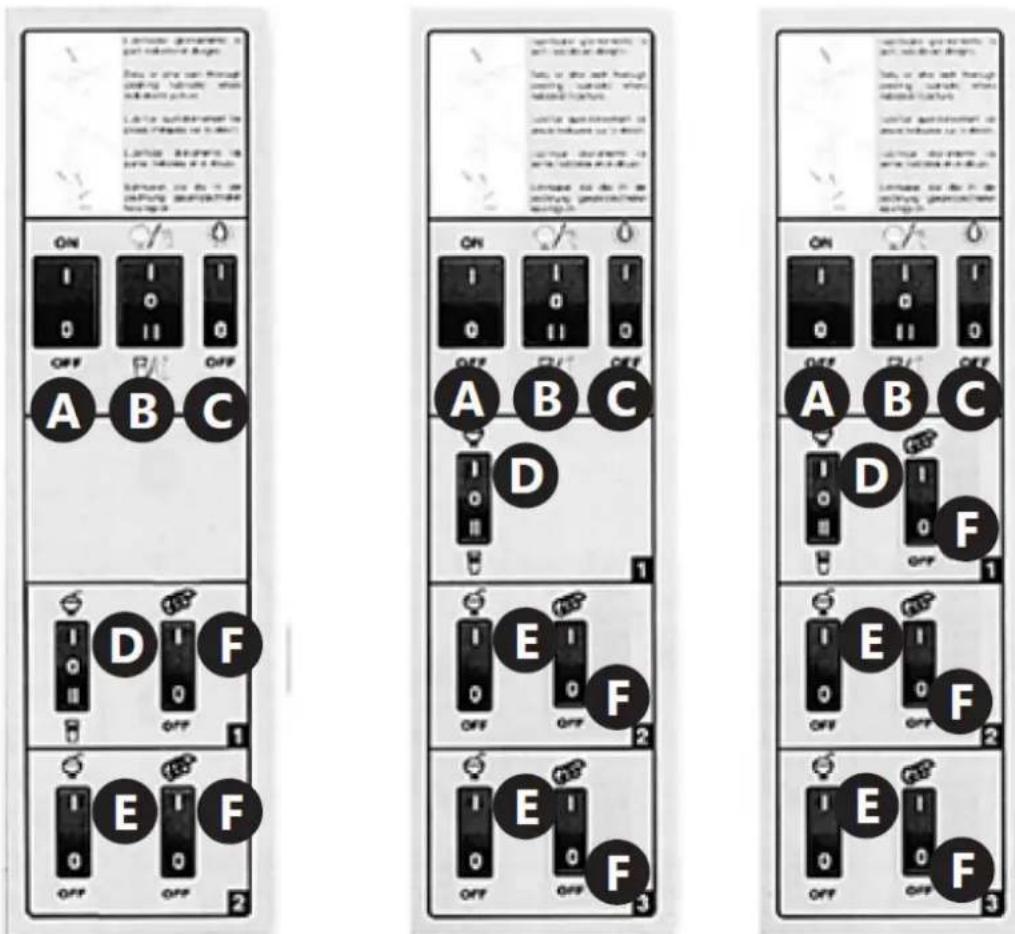
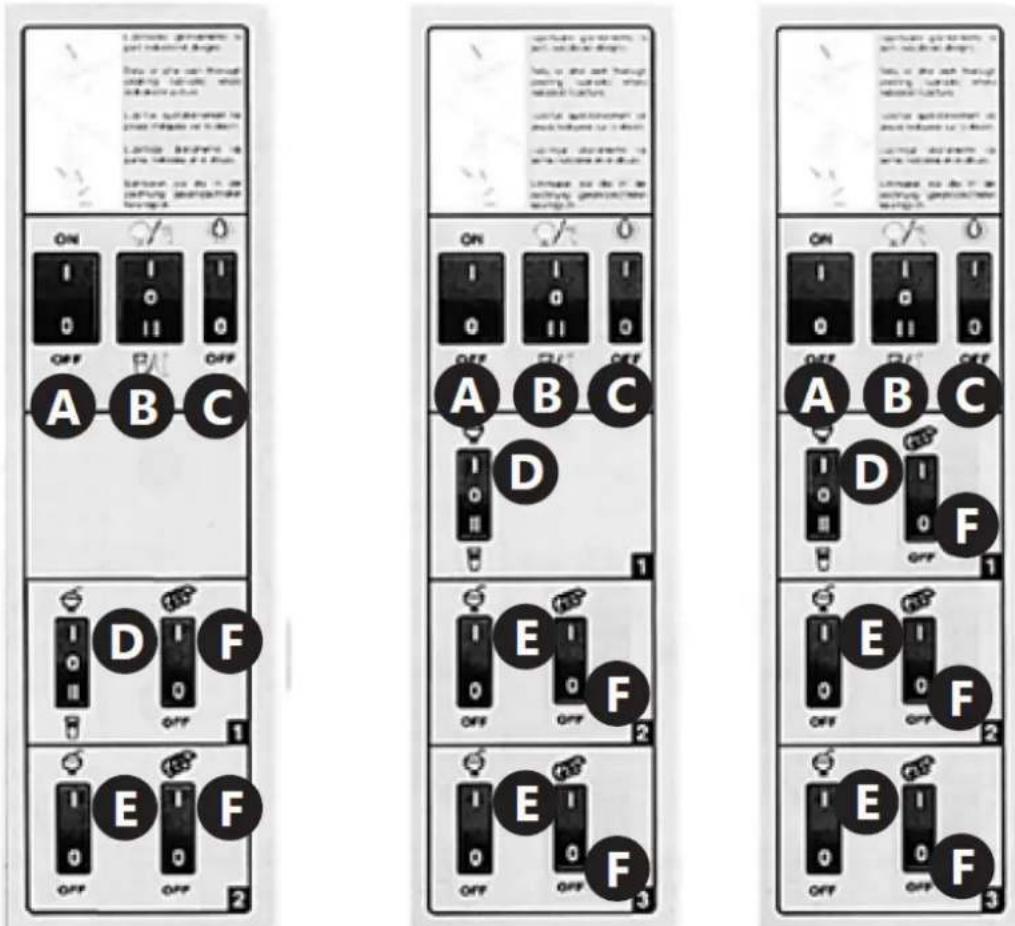
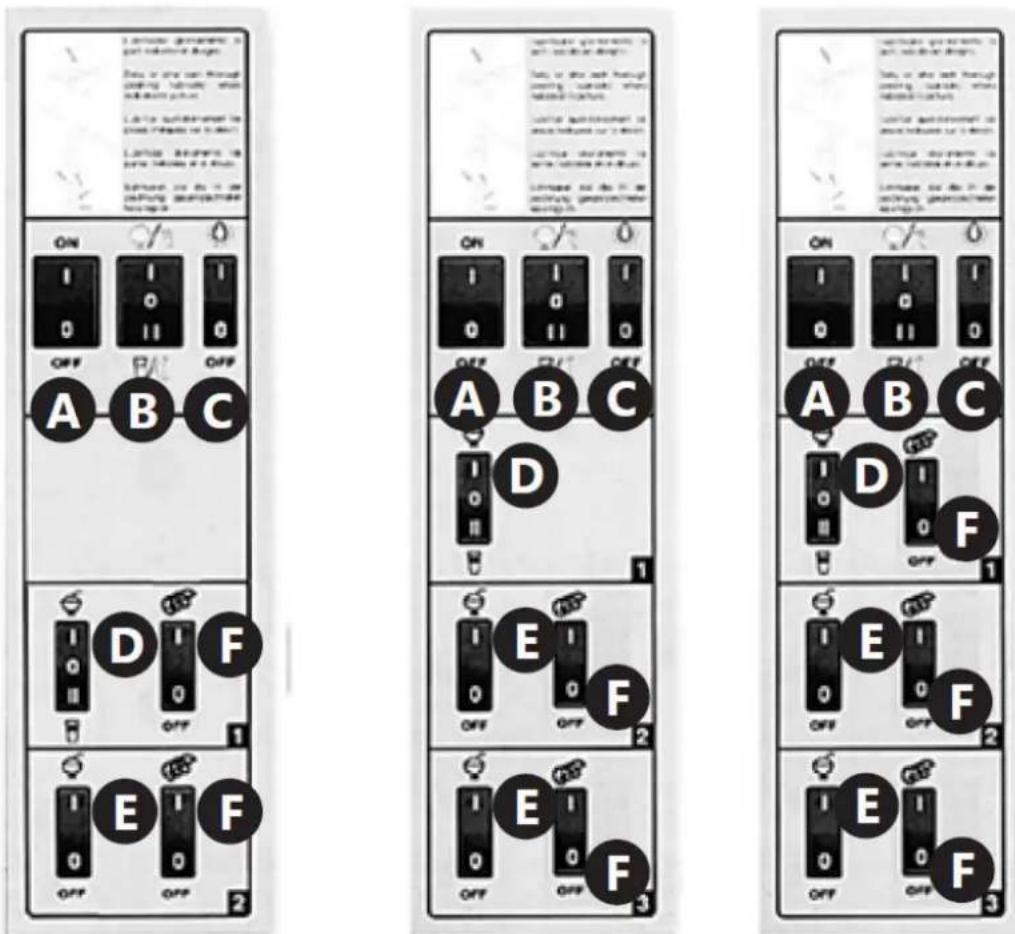
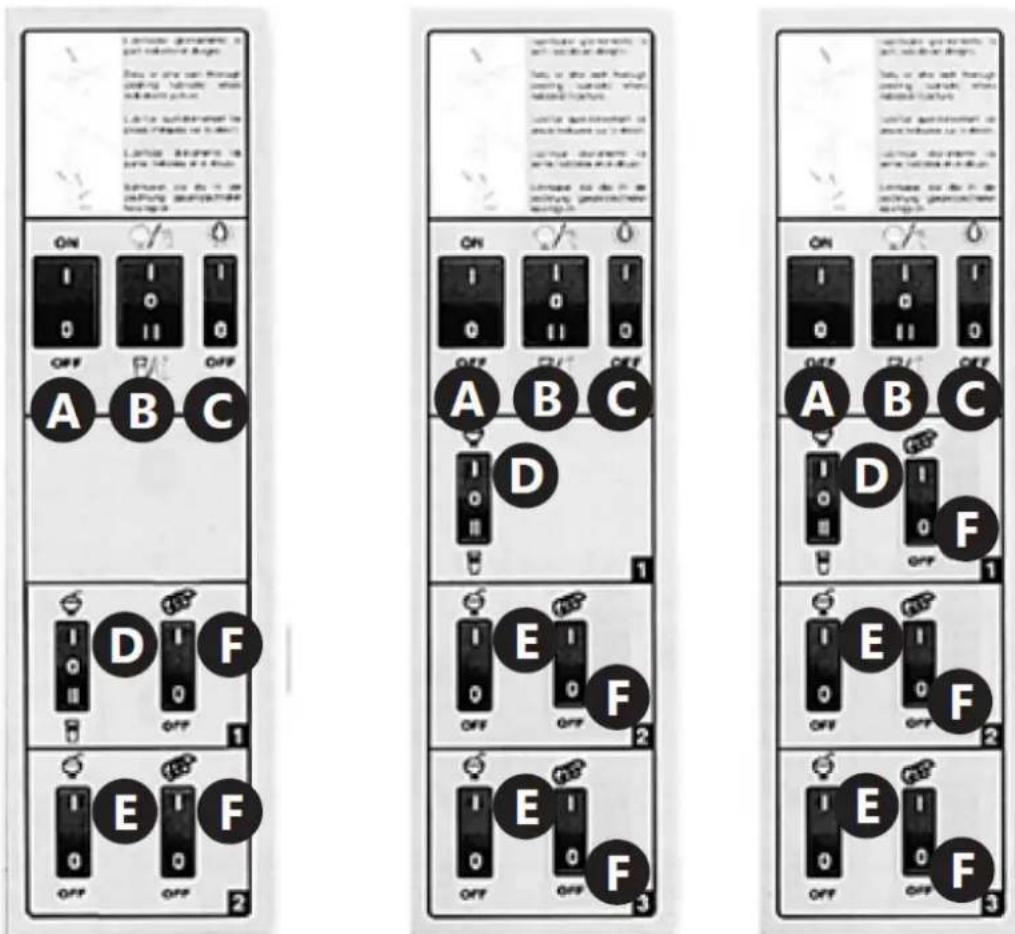
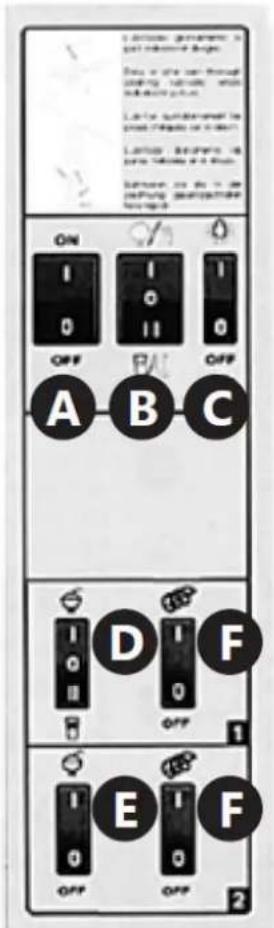
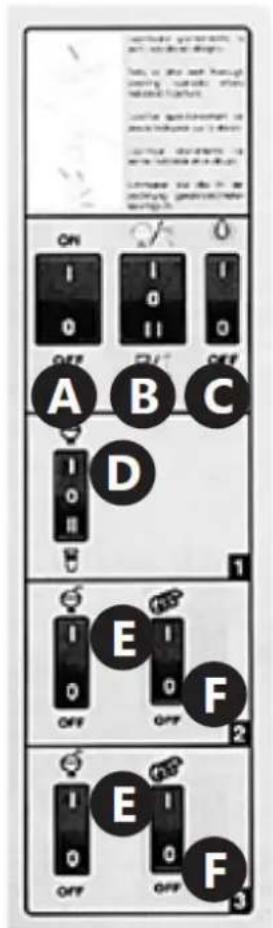
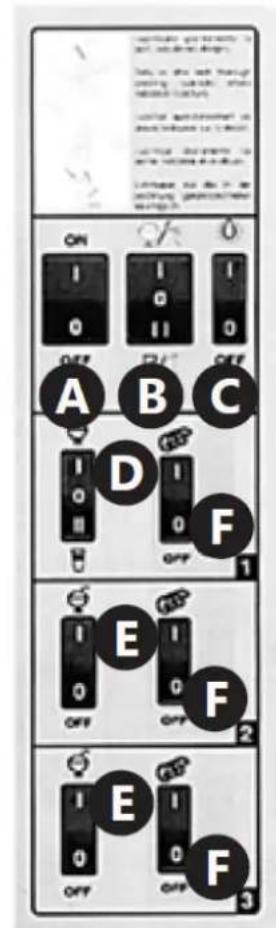
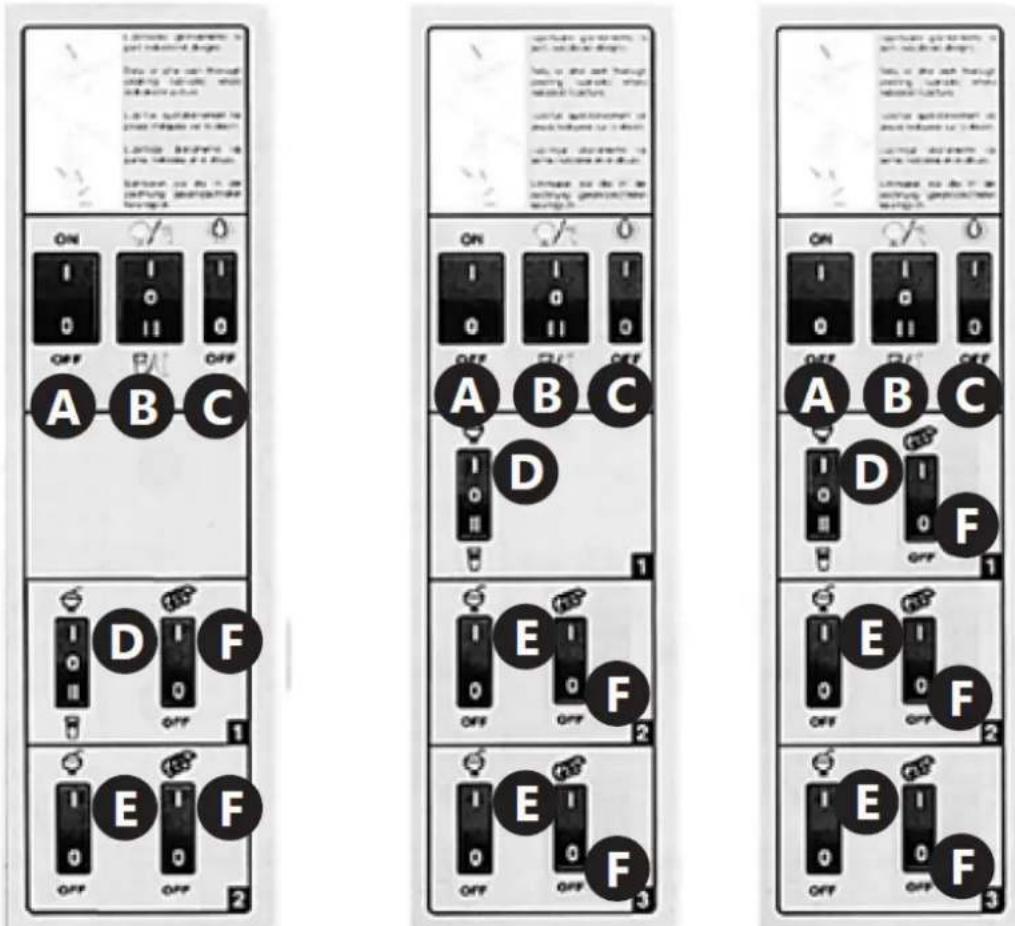
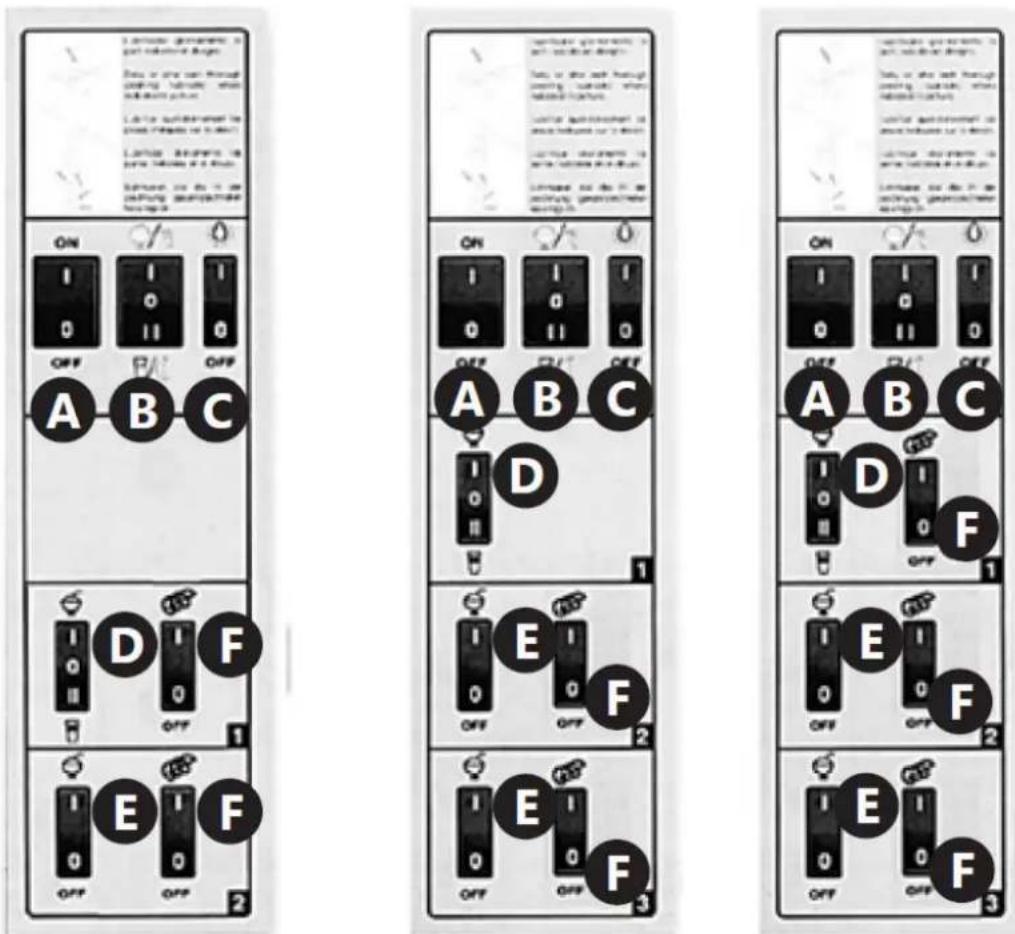
RCSL 2/12, RCSL 2/10, RCSL 3/12, RCSL 3/10
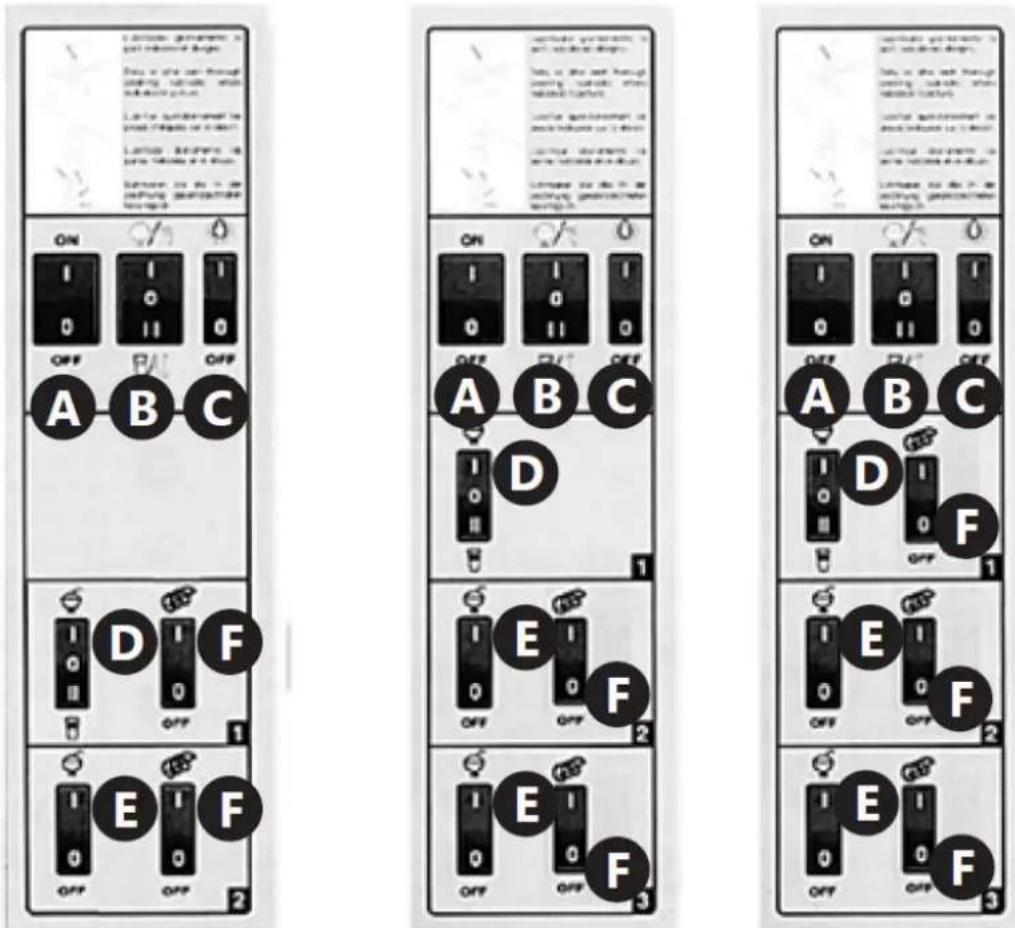
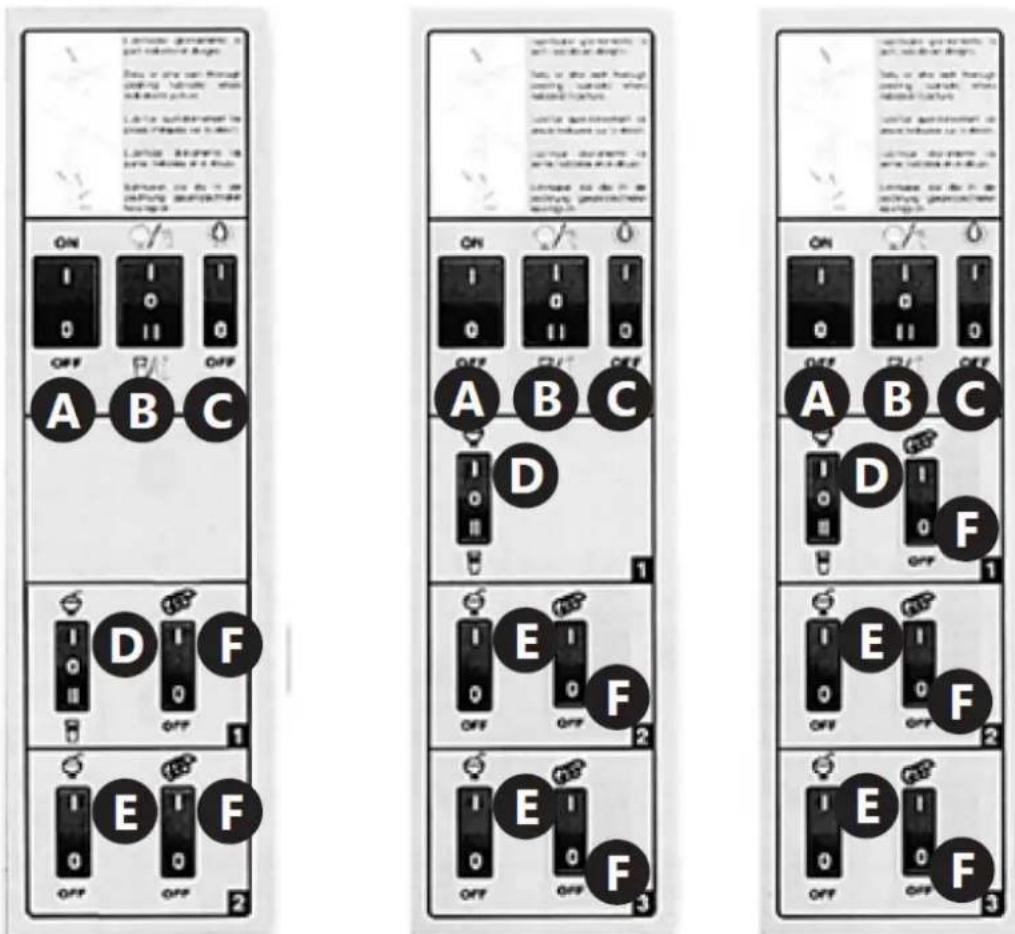
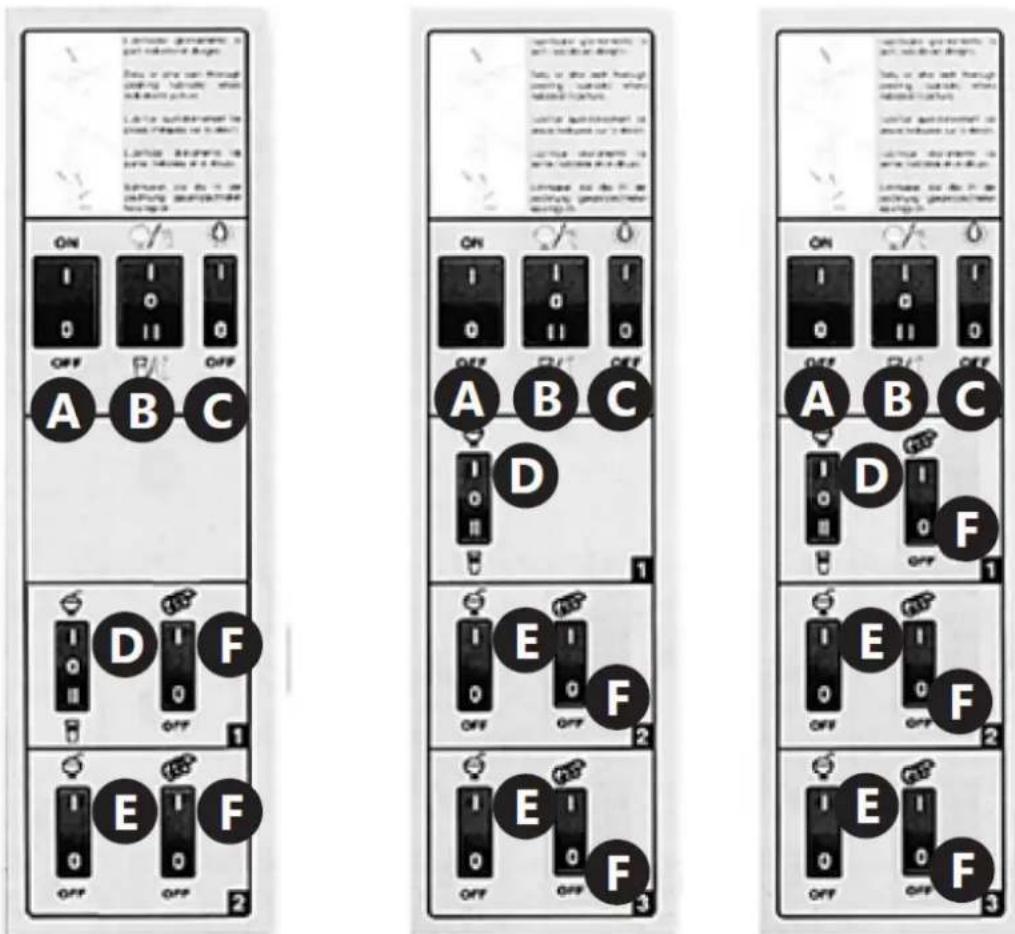
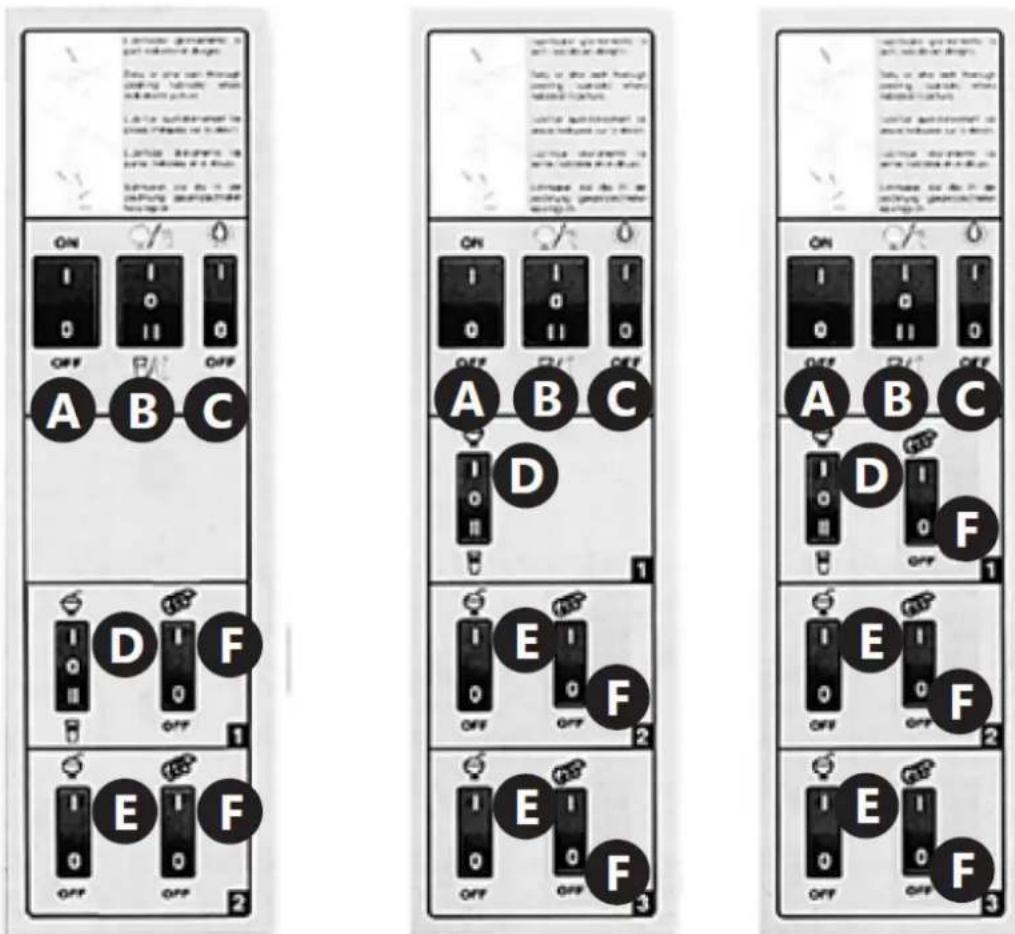
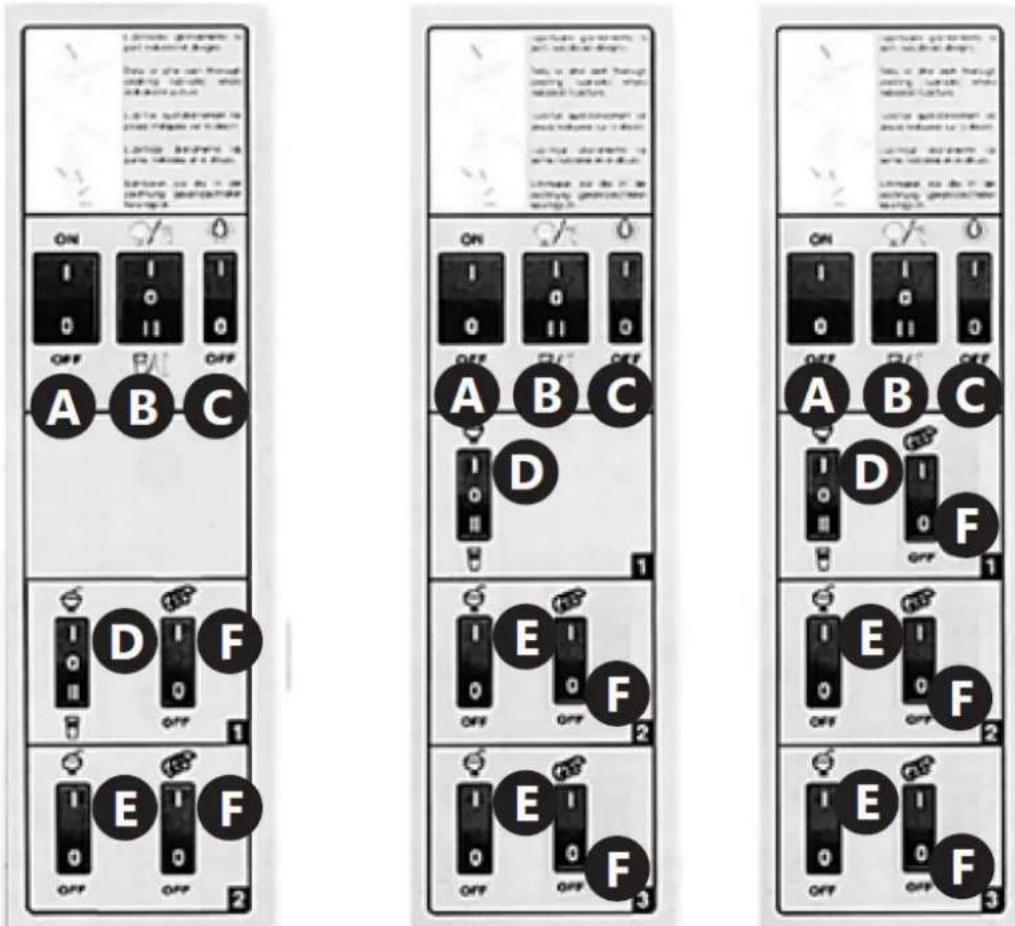
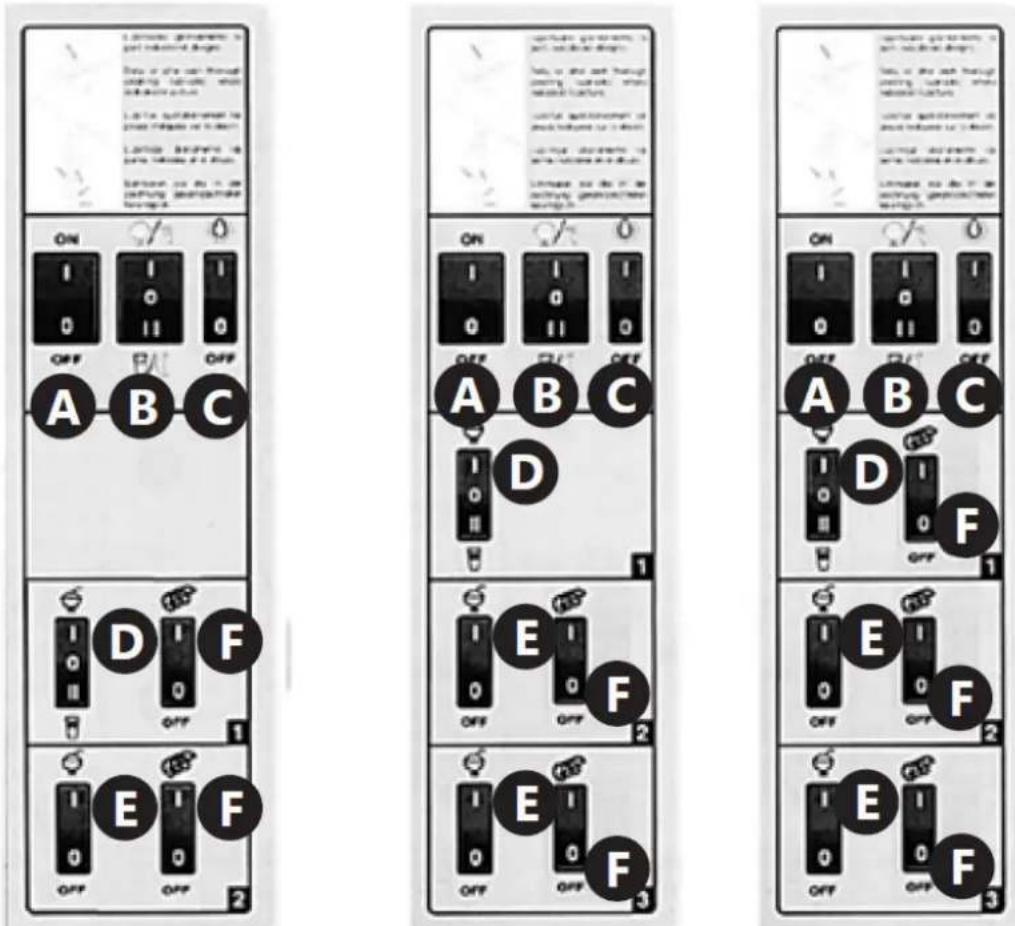
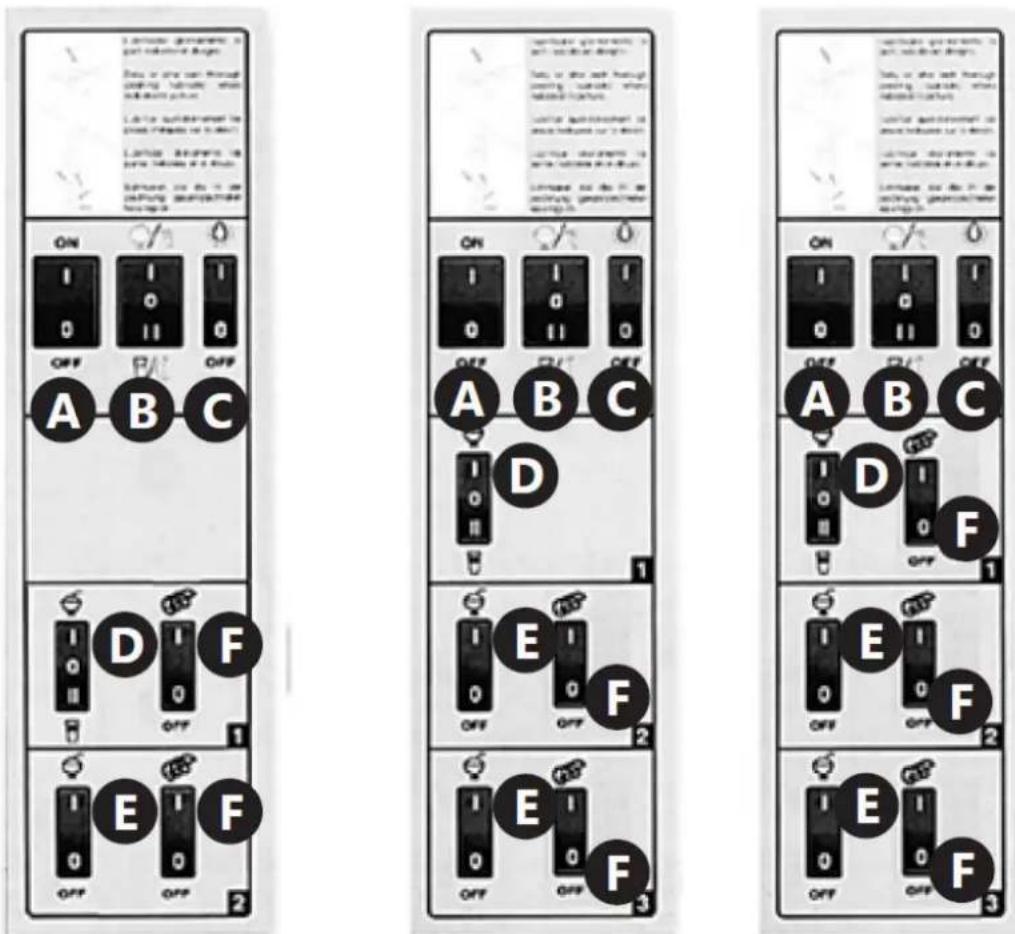
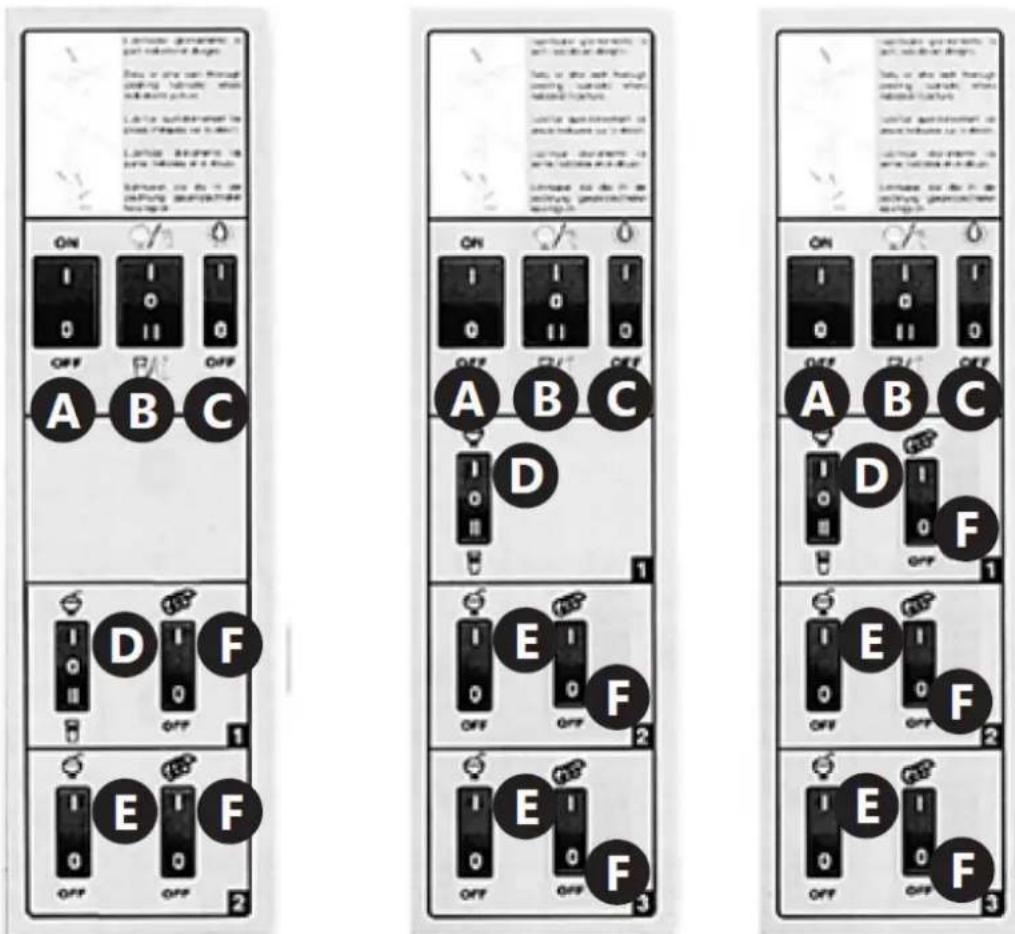
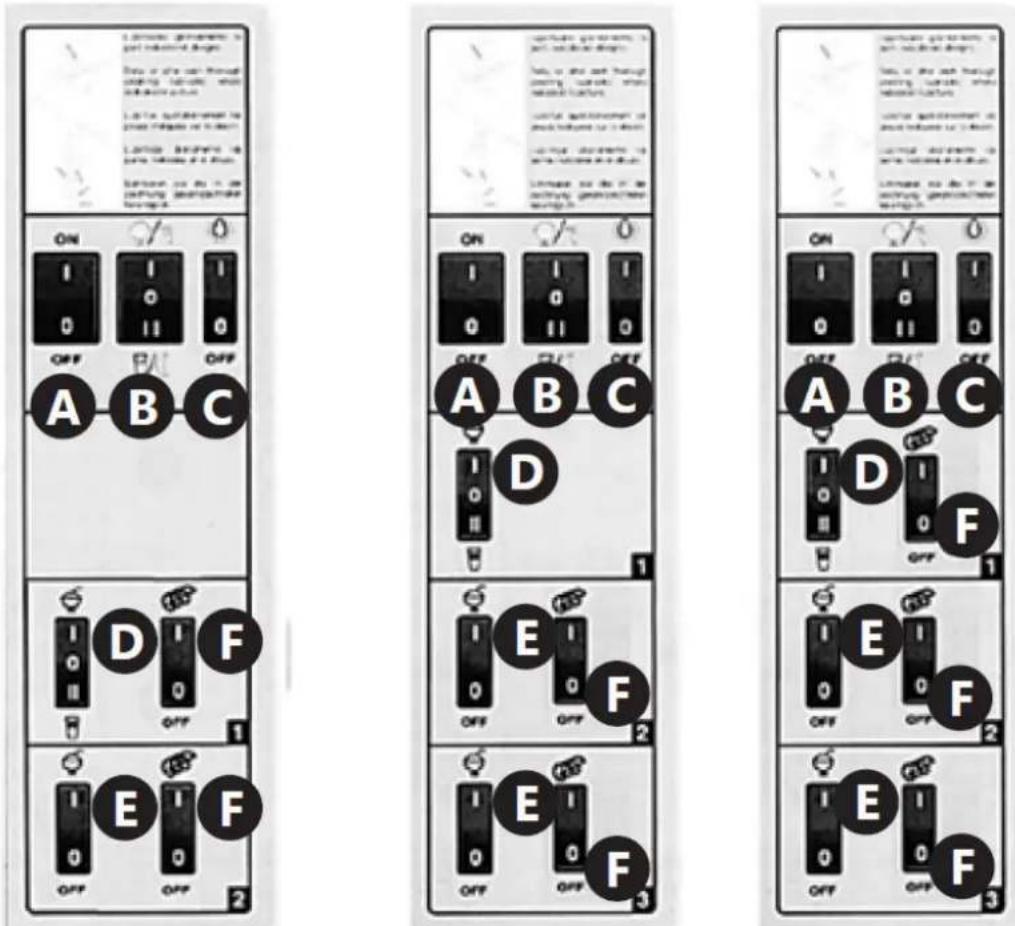
A. Main switch of the device B. Cooling main switch C. Device lighting switch D. Cooling switch for the 1st tank, which is closest to the control panel, with the option of selected cooling mode (slushy / cold drink) E. Cooling switch for other tank(s) F. Agitator switch
Note!
- Only the first tank is equipped with night mode. For food hygiene reasons, we do not recommend leaving the mixture overnight. However, if necessary, you may store the mixture in the first tank overnight and activate night mode (cold drink mode), which will maintain the mixture at approximately 7°C.
- If you wish to operate all tanks in cold drink mode, you can set the B switch (freeze) to cold drink mode (night mode) and ensure that all D and E switches are turned on.
RCSL 2/3
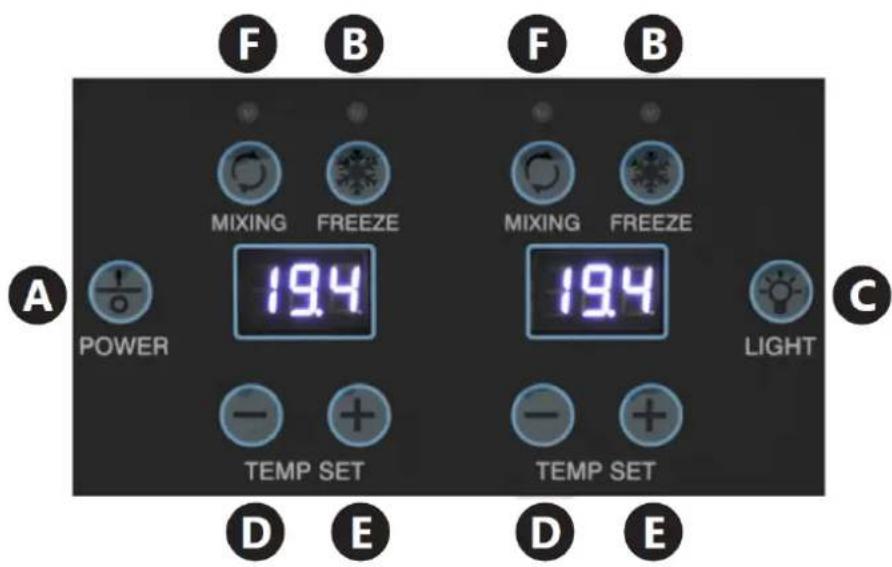
A. Power switch of the device
B. Freeze on/off switch for freezing
C. Device lighting switch
D. Temperature setting button
E. Temperature setting button
F. Agitator switch
4.4.2. Production of ice cream and cold drinks
1) Prepare a liquid for production of granita (it should contain about 13% of sugar).
NOTE! Only use substances intended for the production of ice cream in granitors or for devices for making cold drinks.
2) Connect the device to the power supply.
3) Pour the liquid intended for the production of granita or cold drinks.
4) NOTE! Do not pour too much material into the device and pay attention to the phenomenon of increasing the volume of material under the influence of temperature.
5) Switch on the device with the A button in models RCSL 2/3, RCSL 2/12, RCSL 3/12, RCSL 2/10, RCSL 3/10 or 1 button in models RCSL 2/15, RCSL 3/15. NOTE! Do not turn on the device dry (without the batch intended for processing into granita or cold drinks).
6) Using the F button in models RCSL 2/3, RCSL 2/12, RCSL 3/12, RCSL 2/10, RCSL 3/10 or button in models, activate the agitator for tanks that will produce granita or cold drinks. Turn on cooling of the device using the B button in models RCSL 2/3, RCSL 2/12, RCSL 3/12, RCSL 2/10, RCSL 3/10 or 2 button in models RCSL 2/15, RCSL 3/15.
7) Turn on cooling for tanks that will produce granita or cold drink using the D button in models RCSL 2/12, RCSL 3/12, RCSL 2/10, RCSL 3/10 / (D, E - RCSL 2/3) knobs of ice cream hardness 4 (in models RCSL 2/15, RCSL 3/15).
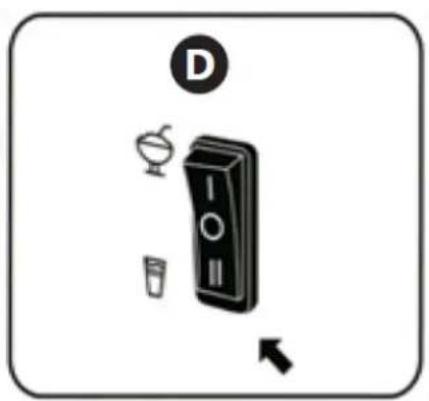
If necessary, it is possible to adjust the hardness of the granita produced. Turn the knob to the right in order to increase hardness or to the left in order to reduce hardness. The knobs are located on the back of the device. Each tank has a separate knob.
- In RCSL 2/15, RCSL 3/15 models, when the ice hardness adjustment knob 4 is set to the value 0, cooling in the tank suitable for the knob is turned off. The higher the value indicated by the knob, the harder the consistency of granita will be. The most liquid consistency will be obtained at the level 1.
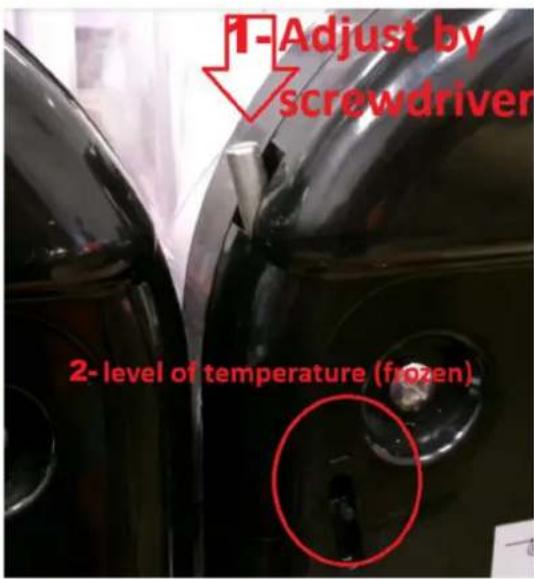
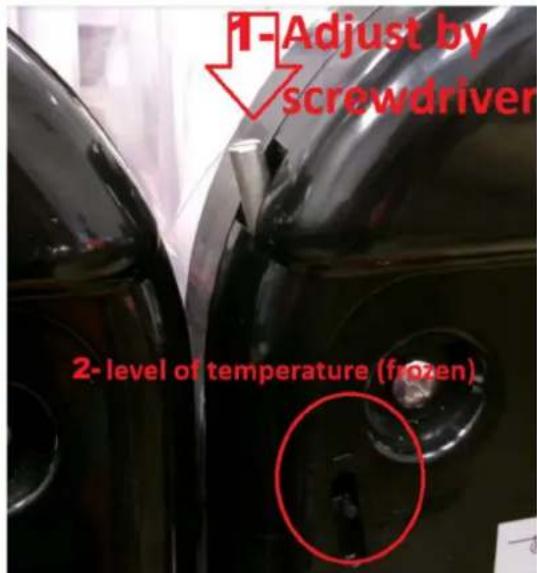
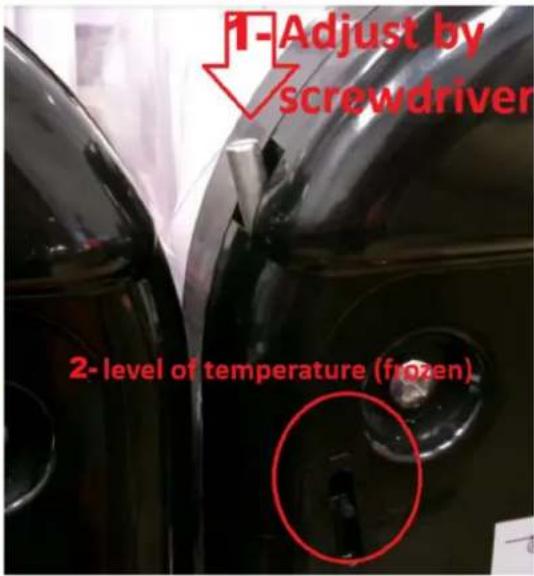
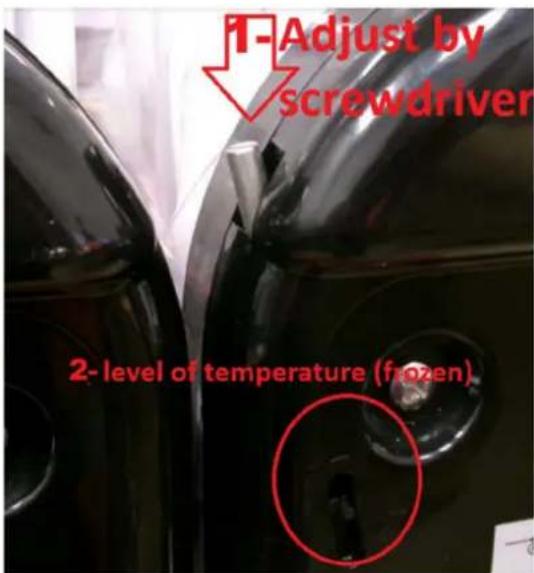
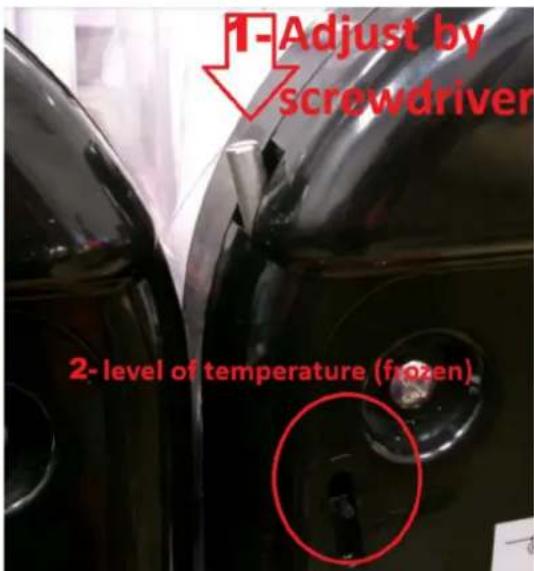
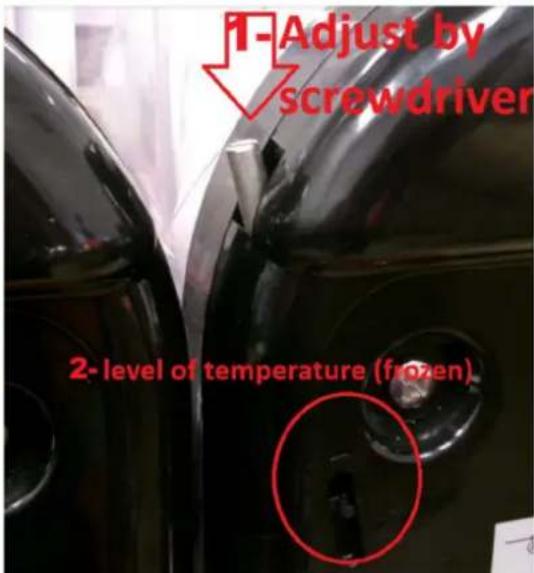
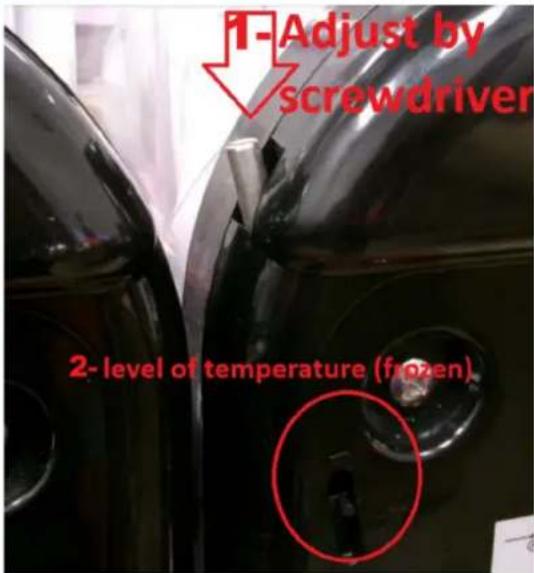
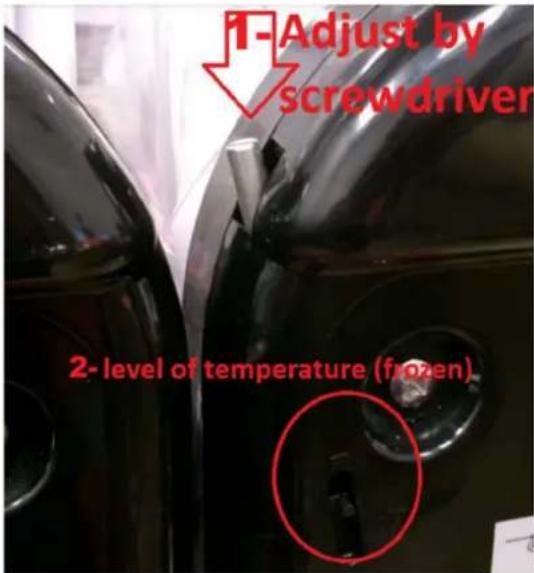
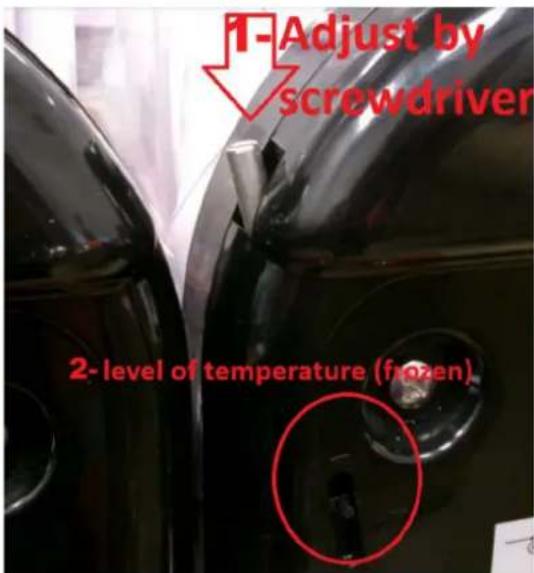
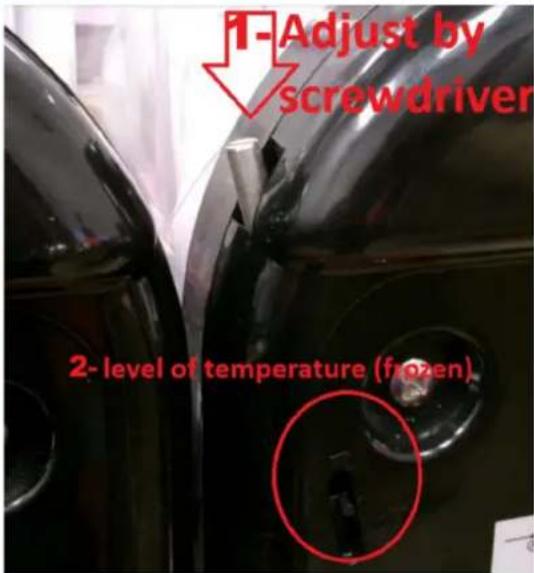
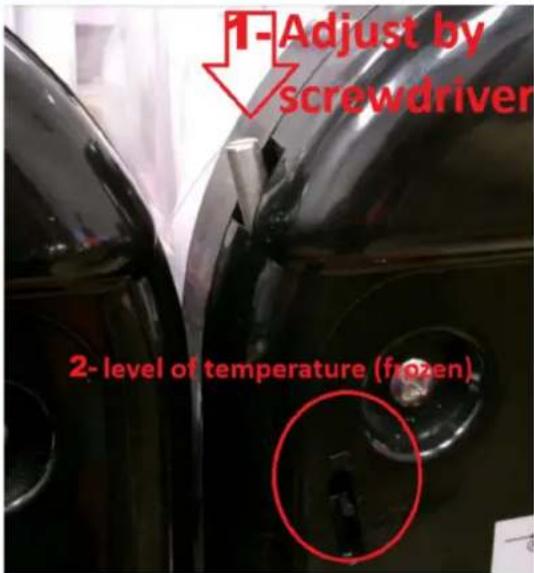
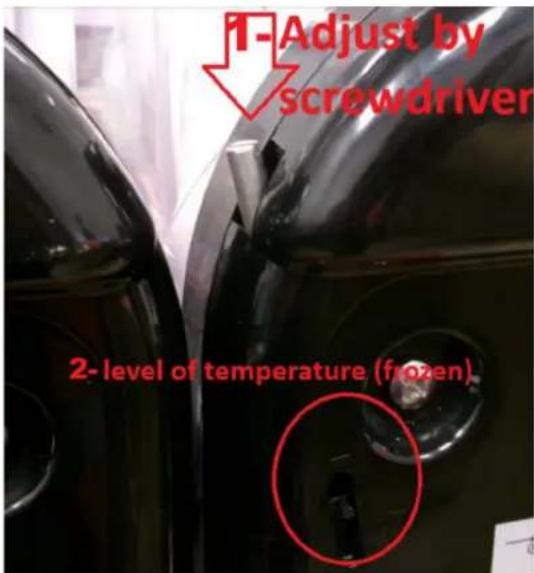
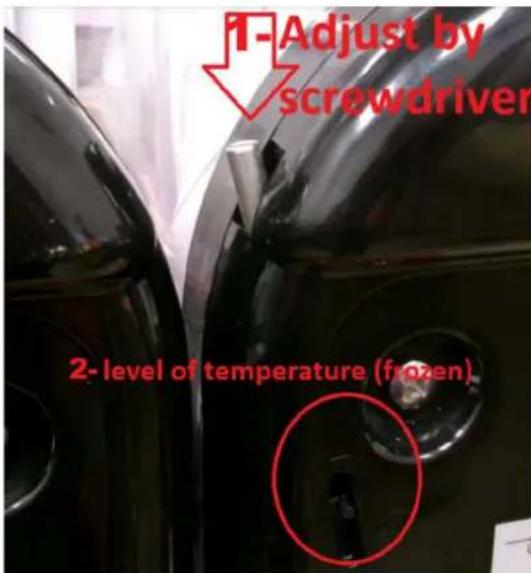
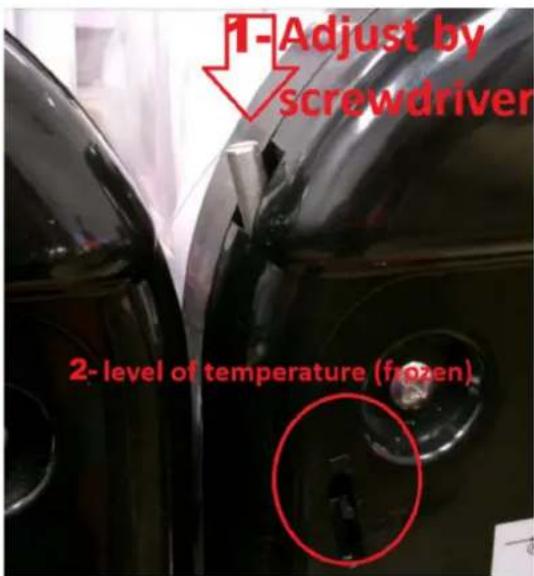
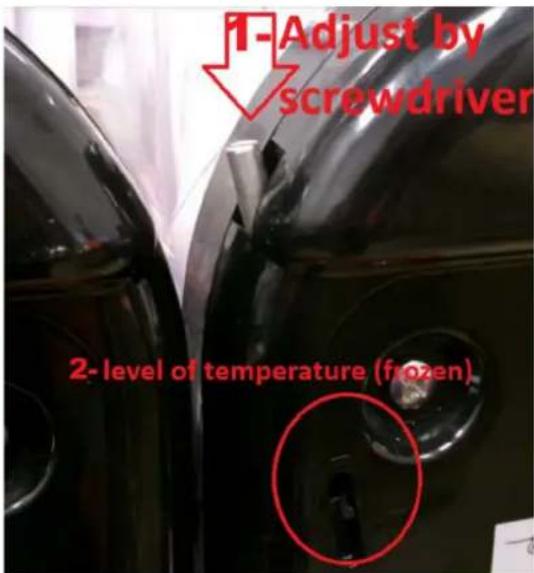
- In RCSL 2/10, RCSL 3/10 model, there is an adjusting screw for setting the hardness, as shown in the picture below. Turn clockwise to decrease cooling / hardness. Turn counterclockwise to increase cooling / hardness. Also, the button shown in the red circle determines the temperature / frozen level.
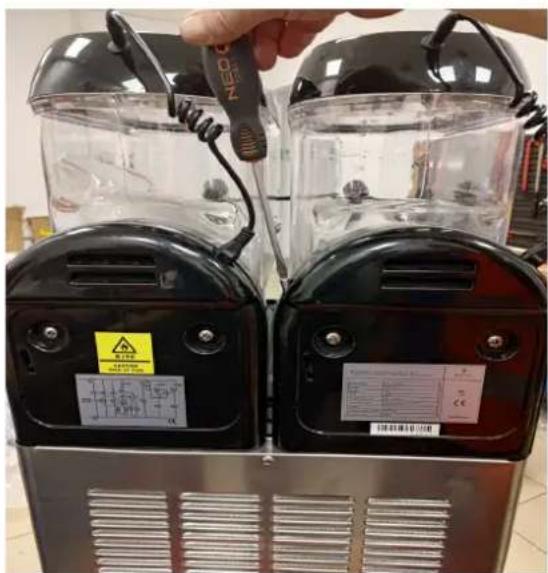
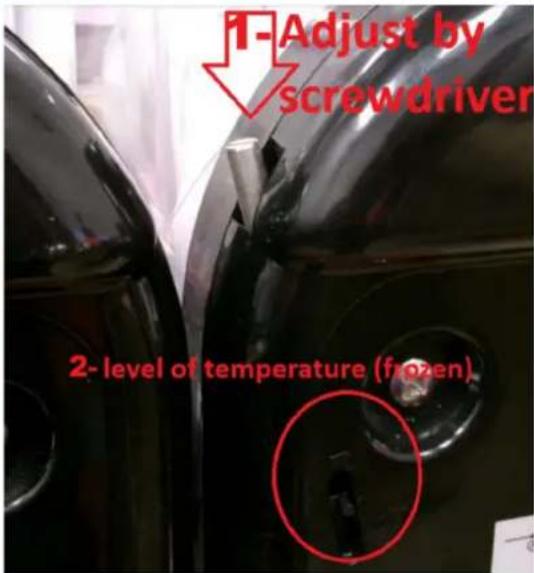
1- Adjust by screwdriver
2- Level of temperature (frozen)
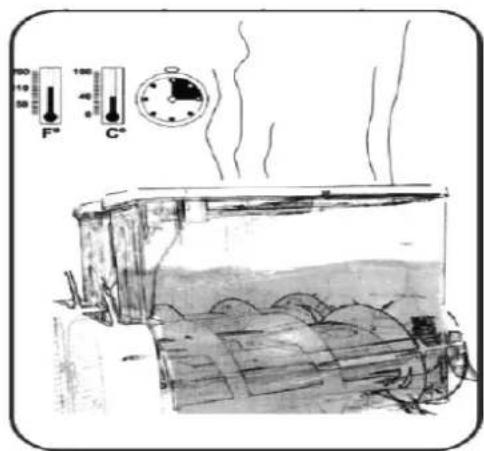
8) To turn on the tank backlight, press button C (on models RCSL 2/3, RCSL 2/12, RCSL 3/12, RCSL 2/10, RCSL 3/10). 9) Set the ice cream hardness according to your needs (on models RCSL 2/15, RCSL 3/15). For models where the temperature is set above 0°C (e.g., 7°C), the machine will operate in cold drink mode. 10) Wait for the time the machine needs to process the liquid intended for granita or cold beverage production. 11) After processing the liquid, the product can be dispensed into suitable containers (e.g., cups) using the tap lever. NOTE: Do not turn off the device when the ice cream reaches the required consistency; the device stops cooling but the agitator continues to work. 12) After use, always turn off the device, disconnect it from the power supply, and wash all parts that come into contact with drinks or ice cream.
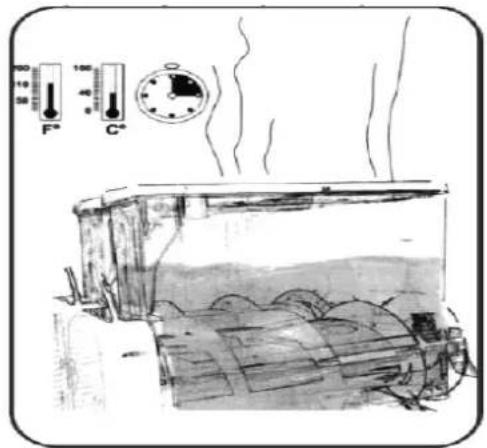
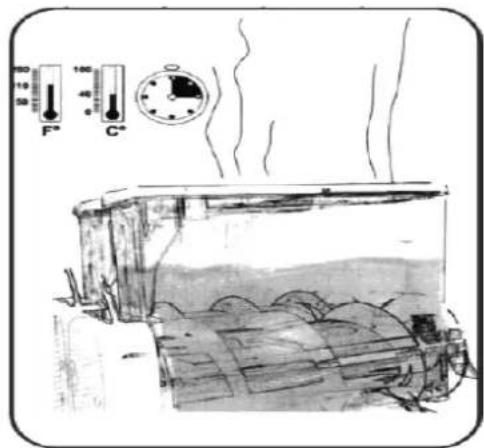
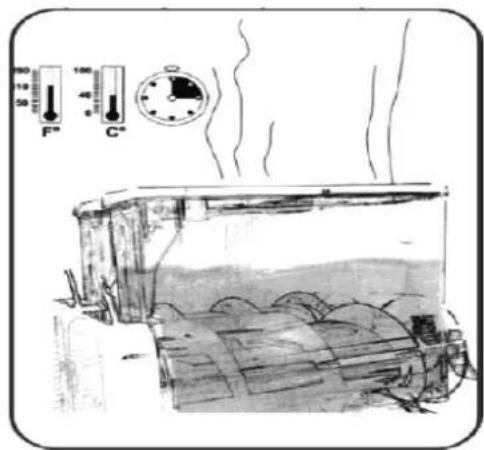
To shorten the batch processing time, it is recommended to top up the tank when the batch level drops to half of the cylinder cooling part (evaporator).
4.5. Cleaning and maintenance
4.5.1. General instructions
a) NOTE: Before each cleaning, maintenance, or repair activity, and also if the device is not in use, pull out the mains plug and allow the device to reach room temperature. b) Cleaning and disinfection should be carried out every day and as often as required by law binding in the place where the device is used.
c) Do not pour water over the device or allow the electrical parts of the machine to get wet. d) The device should be cleaned before use and immediately after each use. In particular, it is necessary to clean all parts that come into contact with the liquid for production of granita and cold beverages. e) To prevent any bacteria from developing in the device, it is necessary to only use special cleaning agents designed for cleaning surfaces made of plastics and having contact with food. f) Never clean the machine with an automatic dishwasher as this may cause damage to parts. g) Never use aggressive disinfectants or corrosive detergents for cleaning. h) Dry all parts well after cleaning before the device is used again. i) In the event of a frost hazard, it is necessary to empty, clean, and dry the device.
4.5.2. Washing of the device
1) Pour out the contents of the device tank through the tap. 2) Remove the tank cover.
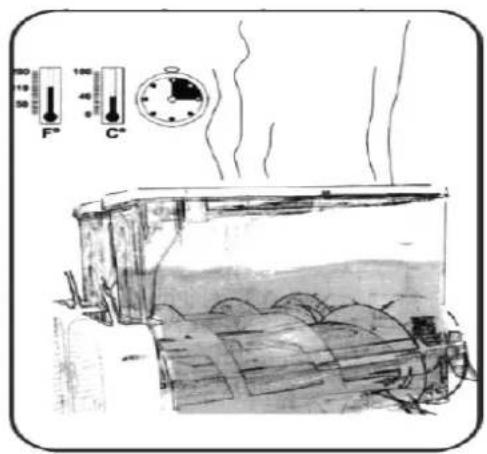
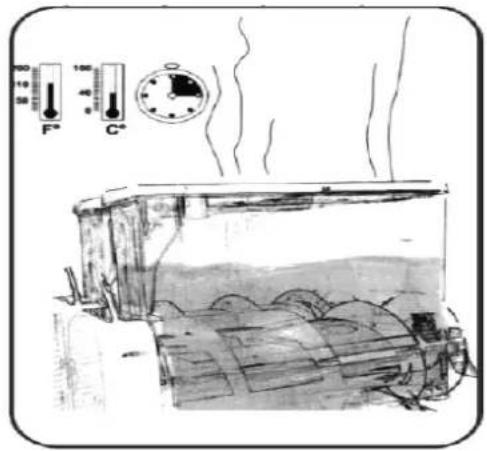
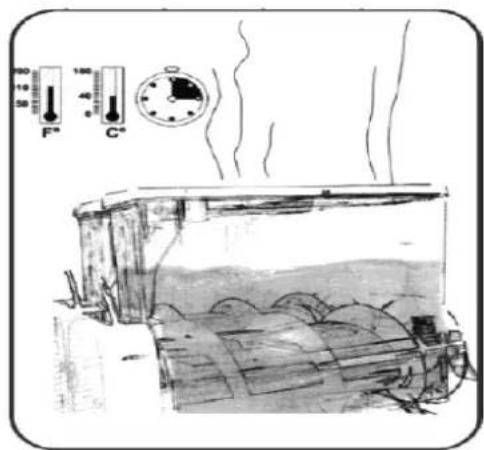
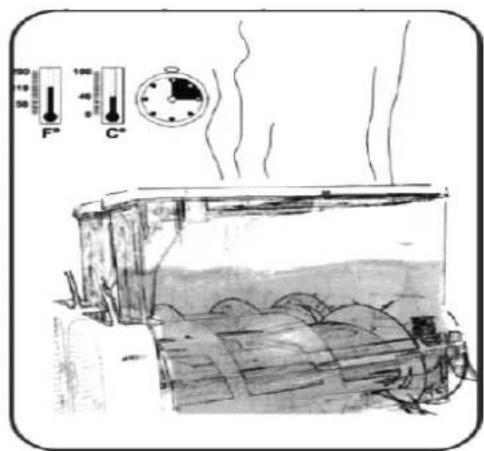
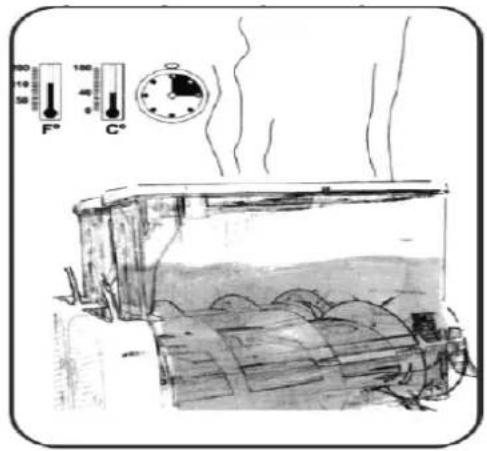
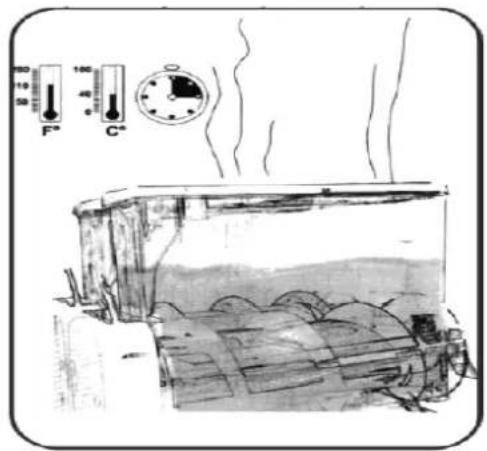
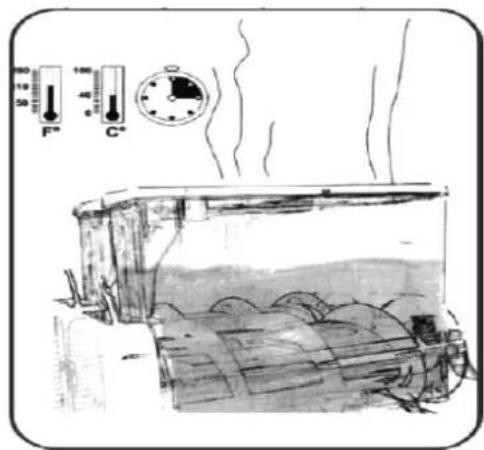
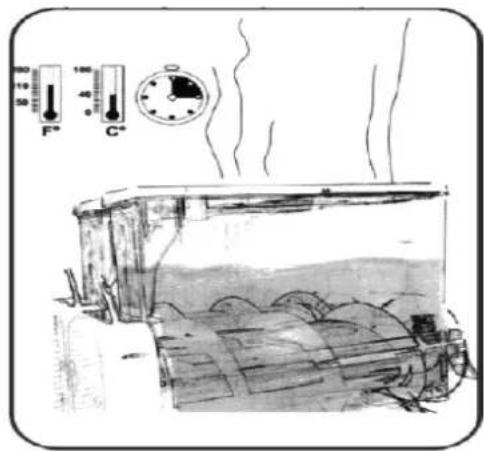
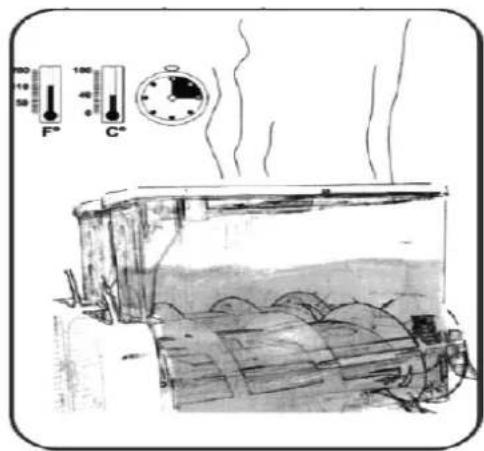
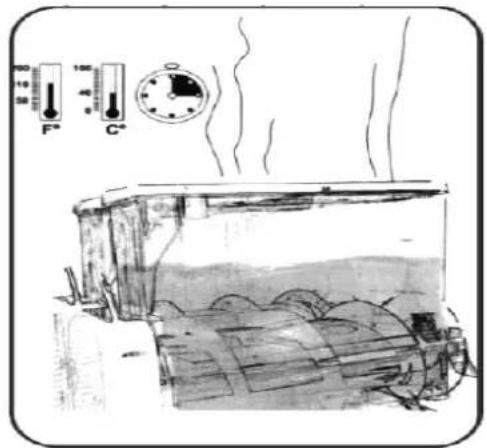
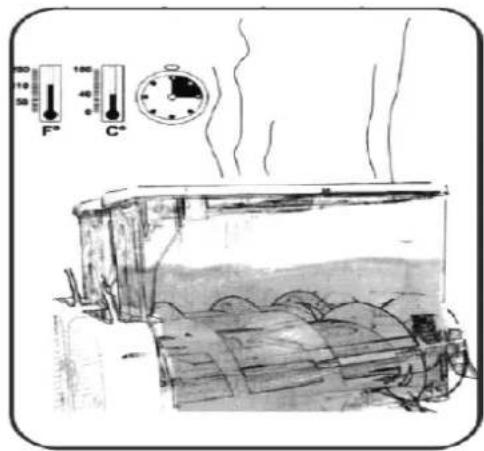
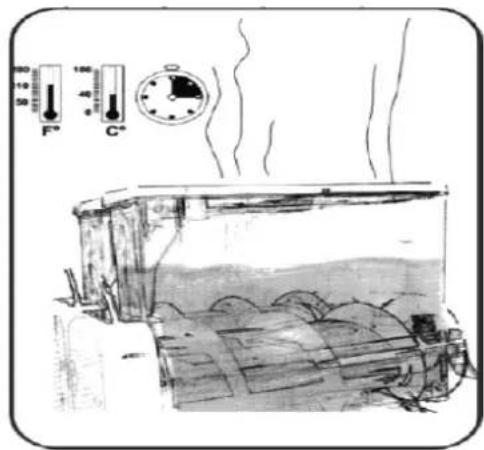
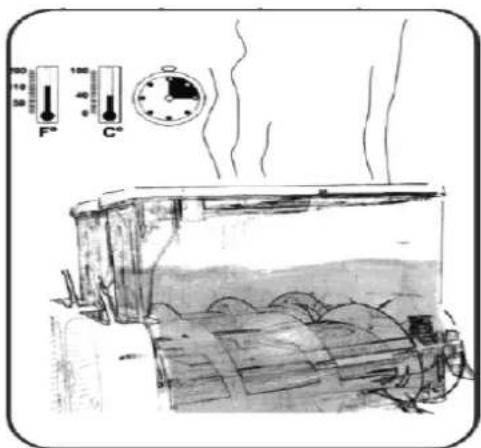
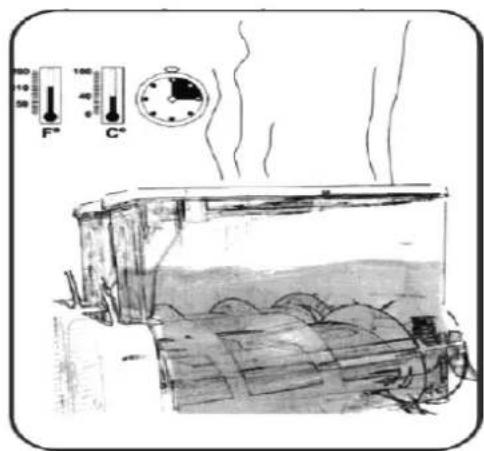
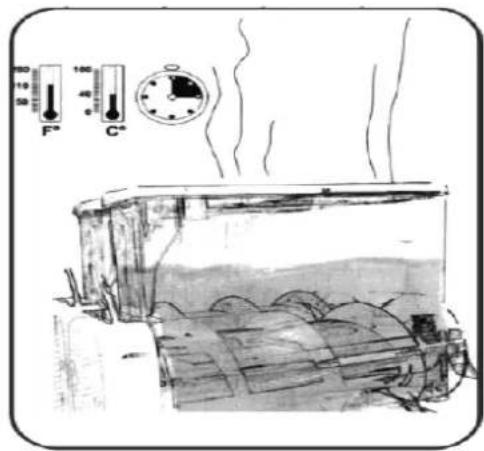
3) Fill the tank with tap water (with temperature below 40°C) and allow the device to stand for about 15 minutes.
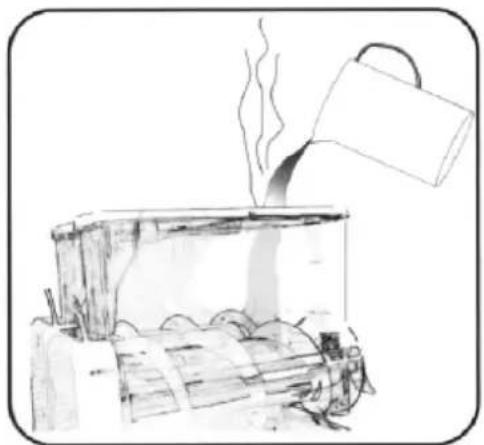
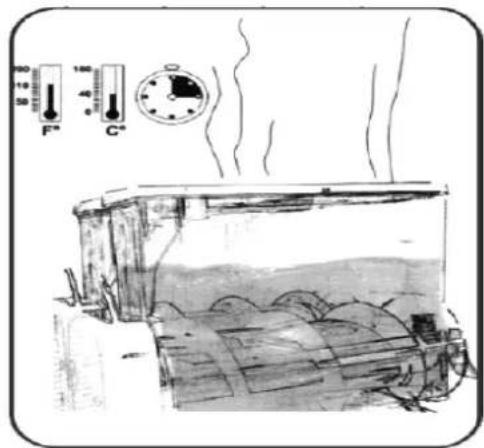
4) Install the tank cover and start stirring (without cooling) in the device for about 3 minutes.
5) Switch off the device and disconnect it from the power supply.
6) Empty the tank, pouring out the contents by means of the tap of the device.
Tips: For short-term cleaning, simply rinse the tank(s) several times and drain the water. There is no need to disassemble the tank(s) for further steps.
7) Remove the tank cover.
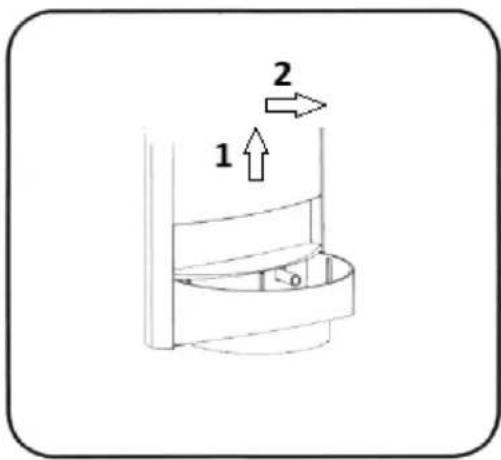
8) Remove the tank by lifting its front part from the hooks, and then slide out the entire tank by pulling towards the front of the device.
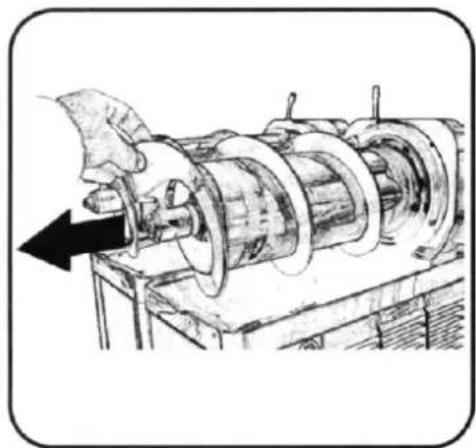
9) Remove the external agitator, and then (only in models RCSL 2/15, RCSL 3/15) the internal agitator.
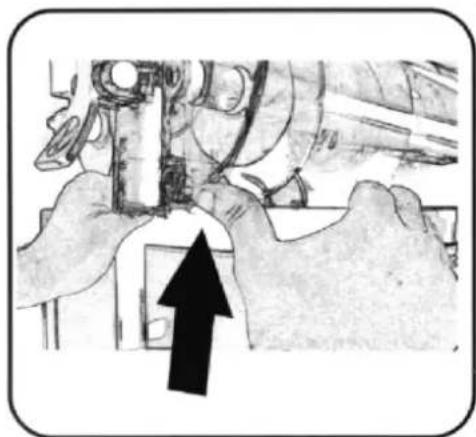
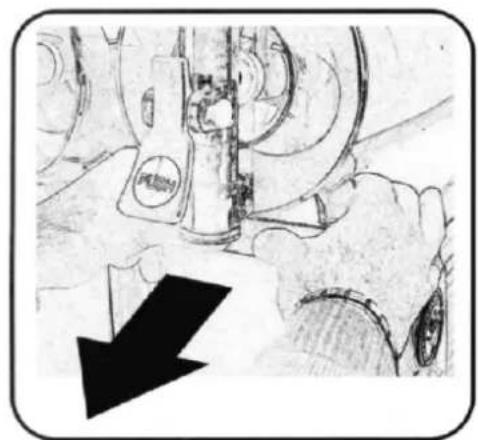
10) Remove the tank seal from the evaporator cylinder.
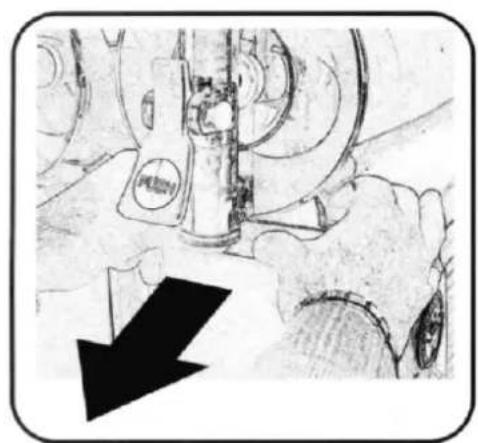
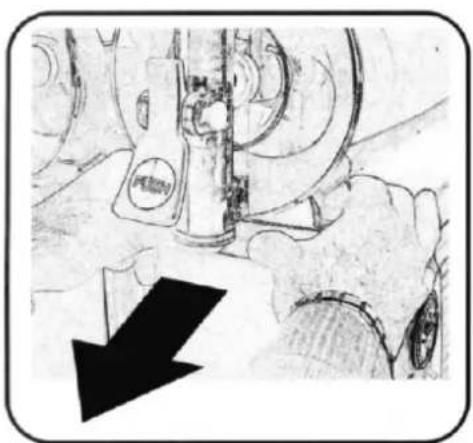
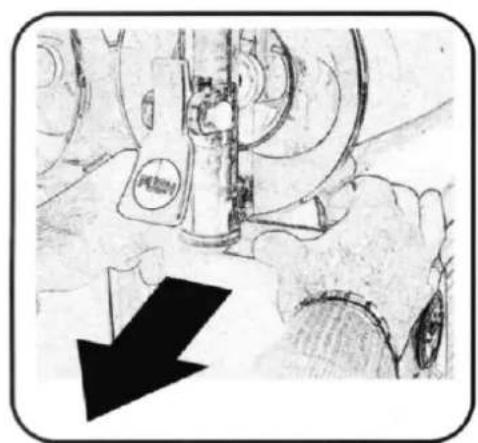
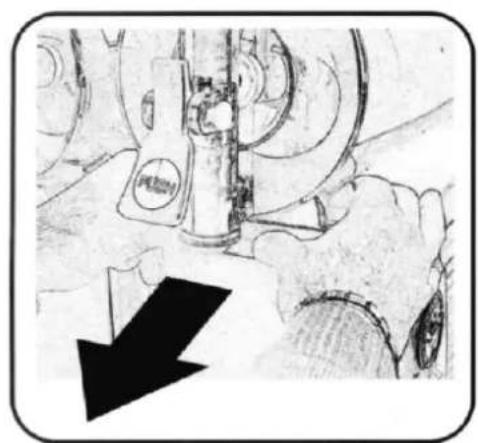
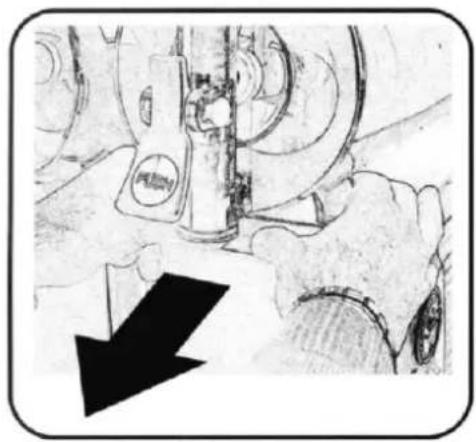
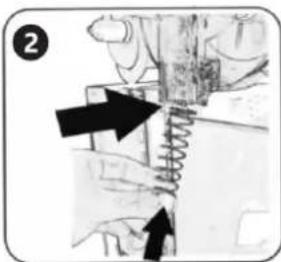
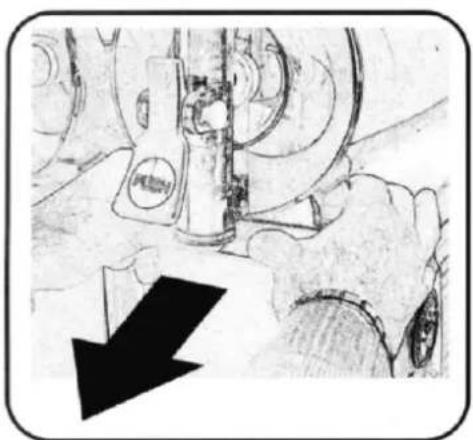
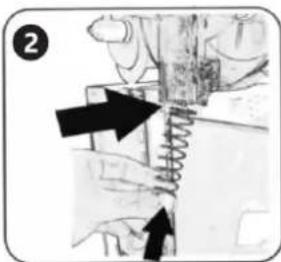
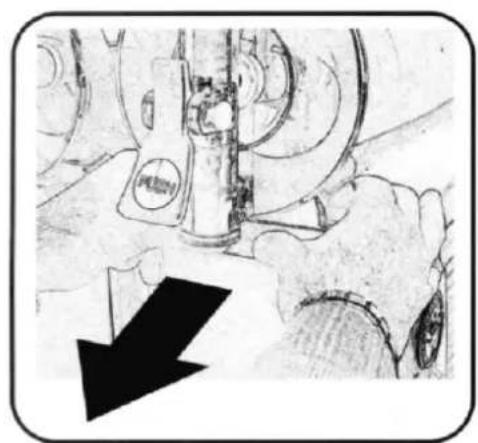
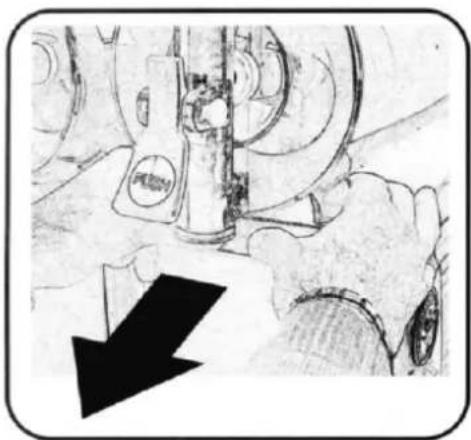
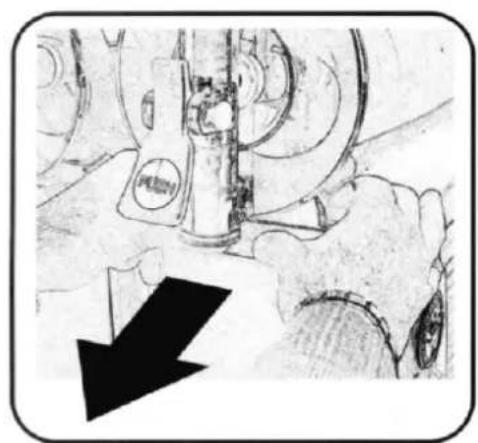
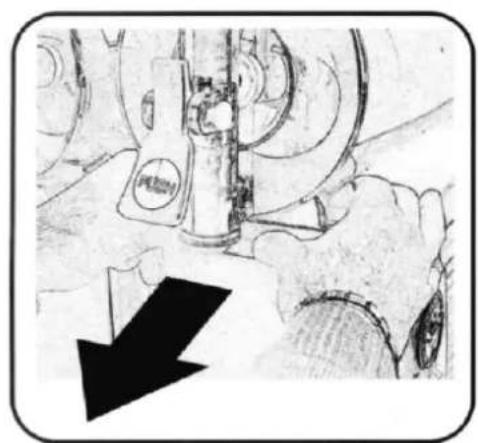
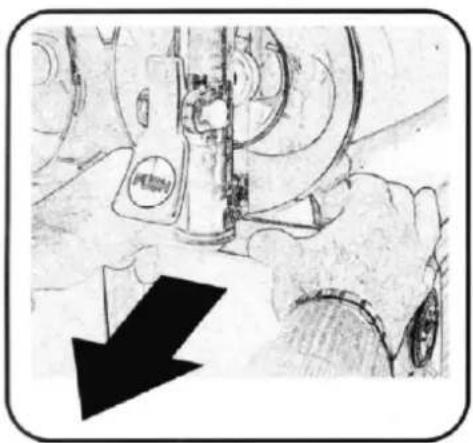
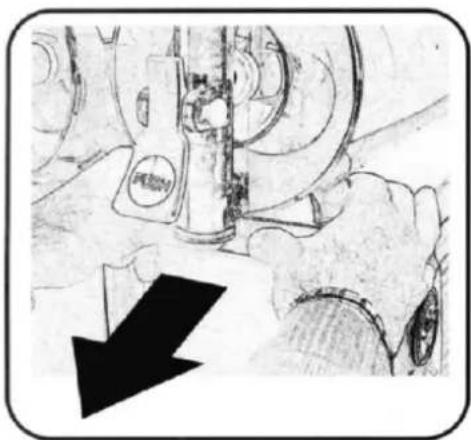
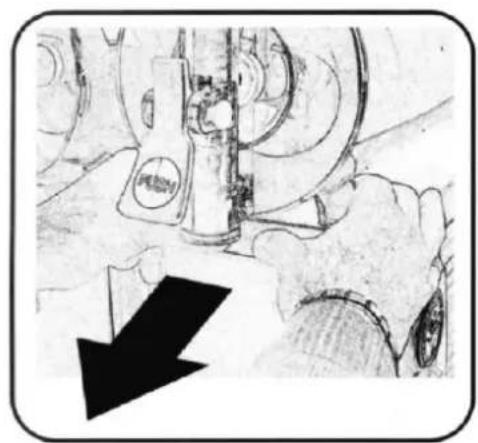
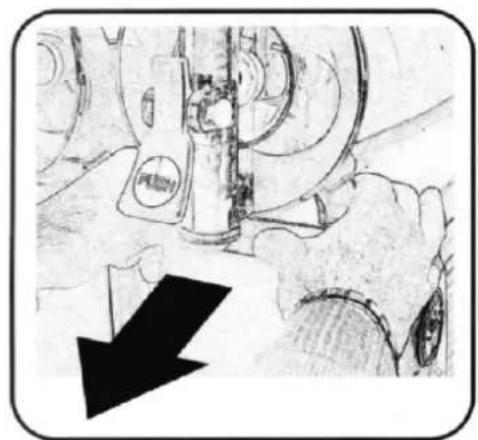
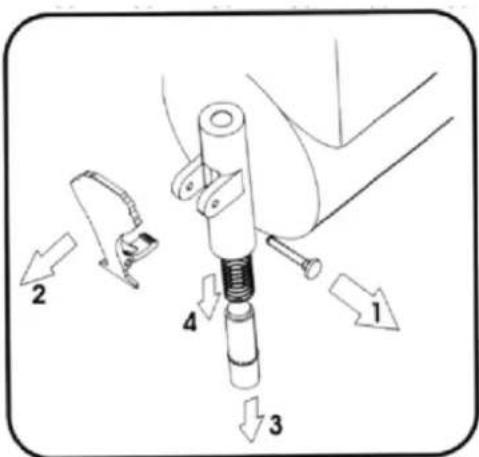
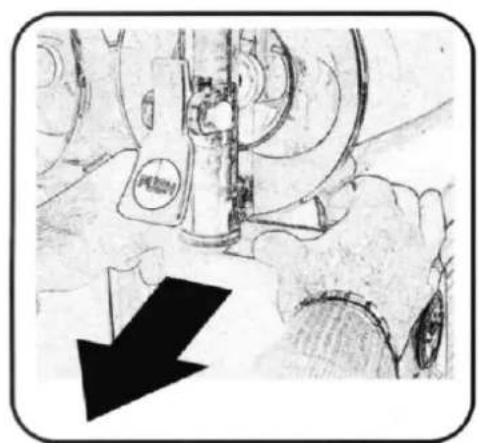
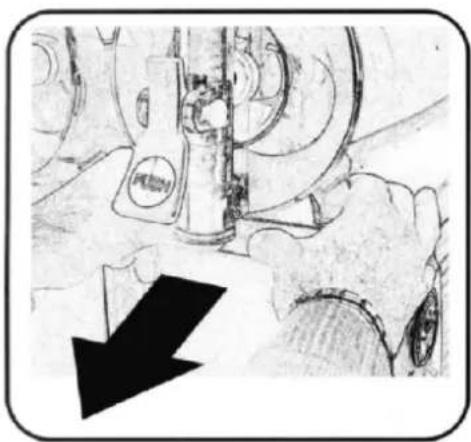
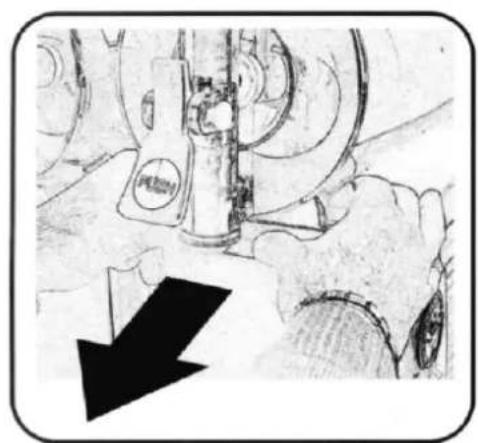
11) Disassemble the tap. Unscrew the nut from the mandrel holding the lever in position, remove the mandrel and pull the piston out of the tap pipe. It is recommended to put the tap parts into a bath in a disinfectant intended for cleaning surfaces having contact with food. The bath should be carried out in accordance with the recommendations of the disinfectant.
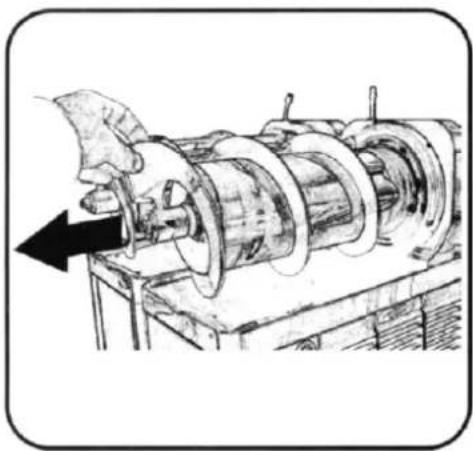
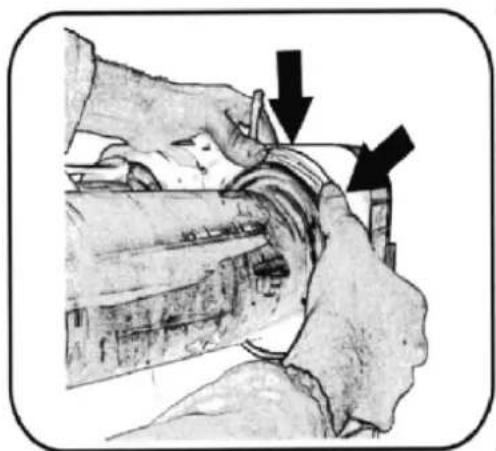
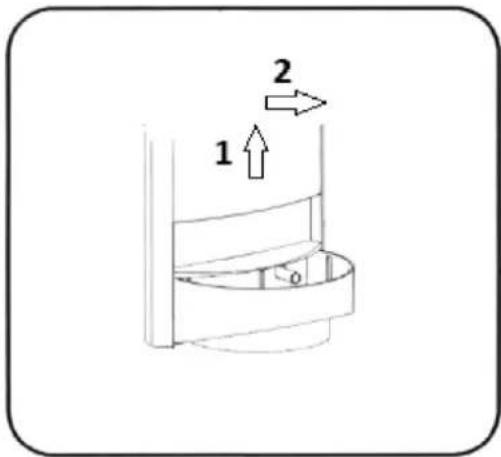
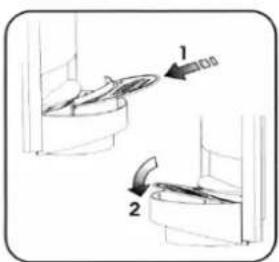
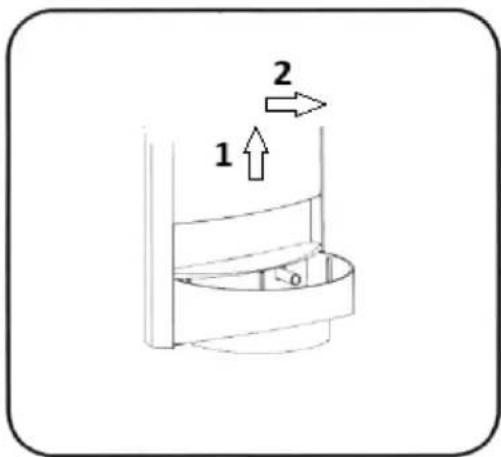
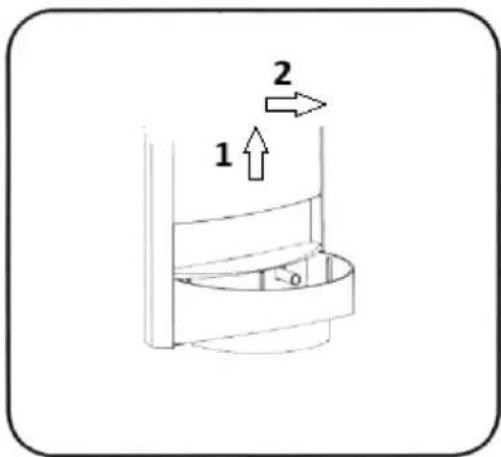
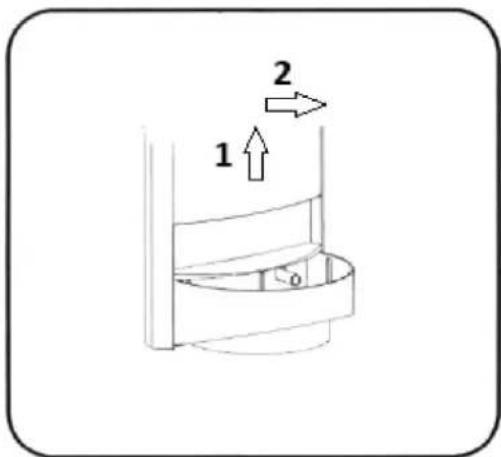
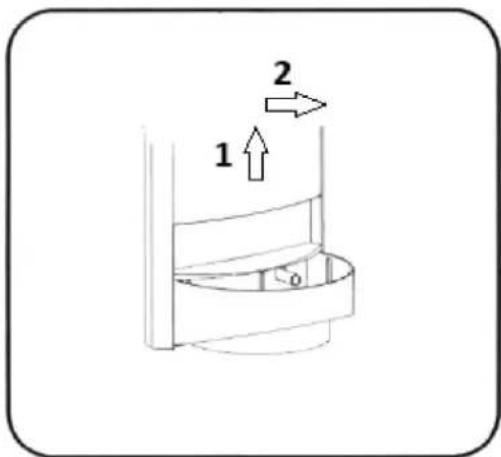
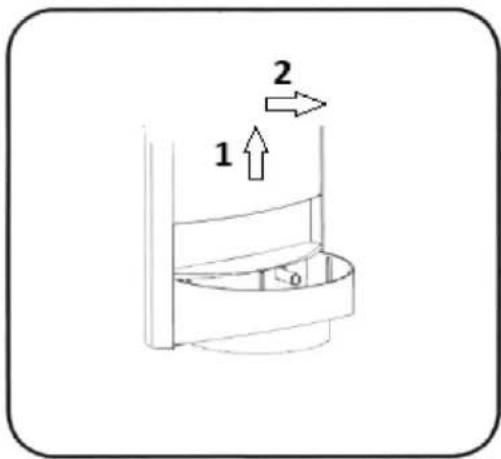
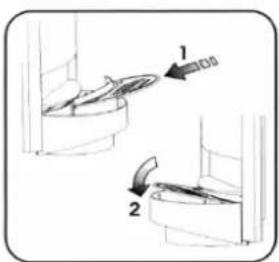
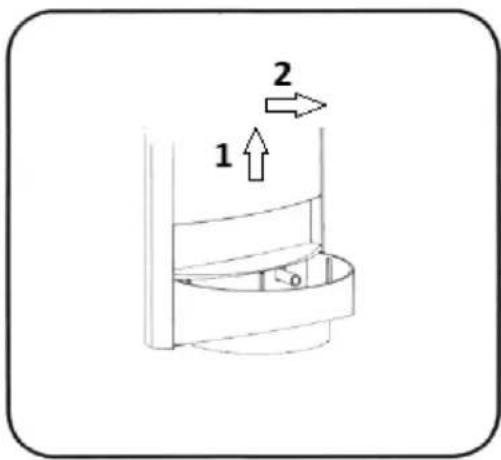
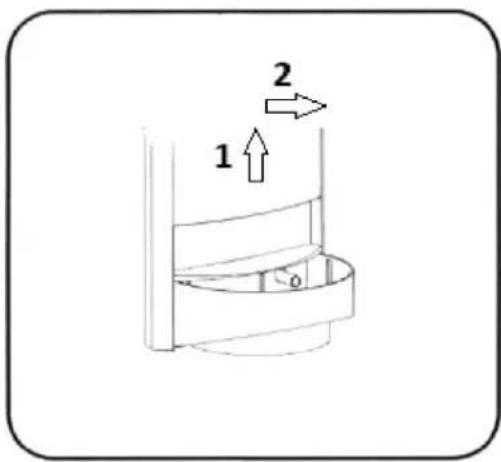
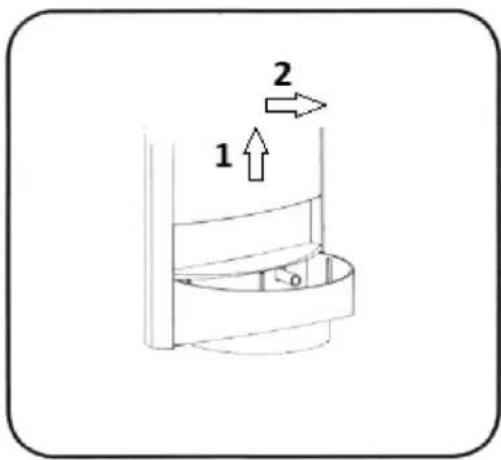
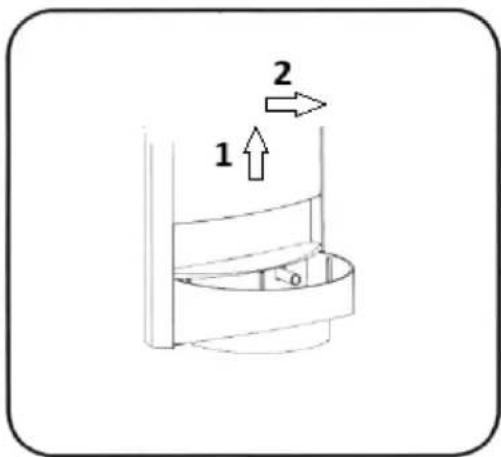
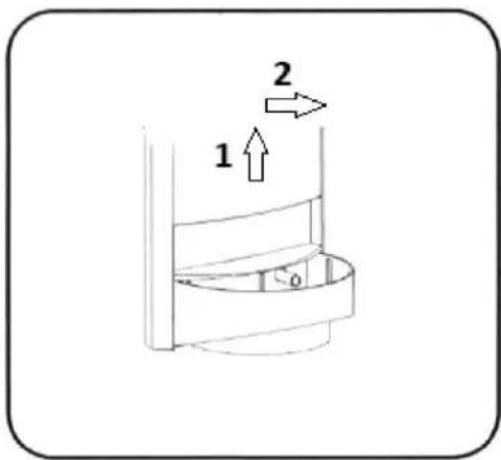
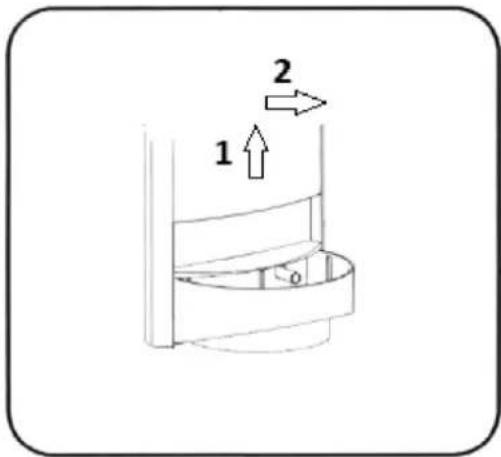
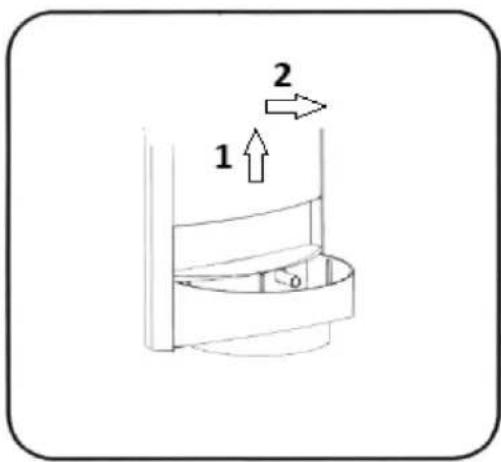
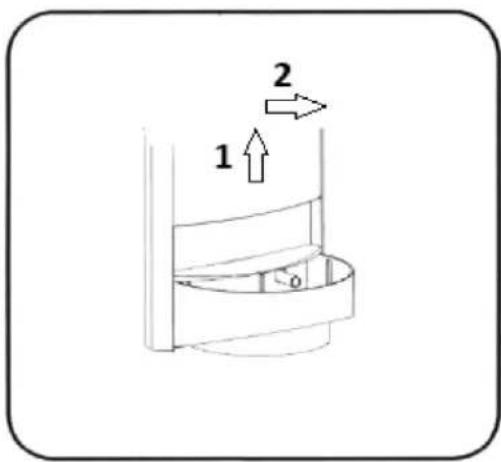
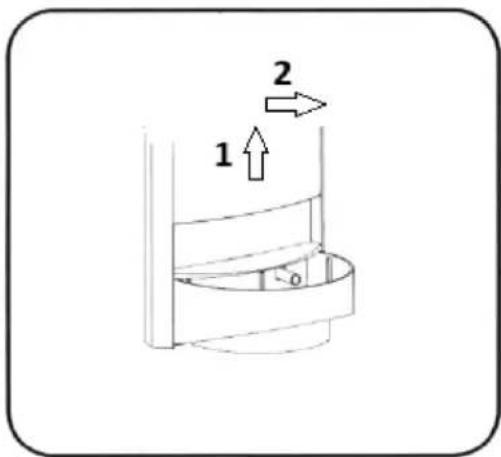
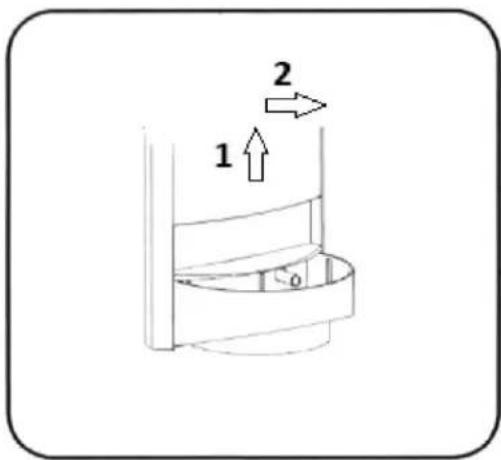
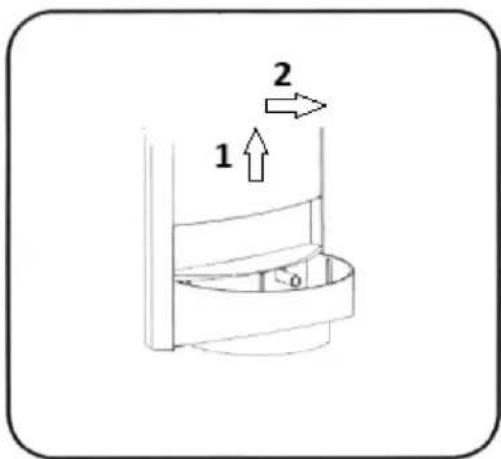
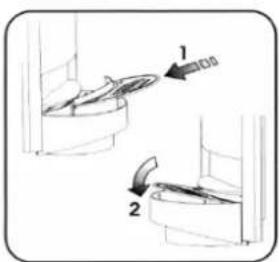
12) Remove the drip trays by lifting them up and pulling in the opposite direction against the device.
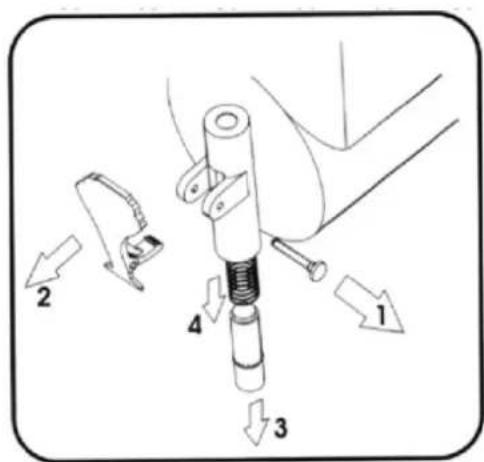
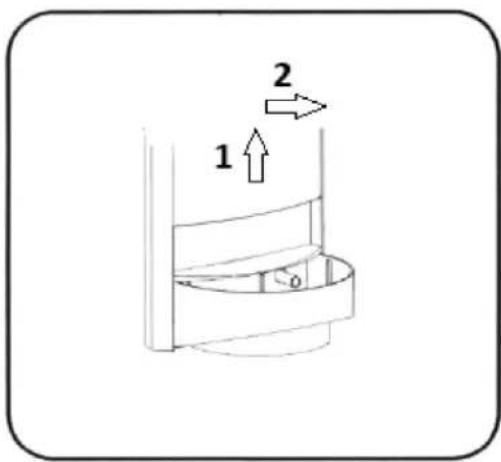
NOTE! In order to properly perform cleaning and disinfection of the device, a person performing these activities should thoroughly wash and disinfect their hands. Wash all parts of the device that may have contact with drinks or ice cream. For cleaning, it is recommended to use a mild detergent designed for cleaning the surfaces having contact with food. After washing with detergent, it is necessary to rinse all disassembled parts with water, and those elements that remained fastened to the device should be wiped with a sponge soaked in water.
4.5.3. Disinfection
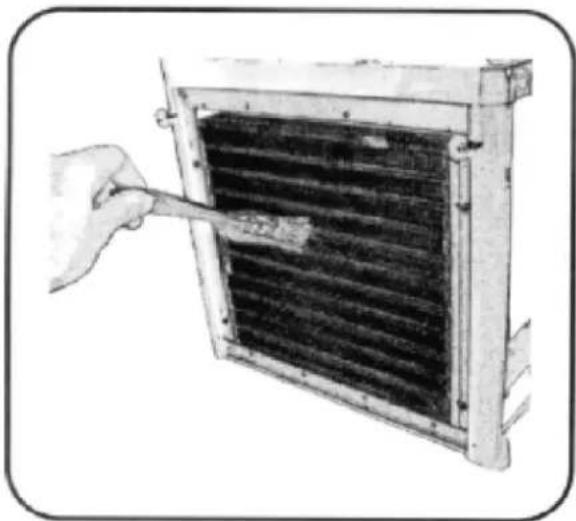
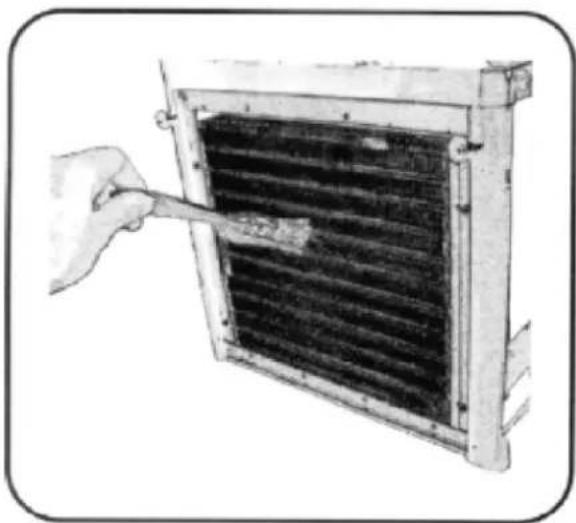
It is recommended to repeat the washing activities using warm water (approximately 40°C) and a disinfectant suitable for the surfaces having contact with food. After washing and/or disinfection it is necessary to allow the parts to dry. Regularly clean the ventilation openings of the device with a brush or tuft. The ventilation openings must not be clogged.
4.5.4. Assembly of the device after washing
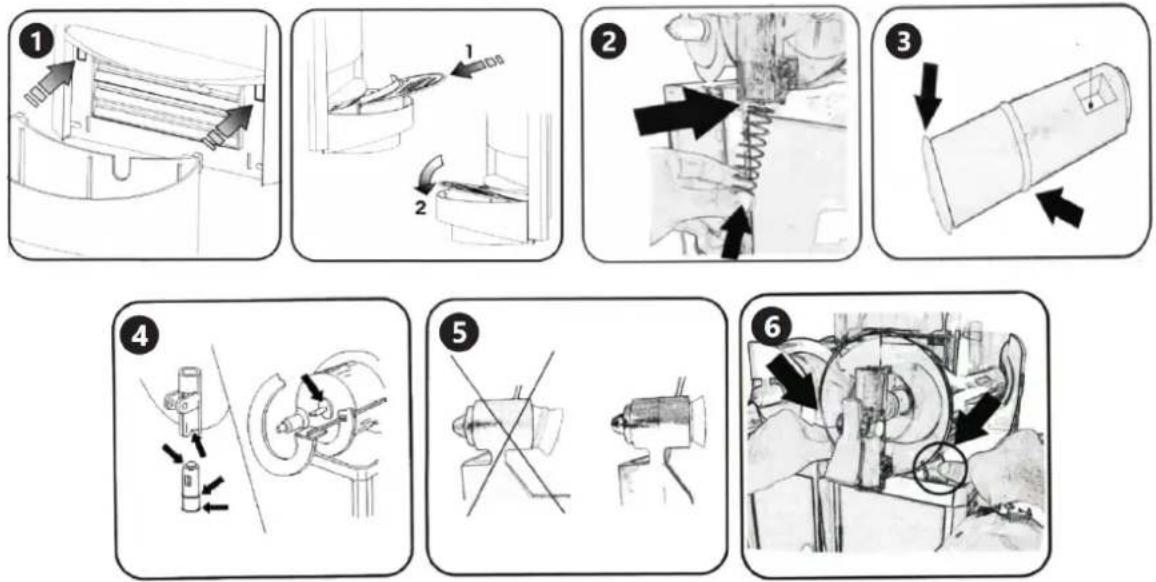
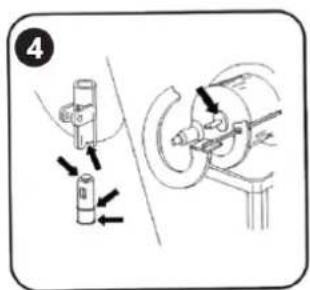
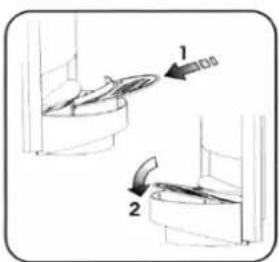
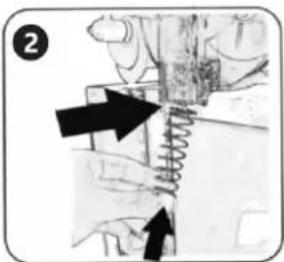
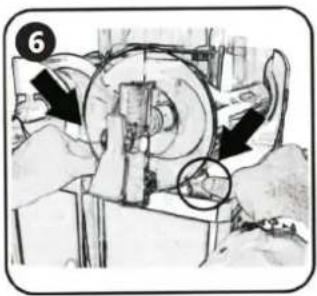
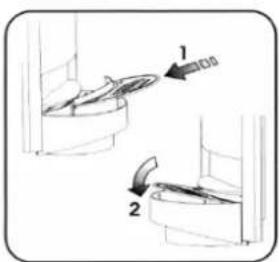
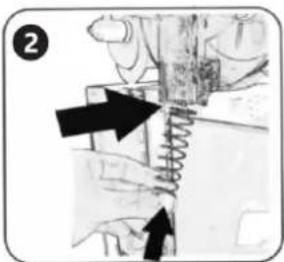
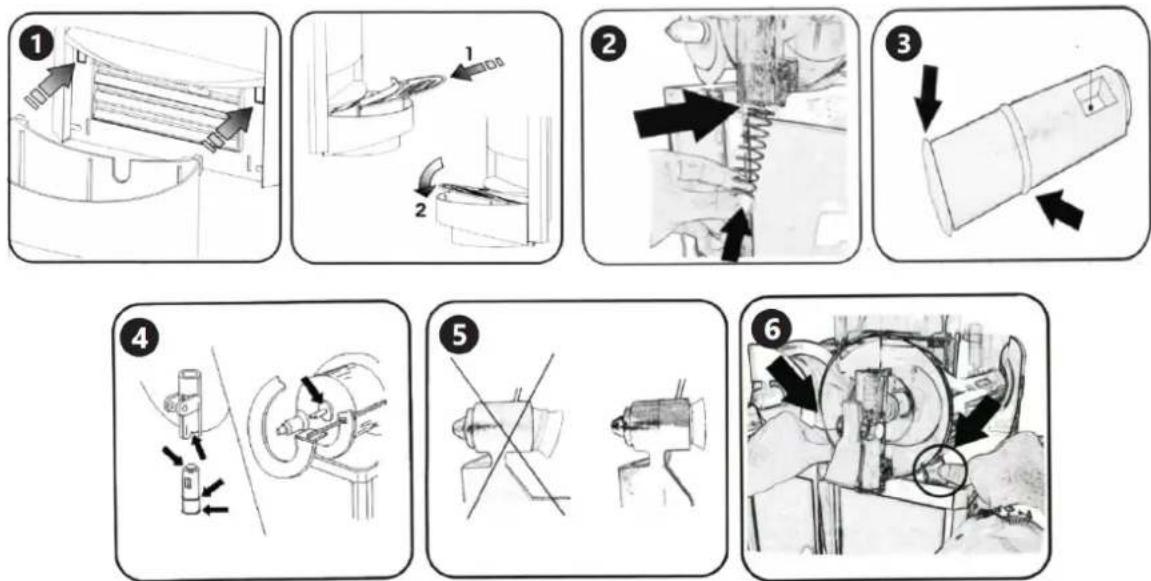
1) Slide the drip trays into place. 2) Assemble the tap.
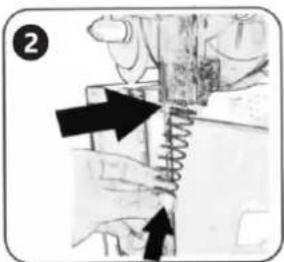
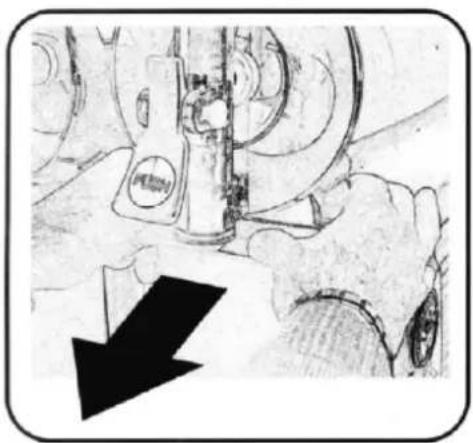
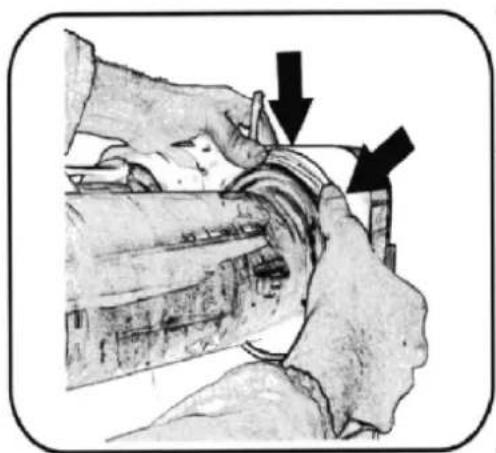
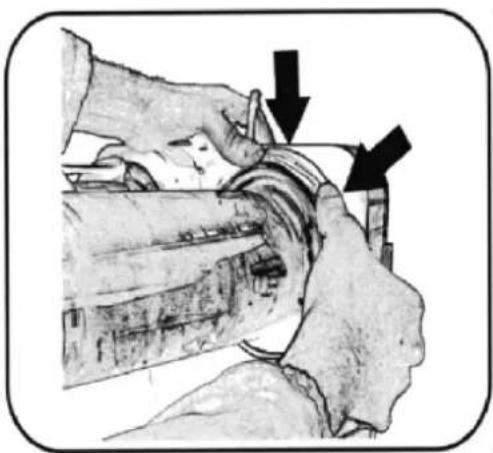
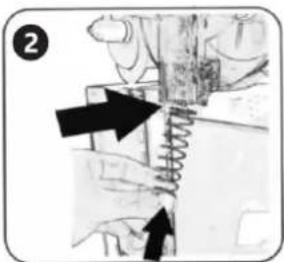
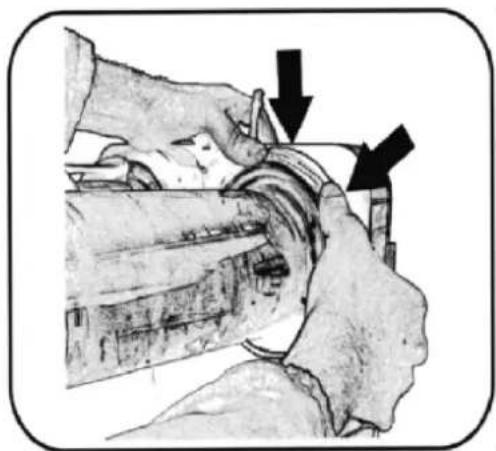
NOTE! Sufficient slipping of moving parts of the device and seals must be ensured. It is recommended to lubricate their cooperating surfaces with a lubricant intended for mechanical elements having contact with food.
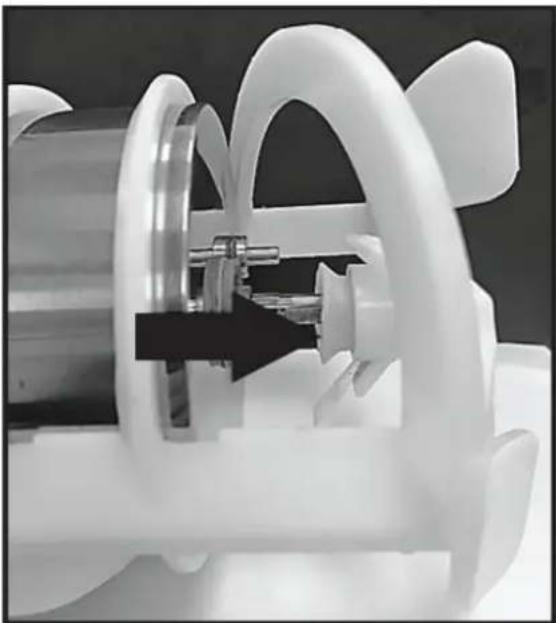
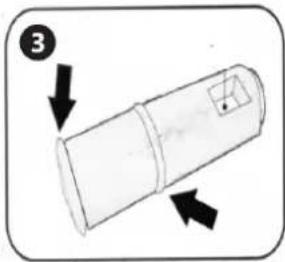
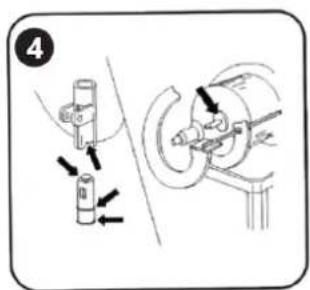
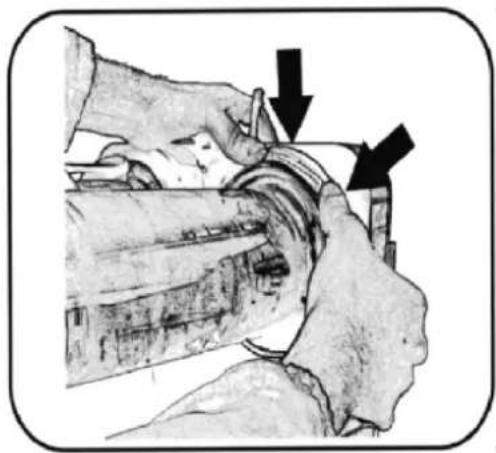
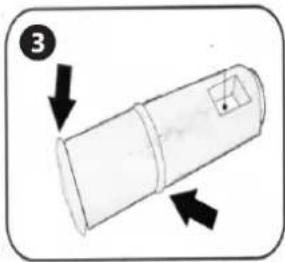
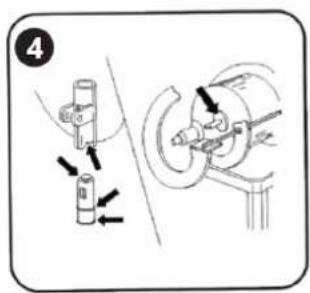
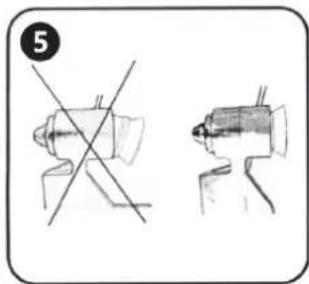
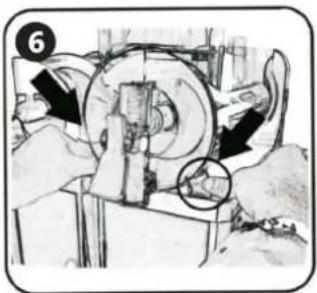
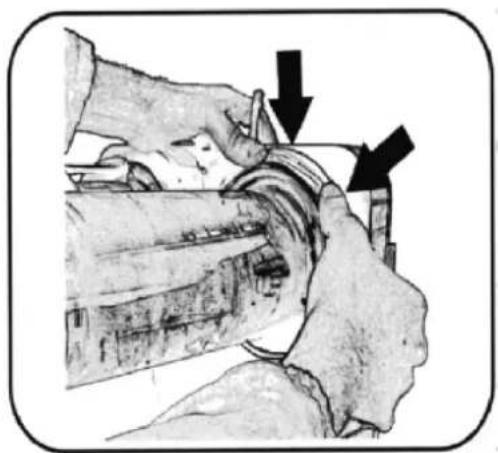
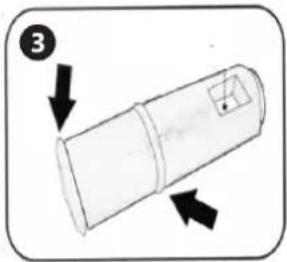
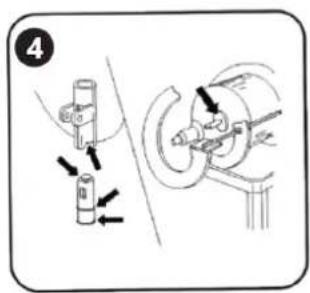
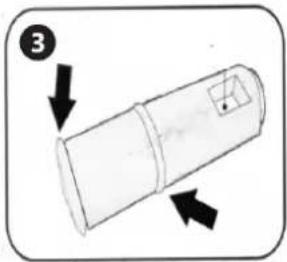
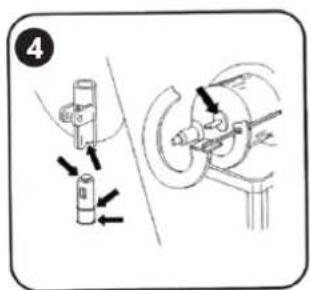
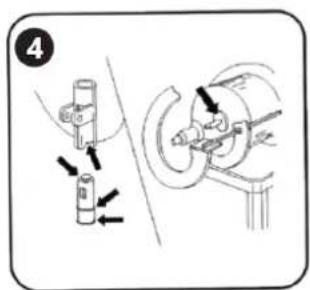
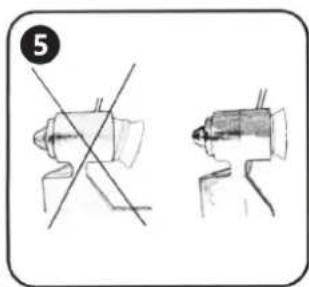
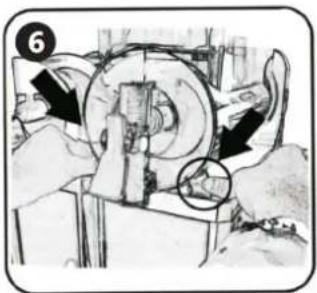
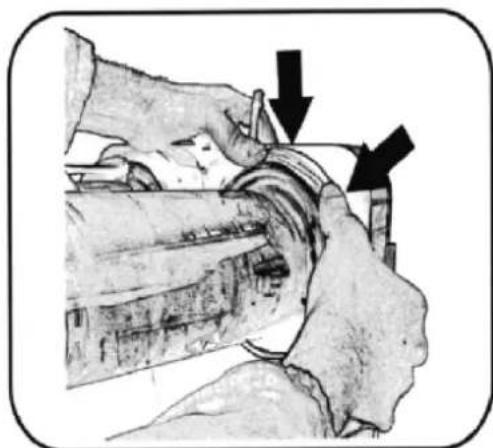
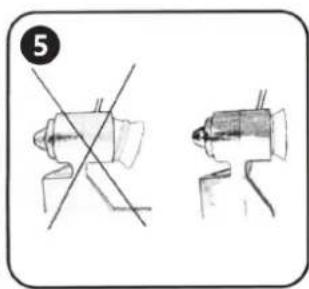
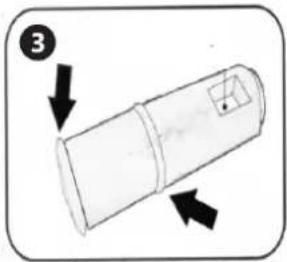
3) Install the tank seal in the back part of the evaporator cylinder. 4) (Applicable to RCSL 2/15, RCSL 3/15). Mount the internal agitator in the evaporator cylinder. 5) Mount the external agitator on the evaporator cylinder by connecting it with the internal agitator. In the models before installing the RCSL 2/12, RCSL 3/12, RCSL 2/10, RCSL 3/10
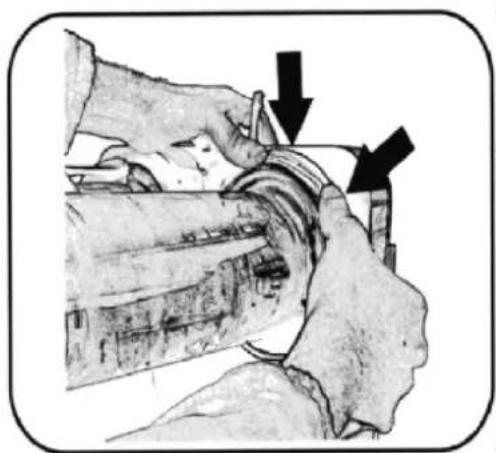
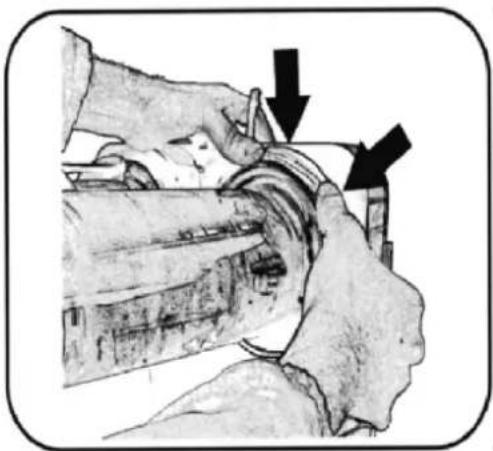
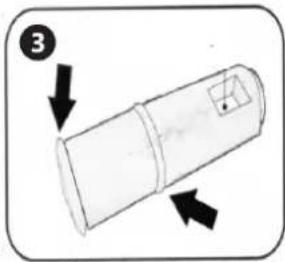
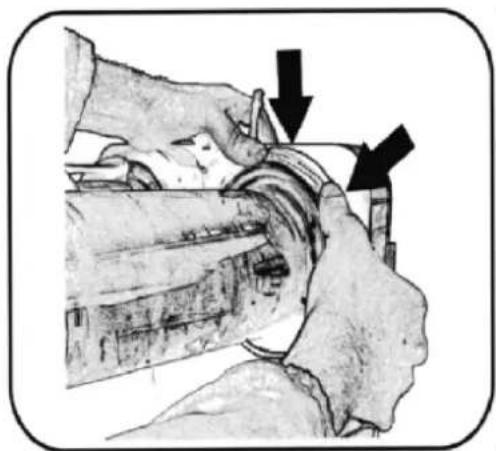
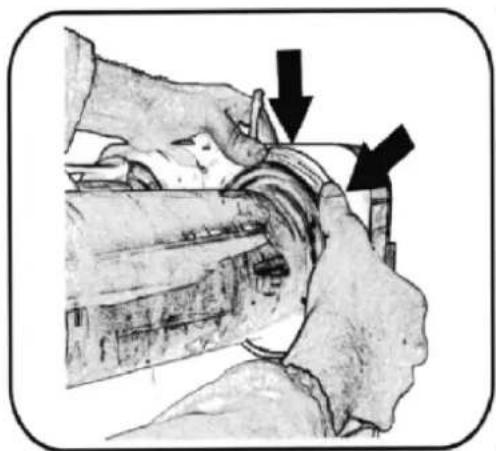
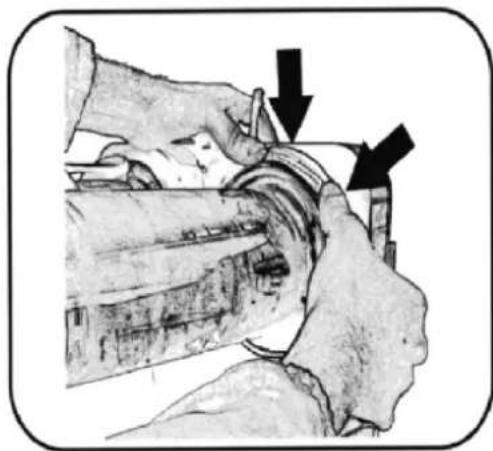
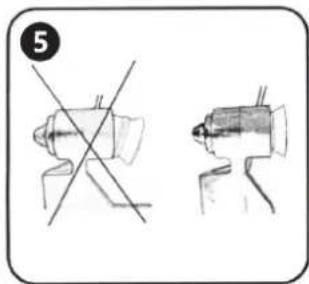
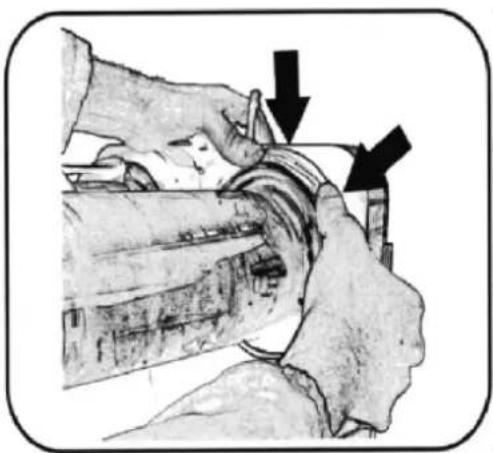
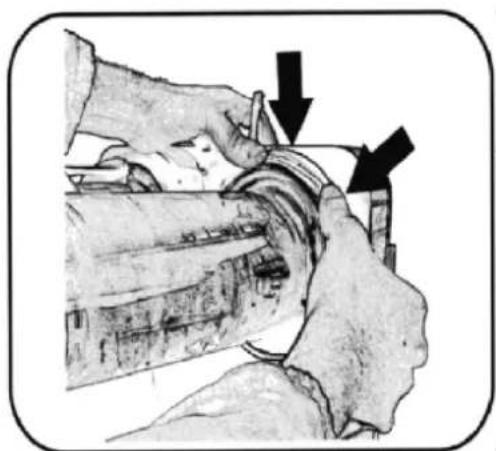
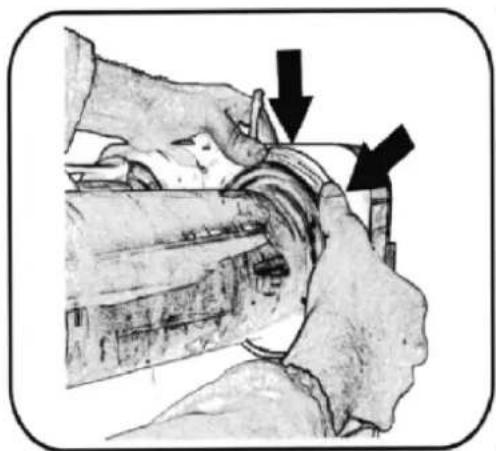
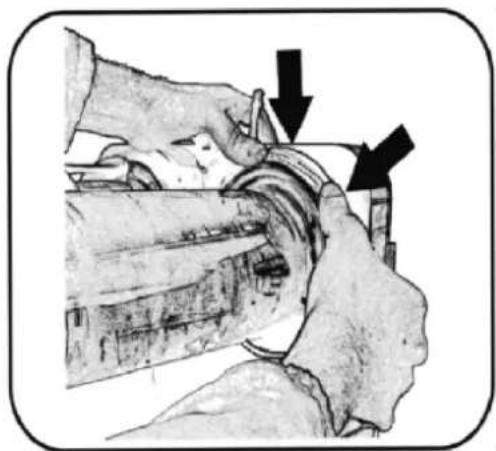
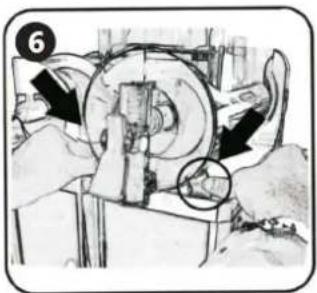
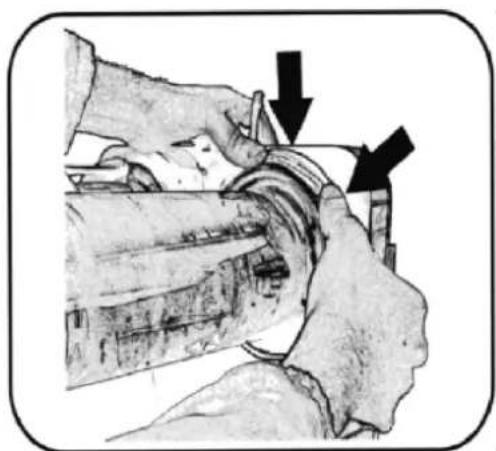
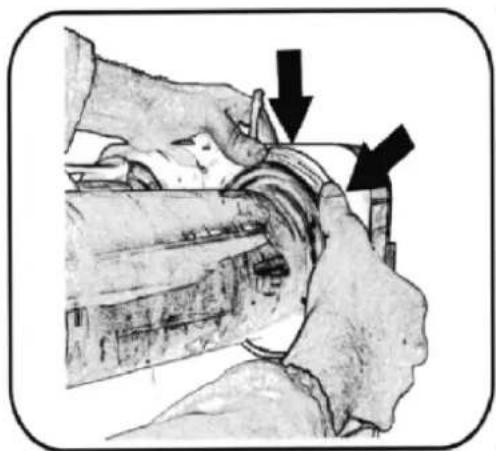
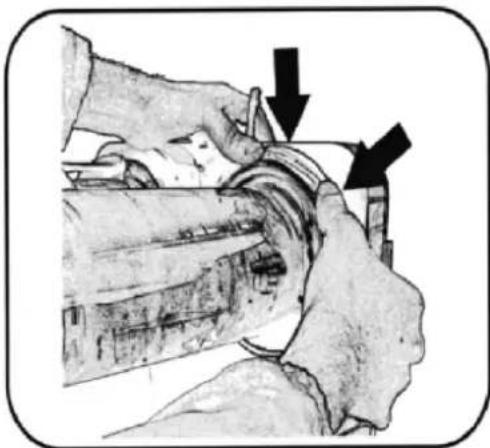
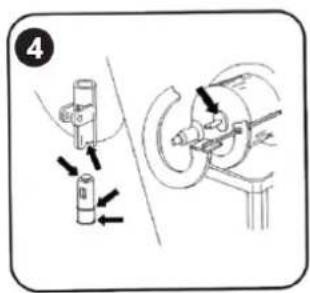
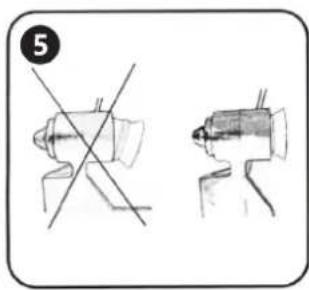
agitator the gasket must be properly adjusted to the agitator opening. NOTE! After each cleaning, lubricate the rubber sleeve/gasket (see photo below) from the inside with a special lubricant intended for contact with food.
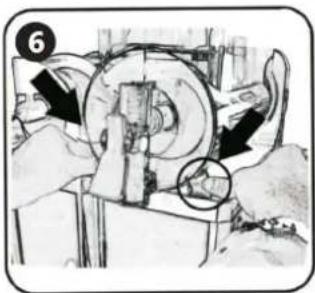
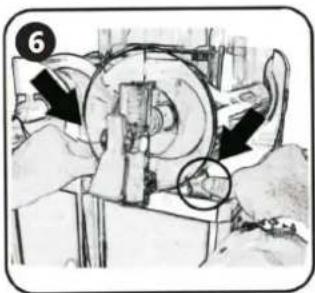
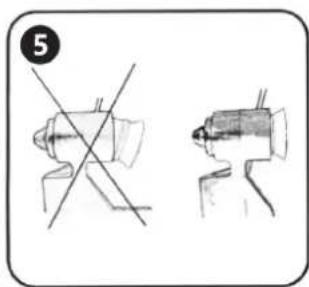
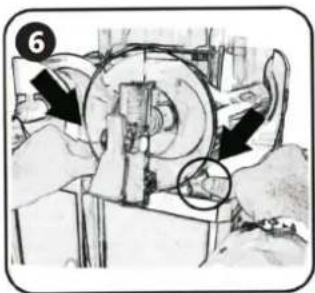
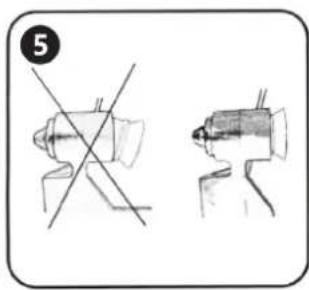
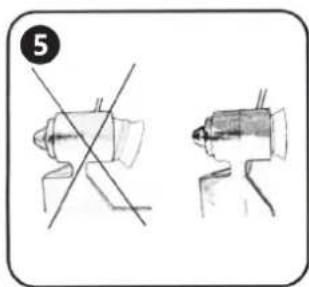
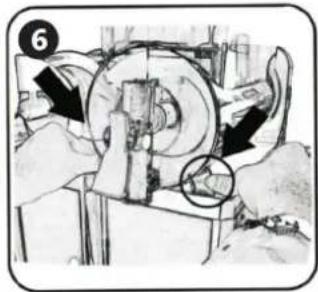
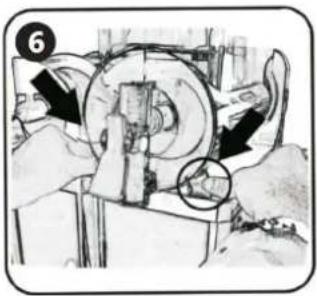
6) Slide the tank into its place by pressing it against the back gasket and pushing the front part down in order to snap it in with the hooks. In order to facilitate assembling, the gasket and the rim of the tank can be moistened.
NOTE! Poorly installed tank will prevent proper operation of the device.
4.5.5. Controlling the maximum filling level of the tank
Frozen ice cream or drinks increase in volume. Be careful not to exceed the maximum level of filling the tank of the device. It is recommended to measure the change in volume (from liquid to frozen) of the mixture from which the ice cream is to be produced and, on this basis, to fill the tank of the device with a correspondingly smaller quantity of mixture to be processed.
4.5.6. Replacement of seals
Replace any seal which has obvious signs of wear, or is leaking.
4.5.7. Special maintenance
Special maintenance should be carried out by the authorized service of the manufacturer. Once a month, it is recommended to carry out a special maintenance consisting in cleaning the internal parts of the device, and above all the condenser. The condenser should be cleaned with a brush.
4.5.8. Disposing of used devices
Do not dispose of this device in municipal waste systems. Hand it over to an electric and electrical device recycling and collection point. Check the symbol on the product, instruction manual and packaging. The plastics used to construct the device can be recycled in accordance with their markings. By choosing to recycle you are making a significant contribution to the protection of our environment.
Contact local authorities for information on your local recycling facility.

RCSL 3/10 RCSL 2/10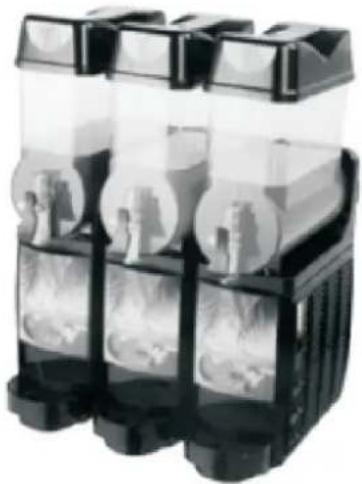
RCSL 2/3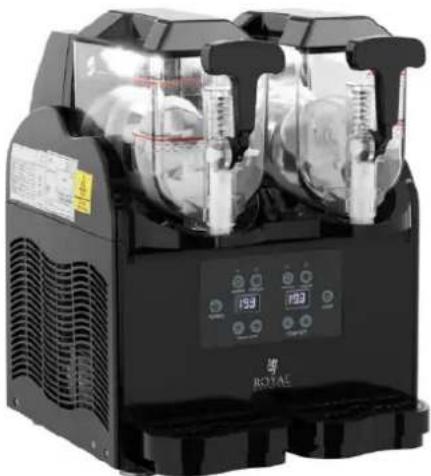
RCSL 2/15, RCSL 3/15
RCSL 2/12, RCSL 2/10, RCSL 3/12, RCSL 3/10

1) Tap lever
2) Tap
3) Drip tray
4) Device cover
5) Device tank
RCSL 2/12
RCSL 3/12
RCSL 3/10
RCSL 2/10
RCSL 2/3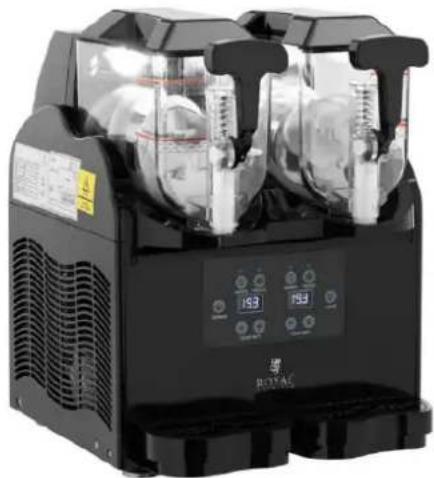
RCSL 2/15, RCSL 3/15
RCSL 2/12, RCSL 2/10, RCSL 3/12, RCSL 3/10
1) Tap lever
2) Tap
3) Drip tray
RCSL 2/12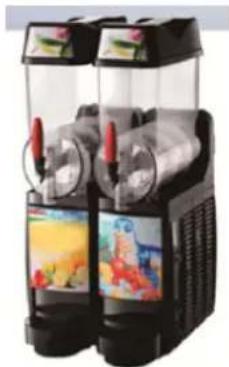
RCSL 3/12
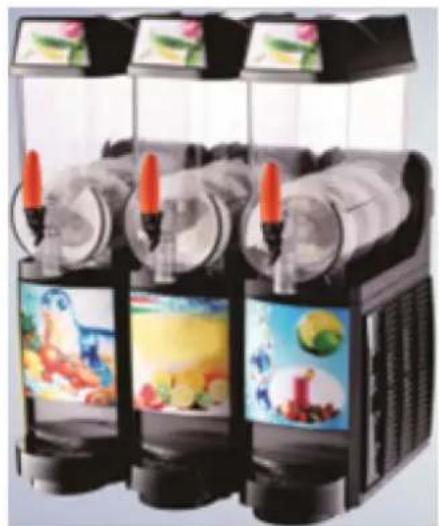
RCSL 3/10 RCSL 2/10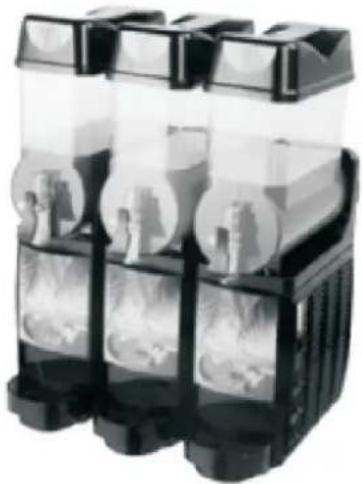
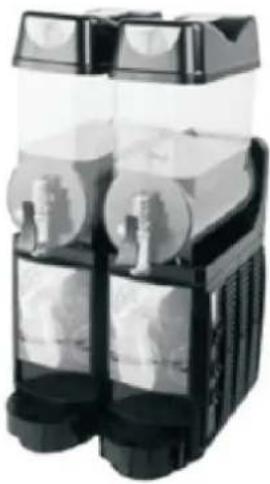
RCSL 2/3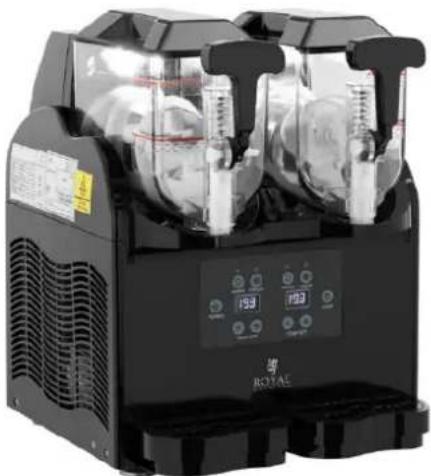
RCSL 2/15, RCSL 3/15
RCSL 2/12, RCSL 2/10, RCSL 3/12, RCSL 3/10
models RCSL 2/3, RCSL 2/12, RCSL 3/12, RCSL 2/10, RCSL 3/10 models RCSL 2/15, RCSL 3/15.
1) Faucet lever
2) Faucet
RCSL 2/12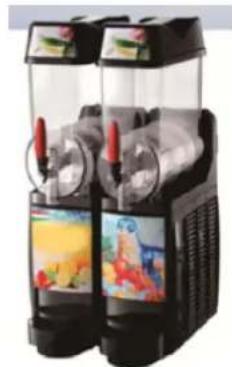
RCSL 3/12
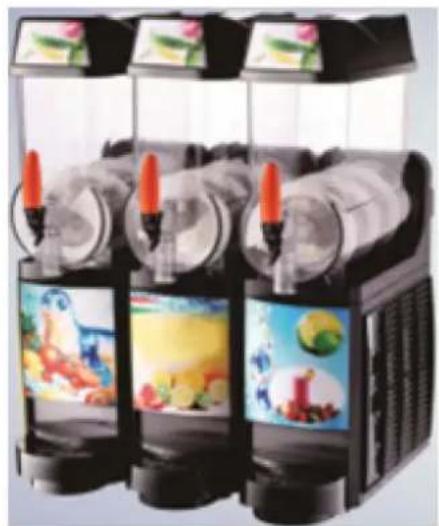
RCSL 3/10 RCSL 2/10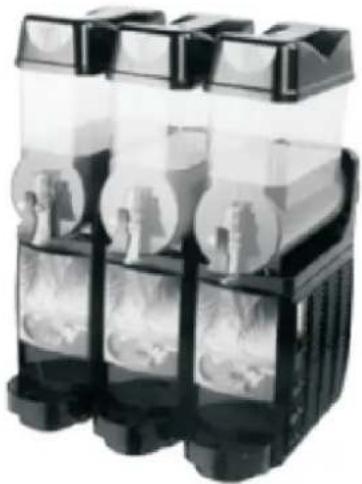
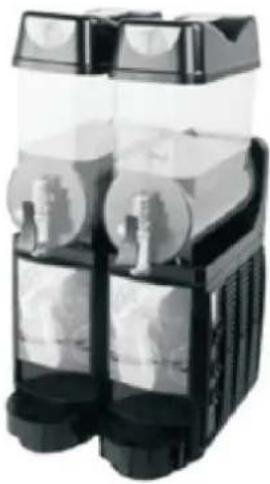
RCSL 2/3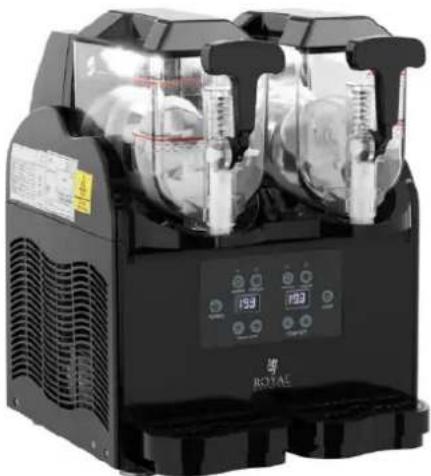
RCSL 2/15, RCSL 3/15
RCSL 2/12, RCSL 2/10, RCSL 3/12, RCSL 3/10
1) Faucet lever
2) Faucet
3) Drip tray
RCSL 2/12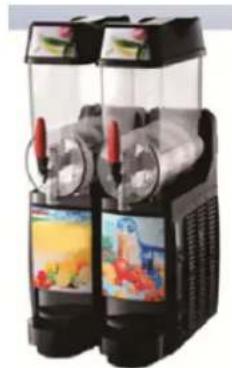
RCSL 3/12
RCSL 3/10 RCSL 2/10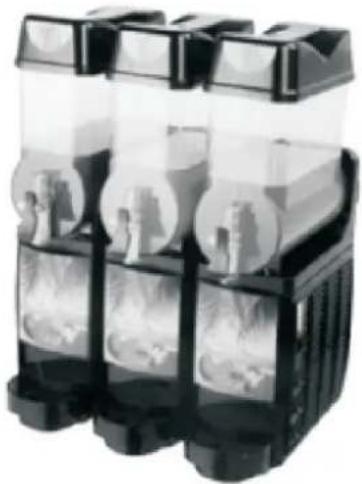
RCSL 2/3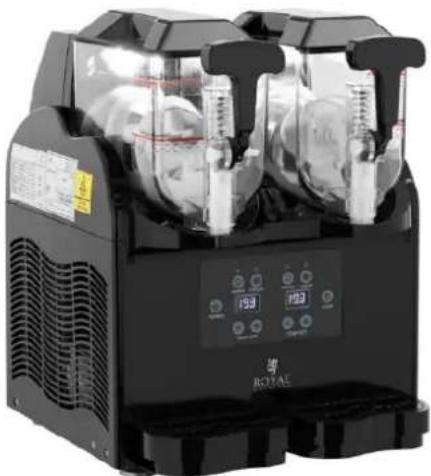
RCSL 2/15, RCSL 3/15
RCSL 2/12, RCSL 2/10, RCSL 3/12, RCSL 3/10
1) Faucet
2) Faucet
3) Drip tray
4) Tool cover
5) Tool container
6) Tool mixer
7) Control panel
8) Ventilation openings
RCSL 2/15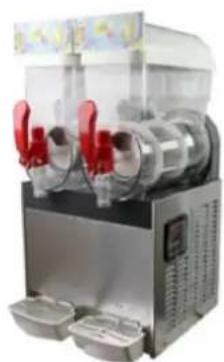
RCSL 2/12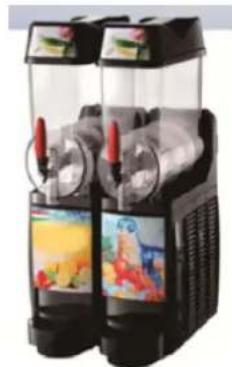
RCSL 3/12
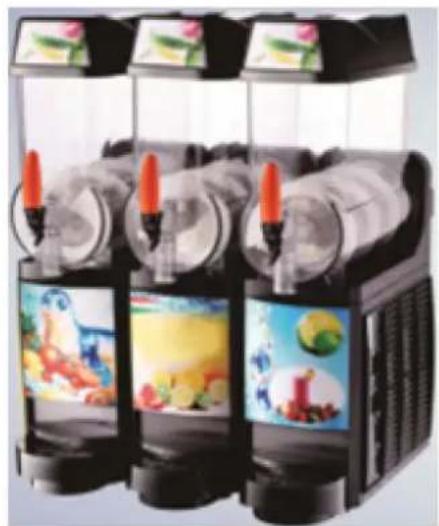
RCSL 3/10 RCSL 2/10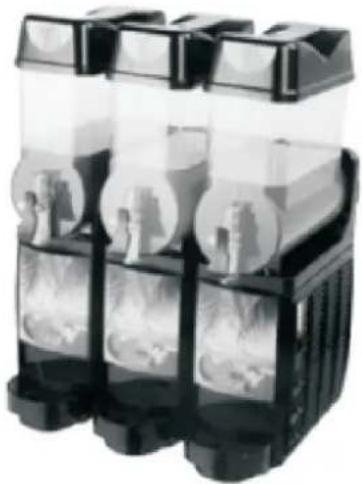
RCSL 2/3
RCSL 2/15, RCSL 3/15
RCSL 2/12, RCSL 2/10, RCSL 3/12, RCSL 3/10
1) Handle
2) Pressure
3) Drip tray
4) Unit cover
5) Unit tank
6) Appliance stirrer
7) Control panel
RCSL 2/12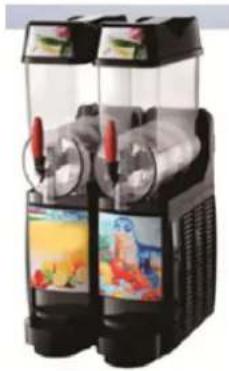
RCSL 3/12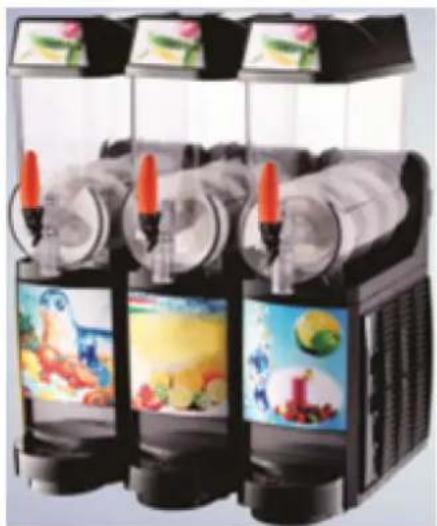
RCSL 3/10
RCSL 2/10
RCSL 2/3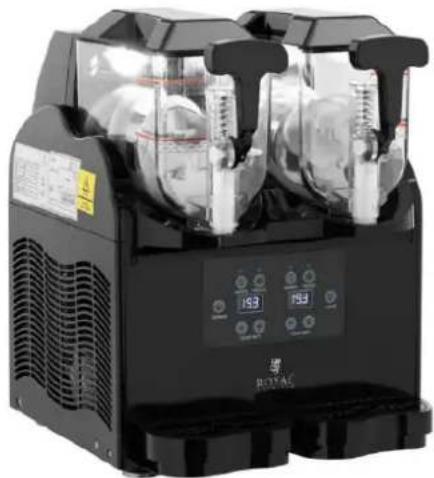
RCSL 2/12, RCSL 2/10, RCSL 3/12, RCSL 3/10
1) Hana-vipu 2) Napauta
3) Tippa-alusta
4) Laitteen kansi
5) Laitesäiliö
RCSL 2/12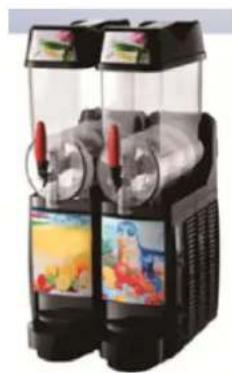
RCSL 3/12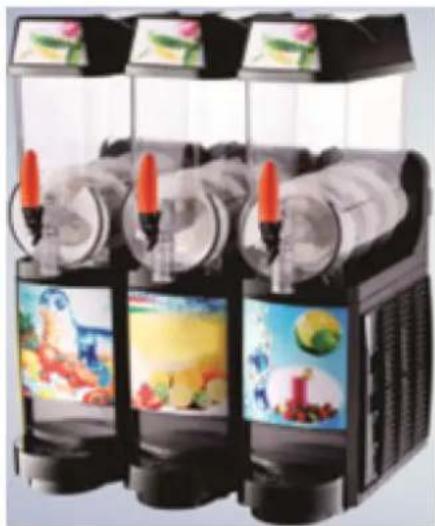
RCSL 3/10
RCSL 2/10
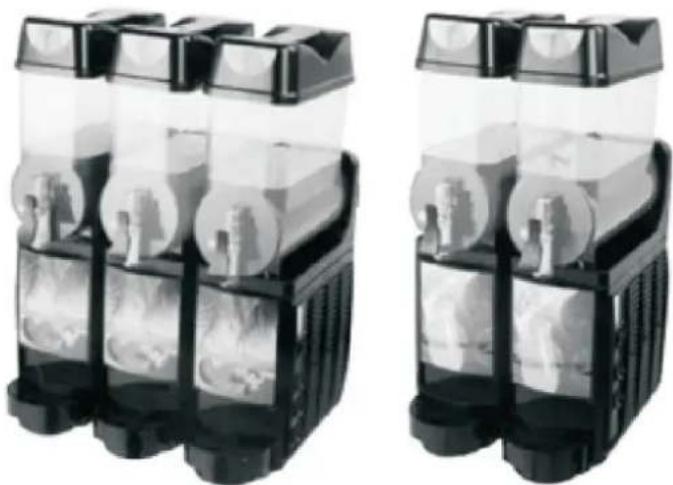
RCSL 2/3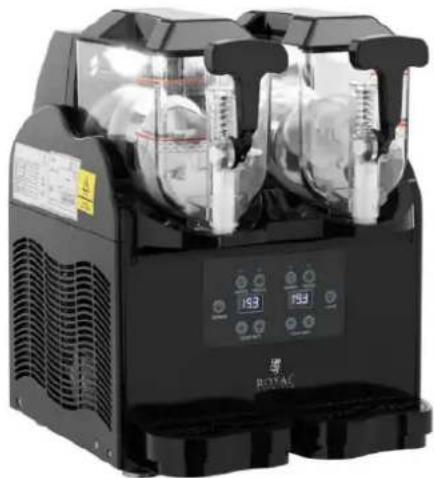
4.2 Commissioning
RCSL 2/15, RCSL 3/15
RCSL 2/12, RCSL 2/10, RCSL 3/12, RCSL 3/10
E. Temperature setting button
F. Switch for the stirrer
in models RCSL 2/3, RCSL 2/12, RCSL 3/12, RCSL 2/10, RCSL 3/10 or in models RCSL 2/15, RCSL 3/15.
1) Slide the drip trays into place. 2) Assemble the tap
1) Tap handle
2) Tap
3) Drip tray
4) Appliance lid
5) Appliance tank
6) Appliance stirrer
7) Control panel
RCSL 2/12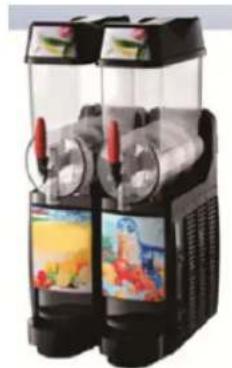
RCSL 3/12
RCSL 3/10 RCSL 2/10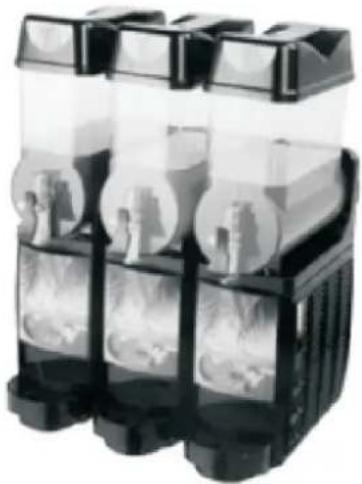
RCSL 2/3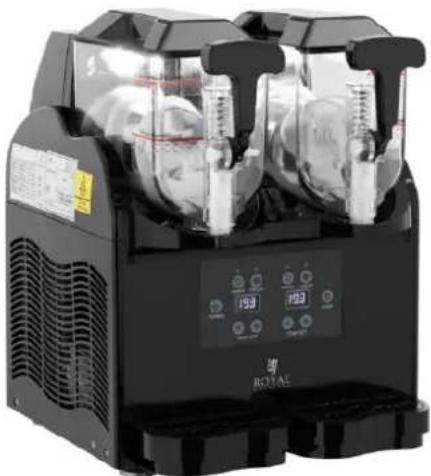
RCSL 2/15, RCSL 3/15
RCSL 2/12, RCSL 2/10, RCSL 3/12, RCSL 3/10
1) Handle 2) Press
3) Drip tray
4) Unit cover
5) Unit tank
6) Appliance stirrer
7) Control panel
RCSL 2/12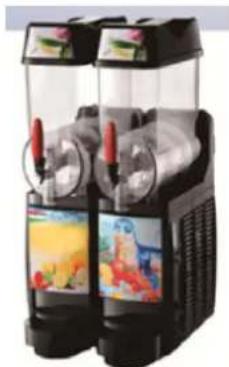
RCSL 3/12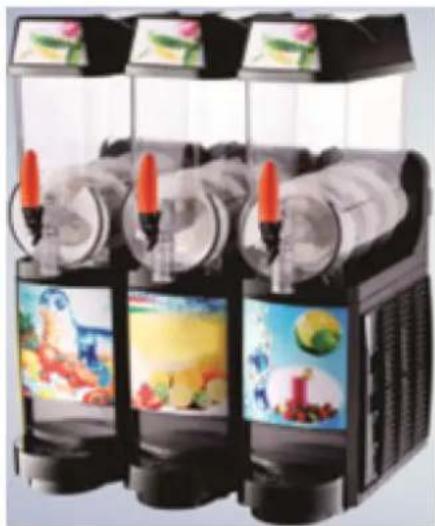
RCSL 3/10
RCSL 2/10
RCSL 2/3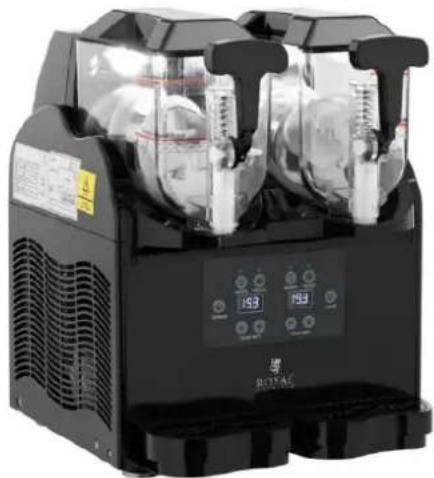
RCSL 2/12, RCSL 2/10, RCSL 3/12, RCSL 3/10
B. avypa bryter for frying
1- Adjust with screwdriver
2- Temperature level (frozen)
1) Ring pack
2) Knock
3) Drip tray
4) Unit guard
5) Unit tank
6) Appliance stirrer
7) Control panel
RCSL 2/12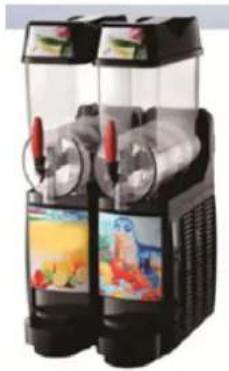
RCSL 3/12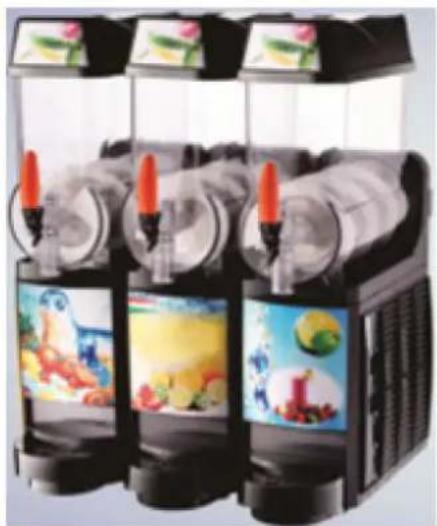
RCSL 3/10
RCSL 2/10
RCSL 2/3
RCSL 2/15, RCSL 3/15
RCSL 2/12, RCSL 2/10, RCSL 3/12, RCSL 3/10

RCSL 2/12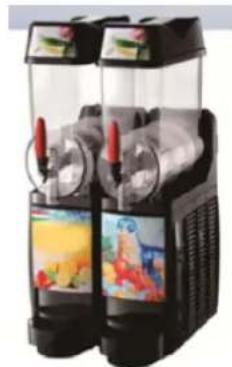
RCSL 3/12
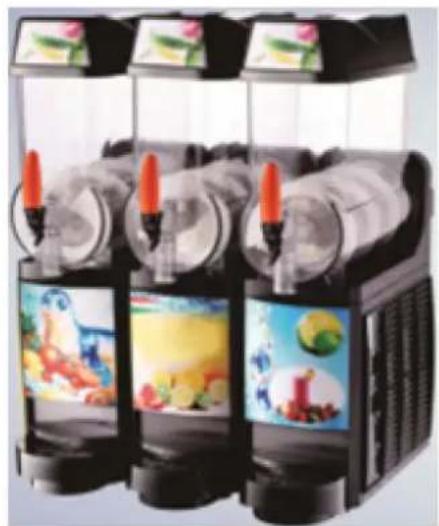
RCSL 3/10 RCSL 2/10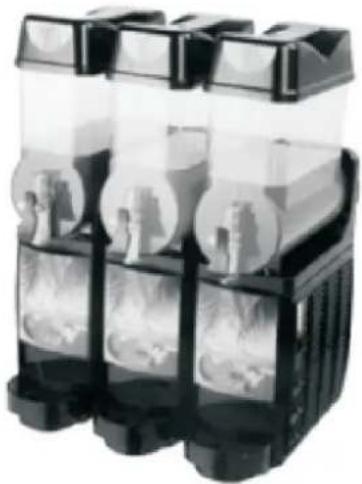
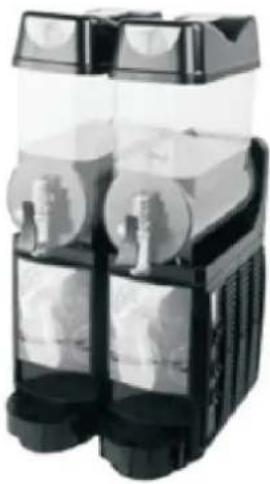
RCSL 2/3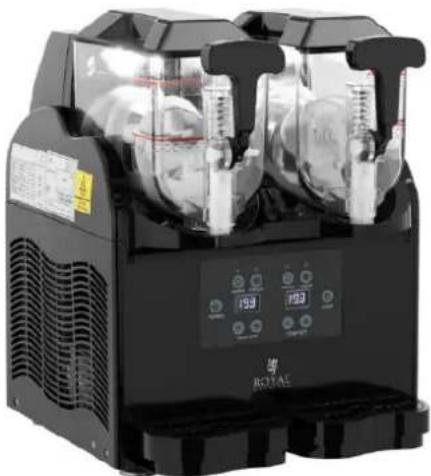
RCSL 2/15, RCSL 3/15
RCSL 2/12, RCSL 2/10, RCSL 3/12, RCSL 3/10

1) Valve handle
2) Press
RCSL 2/12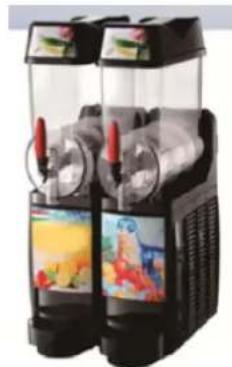
RCSL 3/12
RCSL 3/10 RCSL 2/10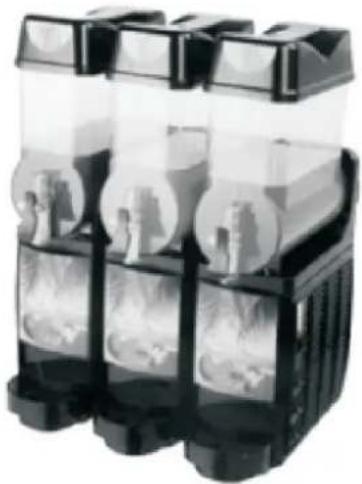
RCSL 2/3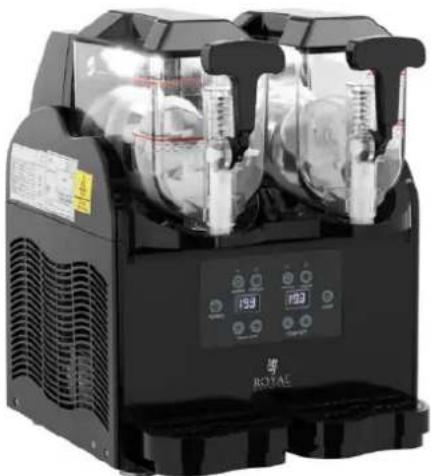
RCSL 2/15, RCSL 3/15
RCSL 2/12, RCSL 2/10, RCSL 3/12, RCSL 3/10
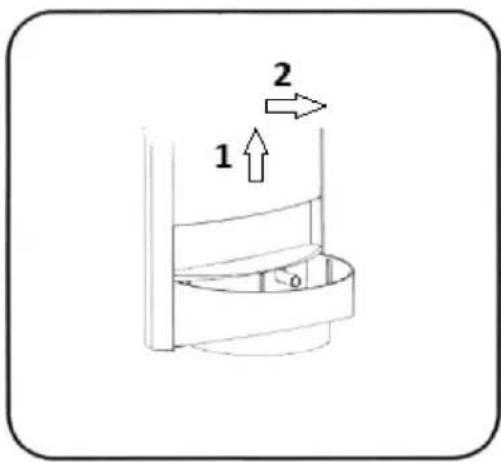
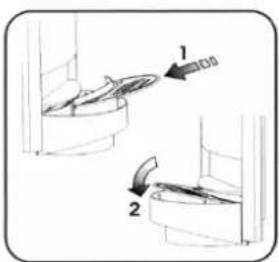
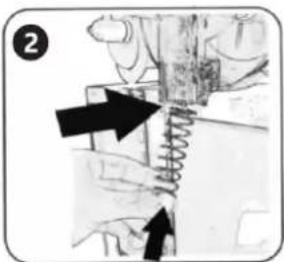
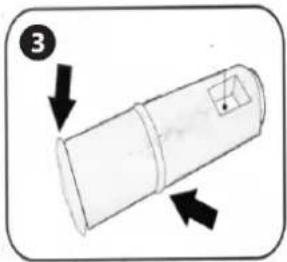
1) Slide the drip trays into place. 2) Assemble the tap
1) Tap lever
2) Touch
RCSL 3/12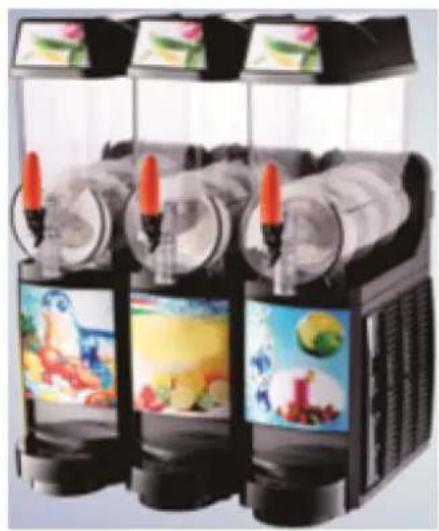
RCSL 3/10 RCSL 2/10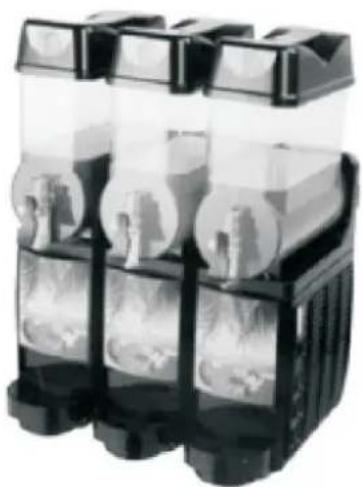
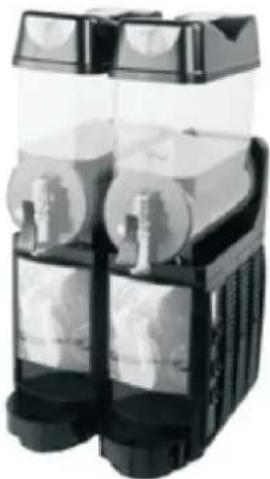
RCSL 2/3
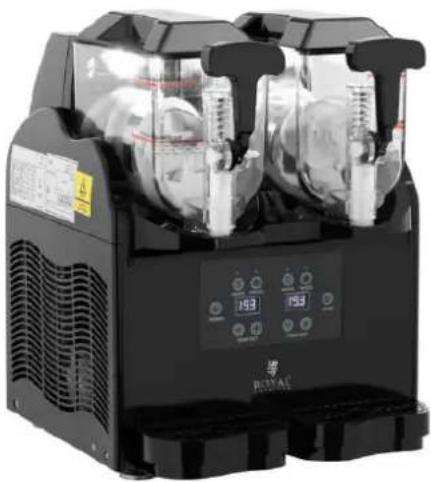
4.2. Preparation for use
4.2.1. Location of the appliance
RCSL 2/15, RCSL 3/15

RCSL 2/12, RCSL 2/10, RCSL 3/12, RCSL 3/10
1) Tap lever
2) Prick

1) Lever for the tap
2) Touch
RCSL 2/12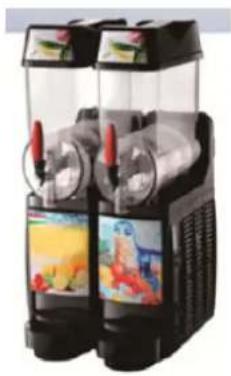
RCSL 3/12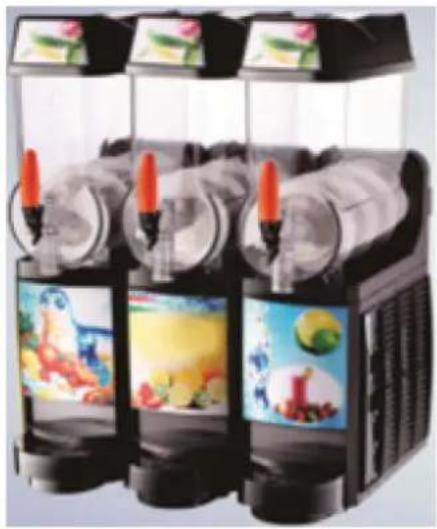
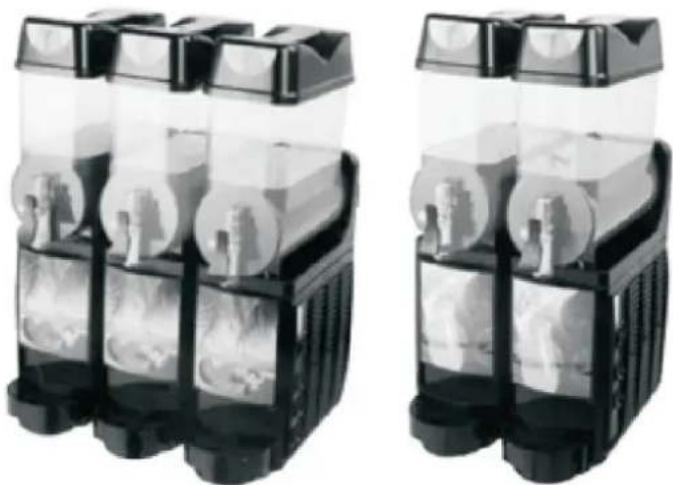
RCSL 3/10
RCSL 2/10
RCSL 2/3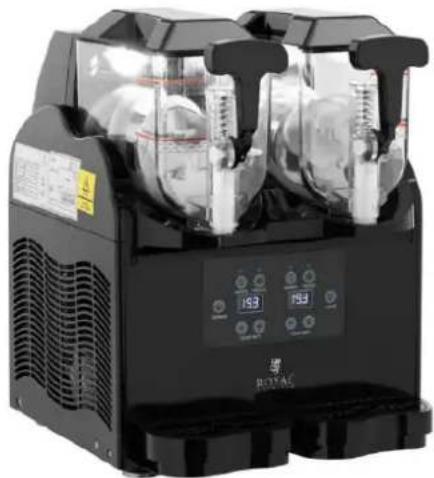
4.2. Preparation for use
4.2.1. Device location
The optimal ambient temperature should be 25-32°C, 85% higher, and relative humidity must not exceed 85%. Ensure good ventilation in the room where the device is used. The distance between each side of the device and the wall or other objects should be at least 35 cm. Keep the device away from hot surfaces. Use the device on flat, stable, clean, fire-resistant, and dry surfaces out of reach of children and persons with mental disabilities. Install the device ensuring constant access to the main plug. The power cable connected to the device must be properly grounded and match the technical specifications. Before first use, remove all elements and clean them together with the entire device. The device is intended for use in rooms at temperatures above 0°C. The surface on which the device will be placed must be strong enough to support the device with its contents.
NOTE! Never immerse the device in a jet of water or spray it with a jet of water.
RCSL 2/15, RCSL 3/15
RCSL 2/12, RCSL 2/10, RCSL 3/12, RCSL 3/10
1- Adjust with a screwdriver
2- Temperature level (frozen)
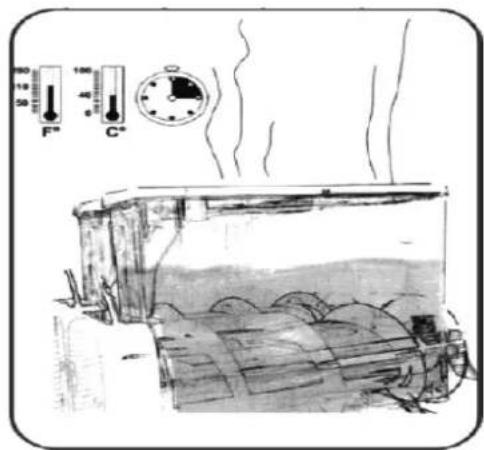
4) Replace the container lid and start mixing (without cooling) in the device for about 3 minutes.
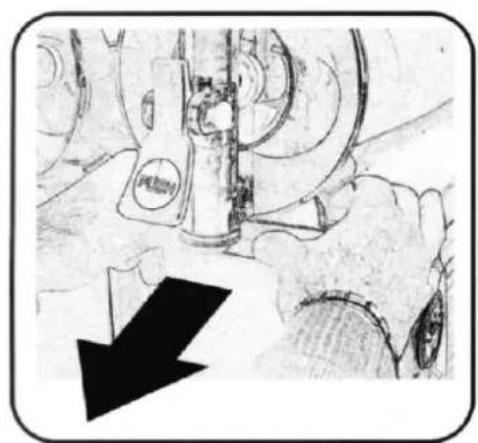
10) Remove the container gasket from the evaporator cylinder.
11) Disassemble the tap. Unscrew the nut from the pin that holds the lever in place, remove the pin, and pull the piston out of the tap tube. It is recommended to place the tap parts in a bath of disinfectant intended for cleaning surfaces that come into contact with food. The bath should be carried out according to the disinfectant's recommendations.
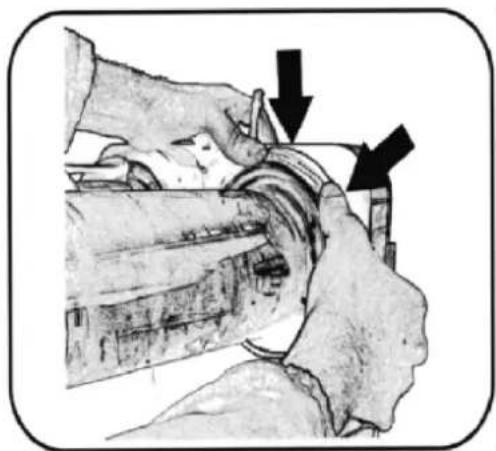
12) Remove the drip trays by lifting them and pulling them in the opposite direction from the device.
NOTE! To properly carry out cleaning and disinfection of the device, the person performing these activities should thoroughly wash and disinfect their hands. Wash all parts of the device that may come into
contact with drinks or ice cream. For cleaning, it is recommended to use a mild detergent intended for cleaning surfaces that come into contact with food. After washing with detergent, rinse all disassembled parts with water, and wipe the elements that remain attached to the device with a sponge soaked in water.
4.5.3. Disinfection
It is recommended to repeat the washing activities with warm water (approximately 40°C) and a disinfectant suitable for surfaces that come into contact with food. After washing and/or disinfection, allow the parts to dry. Regularly clean the device's ventilation openings with a brush or a tuft. The ventilation openings must not be blocked.
4.5.4. Reassembling the device after washing
RCSL 2/12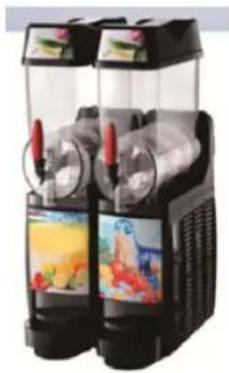
10) Remove the tank seal from the evaporator cylinder.
4.5.4. Device assembly after washing

1) Valve lever
2) Valve
3) Drip tray
4) Device cover
RCSL 2/15, RCSL 3/15
RCSL 2/12, RCSL 2/10, RCSL 3/12, RCSL 3/10
1) Faucet handle
2) Touch
RCSL 2/12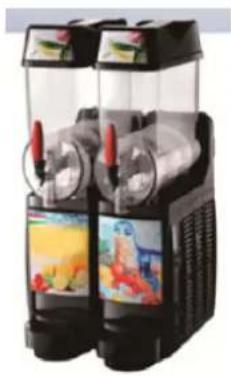
RCSL 3/12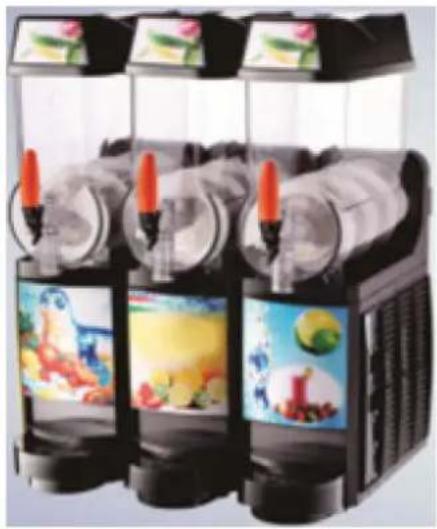
RCSL 3/10
RCSL 2/10
RCSL 2/3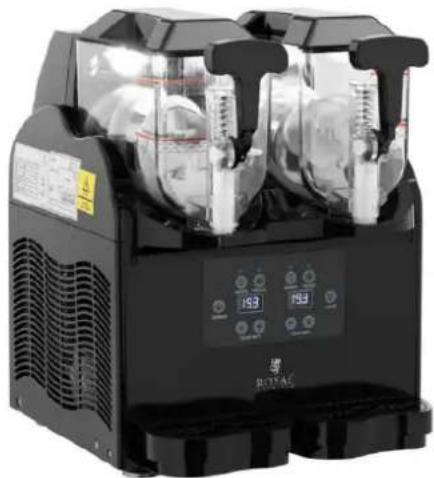
RCSL 2/15, RCSL 3/15
RCSL 2/12, RCSL 2/10, RCSL 3/12, RCSL 3/10
1- Adjust with a screwdriver
2- Temperature level (frozen)
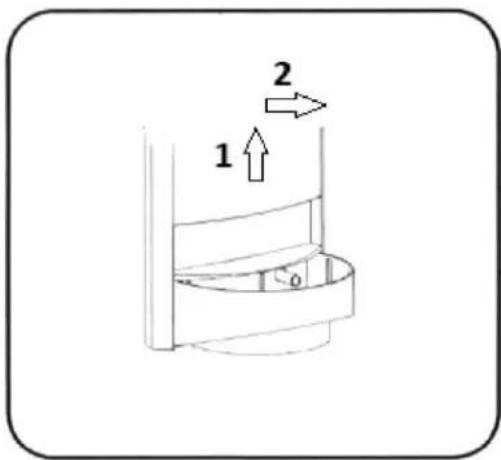
4.5.4. Assembling the appliance after washing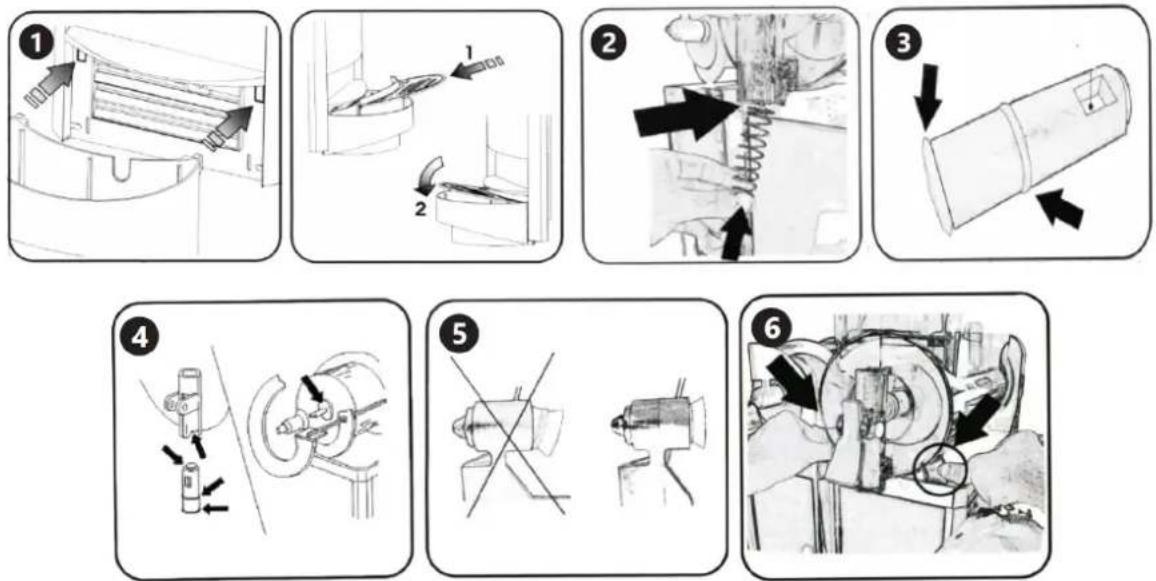
1) Push the drip trays into place. 2) Assemble the faucet
For the disposal of the device, please consider and act according to national and local rules and regulations.
CONTACT
expondo Polska sp. z o.o. sp. k.
- TECHNICAL DATA
- GENERAL DESCRIPTION
- DO NOT USE THE DEVICE UNLESS YOU HAVE THOROUGHLY READ AND UNDERSTOOD THIS USER MANUAL
- LEGEND
- USAGE SAFETY
- ELECTRICAL SAFETY
- SAFETY IN THE WORKPLACE
- PERSONAL SAFETY
- SAFE DEVICE USE
- USE GUIDELINES
- DEVICE DESCRIPTION
- PREPARING FOR USE
- APPLIANCE LOCATION
- ASSEMBLING THE DEVICE
- DEVICE USE
- PRODUCTION OF ICE CREAM AND COLD DRINKS
- LEVEL OF TEMPERATURE (FROZEN)
- CLEANING AND MAINTENANCE
- GENERAL INSTRUCTIONS
- WASHING OF THE DEVICE
- DISINFECTION
- ASSEMBLY OF THE DEVICE AFTER WASHING
- CONTROLLING THE MAXIMUM FILLING LEVEL OF THE TANK
- REPLACEMENT OF SEALS
- SPECIAL MAINTENANCE
- DISPOSING OF USED DEVICES
- COMMISSIONING
- TEMPERATURE LEVEL (FROZEN)
- PREPARATION FOR USE
- LOCATION OF THE APPLIANCE
- DEVICE LOCATION
- REASSEMBLING THE DEVICE AFTER WASHING
- DEVICE ASSEMBLY AFTER WASHING
- CONTACT
Brand : Royal Catering
Model : RCSL 2/15
Category : Ice machine