Bolero DressCode 121000 A - Washing machine CECOTEC - Free user manual and instructions
Find the device manual for free Bolero DressCode 121000 A CECOTEC in PDF.

User questions about Bolero DressCode 121000 A CECOTEC
0 question about this device. Answer the ones you know or ask your own.
Ask a new question about this device
Download the instructions for your Washing machine in PDF format for free! Find your manual Bolero DressCode 121000 A - CECOTEC and take your electronic device back in hand. On this page are published all the documents necessary for the use of your device. Bolero DressCode 121000 A by CECOTEC.
USER MANUAL Bolero DressCode 121000 A CECOTEC
natural_image
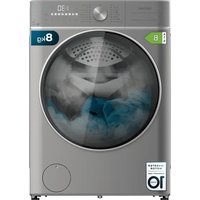
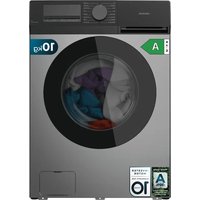
Front view of a white washing machine with a black circular lid and digital display (no visible text or symbols)Safety instructions 8
-
Parts and components
-
Before use
-
Product installation
-
Operation
-
Programmes
-
Cleaning and maintenance
-
Troubleshooting
-
Technical specifications 72
-
Disposal of old electrical
and electronic appliances. 73
-
Technical support and warranty
-
Copyright 74
SOMMAIRE
Read these instructions thoroughly before using the product. Keep this instruction manual for future reference or new users.
- Make sure that the mains voltage matches the voltage stated on the rating label of the appliance and that the wall outlet is grounded.
- If the supply cord is damaged, it must be replaced by the Technical Support Service of Cecotec or by a similarly qualified person to avoid a hazard.
- This appliance is for indoor use only.
- Make sure the device is installed in places where the temperature is above 0 °C.
- The device is not designed for built-in installation.
- Use the hose set provided with the appliance. Do not use old hoses.
- Before carrying out any maintenance in the device, unplug it from the mains.
- As a safety measure, we advise you to unplug the device and cut the water supply after every use. Maximum water inlet pressure: 1 MPa. Minimum water-inlet pressure: 0.05 MPa.
- Never pull out the power plug with wet hands.
- Unplug the power cord before cleaning or repairing the product.
- For safety reasons, the appliance must be properly earthed.
- Water channelling and electrical devices must be connected by a qualified technician in accordance with the local and national safety regulations by the manufacturer.
- The glass door may reach high temperatures during operation. Keep children and pets away from the machine during operation.
- Do not operate the device in very wet rooms or in rooms with
explosive or caustic gas.
- If the room where the washing machine is located has any type of device that generates fumes from the burning of fuels, make sure that there is proper ventilation, as the accumulation of these fumes may cause a fire hazard.
- Do not wash items that have been soiled with substances such as cooking oil, acetone, alcohol, petrol, kerosene, spot removers, turpentine, waxes, and wax removers.
- Items such as foam rubber, shower caps, waterproof textiles, rubber backed articles, and clothes, or pillows fitted with foam rubber pads should not be washed in the machine.
- Fabric softeners or similar products should be used as specified by the manufacturer.
- Do not wash articles that have been cleaned in, washed in, soaked in, or stained with flammable or explosive substances, like wax, oil, paint, petrol, degreasers, dry-cleaning solvents, kerosene, etc., which may result in fire or explosion.
- When washing fabrics that contain vegetable or cooking oil or have been contaminated by haircare products, they should first be washed in hot water with extra detergent. This will reduce, but not eliminate, the hazard.
- The openings must not be obstructed by a carpet.
- Appliances with a single inlet valve can only be connected to a cold-water supply. Appliances with a double inlet valve must be properly connected to a hot water and cold-water supply (depending on the washing machine model).
- The plug must be accessible after installation.
- The appliance must not be installed behind a lockable door, a sliding door, or a door with a hinge on the opposite side to that of the device.
- The appliance shall not be installed in a humid place.
- The product is exclusive for household use and is only
designed for the textiles suitable for machine washing.
- Do not stand or sit on the machine.
- Do not lean against machine door.
- Flammable and explosive or toxic solvents are forbidden. Petrol, alcohol, etc. must not be used as detergents. Use only detergents suitable for machine washing, especially those which are dosed directly in the drum.
- Do not stop the device before ending the washing cycle. In any case, if this should happen, remove the garments with caution, as they may reach high temperatures.
- Once the washing cycle has finished, we recommend removing the laundry as soon as possible to prevent creases.
- This appliance can be used by children aged 8 and above, and persons with reduced physical, sensory, or mental capabilities or lack of experience and knowledge, as long as they have been given supervision or instruction concerning the use of the appliance in a safe way and understand the hazards involved. Do not allow children to play with the appliance. The cleaning and maintenance of the appliance should not be carried out by children without supervision.
- Children should be supervised to make sure that they do not play with the appliance.
- Children under 3 years old must stay away from the washing machine, unless they are constantly supervised.
Cautions during the handling of the machine
- If you wish to change the location of the washing machine, make sure you install the transport bolts again in the device, as they will ensure the interior of the product is not damaged during transport.
- The accumulated water must be drained out of the machine.
- Handle the machine carefully. Never lift the device by its protruding parts. The door cannot be used as the handle
during transportation.
- This appliance is heavy. Transport it with care.
- Secure the drain and water supply hoses correctly.
- Do not close the door with excessive force. Should it be difficult to close the door, please check if the clothes are put in or distributed well.
- It is forbidden to wash carpets.
- Never pour water manually during washing.
INSTRUCTIONS DE SÉCURITÉ
- Top cover
- Control panel
- Power cord
- Drum
- Service filter
- Drain hose
- Door
B. Detergent tank - Water supply hose
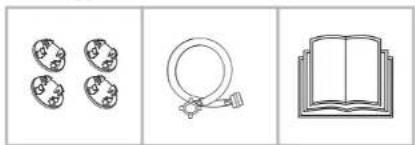
Attachments
Fig. 2
- Transport-bolt hole plug.
- Cold water supply hose
- Instruction manual
Please note
The graphics in this manual are schematic representations and may not exactly match the product.
2. BEFORE USE
- This appliance is packaged in a way as to protect it during transport. Take the device out of its box and remove all packaging materials. You can keep the original box and other packaging elements in a safe place. This will help you prevent product damage when transporting it in the future. In case the original packaging is disposed of, make sure all packaging materials are recycled accordingly.
- Make sure all parts and components are included and in good conditions. If any of them are missing or not in good condition, please contact the official Cecotec Technical Service immediately.
Box contents
- DressCode 121000 A washing machine.
- Cold water supply hose.
- Instruction manual
ENGLISHENGLISH
Note:
- You must calibrate the washing machine before using it.
- Before the first wash, run a first cycle without laundry (i.e., with an empty drum) at low revolutions.
3. PRODUCT INSTALLATION
- Place the washing machine on a stable, flat, and dry surface. Make sure the product does not crush the power cord. Avoid direct sunlight and ensure sufficient ventilation. Fig. 3
- Make sure all extruded polystyrene packaging has been removed. Lift the washing machine and remove the base packing. Make sure the small triangle foam is removed along with the bottom one. If not, carefully position the washing machine sideways and remove it by hand. Fig. 4
- Remove the tape securing the power supply cord and drain hose.
- Remove the water supply hose from the drum.
Removing the transport bolts
- The transport bolts must be removed from the back of the washing machine before using the washing machine.
- Store the transport bolts in a place they can be easily retrieved from in case of future displacement of the washing machine.
- To remove the transport bolts, follow the steps below:
- Loosen the 4 bolts with a spanner and then remove them. Fig. 5
- Stop the holes with transport hole plugs.
- Keep the transport bolts properly for future use.
Levelling the washing machine Fig. 6
Warning
The lock nuts on all four feet must be screwed tightly against the housing.
- Loosen the lock nut.
- Rotate the leg until it reaches the ground.
- Adjust the leg height. Make sure the washing machine is level and fix the lock nuts.
Water supply hose connection
Connect the water supply hose following the steps below:
- Connect the water supply hose to the washing machine's water inlet valve as shown in Figure 7.
- Connect the other end of the water supply hose to a suitable tap as shown in Figure 8.
Note:
- Do not twist, crush, or modify the water supply hose.
- Connect the water supply hose manually. Do not use tools.
- Check that the water hose is correctly installed.
Drain hose
There are two ways to place the end of the drain hose:
- In a drainpipe. Fig. 9
- In a sink's drainpipe, over the trap. Fig. 10
Warning
- Do not kink or protract the drain hose.
- Position the drain hose properly, at 60-90 cm from the floor.
- When installing the drain hose, fix it properly. If drain hose is too long, do not force it into washing machine as it will cause abnormal noises.
4. OPERATION
Note
- Please make sure the appliance is properly installed before operating it.
- This washing machine was test-checked before leaving the factory. To remove possible water residues and colours resulting from these tests, we recommend you run a complete cycle without laundry at low revolutions before the first wash.
Calibration
The device can detect the amount of laundry loaded. This feature optimises performance by minimising energy and water consumption, saving money and time. For this reason, it is recommended to calibrate the device for best use.
-
Make sure the inside of the drum is empty and close the door.
-
Plug the washing machine to a mains socket.
-
Turn on the washing machine and press [ ] and [ ] simultaneously for 10 seconds until the display shows "t19".
-
Press [▶◇] to start up the washing machine and wait until the display shows *****.
Using the washing machine
Fig. 11
- Plug the washing machine to a mains socket.
- Open the water supply tap.
- Put the items to be washed into the washing machine.
ENGLISHENGLISH
- Close the door
- Add detergent (and softener if necessary).
- Turn the device on.
- Turn the knob to select the desired programme.
B. Select function or use the default one. - Press [].
- After washing, the machine will beep, and the display will show "End"
Note
- Add detergent to the I or prewash compartment only after selecting prewash.
- If any of the default options is selected, step 8 can be skipped.
Before each washing
- The washing machine should be operated within a temperature range of 0–40 °C. If used under 0°C, the inlet valve and draining system may be damaged. If the machine is placed or operated in rooms at 0 °C or below, it should be transferred to normal room temperature to ensure the water supply hose and drain hose are not frozen before use.
Before washing, check the garments' labels (Fig. 12) and the cleaning product's instructions. Use non-foaming or less-foaming detergent suitable for machine washing. - Empty the pockets of the clothes to be washed. Fig. 13.
- Knot the long strips, close zips, or tighten buttons. Fig. 14.
- Place small items in washing bags. Fig. 15.
Turn delicate and long-fibre garments inside out. Fig. 16. - Separate garments by colour and fabric type. Fig. 17.
Detergent tank
Fig. 18.
- Prewash detergent tank
- Softener tank
- Main detergent tank
- Detergent-tank release button
Note:
Do not put detergent in the prewash tank if you have not activated this option.
Programme
Cotton
Synthetic
Mix
Bed linen
Baby Care
20°C
Express 15
Sterilisation
Eco 40-60
Wool
Rinse&Spin
Spin Only
Drum Clean
Necessary
Optional
Note
- If you use concentrated, filamentous, or additive detergent, we recommend you slightly dilute it with water to prevent the detergent tank inlet from clogging and causing water overflow.
- Choose a proper detergent suitable to every occasion for maximum performance. It is also important to always close the recommended detergent amount.
- Use a reduced amount of detergent if the drum is not fully loaded
- Adapt the detergent amount to the water-hardness type. The lower the water hardness, the lower the detergent amount.
ENGLISHENGLISH
The following indicators are a sign of detergent overdosing:
- Abundant foaming.
- Poor washing and rinsing results.
The following indicators are a sign of detergent underdosing: - Clothes lose colour or white turns grey.
- Build-up of scale deposits on the drum, heating element, and/or casting.
Detergent must be added in case I only after selecting the pre-washing function.
| Recommended detergent | Wash cycles | Washing temperature (°C) | Type of laundry and textile |
| Heavy-duty detergent with bleaching agents and optical brighteners. | Cotton.Eco 40-60.Mix.Bed linen. | 20/30/40/60 | White laundry made from boll-proof cotton or linen. |
| Colour detergent without bleaching agent and optical brighteners. | Cotton.Mix.Bed linen. | Cold/20/30/40 | Coloured laundry made from cotton or linen. |
| Colour or mild detergent without optical brighteners. | 20 °CSynthetic. | 20 | Coloured laundry made from easy care fibres or synthetic materials. |
| Mild washing detergent. | Synthetic. | 20/30 | Delicate textiles, silk viscose. |
| Special wool detergent. | Wool. | 20/30 | Wool. |
Control panel
Fig. 19 key:
1. On/Off: press the On/Off button to switch the washing machine on or off.
2. Start/Pause: press the button to start or pause the washing cycle.
3. Options: select an additional function, the light indicator will light when selected.
4. Programmes: Different types of programmes for different types of laundry
5. Display: The display shows the settings, estimated time remaining, options, and status messages of the washing machine. The display will remain on through the cycle.
Fig. 20 key:
- Display: shows washing info:
| Washing time Delayed-stall time | 125 | 2h | |
| Revolutions per minute End | 100 | E30 | |
| Programme end Temperature | End | 30 |
- Prewash Icon
- Door Lock icon
- Child lock icon
- Delay Start Icon
- Quick Wash icon
- Comfort Mode icon
B. Extra Rinse icon - SpaCare Icon
- Wash Status icons (Prewash, Wash, Rinse, Spin)
- Clothes' Soiling-Level icon
5. PROGRAMMES
The table below shows the recommended load and the time displayed depending on the programme:
| Programme | Load (kg) | Display time (h:min) |
| Cotton | 12.0 | 3:39 |
| Synthetic | 6.0 | 3:18 |
| Mix | 12.0 | 1:20 |
| Bed linen | 12.0 | 1:48 |
| Baby Care | 12.0 | 1:42 |
| 20°C | 6.0 | 1:01 |
| Drum Clean | -- | 1:18 |
| Spin Only Spin Only | 12.0 | 0:12 |
| Rinse&Spin | 12.0 | 0:20 |
| Wool | 2.0 | 1:07 |
| Eco 40-60 | -- | 4:00 |
ENGLISHENGLISH
| Sterilisation | 6.0 | 2:27 |
| Express 15' | 2.0 | 0:15 |
Please note
The times shown in the table are for reference only. Times can vary depending on different factors.
| Cycle | Recommended maximum capacity (kg) | Temperature setting | Cycle time (h/min) | Energy consumption (kWh/cycle) | Water consumption (U/cycle) | Highest temperature (°C) | Residual moisture content (%/rpm) |
| 20°C | 6.0 | 20 | 1:01 | 0.205 | 58 | 20 | 65%/1000 |
| Cotton | 12.0 | 60 | 3:39 | 1.910 | 99 | 60 | 53%/1400 |
| Mix | 12.0 | 40 | 1:20 | 0.988 | 99 | 40 | 70%/800 |
| Express 15 | 2.0 | Cold | 0:15 | 0.030 | 31 | Cold | 70%/800 |
| Bed linen | 12.0 | 40 | 1:48 | 1.037 | 99 | 40 | 65%/1000 |
| Fca 40-60 | 12.0 | - | 4:00 | 1.186 | 62 | 39 | 53.9%/1350 |
| 6.0 | - | 3:00 | 0.618 | 58 | 3/4 | 53.9%/1350 | |
| 3.0 | 3:00 | 0.253 | 47 | 27 | 53.9%/1350 |
Warnings:
- Check whether the water inside the drum has been drained before opening its door. Do not open the door if there is any water.
- Do not wash one garment only, as this could destabilise the washing machine. Always introduce at least 3 or 4 clothes so that draining can be done smoothly.
- The information given for the different programmes of the eco 40-60 programme are just indicative.
The eco 40-60 programme can clean normally soiled cotton clothes declared as washable at 40°C or 60°C, together in the same cycle. This programme is used to assess compliance with the EU eco-design legislation. - The times indicated for each programme match the length with standard loads and temperatures. Other loads and temperatures will need different programme length.
- The most efficient programmes in terms of energy consumption are generally those that are carried out at lower temperatures and longer length.
- Load the washing machine to the quantity estimated for each programme, this will help you save energy and water.
- The length, and energy and water consumption of each programme may vary according to the weight and type of laundry, the additional functions active, water, and room
temperature.
- It is recommended the use of liquid detergent for washing programmes at low temperature. You can vary the quantity of detergent according to the quantity of laundry and its soiling level. Follow the detergent manufacturer recommendations for the quantity of detergent you must use.
- Noise and remaining moisture level depend on the spin speed. The higher the spin speed, the higher the noise and the lower the remaining moisture level.
- You can access the product database where the information for this model is stored by scanning the QR code of the reference of your product (you will also find the energy label).
| Product Bolera DressCode 121000 A | |
| Reference: 02517 | |
| QR code |
Use the programme that best suits the desired washing type:
| Cotton Hard-wearing textiles, heat-resistant textilesmade of cotton or linen. | |
| Synthetic Wash synthetic articles, for example shirts,coats, mix. While washing the knitting textiles,detergent quantity shall be reduced due to itsloose string construction and easily formingbubbles. | |
| Mix Mixed load consisting of textiles made of | cotton and synthetics. |
| Bed linen This programme is specially designed | to washbed linen such as duvets, sheets... |
| Baby Care This programme is designed to wash | babyclothes. The rinsing of clothes is better andleaves clothes cleaner to protect the baby'sskin. |
| 20°C 20 °C default, can choose cold water. | |
ENGLISHENGLISH
| Drum Clean | This programme is designed to clean the drum and tube. Apply a 90°C sterilisation for an eco-friendlier washing. When running this programme, do not add clothes or other fabric types. You can add a cleaning agent to improve the programme's effectiveness. |
| Spin Only Spin Only | Extra Spin: you can select the drum's rotation speed. |
| Rinse&Spin | Extra rinse with spin. |
| Wool | Hand or machine-washable wool or rich-wool textiles. Gentle washing programme to prevent shrinkage, with longer programme pauses (textiles will be kept soaking). |
| Eco 40-60 | The default temperature of this programme is 40 °C and cannot be modified. It is suitable to wash cotton laundry declared as washable at 40 °C or 60 °C, together in the same cycle. |
| Sterilisation | Keeps the washing temperature above 60 °C for more than 30 minutes to effectively remove harmful bacteria. |
| Express 15' | Extra-short programme, suitable for lightly soiled washing or for small amounts of laundry. |
Warning:
Should the device shut off due to power supply shortage, the memory stores the previously selected programme. When turned back on, the device will resume operation with said programme.
Options
| PROGRAMIME | Default temperature (°C) | Default speed (rpm) | Additional available features |
| Cotton | 40 800 Delayed | Start, SpaCare, Prewash,Extra Rinse, Comfort Mode, Quick Wash |
| Synthetic 40 800 Delayed Start, Prewash, Extra Rinse, | Comfort Mode, Quick Wash | |
| Mix 40 800 Delayed Start, SpaCare, Prewash, | Extra Rinse, Comfort Mode, Quick Wash | |
| Bed linen 40 1000 Delayed Start, SpaCare, Prewash, | Extra Rinse, Comfort Mode, Quick Wash | |
| Baby Care 60 1000 Delayed Start, SpaCare, Prewash, | Extra Rinse, Comfort Mode, Quick Wash | |
| 20°C 20 1000 Delayed Start, Extra Rinse, Comfort | Mode, Quick Wash | |
| Drum Clean | 90 -- Delayed Start, Comfort Mode | |
| Spin Only Spin Only | -- 1000 Delayed Start, Comfort Mode | |
| Rinse&Spin -- 1000 Delayed Start, Extra Rinse, Comfort | Mode | |
| Wool 40 600 | Delayed Start, Extra Rinse, Comfort Mode | |
| Eco 40-60 | -- 1400 Delay start | |
| Sterilisation | 70 800 Delayed Start, Extra Rinse, Comfort Mode | |
| Express 15' | -- 800 Delayed Start, Comfort Mode | |
Please note
- The table shows the cycles' options and how they can be adjusted. - It also shows if some settings are not compatible with some cycles.
Selectable options Fig. 21
- Delay start
- Quick Wash
- Temperature/Mute
- Spin/Favourite
- Functions
- Comfort Mode
- Child lock
ENGLISHENGLISH
Temperature
- The washing temperature can be adjusted by pressing the "Temperature/Mute" button.
- The pre-set temperatures are: Cold / 20 °C / 30 °C / 40 °C / 60 °C / 90 °C.
Spinning speed
- The spinning speed can be adjusted by pressing the "Spin/Favourite" button.
- The pre-set speeds are: 0 / 400 / 600 / 800 / 1000 / 1200 / 1400 rpm.
Delay start
-
Select a programme.
-
Press the "Delay Start" button to select the time (from 0 to 24 hours).
-
Press the "Start/Pause" button to activate the delay start function.
To cancel the function, press the 'Delay Start' button before starting the programme until the display shows 0 h. If the programme has already started, restart the washing machine and select a new programme.
Pre-Wash
- Additional washing cycle prior to the main one to improve washing performance. Suitable for clothes that are very dirty.
- Note: detergent must be added to compartment I.
- To select it, press the 'Functions' button until the 'Prewash' icon lights up.
Extra rinse
- The laundry will undergo an additional water rinse after selecting this function.
- To select it, press the 'Functions' button until the "Extra Rinse" icon lights up.
Soiling level (MAXICLEAN)
- Washing time will increase or decrease after selecting this function.
- To select it, press the "MAXICLEAN" button until selecting the appropriate soiling level: low, medium, or high (the corresponding icon will light up).
Quick Wash
- This function allows to reduce the washing cycle time (depending on the selected programme).
- To select this function, press the "Quick Wash" button.
Favourite
- You can save the most frequently used programme.
- After choosing the programme and selecting the desired settings, press the 'Spin/Favourite' button for 3 seconds before starting the washing cycle.
- The default programme is "Cotton".
SpaCare
- You can use this function with the following programmes: Cotton, Mix, Bed Linen, and Baby Care.
- Before the washing cycle, laundry is sterilised by steam in the drum.
- To select this function, press the "SPACARE" button.
Comfort Mode
- If this function is activated, the spinning speed is set to 800 rpm, even if the selected programme has a higher speed by default. In addition, the control panel sounds are deactivated.
- To activate this function, press the "Comfort Mode" button.
Child lock
- This function is intended to prevent children from misusing the control panel.
- All buttons will be locked except the On/Off button.
- To activate it, press the 'Spin/Favourite' and 'Functions' buttons simultaneously for about 3 seconds until you hear a beep. The "Child Lock" icon will light up.
- To deactivate the function, repeat the same process.
Warning:
- When the child lock is activated, the display will alternately show 'CL' and the remaining time of the washing cycle. Pressing any other button will cause the child lock icon to flash for 3 seconds. When the programme is finished, the display will show 'CL' and 'END' alternately for about 10 seconds. Then, the icon will flash for 3 seconds.
- You must deactivate the child lock before selecting a new programme.
Mute Mode
- Select the programme and press the "Temperature/Mute" button for about 3 seconds to deactivate the control panel sound.
- To activate the sound again, repeat this process.
- The setting will be saved until next restart.
Reload
- This operation can be carried out during the washing process.
- Press the "Start/Pause" button for about 3 seconds to pause the washing cycle, unlock the door, and put new garments into the drum.
- If the drum is rotating with a large amount of hot water inside, the operation cannot be carried out for safety reasons (the door will remain locked).
- The following steps must be followed:
- Wait until the drum stops rolling.
- Check that the door is unlocked.
ENGLISHENGLISH
- Open the door and carefully insert the laundry into the drum.
- Close the door
- Press the "Start/Pause" button.
Warning:
Do not perform the Reload operation if the water level or temperature are high.
6. CLEANING AND MAINTENANCE
Warning:
Always switch off the machine and close the water inlet tap before cleaning or maintenance.
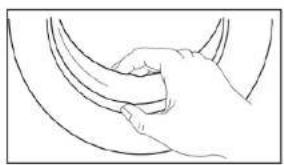
Cleaning the main body. Fig. 22
Proper maintenance can extend the device's lifespan. When necessary, you can clean the washing machine's surface with a soft, dry cloth or by using a small amount of neutral, non-abrasive detergent diluted with water. If water leaks or overflows, use a cloth to wipe it up and absorb the water immediately. Never use sharp objects to remove encrusted dirt.
Warning:
Never use abrasive or caustic agents, formic acids, or diluted solvents or similar substances such as alcohol.
Cleaning the drum
- Rust stains that may appear inside the drum due to the presence of metal objects should be cleaned as soon as possible using a non-chlorine detergent.
- Never use steel wool or similar items to clean the drum.
Please note
Keep the laundry away from the washing machine while cleaning the drum.
Cleaning the door. Fig. 23
- It is advisable to clean both the glass and the plastic door seal after each washing cycle.
- Remove accumulated lint, stains, or dirt to prevent possible leaks.
- Remove any objects that may have been caught in the seal, such as coins, buttons, etc.
- Use a soft cloth for cleaning.
Cleaning the Inlet filter. Fig. 24
- Close the water inlet tap and remove the water supply hose.
- Clean the filter with a soft brush.
- Loosen the water supply hose from the rear part of the washing machine. Remove the
filter using a pair of tweezers or long-nosed, non-cutting pliers.
- Use a soft brush to clean the filter.
- Reinstall the filter in the water inlet and connect the hose.
- It is advisable to clean the inlet filter every 3 months to ensure the proper operation of the washing machine.
Note:
Decreasing water flow indicated that the filter must be cleaned.
Cleaning the detergent tank. Fig. 25
- Open the tank and press down the release mechanism of the softener plastic cover. Pull the tank out of its housing. Clean the inside of the housing with a brush.
- Lift the softener cover off the detergent tank and wash both items with warm, detergent-free water
- Replace the softener cover and push the whole assembly back into place.
Note:
- Do not use abrasive or caustic agents to wash plastic parts.
- Cleaning is recommended every 3 months to ensure a normal operation of the washing machine.
Cleaning the drain pump filter. Fig. 26
- Open the lower front cover.
- Remove the filter by turning it counterclockwise.
- Remove any objects that may have accumulated inside, such as buttons, coins, etc.
- Replace the filter by turning it clockwise and close the cover.
Warning:
When the equipment is in use and depending on the selected programme, the pump may contain hot water. Never open the drain pump cover during a washing cycle. Always wait until the cycle is finished and the water has been drained. Make sure that filter is fitted properly.
ENGLISHENGLISH
- TROUBLESHOOTING
| Problem Cause Solution | ||
| The washing machine does not turn on | The door is not closed properly. | Restart after the door is closed.Check if there is laundry or dirt stuck. |
| The door does not open The safety lock system is activated | Switch off the device and restart it. | |
| Water leaks occur. | Bad connection between pipes and water supply hose or drainpipe. | Make sure the connections are working properly.Examine and remove any impurities from the drain pipe. |
| There are detergent remains in the detergent dispenser. | The detergent is highly concentrated. | Clean and dry the detergent dispenser.Slightly dilute the detergent with water. |
| The light indicators or the display do not light up. | The control board is disconnected, or the system connector has connection problems. | Contact the Technical Support Service of Cecotec. |
| Abnormal noise. | The transport bolts have not been removed.The floor is not level. | Check whether the transport bolts have been removed.Make sure the appliance is installed on a solid and level surface. |
8. TECHNICAL SPECIFICATIONS
You can access the product database where the information for this model is stored by scanning the QR code on the energy label.
| Product Bolero DressCode 121000 A | |
| Reference: 02517 | |
| QR code |  |
| Maximum load (dry clothes) 12 kg | |
| Rated power 2000 W | |
| Water pressure 0.05 MPa-1 MPa | |
| Power supply 220-240 V-, 50 Hz | |
| Rated current 10 A | |
| IPX IPX4 |
Technical specifications may change without prior notification to improve product quality.
Made in China | Designed in Spain
9. DISPOSAL OF OLD ELECTRICAL AND ELECTRONIC APPLIANCES

This symbol indicates that, according to the applicable regulations, the product and/or battery must be disposed of separately from household waste. When this product reaches the end of its shelf life, you should dispose of the batteries/accumulators and take them to a collection point designated by the local authorities.
Consumers must contact their local authorities or retailer for information
ENGLISH
concerning the correct disposal of old appliances and/or their batteries.
Compliance with the above guidelines will help protecting the environment.
10. TECHNICAL SUPPORT AND WARRANTY
Cecotec shall be liable to the end user or consumer for any lack of conformity that exists at the time of delivery of the product under the terms, conditions, and deadlines established by the applicable regulations.
It is recommended that repairs be carried out by qualified personnel.
If at any moment you detect any problem with your product or have any doubt, do not hesitate to contact Cecotec official Technical Support Service at +34 963 210 728.
11. COPYRIGHT
The intellectual property rights over the texts in this manual belong to CECOTEC INNOVACIONES, S.L. All rights reserved. The contents of this publication may not, in whole or in part, be reproduced, stored in a retrieval system, transmitted, or distributed by any means (electronic, mechanical, photocopying, recording, or similar) without the prior authorization of CECOTEC INNOVACIONES, S.L.
FRANCAIS
1. PIÈCES ET COMPOSANTS
Img. 1.
3. INSTALLATION DU PRODUIT
3. PRODUCTINSTALLATIE
3. INSTALACE PRODUKTU
Fig./Img./Abb./Afb./Rys./Obr.1
123
natural_image
Three separate illustrations: two globe icons, a ring with a plug, and an open book (no text or symbols)Fig./Img./Abb./Afb./Rys./Obr.2
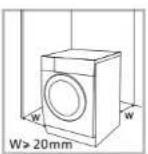
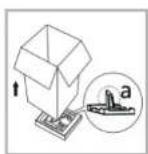
Fig./Img./Abb./Afb./Rys./Obr.3 Fig./Img./Abb./Afb./Rys./Obr.4
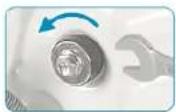
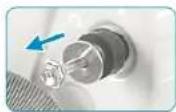
Fig./Img./Abb./Afb./Rys./Obr.5
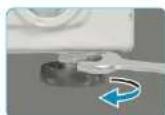
Fig./img./Abb./Afb./Rys./Obr.6
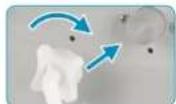
Fig./Img./Abb./Afb./Rys./Obr.7
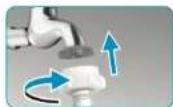
Fig./Img./Abb./Afb./Rys./Obr. 8
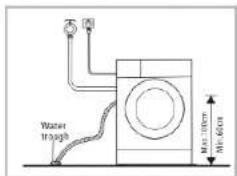
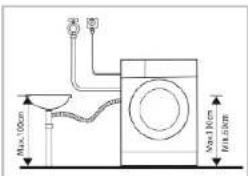
Fig./Img./Abb./Afb./Rys./Obr. 9 Fig./Img./Abb./Afb./Rys./Obr. 10
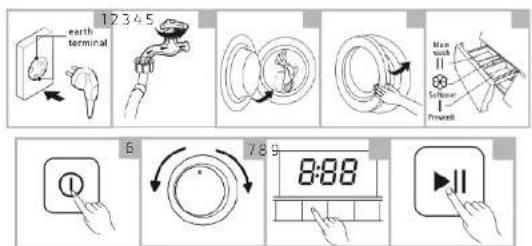
Fig./Img./Abb./Afb./Rys./Obr.11
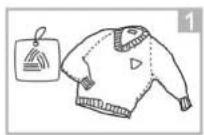
Fig./Img./Abb./Afb./Rys./Obr.12 Fig./Img./Abb./Afb./Rys./Obr.13
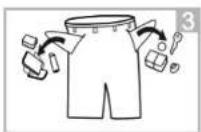

Fig./Img./Abb./Afb./Rys./Obr.14 Fig./Img./Abb./Afb./Rys./Obr.15

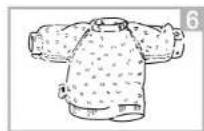
Fig./Img./Abb./Afb./Rys./Obr.16
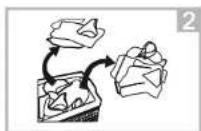
Fig./Img./Abb./Afo./Rys./Obr.17

Fig./Img./Abb./Afb./Rys./Obr.18
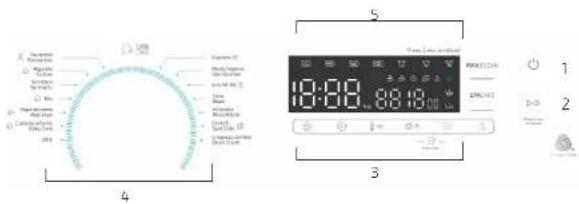
Fig./img./Abb./Afb./Rys./Obr.19
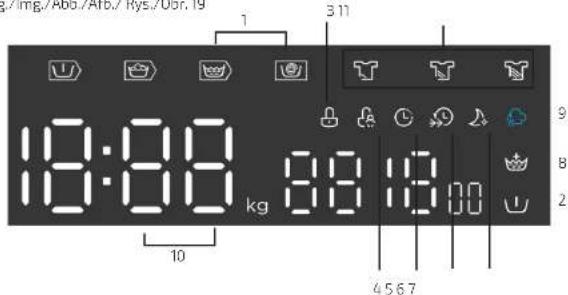
Fig./Img./Abb./Afb./Rys./Obr.20
123456

Fig./Img./Abb./Afb./Rys./Obr.21

natural_image
Line drawing of a hand gripping a curved object (no text or symbols)Fig./Img./Abb./Afb./Rys./Obr. 22 Fig./Img./Abb./Afb./Rys./Obr. 23
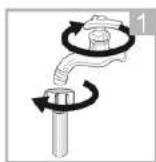
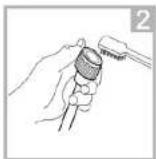
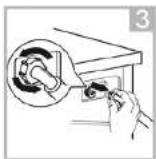
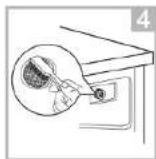
Fig./Img./Abb./Afb./Rys./Obr.24
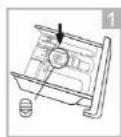
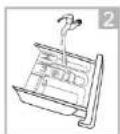
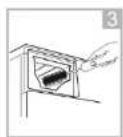
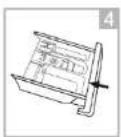
Fig./Img./Abb./Afb./Rys./Obr.25
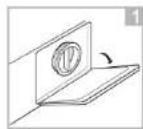
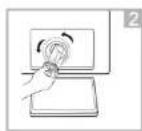
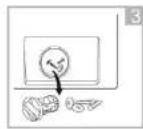
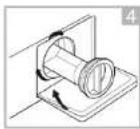
Fig./Img./Abb./Afb./Rys./Obr.26
www.cecotec.es