
FRL 5474 B - Deep fryer BEKO - Free user manual and instructions
Find the device manual for free FRL 5474 B BEKO in PDF.
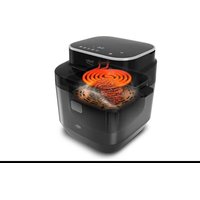


| Product type | Air fryer |
| Brand | Beko |
| Model | FRL 5474 B |
| Power supply | 220-240 V ~ 50-60 Hz |
| Power | 2400-2850 W |
| Chamber capacity | 7.0 L |
| Cooking programs | Meat, Chicken, Fish, Pastries, Vegetables, Pilaf, Potatoes, Slow cooking |
| Cooking modes | Low fat, Grill, Steam |
| Control panel | Digital with LED display |
| Temperature setting | Yes, via + and - buttons |
| Timer | Yes, adjustable |
| Keep warm function | Yes (30 minutes) |
| Auto shut-off | Yes |
| Cooking rack | Removable, adjustable, metal with silicone coating |
| Cooking chamber | Removable, non-stick coating |
| Power cord | Removable |
| Cleaning | Chamber and rack dishwasher safe |
| Safety | Auto shut-off, hot surfaces, overheating protection |
| Included accessories | Cooking rack |
| Recommended uses | Fries, meats, vegetables, pastries, stews |
Frequently Asked Questions - FRL 5474 B BEKO
User questions about FRL 5474 B BEKO
0 question about this device. Answer the ones you know or ask your own.
Ask a new question about this device
Download the instructions for your Deep fryer in PDF format for free! Find your manual FRL 5474 B - BEKO and take your electronic device back in hand. On this page are published all the documents necessary for the use of your device. FRL 5474 B by BEKO.
USER MANUAL FRL 5474 B BEKO
Please read this guide first!
Dear Customer,
Thank you for choosing a BEKO product. We would like you to achieve the optimal efficiency from this high quality product which has been manufactured with state of the art technology. Please make sure you read and understand this guide and supplementary documentation fully before use and keep it as a reference. Include this guide with the unit if you hand it over to someone else. Observe all warnings and information herein and follow the instructions.
Symbols and their meanings
These symbols are used throughout this guide:
| i | Important information and recommendations regarding the use of the appliance. |
| WARNING:Warnings on personal injury or property damage. |
| 只 | Suitable for contact with food. |
| Do not immerse the appliance, the power cord or the plug in water or in any other liquids. |
| WARNING: Electric shock protection rating |
1 Important safety and environmental instructions
This section contains safety instructions to prevent hazards that can result in injury or property damage. Failure to follow these instructions will void any warranty.
1.1 General safety
- This appliance complies with international safety standards.
- This appliance is intended for use at home and in applications as follows;
- In the staff kitchens of the stores, offices and other working environments;
- in farm houses,
- by customers in hotels, motels or other accommodation facilities,
- in bed and breakfast type locations.
- This appliance cannot be used by children between the ages 0-8. The appliance can only be used by children at and above age of 8 under supervision. This appliance may be used by people who have limited physical, auditory or mental skills, or lack of experience and knowledge,
if they are provided with supervision or information about the safe use and hazards encountered.
- Cleaning and user maintenance should not be carried out by children unless they are over 8 years of age and under supervision.
- Even if they are under supervision, do not allow children to play with the appliance.
- Keep the appliance and its power cord out of the reach of children under the age of 8.
- Position the handles of the cooking appliances (if any) so that hot liquids do not spill and place them securely.
- Make sure that the voltage indicated on the appliance is the same as the mains voltage in your home.
- Use the appliance with an earthed plug.
- Do not use the appliance with an extension cord.
- Do not place your appliance on or near heat sources such as ovens and stoves.
1 Important safety and environmental instructions
- To avoid damage to the power cord, prevent it from being pinched, crimped or rubbed against sharp edges.
- Do not unplug the appliance by pulling on the cord.
- Do not immerse the appliance or its power cord in water.
- Do not leave the appliance unattended while it is plugged in.
- Do not disassemble the appliance.
- Use only original parts or parts recommended by the manufacturer.
- Unplug the appliance before cleaning and dry all parts completely after cleaning.
- Clean the appliance in accordance with the instructions in the Cleaning and Maintenance section.
- Do not put large pieces of food in the appliance as it may cause a fire.
- Do not touch the plug of the appliance while your hands are damp or wet.
- Do not use the appliance in
humid environments.
- Do not move the appliance while it is in use and the oil inside is hot.
- Do not use the appliance in or near explosive or flammable environments and substances.
- To avoid the risk of burns, do not touch hot surfaces.
- Let the appliance cool down in a safe place out of the reach of children.
- Do not block the air inlet and air outlet openings while the appliance is operating.
- Do not lean over while the appliance is in use. Hot air rises from the appliance during use!
- The appliance becomes hot during use. To avoid the risk of burns, do not touch hot surfaces.
- Make sure that the room is adequately ventilated during use.
- In case of fire, unplug the appliance.
- Do not pour water on the appliance, as it may cause electric shock hazard.
1 Important safety and environmental instructions
- Do not operate the appliance with an external timer or a separate remote control system.
- Only use metal kitchenware with insulated handles with the appliance.
- Do not put anything on the appliance while it is operating or hot.
- The surface of the heating element is exposed to residual heat after use.
- To disconnect, turn the timer dial and temperature dial to the off position. Then unplug the appliance.
- If you keep the packaging materials, keep them out of the reach of children.
- If the power cord is damaged, it must be replaced by the manufacturer, its service agent or similarly qualified persons to avoid potential hazards.
1.2 Compliance with the WEEE Directive and Disposing of the Waste Product:
This product complies with EU WEEE Directive (2012/19/EU). This product bears a classification symbol for waste electrical and electronic equipment (WEEE).
This symbol indicates that this product shall not be disposed with other household wastes at the end of its service life. Used device must be returned to official collection point for recycling of electrical and electronic devices. To find these collection systems please contact to your local authorities or retailer where the product was purchased. Each household performs important role in recovering and recycling of old appliance. Appropriate disposal of used appliance helps prevent potential negative consequences for the environment and human health.
cal and electronic devices. To find these collection systems, please contact your local authorities or the retailer where the product was purchased. Each household plays an important role in recovering and recycling old appliances. Appropriate disposal of used appliances helps prevent potential negative consequences for the environment and human health.
Packaging materials of the product are manufactured from recyclable materials in accordance with our National Environment Regulations.

Packaging materials of the product are manufactured from recyclable materials in accordance with our National Environment Regulations.
Do not dispose of the packaging materials together with domestic or other wastes. Take them to the packaging material collection points designated by the local authorities.
Comply with the times recommended by the manual while using the appliance. Unplug the appliance after each use.
Comply with the times recommended by the manual while using the appliance. Unplug the appliance after each use.
Signs on the appliance and values specified by the documents provided along with the product have been obtained under laboratory conditions in accordance with the related standards. The values may vary based on use of the appliance and ambient conditions. Power values have been tested in the voltage of 230V.
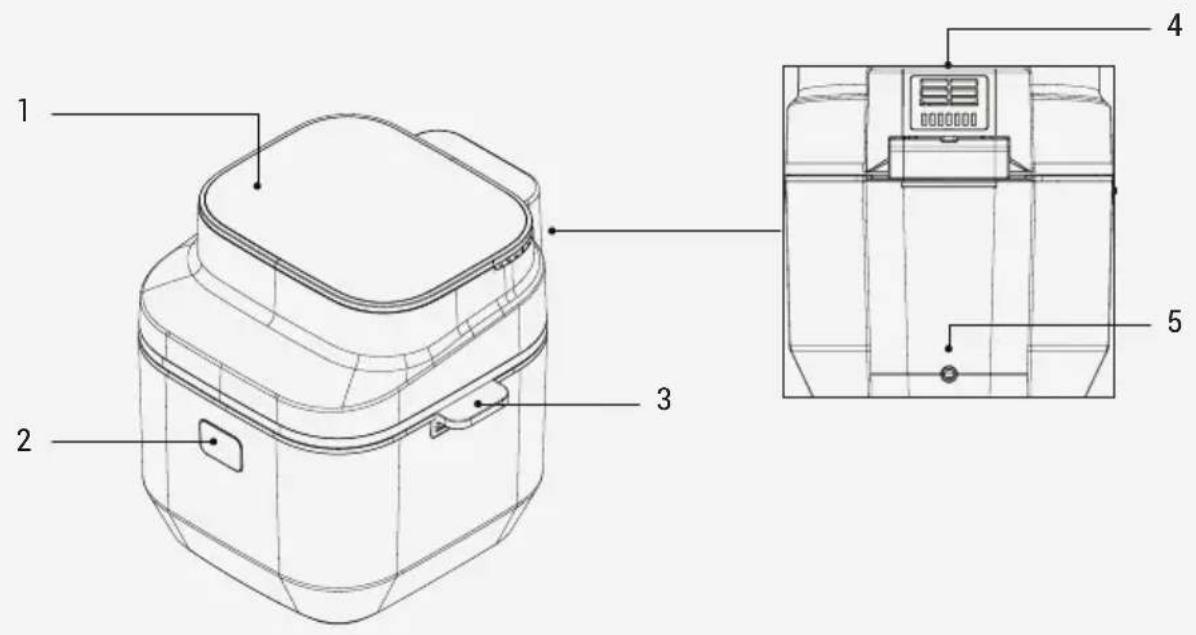
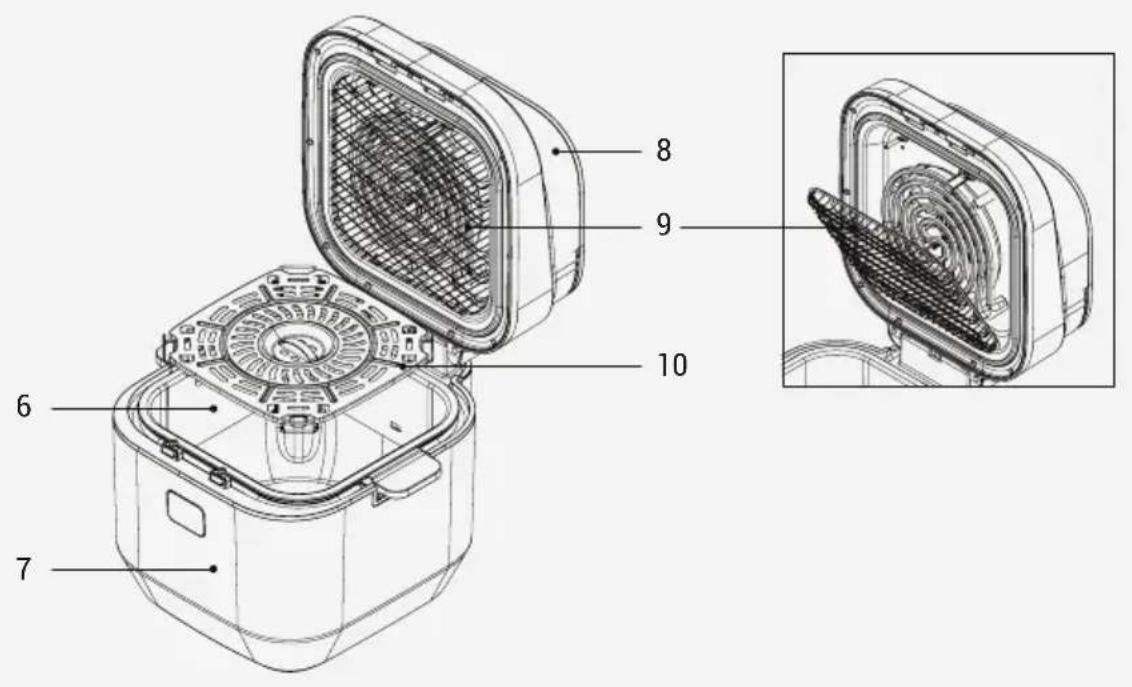
Signs on the appliance and values specified in the documents provided with the product have been obtained under laboratory conditions in accordance with the relevant standards. The values may vary depending on the use of the appliance and ambient conditions. Power values have been tested at a voltage of 230 V.
- Lid Release Button
- Handle
- Air Outlet
- Air Outlet
- Power Cable
- Cooking Chamber
- Body
- Lid
- Removable Wire
- Cooking Rack
Technical data
| Power supply 220-240 V ~ 50-60 Hz |
| Power consumption 24 00-2850 W |
| Chamber capacity 7,0 L |
3 Operation
3.1 Intended use
The appliance is intended for home use only and is not suitable for professional use.

When you use the appliance for the first time, there may be a slight emission of smoke. This is normal.
3.2 Preparing the appliance for use
- Use the appliance in an upright position on a stable, level, clean, dry and non-slip surface.
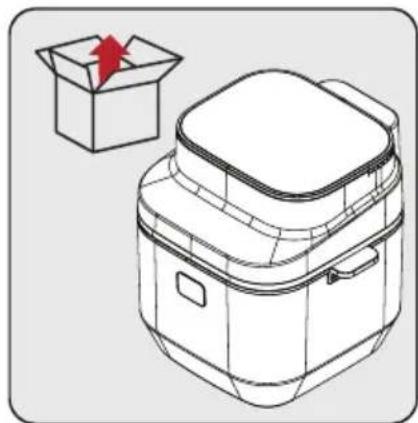
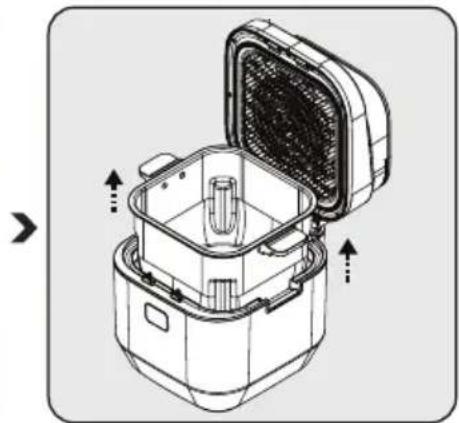
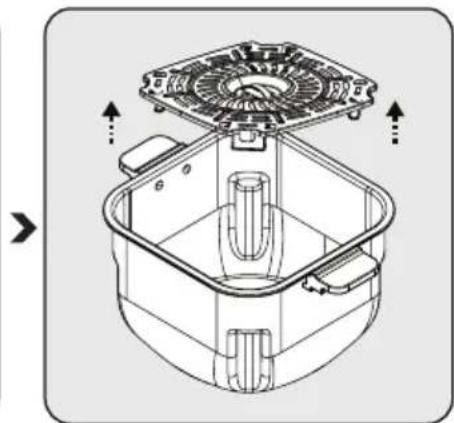
Before using the appliance for the first time, remove the packaging material and place the appliance on a flat, clean work surface.
Firmly grip the removable cooking chamber (6) from its handles (3), then remove the chamber (6) from the body (7).
Remove the cooking rack (10) from the cooking chamber (6).
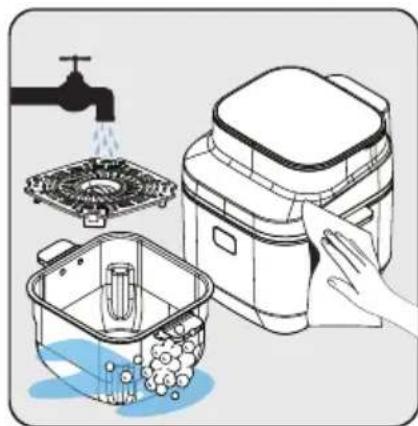
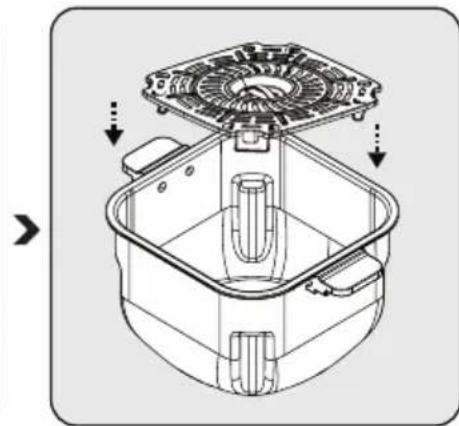
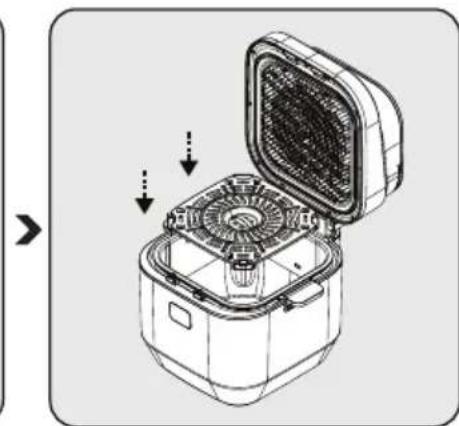
Clean the removable cooking chamber (6) and the cooking rack (10) with warm soapy water. Then dry the outside of the appliance and the parts you washed completely.
Place the cooking rack (10) in the cooking chamber (6).
After cleaning, insert the cooking chamber (6) and cooking rack (10) into the body (7). The appliance is ready for use.

For first time use, set the appliance to any cooking mode, set it to the highest temperature and let it run for 10 minutes without adding any ingredients.
3 Operation
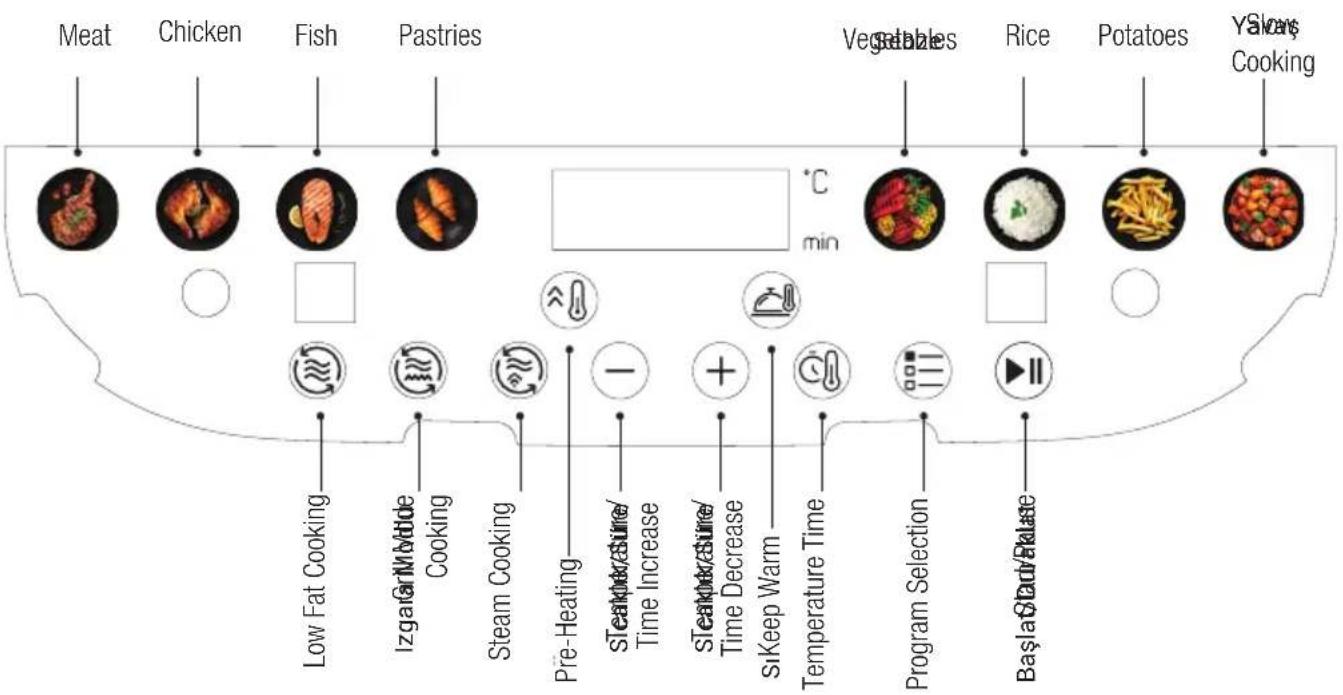
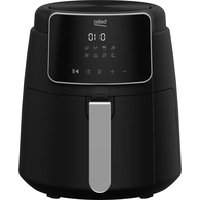
3.3 Digital Control Panel and LED Display
| Cooking Mode | Steam Cooking | Grill Mode Cooking | Description |
| Meat Available | Available | This program is specially designed for red meat types. | |
| Chicken Available | Available | This program is specially designed for poultry. | |
| Fish Available | Available | You can | cook seafood using this program. |
| Pastries Available | Not Available | This program is specially designed for baked goods such as cakes and bread. | |
| Vegetables | Available | Not Available | This program is specially designed for vegetables. |
| Rice | Not Available | Not Available | This program is specially designed for preparing rice and crack wheat pilaf. |
| Potatoes | Not Available | Not Available | This program is designed for potatoes and french fries options. |
| Slow Cooking | Not Available | Not Available | This program is specially designed program for preparing slops. |
3 Operation
3.4 Warnings before first use

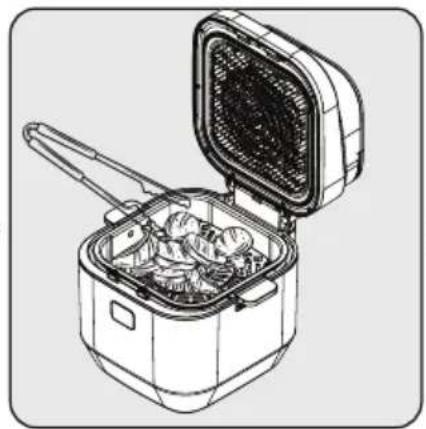
- If the lid (8) is opened while the appliance is in operation, hot steam will flow out of the air outlet (4) and upper side of the cooking chamber (6). Therefore, be careful not to burn due to high-temperature steam.
- While using the device at high temperature, be careful not to directly contact the parts of the cooking chamber (6) other than its handles (3).

The best browning and cooking is usually achieved on the cooking rack (10). It is recommended to use the cooking rack (10) in all recipes and roasted food.
3.5 Operation

- The amount of food to be cooked will vary due to the adjustable cooking rack. While specifying the suitable amount of food, take reference according to the point where the rack is located.
- As the distance between the food to be cooked and the heater decreases, the cooking time/temperature values for the food can vary from the defined values.
3.5.1 Selecting and starting a program

If you want to switch to another program after starting the appliance, press and hold the "start/stop" button for 3 seconds.

- The display shows the automatically set temperatures and times according to the selected cooking functions. You can change these temperatures and times as desired.
- To cancel the cooking process, press and hold the "start/stop" button for 3 seconds. The cooking program you have selected will be cancelled.
- If no cooking function is selected, the appliance will automatically go into power save mode after 120 seconds, and only the 'start-stop' button will flash. You can see the cooking programs on the digital control panel (1) by pressing this button again.
3 Operation
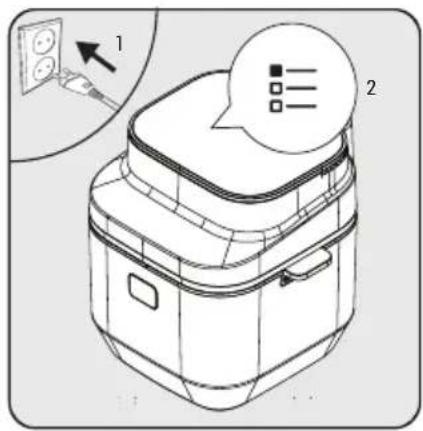
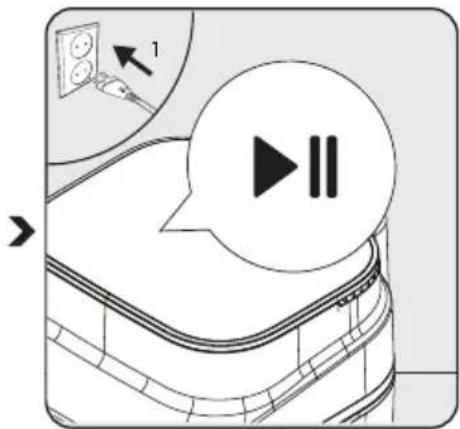
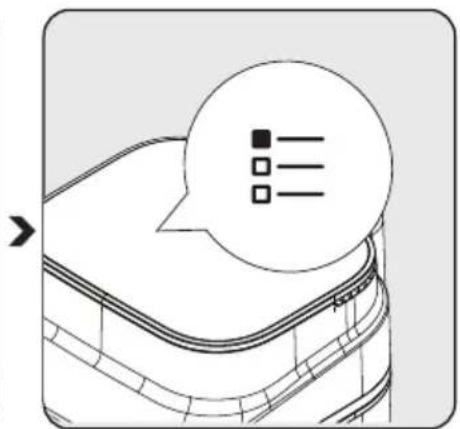
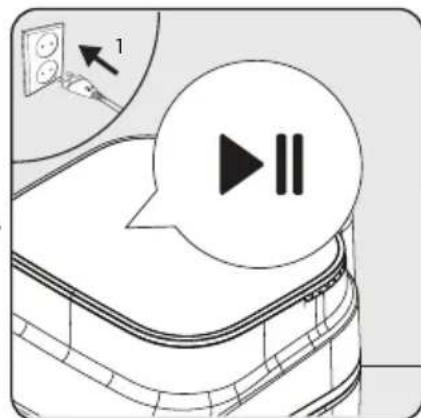
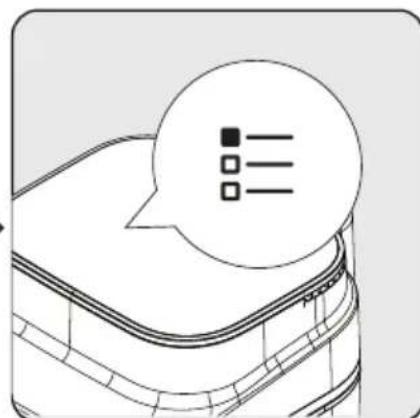
Plug in the product, then press "Program Selection" icon flashing on the menu repeatedly to reach the desired program. According to your preference, if the selected program is suitable for steam or grill mode cooking, press the cooking mode button before cooking.
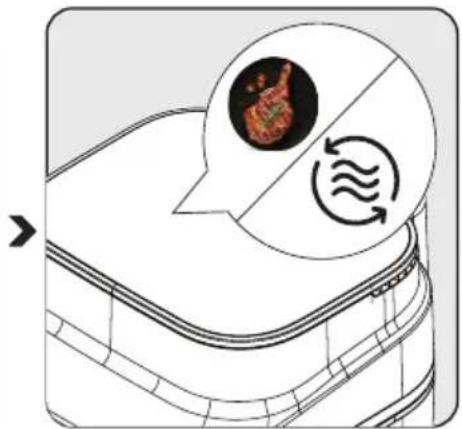
After the desired program and program mode is selected, "Start/Pause" icon flashes. If you wish to change the program, you can select another program by pressing the program selection icon again.
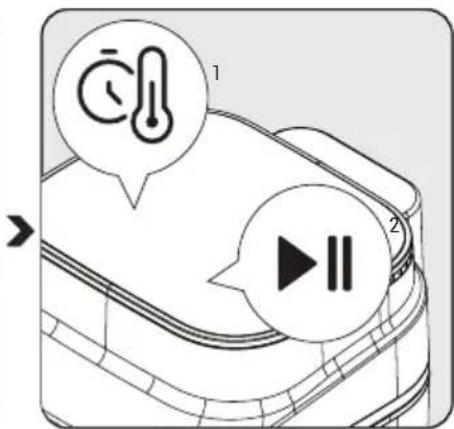
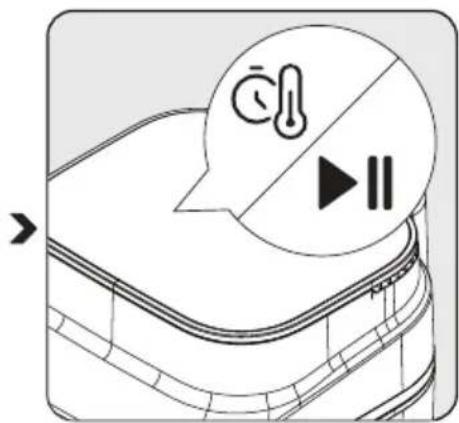
After program selection, you can set the temperature and cooking time by pressing "Temperature/Time" icon. You can start the cooking process by pressing the flashing "Start/Pause" icon.
3.5.2 Temperature and time setting
Press the "C" icon to set the temperature or time. You will see the selected temperature and
time values, respectively. You can set the desired temperature and time by pressing the ⊕ or buttons.


- The silicone of the cooking rack (10) is made of high temperature resistant food grade material. It prevents scratching of the chamber coating. Therefore, make sure that it does not come off during cooking.
- When pulling out the cooking chamber (6), be careful of the hot steam inside and do not touch the parts other than the handles with your hands as those parts are extremely hot.
- When removing cooked food, use a tool (tongs, etc.) that will not damage the inner surface of the appliance.
3.6 Cooking

You will achieve better results if you mix the food with a small amount of oil or brush the food with oil before placing it in the cooking chamber.

Do not hold any part of the removable cooking chamber (6) other than its handles (3) when the chamber is hot.
3 Operation
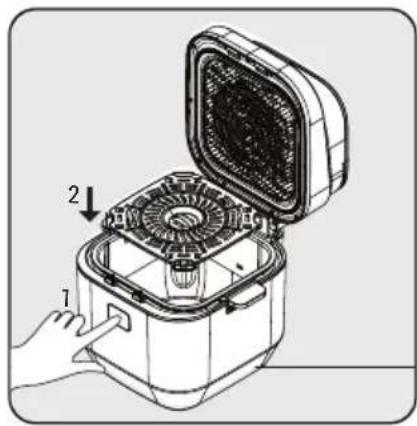
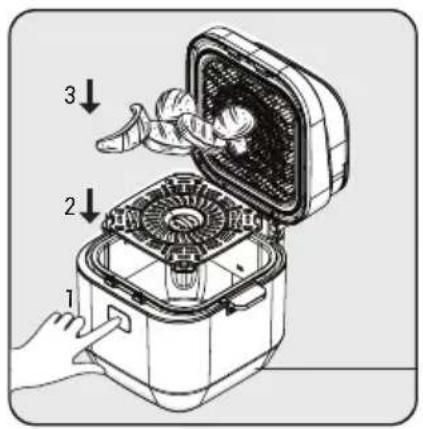
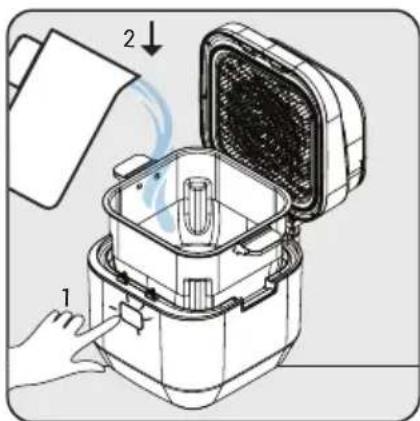
Press the lid release button (2) and insert the cooking rack (10) into the cooking chamber (6).
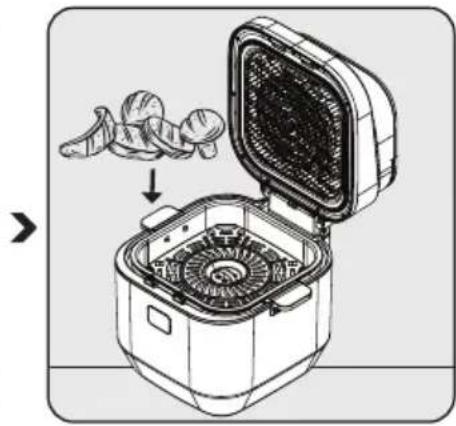
Place the food into the cooking chamber (6) and close the lid (8).
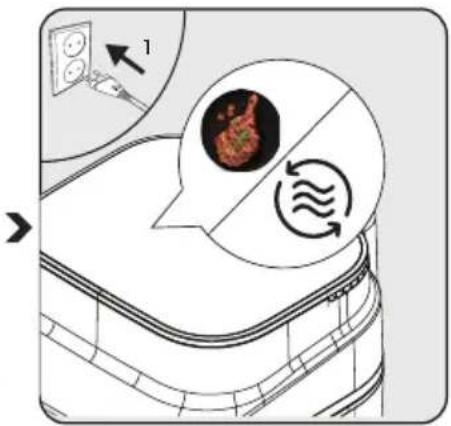
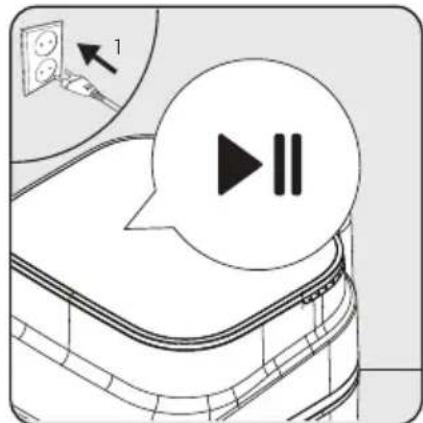
Plug your appliance in and select the desired cooking program. Then select the cooking mode and start the cooking process.
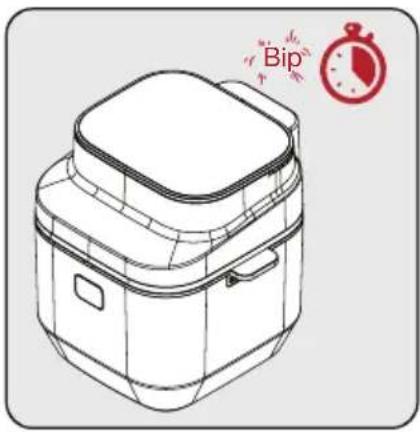
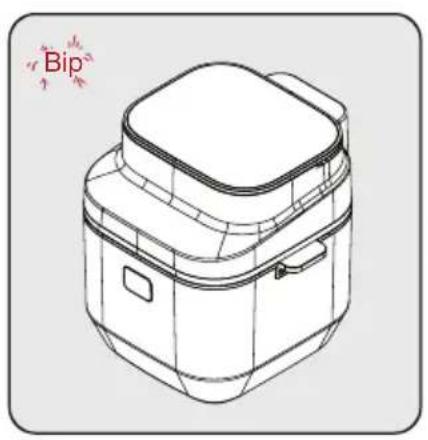
When the selected cooking time elapses, a warning tone will sound and the appliance will automatically stop cooking.
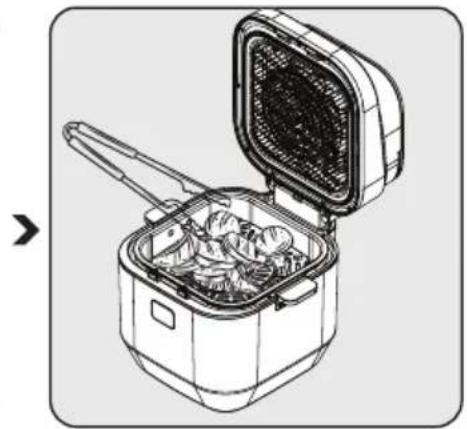
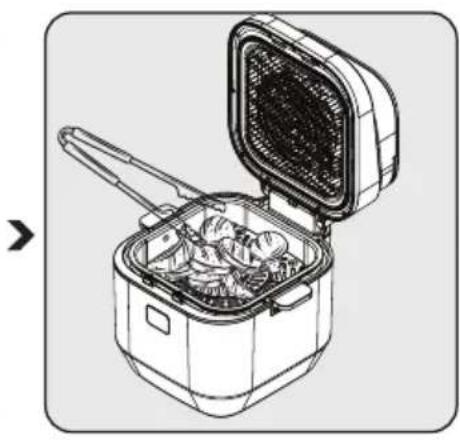
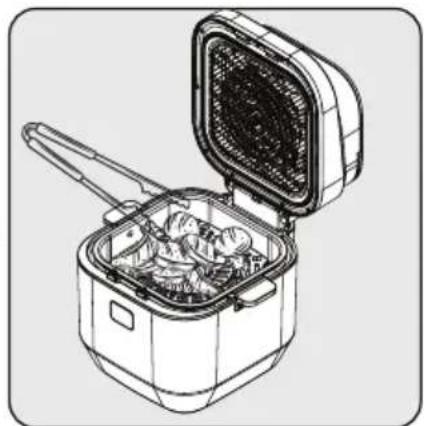
Open the lid (4) and check the food (whether it is roasted/defrosted/cooked). If it requires additional cooking time, you can prolong the cooking time a little bit more.
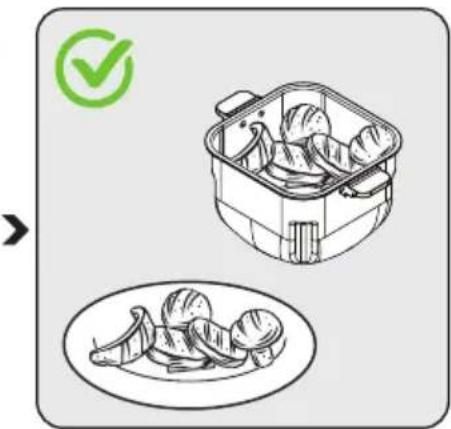
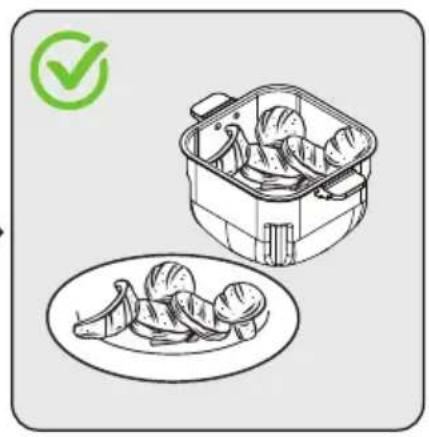
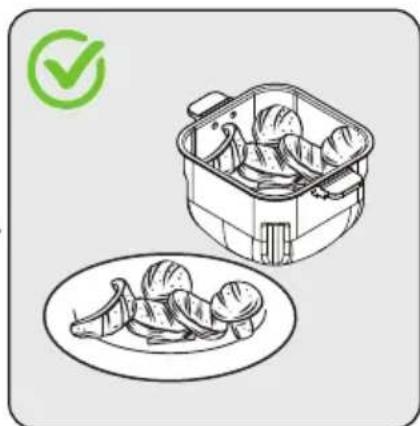
After the process is completed, you can remove the cooking chamber (10) from the appliance holding from its handles (3), and place the cooked food in a bowl or plate.

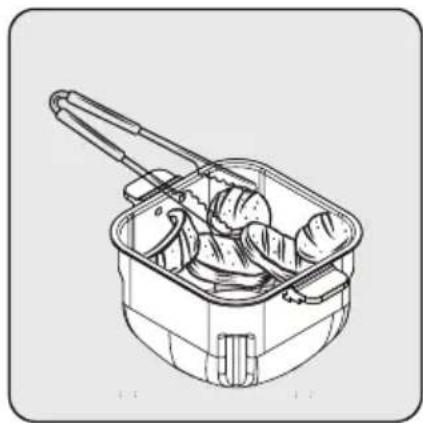
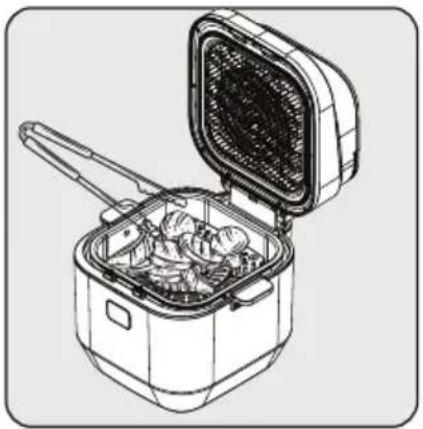
- To ensure even cooking; with the pre-set warning for the half of the cooking process, carefully remove the cooking chamber (6) from the body (7) and shake it, or use tongs to turn the cooking food so as not to scratch the cooking chamber (6) and cooking rack (10).
- Do this procedure more often if you are doing a long cooking cycle or if you want crispier results.

Avoid contact of the cooking chamber (6) and cooking rack (10) with the outer surface of the appliance, since surface of the cooking chamber (6) will be hot during and after cooking.
3 Operation

- Let the food rest for 5 to 10 seconds before removing it from the removable cooking chamber (6).
- Use tongs to remove coarse or soft food from the cooking chamber (6) without damaging the inner surface of the appliance.
- When one batch is ready, the appliance is immediately ready for another batch.

- Note that the appliance can become very hot during the turning process.
- Do not place the product on your worktop in such a way that it blocks the air outlet channels (4).
- Do not place any other product on the appliance.
3.6.1 Meat
3.6.1.1. Low Fat Cooking Mode
Press the lid release button (2) and insert the cooking rack (10) into the cooking chamber (6). Then place the food into the cooking chamber (6) and close the lid (8) of the appliance.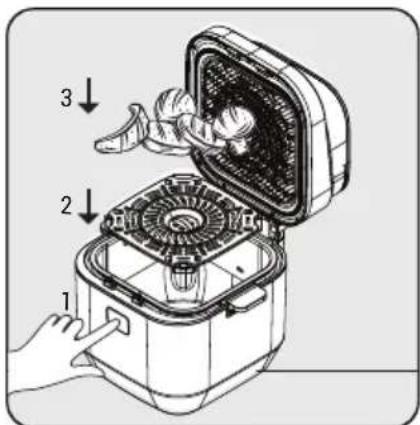
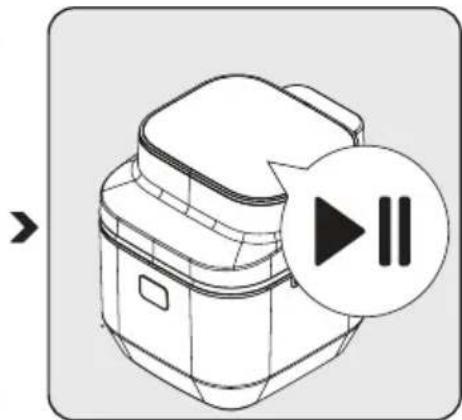
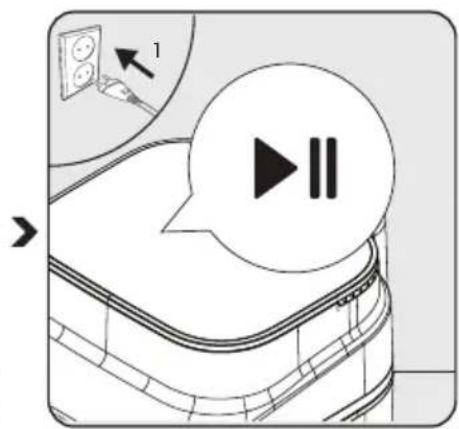
Plug in your appliance. The start/pause ▸ icon will start flashing. In order to determine the product to be used for cooking, press the start/pause ▸ icon; the appliance will exit the standby mode.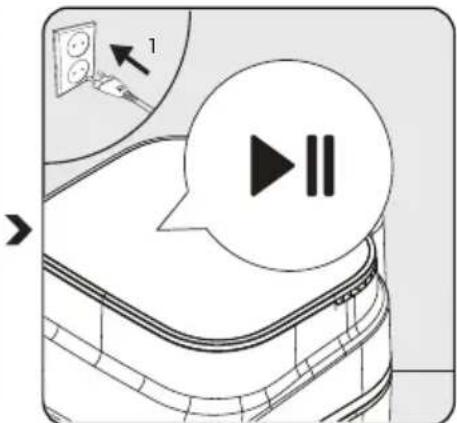
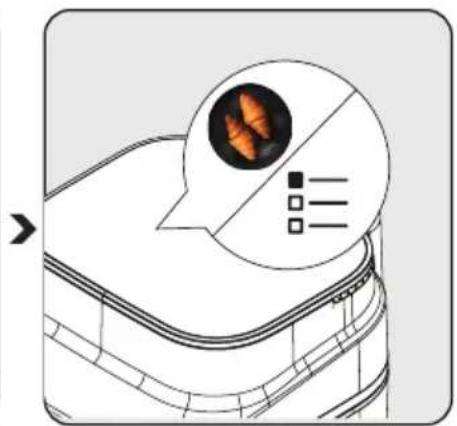
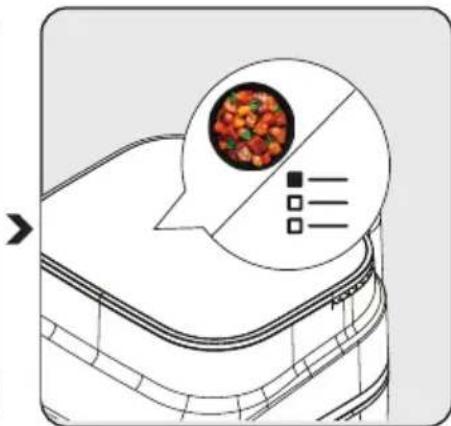
Press the program selection button repeatedly to specify the desired food from the menu or select it from the ready menu.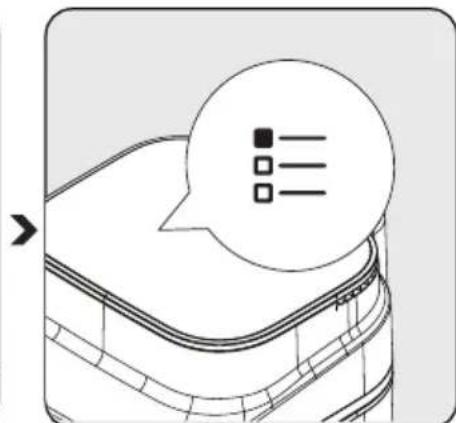
3 Operation
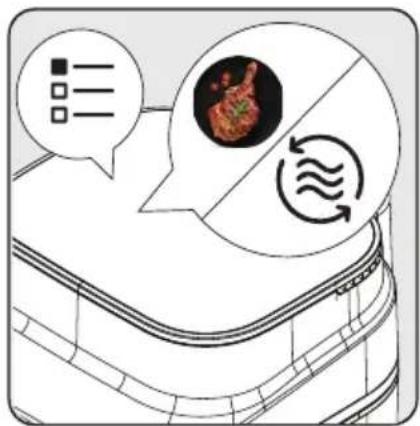
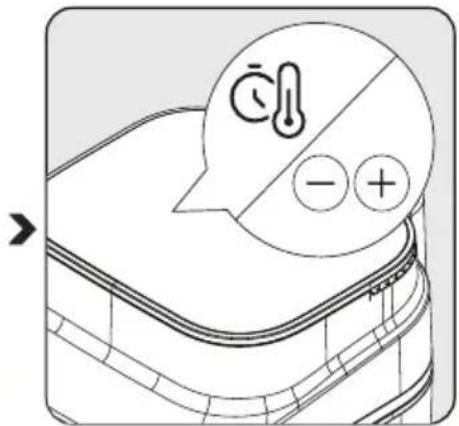
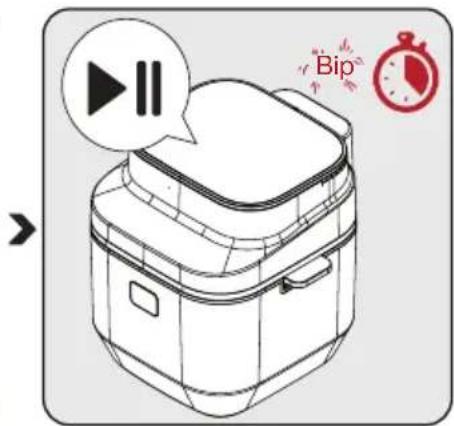
To reach the menu defined for meat options, press the program selection icon once. To cook the food in low fat cooking mode, press the low fat cooking icon.
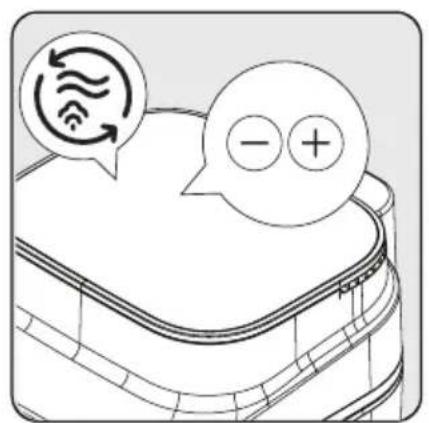
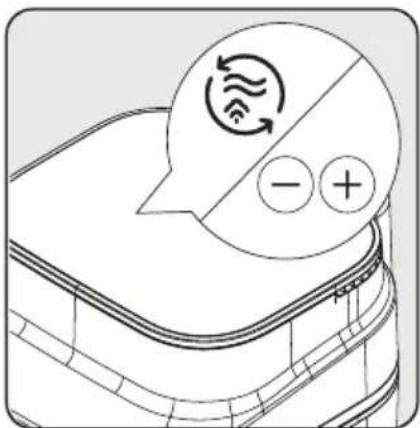
When you select the low fat cooking mode, you can set the ideal temperature and time with the increase/decrease icons. Press the icon to set the temperature or time. After completing the selections, press the start/pause icon to start the process.
When half of the total cooking time is reached, the appliance will generate a 'beep' sound and a 'stir' warning on the display.
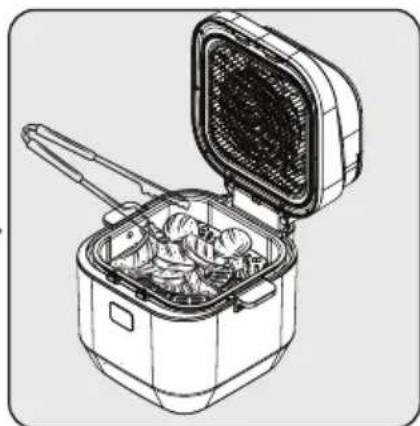
When you see this warning, press the lid release button and remove the cooking chamber (6) by firmly gripping its handles. For homogeneous cooking, shake the cooking chamber (6) or turn the food. If you would like to skip this period, you can proceed by pressing the start/pause icon.
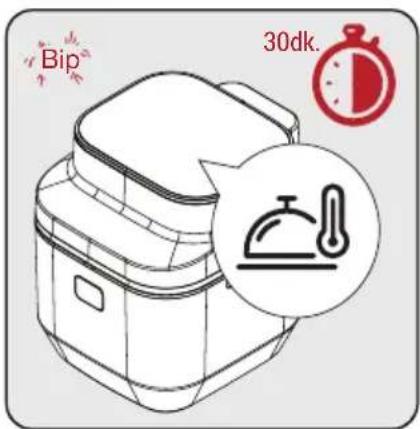

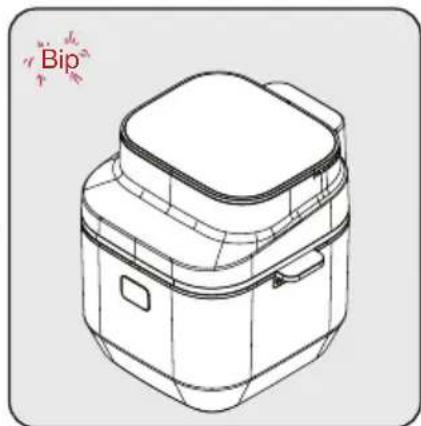

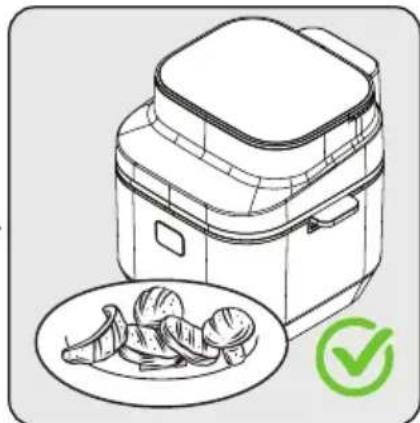
Place the cooking chamber (6) back into the body and close the lid. To continue with the cooking process, press the start/pause button on the Digital Control Panel.
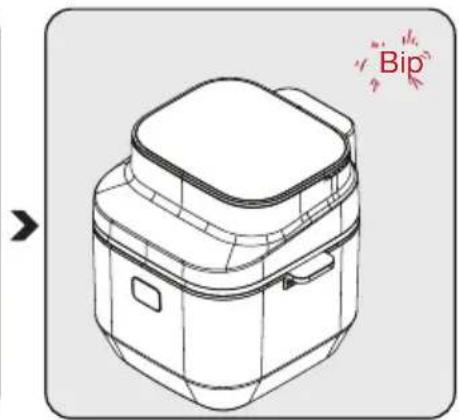
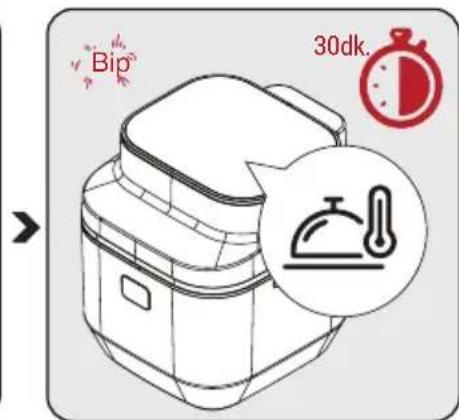
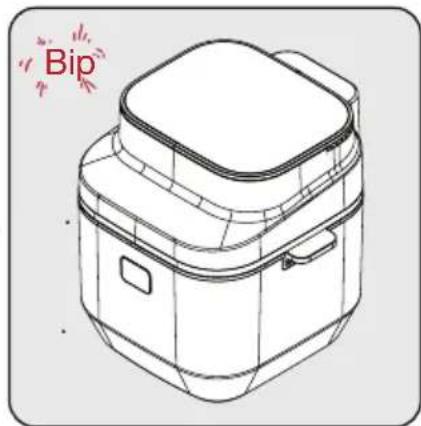
When the cooking process is completed, you will be warned with a 'beep' sound and see that the keep warm icon on the display is lit. This symbol represents the 30-minute keep warm period. During the keep warm period, you can take out your food at any time.
When the selected cooking time, as well as the keep warm period, elapses, a warning tone will sound and the appliance will automatically stop cooking. The '--' symbol appears on the display.
Open the lid by pressing the lid release button and check the food (whether it is roasted/defrosted/cooked). If it requires additional cooking time, you can prolong the cooking time a little bit more.
After the process is completed, you can remove the cooking rack from the appliance holding it by its handles, and place the cooked food in a bowl or plate.
3 Operation
3.6.1.2. Low Fat + Grill Cooking Mode
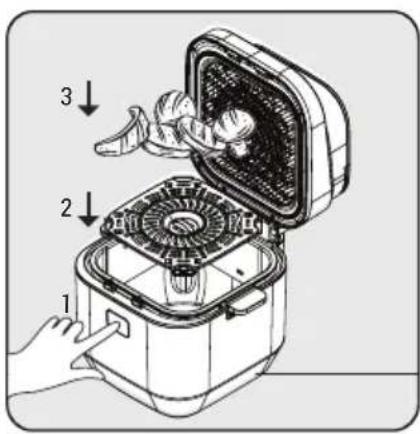
Press the lid release button (2) and insert the cooking rack (10) into the cooking chamber (6). Then place the food into the cooking chamber (6) and close the lid (8) of the appliance.
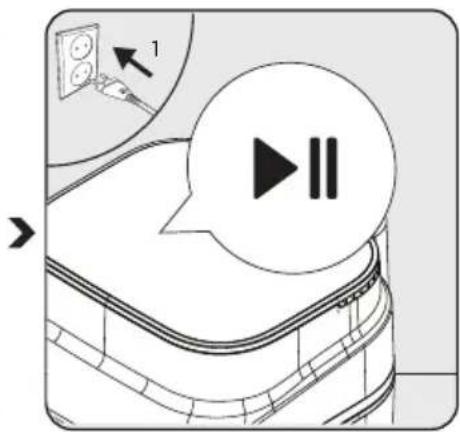
Plug in your appliance. The start/pause ▶ icon will start flashing. In order to determine the product to be used for cooking, press the start/pause button; the appliance will exit standby mode.
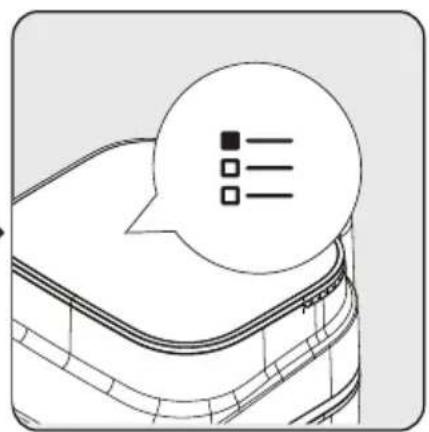
Press the program selection button repeatedly to specify the desired food from the menu or select it from the ready menu.
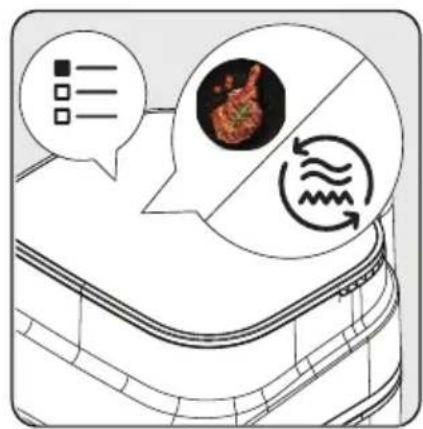
To reach the menu defined for meat options, press the program selection icon once. To cook the food in Low Fat + Grill mode, press the grill mode cooking icon.
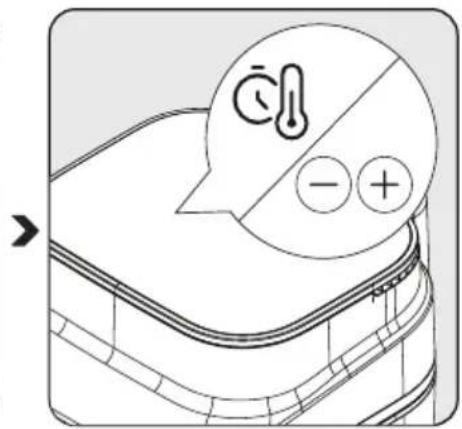
When you select the grill mode, you can set the ideal temperature and time with the increase/decrease icons. Press the icon to set the temperature or time. After completing the selections, press the start/pause button to start the process.
The pre-heating period will start. Place food in the cooking chamber (6). Then close the lid (8) and start the cooking mode of the product by pressing the start/pause icon.
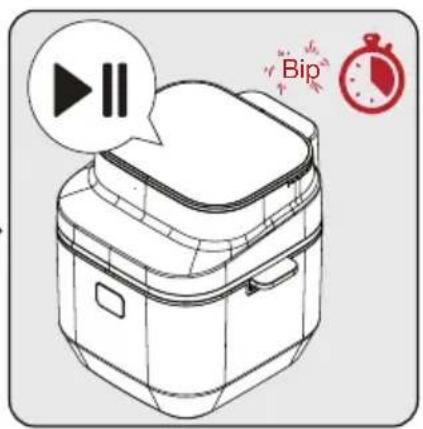
When half of the total cooking time is reached, the appliance will generate a 'beep' sound and a 'stir' warning on the display.
When you see this warning, press the lid release button and remove the cooking chamber (6) by firmly gripping its handles. For a homogeneous cooking, shake the cooking chamber or turn the food. If you would like to skip this period, you can proceed by pressing the start/pause icon.

Pre-heating period will help sear your meat and preserve its water.
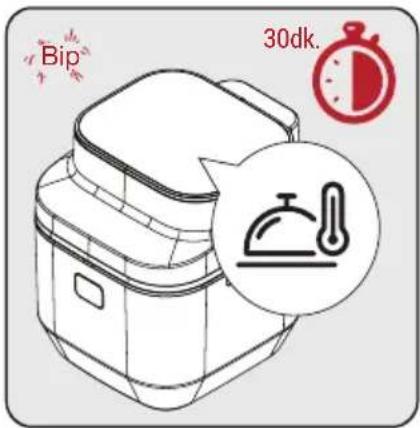

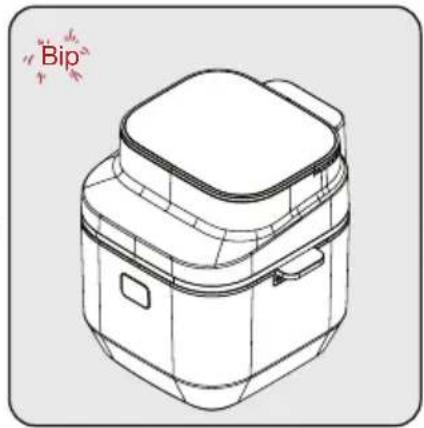

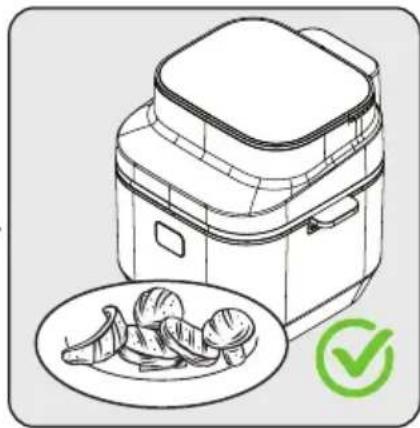
Place the cooking chamber (6) into the body again and close the lid. To continue with the cooking process, press the start/pause button from the Digital Control Panel.
When the cooking process is completed, you will be warned with a 'beep' sound and see that the keep warm icon on the display is lit. This symbol represents the 30-minute keep warm period. During the keep warm period, you can take out your food any time.
When the selected cooking time, as well as the keep warm period elapses, a warning tone will sound and the appliance will automatically stop cooking. '--' symbol appears on the display.
Open the lid by pressing the lid release button and check the food (whether it is roasted/defrosted/cooked). If it requires additional cooking time, you can prolong the cooking time a little bit more.
After the process is completed, you can remove the cooking rack from the appliance holding from its handles, and place the cooked food in a bowl or plate.
3.6.1.3. Low Fat + Steam Cooking Mode
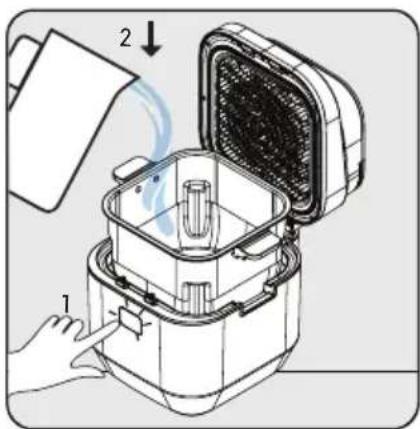


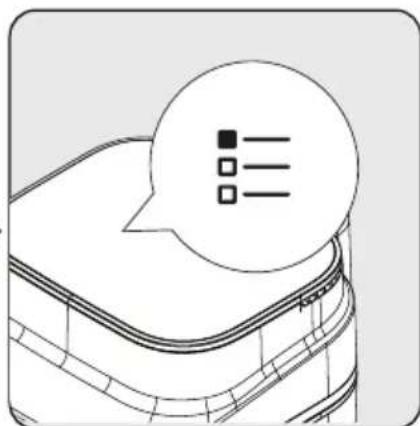
Reach the cooking chamber by pressing the lid release button. Fill the cooking chamber with water until the 'Max' level sign.
Place the cooking rack and close the lid of the product.
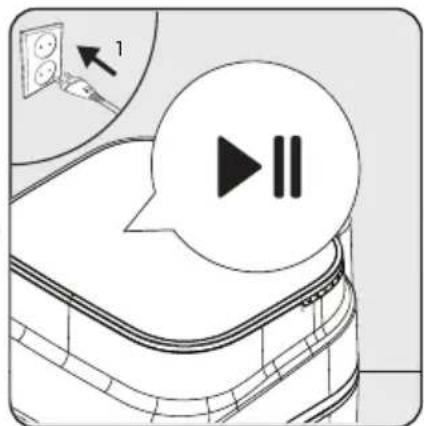
Plug in your appliance. Start/pause icon will start flashing. In order to determine the product to be used for cooking, press the start/pause icon; the appliance will exit the standby mode.
Press the program selection button repeatedly to specify the desired food from the menu or select it from the ready menu. For reaching the menu defined for meat options, press the program selection icon once.
3 Operation
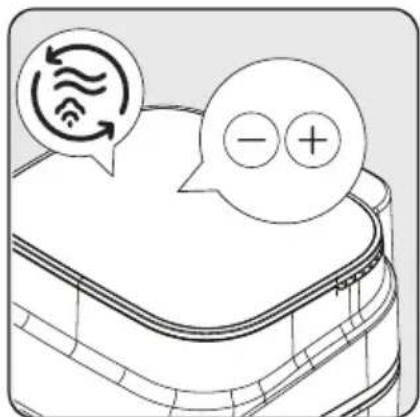
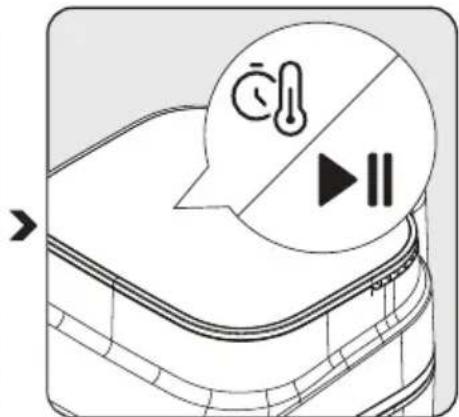
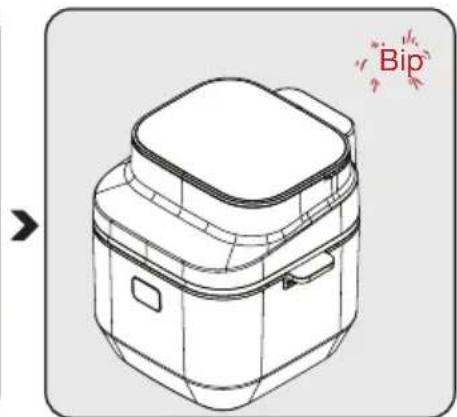
To cook the food in Low Fat + Steam mode, press the steam mode cooking icon.
When you select the Steam cooking mode, you can set the ideal temperature and time using the increase/decrease (+) icons.
Press the icon to set the temperature or time. After completing the selections, press the Start/Pause button to start the process. When the steam cooking process starts, a pre-heating period will begin to increase the water temperature to the evaporation temperature of water.
When the pre-heating period is completed, place your food on the cooking rack of the product. Then close the lid and start the cooking mode by pressing the icon.
When half of the total cooking time is reached, the appliance will generate a 'beep' sound and a 'stir' warning on the display.

The pre-heating period will help increase the water temperature to the evaporation temperature.
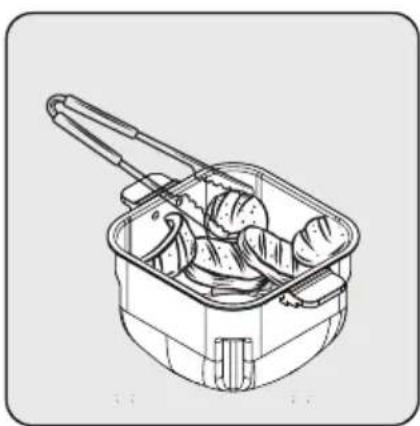
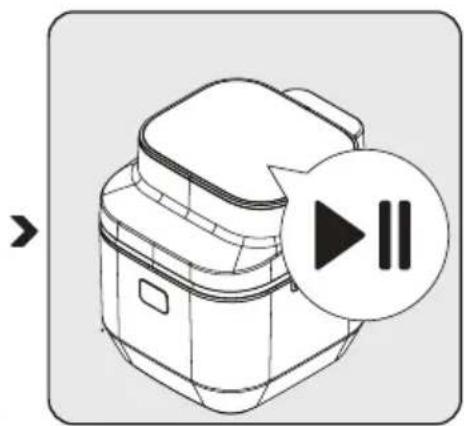

When you see this warning, press the lid release button and remove the cooking chamber (6) by firmly gripping its handles. For homogeneous cooking, shake the cooking chamber (6) or turn the food. If you would like to skip this period, you can proceed by pressing the Start/Pause icon.
Place the cooking chamber (6) back into the body and close the lid. To continue with the cooking process, press the Start/Pause icon on the Digital Control Panel.
When the cooking process is completed, you will be warned with a 'beep' sound and see that the Keep Warm symbol on the display is lit. This symbol represents the 30-minute keep warm period. During the keep warm period, you can take out your food at any time.
3 Operation
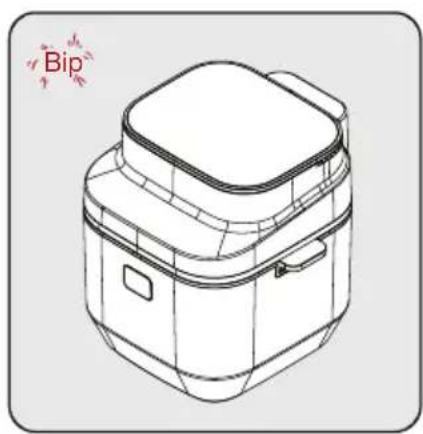
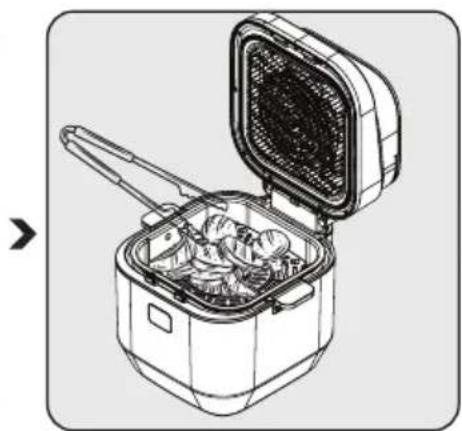
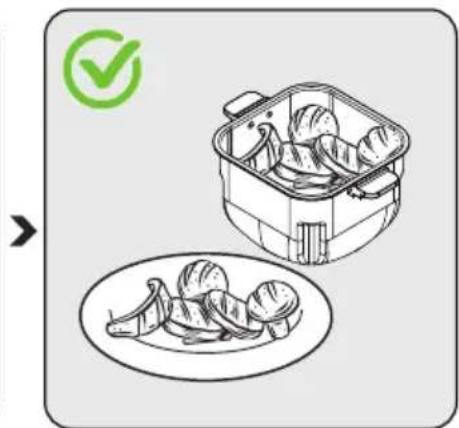
When the selected cooking time, as well as the keep warm period, elapses, a warning tone will sound and the appliance will automatically stop cooking. The '-' symbol appears on the display.
Open the lid by pressing the lid release button and check the food (whether it is roasted/defrosted/cooked). If it requires additional cooking time, you can prolong the cooking time a little bit more.
After the process is completed, you can remove the cooking rack from the appliance holding it by its handles, and place the cooked food in a bowl or plate.
3.6.2 Chicken
3.6.2.1 Chicken - Low Fat Cooking Mode
For Chicken - Low Fat Cooking Mode, follow the steps in "3.6.1.1. Low Fat Cooking Mode".
3.6.2.2 Chicken - Low Fat + Grill Cooking Mode
For Chicken - Low Fat + Grill Cooking Mode, follow the steps in "3.6.1.2. Low Fat + Grill Cooking Mode".
3.6.2.3 Chicken - Low Fat + Steam Cooking Mode
For Chicken - Low Fat + Steam Cooking Mode, follow the steps in "3.6.1.3. Low Fat + Steam Cooking Mode".
3.6.3 Fish
3.6.3.1 Fish - Low Fat Cooking Mode
For Fish - Low Fat Cooking Mode, follow the steps in "3.6.1.1. Low Fat Cooking Mode".
3.6.3.2 Fish - Low Fat + Grill Cooking Mode
For Fish - Low Fat + Grill Cooking Mode, follow the steps in "3.6.1.2. Low Fat + Grill Cooking Mode".
3.6.3.3 Fish - Low Fat + Steam Cooking Mode
For Fish - Low Fat + Steam Cooking Mode, follow the steps in "3.6.1.3. Low Fat + Steam Cooking Mode".
3 Operation
3.6.4 Pastries
3.6.4.1 Pastries - Low Fat Cooking Mode
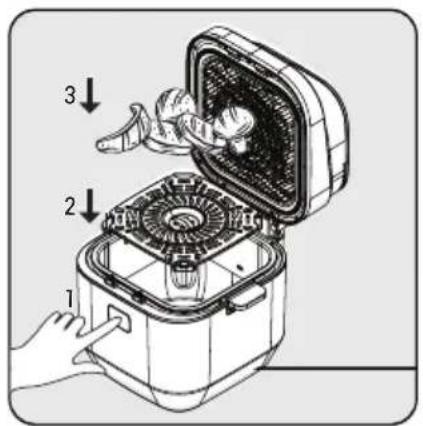
Press the lid release button (2) and insert the cooking rack (10) into the cooking chamber (6). Then place the food into the cooking chamber (6) and close the lid (8) of the appliance
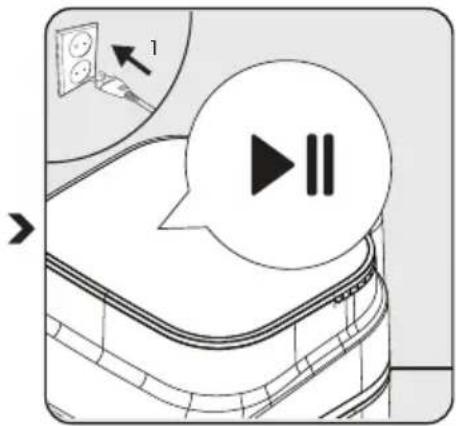
Plug in your appliance. The start/pause ▸ icon will start flashing. To determine the product to be used for cooking, press the start/pause ▸ icon; the appliance will exit standby mode.
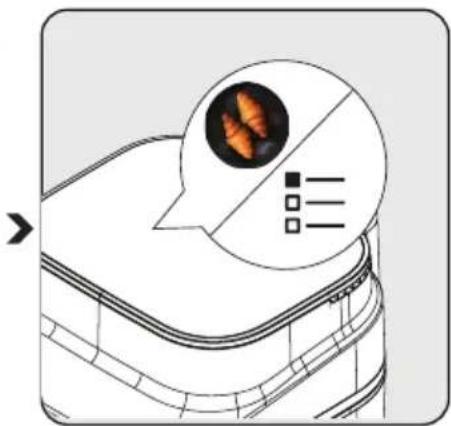
Press the program selection icon repeatedly to specify the desired food from the menu or select it from the ready menu.
To reach the menu defined for pastries options, press the program selection icon 4 times.
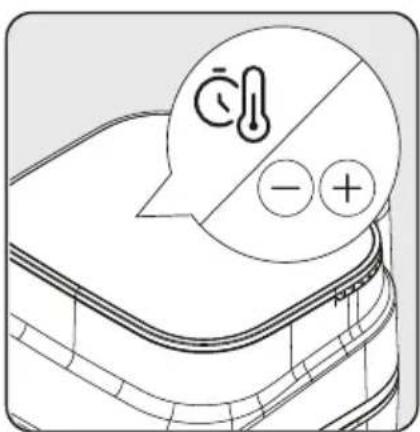

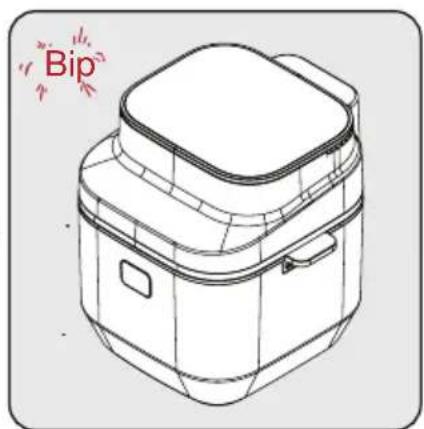

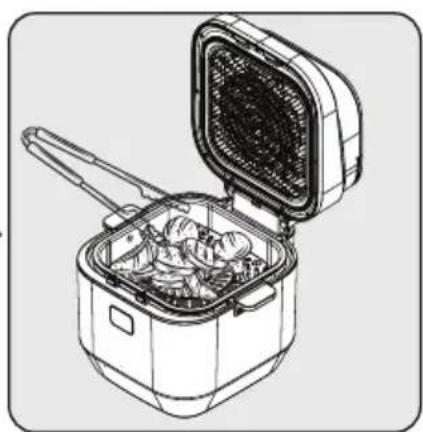
When you select the low fat cooking mode, you can set the ideal temperature and time with the increase - decrease + icons. Press the icon to set the temperature or time. After completing the selections, press the start/pause button to start the process.
When the selected cooking time elapses, a warning tone will sound and the appliance will automatically stop cooking. '--: --' symbol appears on the display.
Open the lid by pressing the lid release button and check the food (whether it is roasted/defrosted/cooked). If it requires additional cooking time, you can prolong the cooking time a little bit more.
After the process is completed, you can remove the cooking rack from the appliance holding from its handles, and place the cooked food in a bowl or plate.
3 Operation
3.6.4.2 Pastries - Low Fat + Steam Cooking Mode
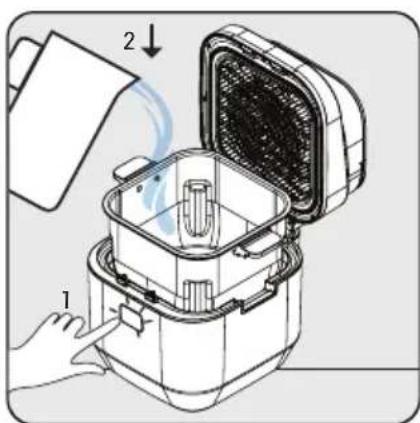
Reach the cooking chamber by pressing the lid release button. Fill the cooking chamber with water until the 'Max' level sign.
Place the cooking rack and close the lid of the product.
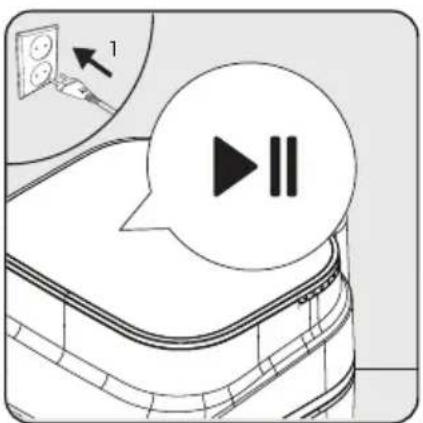
Plug in your appliance. The start/pause ▸ icon will start flashing. To determine the product to be used for cooking, press the start/pause button; the appliance will exit standby mode.
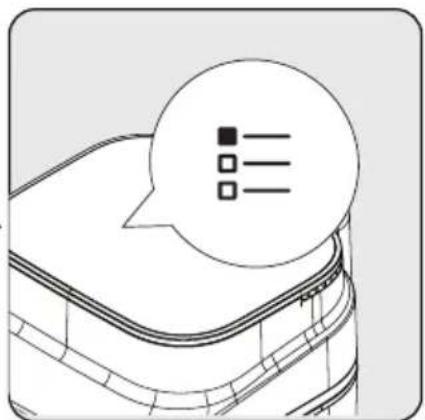
Press the program selection button repeatedly to specify the desired food from the menu or select it from the ready menu.
To reach the menu defined for pastries options, press the program selection on 4 times.
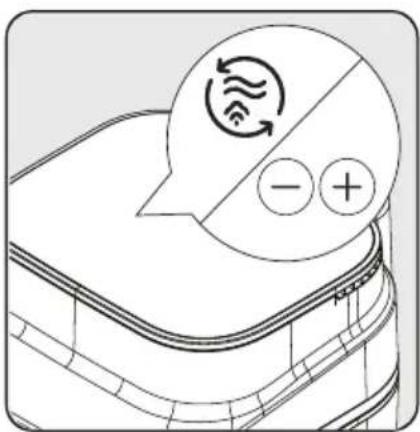
To cook the food in Low Fat + Steam mode, press the steam mode cooking icon.
When you select the Steam cooking mode, you can set the ideal temperature and time using the increase (-) and decrease (+) icons.
Press the icon to set the temperature or time. After completing the selections, press the start/pause button to start the process.
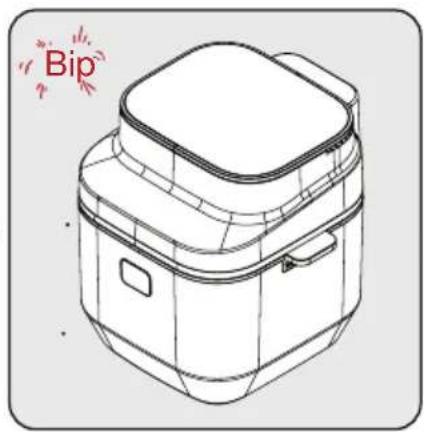
When the selected cooking time elapses, a warning tone will sound and the appliance will automatically stop cooking. The '--:--' symbol appears on the display.
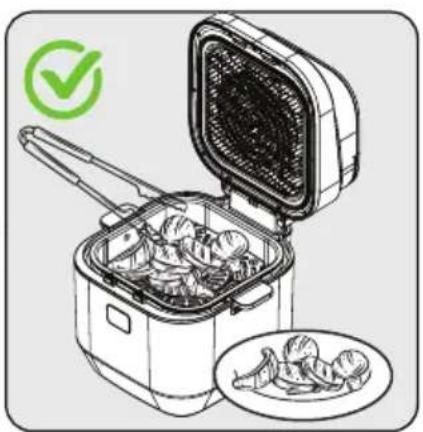
Open the lid by pressing the lid release button and check the food (whether it is roasted/defrosted/cooked). If it requires additional cooking time, you can prolong the cooking time a little bit more.
After the process is completed, you can remove the cooking rack from the appliance holding it from its handles, and place the cooked food in a bowl or plate.

While cooking highly consistent pastries such as patty and bread, you can reach an ideal cooking level by bringing the dough together with the inner surface of the cooking chamber.
3 Operation
3.6.5 Vegetable
3.6.5.1 Vegetable - Low Fat Cooking Mode
Press the lid release button (2) and insert the cooking rack (10) into the cooking chamber (6). Then place the food into the cooking chamber (6) and close the lid (8) of the appliance.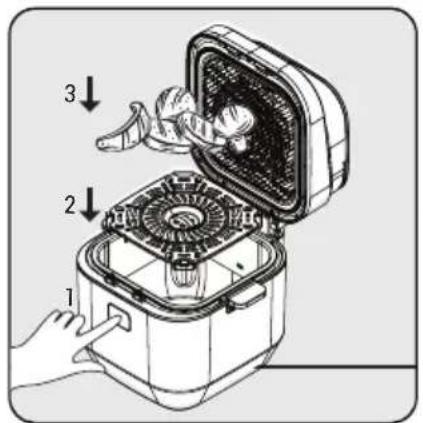
Plug in your appliance. The start/pause (▶) icon will start flashing. In order to determine the product to be used for cooking, press the start/pause (▶) icon; the appliance will exit the standby mode.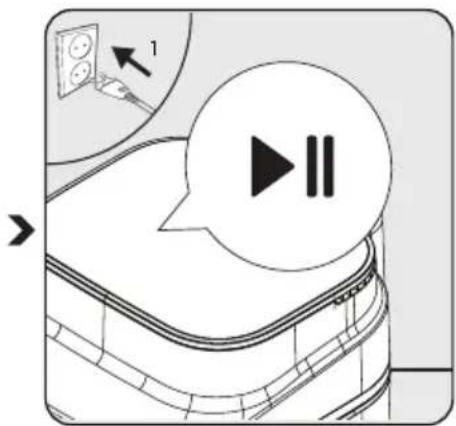
Press the program selection icon repeatedly to specify the desired food from the menu or select it from the ready menu. To reach the menu defined for pastries options, press the program selection icon 5 times.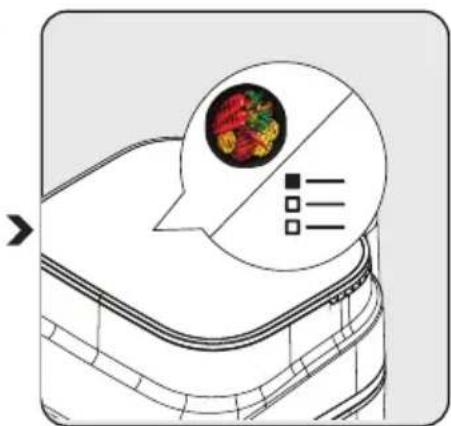
3 Operation
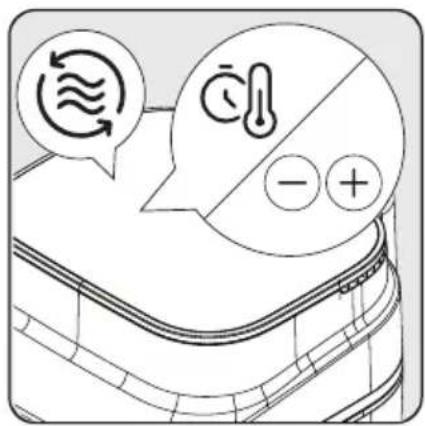

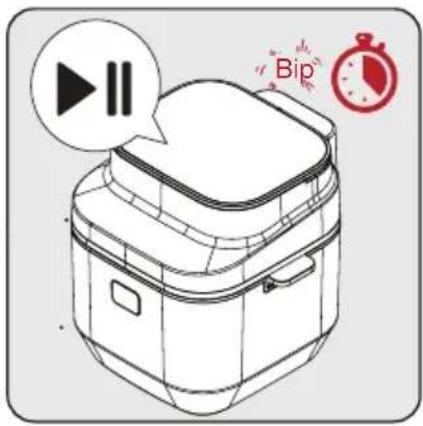

To cook the food in low fat cooking mode, press the low fat cooking icon. When you select the low fat cooking mode, you can set the ideal temperature and time using the increase (-) and decrease (+) icons. Press the icon to set the temperature or time. After completing the selections, press the start/pause (▶) icon to start the process.
When half of the total cooking time is reached, the appliance will generate a 'beep' sound and a 'stir' warning on the display.
When you see this warning, press the lid release button and remove the cooking chamber by firmly gripping its handles. For homogeneous cooking, shake the cooking chamber or turn the food. If you would like to skip this period, you can proceed by pressing the start/pause button.
Place the cooking chamber back into the body and close the lid. To continue with the cooking process, press the icon on the Digital Control Panel.
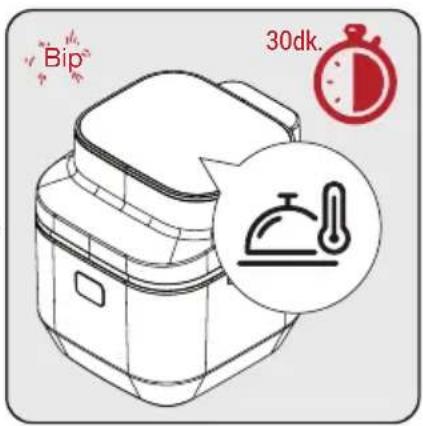
When the cooking process is completed, you will be alerted with a 'beep' sound and see that the keep warm symbol on the display is lit. This symbol represents the 30-minute keep warm period. During the keep warm period, you can take out your food at any time.
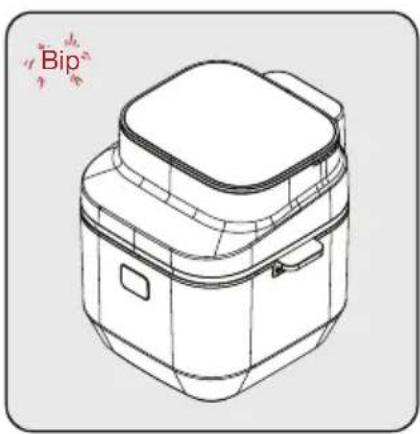

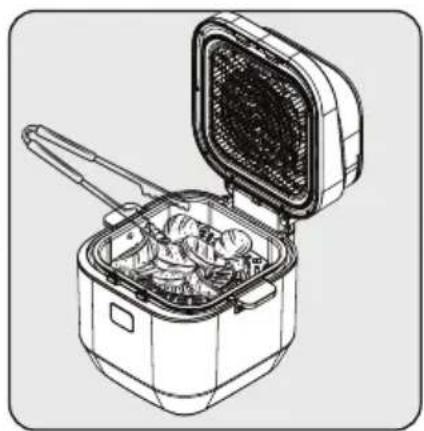

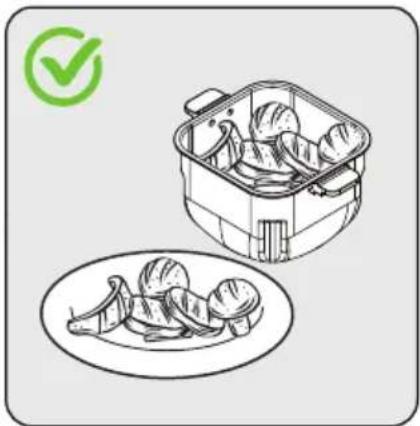
When the selected cooking time, as well as the keep warm period, elapses, a warning tone will sound and the appliance will automatically stop cooking. The '-' symbol appears on the display.
Open the lid by pressing the lid release button and check the food (whether it is roasted/defrosted/cooked). If it requires additional cooking time, you can prolong the cooking time a little bit more.
After the process is completed, you can remove the cooking rack from the appliance by holding its handles, and place the cooked food in a bowl or plate.
3 Operation
3.6.5.2 Vegetable - Low Fat + Steam Cooking Mode
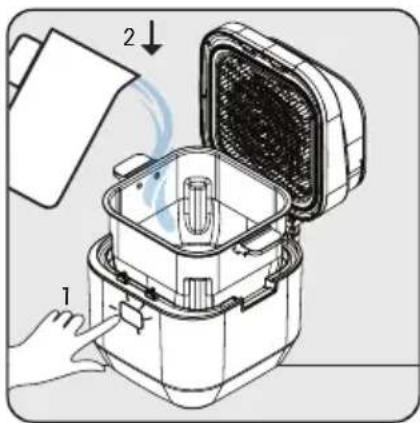
Reach the cooking chamber by pressing the lid release button. Fill the cooking chamber with water up to the 'Max' level sign.
Place the cooking rack and close the lid of the product.
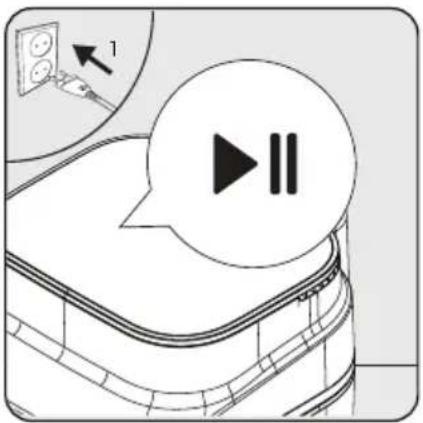
Plug in your appliance. The start/pause ▶ icon will start flashing. In order to determine the product to be used for cooking, press the start/pause ▶ icon; the appliance will exit standby mode.
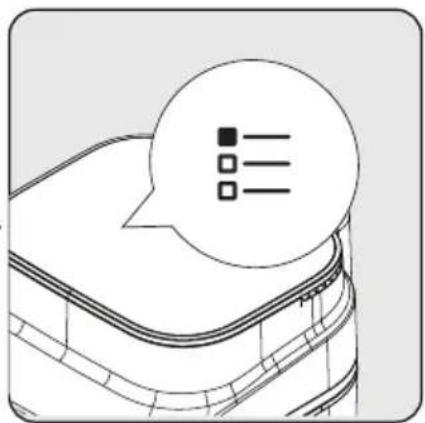
Press the program selection button repeatedly to specify the desired food from the menu or select it from the ready menu.
To reach the menu defined for vegetable options, press the program selection button 5 times.
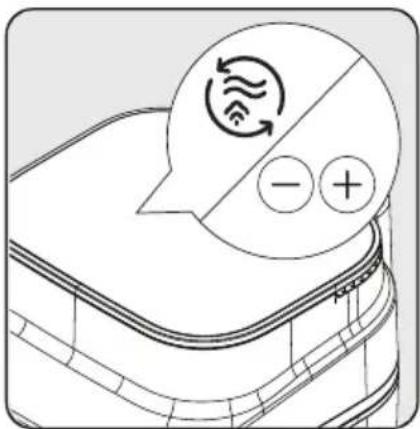
To cook the food in Low Fat + Steam mode, press the steam mode cooking icon.
When you select the Steam cooking mode, you can set the ideal temperature and time with the increase - / decrease + icons.
Press the icon to set the temperature or time. After completing the selections, press the start/pause button to start the process.
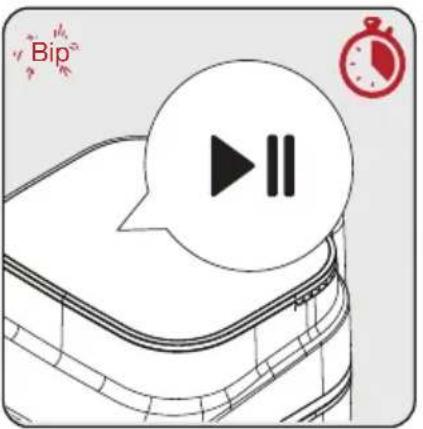
When half of the total cooking time is reached, the appliance will generate a 'beep' sound and a 'stir' warning on the display.
When you see this warning, press the lid release button and remove the cooking chamber by firmly gripping its handles. For a homogeneous cooking, shake the cooking chamber or turn the food. If you would like to skip this period, you can proceed by pressing the start/pause icon.
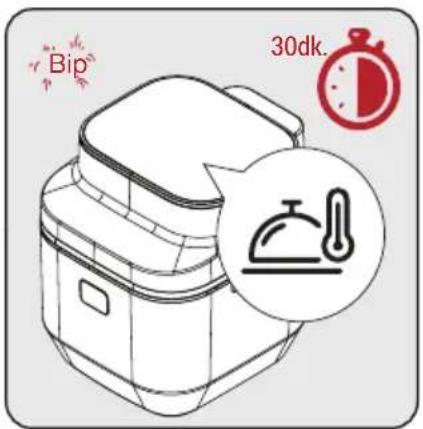
Place the cooking chamber into the body again and close the lid. To continue with the cooking process, press the start/pause button from the Digital Control Panel.
When the cooking process is completed, you will be warned with a 'beep' sound and see that the keep warm symbol on the display is lit. This symbol represents the 30-minute keep warm period. During the keep warm period, you can take out your food any time.
3 Operation
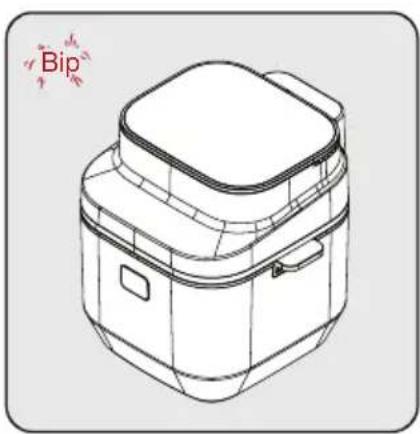
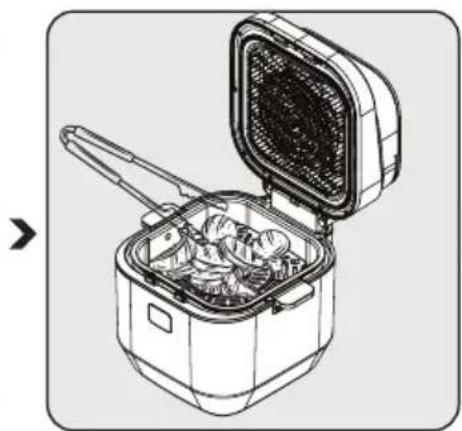
When the selected cooking time, as well as the keep warm period elapses, a warning tone will sound and the appliance will automatically stop cooking. The symbol appears on the display.
Open the lid by pressing the lid release button and check the food (whether it is roasted/defrosted/cooked). If it requires additional cooking time, you can prolong the cooking time a little bit more.
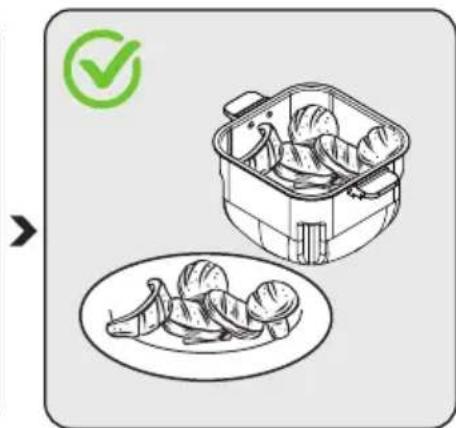
After the process is completed, you can remove the cooking rack from the appliance holding from its handles, and place the cooked food in a bowl or plate.
3.6.6 Rice Cooking Mode
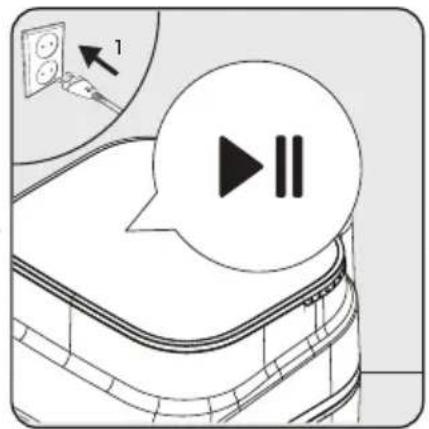
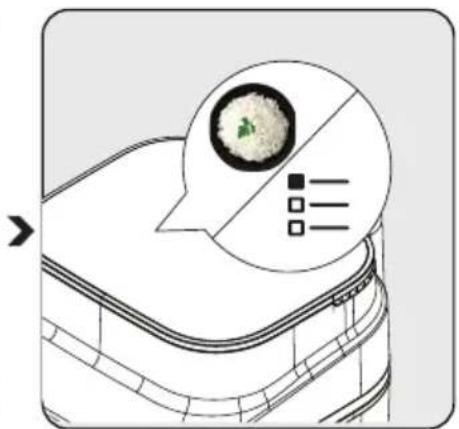
Plug in your appliance. Start/pause icon will start flashing. In order to determine the product to be used for cooking, press the start/pause icon; the appliance will exit the standby mode.
Press the program selection button repeatedly to specify the desired food from the menu or select it from the ready menu.
For reaching the menu defined for Rice options, press the program selection button 6 times.
3 Operation

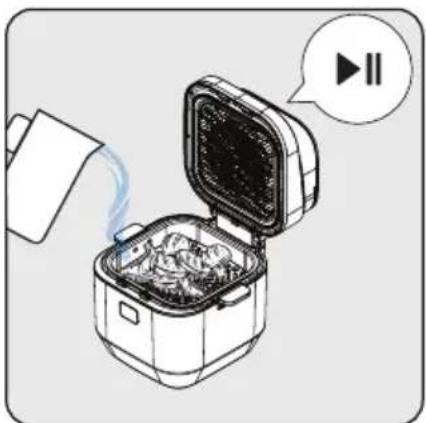
After completing the selections, press the "Start/Pause" icon to start the process.
When Rice cooking mode is initiated, pre-heating period will start. Pre-heating period will bring the oil temperature to the ideal level before sauteing.
Place the food to be sautéd into the cooking chamber and complete the sauteing process.
After sauteing, add water and close the lid. Then press the "Start/Pause" icon to start the cooking mode of the product.
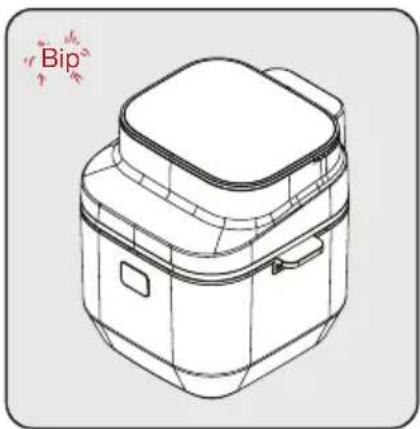

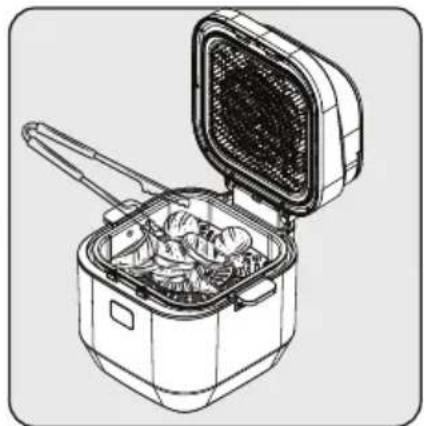

When the selected cooking time elapses, a warning tone will sound and the appliance will automatically stop cooking. An additional time will appear on the display for extension of cooking time.
Open the lid by pressing the lid release button and check the food (whether it is roasted/defrosted/cooked). If additional cooking process is required, you can extend the period by increasing the value on the display.
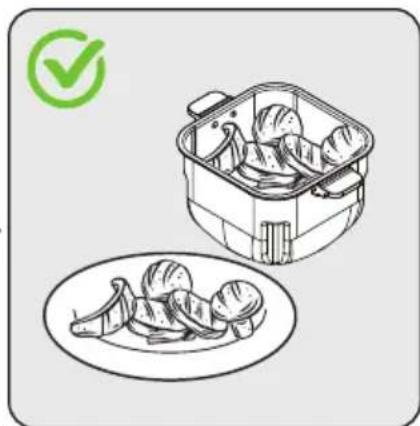
After the process is completed, you can remove the cooking rack from the appliance holding from its handles, and place the cooked food in a bowl or plate.
3 Operation
3.6.7 Potatoes Cooking Mode
3.6.7.1 Potatoes - Low Fat Cooking Mode
For Potatoes - Low Fat Cooking Mode, follow the steps in "3.6.1.1. Low Fat Cooking Mode".

- Pre-heating will bring the cooking chamber temperature to the set temperature.
- You can use this cooking mode for various frying options.
3.6.8 Slow Cooking Mode
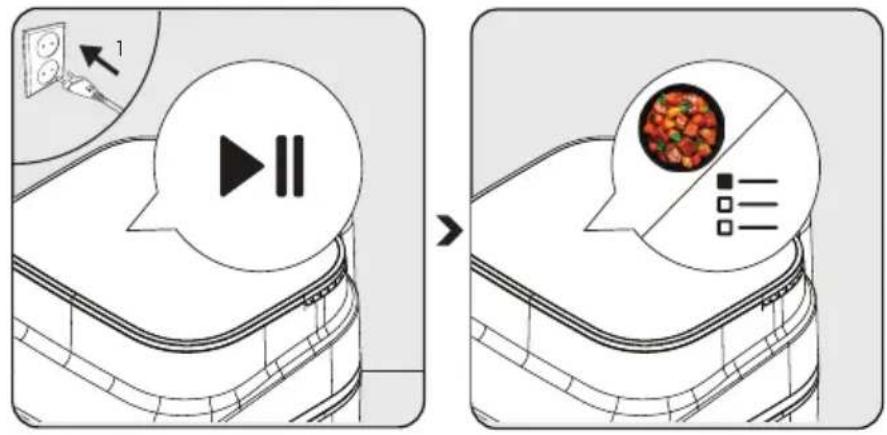
Plug in your appliance. The start/pause ▶ icon will start flashing. To determine the product to be used for cooking, press the start/pause ▶ icon; the appliance will exit standby mode.
Press the program selection button repeatedly to specify the desired food from the menu or select it from the ready menu.
To reach the menu defined for Slow Cooking options, press the program selection button 8 times.
3 Operation
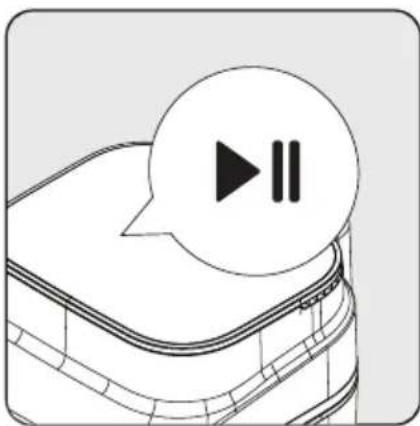
When you select the Slow Cooking mode, you can set the ideal temperature and time with the increase - / decrease + icons.
Press the icon to set the temperature or time. After completing the selections, press the start/pause button to start the process.
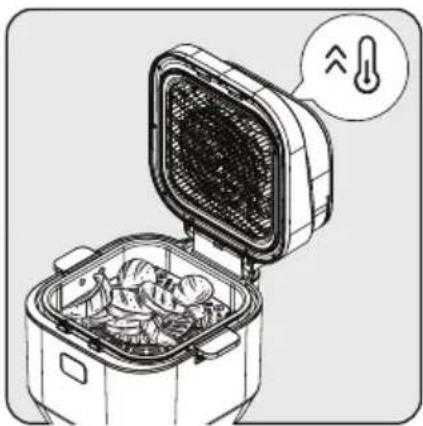
When slow cooking mode is initiated, the pre-heating period will start. The pre-heating period will bring the oil temperature to the ideal level before sautéing. Place the food to be sautéed into the cooking chamber and complete the sautéing process.
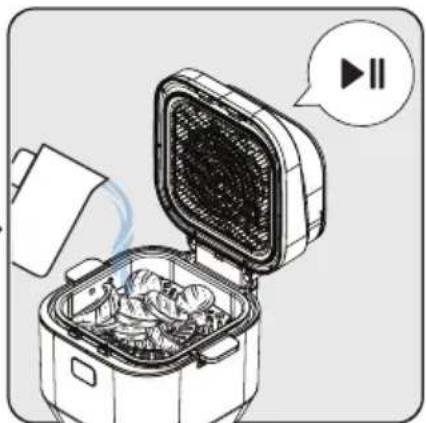
After sautéing, add water and close the lid. Then press the start/pause ▶ icon to start the cooking mode of the product.
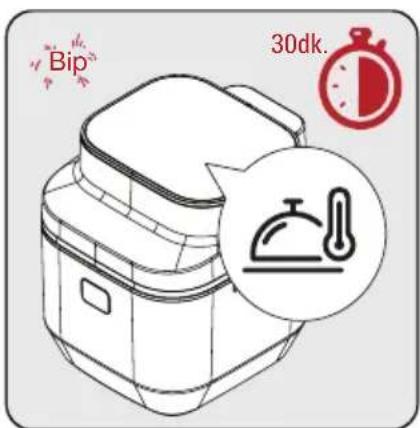
When the cooking process is completed, you will be warned with a 'beep' sound and see that the keep warm symbol on the display is lit. This symbol represents the 30-minute keep warm period. During the keep warm period, you can take out your food at any time.
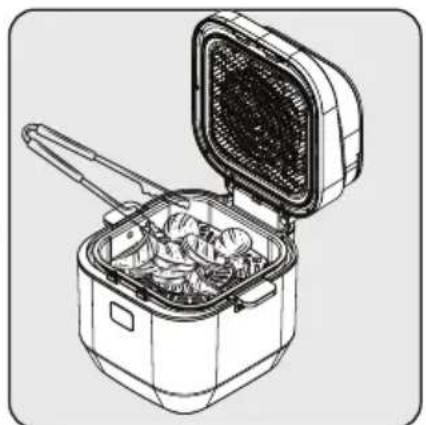
When the selected cooking time, as well as the keep warm period, elapses, a warning tone will sound and the appliance will automatically stop cooking. The -- symbol appears on the display. Open the lid by pressing the lid release button and check the food (whether it is roasted/defrosted/cooked). If it requires additional cooking time, you can prolong the cooking time a little bit more.
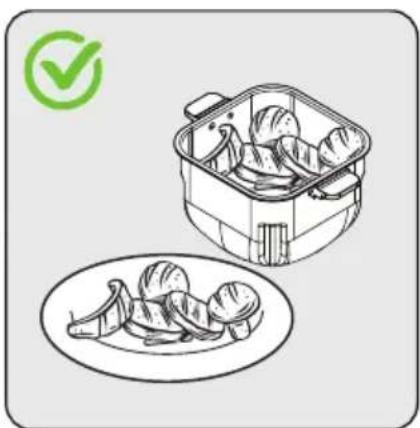
After the process is completed, you can remove the cooking rack from the appliance holding it from its handles, and place the cooked food in a bowl or plate.
3.7 Cooking Rack Accessory
The best browning and cooking is usually achieved on the cooking rack. The cooking rack is a versatile accessory that can be used in both general cooking and grill mode features. The wire legs on the four corners of the cooking rack can be adjusted for such uses.
4 Cooking time
The default temperature and time settings of the programs of the appliance are set automatically. The following table gives an overview of cooking times for different foods. Cooking times depend on the thickness, brand, and consistency of the food. The recommended times and quantities should be regarded as approximate.
| Program Food | Amount | Low Fat Cooking Grill Mode Steam Cooking | Stirring/ Shaking | ||
| Degrees (C°) | Time (min) | ||||
| Meat | Rib steak 700 g. | 200 °C 13 minutes | 1 | ||
| Tenderloin 700 g | 200 °C 13 minutes | 1 | |||
| Turkish Meatball 500 g. | 200 °C 12 minutes | 2 | |||
| Cutlets 700 g. | 200 °C 12 minutes | 1 | |||
| Chicken | Drumstick 450 200 °C 30 minutes | 2 | |||
| Chicken Breast | 500 180 °C | 35 minutes | 1 | ||
| Chicken Wings | 500 190 °C | 35 minutes | 2 | ||
| Fish | Salmon 500 g. | 180 °C 16 minutes | 1 | ||
| Jumbo Shrimp | 300 180 °C | 12 minutes | 2 | ||
| Sea bass 500 g. | 180 °C 16 minutes | 1 | |||
| Vegetables | Potatoes-Carrot Cubes Garnish | 250 180 °C | 14 minutes | 2 | |
| Onion Ring | 200 190 °C | 10 minutes | 2 | ||
| Zucchini and Eggplant (Cut into rings) | 200 180 °C | 14 minutes | 2 | ||
| Rice | Rice and Crack Wheat | 2 cups (400 g) | **** 20-30 minutes | 0 | |
| French Fries | Fresh Potatoes | 250 190 °C | 18 minutes | 4 | |
| Fresh Potatoes | 500 190 °C | 26 minutes | 4 | ||
| Frozen Potatoes | 250 190 °C | 16 minutes | 4 | ||
| Frozen Potatoes | 500 190 °C | 22 minutes | 4 | ||
| Pastries | Muffin | 6 pcs. mini muffin cups | 160 °C 20 minutes | 0 | |
| Slow Cooking | Chicken wings with Teriyaki Sauce | 400 g. | 90 °C 130 minutes | 0 | |
5 Cleaning and care
5.1 Cleaning

Never use gasoline, solvents, abrasive cleaners, metal objects or hard brushes to clean the appliance.
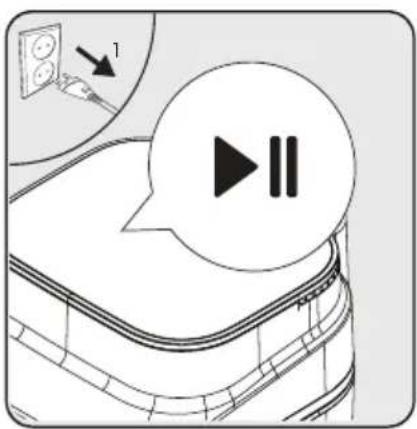

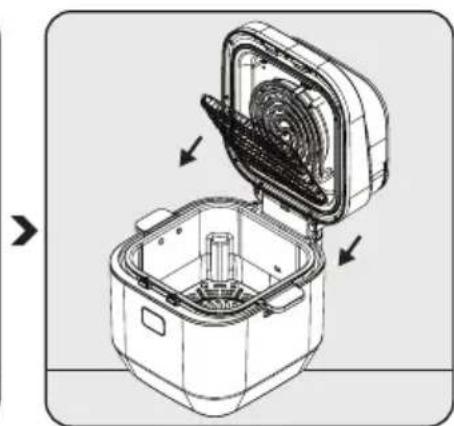
Switch off the appliance and disconnect it from the power supply. Allow the appliance to cool down completely.
Take the removable cooking chamber (6) out of the body (7) using its handles (3).
Easily remove the removable wire (9) in front of the heater from its connection by stretching it.

Open the lid (8) to allow the appliance to cool down more quickly.
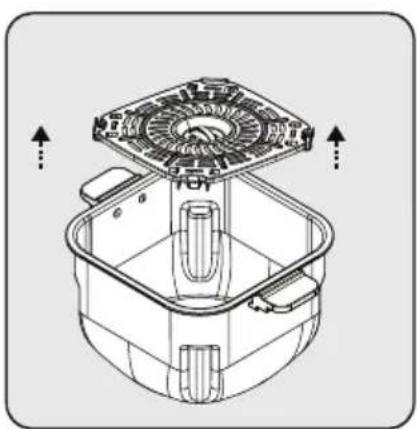
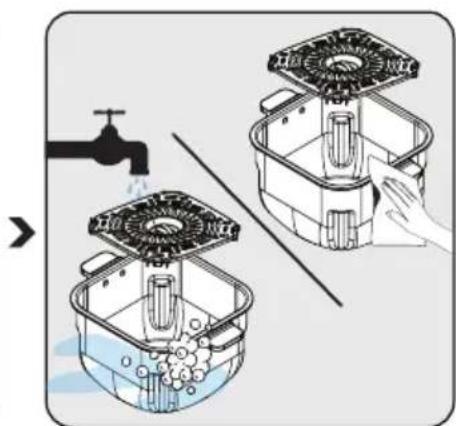
Remove the cooking rack (10) in the cooking chamber (6).
You can wash the cooking chamber (6), cooking rack (10) and removable wire (9) in warm soapy water or in the dishwasher.
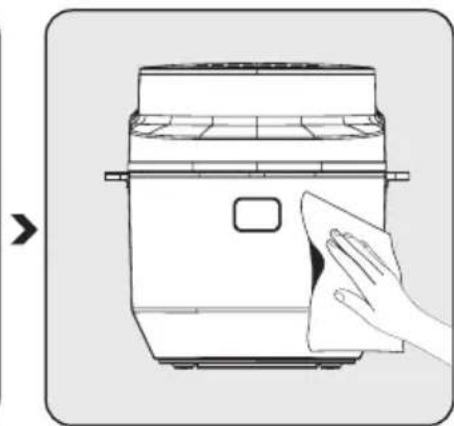
Clean the outside of the appliance with a damp cloth. Dry the outside of the appliance completely.

Always keep the bottom of the cooking chamber clean to avoid the accumulation of foreign objects.
5 Cleaning and care
5.2 Storage
- If you do not intend to use the appliance for a longer period of time, store it carefully.
- Unplug the appliance and let it cool down before putting it away.
- Store the appliance in a cool and dry place.
- Keep the appliance and the cable out of the reach of children.
5.3 Transportation and handling
- Transport the appliance in its original packaging during handling and transport. The packaging protects the appliance from physical damage.
- Do not place heavy objects on the appliance or its packaging. The appliance may get damaged.
- If the appliance is dropped, it may stop working or permanent damage may occur.
6 Troubleshooting
| The problem Cause Solution | |||
| 1 | Product does not work | Power outages | Check the power supply and make sure there is power |
| No power or poor contact at the power outlet | |||
| The power supply voltage of the product | |||
| Timer not set | Turn the timer dial to position, switch on the appliance for the required preparation time | ||
| Cooking chamber is not properly placed in the body | Place the cooking chamber properly | ||
| 2 | The food is insufficiently cooked/burnt | The cooking time is not correct | Combine recipes and your personal experience to adjust cooking |
| The cooking temperature is not correct | Combine recipes and your personal experience to adjust timing | ||
| Too much food in the cooking chamber | Do not place too much food in the cooking chamber | ||
| Certain foods should be stirred in certain periods for even cooking | Particularly the overlapping food, such as potatoes, should be stirred | ||
| 3 | Smoke during first use | Rust-preventive oil remaining on the heater of appliance | When using for the first time, set the temperature to maximum and preheat for 10-15 minutes to remove the anti-rust oil on the heater of the product |
| 4 | Strange smell | Foreign object on the cooking chamber, in the body, on the heater | Remove the foreign object |
| 5 | The display shows E1 and the product does not work any more | NTC not working / PCB Faulty Visit service for repair. | |
| 6 | The display shows E2 and the product no longer works | NTC not working / PCB Faulty / Cooking Chamber not in place. | Check the chamber. If the fault persists, visit service for repair |
| 7 | The display shows E3 and the product has stopped working | NTC not working / PCB Faulty | Visit service for repair |
| 8 | The screen shows E4 and the product has stopped working | NTC not working / PCB Faulty | |
| 9 | The display shows 'Open' and the product does not work any more | Lid Open Close the lid | |
| 10 | The display shows 'Stir' and the product does not work any more | Half of the cooking time is reached, but the food in the appliance is not turned for better cooking | Open the lid and turn the food./ Press the start/pause button for resuming the cooking process |
| 11 | The display shows 'Heat' | Pre-heating process is initiated for a better cooking before the cooking process. | Wait for the process to end or press the start/pause button for resuming the cooking process |
Dear customer,
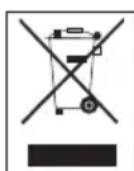
Please dispose of the device at the appropriate collection point for recycling of electrical and electronic equipment. To open the collection points, contact your local authority or the retailer where the product was purchased. Every household plays an important role in the collection and recycling of used appliances. Proper disposal of used appliances helps prevent potential negative effects on the environment and human health.
1.3 Information about the packaging

The packaging of the device is made from recyclable materials in accordance with national legislation.
Do not dispose of packaging waste with household waste or other waste. Dispose of it in the designated collection zones for packaging, as determined by local authorities.
1.4 Important tips for energy saving
Save time and follow the instructions when using the device. Avoid contact with the device during any use.
2 Device Multi-function Oil
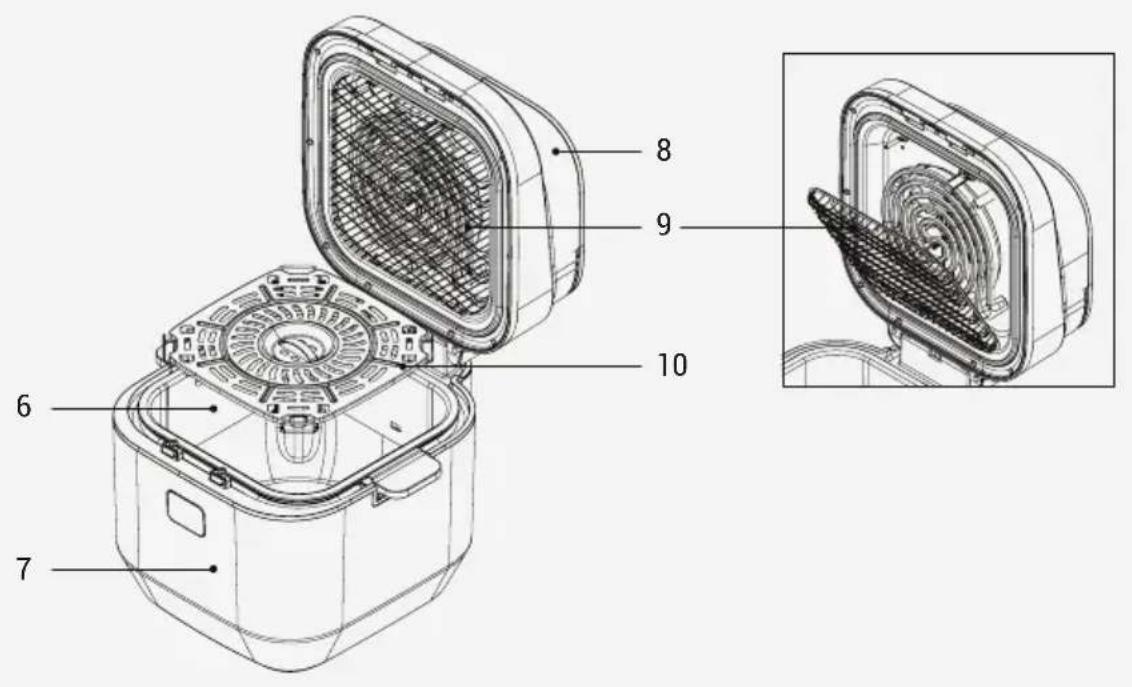
The values on the device and the capacities indicated in the document provided with the product were obtained under laboratory conditions in accordance with relevant standards. The capacity may vary depending on the use of the device and the conditions of the environment. The power values were tested at a voltage of 230 V.
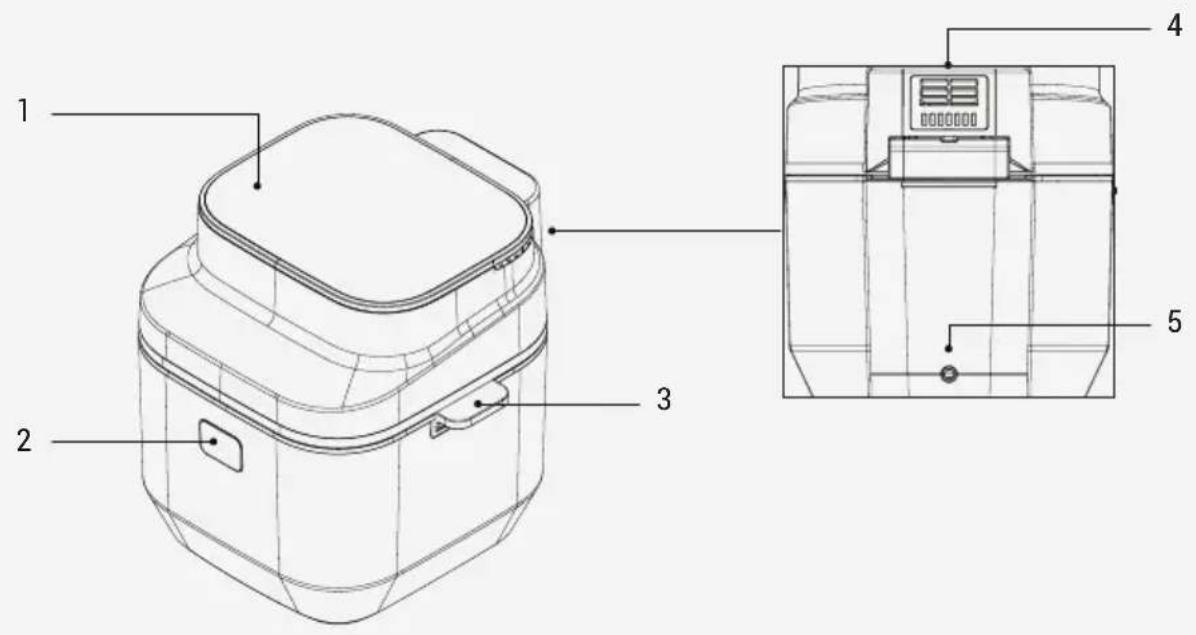
- Control panel 2. Release button 3. Handle 4. Air outlet
- Power cord
- Heating chamber
- Housing
- Lid
- Oil tank
- Heating rack
| Зхсанbeamе 220-240 V ~ 50-60 Hz | |
| Консу мачия на[eнергий] | 2400-2850 W |
| Кацштет на Камера та | 7,0л |
3. Functioning
3.1 Purpose
The appliance is intended for household use and is not suitable for professional use.

When using the appliance for the first time, there may be a slight odor. This is normal.
Remove the grill rack (10) from the oven cavity (6).
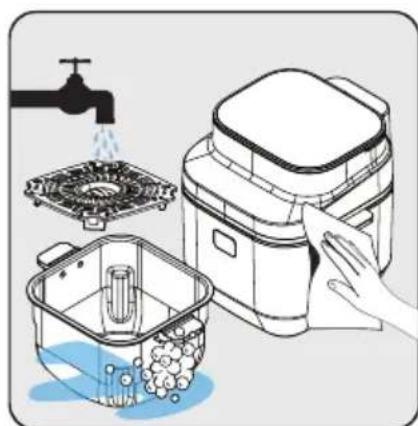

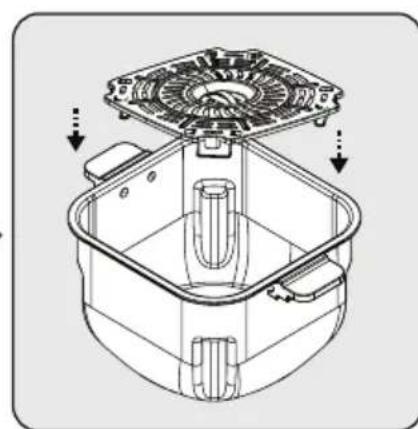

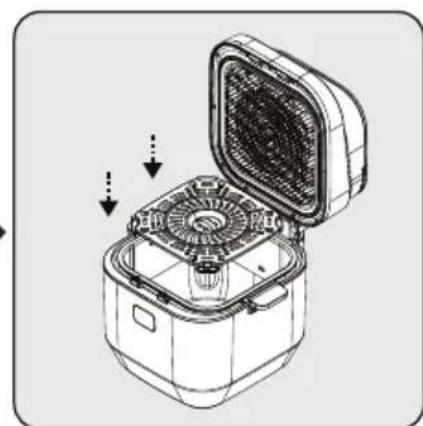
Wash the oven cavity (6) and the grill rack (10) with warm water and mild detergent. Then dry the interior and exterior parts of the appliance.
Place the grill rack (10) back into the oven cavity (6).
After cleaning, place the oven cavity (6) and the grill rack (10) back into the housing (7). The appliance is ready for use.
3. Functioning

Before first use, set the appliance to the highest temperature and let it operate for 10 minutes without adding any ingredients.
3.3 Digital control panel and LED display
| Готвае РекиМ | Готвае На пара | Готвае В рекиМ грип | Описане | |
| Mecо На Пиile Рибa | Налчeн Налчeн Налчeн | He e Налчeн | ТазnporpaMa e cpeцmaJHo pa3pa6ToTeHa 3a Видове черveNo MecO. | |
| ТазnporpaMa e cpeцmaJHo pa3pa6ToTeHa 3a Домаши n PTицn. | ||||
| Стадкиш Зеленчу Зеленчe Зеленчu | ||||
| ТазnporpaMa сpeцmaJHo proeKtɪpaHa 3a пechИва, кato садкиш n XлЯб. | ||||
| ТазnporpaMa cpeцmaJHo pa3pa6ToTeHa 3a Зеленчу Зеленчu | ||||
| ТазnporpaMa cpeцmaJHo pa3pa6ToTeHa 3a Зеленчу Зеленчu | ||||
| ТазnporpaMa cpeцmaJHo pa3pa6ToTeHa За ригове на палф ориз n Hanука пшени. Картоф Картоф Бавно Готвае | Налчe Налчe Налчe Налчe Налчe Налчe Налчe Налчe Налчe Налчe Налчe Налчe Налчe Налчe Налчe Налчe Налчe Налчe Налчe Налчe Налчe |
3. Functioning

Do not touch any part of the oven cavity (6) except the handle (3) while the oven is hot.
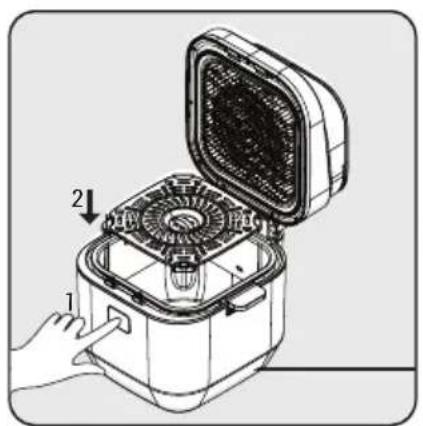
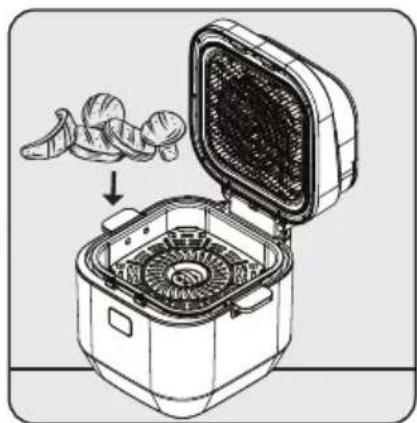
Press the button to release the latch (2) and place the grill rack (10) into the oven cavity (6).
Store the food in the baking chamber (6) and close the lid (8).
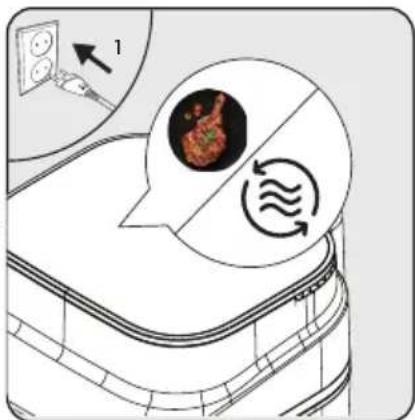
Insert the plug into the socket and select the desired cooking program. Then select the cooking mode and start the cooking process.
Operation
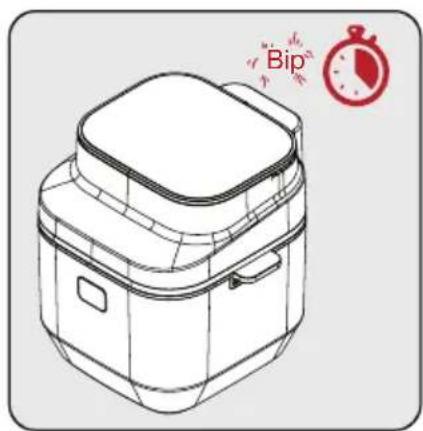
When the selected cooking time has elapsed, an audible warning signal will sound and the cooking will stop automatically.
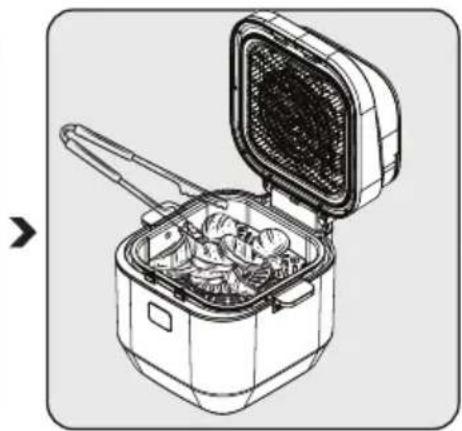
Open the lid (4) and check the food (whether it is cooked/roasted/baked). If additional cooking time is needed, you can extend the cooking time a little.
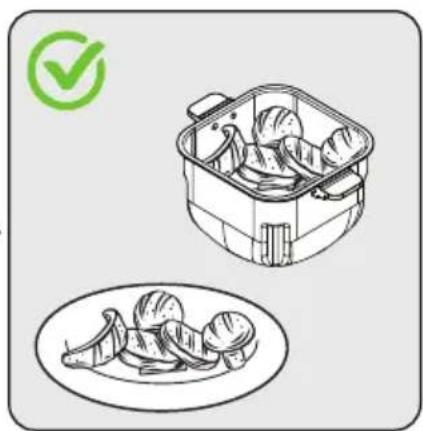
After the cooking process, you can remove the baking chamber (10) from the appliance by holding the handles (3) and place the cooked food in a bowl or on a plate.

To ensure even cooking, with prior notice for half of the cooking process, carefully remove the baking chamber (6) from the housing (7) and shake or use tongs to turn the food, being careful not to scratch the baking chamber (6) and the baking rack (10). - Turn the food over for more even cooking, if you want crispier results.

Avoid contact of the baking chamber (6) and the baking rack (10) with the hot surface of the appliance, as the surface of the baking chamber (6) will be hot during and after cooking.

- Let the food rest for 5 to 10 seconds before removing it from the hot baking chamber (6). - Use tongs to remove the food from the baking chamber (6) without damaging the inner surface of the appliance.
When one batch is ready, the appliance is ready for another

-Be careful, the appliance may become very hot during the cooking process. - Do not place products on the working surface in a way that blocks the air outlet (4).
Do not place other products on the appliance.
Operation
3.6.1 Meat
3.6.1.1. Cooking modes with low fat content
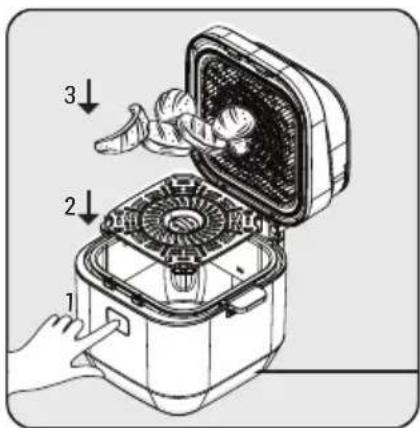
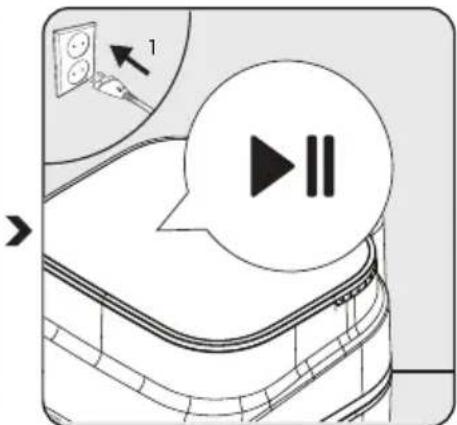

Press the button to open the lid (2) and place the grill for baking (10) in the baking chamber (6). Then place the food in the baking chamber (6) and close the lid (8) of the device.
Plug in the appliance. The button for start/stop is used to start. To determine the program that will be used for baking, press the start/stop button; the cooking modes will appear.
Press the multi-function button to select a program, to prepare the desired food from the menu, choose from the main menu.
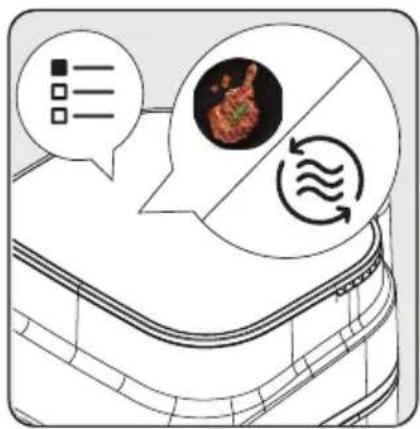
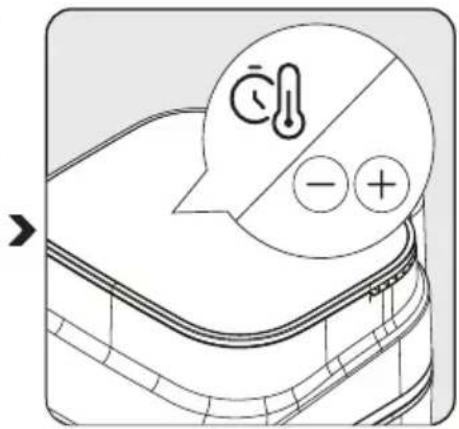
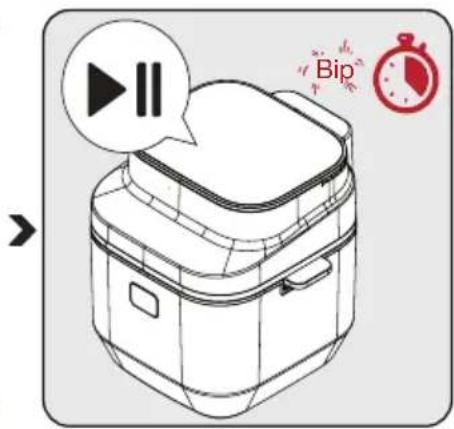
To switch to the menu, defined for meat dishes, press the button for program selection. To cook food in baking mode with low fat content, press the button for baking with low fat content.
When you select the baking mode with low fat content, you can set the desired temperature and time with the increase/decrease button. Press the button to set the temperature and time. After finishing the selection, press the start/stop button to start the process.
When half of the total baking time is reached, the device will emit a sound signal and display a warning for "turning". When you see this warning, press the button to open the lid and take out the baking chamber (6), holding it firmly to shake. For even baking, shake the baking chamber (6) and then put the food back. If you want to skip this period, you can do so by pressing the start/stop button.
Operation
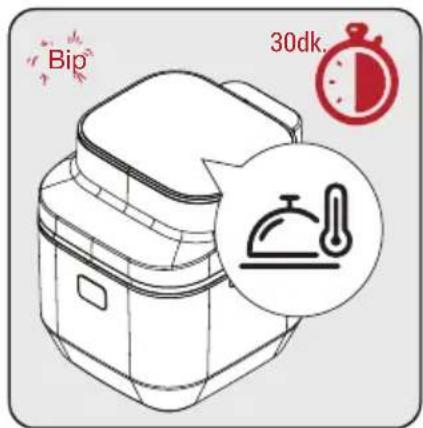

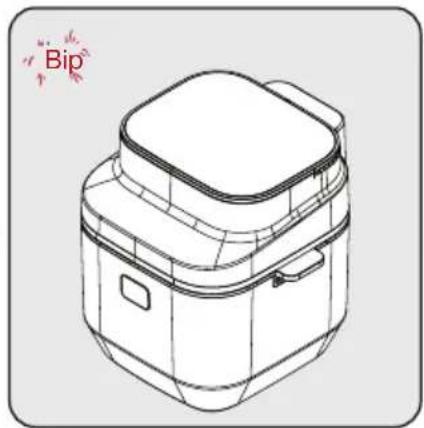

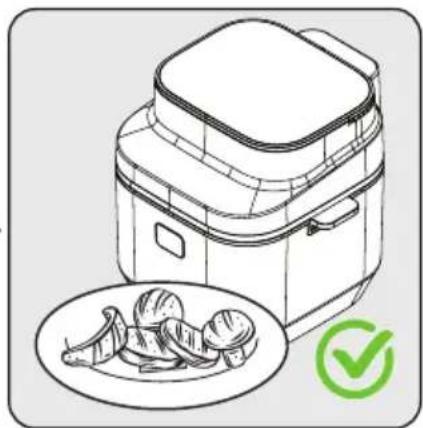
Place the baking chamber (6) back into the body and close the lid. To continue the baking process, press the start/stop button and control the panel. When the baking process is finished, you will be alerted with a sound signal and you will see the button for temperature maintenance light up. This symbol represents a 30-minute period for temperature maintenance. During the temperature maintenance period, you can take out the food at any time.
When the selected baking time and the temperature maintenance period have elapsed, a warning signal will sound and the device will automatically stop baking. The symbol '---' will appear on the display.
Open the lid by pressing the button to open the lid, check the food (if it is cooked/roasted/baked). If additional baking time is needed, you can extend the baking time a little.
After the process is finished, you can take out the baking grill from the device by holding the handles, and place the cooked food in a bowl or on a plate.
Operation
3.6.1.2. Baking mode with low fat content + grill
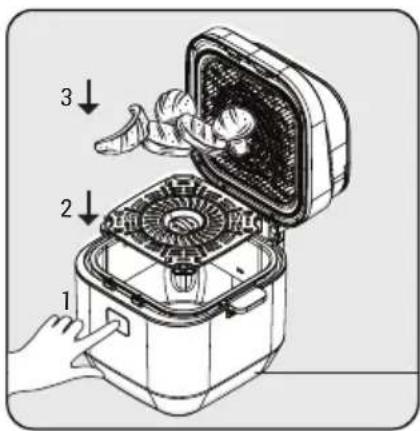
Press the button to open the lid (2) and place the grill for baking (10) in the baking chamber (6). Then place the food in the baking chamber (6) and close the lid (8) of the device.
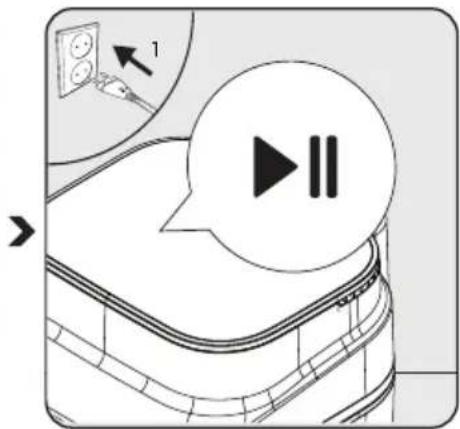
Press the Start/Pause button to begin. To select the product to be cooked, press the Start/Pause button, and it will exit standby mode.
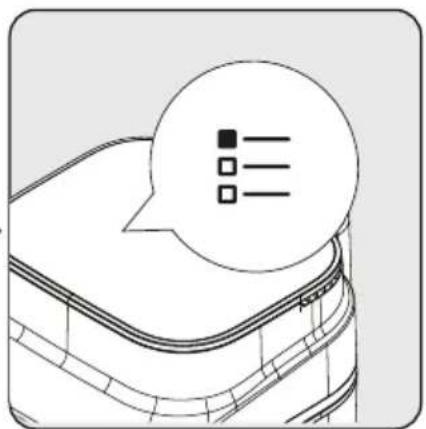
Press the program selection button repeatedly to set the desired program from the menu or select from the ready menu.
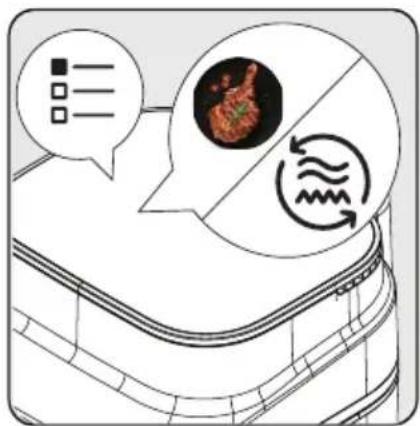
To switch to the menu set for meat dishes, press the program selection button. To cook food in "Low Fat + Grill" mode, press the button to cook in "Grill" mode.
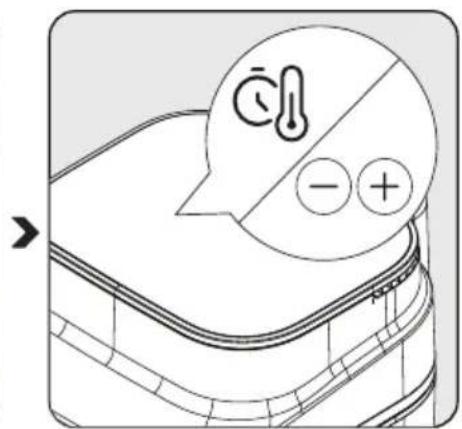
When you select the grill mode, you can set the desired temperature and time using the increase/decrease buttons. Press the button to set the temperature and time. After completing the selection, press the Start/Pause button to start the process.
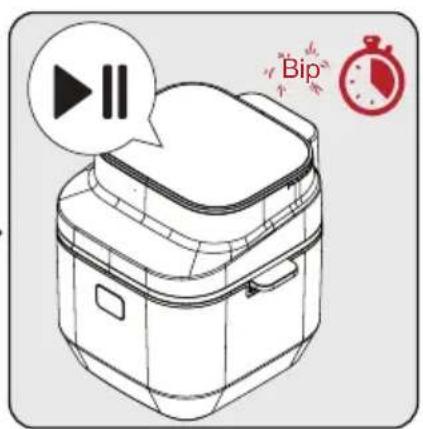
Do not preheat the appliance. Place the food in the cooking chamber (6). Then close the lid (8) and start the cooking program by pressing the Start/Pause button.
When half of the total cooking time is reached, the appliance will emit an audible signal and a "turn over" reminder will appear.
When you see this reminder, press the lid release button and remove the cooking chamber (6), holding it by the handles. To achieve even cooking, shake the cooking chamber or stir the food. If you want to interrupt this period, you can continue by pressing the Start/Pause button.

The preheating period helps to seal the meat and retain its juices.
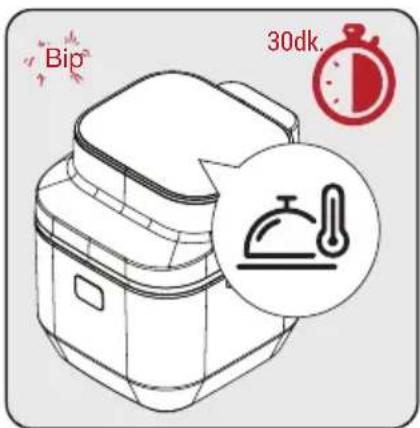
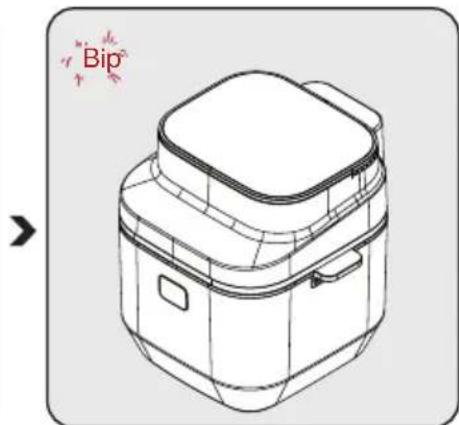
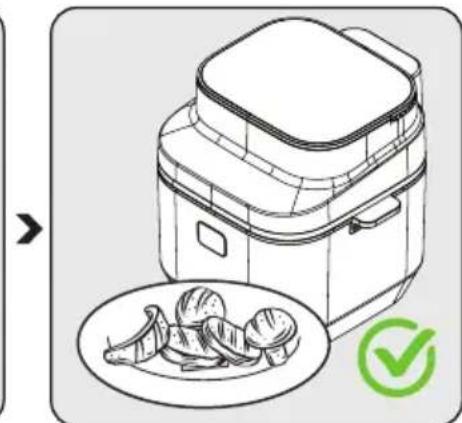
Place the cooking chamber (6) back into the housing and close the lid. To continue the cooking process, press the Start/Pause button and check the control panel. When the cooking process is complete, you will be alerted by an audible signal and the display will show the keep-warm icon. This symbol represents a 30-minute keep-warm period. During the keep-warm period, you can remove the food at any time.
When the selected cooking time has elapsed, including the keep-warm period, an audible alert will sound and the appliance will automatically stop cooking. The display will show the symbol ---.
Open the lid by pressing the lid release button, and check the food (whether it is cooked, browned, or crispy). If additional cooking time is needed, you can extend the cooking time a little more.
After the process is complete, you can remove the cooking rack from the appliance by holding the handles, and place the cooked food in a dish or on a plate.
3. Operation
3.6.1.3. Low Fat + Grill cooking mode
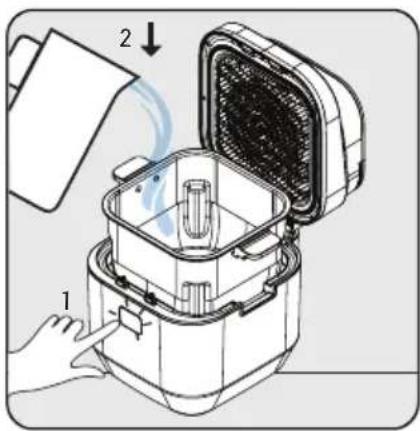
Reach the cooking chamber by pressing the lid release button. Fill the cooking chamber with water up to the "Max" mark. Place the cooking rack and close the lid of the product.
Press the key to select the electric program. The start/pause button will not fill. To determine the product that will be used for cooking, press the start/pause button, you will exit the ready mode.
Press the program selection button repeatedly to set the desired cooking time and then select from the main menu. To switch to the menu set for meat dishes, press the program selection button.
To create the food recipe "Low Fat Oven + Grill", press the cooking button in grill mode.
When you select the grill cooking mode, you can set the desired temperature and time with the increase/decrease button.
Press the button to set the temperature and time. After completing the selection, press the start/pause button to start the process. When the grill cooking process starts, it will begin a preheating period to raise the water temperature to the evaporation temperature.
When the preheating period ends, place the food on the cooking rack. Then close the lid and start the cooking mode by pressing the button.
When the total cooking time is reached, the appliance will emit a sound signal and display the "release" warning.
Operation

The preheating period helps to raise the water temperature to the evaporation temperature.
When you see this warning, press the lid release button and remove the cooking chamber (6), holding it firmly. For even cooking, shake the cooking chamber (6) or stir the food. If you want to skip this period, you can continue by pressing the start/pause button.
Place the cooking chamber (6) back into the housing and close the lid. To continue the cooking process, press the start/pause button. The timer is set.
When the cooking process ends, you will be alerted by a sound signal and you will see the heat retention symbol on the display. This symbol represents a 30-minute period for keeping the food warm. During the heat retention period, you can remove the food at any time.
Operation
When the selected cooking time and the heat retention period have elapsed, a warning signal will sound and the cooking will stop automatically. The following symbol will appear on the display: '----'.
Open the lid by pressing the lid release button, and check the food (if it is cooked/roasted/browned). If additional cooking time is needed, you can extend the cooking time a little more.
You can remove the grate from the oven by pulling it towards you and placing the cooked food in a dish.
3.6.2 Chicken
3.6.2.1 Chicken - grilling mode with low fat content
For chicken - grilling mode with low fat content, follow the steps in "3.6.1.1. Grilling mode with low fat content".
3.6.2.2 Chicken - grilling mode with low fat content + grill
For chicken - grilling mode with low fat content + grill, follow the steps in "3.6.1.2. Grilling mode with low fat content + grill".
3.6.2.3 Chicken - grilling mode with low fat content + steam cooking
For chicken - grilling mode with low fat content + steam cooking, follow the steps in "3.6.1.3. Grilling mode with low fat content + steam cooking".
3.6.3 Fish
3.6.3.1 Fish - grilling mode with low fat content
For fish - grilling mode with low fat content, follow the steps in "3.6.1.1. Grilling mode with low fat content".
3 Operation
3.6.3.2 Fish - grilling mode with low fat content + grill
For fish - grilling mode with low fat content + grill, follow the steps in "3.6.1.2. Grilling mode with low fat content + grill".
3.6.3.3 Fish - grilling mode with low fat content + steam cooking
3a pmba - pexim Ha rotBeHe c HnCKo CbIbpxaHne Ha Ma3HHn + rotBeHe Ha npa, cnEiBaIe CTbIKNTe B "3.6.1.3. PeXIM Ha rotBeHe c HnCKo CbIbpxaHne Ha Ma3HHn + rotBeHe Ha npa".
3.6.4 Cnaknsh
3.6.4.1 CnaKnH - peXm Ha roTbeHe c HnCKO cbIbpxKaHne Ha Ma3HHN
HaTnCHeTe 6yToHa 3a ocB6oxKDaBaHe Ha KanaKa (2) nNoCTaBeTe peWetkata 3a rotBeHe (10) B KaMepaTa 3a rotBeHe (6). CneI TOBa NoCTaBeTe XpaHaTa B KaMepaTa 3a rotBeHe (6) n 3aTBopeTe KaNaka (8) Ha ypeJa.
BkHouTe ypea KbM eJekTpNueckata Mpexa. NkoHaTa 3aCTapr/nay3aIe 3anoUHe daMnra. 3a Da onpeJeNTe npOyKTA, KOTo We Ce n3NoJ3Ba 3a RotBeHe, HATNCHeTe NKoHaTa 3aCTapr/nay3aIyePbT We n3JIe3e OT peXIM Ha FOTOBHOCT.
HaTnCHETe MHOROKpaTHO NKoHata 3a n3bOp Ha nporpaMa, 3a da 3aJaTe Te XeJHaHata Xpaha OT MeHOTo NIN Da Yn3-6peTe OT rTOBOTO MeHIO. 3a Da DOCTnHHTe Do MeHOTo, ONpeJeHeo 3a ONuN 3a CnaKnU, HATnCHETe NKOHATA 3a n3bOp Ha -nporpama 4 nBTn.

Korato n36epeTe peXIM Ha roTBeHe C HnCKO CbIbpxaHne HaMa3HNH, MoXeTe Da 3aJaTeNdeJHaTa TempeTaPy N BpeMe C uKOH 3a yBEnuBaHe -HaMaJIbAHe +HaTncHeTe IKoHaTa Ca Da 3aJaTe TemepaTypa Tn BpeMeTo. CneKaTO 3aBbPunTe n36opa, HATNCHeTe IKohata 3a CTapT/na-y3a, 3a Da CTapTnpaTe npo-ueca.
Korato n36paHOTo Bpeme 3a roTBeHe n3Teue, We npO3By-yn ppeDynpEiTeIeH cnHaJI ypeBbT aBTOMaTHUHO we cnpereTBoHeTo. · - : Ha dncnner ce IOBBA CMBOJbT --
OTBopTe KaNaka, KATO HATNCHe6byToHa 3a OCBO6XdaBaHe Ha KanaKa, INPPOBePeTe XpaHata (JaIn eN3neHepa3mpa3eHa/cBapeHa). Ako e Heo6xOIMO DOIbJIHNTeHNO BpeMe 3a rOTBeHe, MoKTe Da yNbJnxTe BpeMeTO 3a rOTBeHe OSe MaJIko. CNeI npIKNoUbaHe Ha npOceca MoKTe Da n3BaNTpeWetkata 3a rOTBeHe OT UpeDa, KATO JbPxNte 3a dpBXKnTe, IN Da NOCTabNTpNIrOTBeHata XpaHa BV KyNa IIN YHHNA.
3.6.4.2 CnaKnH - peXm Ha rotBeHe c HnCKO cbIbpxaHne Ha Ma3HHN + rotBeHe Ha npa
OCTHHeTe Do KaMepaTa 3a RotBe- He, KaTo HATnCHeTe 6yToHa 3a OC- BO6xJaBaHe Ha KaNaka. HanbI- HeTe KaMepaTa 3a RotBeHe C BOna Do 3HaKa 3a HINBO "Max".
IocTabepeuTeKaTa3a roTBeHe n 3aTBOpTe KaNaKa Ha npOdykTa.
Bknoute ypea KbmeKtpn-yeckata MPexa. IkoHata 3a cTapt/nay3a 3aneONoyHe da Mura. 3a da onpeDenITE npodyKTa, KOTo 7e ce n3noJ3Ba 3a rotBeHe, HATNCHeTe NKOHaTa 3a cTapt/nay3a, ypeBt we n3-Jne3e OT pexkM Ha FOTOBHOCT.
HaTnchete MHOrOkpaTHo 6yTo- Ha 3a n36op Hn nporpama, 3a Da 3aJaTe XeJHaHata xpaHa OT MeHIO UIN Da Jn36epTe OT TOBOTO MeHO.
3a Da DOCTURHETe Do MeHOTo, ONpeDeNEHO 3a ONuN 3a CnaKnUH, HATNCHETe NKOHATA 3a IN3-6op Ha -nporpaMa 4 nbTn.

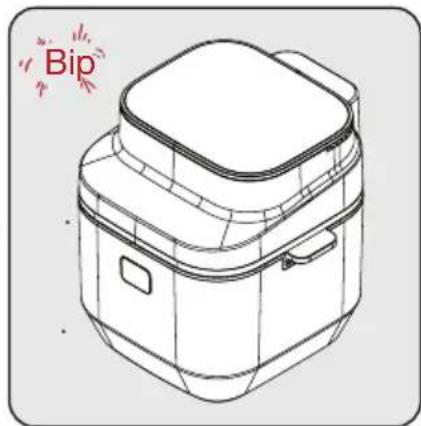

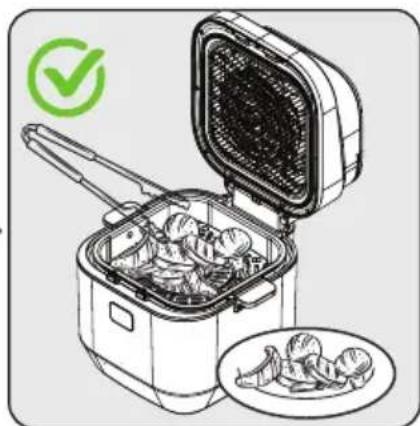
Open the door, select the "Low Fat" mode, and press the button for baking in the "Low Fat" mode.
When you select the baking mode, you can set the desired temperature and time using the increase/decrease buttons.
Press the button to set the temperature and time. After you finish the selection, press the start/pause button to start the process.
When the selected baking time has elapsed, an audible signal will sound and the baking will stop automatically. A new symbol will appear on the display.
Open the door by pressing the door release button, and check the food (if it is cooked/browned/baked). If necessary, you can extend the baking time a little.
After the process is complete, you can remove the baking rack from the appliance by lifting it up, and place the cooked food in a dish or on a plate.

When cooking very dense dishes, such as bread loaves, you can achieve an ideal baking result by placing the dough on the inner surface of the baking chamber.
Operation
3.6.5 Low Fat
3.6.5.1 Low Fat - baking mode with low fat content
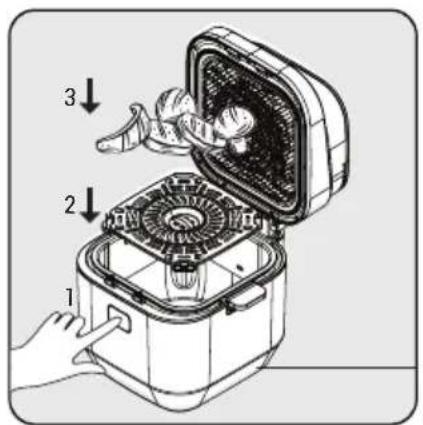
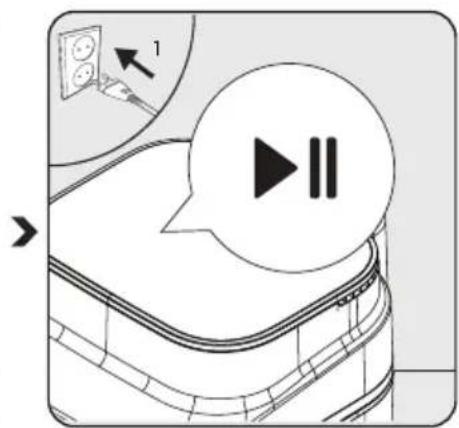
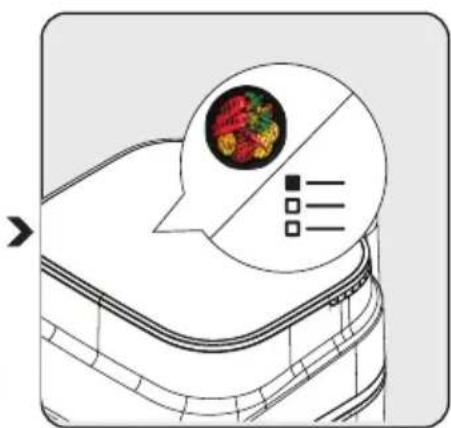
Press the door release button (2) and place the baking rack (10) in the baking chamber (6). Then place the food in the baking chamber (6) and close the door (8) of the appliance.
Connect the appliance to the electrical mains. The start/pause button will flash. To select the product that will be used for baking, press the start/pause button; the appliance will exit standby mode.
Press the program selection button repeatedly to set the desired menu or to select from the main menu. To set the menu for certain dishes, press the program selection button 5 times.
Operation
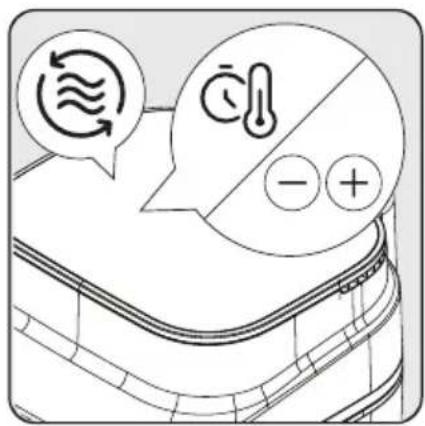
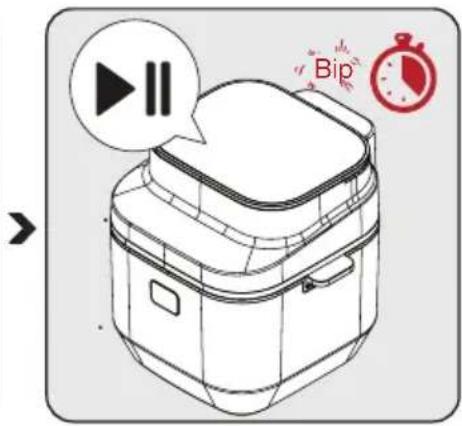
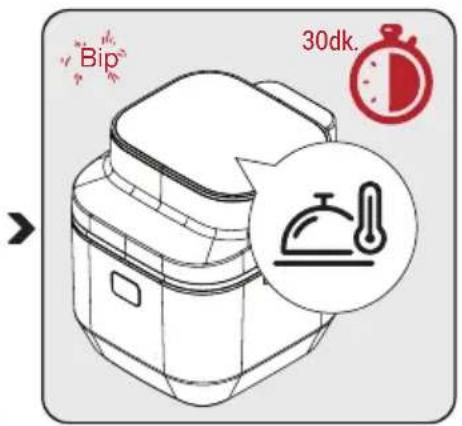
To cook food in the "Low Fat" baking mode, press the button for baking with low fat content. When you select the "Low Fat" baking mode, you can set the ideal temperature and time using the increase/decrease buttons. Press the button to set the temperature and time. After you finish the selection, press the start/pause button to start the process.
When this time for baking has elapsed, an audible signal will sound and the display will show a warning for "rapid baking".
When you see this warning, press the button to release the latch and remove the baking tray, holding it straight for the jump. To get an even baking, spread the baking tray or turn the food. If you want to skip this period, you can continue pressing the button for start/pause.
Place the baking tray back into the body and close the latch. To continue the baking process, press the button for the digital control panel.
When the baking process is complete, you will be warned with an audible signal and you will see the symbol for keeping the food warm. This symbol represents a 30-minute period for keeping the food warm. During the keeping warm period, you can remove the food at any time.
Operation
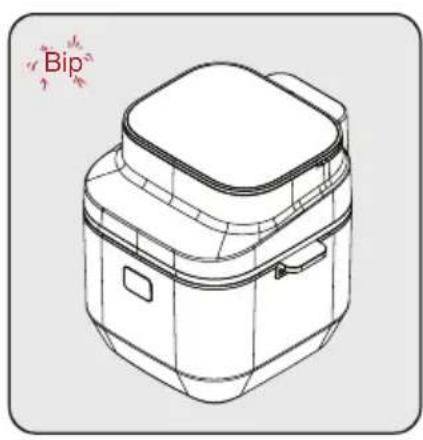
When the selected baking time has elapsed, as well as the period for keeping warm, a warning signal will sound and the baking will stop automatically. The display will show the symbol ---.
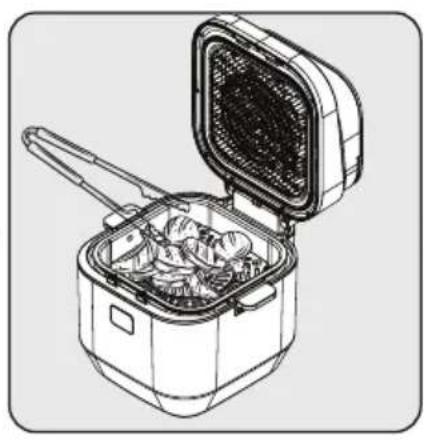
Open the latch by pressing the button for releasing the latch, and check the food (if it is cooked/defrosted/browned). If additional baking time is needed, you can extend the baking time a little more.
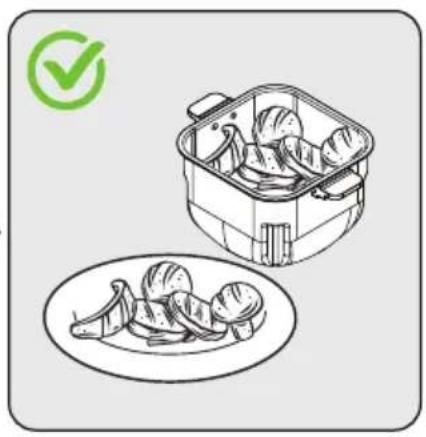
After the process is complete, you can remove the baking tray from the device by holding it for the jump, and place the cooked food in a bowl or dish.
3.6.5.2 Green vegetables - baking mode with low fat frying + baking on the tray

Follow the baking tray, pressing the button for releasing the latch. Fill the baking tray with water up to the "Max" mark.
Place the baking tray and close the latch of the product.
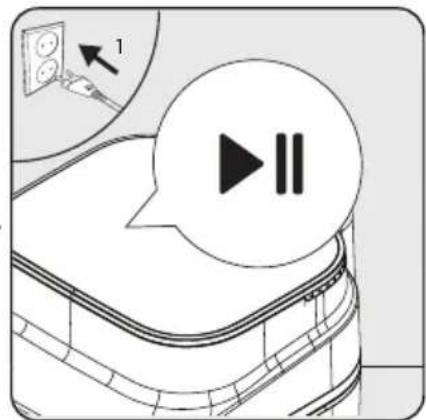
Connect the device to the electrical outlet. The button for start/pause will light up. To select the product that will be used for baking, press the button for start/pause; the button will come out of the ready mode.
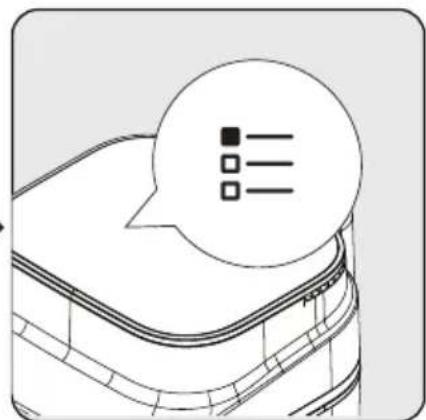
Press the program selection button multiple times to set the desired food from the menu or to choose from the main menu. To reach the menu, defined for green vegetables, press the program selection button 5 times.
Operation
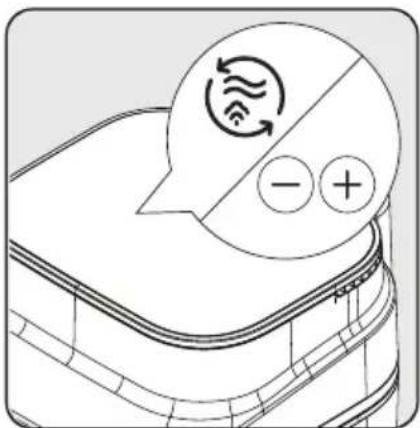
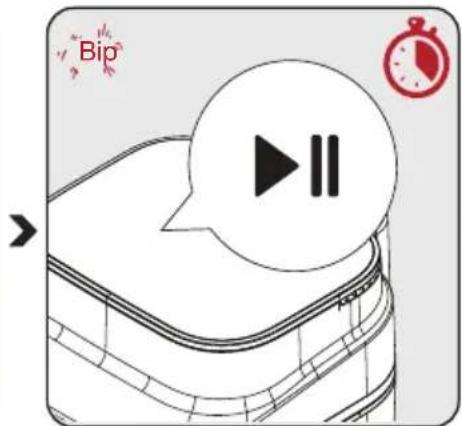
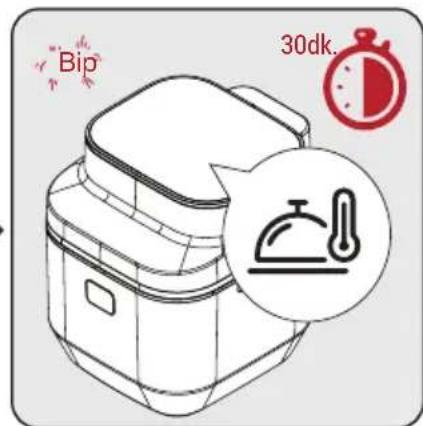
To cook the food in the "low fat frying + baking" mode, press the button for baking in the tray mode.
Once the cooking mode is set, you can set the desired temperature and time using the control knob for increasing/decreasing.
Press the knob to set the temperature and time. After completing the selection, press the Start/Pause button to start the process.
When half of the total cooking time is reached, a sound signal will be emitted and the display will show a reminder for "turning over".
When you see this reminder, press the button to release the lid and take out the cooking pan, holding it by the handles. To achieve even cooking, spread the food in the pan or turn it over. If you want to skip this step, you can continue by pressing the Start/Pause button.
Place the cooking pan back into the body and close the lid. To continue the cooking process, press the Start/Pause button on the control panel.
When the cooking process is finished, you will be alerted by a sound signal and the display will show the keep-warm symbol. This symbol represents a 30-minute keep-warm period. During the keep-warm period, you can take out the food at any time.
Operation
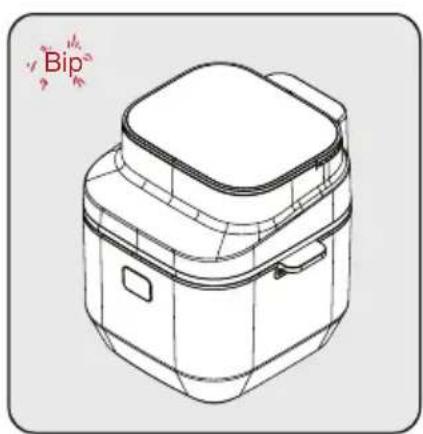
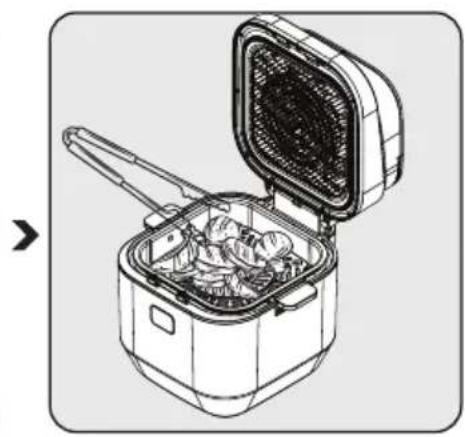
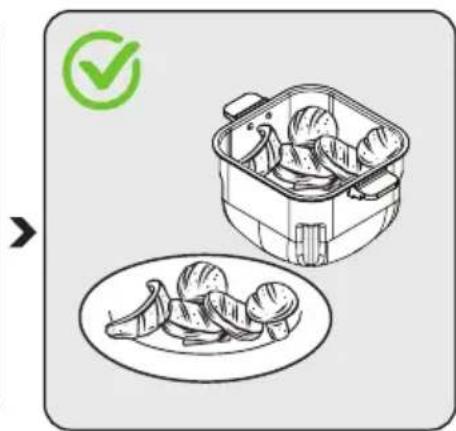
When the selected cooking time and the keep-warm period have elapsed, a warning signal will sound and the appliance will automatically stop cooking. The display will show the symbol ---.
Open the lid by pressing the lid release button, and check the food (if it is cooked/roasted/baked). If additional cooking time is needed, you can extend the cooking time a bit more.
After the process is completed, you can remove the cooking pan from the appliance by holding the handles, and place the cooked food in a dish or bowl.
3.6.6 Cooking mode for pizza
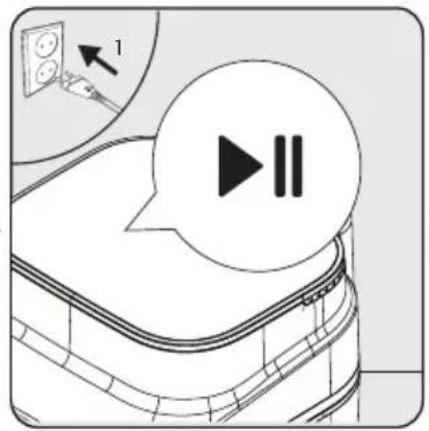
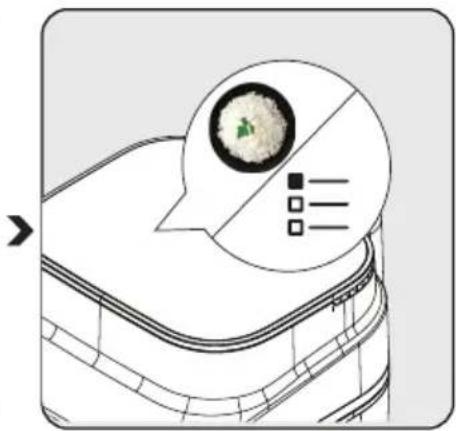
Plug the appliance into the electrical outlet. The Start/Pause button will light up. To select the program to be used for cooking, press the Start/Pause button; the appliance will exit standby mode.
Press the program selection button multiple times to set the desired food from the menu or to choose from the main menu. To access the menu for pizza, press the program selection button 6 times.
Operation

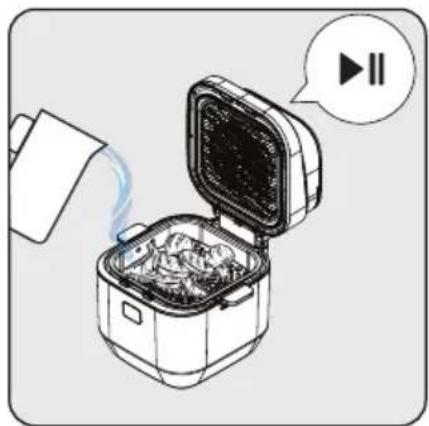
After completing the selection, press the "Start/Pause" button to start the process.
When the cooking program starts, the oven will not be preheated. The preheating program will raise the oil temperature to the desired level during cooking.
Place the food for cooking in the cooking chamber and complete the cooking process.
Once they are activated, add water and close the tap. Then press the "Start/Pause" button to start the cooking program for the product.
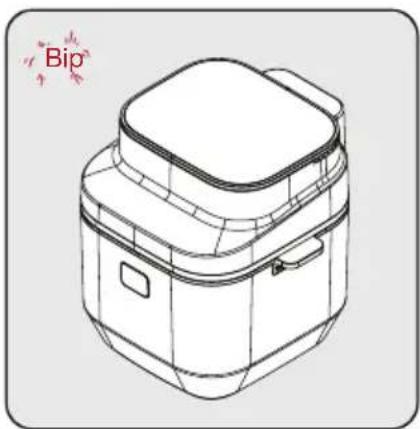


When the selected cooking time has elapsed, an audible signal will sound and the cooking will stop automatically. The display will show additional time for extending the cooking time.
Open the tap by pressing the button for releasing the tap, and check the food (whether it is cooked/roasted/burnt). If additional cooking is necessary, you can extend the period by increasing the value on the display.
After the process is complete, you can remove the cooking rack from the appliance by lifting it by the handles, and place the cooked food in a dish or on a plate.
Functioning
3.6.7 Potato cooking mode
3.6.7.1 Potatoes - cooking mode with low fat content
For potatoes - cooking mode with low fat content, follow the instructions in "3.6.1.1. Cooking mode with low fat content".

- The preheating will be done until the set temperature in the cooking chamber is reached. - You can use this cooking mode for different types of frying.
3.6.8 Baking mode
Connect the appliance to the electrical supply. The start/pause button will light up. To determine the product that will be used for cooking, press the start/pause button; the appliance will exit the standby mode.
Press the program selection button multiple times to select the desired food from the menu or to choose from the main menu. To reach the menu, defined for the baking functions, press the program selection button 8 times.
Functioning
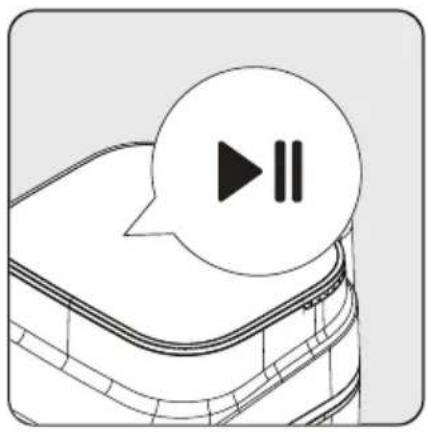
Using the frying program, you can set the desired temperature and time with the increase/decrease buttons. Press the button to set the temperature or time. After completing the selection, press the start/pause button to start the process.
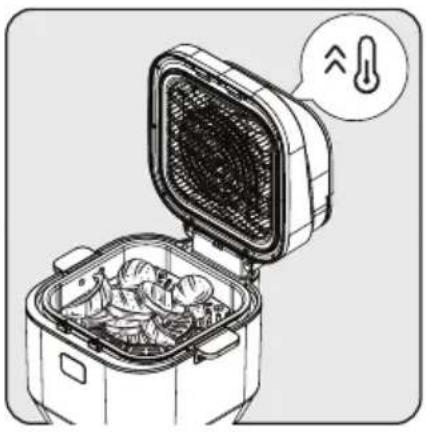
When the frying program is activated, the preheating phase begins first. The preheating phase will raise the oil temperature to the set level while maintaining it. Place the food for frying in the frying basket and do not forget the frying process.
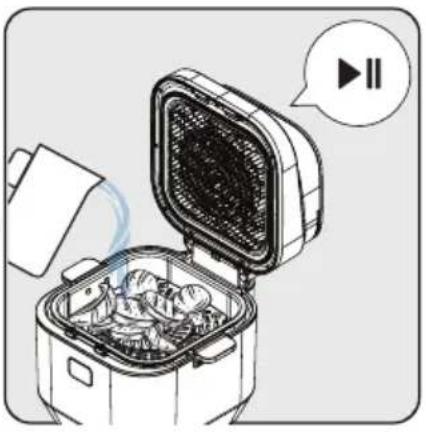
After the preheating is done, add the food and close the lid. Then press the start/pause button to start the frying program for the product.
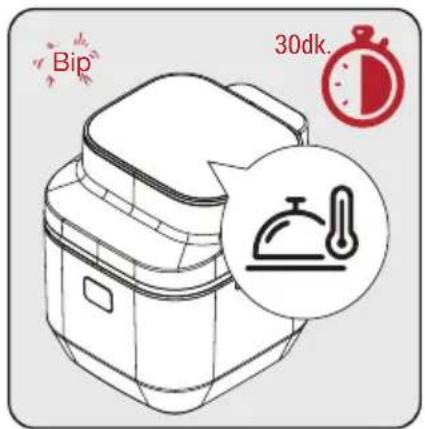
When the frying process is finished, you will be alerted by a sound signal and you will see the keep warm symbol on the display. This symbol represents a 30-minute period for keeping the food warm. During the keep warm period, you can remove the food at any time.
When the selected frying time and the keep warm period have elapsed, an alert sound will sound and the fryer will automatically stop. The symbol will appear on the display.
Open the lid by pressing the lid release button and check the food (if it is cooked/browned/done). If additional frying time is needed, you can extend the frying time a little more.
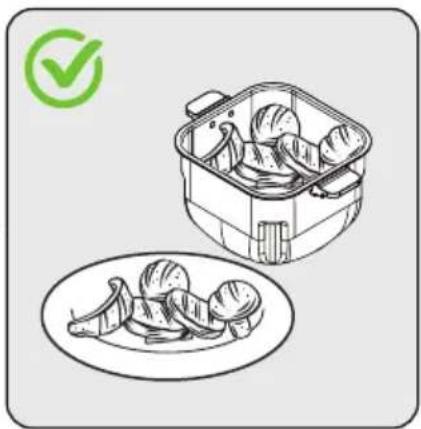
After the process is finished, you can remove the frying basket from the appliance by lifting it by the handles and place the fried food in a bowl or on a plate.
3.7 Accessories for the frying basket
For best results and even frying, it is usually done on the frying basket. The frying basket is a universal accessory that can be used both in the frying mode and in the grill mode. The four legs on the stainless steel basket can be adjusted for such purposes.
Set the temperature and time of the programs on the device are set automatically.
The following table gives approximate frying times for different foods. Frying time depends on the thickness, type, and consistency of the food. The recommended times and quantities should be considered as approximate.
3.6.5
3.6.5.1

- PLEASE READ THIS GUIDE FIRST
- DEAR CUSTOMER
- SYMBOLS AND THEIR MEANINGS
- IMPORTANT SAFETY AND ENVIRONMENTAL INSTRUCTIONS
- GENERAL SAFETY
- COMPLIANCE WITH THE WEEE DIRECTIVE AND DISPOSING OF THE WASTE PRODUCT
- PACKAGING MATERIALS OF THE PRODUCT ARE MANUFACTURED FROM RECYCLABLE MATERIALS IN ACCORDANCE WITH OUR NATIONAL ENVIRONMENT REGULATIONS
- COMPLY WITH THE TIMES RECOMMENDED BY THE MANUAL WHILE USING THE APPLIANCE. UNPLUG THE APPLIANCE AFTER EACH USE
- SIGNS ON THE APPLIANCE AND VALUES SPECIFIED BY THE DOCUMENTS PROVIDED ALONG WITH THE PRODUCT HAVE BEEN OBTAINED UNDER LABORATORY CONDITIONS IN ACCORDANCE WITH THE RELATED STANDARDS. THE VALUES MAY VARY BASED ON USE OF THE APPLIANCE AND AMBIENT CONDITIONS. POWER VALUES HAVE BEEN TESTED IN THE VOLTAGE OF 230V
- OPERATION
- INTENDED USE
- PREPARING THE APPLIANCE FOR USE
- DIGITAL CONTROL PANEL AND LED DISPLAY
- WARNINGS BEFORE FIRST USE
- SELECTING AND STARTING A PROGRAM
- TEMPERATURE AND TIME SETTING
- COOKING
- MEAT
- LOW FAT COOKING MODE
- LOW FAT + GRILL COOKING MODE
- LOW FAT + STEAM COOKING MODE
- CHICKEN
- CHICKEN - LOW FAT COOKING MODE
- CHICKEN - LOW FAT + GRILL COOKING MODE
- CHICKEN - LOW FAT + STEAM COOKING MODE
- FISH
- FISH - LOW FAT COOKING MODE
- FISH - LOW FAT + GRILL COOKING MODE
- FISH - LOW FAT + STEAM COOKING MODE
- PASTRIES
- PASTRIES - LOW FAT COOKING MODE
- PASTRIES - LOW FAT + STEAM COOKING MODE
- VEGETABLE
- VEGETABLE - LOW FAT COOKING MODE
- VEGETABLE - LOW FAT + STEAM COOKING MODE
- RICE COOKING MODE
- POTATOES COOKING MODE
- POTATOES - LOW FAT COOKING MODE
- SLOW COOKING MODE
- COOKING RACK ACCESSORY
- COOKING TIME
- CLEANING AND CARE
- CLEANING
- STORAGE
- TRANSPORTATION AND HANDLING
- TROUBLESHOOTING
- INFORMATION ABOUT THE PACKAGING
- IMPORTANT TIPS FOR ENERGY SAVING
- DEVICE MULTI-FUNCTION OIL
- FUNCTIONING
- PURPOSE
- COOKING MODES WITH LOW FAT CONTENT
- BAKING MODE WITH LOW FAT CONTENT + GRILL
- CHICKEN - GRILLING MODE WITH LOW FAT CONTENT
- CHICKEN - GRILLING MODE WITH LOW FAT CONTENT + GRILL
- CHICKEN - GRILLING MODE WITH LOW FAT CONTENT + STEAM COOKING
- FISH - GRILLING MODE WITH LOW FAT CONTENT
- FISH - GRILLING MODE WITH LOW FAT CONTENT + GRILL
- FISH - GRILLING MODE WITH LOW FAT CONTENT + STEAM COOKING
- CNAKNSH
- CNAKNH - PEXM HA ROTBEHE C HNCKO CBIBPXKAHNE HA MA3HHN
- CNAKNH - PEXM HA ROTBEHE C HNCKO CBIBPXAHNE HA MA3HHN + ROTBEHE HA NPA
- LOW FAT
- LOW FAT - BAKING MODE WITH LOW FAT CONTENT
- GREEN VEGETABLES - BAKING MODE WITH LOW FAT FRYING + BAKING ON THE TRAY
- COOKING MODE FOR PIZZA
- POTATO COOKING MODE
- POTATOES - COOKING MODE WITH LOW FAT CONTENT
- BAKING MODE
- ACCESSORIES FOR THE FRYING BASKET
Brand : BEKO
Model : FRL 5474 B
Category : Deep fryer