FRL5388B - Deep fryer BEKO - Free user manual and instructions
Find the device manual for free FRL5388B BEKO in PDF.
User questions about FRL5388B BEKO
0 question about this device. Answer the ones you know or ask your own.
Ask a new question about this device
Download the instructions for your Deep fryer in PDF format for free! Find your manual FRL5388B - BEKO and take your electronic device back in hand. On this page are published all the documents necessary for the use of your device. FRL5388B by BEKO.
USER MANUAL FRL5388B BEKO
natural_image
Simple line drawing of a rice cooker icon (no text or symbols)FRL 5388 B
EN - DE - FR - ES - RO - RU - IT - PL - SR - BG - UA - AR
CONTENTS
ENGLISH 03-19
DEUTSCH 20-39
FRANÇAIS 40-57
ESPAÑOL 58-77
ROMÂNĂ 78-98
RUSSIAN 99-124
ITALIANO 125-144
POLSKI 145-163
СРБИН 164-180
БЪЛГАРСКИ 181-198
УКРАЇНСЬКА 199-217
Please read this guide first!
Dear Customer,
Thank you for choosing a BEKO product. We would like you to achieve the optimal efficiency from this high quality product which has been manufactured with state of the art technology. Please make sure you read and understand this guide and supplementary documentation fully before use and keep it as a reference. Include this guide with the unit if you hand it over to someone else. Observe all warnings and information herein and follow the instructions.
Symbols and their meanings
These symbols are used throughout this guide:

Important information and recommendations regarding the use of the appliance.

WARNING: Warnings on personal injury or property damage.

Suitable for contact with food.
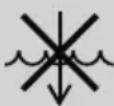
Do not immerse the appliance, the power cord or the plug in water or in any other liquids.
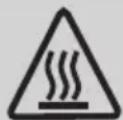
WARNING: Warning about hot surfaces.
1 Important safety and environmental instructions
This section contains safety instructions to prevent hazards that can result in injury or property damage.
Any warranty is void if these instructions are not followed.
1.1 General safety
• This appliance complies with international safety standards.
- This appliances is intended to be used in household and similar applications such as:
-staff kitchen areas in shops, offices and others working environments;
-farm houses;
-by clients in hotels, motels and other residential type environments;
-bed and breakfast type environments.
- If the use of the appliance is limited to less than the above, this shall be clearly stated in the instructions.
• Children being supervised not to play with the appliance
• This appliance can be used
by children aged from 8 years and above and persons with reduced physical, sensory or mental capabilities or lack of experience and knowledge if they have been given supervision or instruction concerning use of the appliance in a safe way and understand the hazards involved.
- If the supply cord is damaged, it must be replaced by the manufacturer, its service agent or similarly qualified persons in order to avoid a hazard.
- Cleaning and user maintenance shall not be made by children unless they are older than 8 and supervised.
- Keep the product and the product cable out of the reach of children under the age of 8.
- Position the handles of the cooking appliances (if any) so that hot liquids do not spill and place them securely.
• Make sure that the voltage
1 Important safety and environmental instructions
indicated on the appliance is the same as the mains voltage in your home.
- Use the appliance in a grounding plug.
- Do not use the appliance with an extension cord.
- Do not place your appliance on or near heat sources such as ovens and stoves.
• To prevent damage to the power cord, prevent it from being pinched, crimped or rubbed against sharp edges. - Do not unplug the appliance by pulling on the cord.
- Do not immerse the appliance or its power cord in water.
- Do not leave the appliance unattended while it is plugged in.
- Do not disassemble the appliance.
- Use only original parts or parts recommended by the manufacturer.
- Unplug the appliance before cleaning and dry all parts completely after cleaning.
- Clean the appliance in ac-
cordance with the instructions in the Cleaning and Maintenance section.
- Do not put large pieces of food in the appliance as it may cause a fire.
- Do not touch the plug of the appliance while your hands are damp or wet.
- Do not use the appliance in humid environments.
- Do not move the appliance while it is in use and the oil inside is hot.
- Do not use the appliance in or near explosive or flammable environments and substances.
• To avoid the risk of burns, do not touch hot surfaces. - Let the appliance cool down in a safe place out of the reach of children.
- Do not block the air inlet and air outlet openings while the appliance is operating.
- Do not lean over while the appliance is in use. Hot air rises from the appliance during use!
• The appliance becomes hot
1 Important safety and environmental instructions
during use. To avoid the risk of burns, do not touch hot surfaces.
• Make sure that the room is adequately ventilated during use.
• In case of fire, unplug the appliance.
- Do not pour water on the appliance, as it may cause electric shock hazard.
- Do not operate the appliance with an external timer or a separate remote control system.
- Only use metal kitchenware with insulated handles with the appliance.
- Do not put anything on the appliance while it is operating or hot.
• To disconnect, turn the timer dial and temperature dial to the off position. Then unplug the appliance.
- If you keep the packaging materials, keep them out of the reach of children.
1.1 Compliance with the WEEE Directive and Disposing of the Waste Product:
This product complies with EU WEEE Directive (2012/19/EU). This product bears a classification symbol for waste electrical and electronic equipment (WEEE).
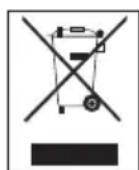
This symbol indicates that this product shall not be disposed with other household wastes at the end of its service life. Used device must be returned to official collection point for recycling of electrical and electronic devices. To find these collection systems please contact to your local authorities or retailer where the product was purchased. Each household performs important role in recovering and recycling of old appliance. Appropriate disposal of used appliance helps prevent potential negative consequences for the environment and human health.
1.2 Compliance with RoHS Directive
The product you have purchased complies with EU RoHS Directive (2011/65/EU). It does not contain harmful and prohibited materials specified in the Directive.
1.3 Package information

Packaging materials of the product are manufactured from recyclable materials in accordance with our National Environment Regulations. Do not dispose of the packaging materials together with the domestic or other wastes. Take them to the packaging material collection points designated by the local authorities.
1.4 Important points for saving energy
Comply with the times recommended by the manual while using the appliance. Unplug the appliance after each use.
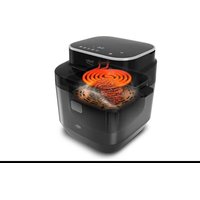
2 Your Hot Air Fryer
Signs on the appliance and values specified by the documents provided along with the product have been obtained under laboratory conditions in accordance with the related standards. The values may vary based on use of the appliance and ambient conditions. Power values have been tested in the voltage of 230 V.
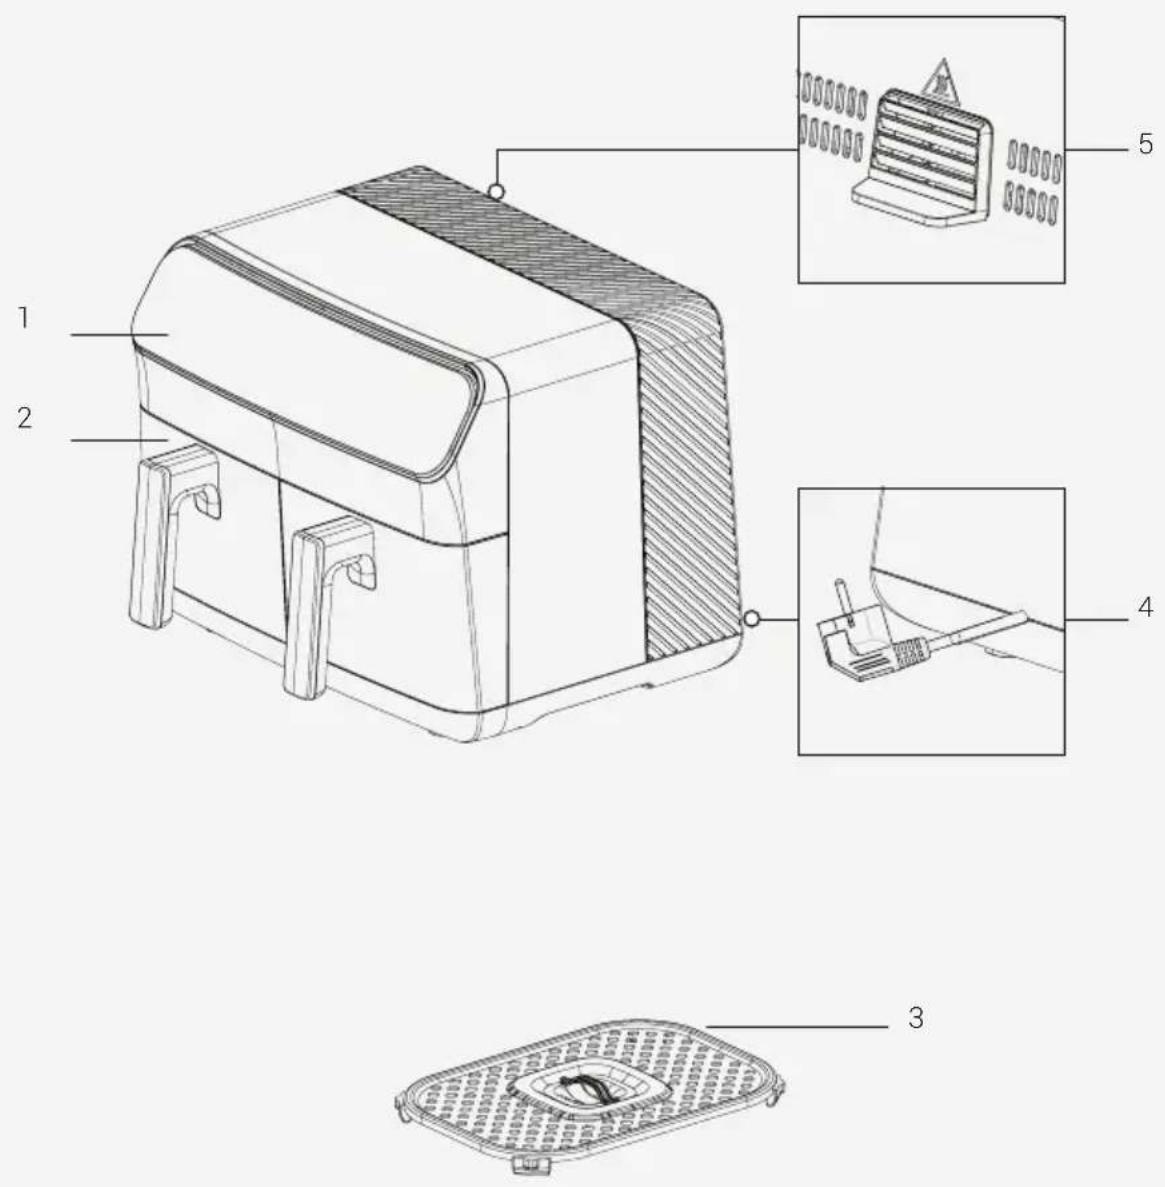
2 Your Hot Air Fryer
- Digital control panel
- Removable cooking chamber
- Cooking rack
- Power cable
- Air outlet
Technical data
| Power supply 220-240 V ~ 50-60 Hz |
| Power consumption 2000-2400W |
| Tray capacity 8,5 L (4,25 L + 4,25 L) |
3 Usage
3.1 Intended use
The appliance is intended for home use only and is not suitable for professional use.

When you use the appliance for the first time, there may be a slight emission of smoke. This is normal.
3.2 Preparing the appliance for use
• Use the appliance in an upright position on a stable, level, clean, dry and non-slip surface.
natural_image
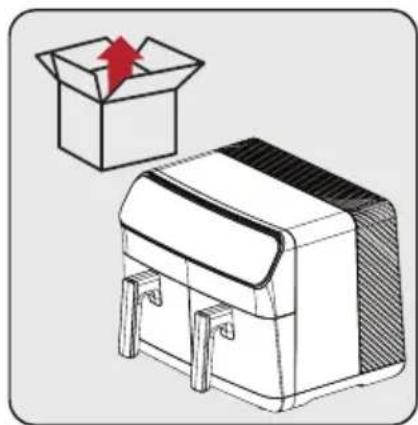
Illustration of a cardboard box with an upward arrow emerging from it, alongside a sketch-style illustration of a closed box (no text or symbols)Before using the appliance for the first time, remove the packaging material and place the appliance on a flat, clean work surface.
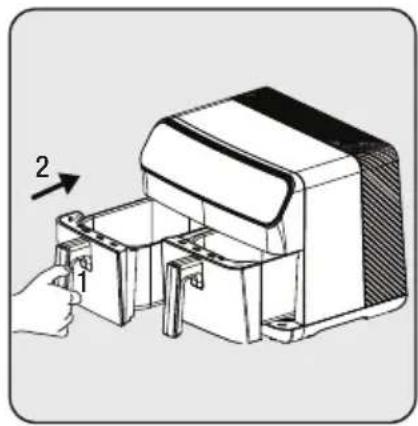
natural_image
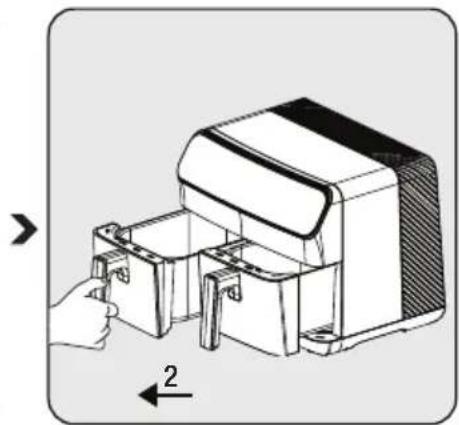
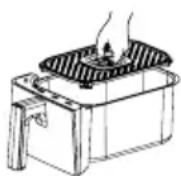
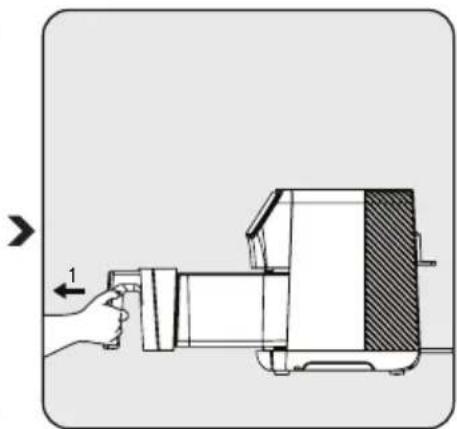
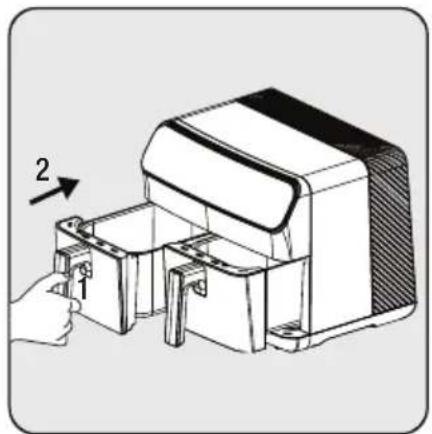
Diagram of a hand inserting into a device into a housing, with an arrow indicating direction (no text or symbols present)To open the removable cooking trays (2), grasp the handles firmly; then pull the chambers out of their slots.
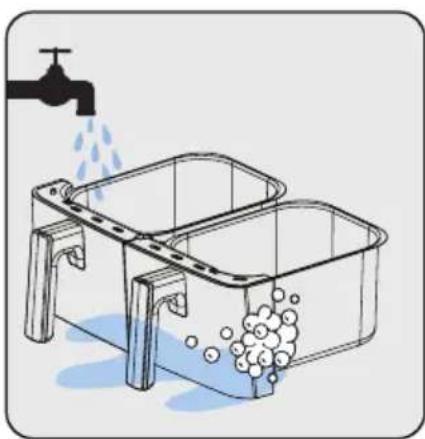
text_image
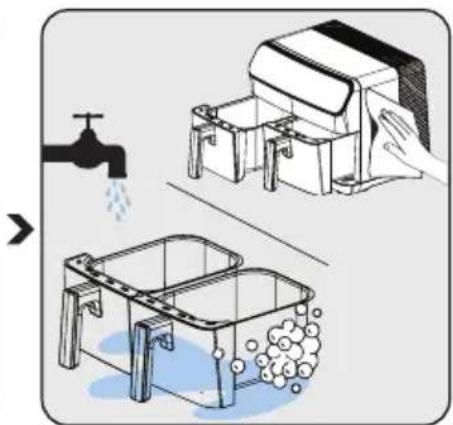
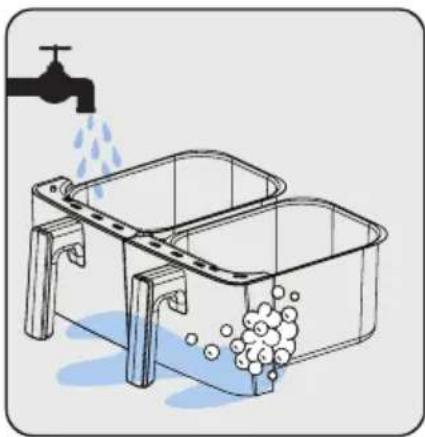
Diagram illustrating a kitchen sink and sink with water displacement, showing water flow from a faucet to a washing machine.Clean the removable cooking trays (2) with warm soapy water.

natural_image
Technical illustration of a mechanical device with labeled components and directional arrow (no text or symbols)After cleaning all parts, insert the cooking tray (2). The appliance is ready for use.

For first time use, set the appliance to "M" mode, set it to the highest temperature and let it run for 10 minutes without adding any ingredients.
3 Usage
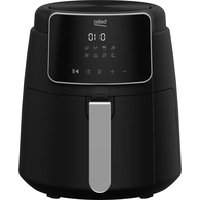
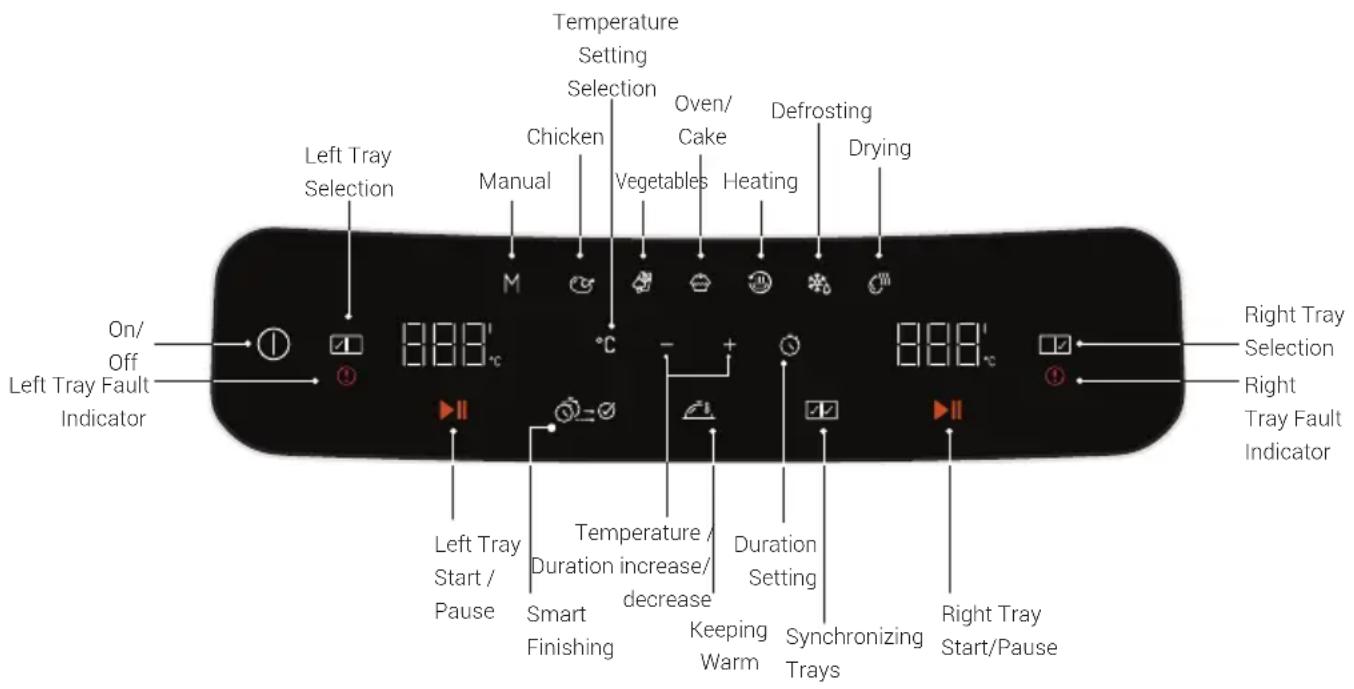
3.3 Control panel and LED display:
| M | Manual | Created for general use. The manual program allows you to prepare your food outside the set programs. |
 | Chicken | This program is specially designed for poultry. You can also cook seafood using this program. |
 | Vegetables | This program is specially designed for vegetables. You can use this program to fry potatoes and all kinds of vegetables. |
 | Oven/Cake | This program is specially designed for baked goods such as cakes and bread. |
 | Heating | This program is specially designed for reheating. |
 | Defrosting | This program is specially designed program for defrosting. |
 | Drying | Specially designed program for drying food. It is used together with the drying accessories. |
text_image
Left Tray Selection Left Tray Fault Indicator On/ Off Temperature Setting Selection Chicken Manual M °C Oven/ Cake Vegetables Heating Defrosting Drying Right Tray Selection Right Tray Fault Indicator Left Tray Start / Pause Temperature / Duration increase/ decrease Keeping Warm Synchronizing Trays Right Tray Start/Pause3 Usage
3.4 Warnings before first use

- When the appliance is in operation and the removable cooking tray (2) is retracted, hot steam will escape from the air outlet (6) and the top of the basket. Therefore, be careful not to burn yourself on the hot steam.
- When using the cooking trays (2) at high temperatures, take care to avoid direct contact.

The best browning and cooking is usually achieved on the cooking rack. It is recommended to use the cooking rack for all recipes and roasts.
3.5 Operation
3.5.1 Selecting and starting a program

If you want to switch to another program after starting the appliance, press and hold the "Start/Stop" key or the "Select Tray" key for 3 seconds. Then select the desired program by selecting the tray again.

- The display shows the automatically set temperatures and times according to the selected cooking functions. You can change these temperatures and times as desired.
- To cancel the cooking process, press and hold the "Start/Stop" key or the "Select chamber" key for 3 seconds. The cooking program you have selected will be cancelled.
3 Usage
text_image
1 2 3
natural_image
Simple line drawing of a two-panel box with a black lid and a speech bubble containing a hand gesture (no text or symbols)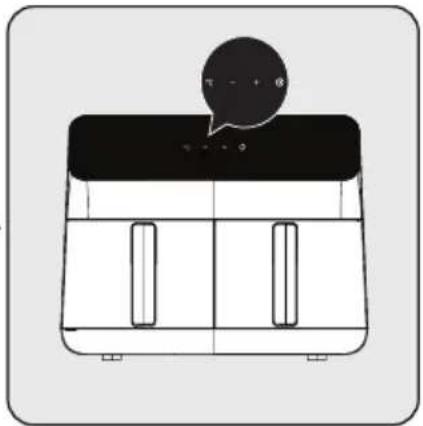
natural_image
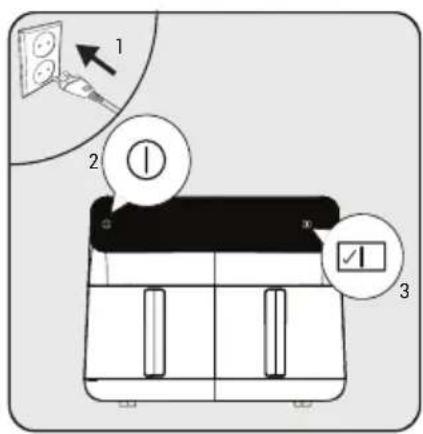
Simple line drawing of a two-panel kitchen appliance with a speech bubble above (no text or symbols)Plug in the appliance and press the on/off button "① After the tray lights come on, select the desired tray "21 After selecting the tray, select the desired program from the Programs menu according to what you wish to cook.
After selecting the desired program, the selected program will light up in bright light. If you want to change the program, you can select one of the dimly lit programs.
After selecting the program, you can set the temperature and cooking time by pressing the temperature and time icons.
Start the cooking process by pressing the start icon. When wishing to cook in the other chamber,
repeat the process by selecting a tray.
3.5.2 Temperature and time setting
Press the "G or " buttons to set the temperature or time. The " " symbol
is activated. Set the temperature and time to the desired value using the "symbol."
3.5.3 Function settings
3.5.3.1 Smart finishing

The 'Smart Finish' function allows you to start and finish 2 different foods simultaneously at different temperatures, cooking times and cooking modes.
- Prepare the cooking settings for the left tray of the appliance as described in section 3.5.1.
- Then select the right tray and adjust the cooking settings.
- Select the 'Smart Finishing' function on the appliance.
- Start the cooking process by pressing one of the start buttons. The appliance will start the cooking process to finish both trays simultaneously.

To select the "Smart Finish" function, the cooking process must not have started in either tray. If cooking has already started in at least one tray, the "Smart Finish" function cannot be selected.
3 Usage
3.5.3.2 Keeping warm

The 'Keep Warm' feature allows you to keep your food warm when it is finished cooking.
- Prepare the desired tray for cooking as described in 3.5.1. Then press the 'Start' button to start cooking.
- Once cooking has started, press the 'Keep Warm' icon. (You can also press the 'Keep warm' icon before you start cooking.)
- After the cooking process is complete, the appliance will maintain the temperature of your food.

- The keep warm function remains activated for 15 minutes.
- You can also select the "Keep warm" function before starting the cooking process.
3.5.3.3 Synchronize cooking

With the synchronize cooking function, you can easily match the trays when you cook the same food in both trays.
- Prepare the left or right tray of the appliance as described in 3.5.1.
- Then select the right chamber of the appliance and press the "Synchronize cooking" icon.
- All temperatures and operating times are synchronized in both trays.
- If you press the "Start" icon, you can perform the same cooking process in two separate trays.

After activating the "Synchronize cooking" function, all changes you make in one tray are transferred to the other.
3.6 Cooking

You will achieve better results if you mix the food with a small amount of oil using brush the food with oil before placing it in the cooking tray.

Do not touch the removable cooking trays when they are hot, except for the handles.
3 Usage
natural_image
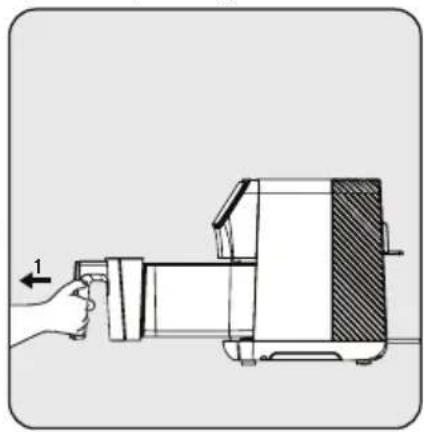
Technical illustration of a mechanical device with labeled parts and directional arrow (no text or symbols)Remove the cooking tray and place it on a flat, clean surface.
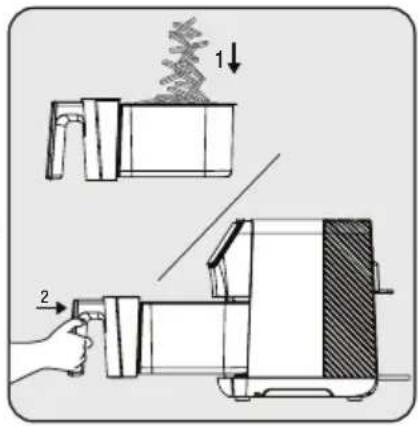
text_image
Diagram illustrating a mechanical device operation with labeled parts and directional arrows indicating process flow.Place the food in the cooking tray. Then insert the tray into the appliance and make sure it is properly seated.
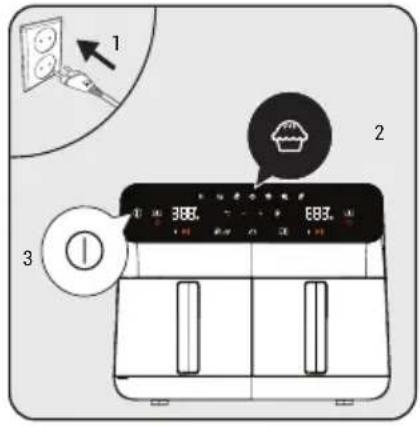
text_image
1 2 3 366. 883.Connect the appliance and select the desired cooking program. Then start the cooking process.
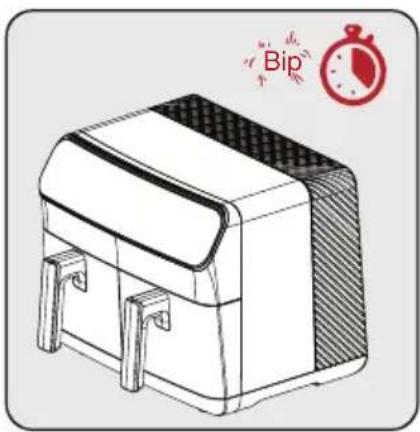
natural_image
Illustration of a closed box with side panels and a stopwatch icon (no text or symbols on the box itself)When the selected cooking time is up, a warning tone will sound and the appliance will automatically stop cooking.

natural_image
Illustration of a hand operating a kitchen grater with a hand holding a tool (no text or symbols visible)Remove the tray and check if the food is fully cooked. If further cooking is required, you can extend the cooking time a little more.
natural_image
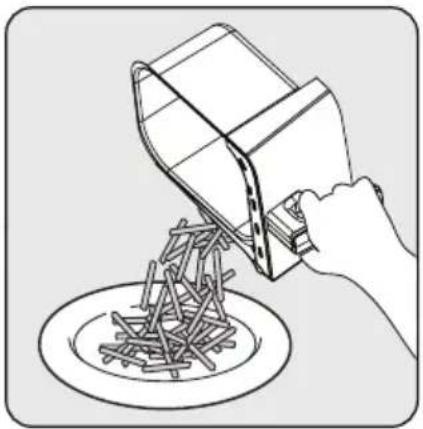
Illustration of a hand pouring liquid into a bowl of noodles (no text or symbols)When the process is complete, transfer the cooked food to a bowl or plate.
natural_image
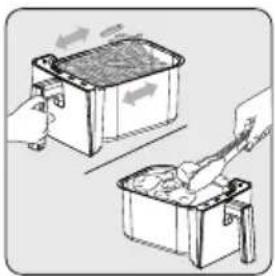
Illustration of two hand-drawn containers with arrows indicating process flow (no text or symbols)• To ensure even cooking, carefully remove and shake the cooking tray midway through the cooking process, or use tongs to turn the cooking food so as not to scratch the tray.
- Do this procedure more often if you are doing a long cooking cycle or if you want crispier results.
3 Usage


natural_image
Illustration of a mechanical device with a red container and black casing (no text or symbols)Do not allow the cooking basket to touch the outside of the appliance as the surface of the cooking tray (2) will be hot during and after cooking.
- Let the food rest for 5 to 10 seconds before removing it from the removable cooking tray (2).
- Use tongs to remove coarse or soft food from the cooking tray without damaging the inner surface of the appliance.
- When one batch is ready, the appliance is immediately ready for another batch.


- Note that the device can become very hot during the turning process.
- Do not place the product on your worktop in such a way that it blocks the air outlet channels.
- Do not place any other product on the appliance.
4 Cooking time
The default temperature and time settings of the programs of the appliance are set automatically.
The following table gives an overview of cooking times for different foods. Cooking times depend on the thickness, brand and consistency of the food. The recommended times and quantities should be regarded as approximate.
| Program Food Temperature Duration | |||
| Chicken | Drumstick (4 pieces) 180°C 24 - 30 min | ||
| Chicken Breast (2 * 200 gr) 180°C 24 - 30 min | |||
| Wing (8 pieces) 180 degrees 180°C 22 - 26 min | |||
| Vegetables | Fresh potato 200 g 200°C 20 - 25 min | ||
| Fresh potato 500 g 200°C 24 - 30 min | |||
| Frozen potato 500 g 200°C 20 - 27 min | |||
| Frozen potato 1000 gr 200°C 42 - 48 min | |||
| Potato - Carrot Cubes Garnish 190°C 15 - 20 min | |||
| Onion Ring 190°C 10 - 15 min | |||
| Zucchini and Eggplant (cut into rings - 1 piece) | 180°C 20 - 25 min | ||
| Oven/cake | Muffin 160°C 15 - 19 min | ||
| Defrosting | Minced meat, chicken, meatballs, etc. | 35- 50°C | 15 - 30 min |
| Drying | Tomato (2-3 mm thick) 55°C | 7 - 9 hours | |
| Apple (2-3 mm thick) | 55°C | 7 - 8 hours | |
| Banana (2-3 mm thick) | 60°C | 7 - 9 hours | |
| Eggplant (2-3 mm thick) | 55°C | 7 - 8 hours | |
| Mushroom (3-4 mm thick) | 60°C | 6 - 8 hours | |
| Pineapple (4-5 mm thick) | 60°C | 6 - 8 hours | |
5 Cleaning and maintenance
5.1 Cleaning

Never use gasoline, solvents, abrasive cleaners, metal objects or hard brushes to clean the appliance.
natural_image
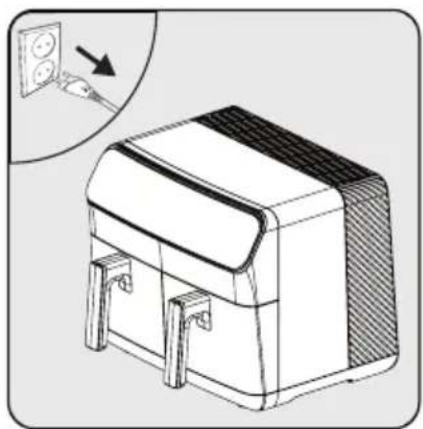
Illustration of a white rectangular device with a sloped top and side connectors, showing internal components and a magnified inset of its electrical outlet (no text or symbols present)Switch off the appliance and disconnect it from the power supply.
natural_image
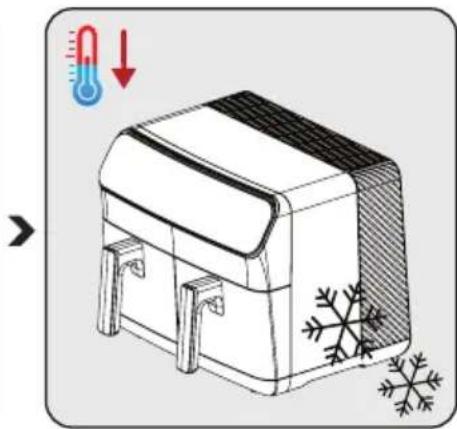
Illustration of a thermosier with a thermometer and snowflake decoration (no text or symbols)Allow the appliance to cool down completely.
natural_image
Diagram of a hand operating a device with a directional arrow indicating left-hand rule (no text or symbols present)Remove the removable cooking basket (5) from the drawer.

Remove the cooking trays from the appliance to allow the appliance to cool down more quickly.
natural_image
Illustration of a kitchen sink with water being poured into it, showing liquid and bubbles (no text or symbols)You can wash the cooking tray in warm soapy water or in the dishwasher.
natural_image
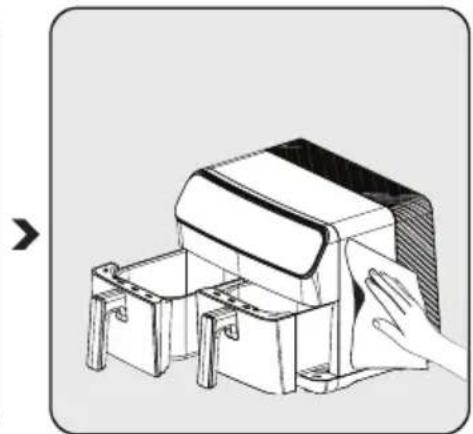
Illustration of a hand cleaning or cleaning a small mechanical device with two compartments (no text or symbols visible)Clean the outside of the appliance with a damp cloth. Dry the outside of the appliance completely.

Always keep the bottom of the cooking tray clean to avoid the accumulation of foreign objects.
5 Cleaning and maintenance
5.2 Storage
• If you do not intend to use the appliance for a longer period of time, store it carefully.
- Unplug the appliance and let it cool down before putting it away.
- Store the appliance in a cool and dry place.
- Keep the appliance and the cable out of the reach of children.
5.3 Transport and shipping
- Transport the appliance in its original packaging during handling and transport. The packaging protects the appliance from physical damage.
• Do not place heavy objects on the appliance or its packaging. The appliance may be damaged.
• If the appliance is dropped, it may stop working or permanent damage may occur.
6 Troubleshooting
| The problem Cause | Solution | ||
| 1 Product does not work | Power outages | Check the power supply and make sure there is power | |
| No power or poor contact at the power outlet | |||
| The power supply voltage of the product | |||
| 2 | The food is insufficiently cooked/ burnt | The cooking time is not correct | Combine recipes and your personal experience to adjust preparation and timing |
| 3 Smoke during first use | Anti-rust grease on the heater of the product | When using for the first time, set the temperature to maximum and preheat for 10-15 minutes to remove the anti-rust oil on the heater of the product | |
| 4 Strange smell | Cooking tray, tray drawer, Foreign body on the heater | Remove the foreign object | |
| 5 | The display shows E1 and the product does not work anymore | Left cooking tray NTC disconnected | Send to service for repair |
| 6 | The display shows E2 and the product no longer works | Left cooking tray NTC does not work | |
| 7 | The display shows E3 and the product has stopped working | Right cooking tray NTC disconnected | |
| 8 | The screen shows E4 and the product has stopped working | Right cooking tray NTC not working | |
| 9 | The screen shows E5 and the product has stopped working | Problem with power PCB (left cooking tray NTC) | |
| 10 | The screen shows E6 and the product has stopped working | Problem with power PCB (right cooking tray NTC) | |
| 11 | The screen shows E7 and the product has stopped working | Problem with the power PCB (Connection problem) | |
| 12 | The screen shows E8 and the product has stopped working | Problem with the power PCB (Connection problem) | |
| 13 | The screen shows E9 and the product has stopped working | Problem with the power PCB | |
| 14 | The display shows E10 and the product has stopped working | Problem with the power PCB (left cooking tray resistance) | |
| 15 | The display shows E10 and the product has stopped working | Problem with the power PCB (right cooking tray resistance) | |
text_image
Technical diagram of a microwave oven with labeled components and exploded viewsnatural_image
Illustration of a cardboard box with an upward arrow emerging from it, alongside a sketch of a closed box (no text or symbols)natural_image
Diagram of a hand inserting a component into a device housing, with no visible text or symbolstext_image
Diagram illustrating a kitchen cleaning procedure with labeled components and water displacement indicationnatural_image
Technical illustration of a mechanical device with labeled parts and directional arrow (no text or symbols)natural_image
Simple line drawing of a two-panel computer case with a speech bubble containing a hand gesture (no text or symbols)natural_image
Simple line drawing of a two-panel kitchen appliance with a speech bubble above (no text or symbols)natural_image
Diagram of a mechanical device with labeled parts and directional arrow (no text or symbols)text_image
Diagram illustrating a two-step process of a device being processed, labeled with steps 1 and 2.natural_image
Illustration of a mechanical device with a side panel and a stopwatch icon (no text or symbols on the device itself)natural_image
Diagram of a hand operating a kitchen appliance with a hand gesture indicating left-hand rule (no text or symbols present)natural_image
Line drawing of a hand pouring liquid into a bowl of noodles (no text or symbols)natural_image
Illustration of two containers with arrows indicating process direction (no text or symbols)natural_image
Illustration of a mechanical device with a red box and black casing (no text or symbols)natural_image
Illustration of a white rectangular device with a sloped top and side connectors, showing internal components and a magnified inset of its electrical outlet (no text or symbols)natural_image
Illustration of a thermosier with a thermometer and snowflake pattern (no text or symbols)natural_image
Diagram of a hand operating a device with a directional arrow indicating left motion (no text or symbols present)natural_image
Illustration of a sink basin with water droplets and bubbles, connected to a faucet (no text or symbols)natural_image
Illustration of a hand cleaning or assembly process with a mechanical device (no text or symbols visible)Cher/Chère client(e),
text_image
Technical diagram of a microwave oven with labeled components and exploded viewsnatural_image
Illustration of a cardboard box with an upward arrow emerging from it, next to a stylized open box (no text or symbols)natural_image
Diagram of a hand inserting into a device into a housing, with an arrow indicating direction (no text or symbols present)text_image
Diagram illustrating a kitchen cleaning procedure with faucet, water drop, and washing machine setupnatural_image
Technical illustration of a mechanical device with labeled parts and directional arrow (no text or symbols)text_image
Diagram showing a device with labeled parts and instructions, including a switch and a numbered callout.
natural_image
Simple line drawing of a two-panel box with a black lid and a speech bubble containing a hand gesture (no text or symbols)
natural_image
Simple line drawing of a two-panel kitchen appliance with a speech bubble above (no text or symbols)natural_image
Technical illustration of a device with labeled parts and directional arrow (no text or symbols)text_image
Diagram illustrating a mechanical device operation with labeled parts and directional arrows indicating process flow.natural_image
Illustration of a closed box with lid and side pockets, featuring a stopwatch icon with the word 'Bip' (no text or symbols on the box itself)natural_image
Illustration of a hand operating a kitchen grater with a hand gesture indicating press (no text or symbols present)natural_image
Illustration of a hand pouring liquid into a bowl of noodles (no text or symbols)natural_image
Illustration of two hand-drawn containers with arrows indicating process, no text or symbols presentnatural_image
Illustration of a mechanical device with two red containers, no text or symbols presentnatural_image
Illustration of a white rectangular device with a sloped top and side connectors, showing internal components and a magnified inset of its electrical outlet (no text or symbols)natural_image
Illustration of a thermosier with a thermometer and snowflake decoration (no text or symbols)natural_image
Diagram of a hand operating a mechanical device with a hatched section, showing no text or symbols.natural_image
Illustration of a kitchen sink with water and bubbles rising, no text or symbols presentnatural_image
Technical line drawing of a mechanical device with a hand interacting with it (no text or symbols present)text_image
Technical diagram of a microwave oven with labeled components and exploded viewsnatural_image
Illustration of a cardboard box with an upward arrow emerging from it, alongside a sketch-style illustration of a closed box (no text or symbols)natural_image
Diagram of a hand inserting into a device into a housing, with an arrow indicating direction (no text or symbols present)text_image
Diagram illustrating a kitchen cleaning procedure with labeled components and water displacement indicationnatural_image
Technical illustration of a mechanical device with labeled parts and directional arrow (no text or symbols)natural_image
Simple line drawing of a two-panel box with a black lid and a speech bubble containing a hand gesture (no text or symbols)
natural_image
Simple line drawing of a two-panel kitchen appliance with a speech bubble above (no text or symbols)natural_image
Diagram of a hand inserting or removing a device into a container, showing internal components and part numbers (no text or symbols present)text_image
Diagram illustrating a mechanical device operation with labeled parts and directional arrows indicating process flow.natural_image
Illustration of a closed box with a side panel and a stopwatch icon (no text or symbols on the box itself)natural_image
Illustration of a hand operating a kitchen grater with a hand gesture indicating left-hand rule (no text or symbols present)natural_image
Line drawing of a hand pouring liquid into a bowl of noodles (no text or symbols)natural_image
Illustration of two hand-drawn containers with arrows indicating process flow (no text or symbols)natural_image
Illustration of a mechanical device with a red container and black casing (no text or symbols)natural_image
Line drawing of a box with two side pockets and a wall, showing a close-up of an electrical outlet (no text or symbols)natural_image
Illustration of a thermosier with a thermometer and snowflake decoration (no text or symbols)natural_image
Diagram of a hand operating a mechanical device with a hatched section, showing no text or symbols.natural_image
Illustration of a kitchen sink with water and bubbles rising, no text or symbols presentnatural_image
Technical line drawing of a mechanical device with a hand interacting with it (no text or symbols present)text_image
Technical diagram of a microwave oven with labeled components and exploded viewsnatural_image
Illustration of a cardboard box with an upward arrow emerging from it, next to a stylized open box (no text or symbols)natural_image
Diagram of a mechanical device with a hand inserting into a housing, showing internal components and an arrow indicating direction (no text or symbols present)text_image
Diagram illustrating a kitchen sink and sink with water spray, showing water flow from a faucet to a washing machine.natural_image
Technical line drawing of a mechanical device with a hand operating a housing (no text or symbols)natural_image
Simple line drawing of a two-panel box with a black lid and a speech bubble containing a hand gesture (no text or symbols)natural_image
Simple line drawing of a two-panel refrigerator with a speech bubble above the top panel (no text or symbols)natural_image
Technical illustration of a mechanical device with labeled parts and directional arrow (no text or symbols)text_image
Diagram illustrating a two-step process of a machine tool, showing step 1 with an arrow and step 2 with a hand holding the tool.natural_image
Illustration of a briefcase with a side panel and a stopwatch icon (no text or symbols on the main object)natural_image
Diagram of a hand operating a kitchen grater with a hand gesture indicating left-hand rule (no text or symbols present)natural_image
Line drawing of a hand pouring liquid into a bowl of noodles (no text or symbols)natural_image
Illustration of two hand-drawn containers with arrows indicating process flow (no text or symbols)natural_image
Illustration of a mechanical device with a red container and black casing (no text or symbols)natural_image
Illustration of a box with a lid and two side pockets, showing a close-up of an electrical outlet (no text or symbols present)natural_image
Illustration of a thermosier with a thermometer and snowflake, no text or symbols presentnatural_image
Diagram of a hand operating a cylindrical device with a shaded section, no text or symbols presentnatural_image
Illustration of a washing machine with liquid and bubbles, no text or symbols presentnatural_image
Technical line drawing of a mechanical device with a hand touching it (no text or symbols)natural_image
Simple line drawing of a rice cooker (no text or symbols)FRL 5388 B
RU
natural_image
Illustration of a cardboard box with an upward arrow emerging from it, alongside a sketch-style illustration of a closed box (no text or symbols)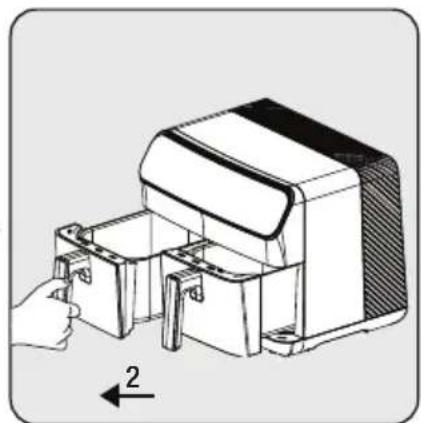
natural_image
Technical line drawing of a mechanical device with a hand operating it, showing internal components and a numbered arrow indicating direction (no text or symbols present)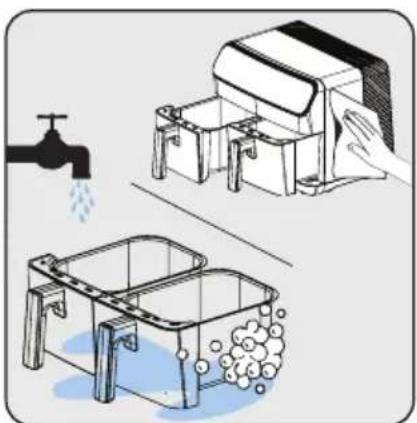
natural_image
Illustration of a kitchen sink and two washers with water splashing, showing different components (no text or symbols)natural_image
Technical illustration of a mechanical device with labeled parts and directional arrow (no text or symbols)natural_image
Simple line drawing of a two-panel box with a black lid and a speech bubble containing a hand gesture (no text or symbols)
natural_image
Simple line drawing of a two-panel kitchen appliance with a speech bubble above (no text or symbols)natural_image
Diagram of a device with labeled parts and directional arrow (no text or symbols present)text_image
Diagram illustrating a mechanical device operation with labeled parts and directional arrows indicating process flow.natural_image
Illustration of a closed box with side panels and a stopwatch icon (no text or symbols on the box itself)natural_image
Illustration of a hand operating a kitchen grater with a hand gesture indicating left-hand rule (no text or symbols present)natural_image
Line drawing of a hand pouring liquid into a bowl of noodles (no text or symbols)natural_image
Illustration of two hand-drawn containers with arrows indicating process direction (no text or symbols)natural_image
Illustration of a mechanical device with two red components, no text or symbols presentnatural_image
Illustration of a white rectangular device with a sloped top and side connectors, showing internal components and a magnified inset of its electrical outlet (no text or symbols present)natural_image
Illustration of a thermosier with a thermometer and snowflake decoration (no text or symbols)natural_image
Diagram of a hand operating a mechanical device with a hatched section, showing no text or symbols.natural_image
Illustration of a washing machine with liquid and bubbles, no text or symbols presentnatural_image
Technical line drawing of a mechanical device with a hand holding a cloth (no text or symbols)text_image
Technical diagram of a microwave oven with labeled components and exploded viewsnatural_image
Illustration of a cardboard box with an upward arrow emerging from it, alongside a sketch-style illustration of a closed box (no text or symbols)natural_image
Diagram of a hand inserting into a device into a housing, with an arrow indicating direction (no text or symbols present)text_image
Diagram illustrating a kitchen sink and drain with water flow, showing components like a faucet and washing machine.natural_image
Technical illustration of a mechanical device with labeled parts and directional arrow (no text or symbols)text_image
Diagram showing three labeled steps of a device or appliance with icons and arrows, likely illustrating a process or installation.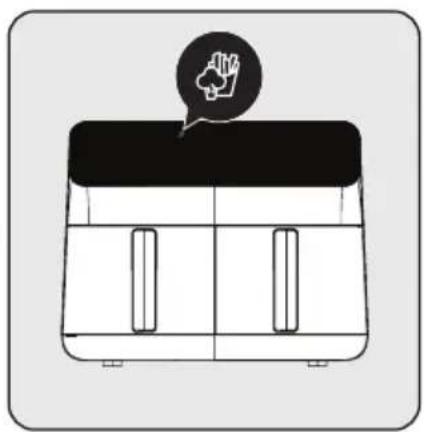
natural_image
Simple line drawing of a two-panel computer case with a speech bubble containing a hand gesture (no text or symbols)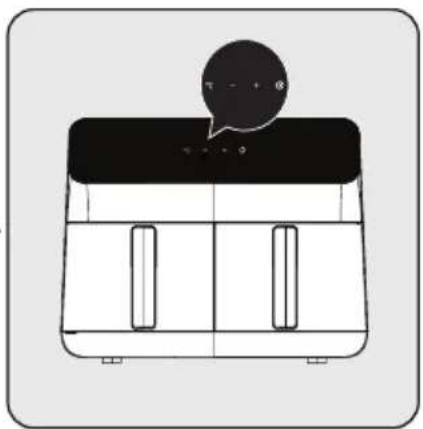
natural_image
Simple line drawing of a two-panel kitchen appliance with a speech bubble above (no text or symbols)natural_image
Technical illustration of a mechanical device with labeled parts and directional arrow (no text or symbols)text_image
Diagram illustrating a mechanical device operation with labeled parts and directional arrows indicating process flow.natural_image
Illustration of a closed box with a side panel and a stopwatch icon (no text or symbols on the box itself)natural_image
Diagram of a hand operating a kitchen grater with a hand gesture indicating left-hand rule (no text or symbols present)natural_image
Line drawing of a hand pouring liquid into a bowl of noodles (no text or symbols)natural_image
Illustration of two hand-drawn containers with arrows indicating process flow (no text or symbols)natural_image
Illustration of a mechanical device with a red container and black casing (no text or symbols)natural_image
Line drawing of a box with two side pockets and a wall, showing a close-up of an electrical outlet (no text or symbols present)natural_image
Illustration of a thermosier with a thermometer and snowflake decoration (no text or symbols)natural_image
Diagram of a hand operating a mechanical device with a hatched section, showing no text or symbols.natural_image
Illustration of a kitchen sink with water and bubbles rising, no text or symbols presentnatural_image
Technical line drawing of a mechanical device with a hand interacting with it (no text or symbols present)text_image
Technical diagram of a microwave oven with labeled components and exploded viewsnatural_image
Illustration of a cardboard box with an open lid and a closed trunk, accompanied by a red arrow pointing upward (no text or symbols)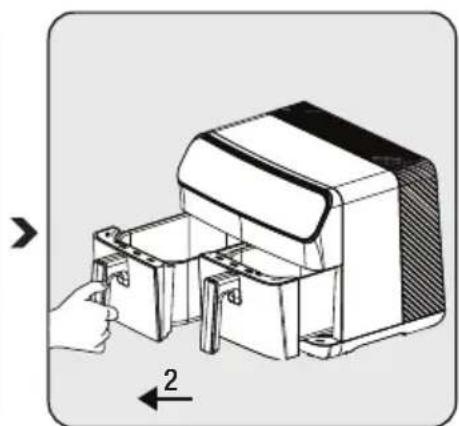
natural_image
Diagram of a hand inserting a component into a device, showing internal components and a numbered arrow (no text or symbols present)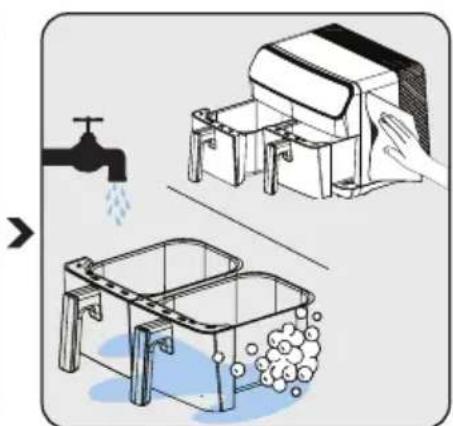
text_image
Diagram illustrating a kitchen cleaning procedure with labeled components and water displacement indicatorsnatural_image
Technical illustration of a mechanical device with labeled parts and directional arrow (no text or symbols)natural_image
Simple line drawing of a two-panel computer case with a speech bubble containing a hand gesture (no text or symbols)
natural_image
Simple line drawing of a two-panel kitchen appliance with a speech bubble above (no text or symbols)natural_image
Technical illustration of a mechanical device with labeled parts and directional arrow (no text or symbols)text_image
Diagram illustrating a mechanical device operation with labeled parts and directional arrows indicating process flow.natural_image
Illustration of a closed box with side panels and a stopwatch icon (no text or symbols on the box itself)natural_image
Illustration of a hand operating a kitchen grater with a hand holding a tool (no text or symbols visible)natural_image
Line drawing of a hand pouring liquid into a bowl of noodles (no text or symbols)natural_image
Illustration of two hands using a tool to lift or remove material from a container (no text or symbols present)natural_image
Illustration of a mechanical device with a red container and black casing (no text or symbols)natural_image
Line drawing of a box with two side pockets and a wall, showing a close-up of an electrical outlet (no text or symbols present)natural_image
Illustration of a thermosier with a thermometer and snowflake decoration (no text or symbols)natural_image
Diagram of a hand operating a mechanical device with a hatched section, showing no text or symbols.natural_image
Illustration of a kitchen sink with water and bubbles rising, no text or symbols presentnatural_image
Technical line drawing of a mechanical device with a hand cleaning it (no text or symbols)text_image
Technical diagram of a microwave oven with labeled components and exploded viewsZnakovi na uređaju i vrednosti navedene u dokumentima priloženim uz proizvod su dobijeni u laboratorijskim uslovima u skladu sa relevantnim standardima. Vrednosti se mogu razlikovati u zavisnosti od upotrebe uređaja i uslova okoline. Vrednosti snage su testirane na naponu od 230 V.
natural_image
Illustration of a cardboard box with an upward arrow emerging from it, alongside a sketch-style illustration of a closed box (no text or symbols)Pre prve upotrebe aparata, uklonite ambalažni materijal i stavite uređaj na ravnu, čistu radnu površinu.

natural_image
Diagram of a hand inserting into a device into a housing, with an arrow indicating direction (no text or symbols present)text_image
Diagram illustrating a kitchen sink and sink with water displacement, showing water flow from a faucet to a washing machine.Očistite uklonjive plehove za kuvanje (2) toplom sapunicom.
natural_image
Technical illustration of a mechanical device with a hand operating a housing component (no text or symbols)Nakon čišćenja svih delova, umetnite pleh za kuvanje (2). Aparat je spreman za upotrebu.

Za prvu upotrebu, postavite aparat na "M" mod, postavite ga na najvišu temperaturu i ostavite da radi 10 minuta bez dodavanja sastojaka.
3 Upotreba
3.3 Kontrolna tabla i LED displej:
natural_image
Simple line drawing of a two-panel computer case with a speech bubble containing a hand gesture (no text or symbols)
natural_image
Simple line drawing of a two-panel kitchen appliance with a speech bubble above (no text or symbols)natural_image
Technical illustration of a mechanical device with labeled parts and directional arrow (no text or symbols)text_image
Diagram illustrating a mechanical device operation with labeled parts and directional arrows indicating process flow.natural_image
Illustration of a closed box with side panels and a stopwatch icon (no text or symbols on the box itself)Kada istekne odabrano vreme kuvanja, čuje se ton upozorenja i uređaj automatski zaustavlja kuvanje.
natural_image
Illustration of a hand operating a kitchen grater with a hand holding a tool (no text or symbols visible)natural_image
Line drawing of a hand pouring liquid into a bowl of noodles (no text or symbols)natural_image
Illustration of two hands using a tool to lift or remove material from a container (no text or symbols present)- Kako biste osigurali ravnomerno kuvanje, pažljivo izvadite i protresite posudu za kuvanje usred procesa kuvanja ili upotrebite klešta za okretanje hrane prilikom kuvanja kako ne biste izgrebali pleh.
- Radite to češće ako imate dugi ciklus kuvanja ili ako želite hrskaviju hranu.
3 Upotreba


natural_image
Illustration of a mechanical device with a red container and black casing (no text or symbols)natural_image
Line drawing of a box with two side pockets and a wall, showing a close-up of an electrical outlet (no text or symbols)natural_image
Illustration of a thermosier with a thermometer and snowflake decoration (no text or symbols)Pustite da se aparat potpuno ohladi.

natural_image
Diagram of a hand operating a mechanical device with a hatched section, showing no text or symbols.Izvadite uklonjivu korpu za kuvanje (5) iz fioke.

Uklonite posude za kuvanje iz uređaja kako biste omogućili da se uređaj brže ohladi.
natural_image
Illustration of a kitchen sink with water and bubbles rising, no text or symbols presentnatural_image
Technical line drawing of a mechanical device with a hand interacting with it (no text or symbols present)5.3 Transport i otprema
- Prevozite uređaj u originalnoj ambalaži tokom rukovanja i transporta. Ambalaža štiti uređaj od fizičkih oštećenja.
- Ne stavljajte teške predmete na uređaj ili njegovu ambalažu. Uređaj može biti oštećen.
- Ako aparat padne, može prestati raditi ili može doći do trajnog oštećenja.
natural_image
Illustration of a cardboard box with an upward arrow emerging from it, next to a white delivery box (no text or symbols)natural_image
Technical line drawing of a mechanical device with a hand operating it, showing internal components and a numbered arrow indicating direction (no text or symbols present)natural_image
Illustration of a kitchen sink with water spray and a hand cleaning the sink (no text or symbols)natural_image
Technical illustration of a mechanical device with labeled parts and directional arrow (no text or symbols)natural_image
Simple line drawing of a rectangular container with two side windows and a black lid, topped with a speech bubble containing a hand icon (no text or symbols)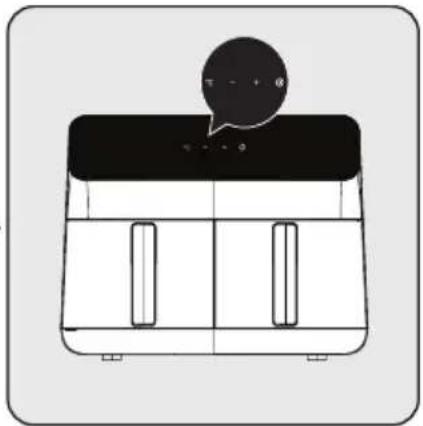
natural_image
Simple line drawing of a two-panel kitchen appliance with a speech bubble on top (no text or symbols)natural_image
Technical line drawing of a mechanical device with labeled parts and directional arrow (no text or symbols)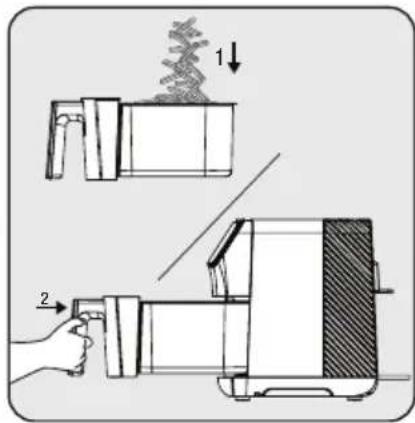
text_image
Diagram illustrating a step-by-step process of a food or kitchen appliance, labeled with steps 1 and 2.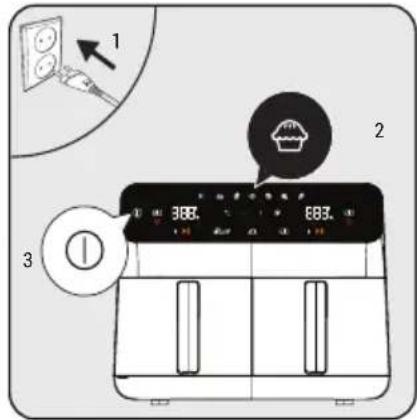
text_image
1 2 3 366. E83.natural_image
Illustration of a closed box with lid and side pockets, accompanied by a stopwatch icon with 'Bip' text (no other symbols or text)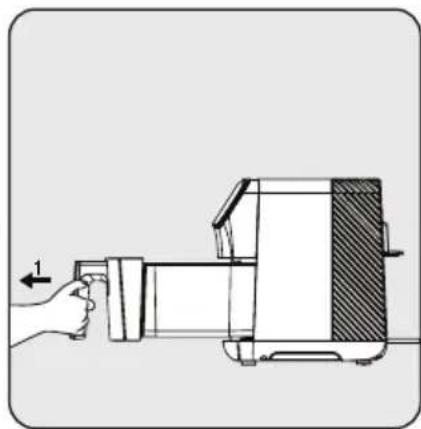
natural_image
Diagram of a hand operating a kitchen grater with a directional arrow indicating motion (no text or symbols present)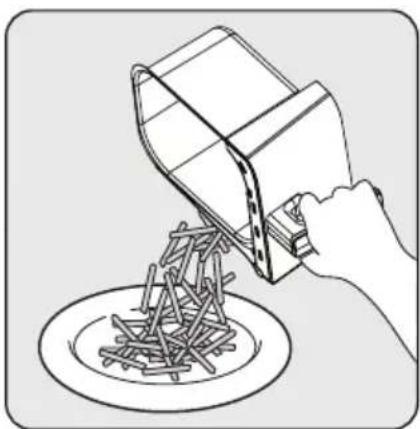
natural_image
Line drawing of a hand pouring liquid into a bowl of noodles (no text or symbols)natural_image
Illustration of two containers with arrows indicating process, one being filled with food and the other holding a tool (no text or symbols)natural_image
Illustration of a mechanical device with a red box and metal frame (no text or symbols)natural_image
Illustration of a box with a lid and two side clips, showing a close-up of an electrical outlet (no text or symbols present)natural_image
Illustration of a thermosier with a thermometer and snowflake decoration (no text or symbols)natural_image
Diagram of a hand operating a kitchen grater with a hand valve, showing no text or symbolsnatural_image
Illustration of a kitchen sink with water and bubbles, showing a faucet and drain (no text or symbols)natural_image
Technical line drawing of a mechanical device with a hand cleaning it (no text or symbols)text_image
Technical diagram of a microwave oven with labeled components and exploded viewsnatural_image
Illustration of a cardboard box with an upward arrow emerging from it, alongside a sketch-style illustration of a closed box (no text or symbols)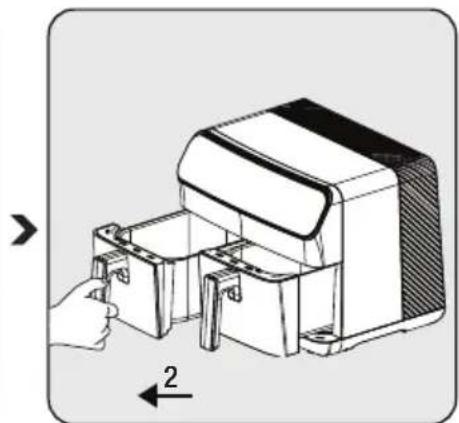
natural_image
Diagram of a hand inserting a small component into a device housing (no text or symbols visible)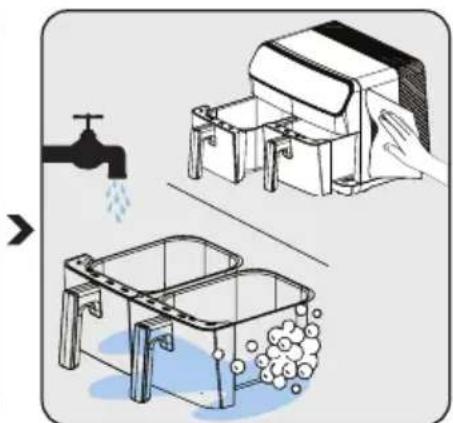
text_image
Diagram illustrating a kitchen sink and sink with water displacement, showing water flow from a faucet to a washing machine.natural_image
Technical illustration of a mechanical device with labeled parts and directional arrow (no text or symbols)natural_image
Simple line drawing of a two-panel computer case with a speech bubble containing a hand gesture (no text or symbols)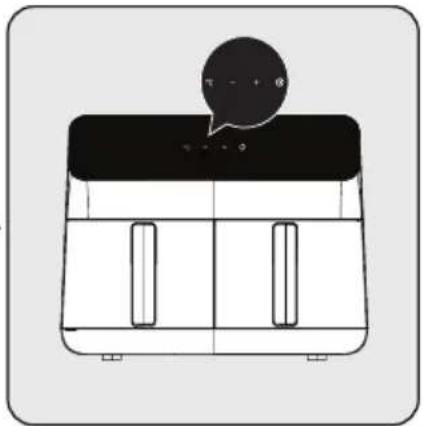
natural_image
Simple line drawing of a two-panel kitchen appliance with a speech bubble above (no text or symbols)natural_image
Diagram of a mechanical device with labeled parts and directional arrow (no text or symbols)text_image
Diagram illustrating a two-step process of a machine tool, showing step 1 with an arrow and step 2 with a hand holding the tool.natural_image
Illustration of a closed box with a lid and side pockets, accompanied by a stopwatch icon with the word 'Bip' (no text or symbols on the box itself)natural_image
Illustration of a hand operating a kitchen machine with a hand gesture indicating left-hand rule (no text or symbols present)natural_image
Line drawing of a hand pouring liquid into a bowl of noodles (no text or symbols)natural_image
Illustration of a mechanical device with two red containers, no text or symbols presentnatural_image
Line drawing of a box with two side pockets and a wall, showing a close-up of an electrical outlet (no text or symbols present)natural_image
Illustration of a thermosier with a thermometer and snowflake decoration (no text or symbols)natural_image
Diagram of a hand operating a mechanical device with a hatched section, showing no text or symbols.natural_image
Illustration of a kitchen sink with water and bubbles, no text or symbols presentnatural_image
Technical line drawing of a mechanical device with a hand interacting with it (no text or symbols present)natural_image
Illustration of a portable electrical outlet device with a close-up inset showing the outlet (no text or symbols)natural_image
Illustration of a thermosier with a thermometer and snowflake pattern (no text or symbols)natural_image
Diagram of a hand operating a sewing machine with a shaded section, showing no text or symbols.من الدرج.
natural_image
Illustration of a kitchen sink with water being poured into a basin, using a faucet (no text or symbols)natural_image
Line drawing of a hand cleaning or cleaning a mechanical device with three compartments (no text or symbols)natural_image
Illustration of a mechanical device with a red box and warning symbol (no text or labels)natural_image
Diagram of a hand inserting a device into a container with labeled parts (no text or symbols present)text_image
Technical diagram showing two-step assembly of a machine tool, labeled with components 1 and 2.natural_image
Illustration of a closed box with a side panel and a stopwatch icon (no text or symbols on the box itself)natural_image
Illustration of a hand operating a kitchen grater with a hand gesture indicating left-hand rule (no text or symbols present)natural_image
Line drawing of a hand pouring liquid into a bowl (no text or symbols)natural_image
Illustration of two containers with arrows indicating process flow, no text or symbols present3.5.3.2
natural_image
Simple line drawing of a rectangular container with two side windows and a black lid, topped with a speech bubble containing a hand icon (no text or symbols)natural_image
Simple line drawing of a two-panel refrigerator with a speech bubble on top (no text or symbols)natural_image
Illustration of a cardboard box with an upward arrow emerging from it, alongside a sketch-style illustration of a closed box (no text or symbols)natural_image
Technical line drawing of a mechanical device with a hand operating it, showing internal components and a 2-unit arrow indicator (no text or symbols present)natural_image
Illustration of a kitchen sink and two washers with water splashing, no text or symbols presentnatural_image
Technical illustration of a mechanical device with labeled parts and directional arrow (no text or symbols)text_image
Technical diagram of a device with labeled parts and exploded views, including front, side, and top views.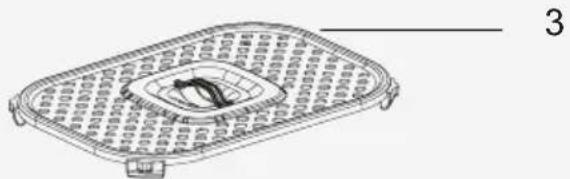
natural_image
Line drawing of a rectangular device with internal components and a central circular element (no text or symbols)natural_image
Simple line drawing of a rice cooker (no text or symbols)FRL 5388 B
AR