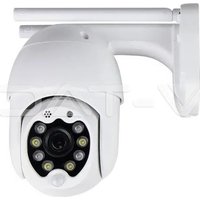
VT-5158 - Surveillance Camera V-TAC - Free user manual and instructions
Find the device manual for free VT-5158 V-TAC in PDF.


| Product Type | Surveillance Camera |
| Brand | V-TAC |
| Model | VT-5158 |
| Video Resolution | 2304 x 1296 pixels (3 MP) |
| Image Sensor | CMOS HD 3 Megapixels |
| Lens | 3.6 mm |
| Video Compression | H.265 / MJPEG |
| Frame Rate | 25 to 30 fps |
| Night Vision | 10 meters (IR) |
| Pan Angle | 220° |
| Tilt Angle | 90° |
| Power Supply | 12 V DC ±5% |
| Wireless Connectivity | Wi-Fi 2.4 GHz IEEE 802.11b/g/n |
| Wired Connectivity | RJ-45 LAN Port |
| Local Storage | Micro SD up to 128 GB (not included) |
| Cloud Storage | Free 30-day cloud service, then subscription |
| Audio | Two-way |
| Motion Detection | Yes, with sound alarm |
| Auto Tracking | Yes |
| Protection Rating | IP65 |
| Wireless Security | Encryption WEP / WPA-PSK / WPA2-PSK |
| Mobile App | YCC365 Plus (iOS and Android) |
| Maintenance and Cleaning | Clean the lens with a soft, dry cloth. Do not use abrasive products. |
| Repairability | No user-serviceable parts. Contact after-sales service. |
Frequently Asked Questions - VT-5158 V-TAC
User questions about VT-5158 V-TAC
0 question about this device. Answer the ones you know or ask your own.
Ask a new question about this device
Download the instructions for your Surveillance Camera in PDF format for free! Find your manual VT-5158 - V-TAC and take your electronic device back in hand. On this page are published all the documents necessary for the use of your device. VT-5158 by V-TAC.
USER MANUAL VT-5158 V-TAC
WEEE Number: 80133970
INSTALLATION INSTRUCTION
OUTDOOR WIFI CAMERA
[VT-5158]
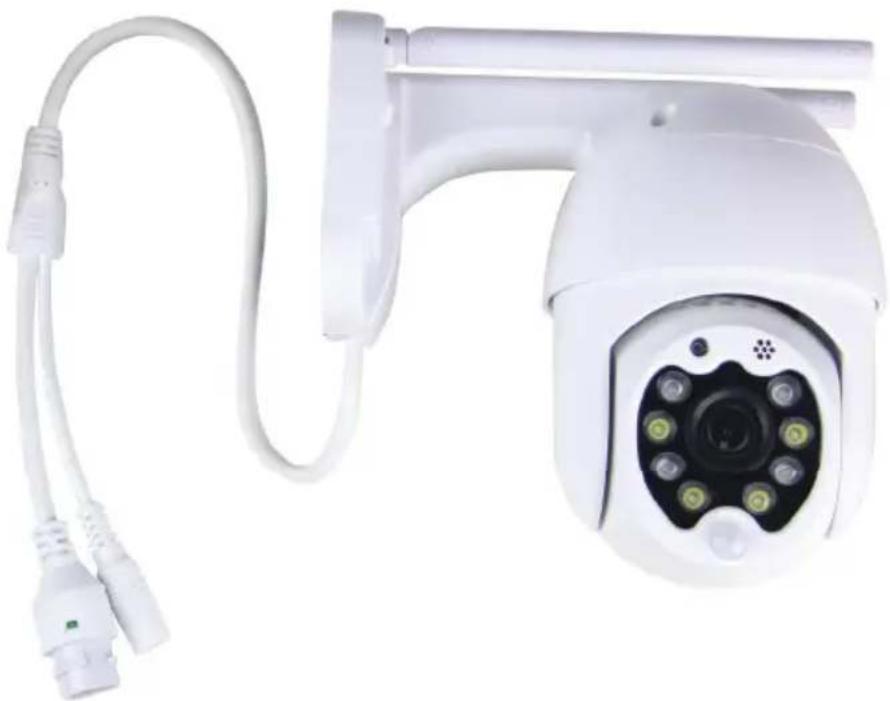
natural_image
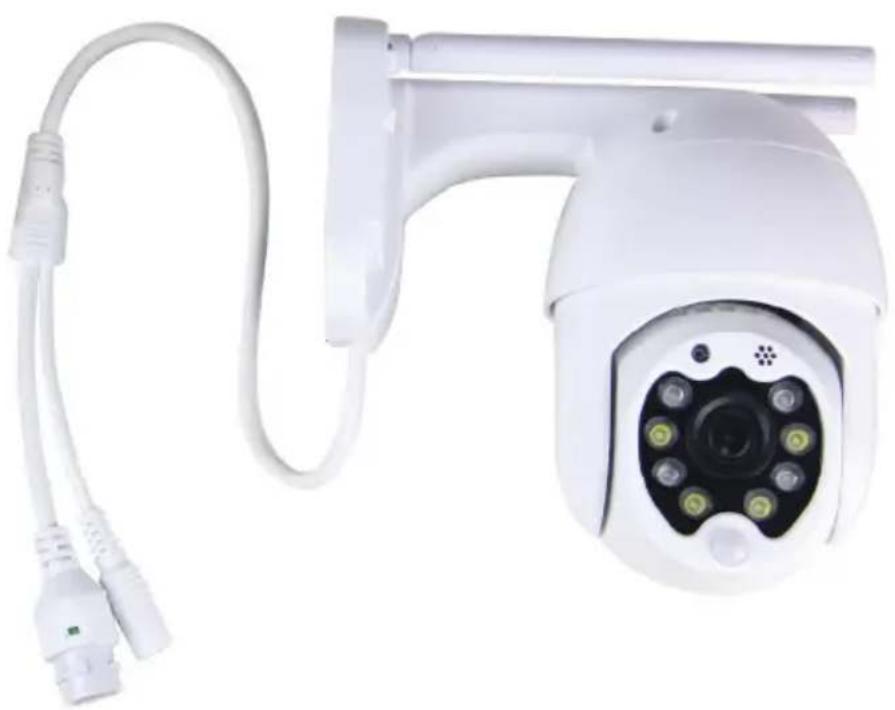
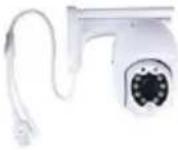
White security camera with attached cable and connector (no visible text or symbols)INTRODUCTION
Thank you for selecting and buying V-TAC product. V-TAC will serve you the best. Please read these instructions carefully before starting the installation and keep this manual handy for future reference. If you have any another query, please contact our dealer or local vendor from whom you have purchased the product. They are trained and ready to serve you at the best.

Multi-Language Manual - QR CODE
Please scan the QR code to access the manual in multiple languages.

This marking indicates that this product should not be disposed of with other household wastes.
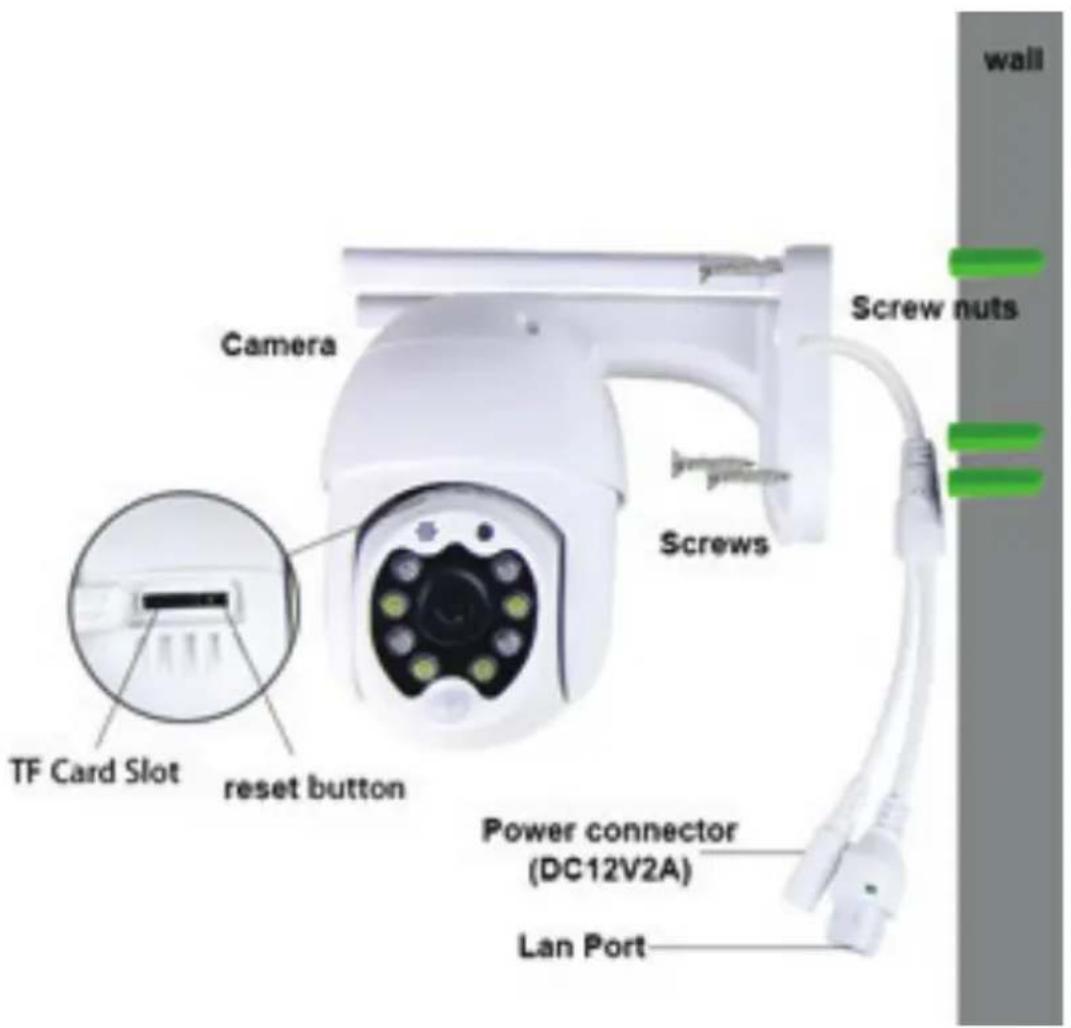
INSTALLATION DIAGRAM
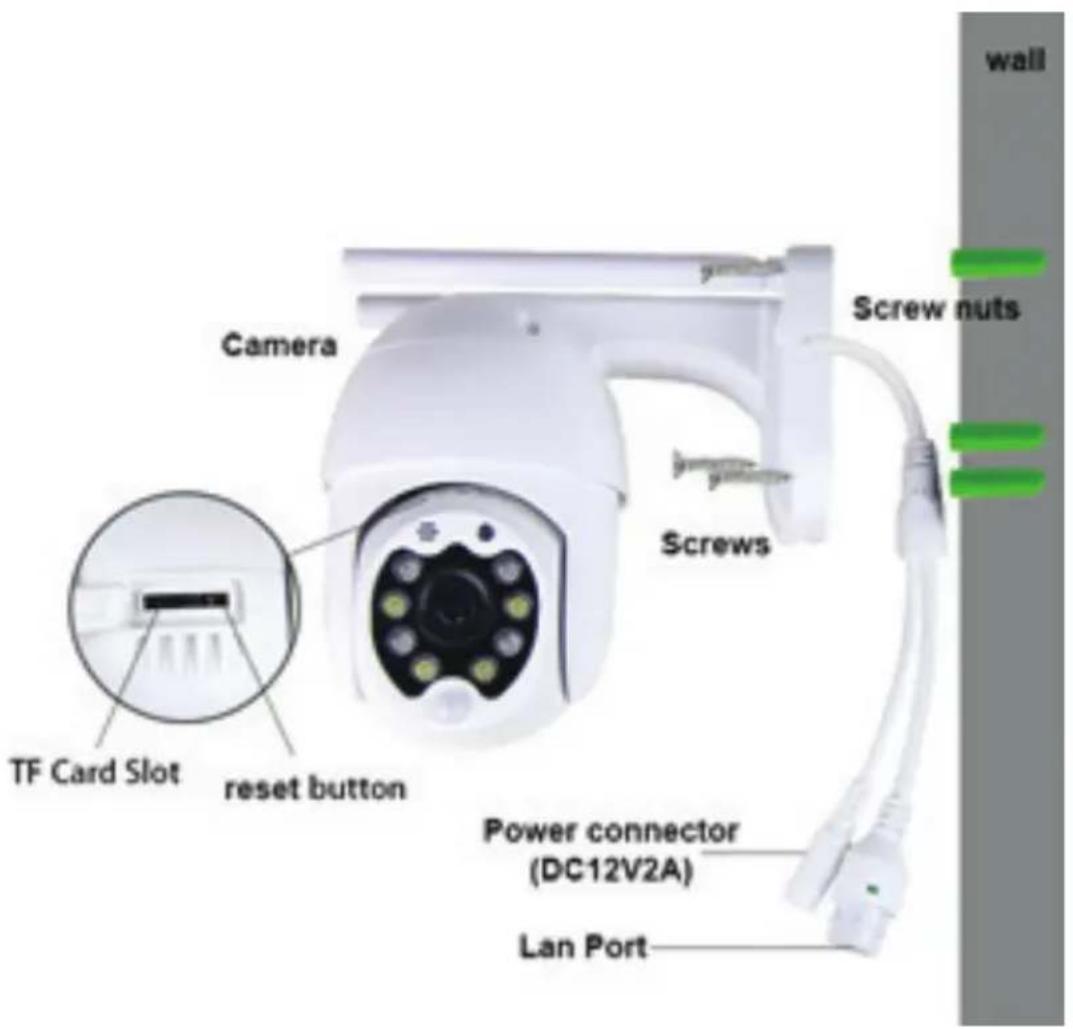
PACKAGING CONTENTS
 |  |  |  |  |  |
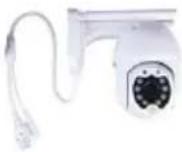
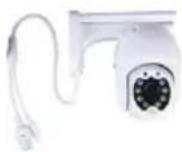
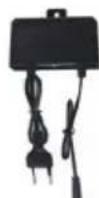
| CAMERA(1PC) | SCREW NUTS(3PCS) | ADAPTER(1PC) | SCREWS(3PCS) | FITTING(1PC) | STEEL PIN(1PC) |
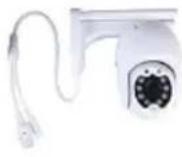
CAMERA (1PC)
SCREW NUTS (3PCS)
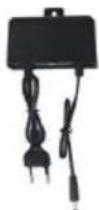
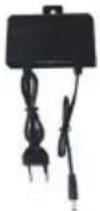
ADAPTER (1PC)
SCREWS (3PCS)
FITTING (1PC)
MAIN FUNCTION

HD picture

Smart pan/Tilt
Remote view

Motion detection

Two way audio
TF card storage
Alarm Plush
Smooth zoom

WIFI connection

Samrt night version

Cloud storage

AP hotspot
TECHNICAL DATA
• DC:12V±5% Input Power
- Auto tracking
- Motion & Sound Detection
• 2.4\~2.4835 Ghz Wireless Frequency
- 220^ / 90^ Pan/Tilt
• 2304x1296P Resolution
• 3.0M pixel HD CMOS Image Sensor
- 3.6mm Lens
• H.265/Mjpeg Video Compression
- Protocol: TCP, UDP, DHCP, DNS, RTSIP2P
• 10 meters Night Visior
• 25-30fps Frame Rate
- Two way Audic
- Wireless Security: WEP/WPA-PSK/M-PA2-PSK data encryption
- Micro SD up to 128gb Storage
- Lan port RJ-45
• Supports Android & IOS devices
- IEEE802.11b/g/n Wireless LAN
- IP Rating: IP65
DOWNLOAD THE APP
- Google Play Store - Search "YCC365 Plus"
- IOS (Apple Store) - Search "YCC365 Plus"
- Android phones and IOS(Iphone) can download by scanning the following QR codes.

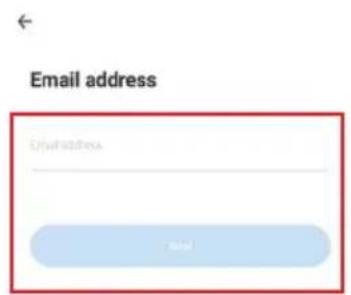
REGISTER NEW ACCOUNT
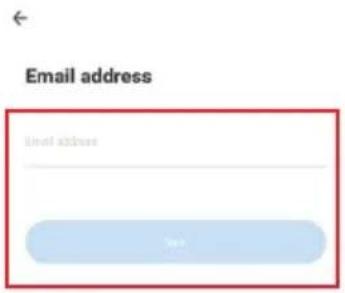
LOGIN USING EMAIL
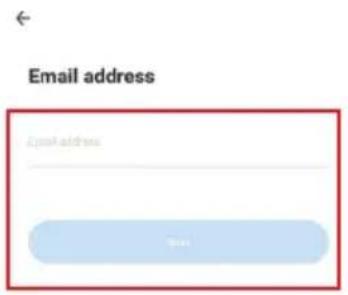
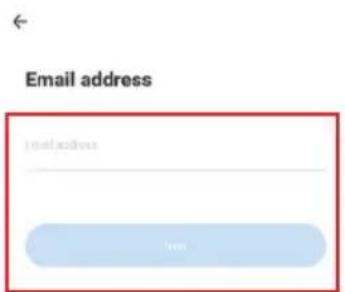
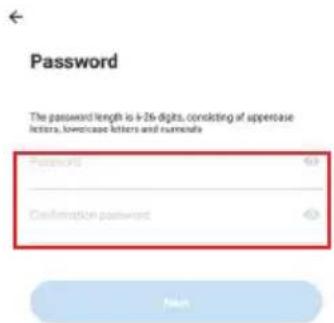
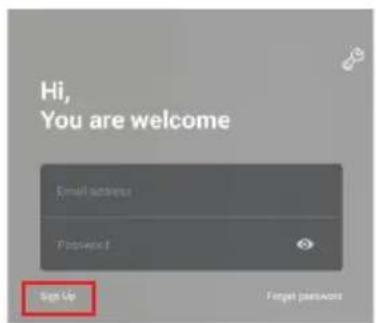
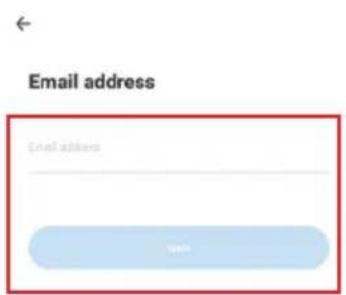
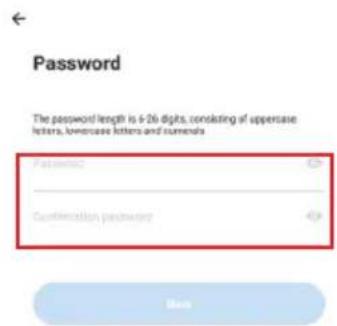
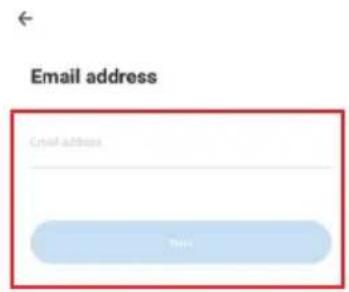
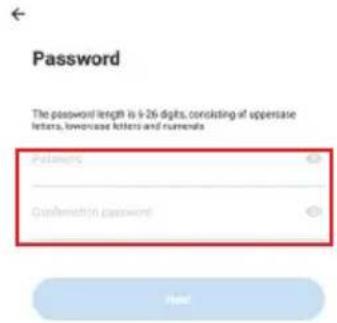
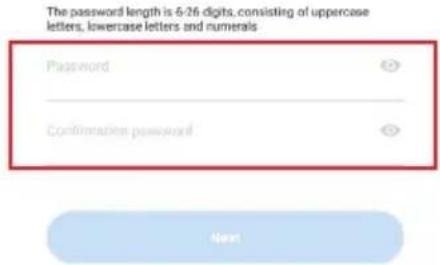
- Tap on "Sign Up" to register with your email address as user ID and tap on "Next" to create a password.
- Tap on "Next" - The APP will send a confirmation link to your email ID. Please confirm the link to complete the registarion process.
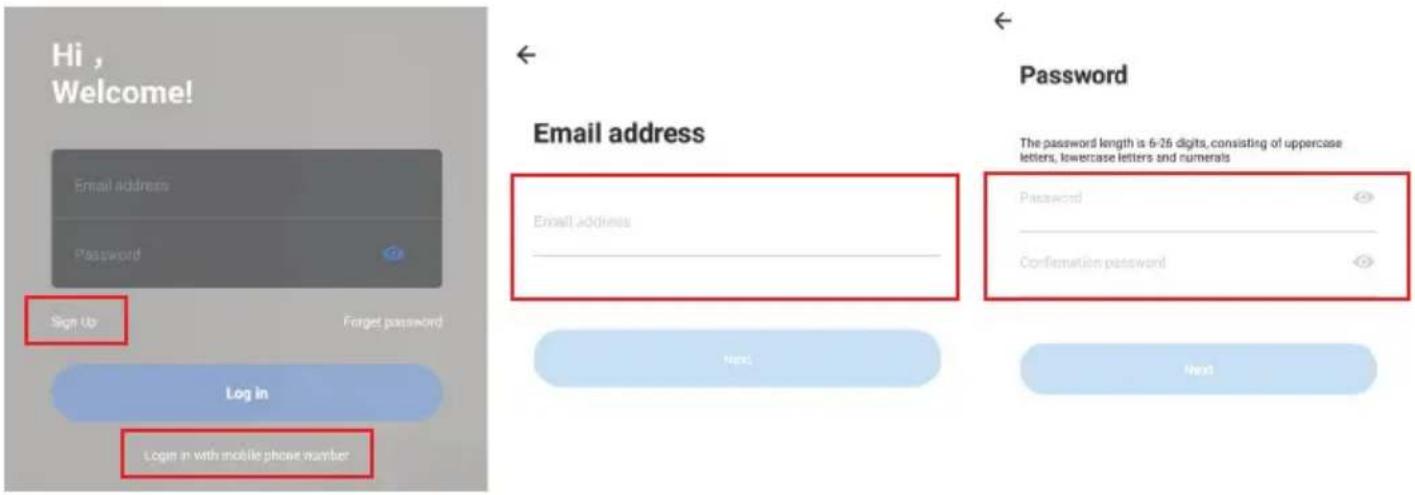
FIGURE 1 FIGURE 2 FIGURE 3
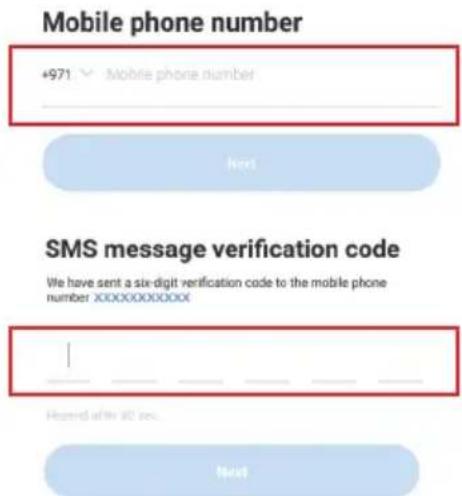
LOGIN USING PHONE NO.
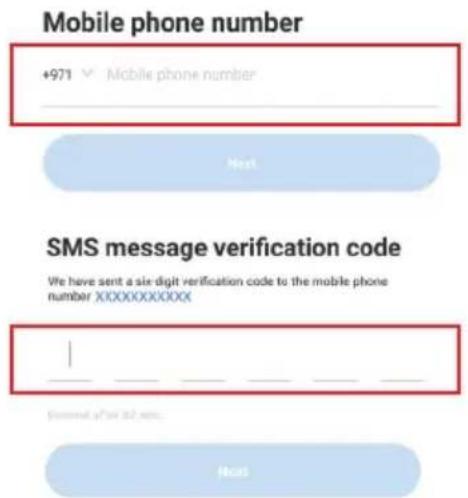
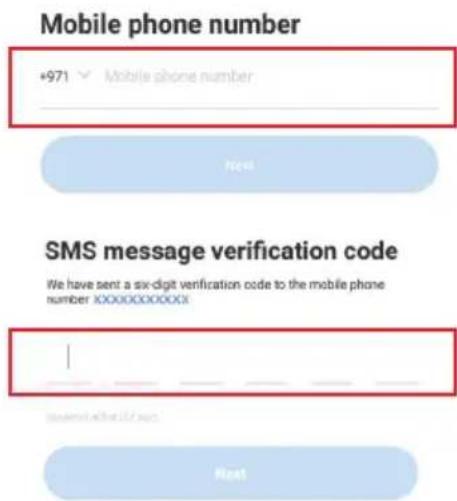
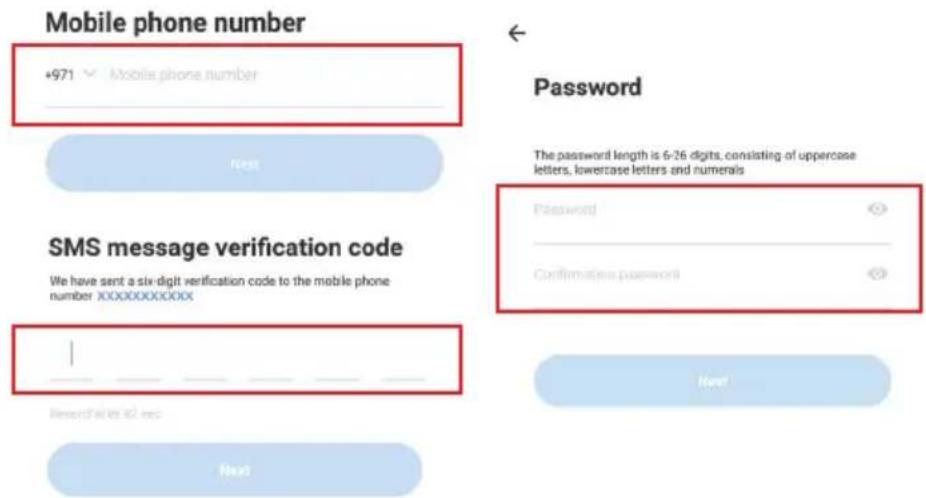
- Tap on "Login in with mobile phone number" (fig 1) to change the login panel
-
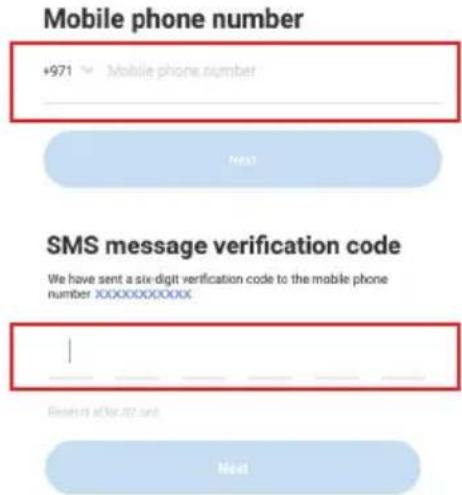
Tap on "Sign Up" to register with your phone number as user ID and tap on "Next" - The APP will send a SMS verification code to your mobile phone. Please input the SMS verification code in the APP to complete the registarion process.
-
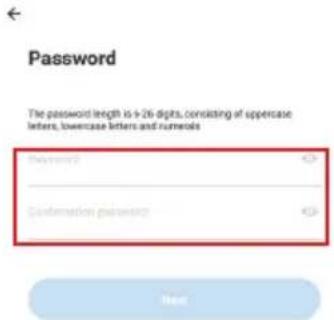
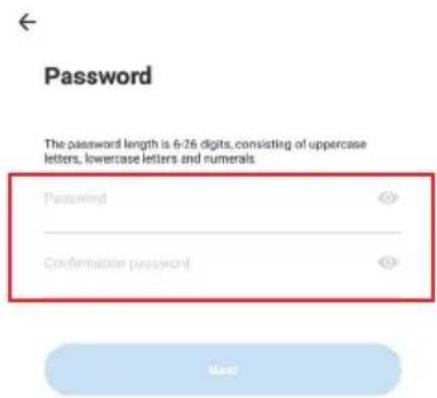
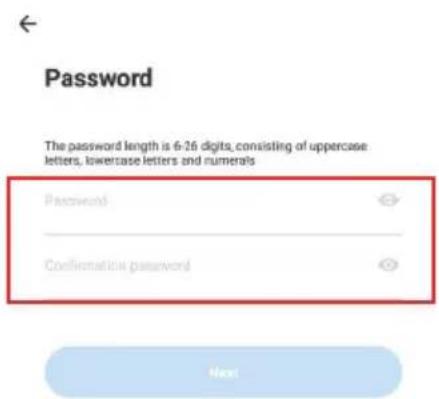
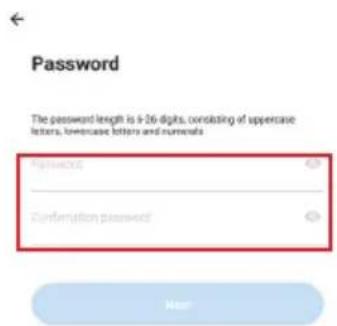
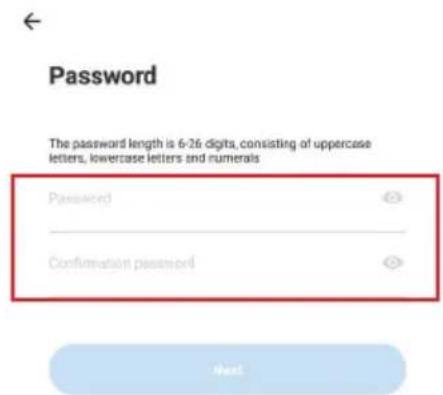
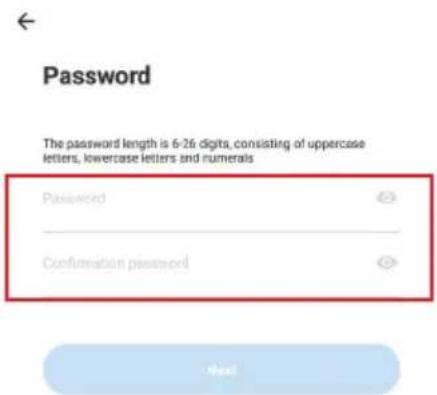
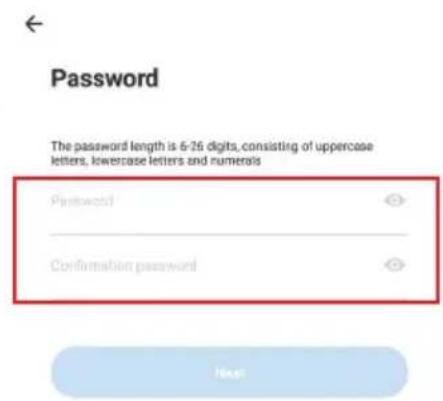
Tap on "Next" to create a password.
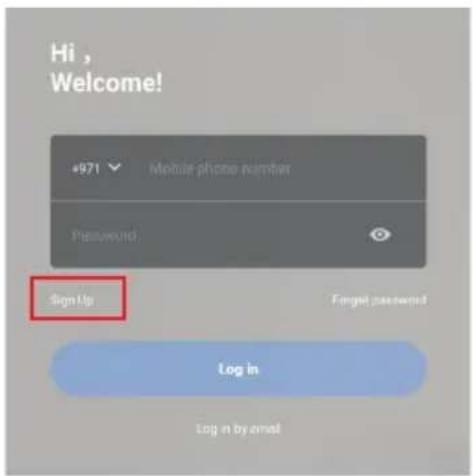
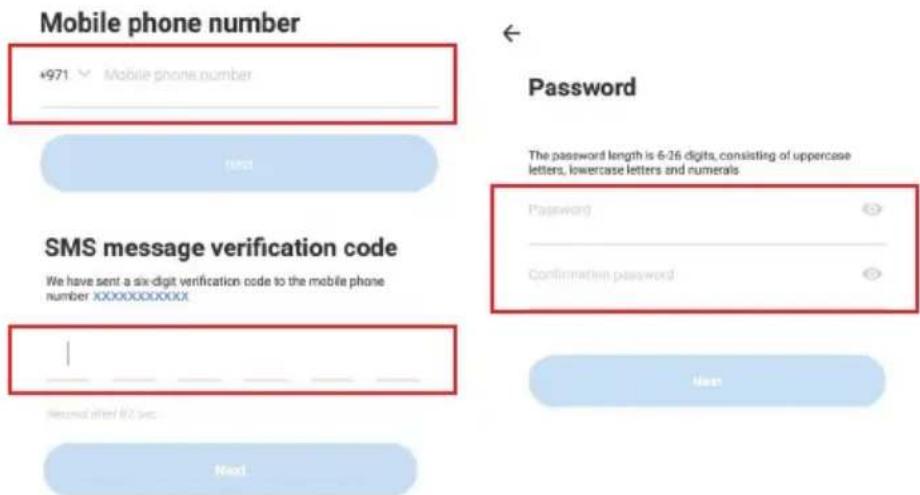
FIGURE 4 FIGURE 6FIGURE 5
ADDING CAMERA DEVICE TO THE APP
TIP: First, connect the power adapter to the camera, then the camera will sound "Please configure camera by AP hotspot or by scanning code" then using the YCC365 Plus APP start adding the camera to the APP. If you do not hear the sound, press and hold the "RESET" button on the device until you hear the sound "Reset Success". Please wait until you hear the sound "Please configure camera by AP hotspot or by scanning code"
NOTE: The camera only supports 2.4G Wi-Fi, before adding devices, make sure your router is 2.4G Wi-Fi, and your phone is connected to 2.4G Wi-Fi.
Add Camera
- Add camera Tap on top right corner "+" sign as shown below (figure 7)
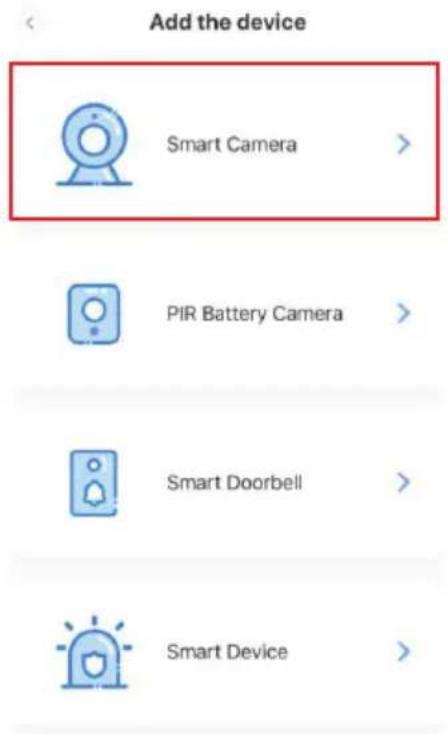
- Tap on "Smart Camera" as shown below(Figure 8)
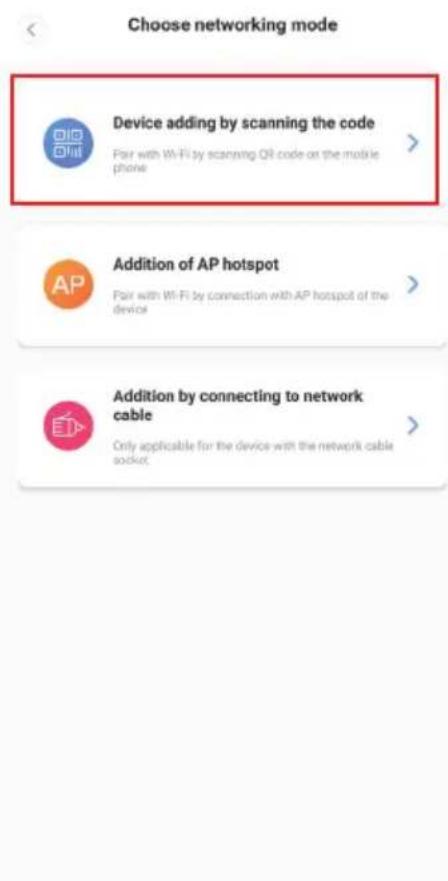
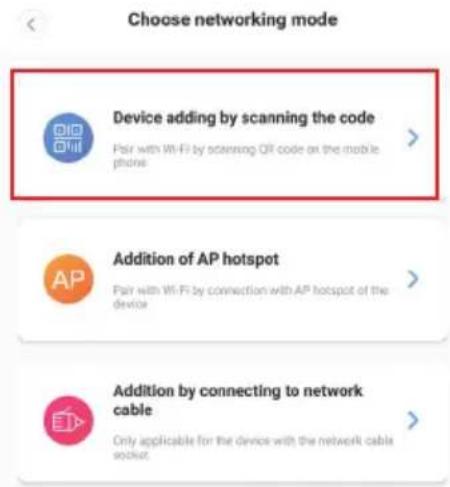
- There are three ways for adding the camera: (a) Device adding by scanning code (b) Addition of AP hotspot (c) Addition by connecting to network cable(This feature is not available for this camera) (Refer to Figure 9)
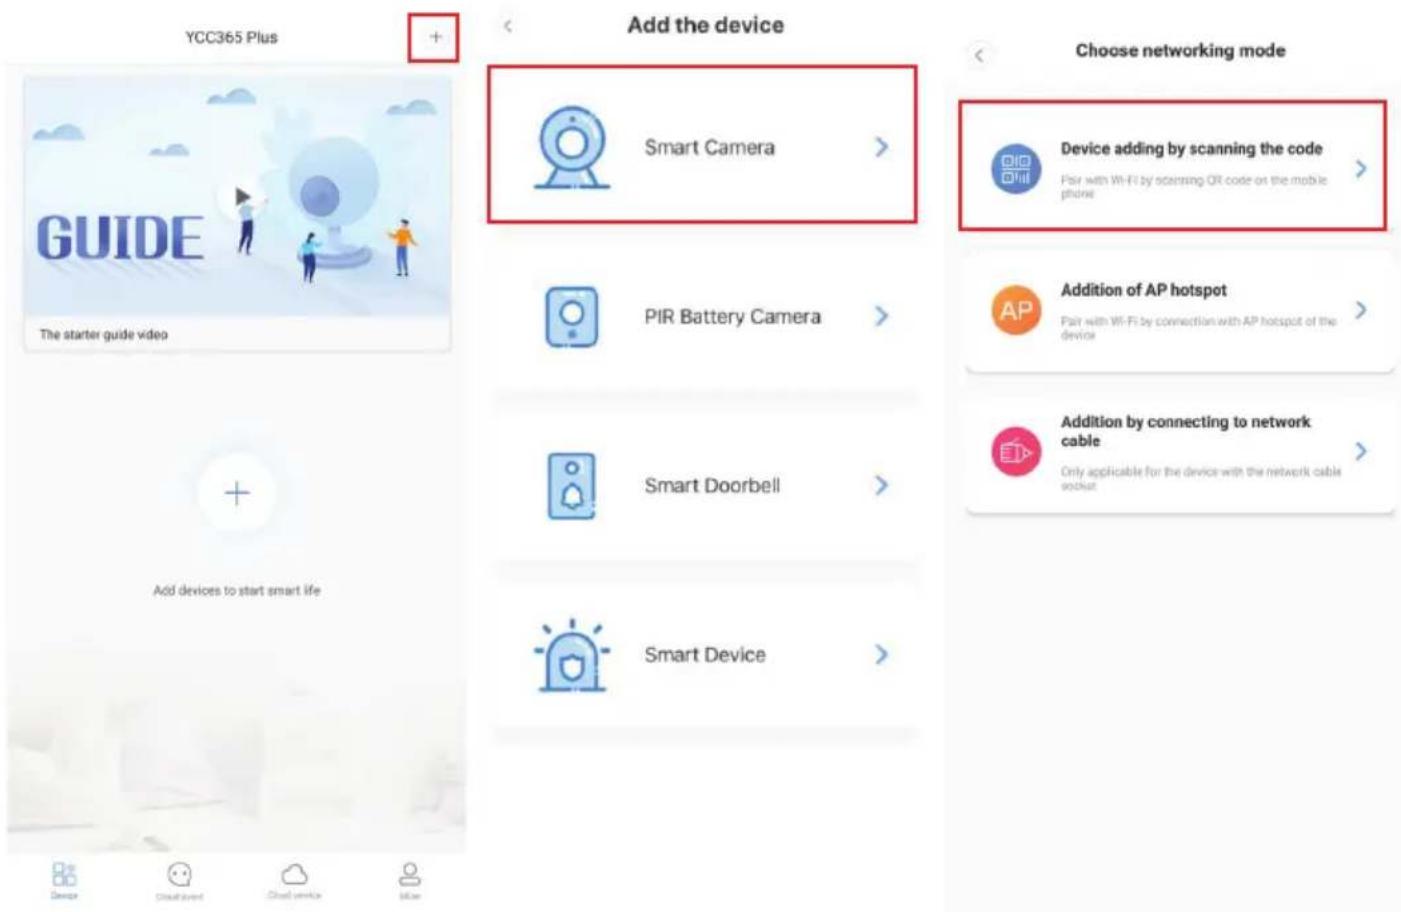
FIGURE 7 FIGURE 8 FIGURE 9
A. DEVICE ADDING BY SCANNING THE CODE
- Tap on "device adding by scanning the code" (Ref Figure 9).
- Please refer to "TIP" before tapping on Next.
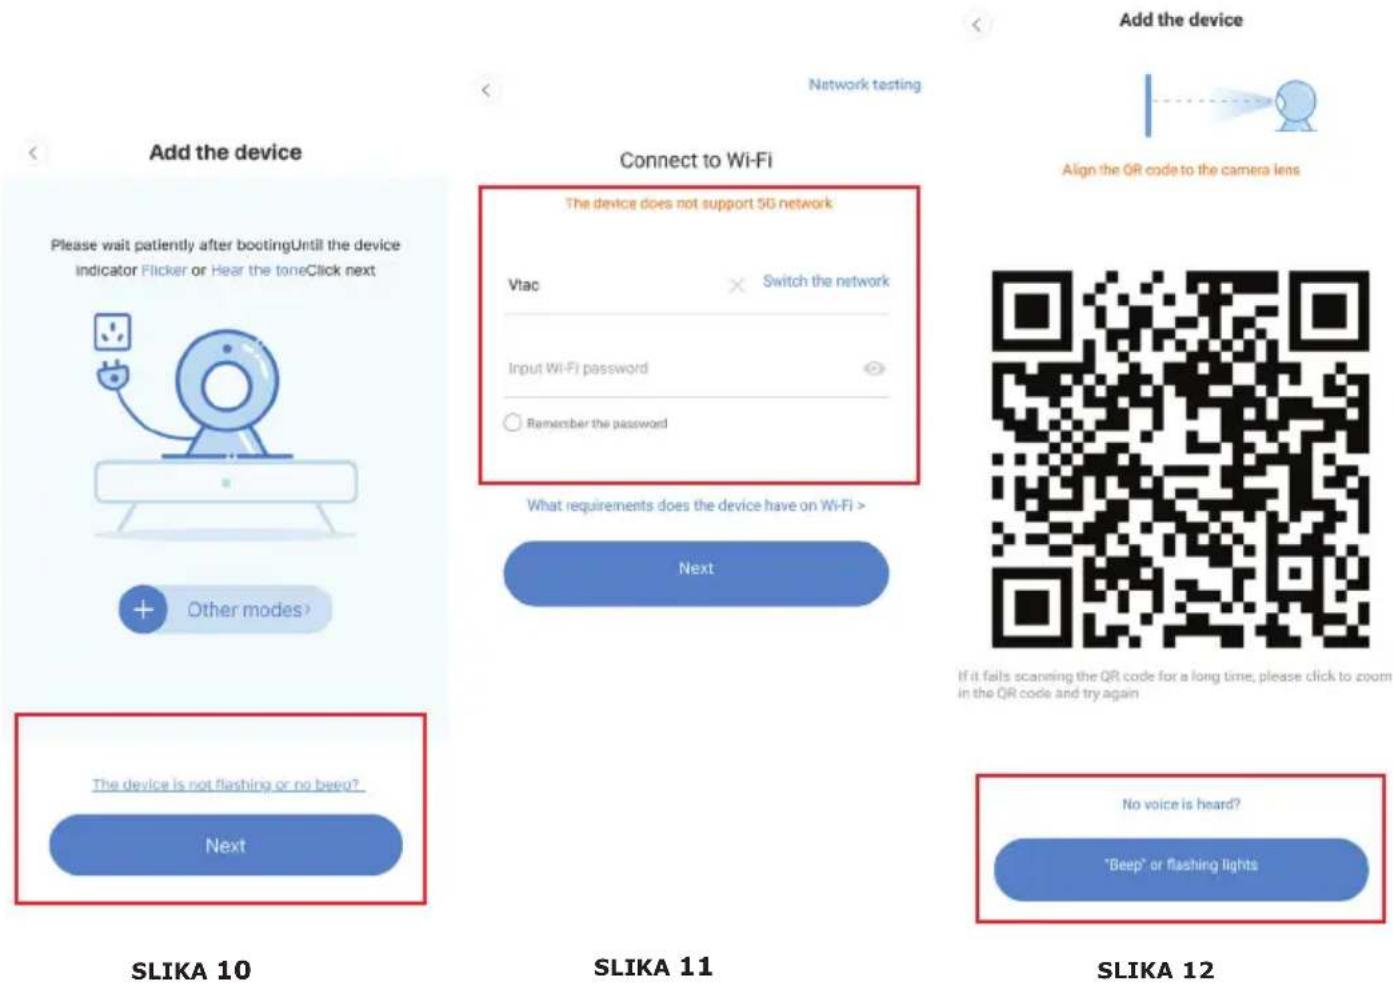
After you hear the sound from camera "Please configure camera by AP hotspot or by scanning code" tap on Next (Figure 10)
- Enter your Wi-Fi Name and Password.
- Now if your mobile phone is already connected to network Wi-Fi, it will show your network Wi-Fi name. If not, press "Switch the network" to open your phone's WLAN and connect to your available network. Then go back to the app. Input Wi-Fi password (note: this password must be your network Wi-Fi password), and then click "Next". A QR code will show on phone screen.
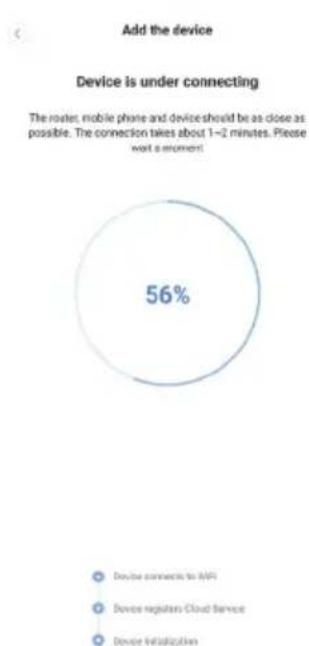
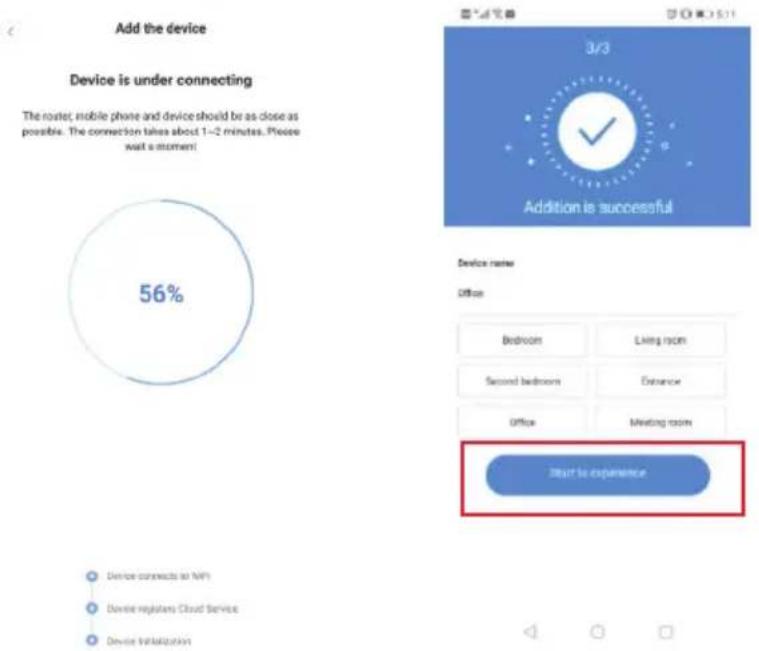
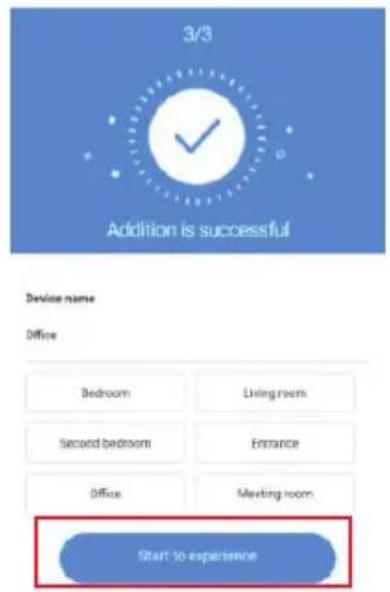
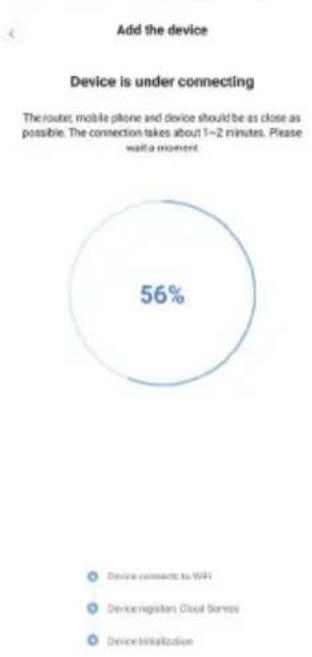
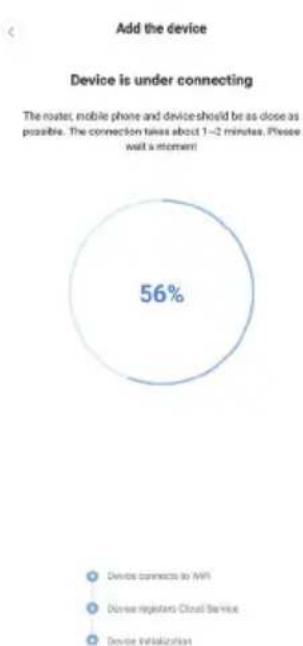
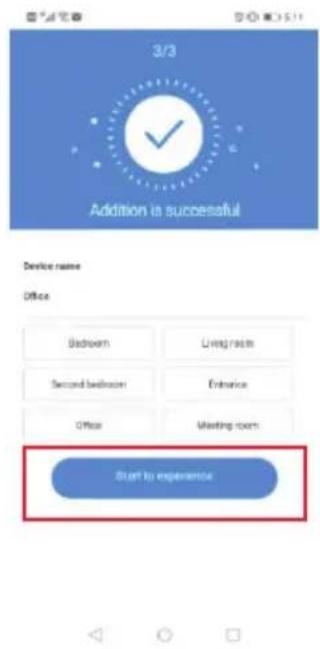
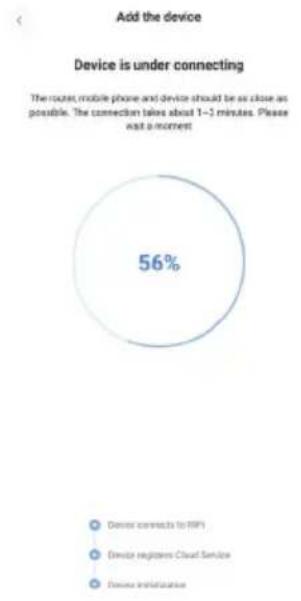
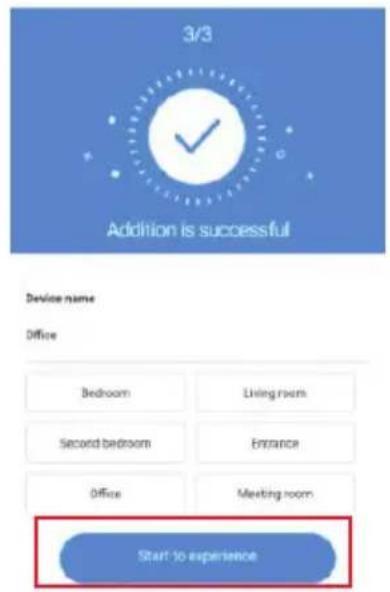
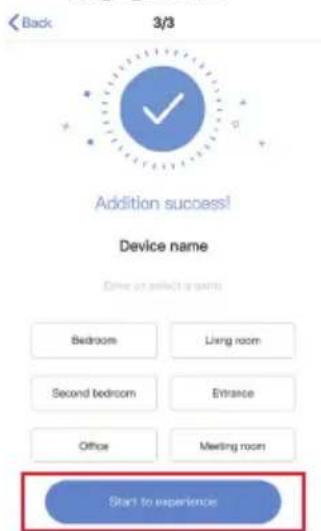
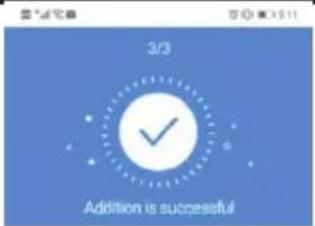
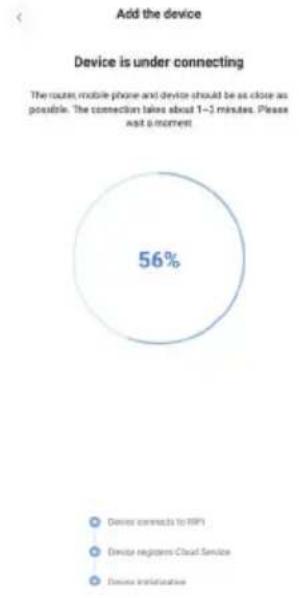
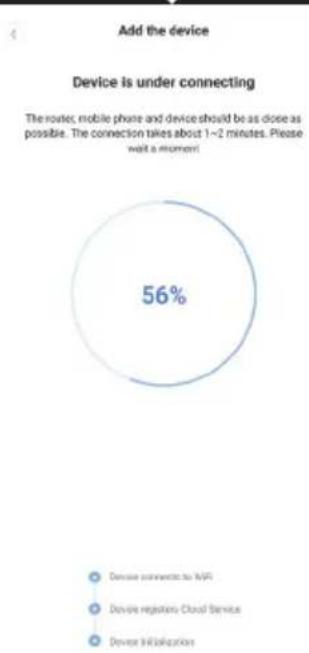
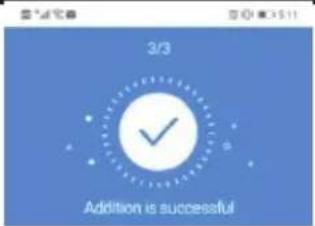
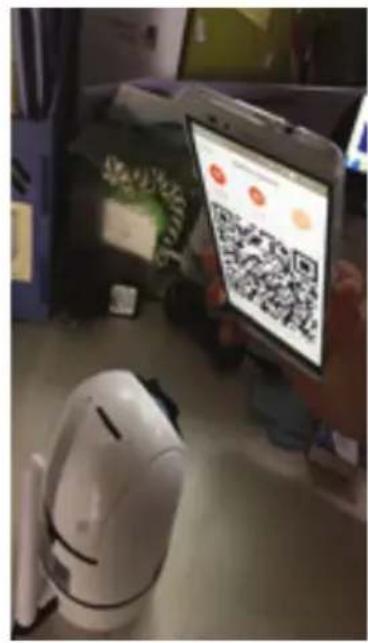
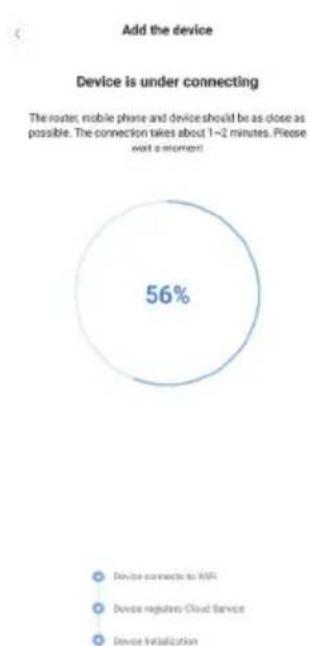
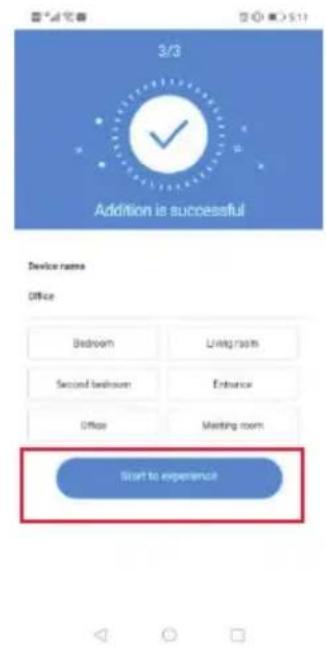
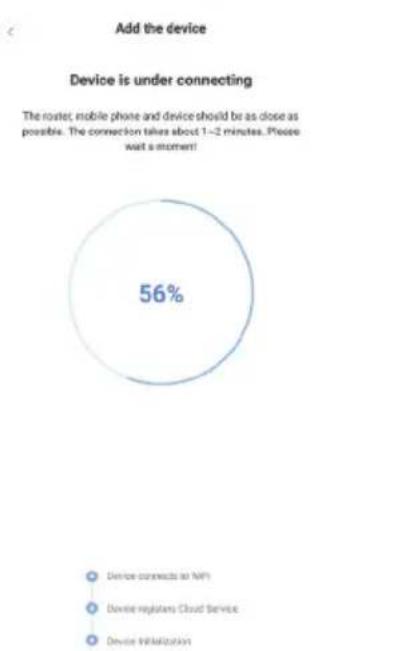
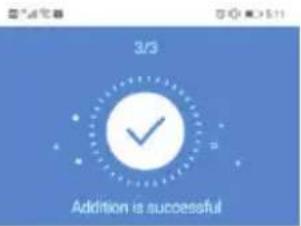
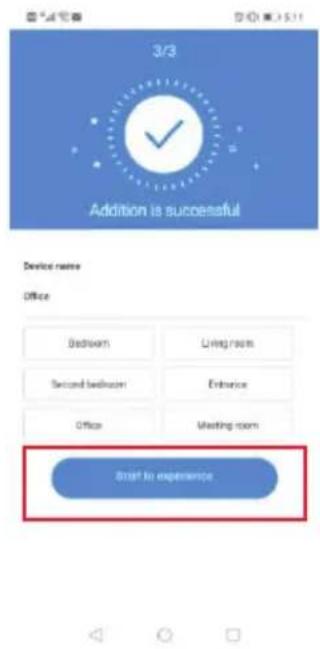
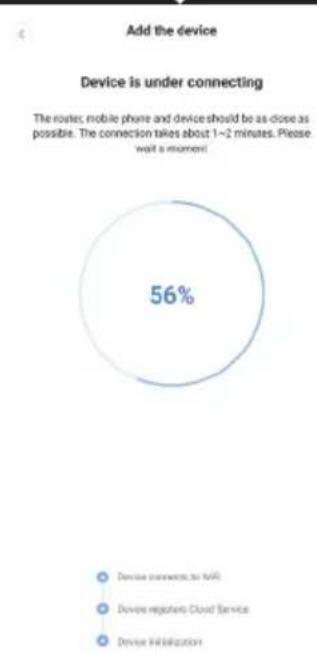
- Place the QR code towards the camera lens at a distance of around 4-8 inches. After the camera reads the QR, it will sound with "two beeps" and Wi-Fi connecting. Now on the App, tap on "Beep or flashing lights" (Figure 12). Then wait till the camera confirms with "Internet connected" "welcome to use cloud camera". On app it will also show "Addition is successful"- Select/type the device name (Figure 15) and tap on "Start to experience".
The following table provides the addition of the shares
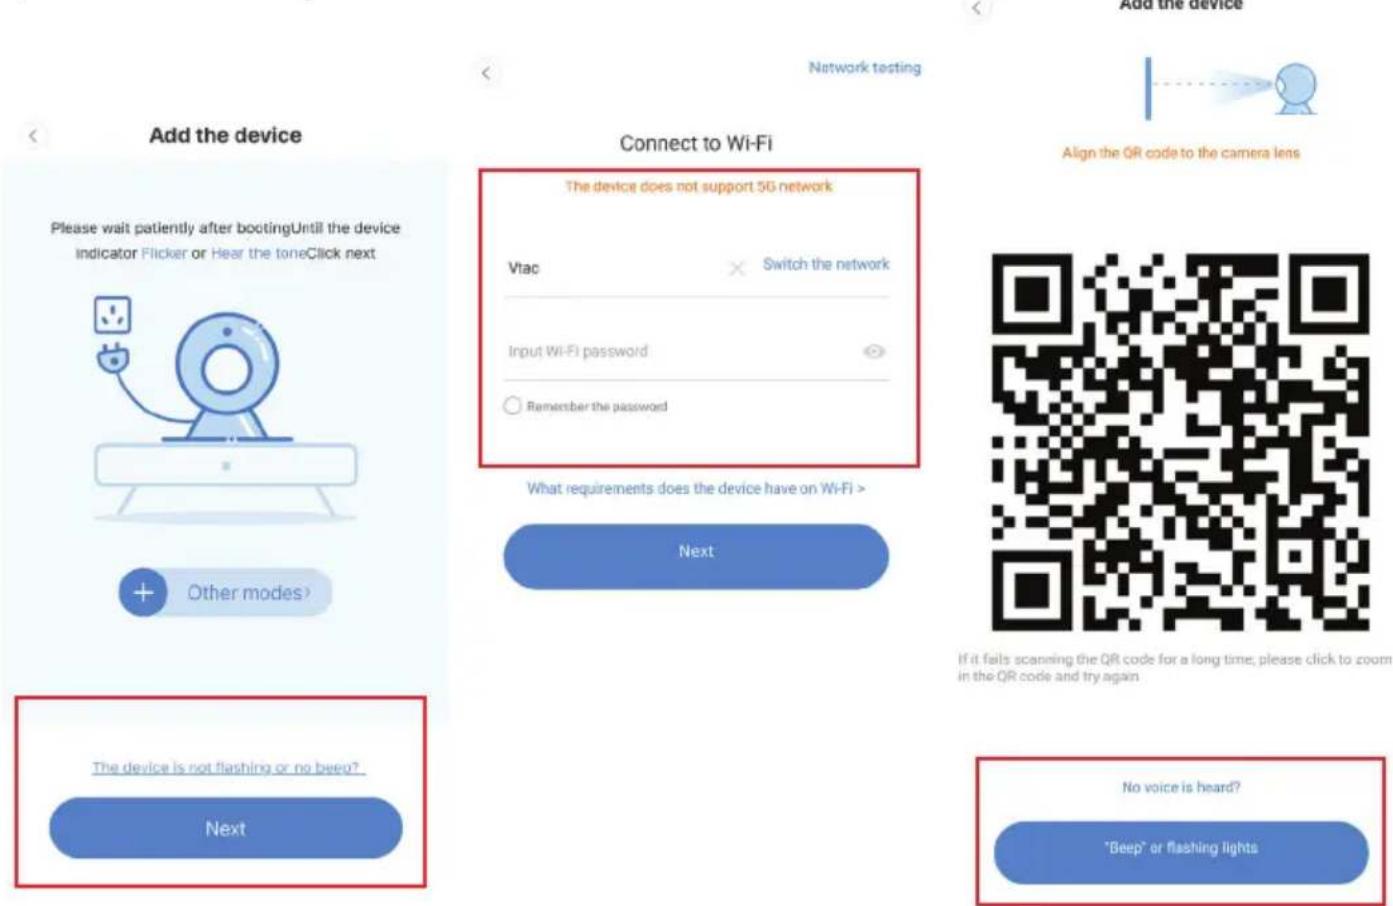
FIGURE 10
FIGURE 11
FIGURE 12
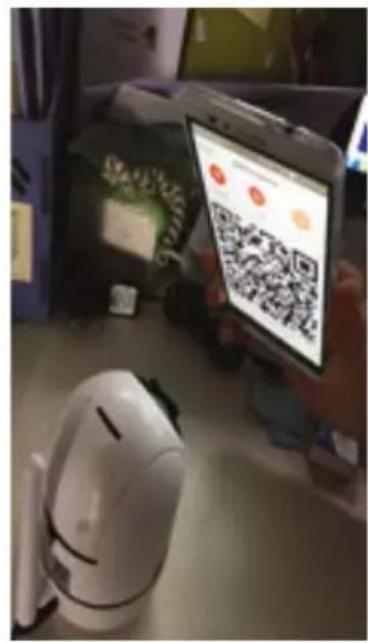
FIGURE 13
pie
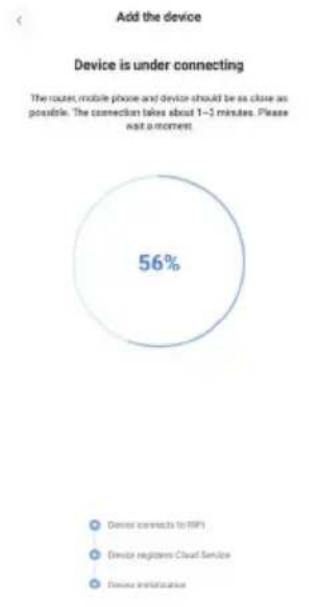
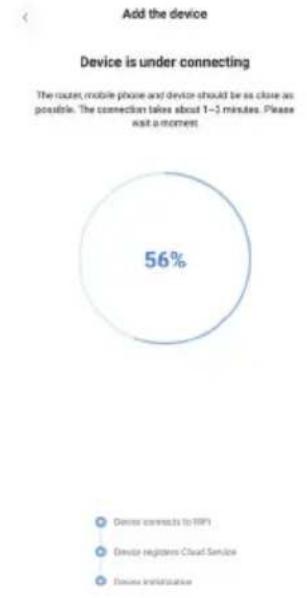
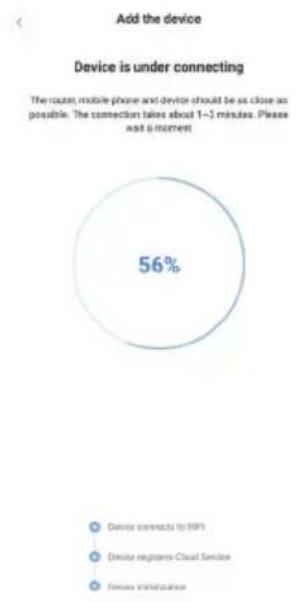
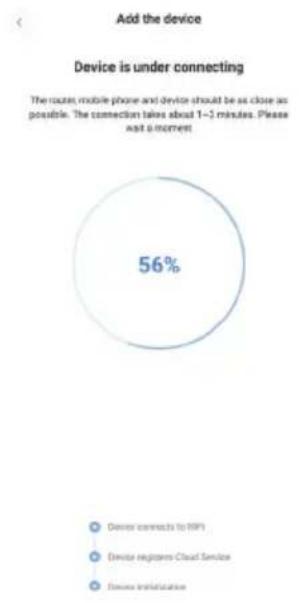
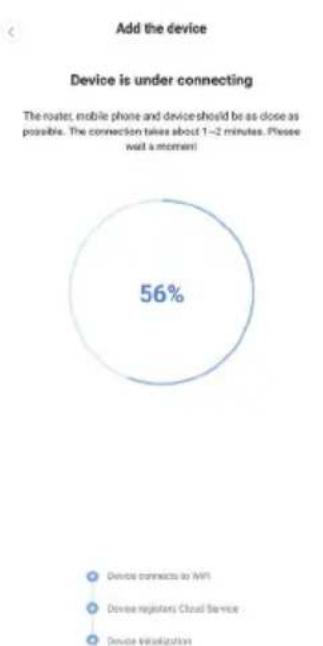
Add the device Device is under connecting The router, mobile phone and device should be as close as possible. The connection takes about 1-2 minutes. Please wait a comment! 56% Device connects to API Device registers Cloud Service Device InitializationFIGURE 14
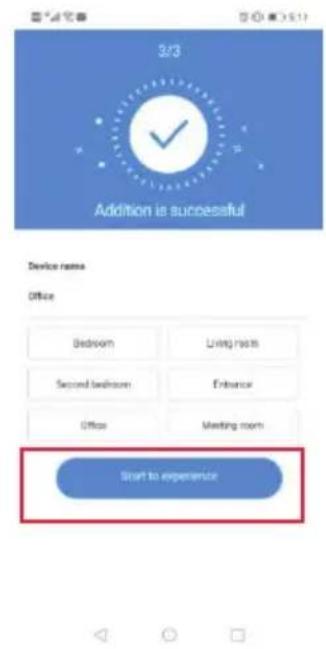
FIGURE 15
B. ADDITION OF AP HOTSPOT
- Tap on "addition of AP Hotspot" (Ref Figure 9).
- Please refer to "TIP" before tapping on "Go to setting".
After you hear the sound from camera "Please configure camera by AP hotspot or by scanning code" tap on "Go to setting" (Figure 10)
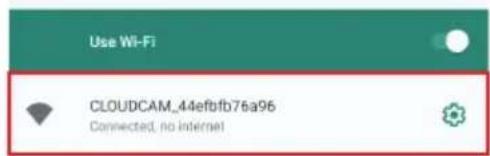
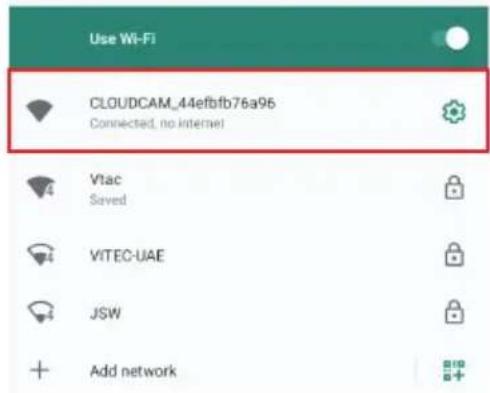
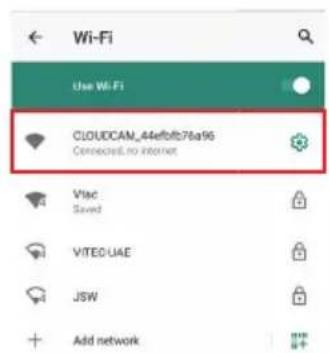
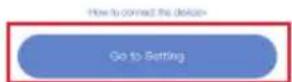
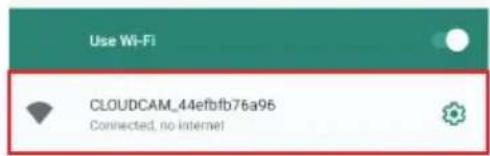
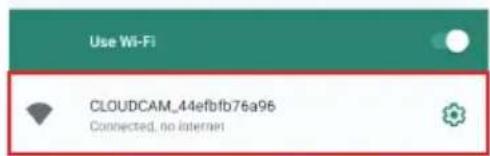
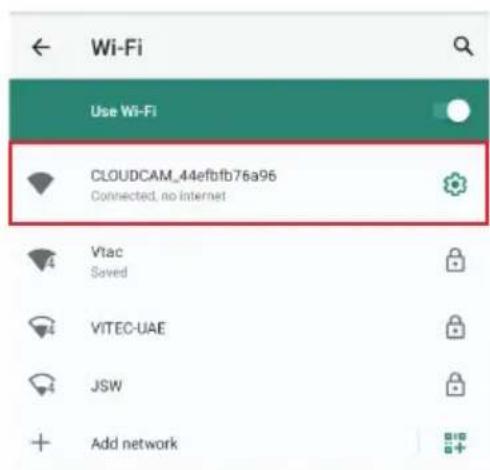
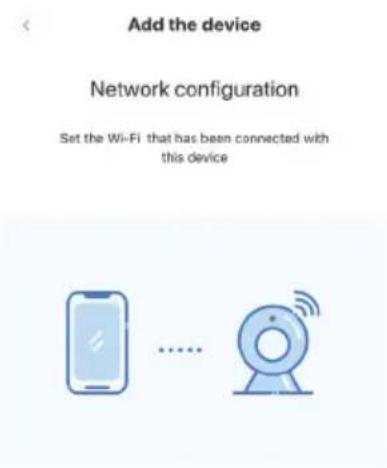
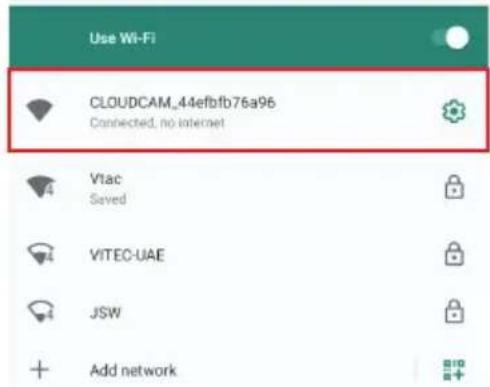
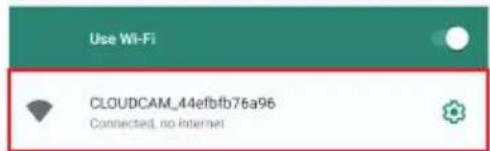
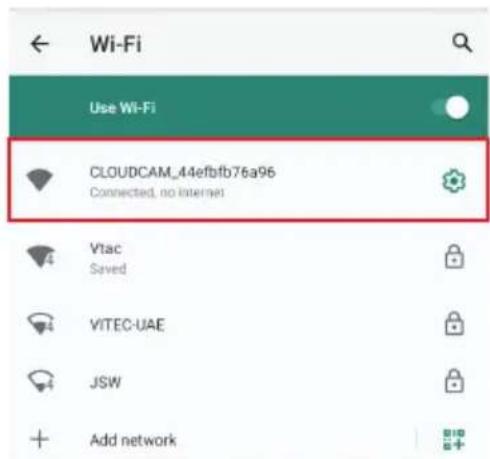
- Tap on "Go to Setting" (Figure 16) button then Select the camera hotspot named with "CLOUDCAM_XXXX" (Figure 17). After connecting the camera then go back to the app and Tap on "Next" (Figure 18).
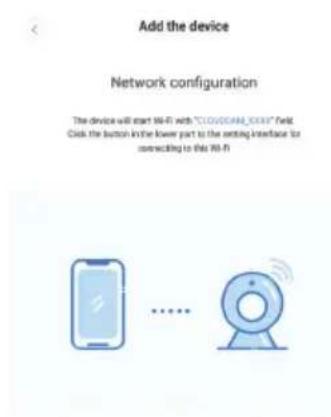
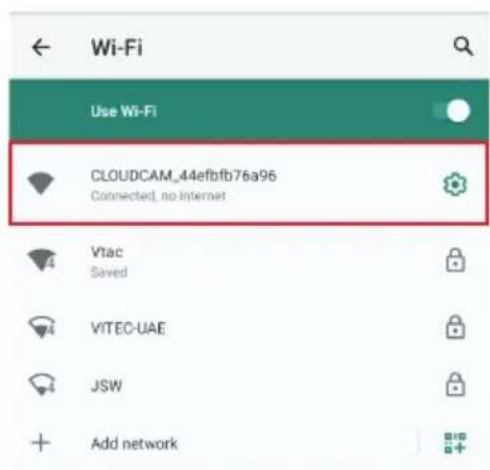
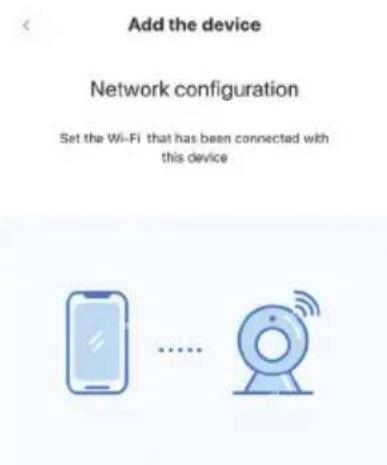

FIGURE 16
FIGURE 17

FIGURE 18
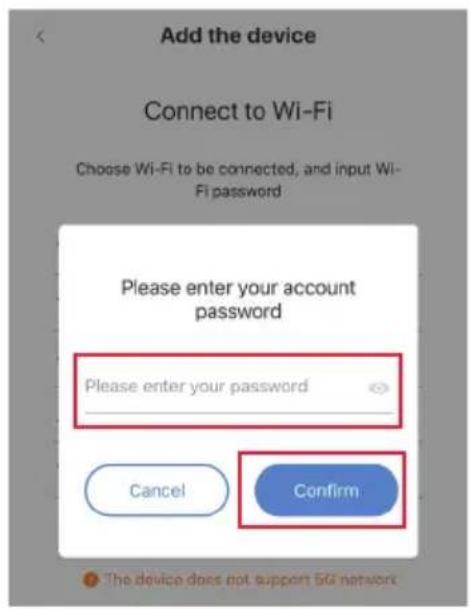
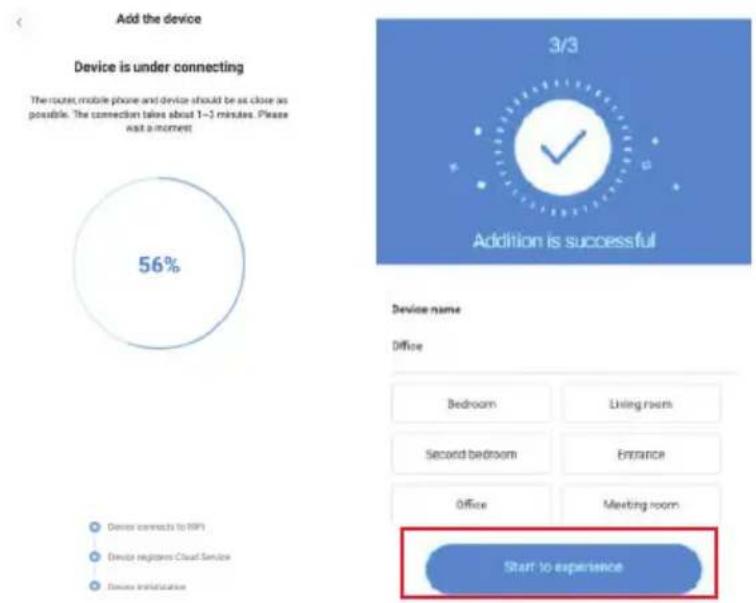
- Select your network Wi-Fi and input Wi-Fi password (note: this password must be your network Wi-Fi password). Then Tap "confirm" [Figure 19], the camera will sound with two beeps and voice "Network is connecting, please wait". Then wait till the camera confirms with "Internet connected welcome to use cloud camera". On app it will also show "Addition is successful"- Select/type the device name (Figure 20 [B]) and tap on "Start to experience".
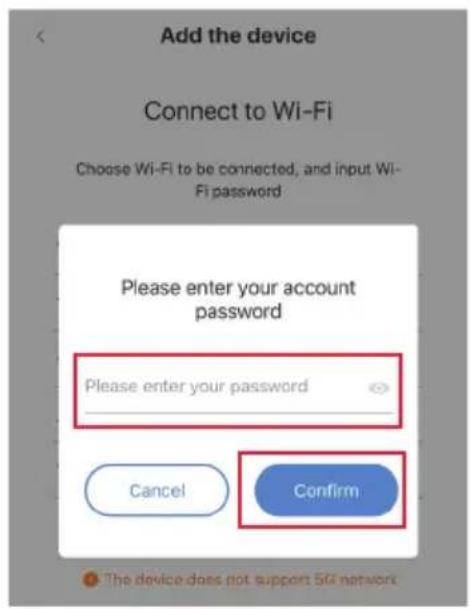
FIGURE 19
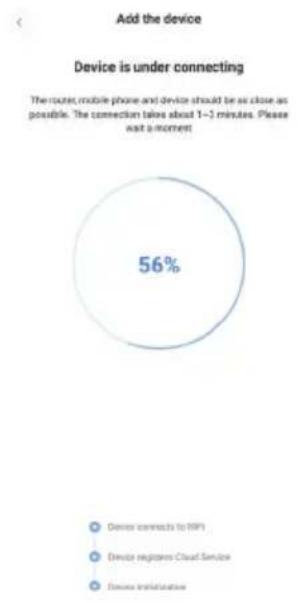
pie
Add the device Device is under connecting The router, mobile phone and device should be as close as possible. The connection takes about 1–3 minutes. Please wait a moment 56% ● Device connects to RFP ○ Device switches Cloud Service ○ Device installationFIGURE 20 [A]
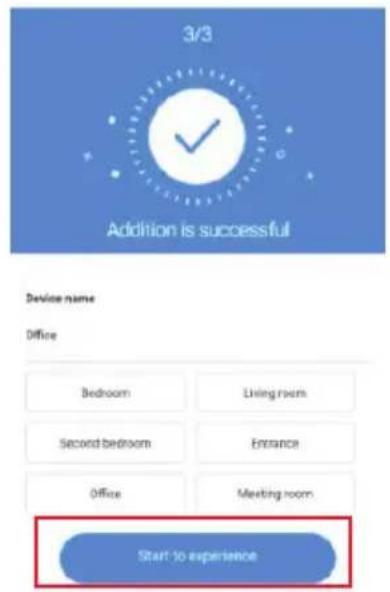
FIGURE 20 [B]
C. ADDITION BY CONNECTING TO NETWORK CABLE (ONLY SUPPORT LAN PORT DEVICE)
- Connect the Ethernet cable between camera and Wi-Fi router.
- Tap on "Addition by connecting to network cable" (Ref Figure 9).
- Please scan the QR code on the device and wait for the network connection to succeed.
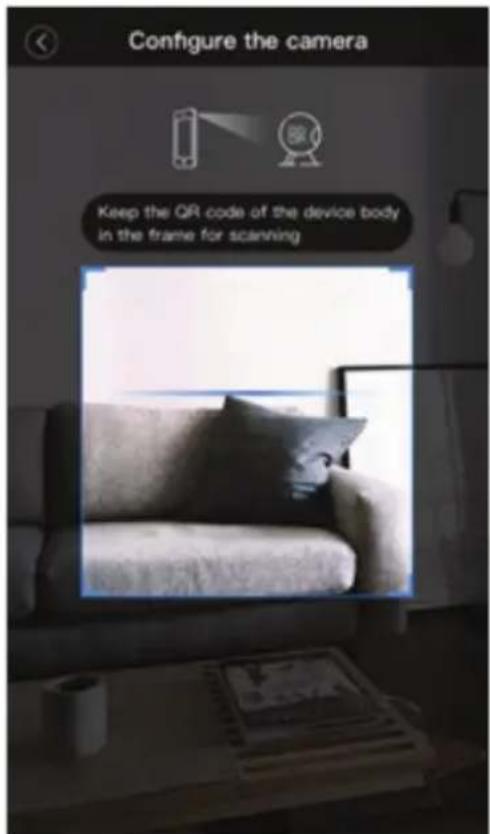
FIGURE 21
D. AP DIRECT MODE (SPECIAL)
- Open the YCC365 plus APP to enter the login interface. Tap on "Local direct connection" as shown in Figure 22[A]
- Tap on plus sign on the top right hand corner as shown in Figure 22[B].
- Power up the camera and wait until you hear the voice "Please configure camera by AP hotspot or scanning code" and Tap on "Next" as shown in Figure 22[C] (if you don't hear the voice, reset the camera)
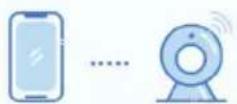
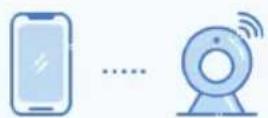
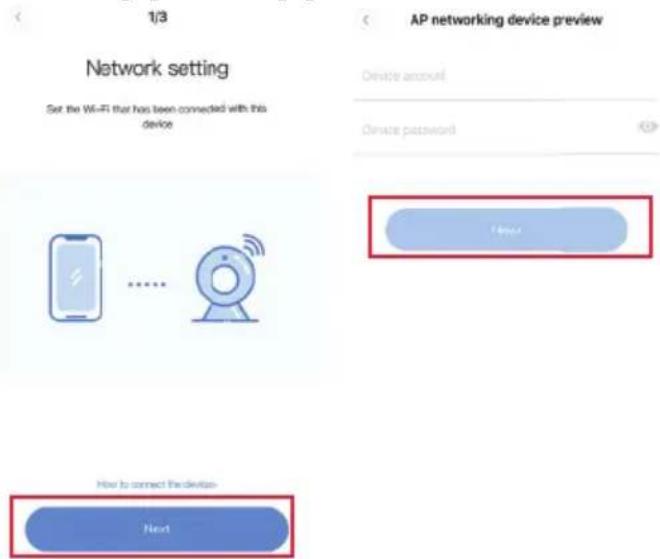
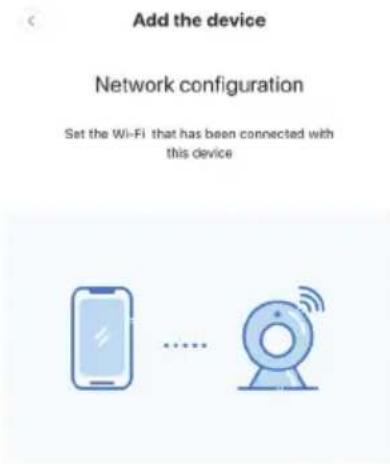
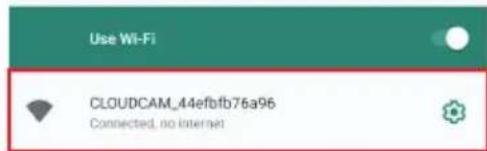
- Tap on "Go to setting" as shown in Figure 22[D] and connect the camera hotspot named with "CLOUDCAM_XXXX" as shown in Figure 22[E]. After connecting the camera go back to the APP and tap on "Next" as shown in Figure 22[F]. If unsure please refer to Figure 22[D] and tap on "How to connect the device".
- Enter the User name: admin | Password: 12345 and tap on "Next", as shown in Figure 22[G].
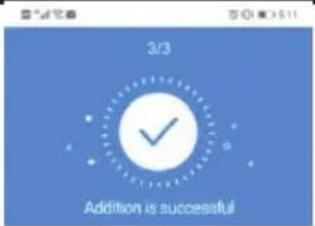
- On app it will also show "Addition is successful"- Select/type the device name (Figure 22[H]) and tap on "Start to experience"
![Hi, Welcome. Email address Password Sign up Forger password Log in Light in with mobile phone number Local direct connection YCC365 Plus AP networking device preview 1/3 Network setting The device will start Wi-Fi with "CLOUDCAM_0000" field. Click the button in the lower part to the setting interface for connecting to this Wi-Fi 1. Connect the power supply, and wait for 30 seconds after the starting up, for this completion of the device startup * Credit the video by using the networking preview that of AP list points of the devices. Before the user ensure that the mobile phone has been connected with its device supporting AP mode Next How to connect the device Go to Setting FIGURE 22 [A] FIGURE 22 [B] FIGURE 22 [C] 1/3 AP networking device preview FIGURE 22 [D] Wi-Fi Use Wi-Fi CLOUDCAM_44efbb78a96 Connected,no internet Vitac Saved VITEO UAE JSW Add network Network setting Set the Wi-Fi that has been connected with this device Device account Device password Home Back 3/3 Addition success! Device name Drive at select is name Bedroom Living room Second bedroom Entrance Office Meeting room Start to experience How to connect the device Next](/content/2026/04/700297/images/c69325df4020dff3525ce69b4dc8917e7488bfc2c5628946ba9b5b8485eb9995.jpg)
FIGURE 22 [F] FIGURE 22 [E] FIGURE 22 [G]
FIGURE 22 [H]
FUNCTION INTRODUCTION
Real-time preview interface
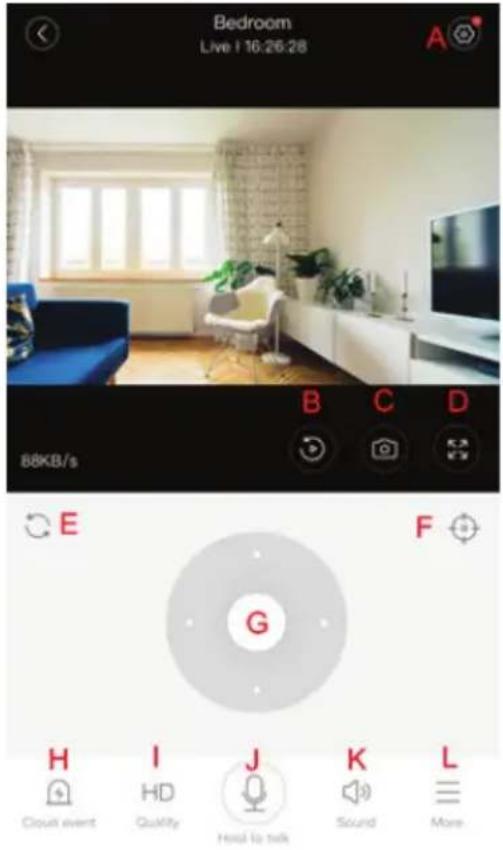
A: Settings Menu
B: Video
C: Snapshot
D: Full Screen
E: Pan-tilt reset
F: Preset
G: Pan&Tilt
H: Message
I: Video quality
J: Hold to talk
K: Sound
L: More
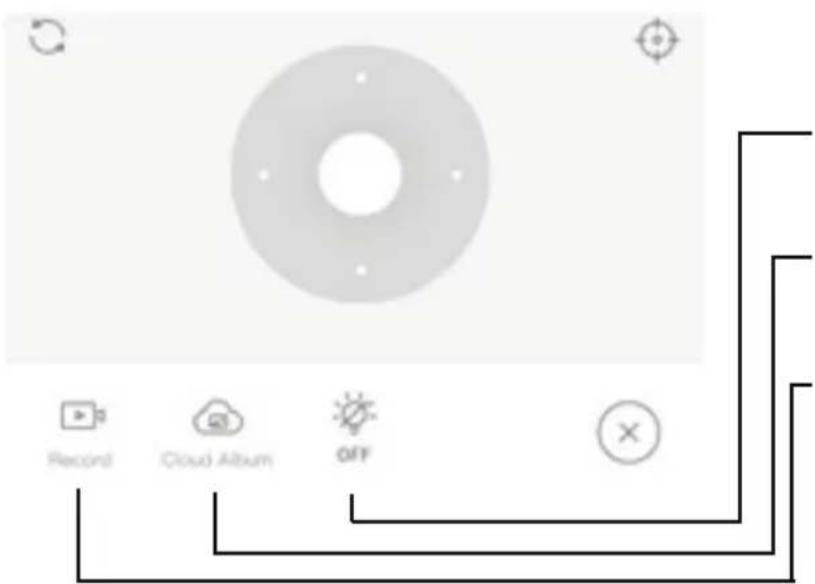
FIGURE 23
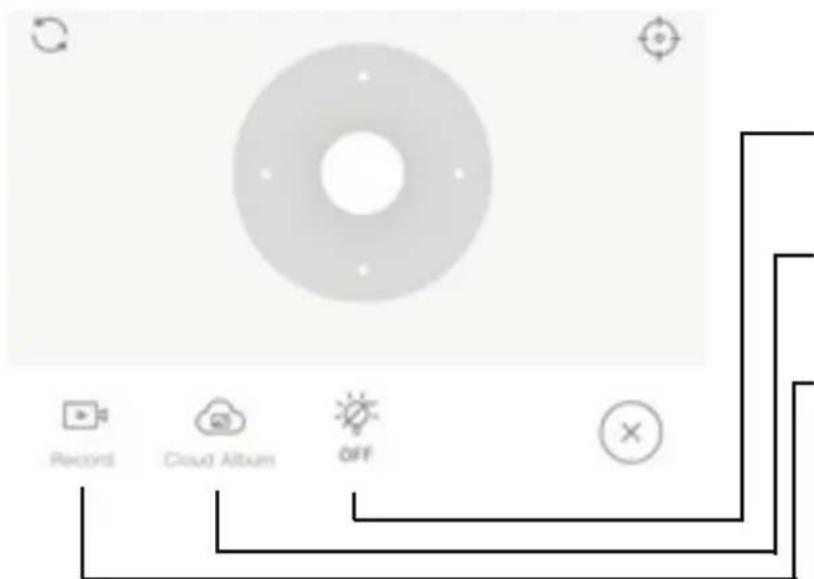
Control white light.
View cloud albums.
Video to the phone.
PTZ
By sliding steering wheel or sliding the screen on the live preview you can control the camera's rotation.
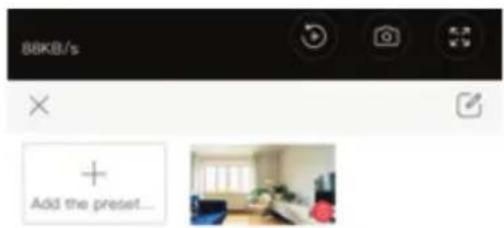
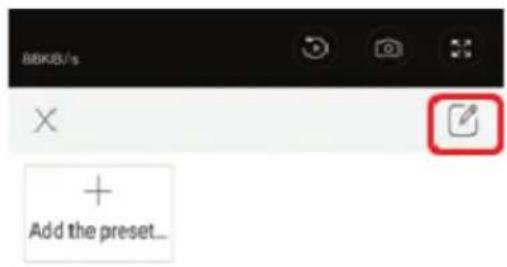
PRESET
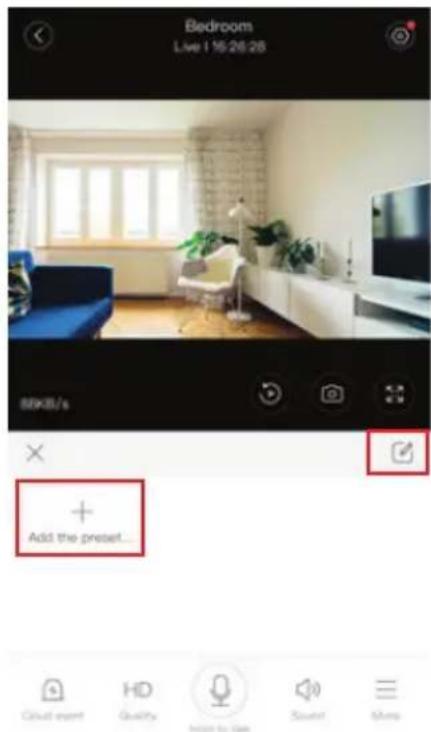
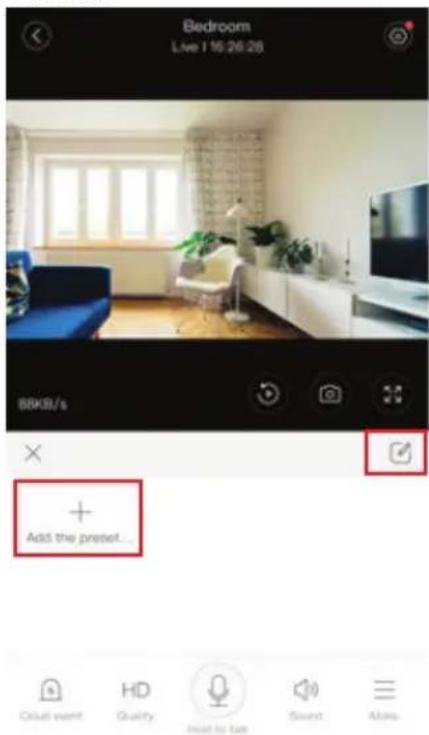
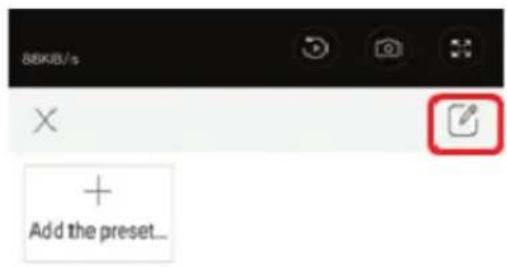
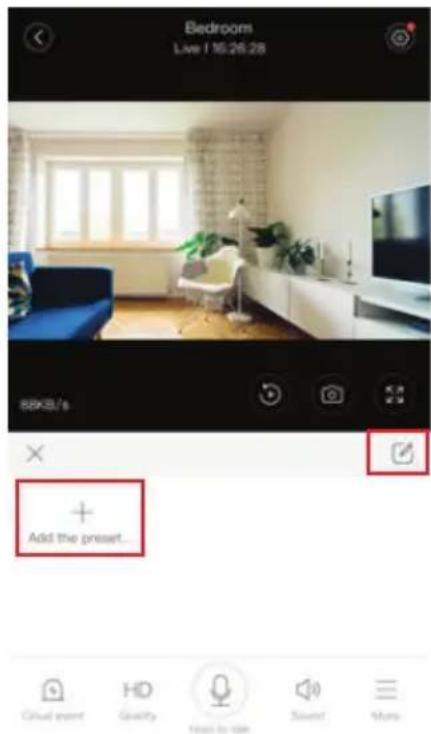
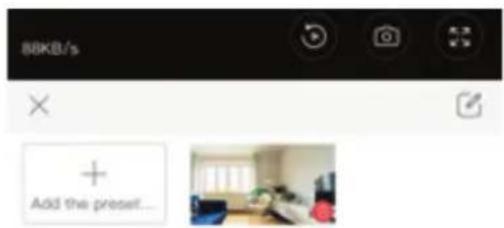
- Click the preset icon to enter the preset management interface (Figure 24).
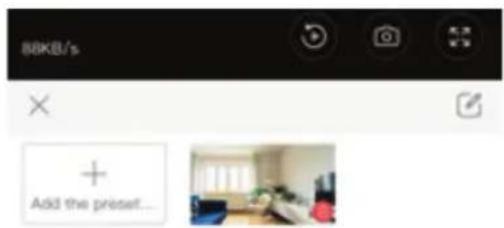
- Adding presets. Refer Figure 25.
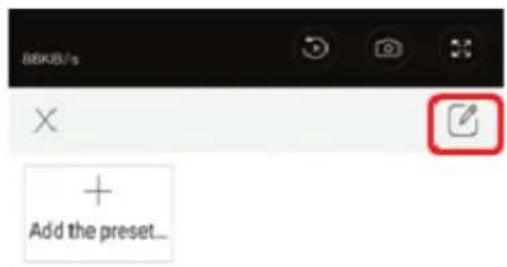
- Delete the preset: Click the edit icon to delete the preset that has been added.
ADD THE PRESET
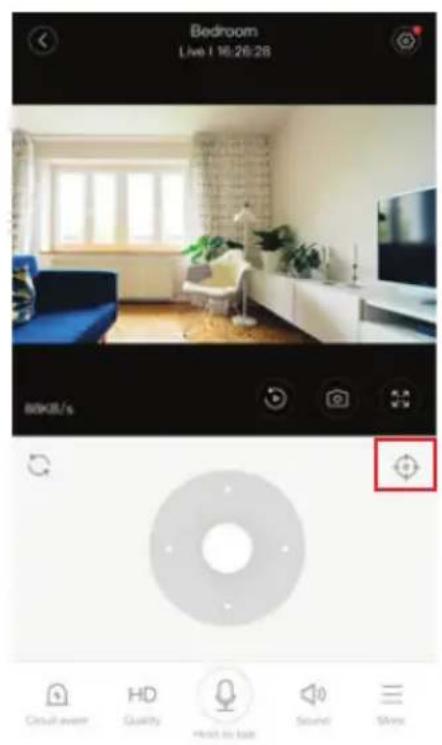
FIGURE 24
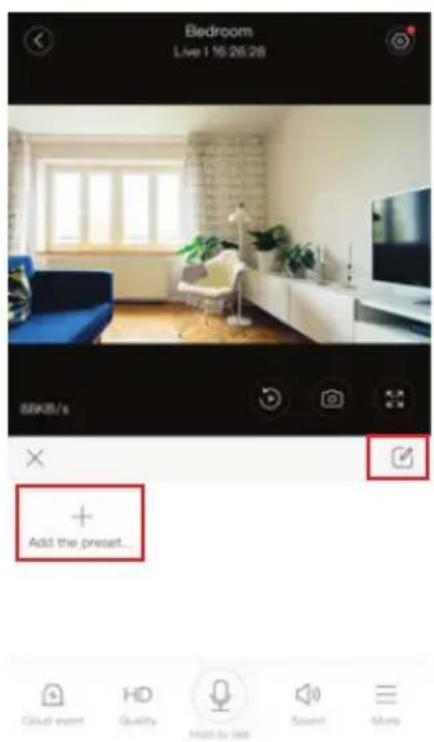
FIGURE 25
DELETE THE PRESET
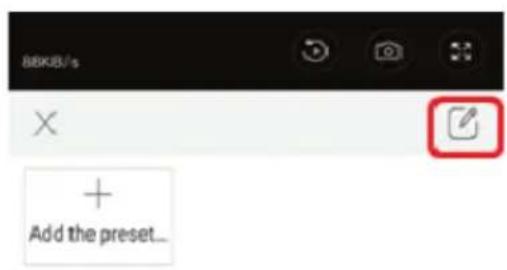
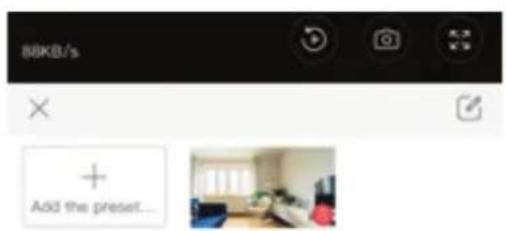
FIGURE 26
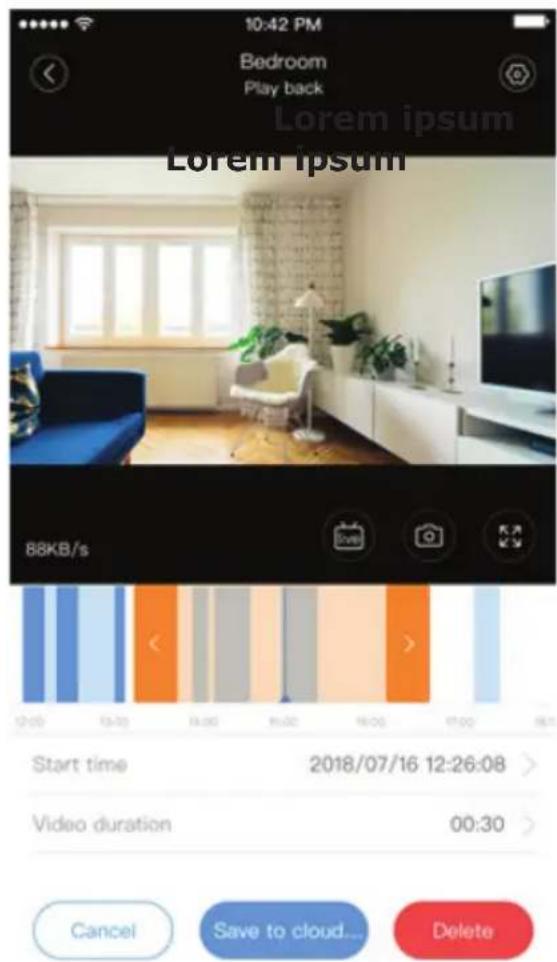
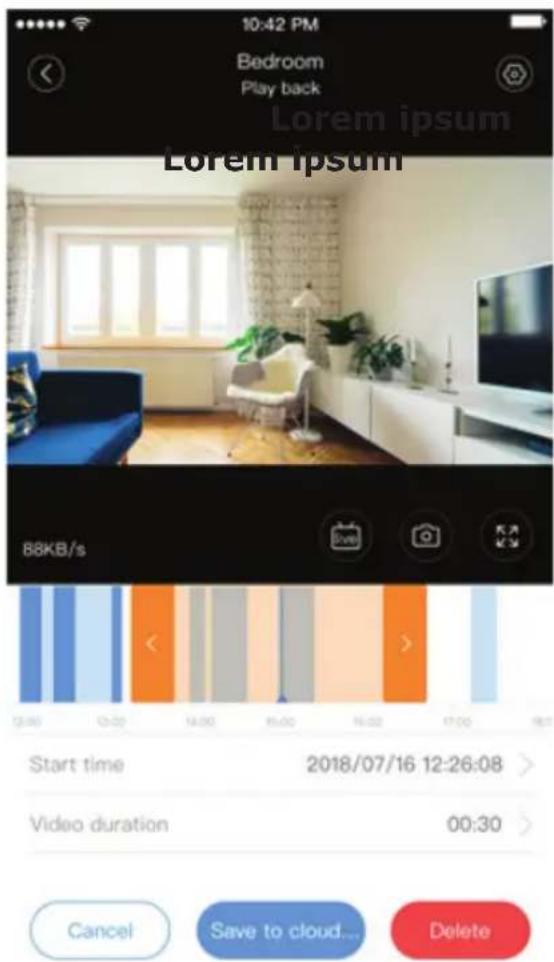
VIDEO PLAYBACK
Note: Video playback by default is cloud recording, if you want to playback the video on the TF card, you can switch "play videos from" to "SD card".
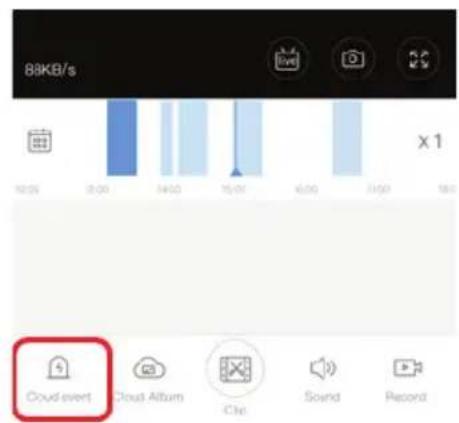
- Cloud video has color variations, dark blue indicates the alarm recording and light blue indicates non-alarm recording. TF card video color is uniform light blue.
- Click the date icon to playback the video of the selected date.
- Click “×1.0” icon to adjust the cloud video playback speed, please note the TF card playback does not support this function.
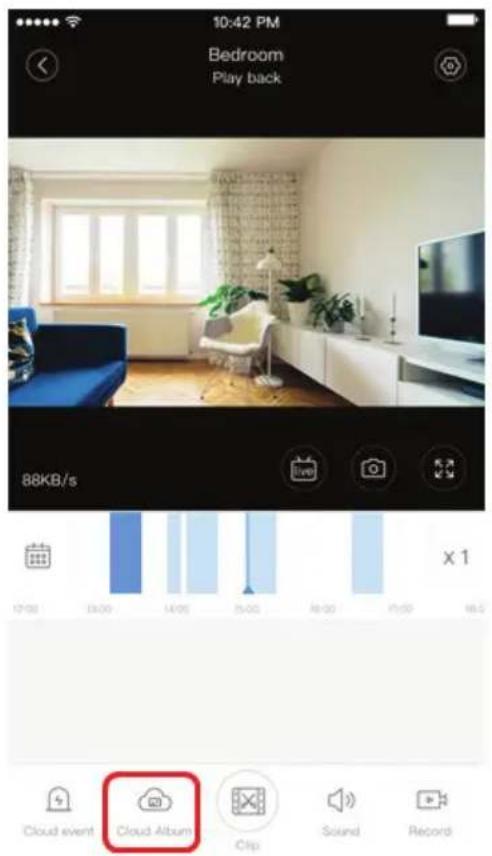
VIDEO CLIP
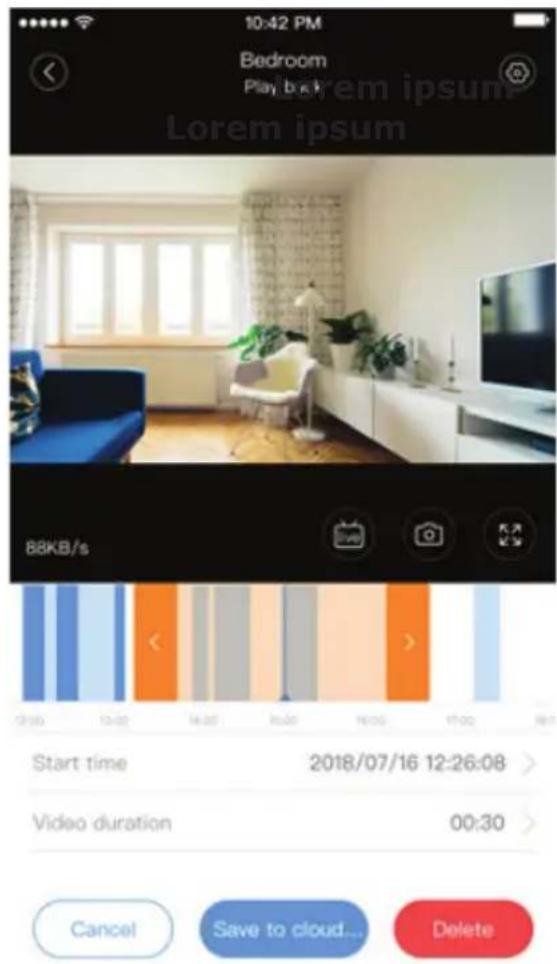
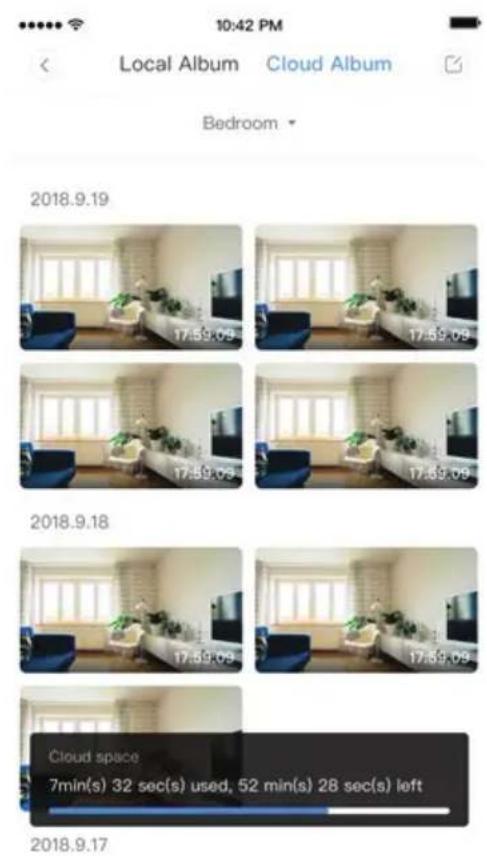
Note: Only the cameras with cloud service package have this feature. Drag the playback cursor and click the clip icon, select start time and click "save to the cloud album", enter the video name and click "save".
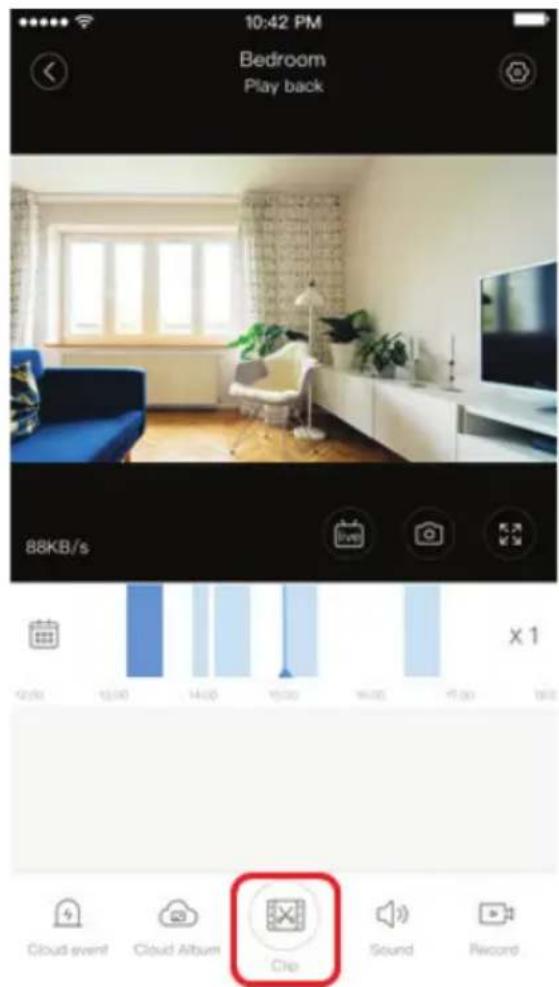
FIGURE 27
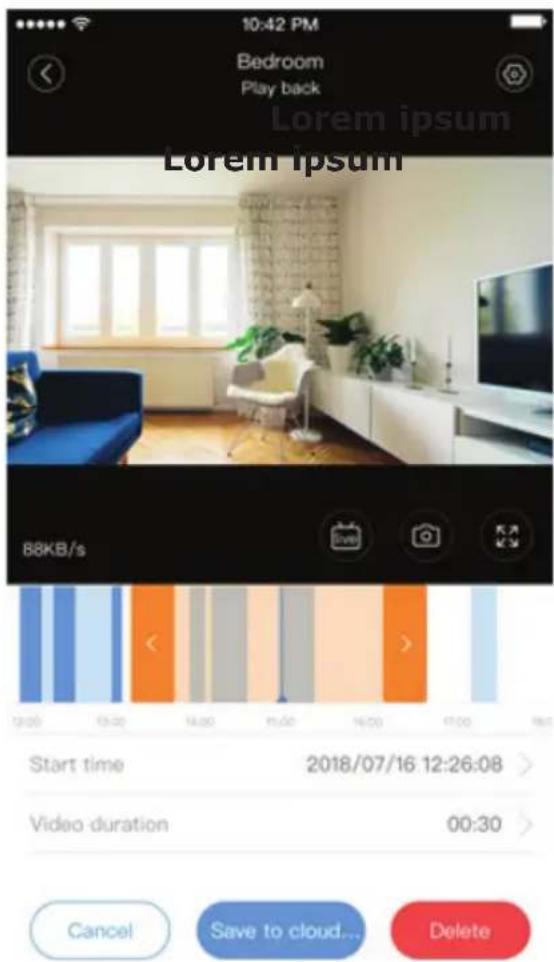
FIGURE 28
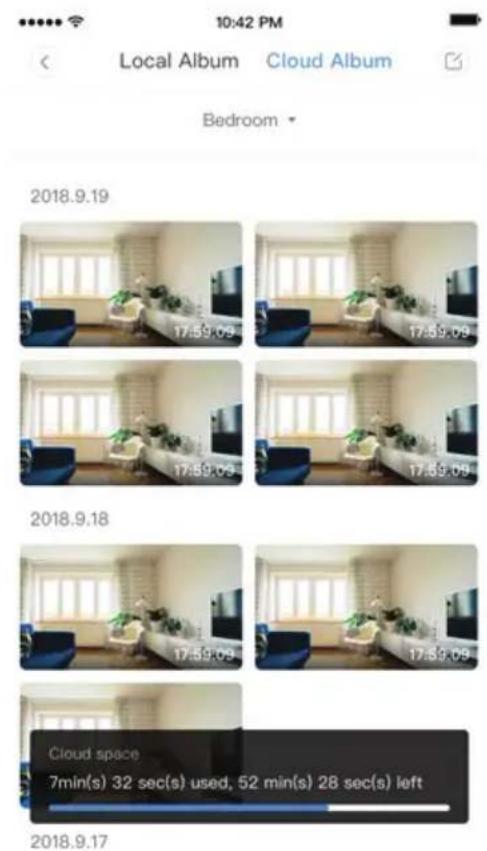
DOWNLOAD CLOUD VIDEO / SHARE CLOUD VIDEO
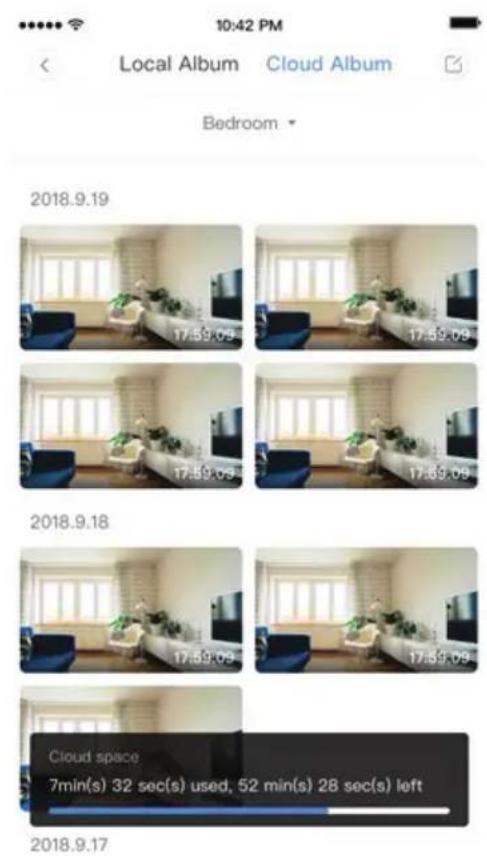
Click the cloud album icon and click the video clip, click "Download" to save the video to your phone or click "Share" to share your Video on Facebook and YouTube.
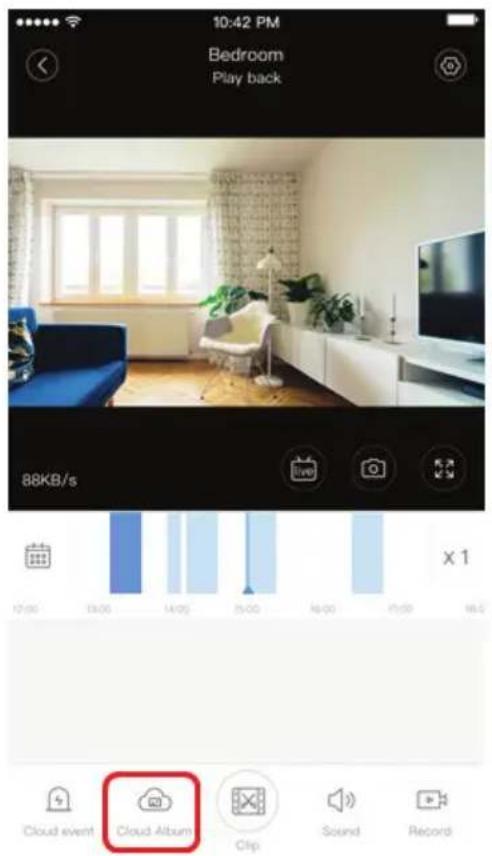
FIGURE 29
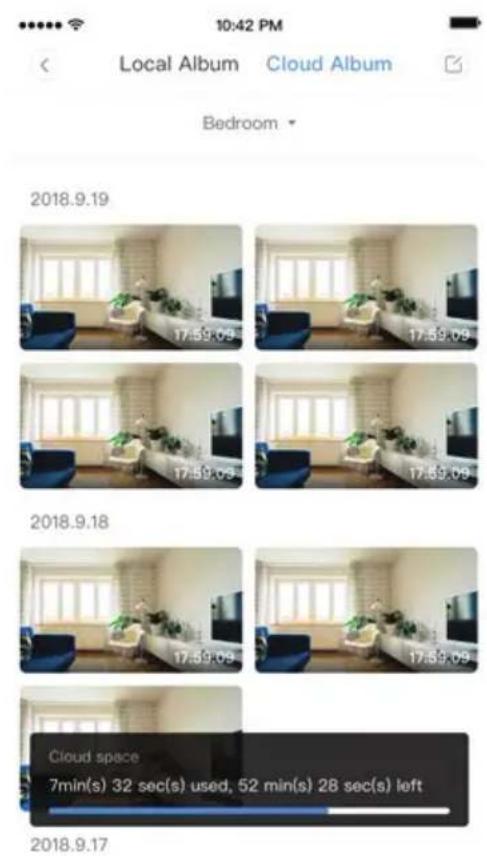
FIGURE 30
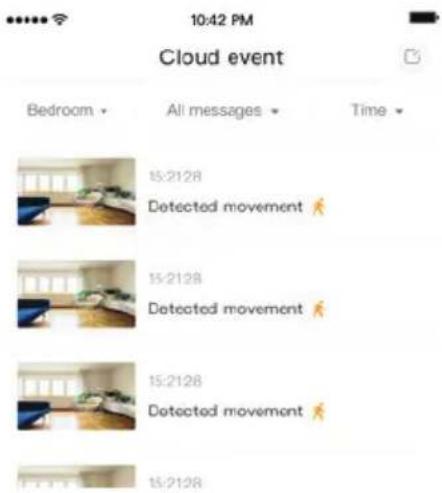
CLOUD VIDEO PLAYBACK
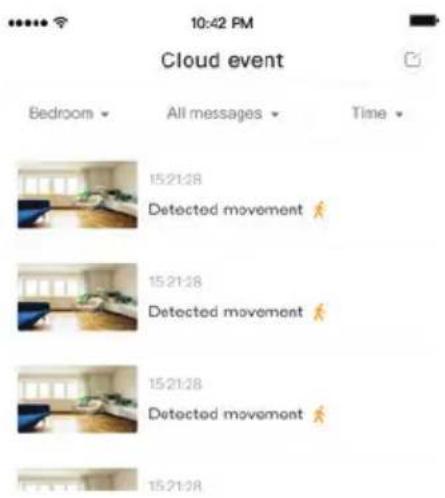
Click "Cloud event" to view the alarm video
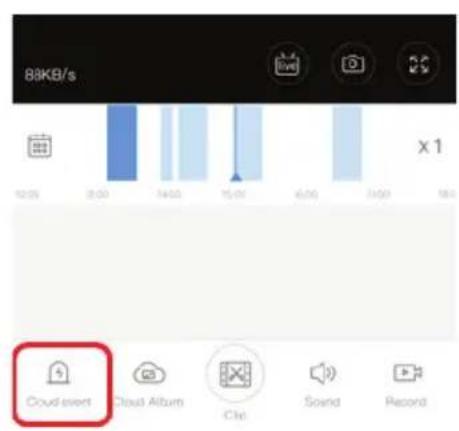
FIGURE 31
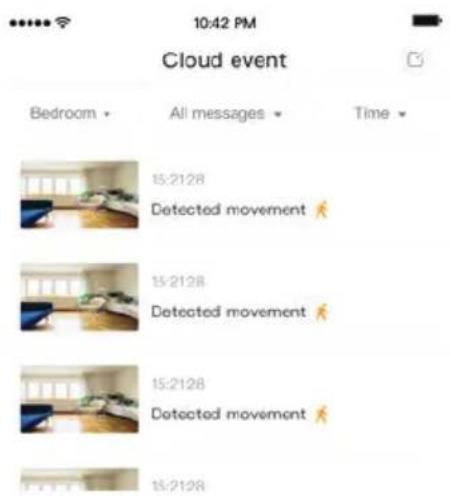
FIGURE 32
PREFERENCES
Click "💡" in the preview screen, check the settings menu
< Setting
Device details
Device setting
message notification
Cloud storage management >
Memory card management
Play Videos From Cloud >
Sharing equipment
Network information YYT >
Reboot device
Remove Device
FIGURE 33
ALARM TONE FUNCTIONALITY
Turn ON the Alarm Tone [Go to Settings Menu > Tap on Alarm Tone]: When detected moving object, camera will make an alarming sound, it will last 30 seconds by default, if it is triggered continuously in 30 seconds, the alarm sound will prolong. If this machine supports humanoid detection, the alarm sound will be triggered only when human's movements are detected. Turn OFF the Alarm Tone:
There is no alarm sound even when it detected the moving objects
Switch of the infrared light corresponding to the night vision off APP Turn ON the night vision [Go to Settings Menu > Tap on Night Vision]: Infrared light turns on - the picture is black and white.
Turn OFF the night vision [Go to Settings Menu > Tap on Night Vision]: Infrared light turns off, the picture is colorful.
Automatic night vision: Switch infrared lights automatically according to the photosensitive reaction, the color of the picture also depends on the photosensitive reaction.
CONTROL OF WHITE LIGHT
White light switch corresponding to the light bulb icon (Figure 23). In case of automatic night vision, open the white light by tapping on the bulb icon (Figure 23), it is bright and the picture is colorful. In the case of automatic night vision, close the white light by tapping on the bulb icon, it goes off and the picture's color depends on the photosensitive reaction. In the case of automatic night vision, Set the white light of automatic, it won't trigger the white light in the daytime, when moving objects detected at night, the white light will open automatically. It will last 60 seconds when triggered one time, if there are no moving objects, it will close after 60 seconds. The white light time will prolong if there are moving objects during the 60 seconds.
SET TF CARD RECORDING MODE
Insert the TF card into the card slot and power on the camera. (Ensure to install the TF card only when the camera is powered OFF).
TF card requirements :
- Memory space 8-128G
- C10 TF card
- Use after formatting.
- Recommend Kingston/SanDisk/Samsung
Click "Device storage" to check it
Click "Memory card recording mode" to select the video mode of TF card.
CLOUD STORAGE SERVICE
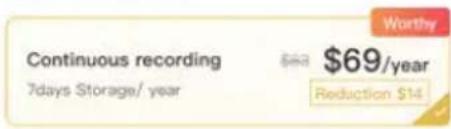
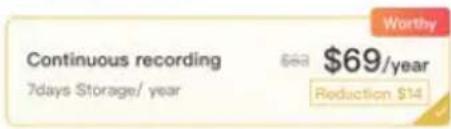
We offer 30-day-long cloud service, everyone can enjoy the cloud storage service for free, after that you can choose to pay for the service with a low cost.
A. Select "Cloud service" and check Subscription packages
B. There are three kinds of subscription packages for you, you can choose to pay for this service by monthly or yearly.
C. We support PayPal payment system, click "Go to PayPal now" and then complete the payment ( please install PayPal app in advance )
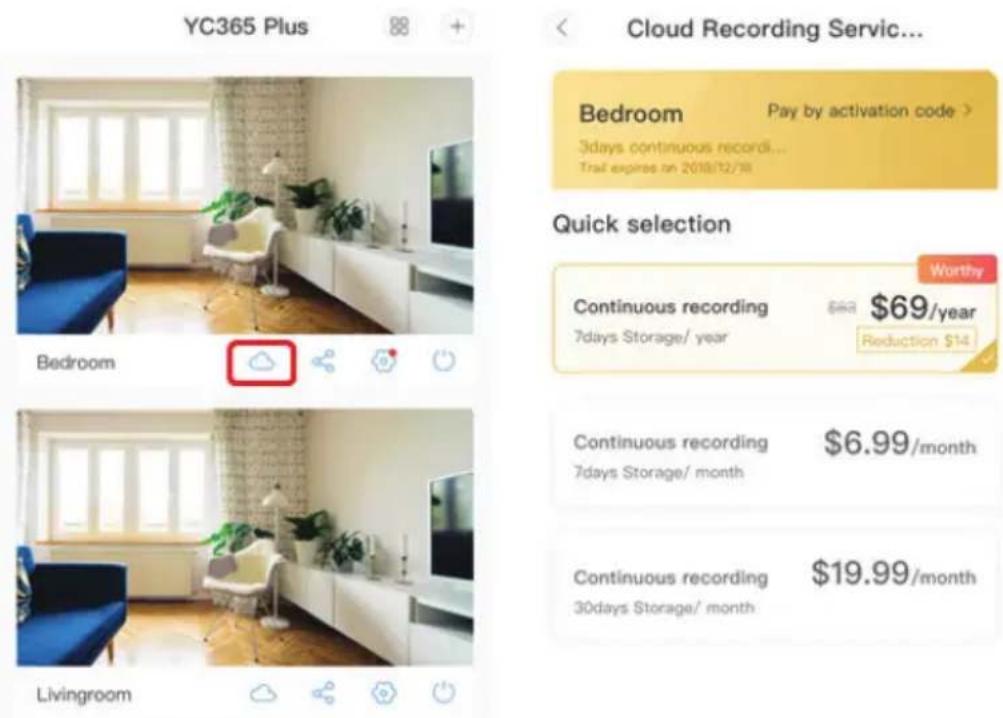
FIGURE 34
SPLIT SCREEN FEATURE
- Applicable only for multiple cameras under the same account.
- Click on the split screen button to simultaneously preview multiple devices.
Note: To use this feature you must have 2 or more cameras installed under the same account.
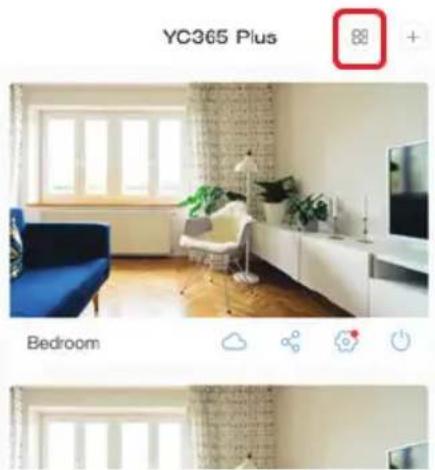
FIGURE 35
HOW TO USE THE CAMERA ON A COMPUTER
Enter your account number and password, click to Login
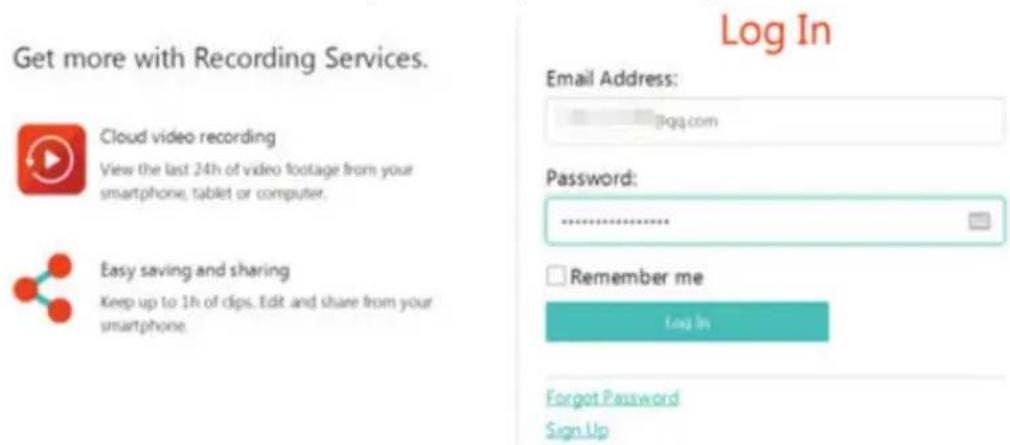
FIGURE 36
FREQUENTLY ASKED QUESTIONS
- Unable to add the device?
A. Please make sure the camera has been reset. Press the Reset button until you hear the prompt tone.
B. Camera supports Only 2.4GHz Wi-Fi, if your Wi-Fi router is 5GHz, please switch to 2.4/5GHz dual mode.
C. Please turn on the GPS service before adding the device on the Android/IOS mobile phone. After installation is complete, you will be asked to turn on GPS service when you use the app for the first time, if you have chosen not to turn ON the GPS service please uninstall the APP and reinstall again and ensure to enable the GPS service.
D. Please ensure the camera was not linked to any other account. If it was then please reset the device and add to your account.
There are four voice prompts in the progress
(1) "Please configure camera by AP hotspot or scanning code"
(2) Select your Wi-Fi and login with your password, after the device makes a noise like "beep" you will hear this "Please wait for Wi-Fi connecting".
(3)"Please wait for internet connecting" after getting the Internet IP address.
(4)"Internet connected welcome to use cloud camera"
A. If you cannot go to the second step, please ensure your Wi-Fi channel is not hidden, and the Wi-Fi router is not placed far from the camera. If this way doesn't work, please scan the QR code to add the camera.
B. If you cannot go to the third step, please reduce the number of the Wi-Fi users, and delete the special characters of your Wi-Fi password.
C. If you cannot go to the fourth step, please repeat the entire process again, if it still doesn't work, please contact the seller.
- Why does the video recording split into multiple videos?
The size of the video file is limited. Once the video size reaches its limit, the video file will be created and the next video will continue to be recorded.
- The TF card can't be identified?
Please check the TF card if it meets the quality requirements. When the Wi-Fi signal is not good, the TF Card will not be identified.
- The video recording timeline is blank after the cloud service expired?
The video cannot be replayed after cloud service is expired, if there is no TF card in the camera, the video cannot be recorded.
If the TF card is always working, but the video files disappear, please check the TF card state, if it is normal in the App but no video has been recorded, please format the TF card. If it still doesn't work, please get a new TF card and try again.
- Why can't I get notifications on my phone?
Make sure the APP notification is enabled in the phone settings, when you are watching the real-time video in the App, there is no warning notifications, because it's unnecessary to send notifications when you are watching the video online. Advanced message push system, the warning notifications won't be notified to your phone all the time but it will record all the messages and videos.
- Camera disconnected?
Please check the power and the Internet then restart the camera. If this way does not work please remove the camera and add it again in the App.
- Circle in the video, video is running slowly?
Circle in the video means it's still loading, please check your network environment.
- How can I give access to other people to watch the video?
Share the App account with the other people.
- How many people can use the account simultaneously?
There is no theoretical limit.
- Why adding camera to another account would fail?
One camera one account, if the other account needs to be added with the camera, please remove the camera from the current account and add it to the new account.
- How can I get my camera connected to the other Wi-Fi?
Two ways:
A: When you need to change to another Wi-Fi without moving the place.
Setting Menu >> Wi-Fi Network >> select the Wi-Fi
B: When the camera is moved to another place, please start the camera, you will see the "Device disconnected" on the main page, and then click "TROUBLESHOOT" to connect to the Wi-Fi again.
WEEE Number: 80133970
УКАЗАНИЯ ЗА МОНТАЖ
natural_image
White surveillance camera with attached cable and connector (no visible text or symbols)ВЪВЕДЕНИЕ
ФИГУРА 4
ФИГУРА 5
ФИГУРА 6
фигура 13
фигура 14 фигура 15
В. ДОБАВЯНЕ НА АР ХОТСПОТ
The device will start WiFi with "CLOUDCHIEXXXX" field. Click the button in the lower part to the setting interface for connecting to this WiFi

← Wi-Fi
4 Vtac
Saved
VITEC-UAE
JSW
+ Add network
Add the device
Network configuration
Set the Wi-Fi that has been connected with this device


фигура 16
фигура 18фигура 17
фигура 19
pie
Add the device Device is under connecting The router, mobile phone and device should be as close as possible. The connection takes about 1–2 minutes. Please wait a moment 56% ● Device connects to RFPs ○ Device switches to Cloud Service ● Device installation opportunitiesфигура 20 [А]
фигура 20 [В]
фигура 21
фигура 24
фигура 25
ИЗТРИВАНЕ НА НАСТРОЙКА
фигура 27
фигура 28
фигура 29
фигура 30
фигура 31
фигура 32
ПРЕДПОЧИТАНИЯ
Cloud storage management
Memory card management
Play Videos From Cloud >
Sharing equipment
Network information YYT >
Reboot device
Remove Device
ФУНКЦИОНАЛНОСТ НА ТОНА ЗА АЛАРМА
фигура 34
фигура 36
natural_image
White surveillance camera with attached cable and connector (no visible text or symbols)INTRODUZIONE
ACCESSO CON IL E-MAIL
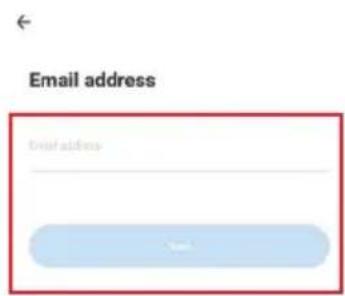
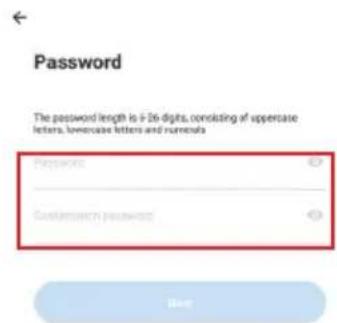
FIGURA 1 FIGURA 2 FIGURA 3
ACCESSO CON IL NUMERO DI TELEFONO
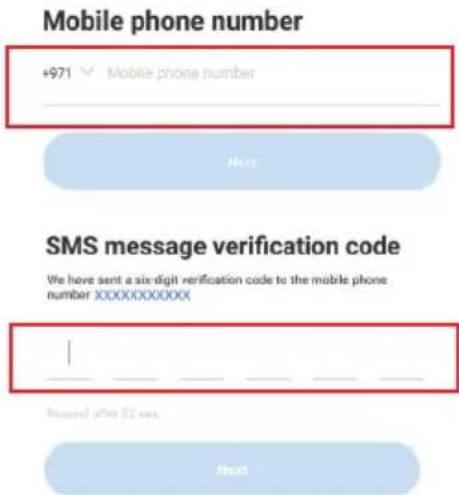
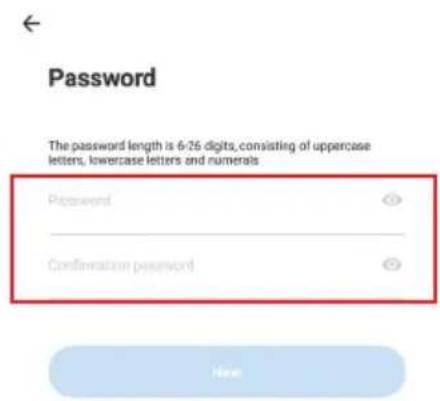
FIGURA 4 FIGURA 6FIGURA 5
AGGIUNTA DEL DISPOSITIVO DELLA VIDEOCAMERA ALL'APPLICAZIONE
FIGURA 7
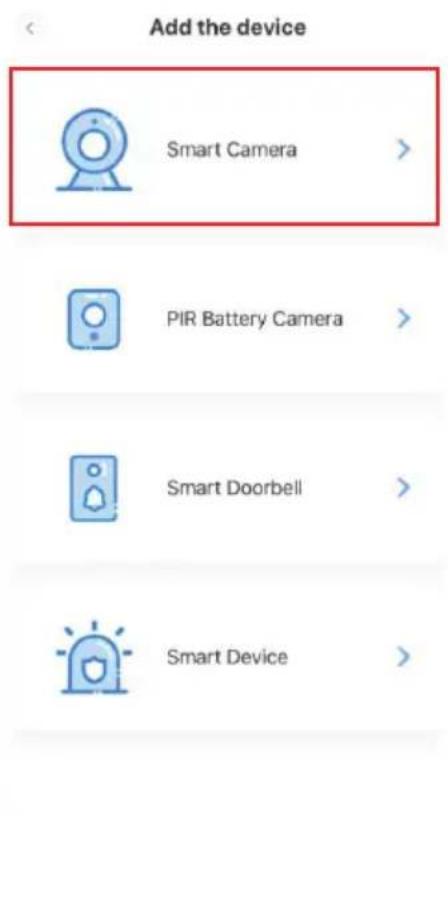
FIGURA 8 FIGURA 9
A. AGGIUNTA DEL DISPOSITIVO MEDIANTE LA SCANSIONE DEL CODICE
FIGURA 13
pie
Add the device Device is under connecting The routes, mobile phone and device should be as close as possible. The connection takes about 1-2 minutes. Please wait a moment. 56% ● Device contacts to WiFi ● Devices registers Cloud Service ● Device InitializationFIGURA 14
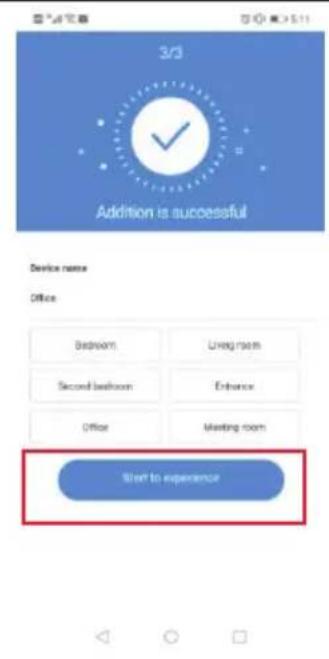
FIGURA 15
B. AGGIUNTA DELL'AP HOTSPOT
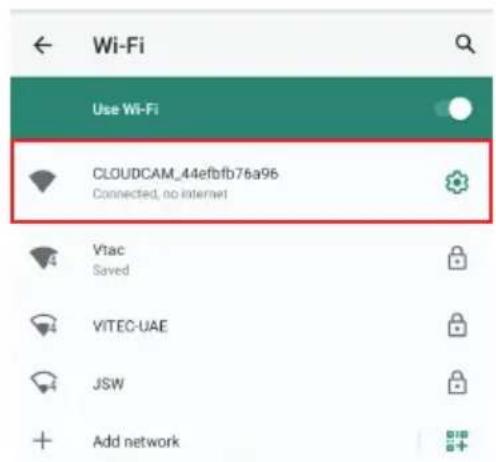
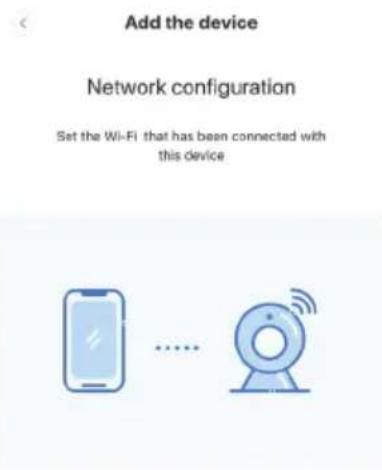
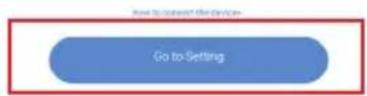
FIGURA 16
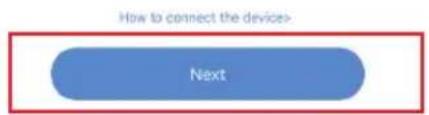
FIGURA 18FIGURA 17
FIGURE 19
pie
Add the device Device is under connecting The router, mobile phone and device should be as close as possible. The connection takes about 1–3 minutes. Please wait a moment. 56% ● Device connects to RIPs ○ Device registers Cloud Service ○ Device installatizationFIGURE 20 [A]
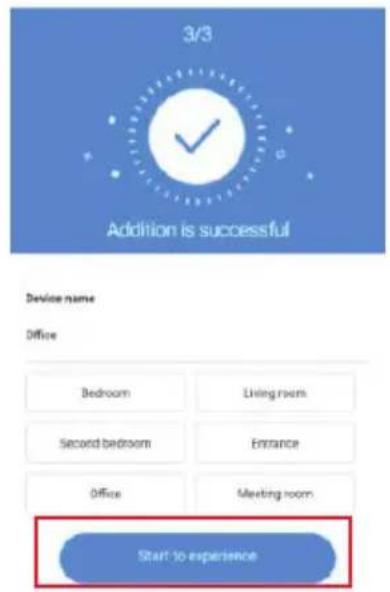
FIGURE 20 [B]
C. AGGIUNTA DEL DISPOSITIVO MEDIANTE IL COLLEGAMENTO AL CAVO DI RETE (SUPPORTATO SOLTANTO DA DISPOSITIVO DOTATO DELLA PORTA LAN)
FIGURE 21
D. APPLICAZIONE MODALITÀ DIRETTA (SPECIALE)
FIGURE 22 [F] FIGURE 22 [E] FIGURE 22 [G]
FIGURE 22 [H]
FIGURE 24
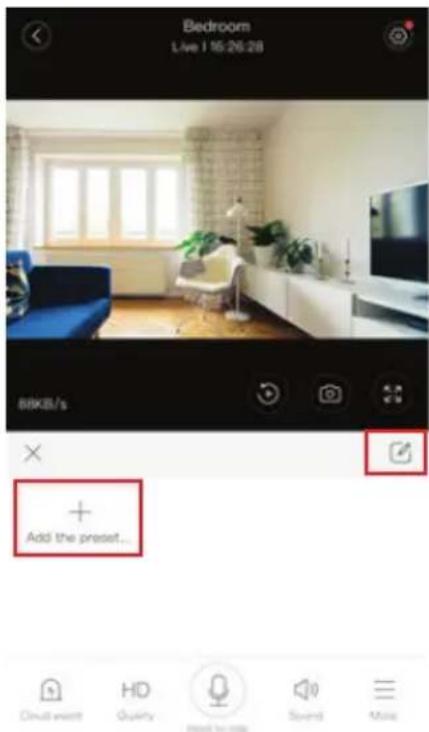
FIGURE 25
FIGURE 27
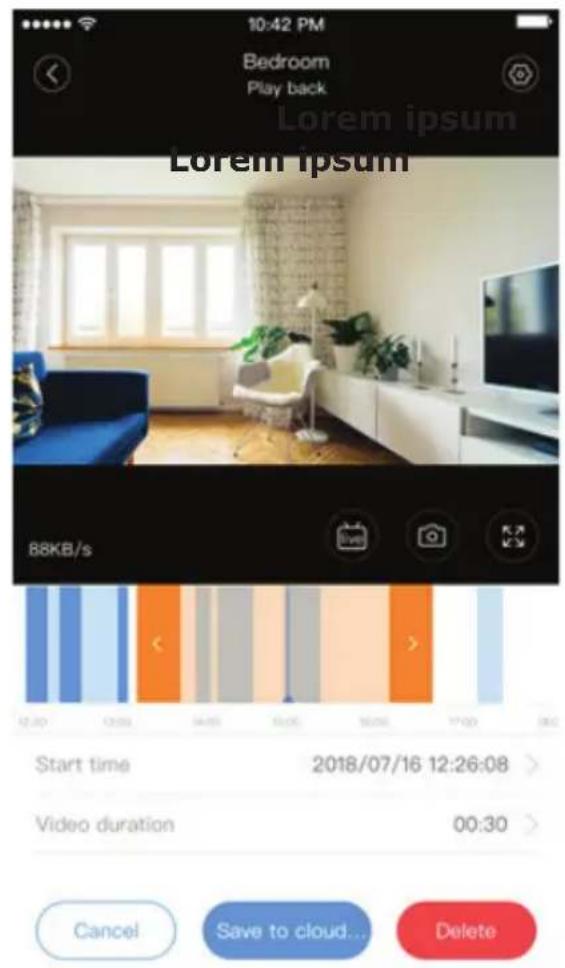
FIGURE 28
SCARICARE VIDEO DAL CLOUD/CONDIVIDERE VIDEO NEL CLOUD
FIGURE 29

FIGURE 30
VIDEO NEL CLOUD RIPRODUZIONE
FIGURE 32
PREFERENZE
| Setting | |
| Device details | > |
| Device setting | > |
| message notification | > |
| Cloud storage management | > |
| Memory card management | > |
| Play Videos From | Cloud > |
| Sharing equipment | > |
| Network information | YYT > |
| Reboot device | |
| Remove Device | |
FIGURE 33
FIGURE 34
FIGURE 36
DOMANDE FREQUENTI
natural_image
White surveillance camera with attached cable and sensor array (no visible text or symbols)BEVEZETÉS
TELEPÍTÉSI RAJZ
 CAMERA (1PC) CAMERA (1PC) |  SCREW NUTS (3PCS) SCREW NUTS (3PCS) | 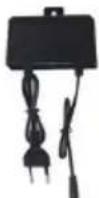 ADAPTER (1PC) ADAPTER (1PC) |  SCREWS (3PCS) SCREWS (3PCS) |  FITTING (1PC) FITTING (1PC) | [50HC] STEEL PIN (1PC) |
FÓ FUNKCIÓ

HD picture

Smart pan/Tilt
Remote view

Motion detection

Two way audio
TF card storage
Alarm Plush
Smooth zoom

WIFI connection

Samrt night version

Cloud storage

AP hotspot
MÜSZAKI ADATOK
REGISZTRÁLJON ÚJ FIÓKOT
BEJELENTKEZÉS EMAIL
1 ÁBRA 2 ÁBRA 3 ÁBRA
BEJELENTKEZÉS TELEFONSZÁMMAL
4 ÁBRA 6 ÁBRA5 ÁBRA
KAMERÁS ESZKÖZ HOZZÁADÁSA AZ ALKALMAZÁSHOZ
7 ÁBRA 8 ÁBRA 9 ÁBRA
A. ESZKÖZ HOZZÁADÁSÁVAL KÓD BEOLVASÁSÁVAL
13 ÁBRA
pie
Add the device Device is under connecting The router, mobile phone and device should be as close as possible. The connection takes about 1–2 minutes. Please wait a moment 56% ● Devices connects to Wi-Fi ○ Device registers Cloud Service ● Device Initialization14 ÁBRA
15 ÁBRA
B. HOTSPOT HOZZÁADÁSA
The device will start WiFi with "COSUBOSA_XOOO" field. Click the button in the lower part to the setting interface for connecting to this WiFi

Wi-Fi

Add the device
Network configuration
Set the Wi-Fi that has been connected with this device.

16 ÁBRA
17 ÁBRA
18 ÁBRA
19 ÁBRA
pie
Add the device Device is under connecting The router, mobile phone and device should be as close as possible. The connection takes about 1–3 minutes. Please wait a moment 56% ● Device connects to RFP1 ○ Device installs Cloud Service ● Device installation20[A] ÁBRA
20[B] ÁBRA
C. KIEGÉSZÍTÉS HÁLÓZATI KÁBELLEL TÖRTÉNŐ CSATLA- KOZÁSSAL (CSAK A LAN PORTOT TÁMOGATJA)
21 ÁBRA
D. AP KÖZVETLEN MÓD (SPECIÁLIS)
22[A] ÁBRA
22[B] ÁBRA 22[C] ÁBRA
22[F] ÁBRA22[E] ÁBRA 22[G] ÁBRA
22[D] ÁBRA
22[H] ÁBRA
FUNKCIÓ BEVEZETÉSE
24 ÁBRA
25 ÁBRA
AZ ELÖRE BEÁLLÍTOTT ÉRTÉK TÖRLÉSE
VIDEÓ LEJÁTSZÁS
27 ÁBRA
28 ÁBRA
FELHŐ VIDEÓ LETÖLTÉSE / FELHŐ VIDEÓ MEGOSZTÁSA
29 ÁBRA
30 ÁBRA
PREFERENCIÁK
Cloud storage management >
Memory card management
Play Videos From Cloud >
Sharing equipment
Network information YYT >
Reboot device
Remove Device
FIGURE 33
RIASZTÁSI HANG FUNKCIÓ
OSZTOTT KÉPERNYŐ FUNKCIÓ
natural_image
Interior view of a modern living room with blue sofas and white furniture, no visible text or symbols on the main image area.35 ÁBRA
HOGYAN KELL HASZNÁLNI A KAMERÁT A SZÁMÍTÓGÉPEN
Bemenet: www.ucloudcam.com
36 ÁBRA
GYAKRAN ISMÉTELT KÉRDÉSEK
natural_image
White security camera with attached cable and connector (no visible text or symbols)GEBRAUCHSANWEISUNG
NEUES KONTO REGISTRIEREN
LOGIN MIT EMAIL.
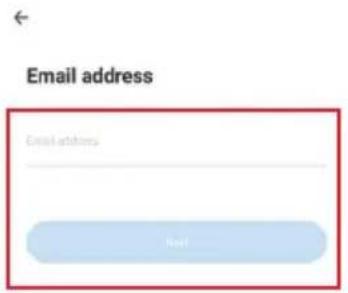
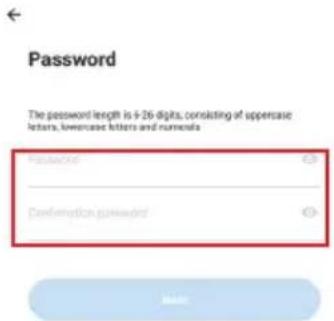
ABBILDUNG 5

A. HINZUFÜGEN DES GERÄTS DURCH SCANNEN DES CODES
ABBILDUNG 13
Add the device
Device is under connecting
The router, mobile phone and device should be as close as possible. The connection takes about 1\~2 minutes. Please wait a moment

pie
| Category | Value (%) | |---|---| | Pie Chart | 56% |Device concepts to WiFi
Device registers Cloud Service
Device Installation
ABBILDUNG 14
Device name
(1)ce
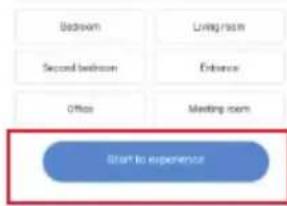

ABBILDUNG 15
B. HINZUFÜGEN VON HOTSPOT-ZUGANGSPUNKT IM NETZ (AP, ACCESS POINT HOTSPOT)
The device will start WiFi with "COLDERSA_X000X" field. Click the button in the lower part to the setting interface for connecting to this WiFi
← Wi-Fi Q
Vtac
Saved
VITEC-UAE
JSW
+ Add network
Add the device
Network configuration
Set the Wi-Fi that has been connected with this device

ABBILDUNG 16
FIGURE 19
pie
Add the device Device is under connecting The router, mobile phone and device should be as close as possible. The connection takes about 1–3 minutes. Please wait a moment 56% ● Device connects to RFP1 ○ Device registers Cloud Service ● Device installationFIGURE 20 [A]
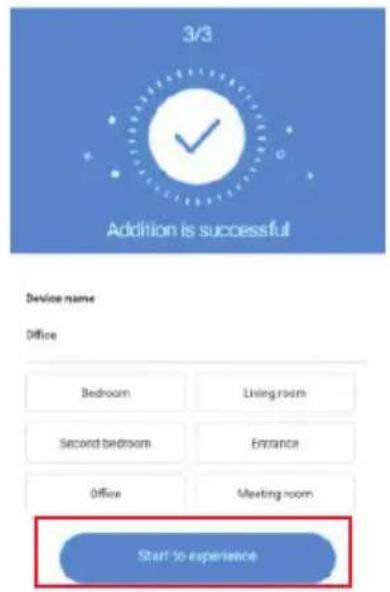
FIGURE 20 [B]
FIGURE 21
FIGURE 22 [F] FIGURE 22 [E] FIGURE 22 [G]
FIGURE 22 [H]
FUNKTION EINFÜHRUNG
FIGURE 24

FIGURE 25
FIGURE 27
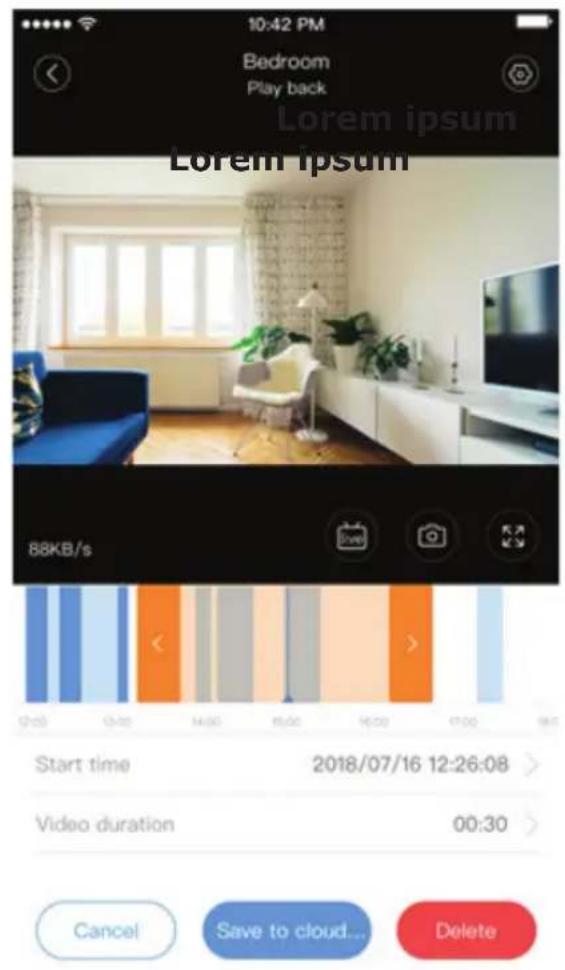
FIGURE 28
CLOUD-VIDEO HERUNTERLADEN / CLOUD-VIDEO TEILEN
FIGURE 29
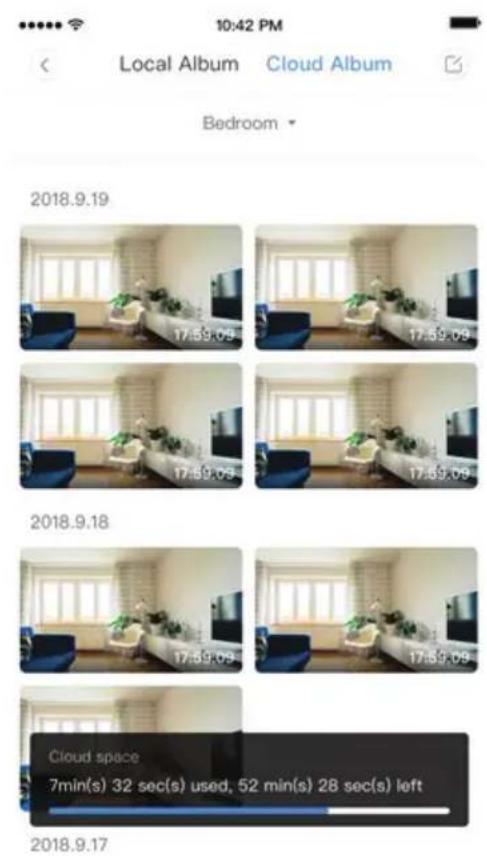
FIGURE 30
CLOUD VIDEO WIEDERGABE
FIGURE 32
PRÄFERENZEN
Cloud storage management
Memory card management
Play Videos From Cloud >
Sharing equipment
Network information YYT >
Reboot device
Remove Device
FIGURE 33
FUNKTIONALITÄT DES ALARMSIGNALS
FIGURE 34
natural_image
Interior view of a modern living room with blue sofas, white furniture, and wall art (no visible text or symbols)FIGURE 35
FIGURE 36
natural_image
White surveillance camera with attached cable and display screen (no visible text or symbols)INTRODUCCIÓN
Manual multilingüe - CÓDIGO QR
CONTENIDO DEL EMBALAJE
 CAMERA(1PC) CAMERA(1PC) |  SCREW NUTS(3PCS) SCREW NUTS(3PCS) |  ADAPTER(1PC) ADAPTER(1PC) |  SCREWS(3PCS) SCREWS(3PCS) |  FITTING(1PC) FITTING(1PC) | [376W]STEEL PIN(1PC) |
FUNCIONES BÁSICAS

HD picture

Smart pan/Tilt
Remote view

Motion detection

Two way audio
TF card storage
Alarm Plush

Smooth zoom

WIFI connection

Samrt night version

Cloud storage

AP hotspot
DATOS TÉCNICOS
natural_image
QR code with a blue circular logo in the center (no readable text or symbols)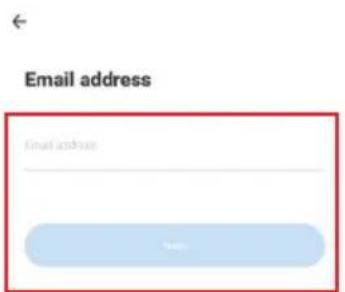
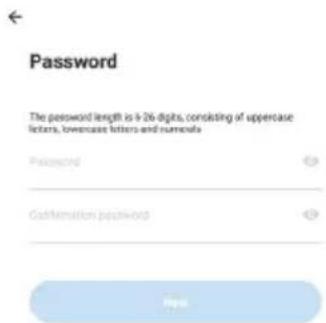
FIGURA 1 FIGURA 2 FIGURA 3
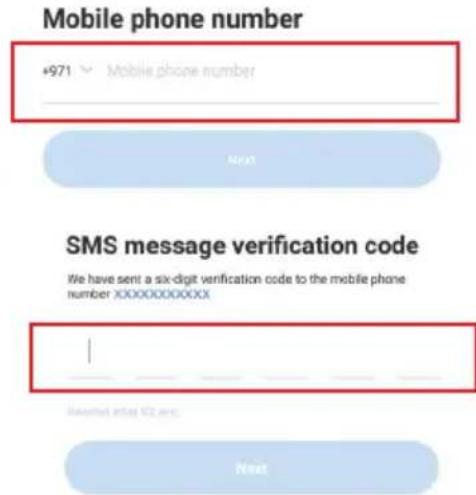
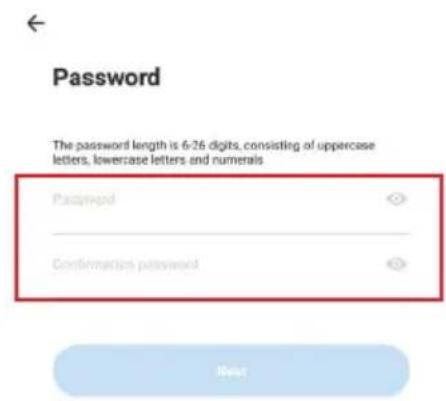
FIGURA 4 FIGURA 6FIGURA 5
FIGURA 7 FIGURA 8 FIGURA 9
A. AÑADIR DISPOSITIVO ESCANEANDO EL CÓDIGO
FIGURA 10
FIGURA 12
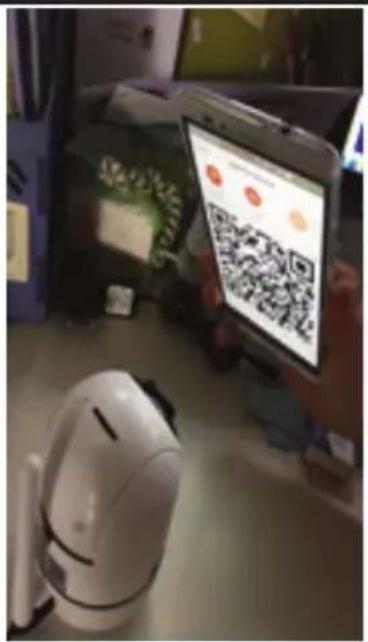
FIGURA 13
pie
Add the device Device is under connecting The router, mobile phone and device should be as close as possible. The connection takes about 1~2 minutes. Please wait a moment! 56% Device connects to Wi-Fi Device registers Cloud Service Device MilyolizationFIGURA 14
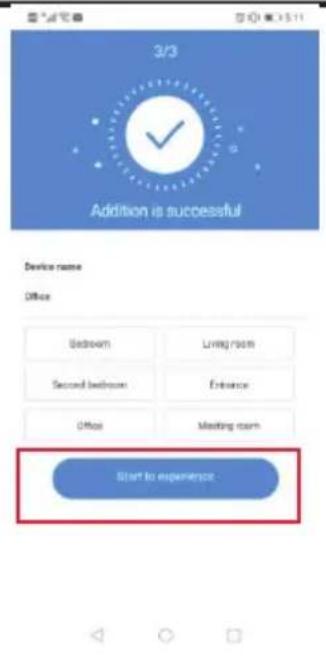
FIGURA 15
B. AÑADIR PUNTO DE ACCESO AP
FIGURA 16
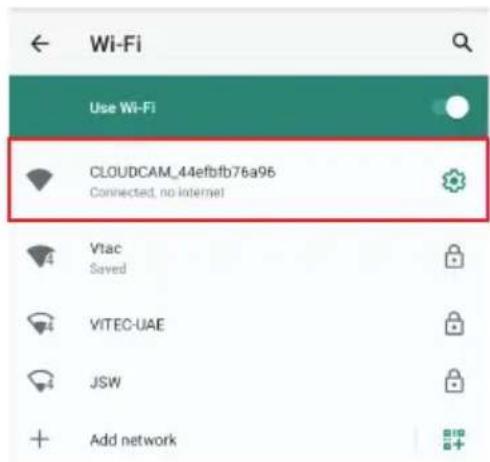
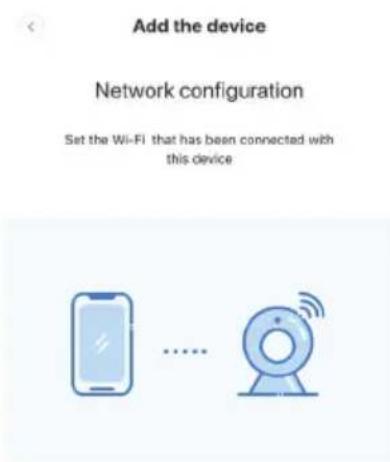
FIGURA 18FIGURA 17
FIGURE 19
pie
Add the device Device is under connecting The router, mobile phone and device should be as close as possible. The connection takes about 1–3 minutes. Please add a moment 56% ● Device connects to RFP ○ Device registers Cloud Service ● Device installationFIGURE 20 [A]
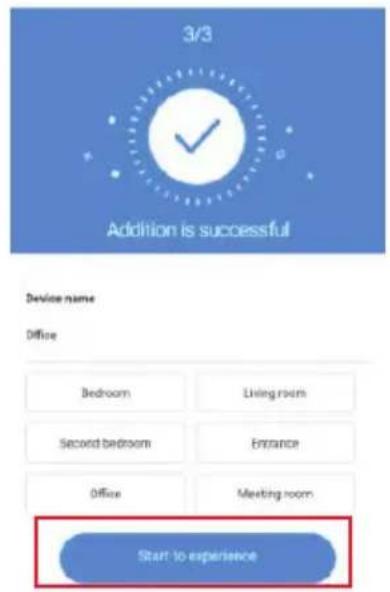
FIGURE 20 [B]
FIGURE 21
D. MODO DIRECTO AP (ESPECIAL)
FIGURE 22 [F] FIGURE 22 [E] FIGURE 22 [G]
FIGURE 22 [H]
FIGURE 24
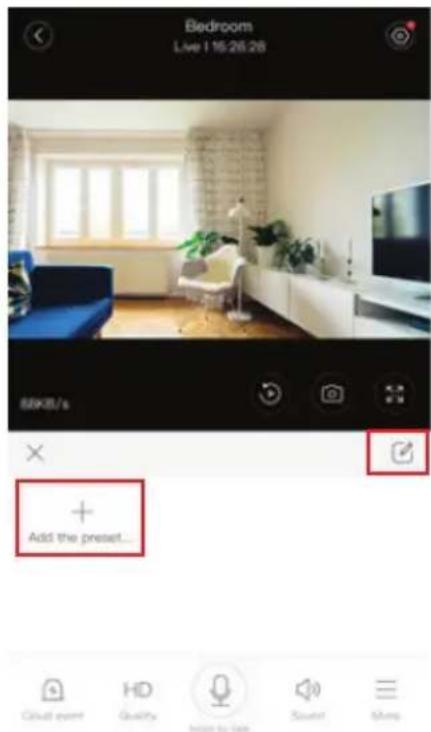
FIGURE 25
FIGURE 27
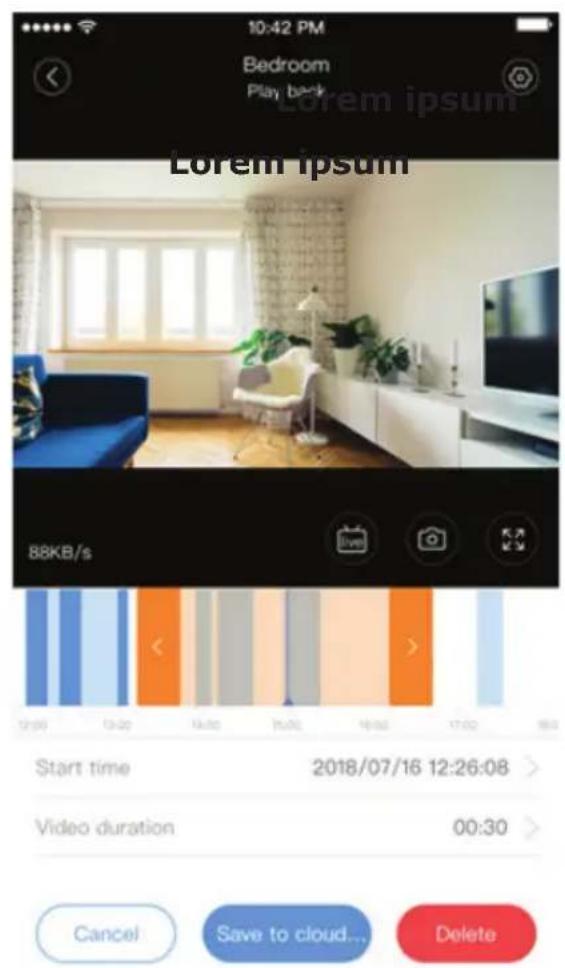
FIGURE 28
DESCARGAR VIDEO DESDE LA NUBE/COMPARTIR VIDEO EN LA NUBE
FIGURE 29
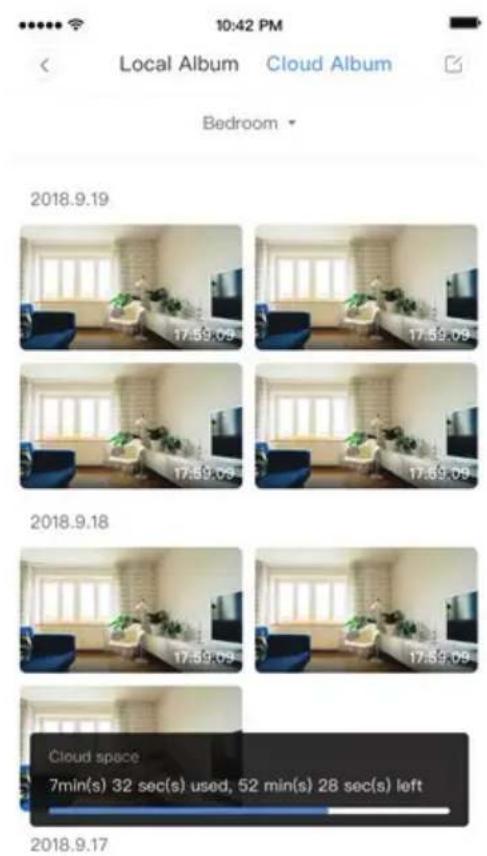
FIGURE 30
FIGURE 31
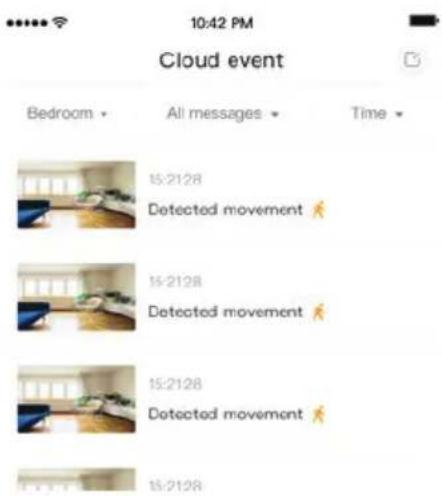
FIGURE 32
PREFERENCIAS
Cloud storage management
Memory card management
Play Videos From Cloud >
Sharing equipment
Network information YYT >
Reboot device
Remove Device
FIGURE 33
FIGURE 34
natural_image
Interior view of a modern living room with blue sofas and white furniture, no visible text or symbols on the main objects.FIGURE 35
CÓMO USAR LA CÁMARA DEL ORDENADOR
FIGURE 36
natural_image
White security camera with attached cable and connector (no visible text or symbols)INTRODUCTION
Manuel multilingue - QR CODE
CONTENU DE L'EMBALLAGE
 CAMERA(1PC) CAMERA(1PC) |  SCREW NUTS(3PCS) SCREW NUTS(3PCS) | 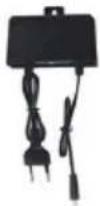 ADAPTER(1PC) ADAPTER(1PC) |  SCREWS(3PCS) SCREWS(3PCS) |  FITTING(1PC) FITTING(1PC) |  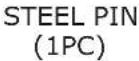 |
FONCTIONS PRINCIPALES

HD picture

Smart pan/Tilt
Remote view

Motion detection

Two way audio
TF card storage
Alarm Plush

Smooth zoom

WIFI connection

Samrt night version

Cloud storage

AP hotspot
DONNÉES TECHNIQUES
CRÉER UN NOUVEAU COMPTE
SE CONNECTER À PARTIR DU EMAIL.
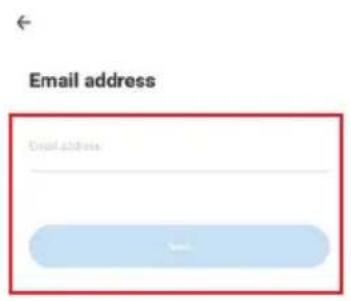
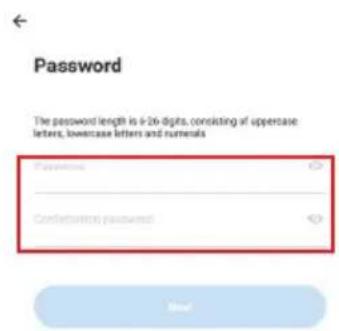
FIGURA 1 FIGURA 2 FIGURA 3
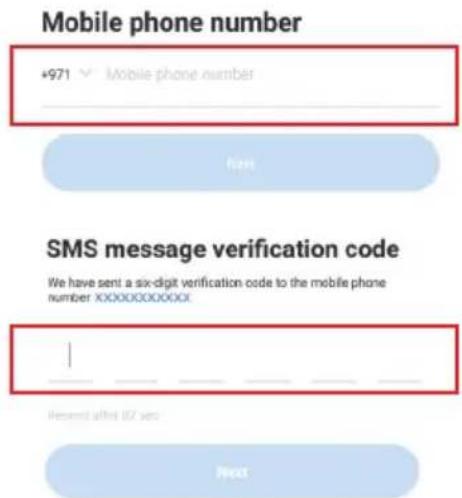
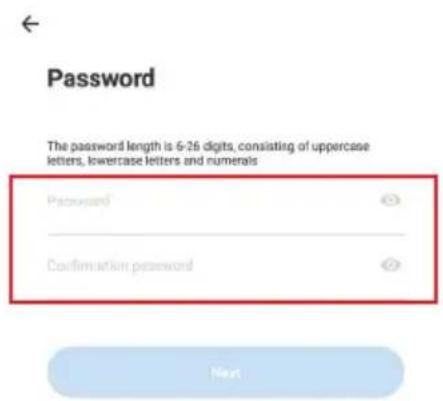
FIGURA 4 FIGURA 6FIGURA 5
AJOUT D'UNE CAMÉRA À L'APPLICATION
FIGURA 7 FIGURA 8 FIGURA 9
A. AJOUTER UN DISPOSITIF EN SCANNANT LE CODE
FIGURA 13
Add the device
Device is under connecting
The router, mobile phone and device should be as close as possible. The connection takes about 1\~2 minutes. Please wait a moment

pie
| Category | Value (%) | |---|---| | Pie Chart | 56% |Device concepts to WiFi
Device registered Cloud Service
Device Interlakation
FIGURA 14
Device name
(1)ce
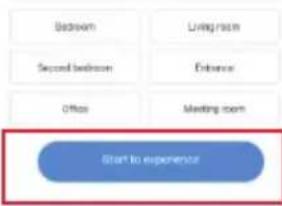

FIGURA 15
B. AJOUTER UN POINT D'ACCÈS SANS FIL
The device will start Wi-Fi with "C:\WINDOWS\XXX" field. Click the button in the lower part to the setting interface for connecting to this Wi-Fi
← Wi-Fi
4 Vtac
Saved
VITEC-UAE
JSW
+ Add network
Add the device
Network configuration
Set the Wi-Fi that has been connected with this device

FIGURA 16
FIGURA 17
How to connect the device>

FIGURA 18
FIGURE 19
pie
Add the device Device is under connecting The router, mobile phone and device should be as close as possible. The connection takes about 1–3 minutes. Please wait a moment 56% ● Device connects to RFP ○ Device registers Cloud Service ● Device installationFIGURE 20 [A]
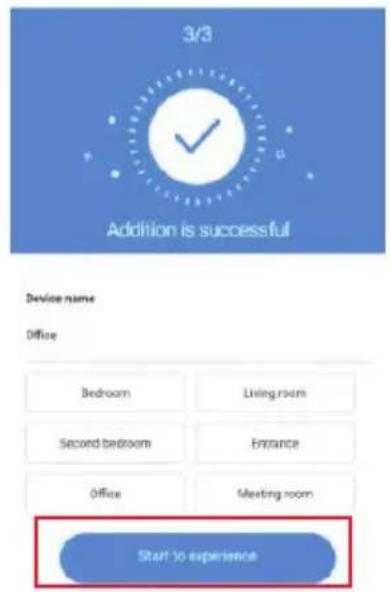
FIGURE 20 [B]
C. AJOUT PAR CONNEXION AU CÂBLE DE RÉSEAU (NE SUPPORTE QU'UN DISPOSITIF DE PORT LAN)
FIGURE 21
D. MODE DIRECT AP (SPÉCIAL)
FIGURE 22 [F] FIGURE 22 [E] FIGURE 22 [G]
FIGURE 22 [H]
INTRODUCTION AUX FONCTIONS
FIGURE 24
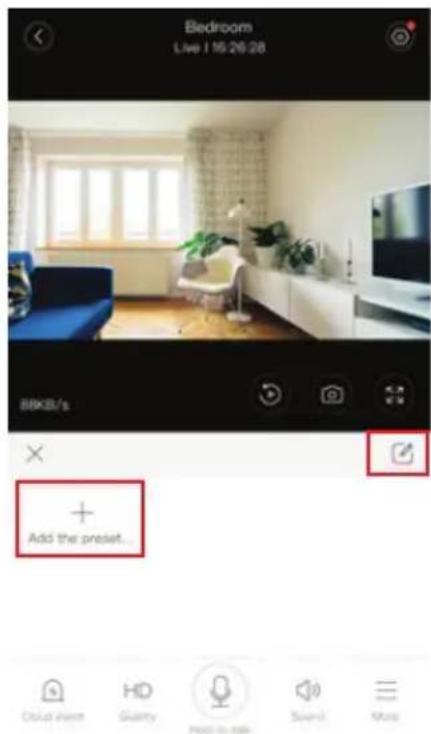
FIGURE 25
SUPPRIMER LE PRÉRÉGLAGE
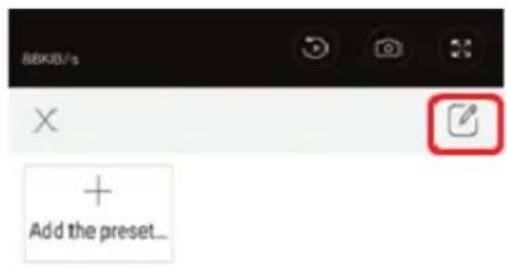
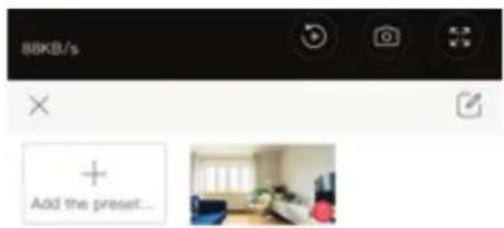
FIGURE 26
LECTURE VIDÉO
FIGURE 28
TÉLÉCHARGER LA VIDÉO DU NUAGE/PARTAGER LA VIDÉO DU NUAGE
FIGURE 29
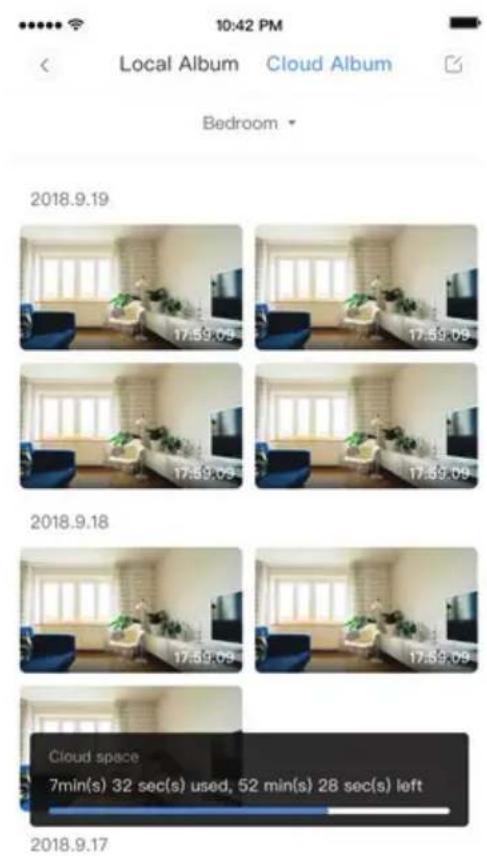
FIGURE 30
VIDÉO NUAGE LECTURE
FIGURE 31
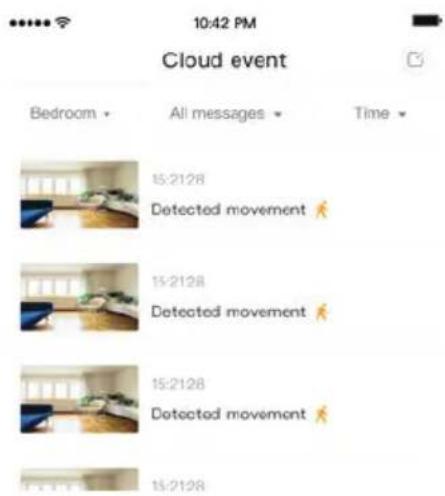
FIGURE 32
PRÉFÉRENCES
Cloud storage management >
Memory card management
Play Videos From Cloud >
Sharing equipment
Network information YYT >
Reboot device
Remove Device
FIGURE 33
FONCTIONNALITÉ DE LA TONALITÉ D'ALARME
natural_image
Interior view of a modern living room with blue sofas, white furniture, and a wall-mounted TV (no visible text or symbols)Bedroom


natural_image
Interior view of a modern living room with blue sofas, white furniture, and a wall-mounted TV (no visible text or symbols)Livingroom


Bedroom
Pay by activation code >
3days continuous recordi...
Trail expires on 2018/02/18
Quick selection
Continuous recording
\$6.99/month
7days Storage/month
Continuous recording
30days Storage/ month
\$19.99/month
FIGURE 34
FONCTION D'ÉCRAN PARTAGÉ
FIGURE 36
QUESTIONS FRÉQUEMMENT POSÉES
natural_image
White surveillance camera with attached cable and connector (no visible text or symbols)UVOD
Hvala vam, što ste odabrali i kupili tvrtke Vi-Tek (V-TAC). Vi-Tek (V-TAC) će va poslužiti na najbolji mogući način. Molimo, pažljivo pročitajte ove upute prije instalacije i spremite upute za buduću uporabu. Ako imate dodatnih pitanja, molimo obratite se našemprodavaču ili lokalnom trgovcu gdje ste kupili ovaj proizvod. Oni su osposobljeni i spremni vam pomognu na najbolji način.

Višejezični priručnik - QR KOD
Skenirajte QR kôd da biste pristupili priručniku na više jezika.

Ova oznaka označava da se ovaj proizvod ne smije odlagati s ostalim kućnim otpadom.
UPUTE ZA UGRADNJU
SADRŽAJ PAKIRANJA
 |  |  |  |  |  |
 |  |  |  |  | STEEL PIN(1PC) |
OSNOVNE FUNKCIJE

HD picture

Smart pan/Tilt
Remote view

Motion detection

Two way audio
TF card storage
Alarm Plush
Smooth zoom

WIFI connection

Samrt night version

Cloud storage

AP hotspot
TEHNIČKI PODACI
• DC: 12V ± 5% ulazne snage
• Automatsko praćenje
- Otkrivanje pokreta i zvuka
- Bežična frekvencija 2,4 \~ 2,4835 Ghz
• 220 ° / 90 ° pomicanje / nagit
• Rezolucija 2304x1296F
• HD CMOS senzor slike od 3,0 piksela
- Objektiv od 3,6 mm
• Video kompresija H.265 / Mjpeg
- Protokol: TCP, UDP, DHCP, DNS, RTSP, P2
• 10 metara noćnog vida
• Brzina kadrova 25–30 fps
• Dvosmjerni audic
- Bežična sigurnost: WEP / WPA-PSK / WPA2-PSK šifriranje podataka
- Micro SD do 128 GB prostora za pohranu
• Lan priključak RJ-45
- Podržava Android i IOS uređaje
• IEEE802.11b / g / n bežični LAN
- IP ocjena: IP65
PREUZIMANJE APLIKACIJE
- Trgovina Google Play - Traži "YCC365 Plus
- IOS (Apple Store) - Traži "YCC365 Plus"
- Android telefoni i IOS (iPhone) mogu preuzeti tako što će skenirati sljedeće QR kodove.

PRIJAVA NOVOG PROFILA
PRIJAVA S KORIŠTENJEM E-POŠTE
- Kliknite "Postavke" da biste registrirali svoju adresu e-pošte kao i korisnički ID i zatim kliknite "Dalje" da biste stvorili lozinku.
- Kliknite "Sljedeće" - Aplikacija će poslati vezu za potvrdu na vašu e-poštu. Molimo potvrdite vezu, da biste dovršili postupak registracije.
SLIKA 1 SLIKA 2 SLIKA 3
PRIJAVA S KORISTENJEM TELEFONSKOG BROJA
SLIKA 4 SLIKA 6 SLIKA 5
DODAVANJE KAMERE U APLIKACIJI
SAVJET: Prvo spojite adapter napajanja na kameru, a zatim kamera šalje glasovnu poruku "Please configure camera by AP hotspot or scanning code" (molimo konfigurirajte kameru pomoću AP hotspot ili koda za skeniranje). Počnite dodavati kameru u aplikaciju YCC365 Plus APP. Ako ne čujete glasovnu poruku, pritisnite i držite tipku za resetiranje uređaja dok ne čujete poruku"Reset Success" (Uspješno resetiranje). Pričekajte dok ne čujete glasovnu poruku "Please configure camera by AP hotspot or scanning code".
NAPOMENA: Kamera podržava samo 2.4G Wi-Fi, a prije dodavanja uređaja provjerite je li vaš Wi-Fi usmjerivač 2.4G i je li vaš telefon povezan s 2.4G Wi-Fi.
Dodavanje kamere
- Da biste dodali kameru, kliknite znak "+" u gornjem desnom kutu, kao što je dolje prikazano (slika 7).
- Kliknite "Smart Camera" kao što je dolje prikazano (slika 8).
- Postoje tri načina za dodavanje kamere: (a) Dodavanje uređaja skeniranjem koda, (b) Dodavanje AP hotspot, (c) Dodavanje povezivanjem mrežnim kabelom (ta opcija nije dostupna s ovom kamerom) (vidi sliku 9).

SLIKA 7 SLIKA 8 SLIKA 9
A. DODAVANJE UREĐAJA SKENIRANJEM KODA
- Kliknite na "device adding by scanning the code" (vidi sliku 9).
- Pročitajte savjet prije nego što kliknete Next. Nakon što začujete glasovnu poruku iz kamere "Please configure camera by AP hotspot or scanning code", kliknite Next (slika 10).
- Unesite ime i zaporku svog Wi-Fi-ja.
- Ako je vaš mobilni telefon već povezan s Wi-Fi mrežom, prikazat će se puno ime Wi-Fi mreže. Ako nije, pritisnite "Switch the network", da biste otvorili WLAN u Vašem telefonu i povezali se s dostupnom mrežom. Zatim se vratite u aplikaciju. Unesite zaporku za Wi-Fi (Napomena: ovo mora biti zaporka vaše Wi-Fi mreže), a zatim kliknite "Next". Na zaslonu telefona pojavit će se QR kôd.
- Postavite QR kod do objektiva kamere, na udaljenost od oko 4-8 inča. Nakon što kamera pročita QR kôd, poslat će dva signala i povezati se s Wi-Fi mrežom.
Sada u aplikaciji kliknite "Beep or flashing lights" (slika 12). Zatim pričekajte da kamera potvrdi porukame "Internet connected" "welcome to use cloud camera" (spojen na Internet, dobrodošli u cloud kameru). Aplikacijia se šalje poruka "Addition is successful" - Odaberite / napišite naziv uređaja (slika 15) i kliknite na "Start to experience".
V-TAC®
SLIKA 13
pie
Add the device Device is under connecting The router, mobile phone and device should be as close as possible. The connection takes about 1~2 minutes. Please wait a moment! 56% ● Device connects to WiFi ○ Device registers Cloud Service ● Device installationSLIKA 14
SLIKA 15
B. DODAVANJE AP HOTSPOTA
SLIKA 16
SLIKA 17
SLIKA 18
- Odaberite svoju Wi-Fi mrežu i unesite Wi-Fi zaporku (napomena: ovo mora biti zaporka vaše Wi-Fi mreže). Kliknite " confirm" [Slika 19], kamera šalje dva signala i poruku " Network is connecting, please wait". Pričekajte da kamera potvrdi s " Internet connected welcome to use cloud camera". U aplikaciji se prikazuje "Addition is successful " - Odaberite / upišite naziv uređaja (slika 20 [B]) i kliknite na "Start to experience".
SLIKA 19
SLIKA 20 [A] SLIKA 20 [B]
C. DODAVANJE POVEZIVANJEM MREŽNOM KABLOVSKOM VEZOM (PODRŽANO SAMO UREĐAJEM S LAN PORT)
SLIKA 21
D. AP IZRAVNI NAČIN RADA (POSEBNI)
SLIKA 22 [F] SLIKA 22 [E] SLIKA 22 [G] SLIKA 22 [H]
UVOD U FUNKCIJE
A: Izbornik Postavke
B: Video
C: Trenutna snimka
D: Puni zaslon
E: Resetiranje pomicanja-nagiba
F: Postavljanje
G: Pomicanje i nagibanje
H: Obavijesti
I: Kvaliteta video zapisa
J: Pričekajte poziv
K: Zvuk
L: Još
SLIKA 24
SLIKA 25
BRISANJE POSTAVKE
SLIKA 26
PRIKAZ VIDEO SNIMKA
Napomena: Prema zadanim postavkama emitira se videozapis snimljen u oblaku, a ako želite emitirati video snimljen na TF kartici, možete postaviti "play videos from" na "SD card".
SLIKA 27
SLIKA 28
PREUZMITE VIDEO SA OBLAKA / PODIJELITE VIDEO U OBLAKU
Kliknite ikonu "album u oblaku", a zatim video, kliknite "Download" da biste spremili video na telefon ili kliknite "Share" da biste ga podijelili na Facebooku i YouTube.
SLIKA 29
SLIKA 30
VIDEO U OBLAKU EMITIRANJE
Kliknite " Cloud event" da biste pogledali videozapis alarma.
SLIKA 31 SLIKA 32
PREFERENCIJE
| Setting | |
| Device details | > |
| Device setting | > |
| message notification | > |
| Cloud storage management | > |
| Memory card management | > |
| Play Videos From | Cloud > |
| Sharing equipment | > |
| Network information | YYT > |
| Reboot device | |
| Remove Device | |
SLIKA 36
ČESTO POSTAVLJANA PITANJA
natural_image
White security camera with attached cable and connector (no visible text or symbols)INTRODUÇÃO
Manual multilíngue - QR CODE
CONTEÚDO DA EMBALAGEM
 |  |  |  |  |  |
 |  |  |  |  |  |
FUNÇÕES BÁSICAS

HD picture

Smart pan/Tilt
Remote view

Motion detection

Two way audio
TF card storage
Alarm Plush
Smooth zoom

WIFI connection

Samrt night version

Cloud storage

AP hotspot
DADOS TÉCNICOS
REGISTAR NOVA CONTA
FAZER LOGIN COM O USO DUM EMAIL
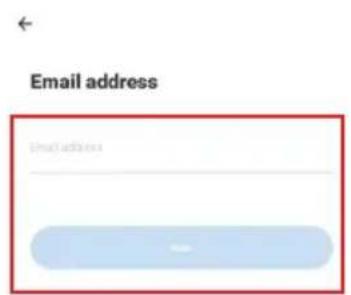
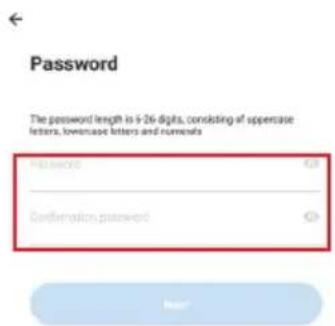
FIGURA 1 FIGURA 2 FIGURA 3
FAZER LOGIN COM O USO DUM NÚMERO DE TELEFONE
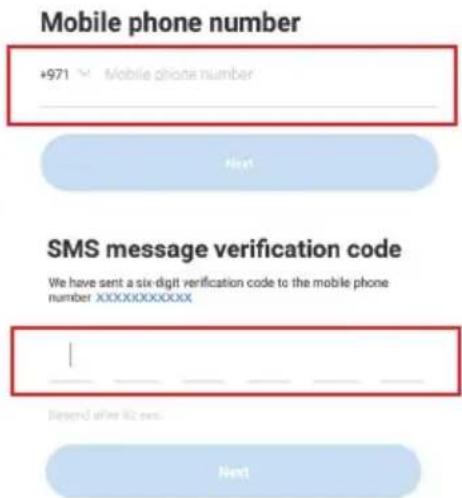
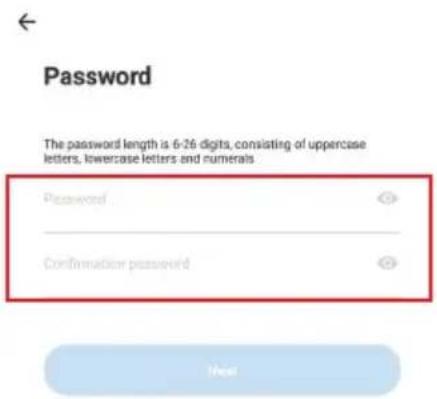
FIGURA 4 FIGURA 6FIGURA 5
FIGURE 7 FIGURE 8 FIGURE 9
A. ADICIONAR DISPOSITIVO AO DIGITALIZAR O CÓDIGO
FIGURE 10 FIGURE 11
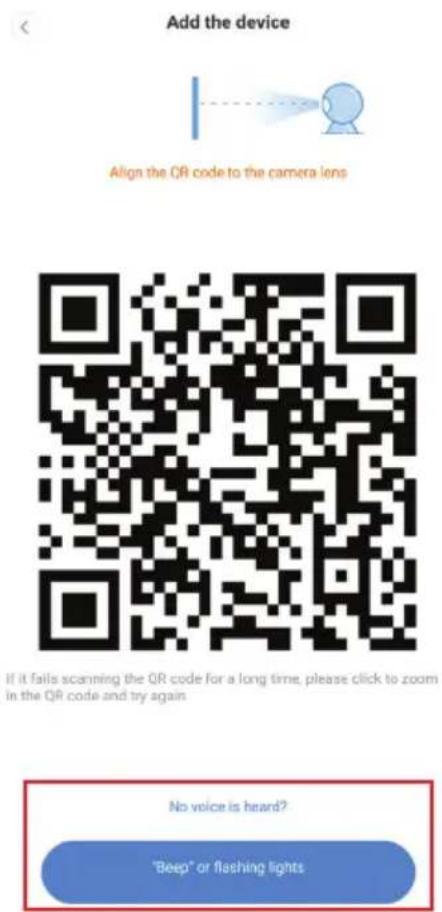
FIGURE 12
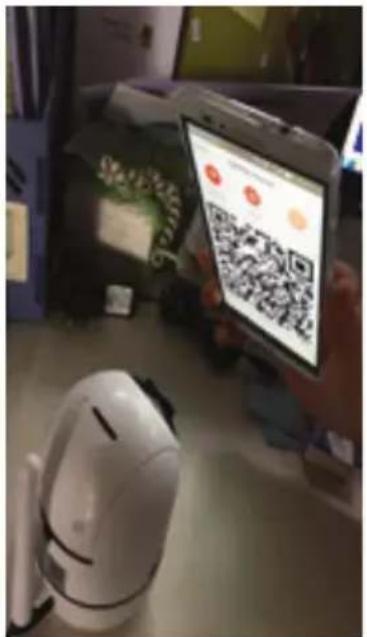
FIGURE 13
pie
Add the device Device is under connecting The router, mobile phone and device should be as close as possible. The connection takes about 1–2 minutes. Please wait a moment! 56% ● Device connects to NPs ○ Device registers Cloud Service ● Device InitializationFIGURE 14 FIGURE 15

The device will start Wi-Fi with "OSUBOSU_000C" field. Click the button in the lower part to the setting interface for connecting to this Wi-Fi

Wi-Fi

Add the device
Network configuration
Set the Wi-Fi that has been connected with this device
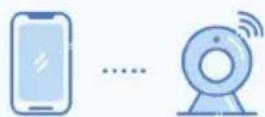
FIGURE 16
How to connect the device>

FIGURE 18FIGURE 17
FIGURE 19
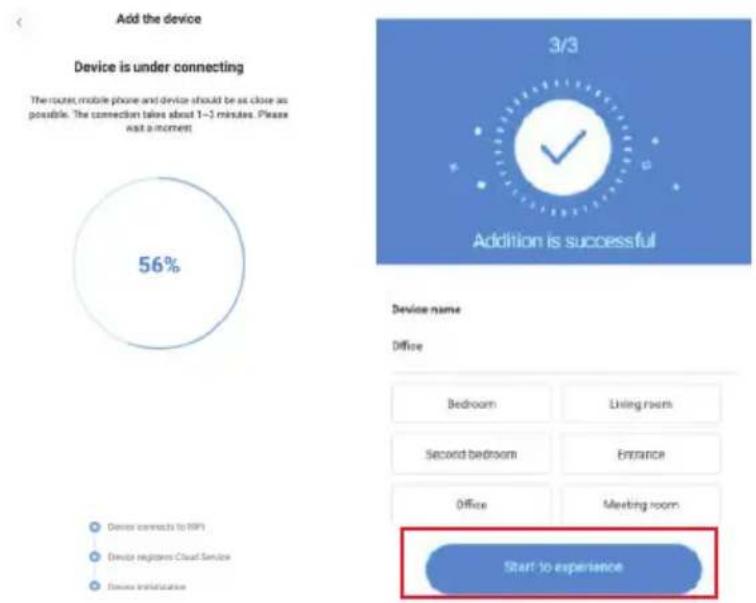
FIGURE 20 [A] FIGURE 20 [B]
C. ADICIONAR VIA CONEXÃO DE CABO DE REDE (COMPATÍVEL APENAS COM DISPOSITIVO DE PORTA LAN)
FIGURE 21
D. MODO DIRETO AP (ESPECIAL)
FIGURE 22 [F] FIGURE 22 [E] FIGURE 22 [G] FIGURE 22 [H]
FIGURE 24
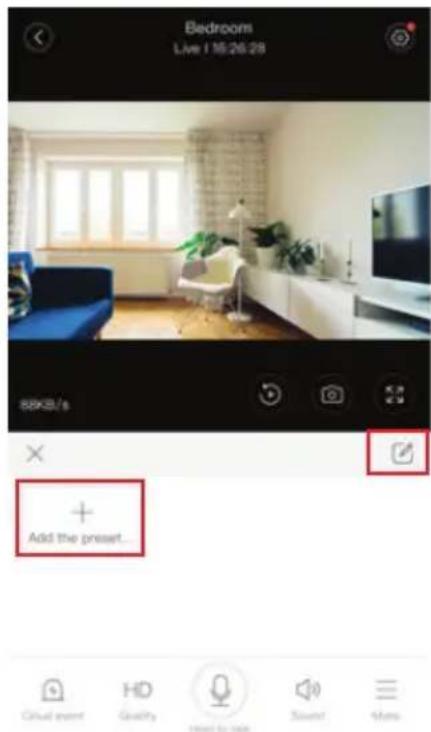
FIGURE 25
EXCLUIR CONFIGURAÇÕES
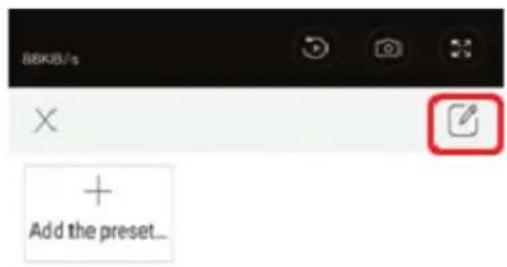
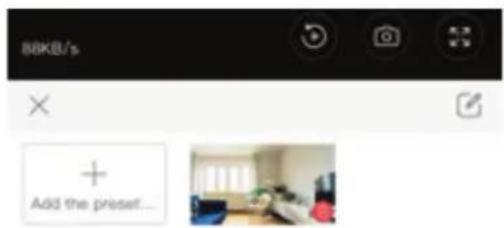
FIGURE 26
REPRODUÇÃO DE VÍDEO
FIGURE 27
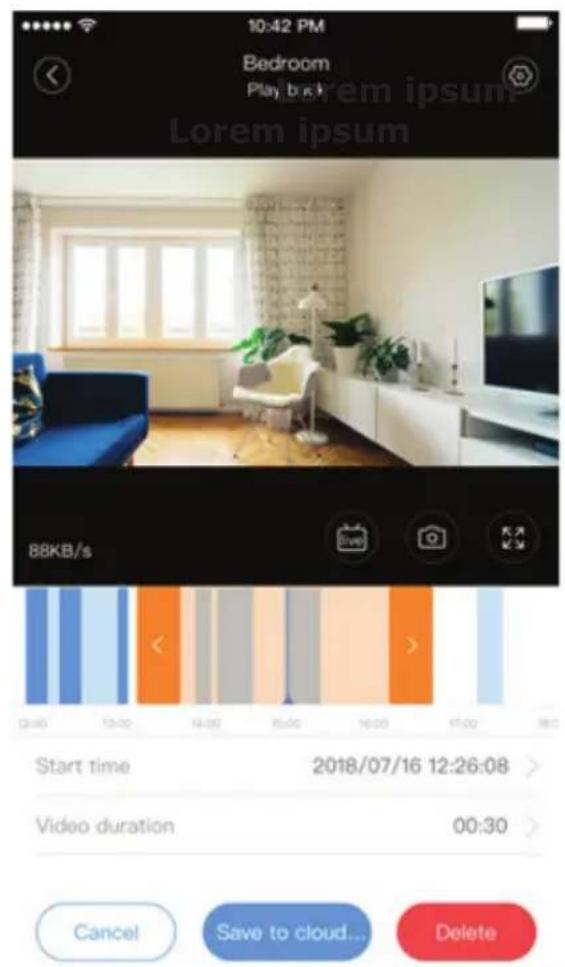
FIGURE 28
DESCARREGAR O VÍDEO DA NUVEM/COMPARTILHE O VÍDEO NA NUVEM
FIGURE 29
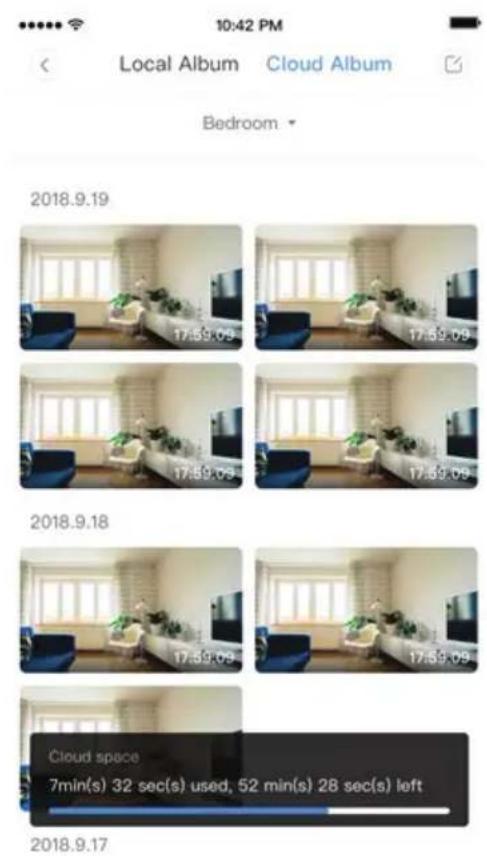
FIGURE 30
FIGURE 31 FIGURE 32
PREFERÊNCIAS
Cloud storage management
Memory card management
Play Videos From Cloud >
Sharing equipment
Network information YYT >
Reboot device
Remove Device
FIGURE 34
Get more with Recording Services.

Cloud video recording
View the last 24h of video footage from your smartphone, tablet or computer.

Easy saving and sharing
Keep up to 1h of clips. Edit and share from your smartphone.
Log In
Email Address:

Password:

Remember me

ForgotPassword
Sign Up
FIGURE 36
PERGUNTAS FREQUENTES
natural_image
White security camera with attached cable and sensor array (no visible text or symbols)WSTEP
ZAWARTOŚĆ OPAKOWANIA
 CAMERA(1PC) CAMERA(1PC) | [IMAGE]SCREW NUTS(3PCS) | 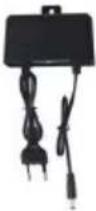 ADAPTER(1PC) ADAPTER(1PC) |  SCREWS(3PCS) SCREWS(3PCS) | [7ABG]FITTING(1PC) |  STEEL PIN(1PC) STEEL PIN(1PC) |
FUNKCJE PODSTAWOWE

HD picture

Smart pan/Tilt
Remote view

Motion detection

Two way audio
TF card storage
Alarm Plush

Smooth zoom

WIFI connection

Samrt night version

Cloud storage

AP hotspot
DANE TECHNICZNE
REJESTRACJA NOWEGO PROFILU

RYSUNEK 1 RYSUNEK 2 RYSUNEK 3
LOGOWANIE SIĘ ZA POMOCA NUMERU TELEFONU
RYSUNEK 4 RYSUNEK 6 RYSUNEK 5
DODAWANIE KAMERY DO APLIKACJI
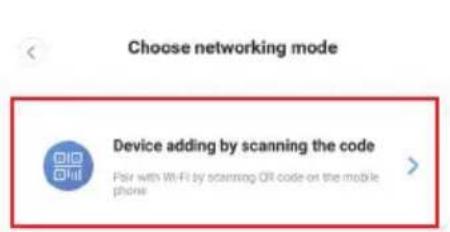
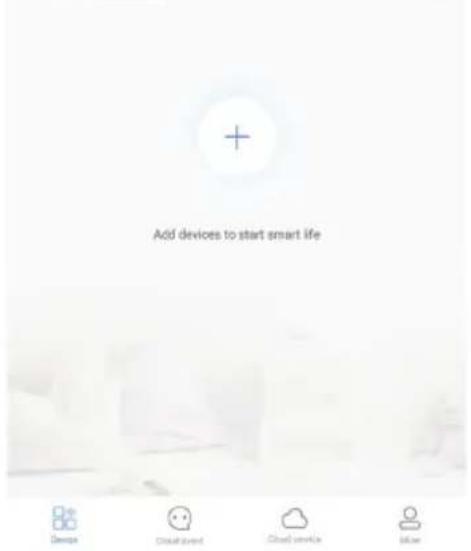
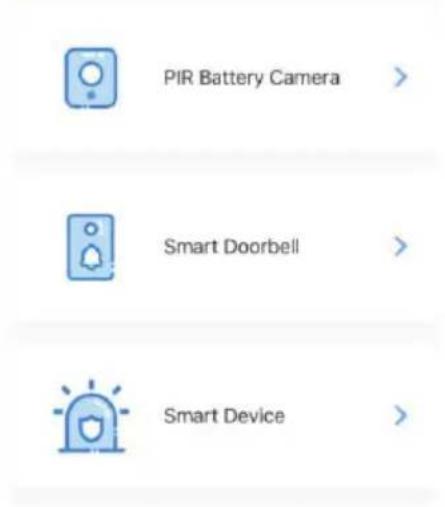
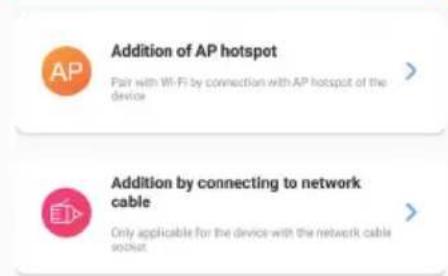
FIGURA 7 FIGURA 8 FIGURA 9
A. DODAWANIE URZĄDZENIA POPRZEZ SKANOWANIE KODU
FIGURA 13
Add the device
Device is under connecting
The router, mobile phone and device should be as close as possible. The connection takes about 1\~2 minutes. Please wait a moment.
pie
| Category | Value (%) | |---|---| | Other | 56 |Device connects to WiFi
Device Registers Cloud Service
Device Initialization
FIGURA 14
Device name
Office
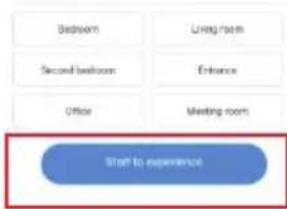

FIGURA 15
B. DODANIE HOTSPOTU AP
The device will start WiFi with "CUSTOMER BOOK" field. Click the button in the lower part to the setting interface for connecting to this WiFi
← Wi-Fi
Vtac
Saved
VITEC-UAE
JSW
+ Add network
[NO TEXT]
[NO TEXT]
[NO TEXT]
图
Add the device
Network configuration
Set the Wi-Fi that has been connected with this device


How to connect the device>

FIGURA 16 FIGURA 18FIGURA 17
FIGURE 19
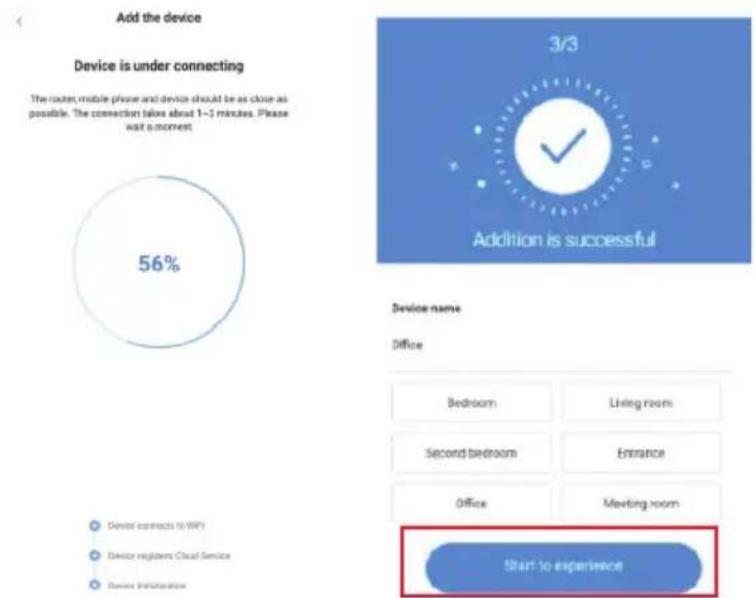
FIGURE 20 [A] FIGURE 20 [B]
C. DODANIE POPRZEZ POŁĄCZE- NIE ZA POMOCĄ KABLA SIECIO- WEGO (OBSŁUGIWANE TYLKO PRZEZ URZĄDZENIA WY- POSAŻONE W PORT LAN)
FIGURE 21
D. TRYB BEZPOŚREDNI AP (SPECJALNY)
FIGURE 22 [A] FIGURE 22 [B] FIGURE 22 [C]
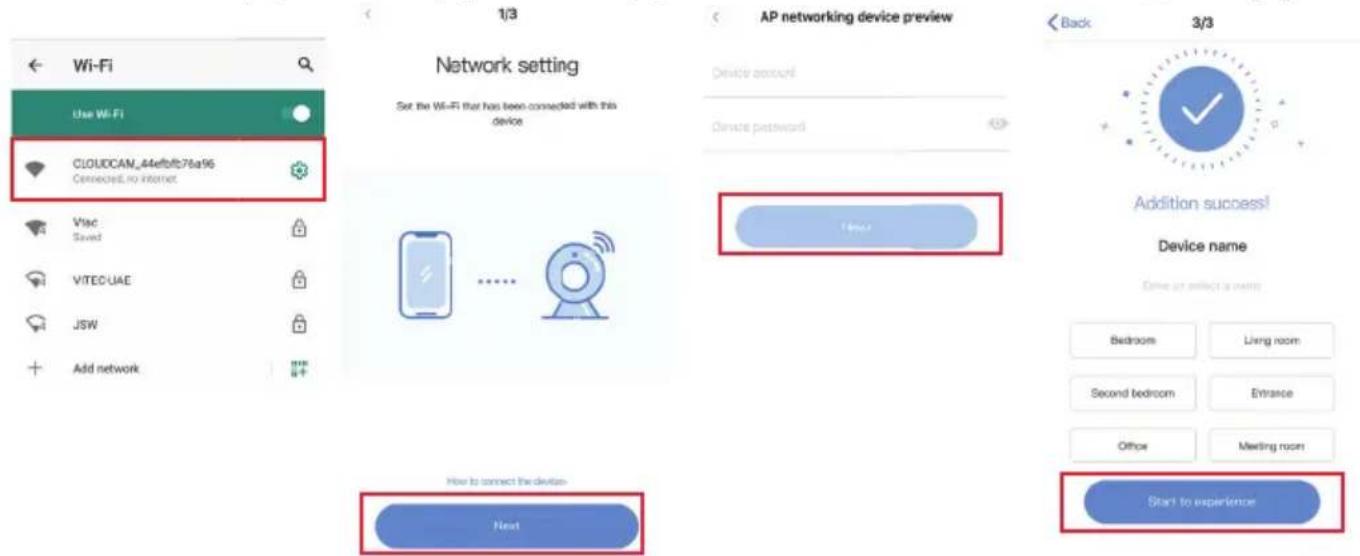
FIGURE 22 [F] FIGURE 22 [E] FIGURE 22 [G] FIGURE 22 [H]
ZAPOZNANIE SIĘ Z FUNKCJAMI
FIGURE 24
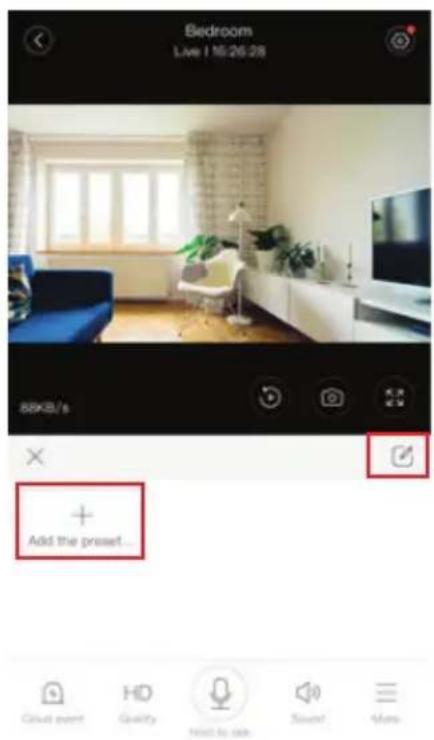
FIGURE 25
USUÑ USTAWIENIE
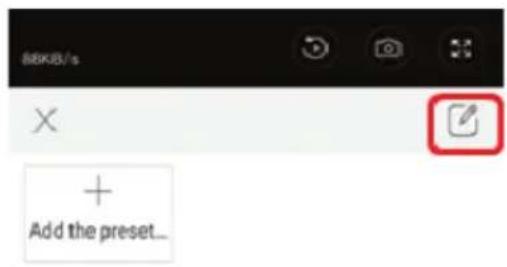

FIGURE 26
ODTWARZANIE WIDEO
FIGURE 27
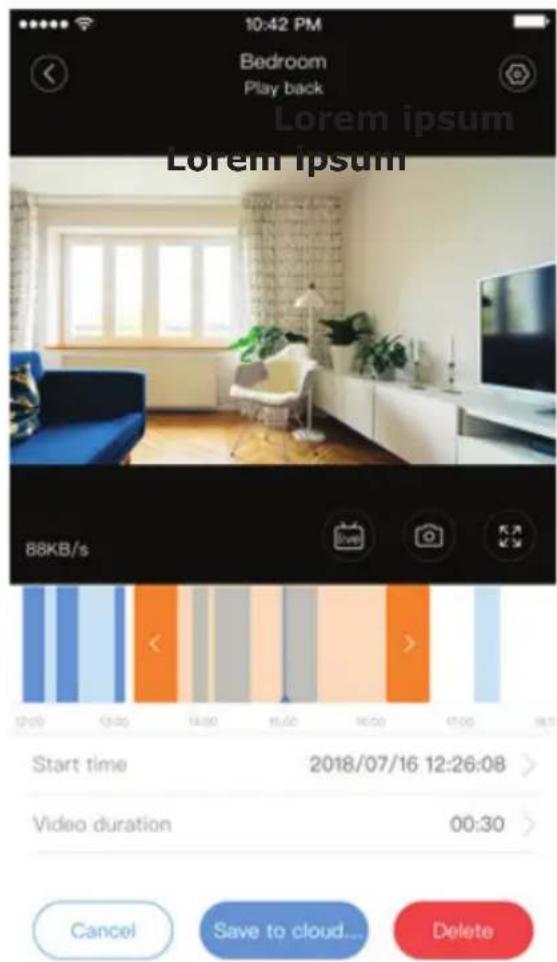
FIGURE 28
POBIERANIE WIDEO Z CHMURY / UDOSTĘPNIANIE WIDEO W CHMURZE
FIGURE 29
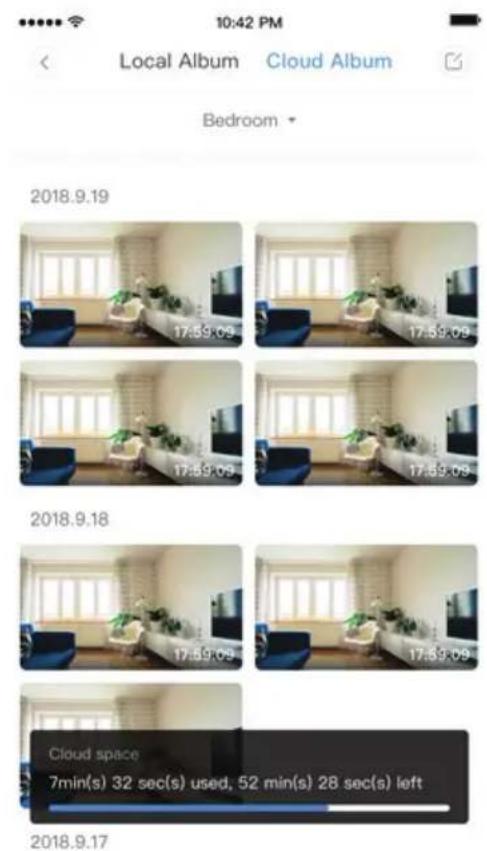
FIGURE 30
WIDEO W CHMURZE ODTWARZANIE
FIGURE 31 FIGURE 32
PREFERENCJE
| Setting | |
| Device details | > |
| Device setting | > |
| message notification | > |
| Cloud storage management | > |
| Memory card management | > |
| Play Videos From | Cloud > |
| Sharing equipment | > |
| Network information | YYT > |
| Reboot device | |
| Remove Device | |
FIGURE 33
FUNKCJONALNOŚĆ DŻWIĘKU ALARMU
FIGURE 34
natural_image
Interior view of a modern living room with blue sofas and a window, featuring a TV and wall-mounted equipment (no visible text or symbols)FIGURE 35
JAK KORZYSTAĆ Z KAMERY NA KOMPUTERZE
FIGURE 36
CZĘSTO ZADAWANE PYTANIA
natural_image
White security camera with attached cable and display screen (no visible text or symbols)BEVEZETÉS
7 FIGURE 8 FIGURE 9 FIGURE
13 FIGURE
pie
Add the device Device is under connecting The router, mobile phone and device should be as close as possible. The connection takes about 1–2 minutes. Please wait a moment! 56% ● Device connects to WiFi ○ Device registers Cloud Service ● Device installation14 FIGURE
15 FIGURE

16 FIGURE
18 FIGURE 17 FIGURE
FIGURE 19
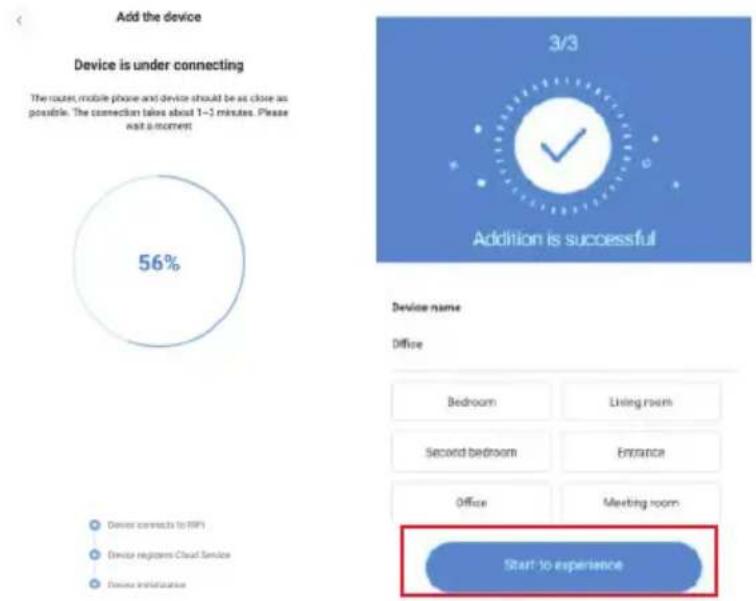
FIGURE 20 [A] FIGURE 20 [B]
FIGURE 21
FIGURE 22 [F] FIGURE 22 [E] FIGURE 22 [G] FIGURE 22 [H]
FIGURE 24
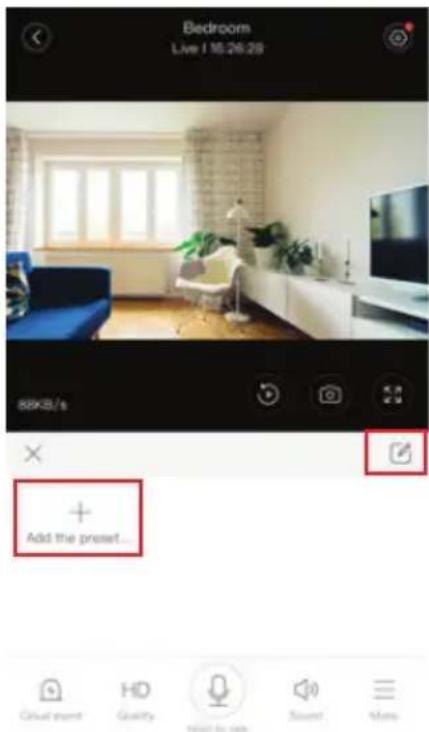
FIGURE 25
ΔΙΑΓΡΑΦΗ ΡΥΘΜΙΣΗΣ
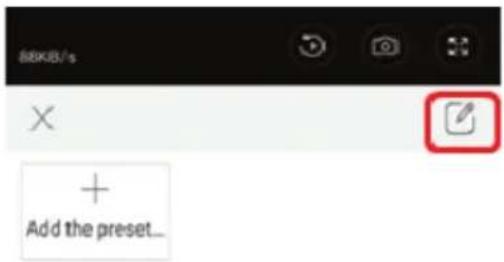
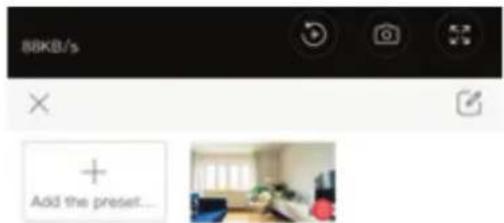
FIGURE 26
ΑΝΑΠΑΡΑΓΩΓΗ ΒΙΝΤΕΟ
FIGURE 27
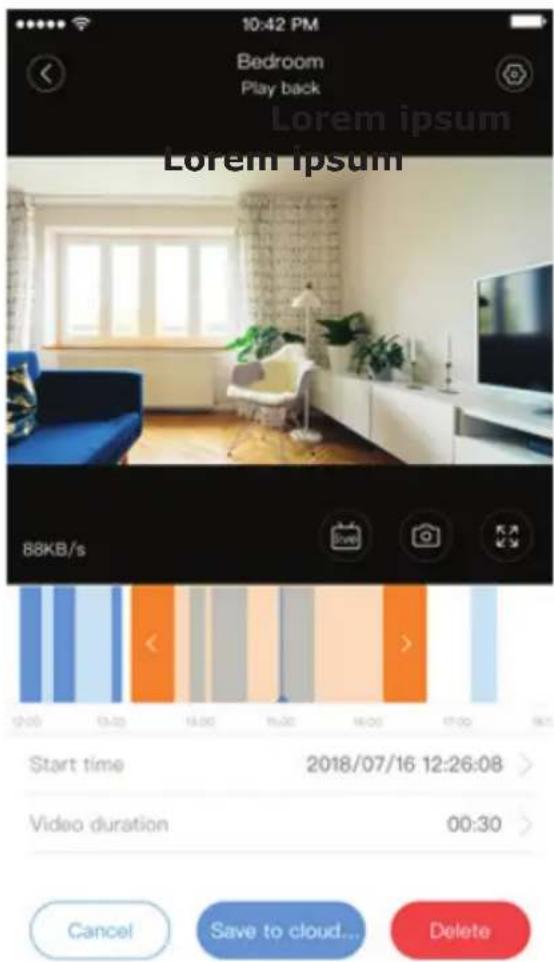
FIGURE 28
FIGURE 29
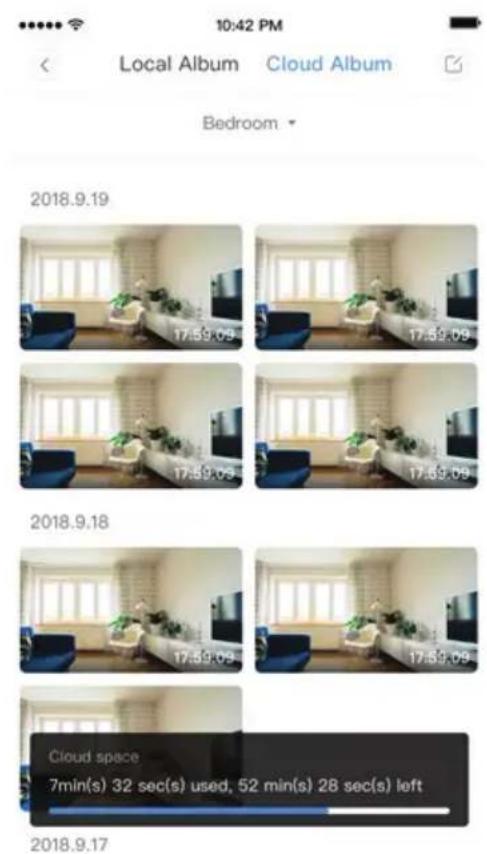
FIGURE 30
FIGURE 31 FIGURE 32
ΠΡΟΕΙΔΟΠΟΙΗΣΕΙΣ
| Setting | |
| Device details | > |
| Device setting | > |
| message notification | > |
| Cloud storage management | > |
| Memory card management | > |
| Play Videos From | Cloud > |
| Sharing equipment | > |
| Network information | YYT > |
| Reboot device | |
| Remove Device | |
FIGURE 33
natural_image
Interior view of a modern living room with blue sofas, white furniture, and a wall-mounted TV (no visible text or symbols)Bedroom


natural_image
Interior view of a modern living room with blue sofas, white furniture, and a large wall-mounted TV (no visible text or symbols)Livingroom


Bedroom
Pay by activation code >
3days continuous recordi...
Trail expires on 2019/12/18
Quick selection
Continuous recording
\$6.99/month
7days Storage/month
Continuous recording
30days Storage/month
\$19.99/month
FIGURE 33
Get more with Recording Services.

Cloud video recording
View the last 24h of video footage from your smartphone, tablet or computer.

Easy saving and sharing
Keep up to 1h of clips. Edit and share from your smartphone.
Log In
Email Address:

Password:

Remember me

Forgot Password
Sign Up
FIGURE 35
ΣΥΧΝΕΣ ΕΡΩΤΗΣΕΙΣ
natural_image
White surveillance camera with attached cable and sensor array (no visible text or symbols)INTRODUCERE
CONTINUTUL AMBALAJULUI
 |  |  |  |  |  |
 |  |  |  |  |  |
FUNCTII PRINCIPALE

HD picture

Smart pan/Tilt
Remote view

Motion detection

Two way audio
TF card storage
Alarm Plush
Smooth zoom

WIFI connection

Samrt night version

Cloud storage

AP hotspot
DATE TEHNICE
ÎNREGISTRAREA UNUI PROFIL NOU
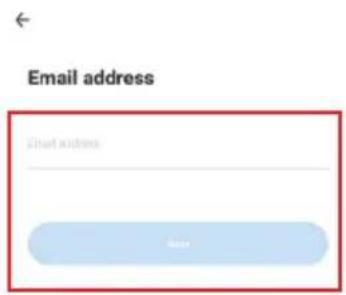
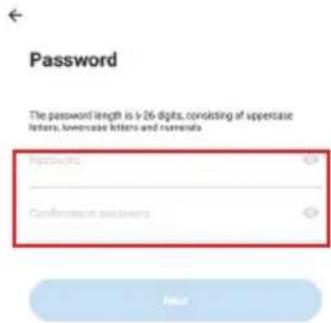
FIGURA 1 FIGURA 2 FIGURA 3
AUTENTIFICARE CU UTILIZARE A UNUI NUMĂR DE TELEFON
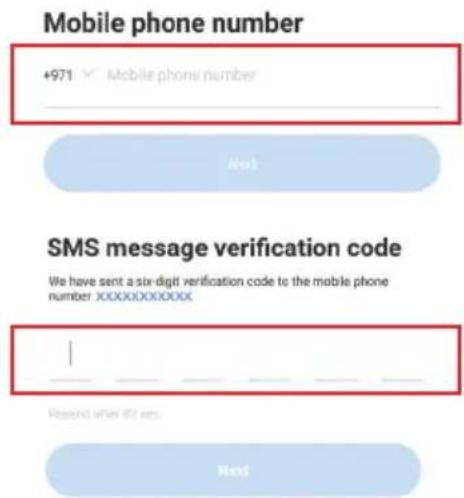
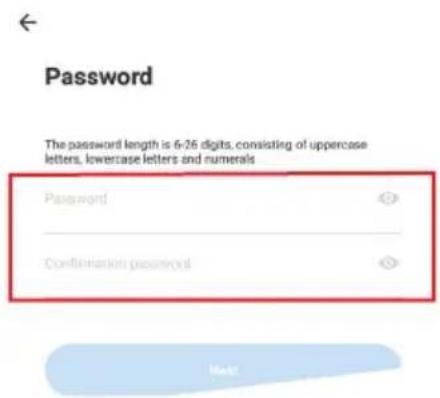
FIGURA 4 FIGURA 6FIGURA 5
ADĂUGAREA ÎN APLICATIE A CAMAREI VIDEO
FIGURE 7
FIGURE 8
FIGURE 9
A. ADĂUGAREA DISPOZITIVULUI PRIN SCANAREA CODULUI
FIGURE 13
Add the device
Device is under connecting
The router, mobile phone and device should be as close as possible. The connection takes about 1\~2 minutes. Please wait a moment

pie
| Category | Value (%) | |---|---| | Pie Chart | 56% |Device connects to WiFi
Device registers Cloud Service
Device Inidialization
FIGURE 14
Device name
(3)ce
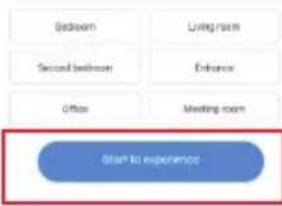

FIGURE 15
B. ADĂUGAREA APLICATIEI AP HOTSPOT
The device will start WiFi with "COSKONIC KBOX" field. Click the button in the lower part to the setting interface for connecting to this WiFi
← Wi-Fi
Vtac
Saved
VITEC-UAE
JSW
+ Add network
Add the device
Network configuration
Set the Wi-Fi that has been connected with this device


How to connect the device>

FIGURE 16 FIGURE 18FIGURE 17
FIGURE 19
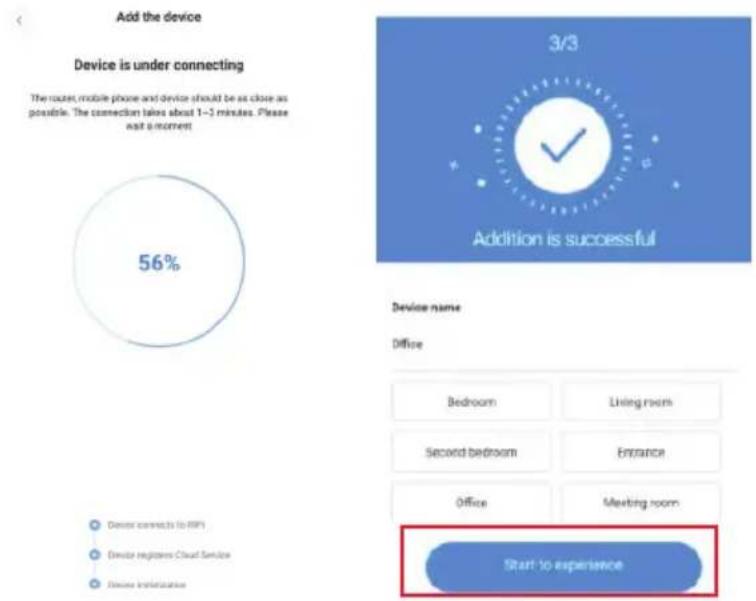
FIGURE 20 [A] FIGURE 20 [B]
C. ADĂUGARE PRIN CONECTARE PRIN INTERMEDIUL CABLULUI DE REȚEA (FUNCTIONEAZĂ NUMAI DE LA DISPOZITIVUL CU USB LAN)
FIGURE 21
D. REGIM DIRECT AP (REGIM SPECIAL)
FIGURE 22 [F] FIGURE 22 [E] FIGURE 22 [G] FIGURE 22 [H]
STUDIEREA FUNCTIILOR
FIGURE 24
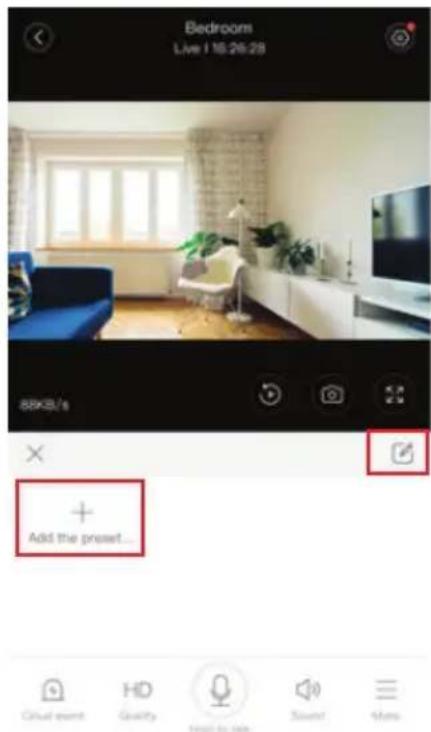
FIGURE 25
ŞTERGEREA UNEI SETĂRI
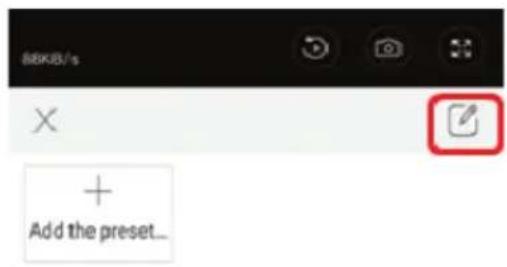
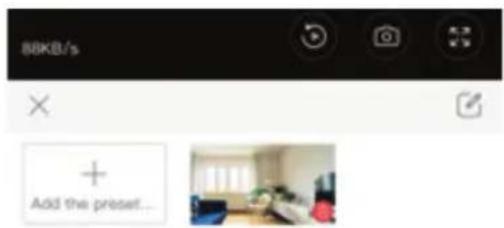
FIGURE 26
REPRODUCERE VIDEO
FIGURE 27
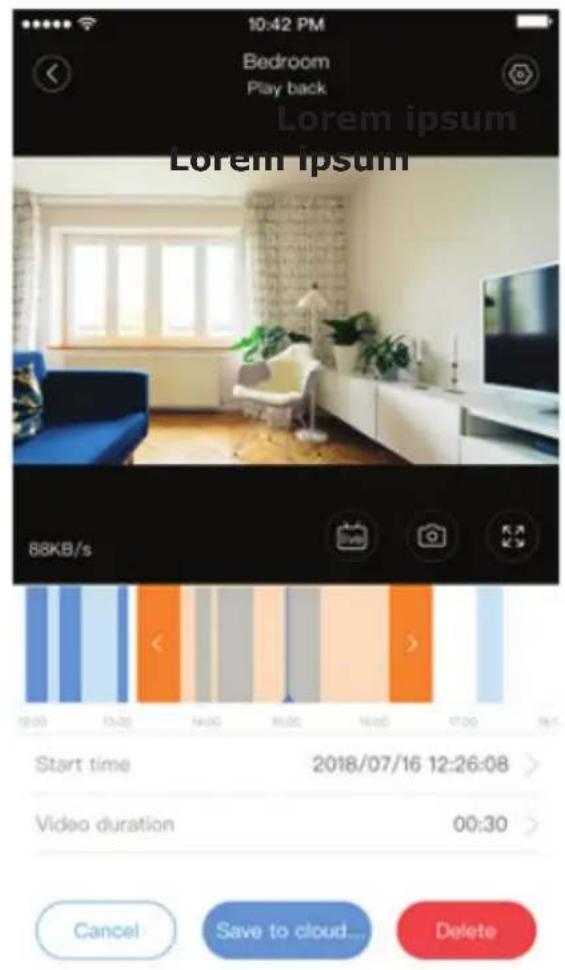
FIGURE 28
DESCĂRCAREA UNEI FILMĂRI VIDEO DE LA SISTEMUL CLOUD / ÎMPĂRTĂŞIRE ÎN SISTEMUL CLOUD
FIGURE 29
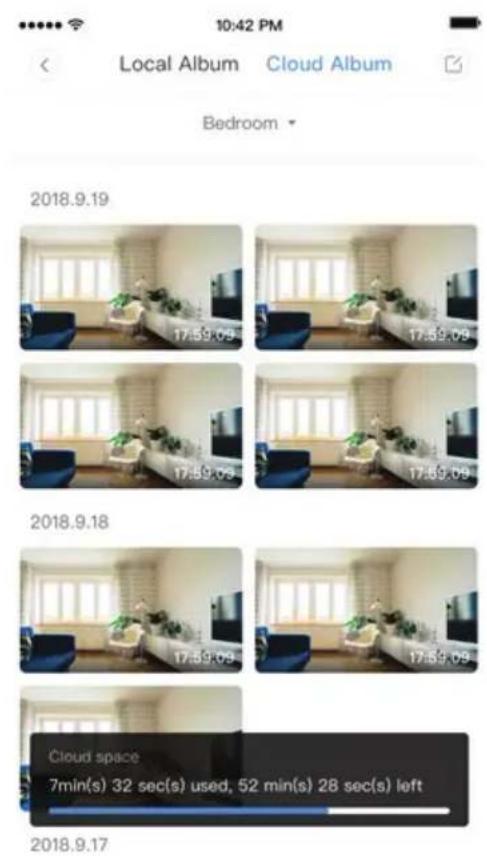
FIGURE 30
VIDEO ÎN CLOUD REPRODUCERE
FIGURE 31 FIGURE 32
PRÄFERENZEN
Cloud storage management
Memory card management
Play Videos From Cloud >
Sharing equipment
Network information YYT >
Reboot device
Remove Device
FIGURE 33
MOD DE FUNCTIONARE A SUNETULUI ALARMEI
FIGURE 33
OPTIUNEA PENTRU ÎMPĂRȚIREA ECRANULUI
FIGURE 35
CELE MAI FRECVENTE ÎNTREBĂRI
natural_image
White surveillance camera with attached cable and connector (no visible text or symbols)ÚVOD
OBSAH BALENÍ
 |  |  |  |  |  |
 |  |  |  |  |  |
ZÁKLADNÍ FUNKCE

HD picture

Smart pan/Tilt
Remote view

Motion detection

Two way audio
TF card storage
Alarm Plush
Smooth zoom

WIFI connection

Samrt night version

Cloud storage

AP hotspot
TECHNICKÉ ÚDAJE
REGISTRACE NOVÉHO PROFILU
OBR. 1 OBR. 2 OBR. 3
PŘIHLÁŠENÍ ZA POUŽITÍ ČÍSLA MOBILNÍHO TELEFONU
OBR. 4 OBR. 6OBR. 5


Password
PŘIDÁNÍ KAMERY DO APLIKACE
FIGURA 7 FIGURA 8 FIGURA 9
A. PŘIDÁNÍ ZAŘÍZENÍ SKENOVÁNÍM KÓDU
FIGURA 13
pie
Add the device Device is under connecting The routes, mobile phone and device should be as close as possible. The connection takes about 1~2 minutes. Please wait a moment! 56% ● Device connects to MRI ○ Device registers Cloud Service ○ Device InitializationFIGURA 14
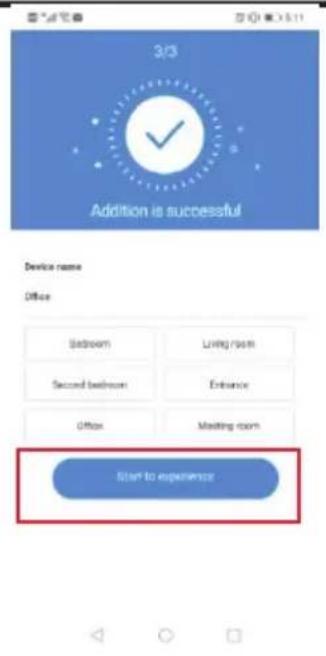
FIGURA 15
B. PŘIDÁNÍ PŘÍSTUPOVÉHO BODU
FIGURA 16 FIGURA 18FIGURA 17
FIGURE 19
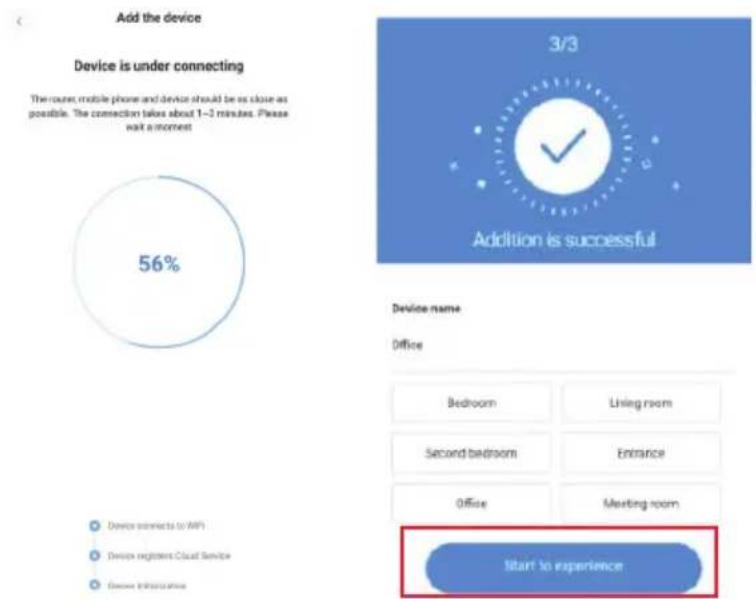
FIGURE 20 [A] FIGURE 20 [B]
C. PŘIDÁNÍ PŘIPOJENÍM K SÍŤOVÉMU KABELU (PODPORUJÍ POUZE PORTOVÉ ZAŘÍZENÍ LAN)
FIGURE 21
D. PŘÍMÝ REŽIM AP (SPECIÁLNÍ)
FIGURE 22 [F] FIGURE 22 [E] FIGURE 22 [G] FIGURE 22 [H]
ZAVEDENÍ FUNKCE
FIGURE 24
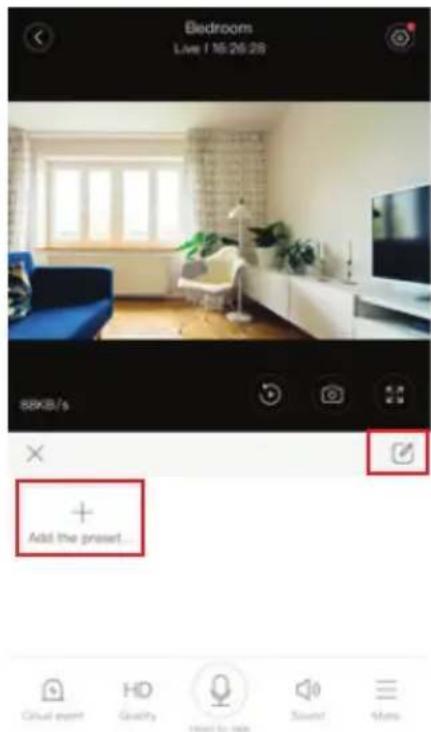
FIGURE 25
VYMAZÁNÍ PŘEDVOLEB
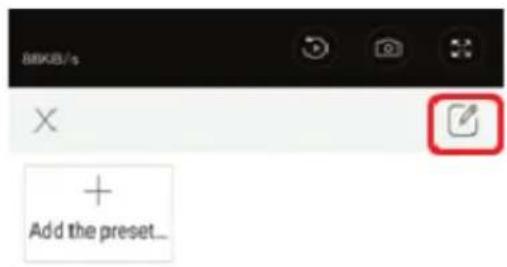
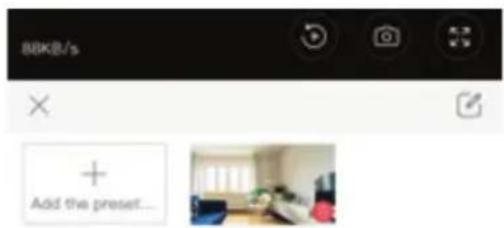
FIGURE 26
PŘEHRÁVÁNÍ VIDEA
FIGURE 27
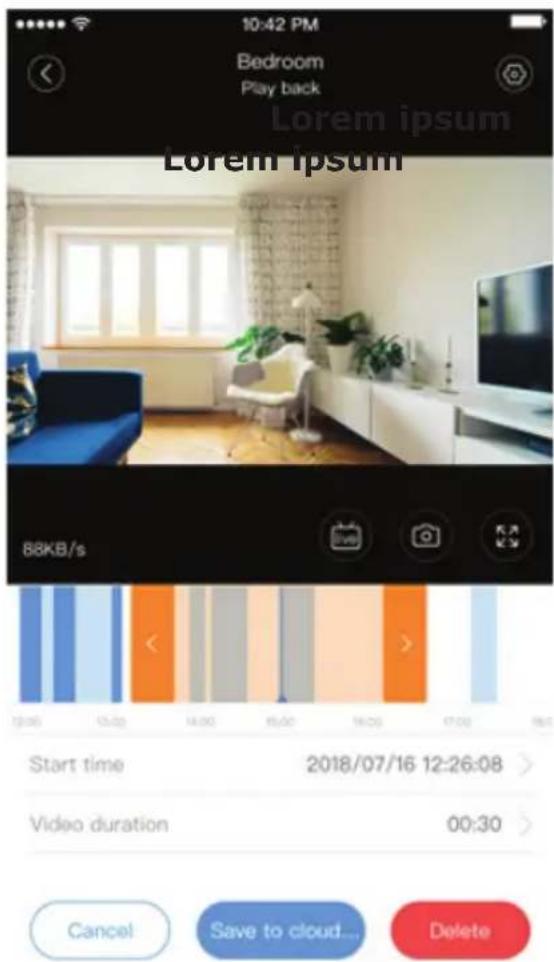
FIGURE 28
STAŽENÍ / SDÍLENÍ CLOUDOVÉHO VIDEA
FIGURE 29
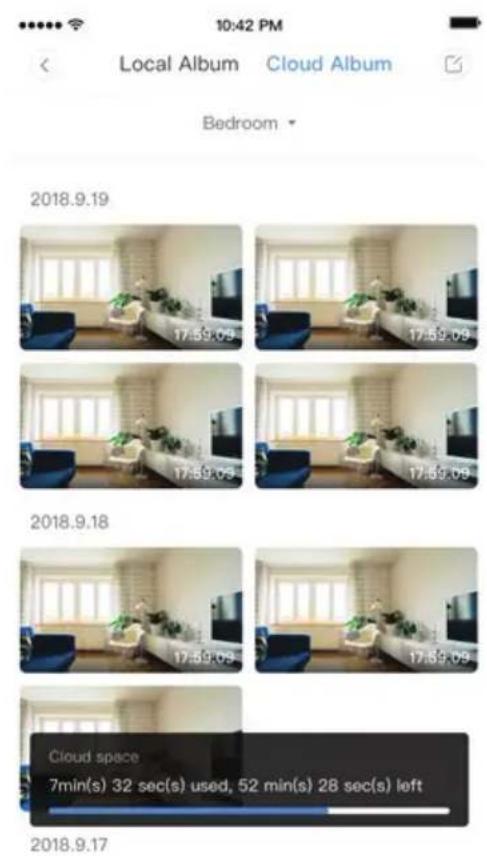
FIGURE 30
CLOUDOVÉ VIDEO PŘEHRÁNÍ
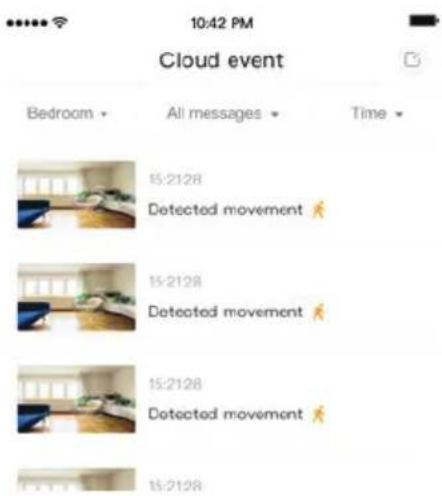
FIGURE 31 FIGURE 32
PREFERENCE
Cloud storage management
Memory card management
Play Videos From Cloud >
Sharing equipment
Network information YYT >
Reboot device
Remove Device
FIGURE 33
FUNKČNOST TÓNU ALARMU
FIGURE 33
MOŽNOST ROZDĚLENÍ OBRAZOVKY
FIGURE 35
ČASTÉ DOTAZY
- INSTALLATION INSTRUCTION
- INTRODUCTION
- Multi-Language Manual - QR CODE
- MAIN FUNCTION
- TECHNICAL DATA
- DOWNLOAD THE APP
- REGISTER NEW ACCOUNT
- LOGIN USING EMAIL
- LOGIN USING PHONE NO.
- ADDING CAMERA DEVICE TO THE APP
- Add Camera
- DEVICE ADDING BY SCANNING THE CODE
- ADDITION OF AP HOTSPOT
- ADDITION BY CONNECTING TO NETWORK CABLE (ONLY SUPPORT LAN PORT DEVICE)
- AP DIRECT MODE (SPECIAL)
- FUNCTION INTRODUCTION
- PTZ
- PRESET
- VIDEO PLAYBACK
- VIDEO CLIP
- DOWNLOAD CLOUD VIDEO / SHARE CLOUD VIDEO
- CLOUD VIDEO PLAYBACK
- PREFERENCES
- ALARM TONE FUNCTIONALITY
- CONTROL OF WHITE LIGHT
- SET TF CARD RECORDING MODE
- TF card requirements :
- CLOUD STORAGE SERVICE
- SPLIT SCREEN FEATURE
- HOW TO USE THE CAMERA ON A COMPUTER
- FREQUENTLY ASKED QUESTIONS
- УКАЗАНИЯ ЗА МОНТАЖ
- ВЪВЕДЕНИЕ
- В. ДОБАВЯНЕ НА АР ХОТСПОТ
- ПРЕДПОЧИТАНИЯ
- ФУНКЦИОНАЛНОСТ НА ТОНА ЗА АЛАРМА
- INTRODUZIONE
- ACCESSO CON IL E-MAIL
- ACCESSO CON IL NUMERO DI TELEFONO
- AGGIUNTA DEL DISPOSITIVO DELLA VIDEOCAMERA ALL'APPLICAZIONE
- AGGIUNTA DEL DISPOSITIVO MEDIANTE LA SCANSIONE DEL CODICE
- AGGIUNTA DELL'AP HOTSPOT
- AGGIUNTA DEL DISPOSITIVO MEDIANTE IL COLLEGAMENTO AL CAVO DI RETE (SUPPORTATO SOLTANTO DA DISPOSITIVO DOTATO DELLA PORTA LAN)
- APPLICAZIONE MODALITÀ DIRETTA (SPECIALE)
- SCARICARE VIDEO DAL CLOUD/CONDIVIDERE VIDEO NEL CLOUD
- VIDEO NEL CLOUD RIPRODUZIONE
- PREFERENZE
- DOMANDE FREQUENTI
- BEVEZETÉS
- FÓ FUNKCIÓ
- MÜSZAKI ADATOK
- REGISZTRÁLJON ÚJ FIÓKOT
- BEJELENTKEZÉS EMAIL
- BEJELENTKEZÉS TELEFONSZÁMMAL
- KAMERÁS ESZKÖZ HOZZÁADÁSA AZ ALKALMAZÁSHOZ
- ESZKÖZ HOZZÁADÁSÁVAL KÓD BEOLVASÁSÁVAL
- HOTSPOT HOZZÁADÁSA
- KIEGÉSZÍTÉS HÁLÓZATI KÁBELLEL TÖRTÉNŐ CSATLA- KOZÁSSAL (CSAK A LAN PORTOT TÁMOGATJA)
- AP KÖZVETLEN MÓD (SPECIÁLIS)
- FUNKCIÓ BEVEZETÉSE
- AZ ELÖRE BEÁLLÍTOTT ÉRTÉK TÖRLÉSE
- VIDEÓ LEJÁTSZÁS
- FELHŐ VIDEÓ LETÖLTÉSE / FELHŐ VIDEÓ MEGOSZTÁSA
- PREFERENCIÁK
- RIASZTÁSI HANG FUNKCIÓ
- OSZTOTT KÉPERNYŐ FUNKCIÓ
- HOGYAN KELL HASZNÁLNI A KAMERÁT A SZÁMÍTÓGÉPEN
- GYAKRAN ISMÉTELT KÉRDÉSEK
- GEBRAUCHSANWEISUNG
- NEUES KONTO REGISTRIEREN
- LOGIN MIT EMAIL.
- HINZUFÜGEN DES GERÄTS DURCH SCANNEN DES CODES
- HINZUFÜGEN VON HOTSPOT-ZUGANGSPUNKT IM NETZ (AP, ACCESS POINT HOTSPOT)
- FUNKTION EINFÜHRUNG
- CLOUD-VIDEO HERUNTERLADEN / CLOUD-VIDEO TEILEN
- CLOUD VIDEO WIEDERGABE
- PRÄFERENZEN
- FUNKTIONALITÄT DES ALARMSIGNALS
- INTRODUCCIÓN
- Manual multilingüe - CÓDIGO QR
- FUNCIONES BÁSICAS
- DATOS TÉCNICOS
- AÑADIR DISPOSITIVO ESCANEANDO EL CÓDIGO
- AÑADIR PUNTO DE ACCESO AP
- MODO DIRECTO AP (ESPECIAL)
- DESCARGAR VIDEO DESDE LA NUBE/COMPARTIR VIDEO EN LA NUBE
- PREFERENCIAS
- CÓMO USAR LA CÁMARA DEL ORDENADOR
- Manuel multilingue - QR CODE
- FONCTIONS PRINCIPALES
- DONNÉES TECHNIQUES
- CRÉER UN NOUVEAU COMPTE
- SE CONNECTER À PARTIR DU EMAIL.
- AJOUT D'UNE CAMÉRA À L'APPLICATION
- AJOUTER UN DISPOSITIF EN SCANNANT LE CODE
- AJOUTER UN POINT D'ACCÈS SANS FIL
- AJOUT PAR CONNEXION AU CÂBLE DE RÉSEAU (NE SUPPORTE QU'UN DISPOSITIF DE PORT LAN)
- MODE DIRECT AP (SPÉCIAL)
- INTRODUCTION AUX FONCTIONS
- SUPPRIMER LE PRÉRÉGLAGE
- LECTURE VIDÉO
- TÉLÉCHARGER LA VIDÉO DU NUAGE/PARTAGER LA VIDÉO DU NUAGE
- VIDÉO NUAGE LECTURE
- PRÉFÉRENCES
- FONCTIONNALITÉ DE LA TONALITÉ D'ALARME
- Bedroom
- FONCTION D'ÉCRAN PARTAGÉ
- QUESTIONS FRÉQUEMMENT POSÉES
- UVOD
- Višejezični priručnik - QR KOD
- SADRŽAJ PAKIRANJA
- OSNOVNE FUNKCIJE
- TEHNIČKI PODACI
- PREUZIMANJE APLIKACIJE
- PRIJAVA NOVOG PROFILA
- PRIJAVA S KORIŠTENJEM E-POŠTE
- PRIJAVA S KORISTENJEM TELEFONSKOG BROJA
- DODAVANJE KAMERE U APLIKACIJI
- DODAVANJE UREĐAJA SKENIRANJEM KODA
- V-TAC®
- DODAVANJE AP HOTSPOTA
- DODAVANJE POVEZIVANJEM MREŽNOM KABLOVSKOM VEZOM (PODRŽANO SAMO UREĐAJEM S LAN PORT)
- AP IZRAVNI NAČIN RADA (POSEBNI)
- UVOD U FUNKCIJE
- PRIKAZ VIDEO SNIMKA
- PREUZMITE VIDEO SA OBLAKA / PODIJELITE VIDEO U OBLAKU
- VIDEO U OBLAKU EMITIRANJE
- PREFERENCIJE
- ČESTO POSTAVLJANA PITANJA
- INTRODUÇÃO
- Manual multilíngue - QR CODE
- FUNÇÕES BÁSICAS
- DADOS TÉCNICOS
- REGISTAR NOVA CONTA
- FAZER LOGIN COM O USO DUM EMAIL
- FAZER LOGIN COM O USO DUM NÚMERO DE TELEFONE
- ADICIONAR DISPOSITIVO AO DIGITALIZAR O CÓDIGO
- ADICIONAR VIA CONEXÃO DE CABO DE REDE (COMPATÍVEL APENAS COM DISPOSITIVO DE PORTA LAN)
- MODO DIRETO AP (ESPECIAL)
- REPRODUÇÃO DE VÍDEO
- DESCARREGAR O VÍDEO DA NUVEM/COMPARTILHE O VÍDEO NA NUVEM
- PREFERÊNCIAS
- PERGUNTAS FREQUENTES
- WSTEP
- FUNKCJE PODSTAWOWE
- DANE TECHNICZNE
- REJESTRACJA NOWEGO PROFILU
- LOGOWANIE SIĘ ZA POMOCA NUMERU TELEFONU
- DODAWANIE KAMERY DO APLIKACJI
- DODAWANIE URZĄDZENIA POPRZEZ SKANOWANIE KODU
- DODANIE HOTSPOTU AP
- DODANIE POPRZEZ POŁĄCZE- NIE ZA POMOCĄ KABLA SIECIO- WEGO (OBSŁUGIWANE TYLKO PRZEZ URZĄDZENIA WY- POSAŻONE W PORT LAN)
- TRYB BEZPOŚREDNI AP (SPECJALNY)
- ZAPOZNANIE SIĘ Z FUNKCJAMI
- ODTWARZANIE WIDEO
- POBIERANIE WIDEO Z CHMURY / UDOSTĘPNIANIE WIDEO W CHMURZE
- WIDEO W CHMURZE ODTWARZANIE
- PREFERENCJE
- FUNKCJONALNOŚĆ DŻWIĘKU ALARMU
- JAK KORZYSTAĆ Z KAMERY NA KOMPUTERZE
- CZĘSTO ZADAWANE PYTANIA
- ΑΝΑΠΑΡΑΓΩΓΗ ΒΙΝΤΕΟ
- ΠΡΟΕΙΔΟΠΟΙΗΣΕΙΣ
- ΣΥΧΝΕΣ ΕΡΩΤΗΣΕΙΣ
- INTRODUCERE
- FUNCTII PRINCIPALE
- DATE TEHNICE
- ÎNREGISTRAREA UNUI PROFIL NOU
- AUTENTIFICARE CU UTILIZARE A UNUI NUMĂR DE TELEFON
- ADĂUGAREA ÎN APLICATIE A CAMAREI VIDEO
- ADĂUGAREA DISPOZITIVULUI PRIN SCANAREA CODULUI
- ADĂUGAREA APLICATIEI AP HOTSPOT
- ADĂUGARE PRIN CONECTARE PRIN INTERMEDIUL CABLULUI DE REȚEA (FUNCTIONEAZĂ NUMAI DE LA DISPOZITIVUL CU USB LAN)
- REGIM DIRECT AP (REGIM SPECIAL)
- STUDIEREA FUNCTIILOR
- REPRODUCERE VIDEO
- DESCĂRCAREA UNEI FILMĂRI VIDEO DE LA SISTEMUL CLOUD / ÎMPĂRTĂŞIRE ÎN SISTEMUL CLOUD
- VIDEO ÎN CLOUD REPRODUCERE
- MOD DE FUNCTIONARE A SUNETULUI ALARMEI
- OPTIUNEA PENTRU ÎMPĂRȚIREA ECRANULUI
- CELE MAI FRECVENTE ÎNTREBĂRI
- ÚVOD
- OBSAH BALENÍ
- ZÁKLADNÍ FUNKCE
- TECHNICKÉ ÚDAJE
- REGISTRACE NOVÉHO PROFILU
- PŘIHLÁŠENÍ ZA POUŽITÍ ČÍSLA MOBILNÍHO TELEFONU
- Password
- PŘIDÁNÍ KAMERY DO APLIKACE
- PŘIDÁNÍ ZAŘÍZENÍ SKENOVÁNÍM KÓDU
- PŘIDÁNÍ PŘÍSTUPOVÉHO BODU
- PŘIDÁNÍ PŘIPOJENÍM K SÍŤOVÉMU KABELU (PODPORUJÍ POUZE PORTOVÉ ZAŘÍZENÍ LAN)
- PŘÍMÝ REŽIM AP (SPECIÁLNÍ)
- ZAVEDENÍ FUNKCE
- VYMAZÁNÍ PŘEDVOLEB
- PŘEHRÁVÁNÍ VIDEA
- STAŽENÍ / SDÍLENÍ CLOUDOVÉHO VIDEA
- CLOUDOVÉ VIDEO PŘEHRÁNÍ
- PREFERENCE
- FUNKČNOST TÓNU ALARMU
- MOŽNOST ROZDĚLENÍ OBRAZOVKY
- ČASTÉ DOTAZY
Brand : V-TAC
Model : VT-5158
Category : Surveillance Camera