HP DIGITAL SMART - Earphones MELICONI - Free user manual and instructions
Find the device manual for free HP DIGITAL SMART MELICONI in PDF.

| Product Type | RF Wireless Stereo Headphones |
| Brand | Meliconi |
| Model | HP DIGITAL SMART |
| Transmission Technology | Digital Hopping System (2.4 GHz) |
| Frequency Band | 2400 MHz – 2483.5 MHz |
| RF Output Power | < 10 mW e.r.p. |
| Maximum Range | 30 meters in open field |
| Transmitter (Base) Power Supply | DC 5 V – 500 mA (via USB) |
| Headphone Battery | Built-in lithium-polymer, 3.7 V – 600 mAh – 2.22 Wh |
| Headphone Battery Life | Approximately 40 hours at medium volume |
| Headphone Charging Time | Approximately 2 h to 2 h 30 min |
| Headphone Charging Current | 300 mA maximum |
| Frequency Response | 20 Hz – 20 kHz (stereo) |
| Total Harmonic Distortion | < 1% |
| Signal-to-Noise Ratio | ≥ 80 dB |
| Channel Separation | > 45 dB |
| Base Audio Inputs | Toslink digital optical, 3.5 mm analog jack |
| Headphone Connectors | USB-C for charging, 3.5 mm AUX jack |
| Number of Paired Headphones | Up to 4 headphones on one base |
| LED Indicators | Headphone: red (charging), green (charged), blue (on/paired); Base: blue (on/flashing during pairing) |
| Compatibility | TV, set-top box, DVD/Blu-ray player, Hi-Fi system, PC, etc. |
| Safety | Battery not user-replaceable; avoid exposure to water/heat; keep distance >10 cm from medical implants |
| Operating Temperature | 0 °C to 35 °C |
| Compliance | RED Directive 2014/53/EU, WEEE, SAR exemption |
Frequently Asked Questions - HP DIGITAL SMART MELICONI
User questions about HP DIGITAL SMART MELICONI
0 question about this device. Answer the ones you know or ask your own.
Ask a new question about this device
Download the instructions for your Earphones in PDF format for free! Find your manual HP DIGITAL SMART - MELICONI and take your electronic device back in hand. On this page are published all the documents necessary for the use of your device. HP DIGITAL SMART by MELICONI.
USER MANUAL HP DIGITAL SMART MELICONI
natural_image
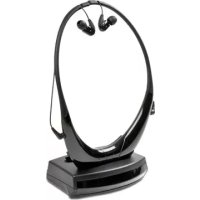
Line drawing of a pair of headphones with a separate cover, shown in two different angles (no text or symbols present)WIRELESS STEREO HEADPHONES WITH TRANSMITTER BASE AND DIGITAL AUDIO INPUT
HP DIGITAL SMART
RECYCLAGE DU PRODUIT
Thank you for choosing a Meliconi product
The Meliconi HP DIGITAL SMART wireless RF stereo headphone system uses advanced wireless audio transmission technology and allows you to listen to high-quality stereo sound from various audio playback devices (TV, Decoder, DVD and Blu-ray, CD players, HiFi, radio, PC, etc. ...), providing total freedom of movement. The transmitter can be connected to both audio sources equipped with a digital optical output (Toslink), and to analog devices via the traditional headphone audio output (3.5 mm jack). The transmitter signal, capable of passing through walls, has a maximum range of 30 meters in open fields

This symbol indicates that these instructions should be read carefully, in particular the Safety Warnings, which must be kept by the user for future reference and passed on to a new user together with the product in the event of transfer. Meliconi SpA excludes any type of liability for injuries or damage caused to people and/or objects resulting from improper use of the product.

Safety warnings
This radio headset uses a rechargeable Lithium Polymer battery that is not user-replaceable. If you need to dispose of the product, or at the end of its life, refer to the "Product Disposal" section of this manual.
- Disconnect the appliances from the mains before making connections. To avoid electric shock, do not tamper with or attempt to open the appliance or its power supply. For any repairs, contact qualified personnel only.
- Do not use this product outdoors or in humid environments and do not expose it to dripping or splashing water.
- Keep away from children and pets. The product contains small parts that could be swallowed (danger of suffocation)
- The product generates electromagnetic fields that may interfere with pacemakers, -implanted defibrillators (ICDs) and other implants. A minimum distance of 10cm must always be maintained between the product and the implanted device. Before use, it is advisable to seek confirmation from your doctor.
- Do not install the product in an enclosed space, and in any case always ensure adequate ventilation.
- In order to allow the separation of the product from the electrical network, the AC power supply must be in an easily accessible position.
- If you notice any abnormality in the AC adapter, disconnect it from the mains immediately.
- Do not expose the product to excessive heat sources such as direct sunlight, fire or the like.
- Do not wear or use the headset while charging via USB cable.
• To charge the headphones via USB cable, use only a Certified Power Supply for your safety
• Meliconi assumes no responsibility for any direct or indirect damages resulting from improper use of this product.
• DANGER: Never short circuit the battery charging contact.
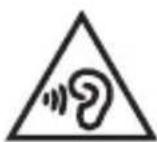
To avoid possible hearing damage, do not use headphones at high volume for extended periods of time.
Product disposal
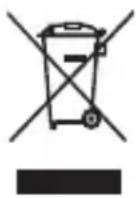
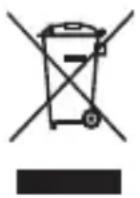
The European Directive 2012/19/EU on waste electrical and electronic equipment (WEEE) requires that these devices should not be disposed of in the normal flow of solid urban waste, but that they should be collected separately to optimize the flow of recovery and recycling of the materials that compose them and prevent potential damage to health and the environment due to the presence of potentially dangerous substances. The crossed-out bin symbol is shown on all products to remind you of this. The waste can be taken to the appropriate collection centers, or can be delivered free of charge to the distributor where the device was purchased when purchasing a new equivalent device or without the obligation to purchase a new one for devices smaller than 25cm. For further information on the correct disposal of these devices, you can contact the relevant public service. The removal of the integrated batteries from the product is the responsibility of the consortium that will take care of the disposal of the product itself.
WARNING: Do not dispose of batteries in the environment, do not disassemble them or throw them into fire. Improper use can cause damage to the environment and health. The crossed-out bin symbol indicates that batteries must be disposed of in accordance with current regulations.
Battery Disposal:
The product is subject to the Battery Directive 2006/66/EC + Re_2023/1542/EU and must not be disposed of with household waste. The removal of the integrated batteries from the product is carried out by the consortium that will take care of the disposal of the product itself.
Do not short circuit the battery.
Package contents (Fig. 1)
- HEADPHONES (receiver) Fig. 1
- BASE (transmitter) Fig. 2
- Headphone charging cable (USB - USB Type C)
-
Aux Audio Cable (3.5mm analog stereo jack)
-
Power cable (USB-DC 5V)
- Digital optical cable ( Toslink )
- Instruction booklet
Description
HEADPHONES (FIG. 1) Detail of elements:
A. Volume Control +
B. Volume Control -
C. LED indicator (RED/GREEN/BLUE)
D. On/off button
E. Aux socket (3.5 mm jack analog audio input)
F. USB Type C socket for battery charging
It is recommended to maintain a certain distance (30-40cm) between the transmitting base and any transmission devices such as PCs, WiFi modems, WiFi repeaters, Smartphones ... in order to avoid possible interference.
Headphone battery charging
- Before using the headphones, you need to charge the battery.
- To recharge the battery, insert one end of the USB cable into the "F" socket on the headphones and the other end into an available USB socket (PC / Certified charger / etc.).
- During charging the LED light "C" lights up RED, and turns GREEN when fully charged.
- While charging the battery, the headphones must not be used or worn.
WARNINGS:
For this operation, we recommend using approved power supplies and cables that comply with current safety regulations. Meliconi SpA excludes any type of liability deriving from the use of a power supply or cable not supplied.
Installation
Connecting the base to the audio source.
NB: Before making connections, make sure that the audio source (e.g. TV) and the base are switched off
- Using the appropriate cable (USB-DC 5V) turn on the base by supplying power to the "G" socket using any available USB socket (minimum current 500mA) even among those present on your TV, and check that the "L" light on the base lights up in blue.
- Locate the digital optical audio output on the TV or device you want to connect
• In the package, locate the TOSLINK digital optical cable (6) and remove the silicone protections at its ends. - Toslink digital optical cable, connect the optical audio output of the TV to the "M" (OPTICAL IN) input on the base.
- If the TV does not have an optical output, use the 3.5 mm stereo jack audio cable (4) and connect the headphone output of the TV to the "I" (AUX) input on the base.
- Turn on the audio source (e.g. TV).
NOTE: If you connect to your TV via a Toslink digital optical cable, you may need to enter your TV's menu, activate the optical audio output and select the PCM audio format (refer to your TV's user manual).
In case of analogue connection (3.5 mm jack cable), it is advisable to increase the volume level on the TV, with too weak audio signals the base does not transmit the signal (refer to the TV user manual).
- Remaining near the base, turn on the headphones by holding down the "D" button for a few moments, the LED "C" must light up in BLUE.
- Wear the headphones and use only the "A" and "B" buttons to adjust the volume and obtain correct sound reproduction.
- If the sound is not reproduced correctly, see the chapter "TROUBLESHOOTING".
Usage
For normal use, simply turn the headphones on and off by pressing the "D" button located on the headphones themselves.
NOTE: It is possible to use the headphones with direct connection to the audio source (without the base) by using the 3.5 mm jack cable supplied to connect to the Aux socket "E".
Pairing Headphones - Basic
To manually pair the headset with the base, proceed as follows:
• Make sure the base is turned on
- Quickly press the PAIR "H" button located on the back of the base 3 times : the "L" LED on the base flashes blue
- urn on the headphones by holding down the "D" button for approximately 3 seconds. Once turned on, quickly press the "D" button 3 times: the "C" LED on the headphones will flash blue quickly.
- When both the LEDs on the base and the headphones turn solid blue, the procedure has been completed successfully (otherwise, repeat the procedure)
Technical specifications
| Transmission system Digital Hopping System | |
| Frequency Band 2400MHz-2483.5MHz | |
| RF Output Power <10mW erp . | |
| Transmitter power supply DC 5V – 500mA | |
| Frequency response 20Hz - 20KHz stereo | |
| Distortion <1 % | |
| Signal to noise ratio ≥ 80dB | |
| Channel separation > 45dB | |
| Maximum transmission distance 30 meters (in free field) | |
| Headphone charging current 300mA max | |
| Headphone charging time | about 2 - 2.5 hours |
| Headphone operating current 27mA MAX, standby 18mA | |
| Built-in Lithium Polymer battery (headphone) 3.7V - 600mAh -2.22Wh | |
| Headphone operating time | about 40 hours with new battery, at medium volume |
| Operating temperature | 0°C – 35°C |
Troubleshooting
If your headphones do not produce any sound, or the audio appears to be static or you suspect it may be coming from other sources, do the following:
- Check that the connections are correct and make sure you operate as described in this manual.
- If the audio connection is made via a digital optical cable ( Toslink ), check that the audio output of your device (e.g. TV or Decoder) is set to "PCM" (or "LPCM"). To correctly set this setting, consult the TV or Decoder manual.
- If the audio connection is made via a 3.5 mm jack cable, make sure that the connected device plays audio correctly (even when the cable is disconnected) and check that the "L" indicator lights up in blue. If necessary, increase the output volume level on the device.
- Turn off the headphones with the "D" button, move closer to the base, turn them back on and check that the BLUE "C" light comes on.
- If the "C" LED on the headset flashes BLUE, it means that the base is not transmitting the audio signal to the headset, in this case repeat the procedure from point 1.
- Press the "A" and "B" buttons to adjust the audio in the headphones.
Helpline
If you have any questions regarding HP DIGITAL SMART:
- read this instruction manual carefully as it will help you solve most problems
- visit our website www.meliconi.com
For any problem/question write an email to the address: info@meliconi.com
Simplified EU Declaration of Conformity
The manufacturer, Meliconi SpA, declares that the type of radio equipment, HP DIGITAL SMART headphones, complies with Directive 2014/53/EU (RED) and the remaining Product Directives/Regulations. The full text of the EU Declaration of Conformity is available at the following Internet address:
https://www.meliconi.com/doc -> > hpdigitalsmart
HP DIGITAL SMART
EN - Harmonized Charger
The symbol in the figure indicates the type and requirements of the charger to be used for charging (harmonized charger (minimum and maximum power required). To charge the product, use a harmonized charger with a minimum power of 2.0 W. Harmonized fast charging (PD=Power Delivery) is not supported.