
IMD1200SB - Vacuum packaging machines GORENJE - Free user manual and instructions
Find the device manual for free IMD1200SB GORENJE in PDF.

User questions about IMD1200SB GORENJE
0 question about this device. Answer the ones you know or ask your own.
Ask a new question about this device
Download the instructions for your Vacuum packaging machines in PDF format for free! Find your manual IMD1200SB - GORENJE and take your electronic device back in hand. On this page are published all the documents necessary for the use of your device. IMD1200SB by GORENJE.
USER MANUAL IMD1200SB GORENJE
natural_image
Exterior view of a modern ice cream maker with clear lid and circular vent, no visible text or symbolsIMD1200SB


natural_image
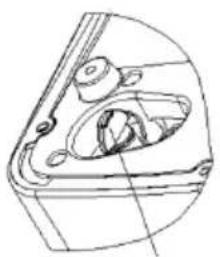
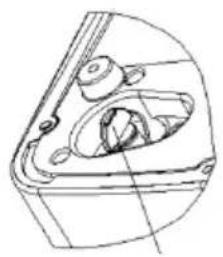
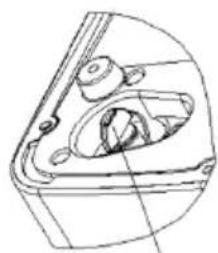
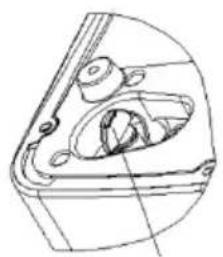
Technical line drawing of a mechanical device with a circular component and side panel (no text or symbols)Delovna površina
natural_image
Technical line drawing of a mechanical component with no visible text or symbols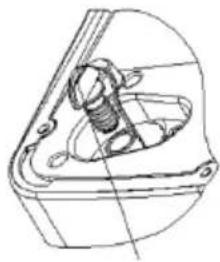
natural_image
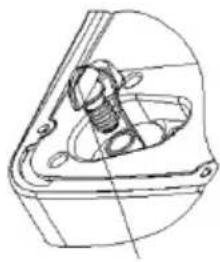
Technical line drawing of a mechanical component with no visible text or symbolsOdtočni čep
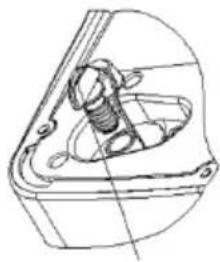
Odpravljanje težav


natural_image
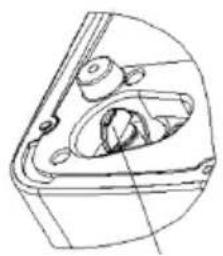
Technical line drawing of a mechanical device with a circular component and side panel (no text or symbols)Radni stol

natural_image
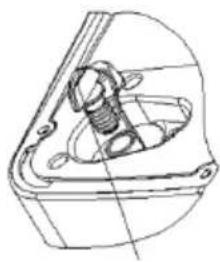
Technical line drawing of a mechanical component with no visible text or symbolsIspusni čep
natural_image
Technical line drawing of a mechanical component with no visible text or symbolsOtklanjanje kvarova
| Problem odnosno smetnja | Mogući razlozi | Rješenje |
| Svijetli signalna lampica „ADD WATER“ (Dodati vodu). | 1. Niska razina vode – premalo vode u aparatu.2. Filtar na dnu posude za vodu je začepljen.3. Greška u radu crpke. | 1.Prekinite izradu leda, ponovno nalijte vodu, i pritisnite tipku ON/OFF (uključenje / isključenje) kako biste ponovno uputili u rad ciklus izrade leda.2.Očistite aparat3.Pošaljite aparat ovlaštenom serviseru na popravak. |
| Svijetli signalna lampica „ICE FULL“ (Košara za led je puna). | 1.Košara za led je puna i led blokira infracrveno svjetlo.2. Infracrveno svjetlo (senzor odnosno primopredajna dioda) ne radi. | 1. Odstranite led iz košare.2a. Obrišite prljavštinu odnosno strana tijela sa primopredajne infracrvene diode, te ponovno uključite ledomat.2b. Ako čak i nakon što diodu obrišete i ponovno uključite aparat za led, infracrveno svjetlo odnosno primopredajna dioda i dalje ne radi, nazovite servis. |
| Kockice leda slijepe se u grudu. | Izrada leda traje predugo. | Prekinite s izradom leda. Kad se led otopi, ponovno ga pokrenite. |
| Voda u spremniku za vodu je prehladna. | U spremnik za vodu ulijte vodu čija temperatura je između 8 i 25 °C. | |
| Čini se da izrada leda teče normalno, ali aparat ne izrađuje led. | Temperatura okoline ili temperature vode je previsoka. | Led izrađujte kada je temperatura okoline niža od 32 °C, a u spremnik za vodu natočite hladnu vodu. |
| Propuštanje rashladnog sustava. | Pozovite servisnu službu. | |
| Začepljen rashladni sustav. | Pozovite servisnu službu. | |
| Loši rezultati izrade leda. | 1.Loše otpuštanje toplote.2.Temperatura vode je previsoka.3.Temperatura okoline je previsoka. | 1. Oko stranica ledomata ostavite oko15 cm prostora kako biste osigurali izdašno prozračivanje.2. U spremnik za vodu ulijte vodu čija temperatura treba biti između 8 i 25 °C.3. Ledomat koristite kada je temperatura okoline između 10 i 32 °C. |
Zaštita okoline
Nakon isteka njegovog životnog vijeka uređaj nemojte odbaciti zajedno s običnim otpadom iz kućanstva, nego ga odložite na službeno skupljalište takvog otpada za recikliranje. Pravilnim zbrinjavanjem doprinosite k očuvanju životne sredine.
Garancija i servis:
Ukoliko vam bude potrebna bilo kakva informacija u vezi uređaja, ili ako se susretnete sa nekim problemom u vezi njegova rada, provjerite internetni portal Gorenja www.gorenje.com, ili se obratite Centru za korisnike Gorenje u vašoj državi (telefonski broj takvog centra naveden je u globalnom garancijskom listu koji važi u čitavom svijetu). Ukoliko u vašoj državi nema Centra za korisnike Gorenje, obratite se vašem lokalnom prodavaču Gorenje, ili pozovite odjel Gorenja za male kućanske aparate i aparate za osobnu njegu.


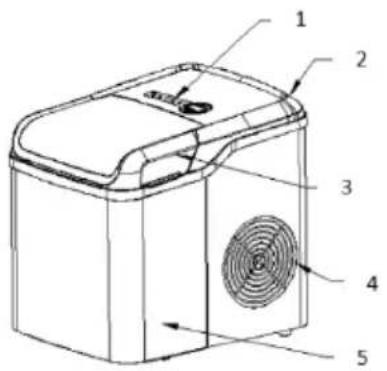
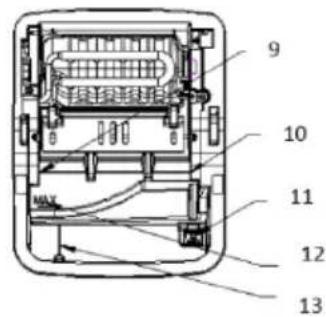
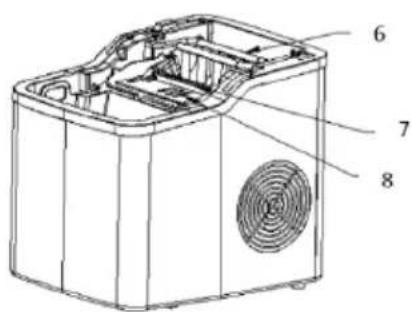
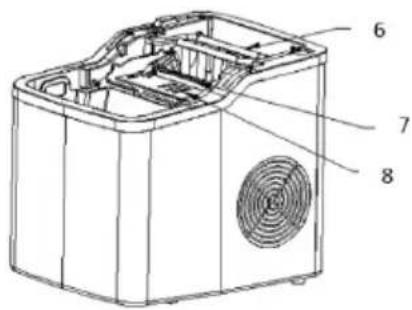
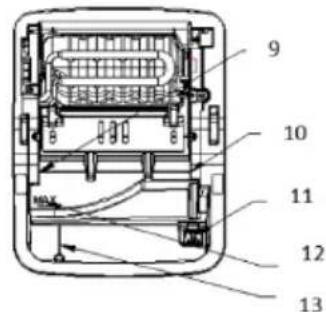
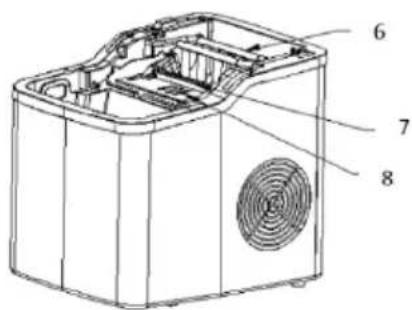
1.Kontrolna tabla
2.Gornji poklopac
3.Kontrolni prozorčić
4.Zadnje kućište
5.Prednje kućište
6.Isparivač
7. Posuda za led
8. Lopatica za led
-
Infracrvena svetlosna dioda
-
Infracrvena svetleća dioda
- Filter
- MAX nivo vode
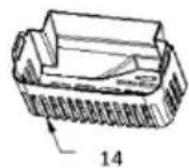
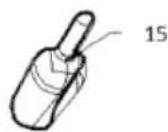
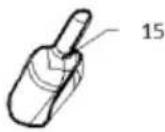
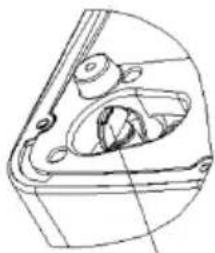
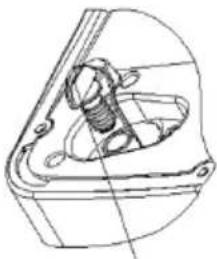
- Odvodni čep
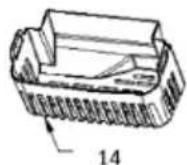
- Korpa za led
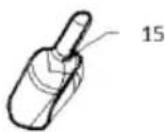
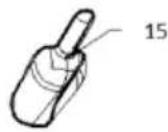
- Kašika za led
Važno:
natural_image
Technical line drawing of a mechanical device with a circular vent and side panel (no text or symbols)Radna površina
natural_image
Technical line drawing of a mechanical component with no visible text or symbolsOdvodni čep
natural_image
Technical line drawing of a mechanical component with no visible text or symbolsRešavanje problema
| Problem odnosno smetnja | Mogući razlozi | Rešenje |
| Svetli signalna lampica „ADD WATER“ (Dodati vodu). | 1. Nizak nivo vode – premalo vode u aparatu.2. Filter na dnu posude za vodu je zapušen.3. Greška u radu pumpe. | 1.Prekinite izradu leda, ponovno sipajte vodu, i pritisnite taster ON/OFF (uključenje / isključenje) kako biste ponovno uputili u rad ciklus izrade leda.2.Očistite aparat3.Pošaljite aparat ovlašćenom serviseru na popravku. |
| Svetli signalna lampica „ICE FULL“ (Korpa za led je puna). | 1.Korpa za led je puna i led blokira infracrveno svetlo.2. Infracrveno svetlo (senzor odnosno primopredajna dioda) ne radi. | 1. Izvadite led iz korpe.2a. Obrišite prljavštinu odnosno uklonite strana tela sa primopredajne infracrvene diode, te ponovno uključite ledomat.2b. Ako čak i nakon što ste obrisali diodu i ponovno uključili aparat za led, infracrveno svetlo odnosno primopredajna dioda i dalje ne radi, nazovite servis. |
| Kockice leda slepljuju se u grude. | Izrada leda traje predugo. | Prekinite s izradom leda. Kada se led otopi, ponovno pokrenite rad aparata. |
| Voda u rezervoaru za vodu je prehladna. | U rezervoar za vodu sipajte vodu čija temperatura je između 8 i 25 °C. | |
| Čini se da izrada leda teče normalno, ali aparat ne izrađuje led. | Temperatura okoline ili temperature vode je previsoka. | Led izrađujte kada je temperatura okoline niža od 32 °C, a u rezervoar za vodu sipajte hladnu vodu. |
| Propuštanje rashladnog sistema. | Pozovite servisnu službu. | |
| Zapušen rashladni sistem. | Pozovite servisnu službu. | |
| Loši rezultati izrade leda. | 1.Loše otpuštanje toplote.2.Temperatura je previsoka.3.Temperatura okoline je previsoka. | 1. Oko stranica ledomata ostavite oko15 cm prostora kako biste obezbedili izdašno provetravanje.2. U rezervoar za vodu sipajte vodu čija temperatura treba da bude između 8 i 25 °C.3. Ledomat koristite kada je temperatura okoline između 10 i 32 °C. |


natural_image
Technical line drawing of a mechanical device with a circular vent and side panel (no text or symbols)Работна маса
natural_image
Technical line drawing of a mechanical component with no visible text or symbolsЧеп за одвод
natural_image
Technical line drawing of a mechanical component with no visible text or symbolsРешавање проблеми
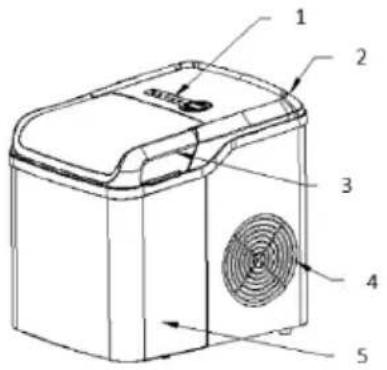
General description:


- Control panel
2.Top lid
3.Viewing window - Back housing
5.Front housing - Evaporator
- Ice tray
-
Ice shovel
-
Infrared light – receiving diode
- Infrared light – emitting diode
- Filter
- MAX water level
- Drain plug
- Ice basket
- Ice spoon
Important:
To reduce the risk of fire, explosion, electric shock or injury when using your ice maker, follow these important safety instructions:
Before using, check that the voltage in your home corresponds to the voltage indicated on the appliance nameplate. // Do not remove any safety, warning or product information labels from your ice maker. // Plug the ice maker into a grounded power outlet. No other appliance should be plugged into the same outlet. Be sure that the plug is fully inserted into the receptacle. // This appliance must be grounded. It is fitted with a power cord with a grounding plug. The plug must be plugged into an outlet that is properly installed and grounded. // Avoid the use of an extension cord, because it may overheat and cause a risk of fire. However, if it is necessary to use an extension cord, use only extension cords with a grounding plug. // The indicated rating of the extension cord you use must be equal to or greater than the rating of this appliance. // The extension cord and power cord should be positioned such that they do not drape over
the counter or tabletop where they could be pulled on by children. // Do not operate any appliance with a damaged cord or plug, after the appliance malfunctions, or after it has been damaged in any way. Return the appliance to the nearest authorized service facility for examination, repair or adjustment. // If the supply cord is damaged, it must be replaced by the manufacturer or its service agent or a similarly qualified person in order to avoid hazard. // For appliances in which flammable insulation blowing gases are or were used, the instructions shall include information regarding disposal of the appliance. // Do not let the power cord hang over edge of table or counter. // Do not place the appliance on or near a hot gas or electric burner, or in a heated oven. // Place the power cord in such way that it cannot be pulled on by children or cause a tripping hazard. // Place the power cord in such way that it is not in contact with any hot surfaces. // Use of attachments not recommended or sold by the manufacturer may cause fire, electric shock or injury. // To avoid frostbite, do not touch the evaporator unit while the ice maker is in use or while it is making ice. // Do not immerse any part of the product in water. // To disconnect, turn the relevant control to “OFF”, then remove the plug from the wall outlet. // Do not plug or unplug the product with wet hands. // Unplug the product before cleaning, maintenance and when it is not in use. // Do not use water that is microbiologically unsafe or of unknown quality. // Do not clean your ice maker with any flammable fluids. The fumes may create a fire hazard or cause an explosion. // Do not turn the ice maker on the side or upside-down. If the ice maker is accidentally turned upside-down, let it stand steadily for 2 hours before powering it on again. // If the ice maker is brought in from outside in wintertime, do not use it for a few hours. Allow the unit to warm up to room temperature before operating. // Never put flammable, explosive or corrosive articles into the ice maker. // Never use the ice maker when there is a leakage of flammable gas. // To avoid any fire, never store or use gas or any other flammable substances near the ice maker. // Unplug the ice maker before moving it, to avoid damaging the refrigeration system. // Do not attempt to disassemble, repair, modify or replace any part of your product. // The appliance is not to be used by persons (including children) with reduced physical, sensory or mental capabilities, or lack of experience and knowledge, unless they have been given supervision or instruction. // Children should be supervised to make sure they do not play with the appliance. // This appliance can be used by children aged 8 years and above, and by persons with reduced physical, sensory or mental capabilities or lack of experience and knowledge, if they have been given supervision or instruction concerning use of the appliance in a safe way, and if they understand the hazards involved. // Children shall not play with the appliance. // Cleaning and user maintenance shall not be done by children without supervision. // Close supervision is necessary when any appliance is used by or near children. // Do not leave the appliance unattended while in use. // Do not use outdoors. // Do not use the appliance for any other purpose than the intended use. // Please discard the ice maker according to local regulations, since flammable blowing gas and refrigerant are used in it. //
! WARNINGS:
Fill with potable water only. // Keep ventilation openings, in the appliance enclosure or in the cabinet or other structure the appliance is built into, clear of obstruction. // Do not use mechanical devices or other means to accelerate the defrosting process, other than those recommended by the manufacturer. // Do not damage the refrigerant circuit. // Do not use electrical appliances inside the ice storage compartments of the appliance, unless they are of the type recommended by the manufacturer. // Do not store explosive substances such as aerosol cans with a flammable propellant in this appliance. //

Warning: Risk of fire/flammable materials. // When positioning the appliance, ensure the supply cord is not trapped or damaged. // There should not be multiple portable sockets/outlets, extension cords with multiple sockets, or portable power supplies behind the appliance. // This appliance is intended to be used in households.
Save these instructions.
This equipment is labelled in compliance with the European Directive 2012/19/EC on waste electric and electronic equipment — WEEE. The Directive specifies the requirements for collection and management of waste electric and electronic equipment effective in the entire European Union.
Control panel
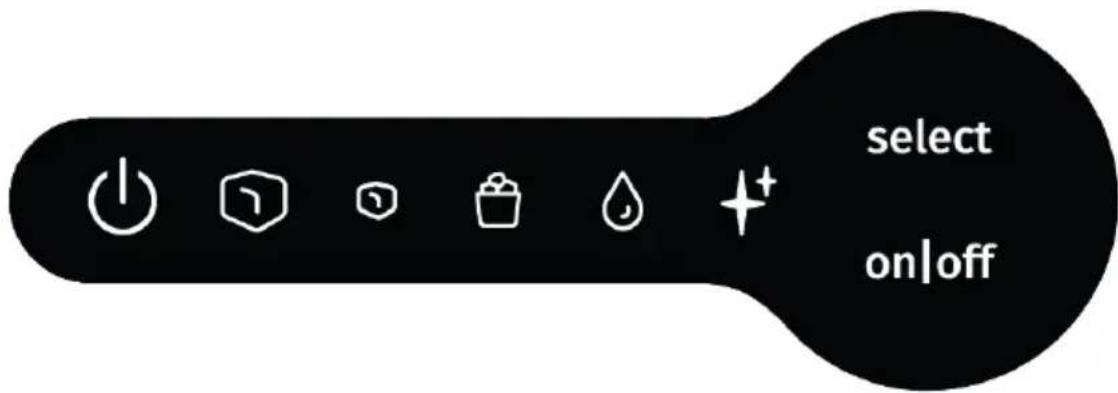
| Key | Function | ||
| on|off | Start or stop the appliance. | ||
 | In standby mode: indicator blinksIn operation: indicator stays on continuously. | ||
 | Indicator lights up when the ice basket is full. | ||
 | Indicator lights up when the water reservoir is lacking water. | ||
 | Indicator lights up when small ice is selected. | ||
 | Indicator lights up when large ice is selected. | ||
 | Indicator lights up when the appliance is cleaned. | ||
 | To select small/large ice or clean function. | ||
Using the appliance
- Ensure that the drain plug at the bottom of the water reservoir is properly closed.
- Plug the ice maker into the wall socket; the indicator will blink. NOTE: Please leave the ice maker idle for 30 minutes before plugging it in if it has been moved.
- Open the top lid and remove the ice basket.
- Fill the water reservoir with drinking water. NOTE: Do not fill above the MAX water level mark.
- Replace the ice basket and close the top lid.
-
Press the onloff key; the ⏻ indicator will stay lit. At that time, press the select key to select the ice size. If the appliance requires cleaning, press the select key to select the function in standby mode.
-
The ice-making cycle will last approximately 7-15 minutes, depending on the ambient temperature and water temperature.
- The ice-making cycle starts with water being pumped into the ice tray situated below the evaporator. Over the next 7-15 minutes, ice will form on the evaporator. After that, the ice tray will tilt backwards and the remaining water in the ice tray will be drained back into the water reservoir. The ice cubes are then dropped from the evaporator and pushed forward into the ice basket by the ice shovel. The ice tray will automatically move back into position under the evaporator and start the next cycle.
- The indicator will light up when the ice basket is full; the ice maker will then stop the ice-making cycle automatically. Gently remove the ice from the ice basket with the ice scoop. About 7.5 seconds later, the ice maker will restart the ice-making process automatically.
- The indicator will light up when the water reservoir is lacking water, and the ice-making cycle will stop automatically. At that time, remove the ice basket and add water to the water reservoir. Then press the on!off gain to restart the ice-making cycle. The appliance will start working automatically after about 20 minutes if the operator forgets to restart the appliance after refilling.
- When you have attained the desired amount of ice, stop the ice-making cycle by pressing the onloff key, and unplug the unit from the wall socket.
- Open the top lid and transfer the ice to a freezer.
- Allow the ice maker to reach room temperature.
- It is recommended that you replace the water every day. Empty the water reservoir for long periods without use.
Upon first use, it is recommended for hygienic reasons to discard the ice cubes made from the first two cycles.
Cleaning
To keep your ice tasting fresh and your ice maker looking great, we recommend cleaning your ice maker once per week.
- Stop the ice-making cycle by pressing the on/off key. Unplug the ice maker from the wall outlet, and allow it to warm up to room temperature.
- If residual water is found in the ice tray, gently push the ice tray back so that all water drains into the water reservoir.
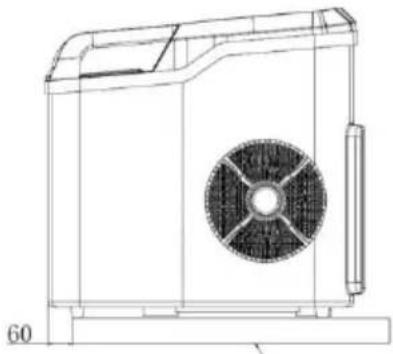
- Move the appliance forward to a place 60mm away from the working table and open the drain plug to drain out excess water.
- Check to make sure the drain plug is closed properly. Fill the water reservoir with clean water, press select until the indicator flashes, then press the key pump will start to pump water and will keep running for 5 minutes. Then it will enter into standby mode after 5 minutes of operation. Finally, open the drain plug and empty the water.
- Remove the ice basket.
- Clean the ice maker's interior with a soft cloth soaked with warm water and vinegar, then rinse with clean water and drain the water out.
- Put the drain plug properly back in position. Wash the ice basket and ice scoop with warm soapy water. Rinse and dry.
- Clean the exterior of the ice maker with a soft damp cloth. Use a mild dishwashing soap if necessary.
NOTE:
- Do not use organic solvent, boiling water, detergent, strong acid or strong alkali etc. for cleaning.
- Do not clean the evaporator.
- Please empty the water reservoir and dry it for storage if the ice maker is not used for a long time.
natural_image
Technical line drawing of a mechanical device with a circular component and side panel (no text or symbols)Working table

natural_image
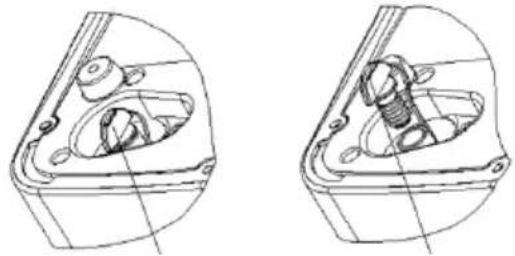
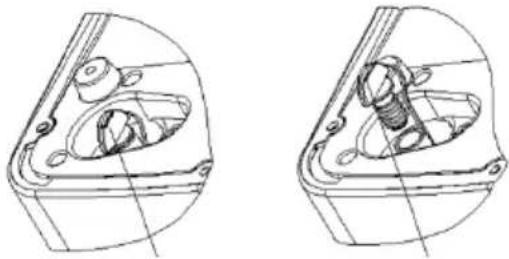
Technical line drawing of a mechanical component with no visible text or symbolsDrain plug

natural_image
Technical line drawing of a mechanical component with no visible text or symbolsTroubleshooting
| Problem | Possible causes | Solution |
| “ADD WATER” indicator lights up | 1. Low water level or lack of water2. The water screen (filter) at the bottom of water tank is blocked.3. Pump malfunction. | 1. Stop making ice, refill water and then press the “ON/OFF” key to restart the ice-making cycle.2. Clean the appliance.3. Send the appliance to the authorized department for repair. |
| “ICE FULL” indicator lights up | 1. Ice basket is full and the infrared light is blocked by the ice.2. Infrared light-emitting diode & light-receiving diode do not work. | 1. Remove the ice from the ice basket.2a. Wipe any foreign objects from the infrared light-emitting diode & light-receiving diode and restart the ice maker.2b. Call Customer Service, if the infrared light-emitting diode & light-receiving diode still do not work after wiping up the foreign objects from them and restarting the ice maker. |
| Ice is lumped together. | Making ice takes too much time. | Stop making ice and restart the ice-making cycle after the ice melts. |
| The water in the water tank is of too low temperature. | Fill the water tank with water with a temperature between 8 °C and 25 °C. | |
| The ice-making cycle seems normal but no ice is produced. | The ambient temperature or water temperature is too high. | Start the ice-making cycle at an ambient temperature below 32 °C and fill the water tank with some cold water. |
| Refrigeration system is leaking. | Call customer service. | |
| Refrigeration system is blocked. | Call customer service. | |
| Poor ice-making result | 1. Poor heat dissipation.2. The water temperature is too high.3. The ambient temperature is too high. | 1. Leave a clearance of 15 cm on all sides of the ice maker for adequate ventilation.2. Fill the water tank with water with a temperature between 8 °C and 25 °C.3. Operate the ice maker at an ambient temperature between 10 °C and 32 °C |
Environment
After the expiry of its useful life, do not discard the appliance with common household waste. Take is to an authorized recycling centre. This will help preserve the environment.
Warranty and repair:
For more information or in case of problems, please visit Gorenje website at www.gorenje.com or contact Gorenje customer service in your country (phone numbers are listed in the International Warranty Sheet). If there is no such centre in your country, please contact the local Gorenje dealer or Gorenje's small domestic appliance and personal care appliance department.
For personal use only!
GORENJE
WISHES YOU A LOT OF PLEASURE IN USING YOUR APPLIANCE.
We reserve the right to modifications.
Общо описание:


natural_image
Technical line drawing of a mechanical device with a circular vent and side panel (no text or symbols)Работна маса
natural_image
Technical line drawings of mechanical components, showing two views with no visible text or symbolsТапа за източване


natural_image
Technical line drawing of a mechanical device with a circular component and side panel (no text or symbols)Stół roboczy
natural_image
Technical line drawings of mechanical components inside a housing (no text or symbols)Korek spustowy


natural_image
Technical line drawing of a mechanical device with a circular component and side panel (no text or symbols)Masa de lucru

natural_image
Technical line drawing of a mechanical component with no visible text or symbolsDop de scurgere

natural_image
Technical line drawing of a mechanical component with no visible text or symbolsDepanarea

natural_image
Technical line drawing of a mechanical device with a circular component and side panel (no text or symbols)Pracovný stolík

natural_image
Technical line drawing of a mechanical component with no visible text or symbols
natural_image
Technical line drawing of a mechanical component with no visible text or symbolsVypúšťacia zátka


natural_image
Technical line drawing of a mechanical device with a circular vent and side blades (no text or symbols)Munkaasztal
natural_image
Technical line drawing of a mechanical component with no visible text or symbolsVízleeresztő dugó
natural_image
Technical line drawing of a mechanical component with no visible text or symbolsHibaelhárítás


natural_image
Technical line drawing of a mechanical device with a circular vent and side blades (no text or symbols)Pracovní stolek

natural_image
Technical line drawing of a mechanical component with no visible text or symbolsVypouštěcí zátka

natural_image
Technical line drawing of a mechanical component with no visible text or symbolsŘešení problémů


natural_image
Technical line drawing of a mechanical device with a circular component and side panel (no text or symbols)Робочий стіл

natural_image
Technical line drawing of a mechanical component with no visible text or symbols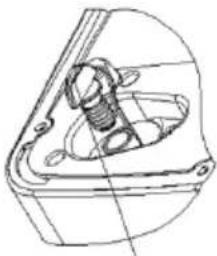
natural_image
Technical line drawing of a mechanical component with internal threading and mounting holes (no text or symbols)


natural_image
Technical line drawing of a mechanical fan or vent assembly with no visible text or symbolsРабочая поверхность
natural_image
Technical line drawing of a mechanical component with no visible text or symbolsПробка слива воды

natural_image
Technical line drawing of a mechanical component with no visible text or symbols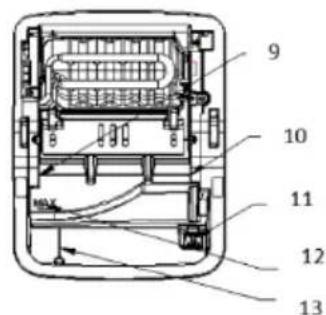


natural_image
Technical line drawing of a mechanical device with a circular component and side panel (no text or symbols)Arbeitstisch

natural_image
Technical line drawing of a mechanical component with no visible text or symbolsAblassschraube

natural_image
Technical line drawing of a mechanical component with no visible text or symbolsFehlerbehebung


natural_image
Technical line drawing of a mechanical device with a circular component and side panel (no text or symbols)Plan de travail
natural_image
Technical line drawing of a mechanical component with no visible text or symbolsBouchon de vidange

natural_image
Technical line drawing of a mechanical component with internal threading (no text or symbols)Guide de dépannage


natural_image
Technical line drawing of a mechanical device with a circular component and side panel (no text or symbols)Tryeza e punës

natural_image
Technical line drawing of a mechanical component with no visible text or symbolsTapa e kullimit
