Finn mobile - Fan Stadler Form - Free user manual and instructions
Find the device manual for free Finn mobile Stadler Form in PDF.

User questions about Finn mobile Stadler Form
0 question about this device. Answer the ones you know or ask your own.
Ask a new question about this device
Download the instructions for your Fan in PDF format for free! Find your manual Finn mobile - Stadler Form and take your electronic device back in hand. On this page are published all the documents necessary for the use of your device. Finn mobile by Stadler Form.
USER MANUAL Finn mobile Stadler Form
Operating instructions
Gebrauchsanweisung
Mode d'emploi
natural_image
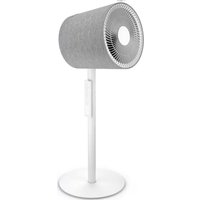
Two modern white electric fans with radial blades mounted on poles, one with a white base and the other with a white top (no text or symbols visible)Setting up

text_image
Technical diagram showing a turbine blade assembly with numbered parts and directional arrows indicating components.EN: Optional assembly
DE: Optionale Montage
natural_image
White 3D-printed white fan with radial blades and a circular head, mounted on a stand (no text or symbols visible)
text_image
QR code image containing encoded data, no visible human-readable textWATCH ASSEMBLY
VIDEO
text_image
Diagram of a fan assembly with numbered parts for identification and assembly referenceFinn
text_image
2 JAHRE GARANTIE 8 20 9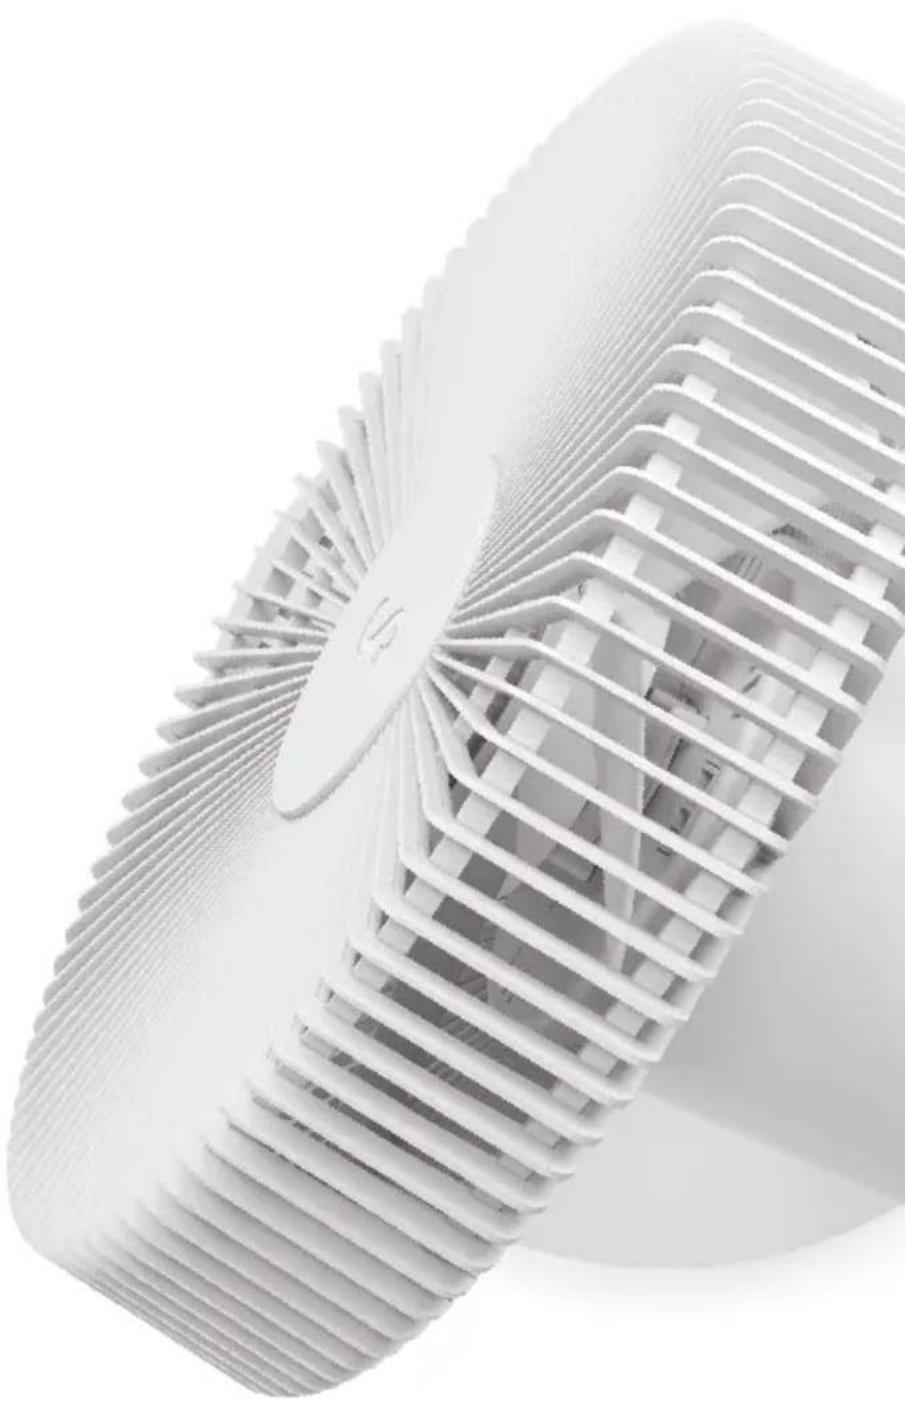
natural_image
Close-up of a white 3D-printed air duct or fan structure with radial grooves and a central hub (no text or symbols visible)
text_image
13 12 10 11 10 15 12 17 14 11 16 Statier Form 19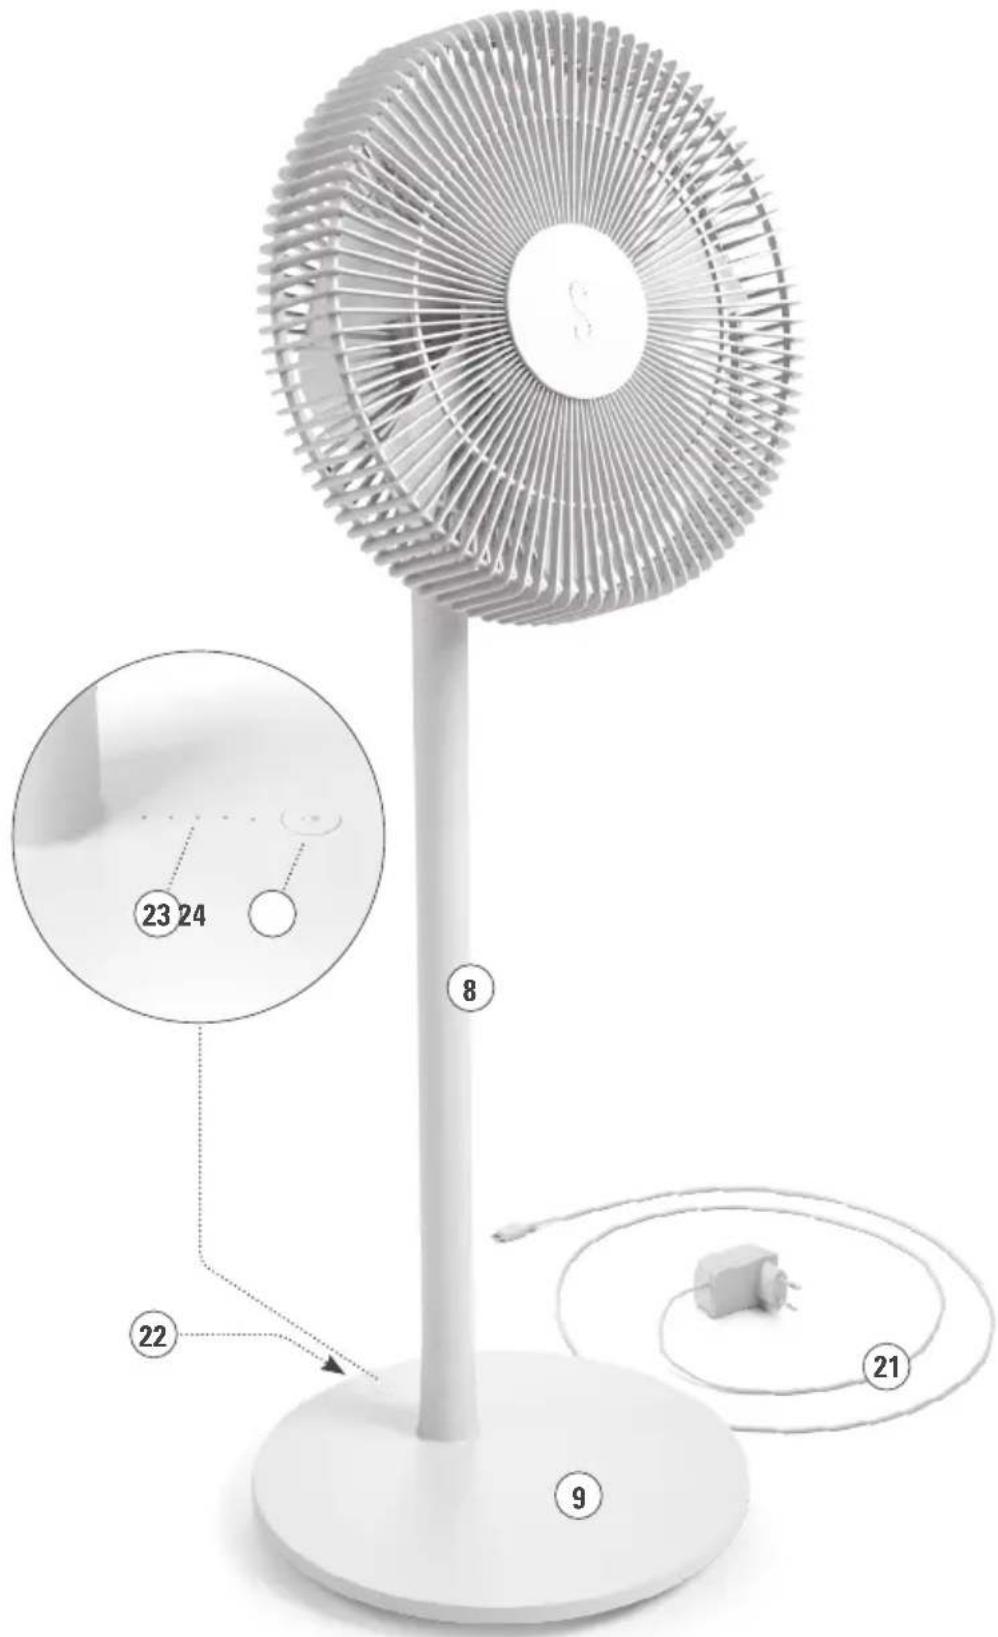
text_image
Diagram of a standard 3D fan with labeled parts and numbered annotations, including a zoomed-in inset showing measurements.Finn mobile
USB CONNECTION COVER / ABDECKUNG USB ANSCHLUSS/ COUVERCLE DE CONNEXION USB / PROTEZIONE CONNETTORE USB OSŁONA ZŁĄCZA USB / KAPJE VOOR USB-AANSLUITING / USB-TILSLUTNINGSAFDÆKNING / USB-LIITÄNNÄN SUOJAKATE USB-TILKOBLINGSDEKSEL / USB-ANSLUTNINGSLOCK / KPЫШКА USB-РАЗЪЕМА

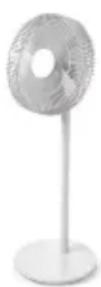
Congratulations! You have just purchased the exceptional FINN / FINN MOBILE fan. He will give you great pleasure and improve the indoor air for you.
As with all domestic electrical appliances, particular care is needed with this model also, in order to avoid injury, fire damage or damage to the appliance. Please study these operating instructions carefully before using the appliance for the first time and follow the safety advice on the appliance itself.
Description of the appliance FINN & FINN MOBILE
The appliance consists of the following main components:
- Motor housing
- Protection grille rear
- Securing nut for grille
- Fan blade
- Knob for fixing the fan blade in place
- Protection grille front
- Securing screw
- Connecting pole
- Foot
- On/off button / selection of the speed level: 1–8
- Button for the selection of timer function: 1–8 h
- Button for horizontal swing mode: 120°
- LED-display of the selected speed level / remaining operating time of timer
- Remote control (infrared)
- Button for the selection of the speed level: 1–8
- Button for the selection of „Natural Breeze“ mode
- Button for the night mode (LEDs off, speed level 1)
- Compartment for remote control
- Battery compartment remote control (type CR2025)
Description of the appliance FINN
- Mains cable for power supply
Description of the appliance FINN MOBILE
- USB-C cable with power adapter
- Connection for USB-C cable with cover for outdoor use
- Battery status display
(charging process / battery status on battery power mode) - Button for checking battery status
Important safety instructions
Please read through the operating instructions carefully before you use the appliance for the first time and keep them safely for later reference; if necessary pass them on to the next owner.
- Stadler Form refuses all liability for loss or damage which arises as a result of failure to follow these operating instructions.
- The appliance is only to be used in the home for the purposes described in these instructions. Unauthorised use and technical modifications to
the appliance can lead to danger to life and health.
- This appliance can be used by children aged from 8 years and above and persons with reduced physical, sensory or mental capabilities or lack of experience and knowledge if they have been given supervision or instruction concerning use of the appliance in a safe way and understand the hazards involved. Children shall not play with the appliance. Cleaning and user maintenance shall not be made by children without supervision.
- Never leave any parts of the packing within the reach of children.
-
If the supply cord is damaged, it must be replaced by the manufacturer, or its service agent, or a qualified person in order to avoid a hazard.
-
Assemble the appliance in accordance with the instructions for Assembly. Follow the instructions for assembly exactly and ensure that all screws are firmly tightened so as to avoid damage and hazards.
- Never insert objects into the grille of the fan. Do not cover the appliance during operation.
- Always disconnect the power cord from the socket before removing the protection grille.
- Only connect the cable to alternating current. Observe the voltage information given on the appliance.
- Do not use damaged extension cords.
- Do not run the power cord over sharp edges and make sure that it does not get trapped.
- Do not pull the plug from the socket with wet hands or by holding on to the power cord.
- Do not use the appliance in immediate vicinity of a bath tub, a shower or a swimming pool (observe a minimum distance of 3 m). Place the appliance such that a person in the bath tub cannot touch the appliance.
- Do not place the appliance near a heat source. Do not subject the power cord to direct heat (such as a heated hotplate, open flames, hot iron sole plates or heaters for example). Protect power cords from oil.
- See to it that the appliance is properly positioned to ensure a high stability during its operation and make sure that no one can trip over the power cord.
• The appliance is not splash-proof. (Finn) - For indoor use only. (Finn)
- Do not store the appliance outdoors.
- Store the appliance in a dry place inaccessible to children (pack the appliance).
- Prior to any maintenance, cleaning and after each use, switch off the appliance and unplug the mains cable from the socket.
- Repairs to electrical appliances must only be carried out by a qualified electrical technician.
• FINN MOBILE:
- The product is protected according to standard IP44 against solid foreign bodies more than 1 mm in diameter and against access by a wire and is splashproof from all sides.
- Only use the device directly on the house wall or under a canopy. The device must not be exposed to rain or snow.
- Keep the device away from heat sources.
- This device contains a lithium battery.
- Do not drop the device. Otherwise the battery may overheat, cause a fire or malfunction and reduce service life.
- In case of battery leakage: Avoid contact with human eyes and skin. Collect spillage.
- WARNING: Only use the USB cable provided by the manufacturer. Use only an external supply with the following specifications: extra low voltage DC 24 V / 2 A.
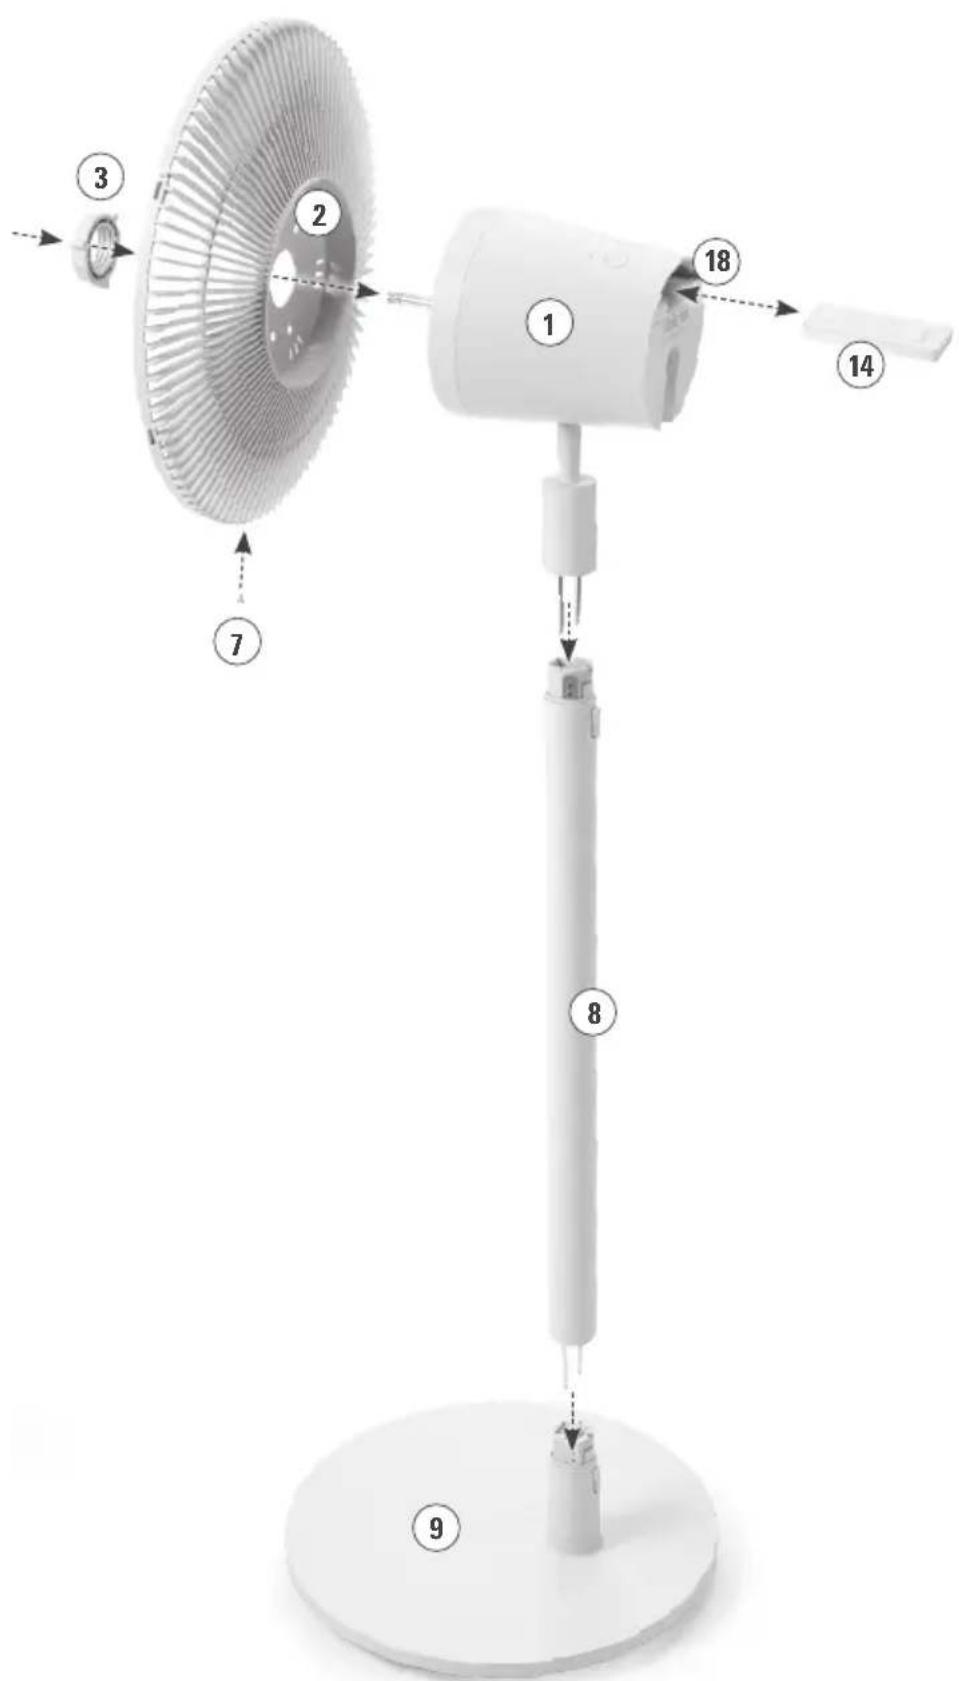
Assembly (see page 2 and 3)
Caution: The protection grilles must be properly closed prior to switching on the appliance so as to avoid any damage or hazards. Ensure that the securing screw (7) underneath the protection grilles is firmly tightened. Do not plug the power cable into the socket until you have finished assembling the device.
- Remove the securing nut for grille (3) and the knob for fixing the fan blade (5) from motor housing (1) and place the protection grille rear (2) onto the motor housing (1). Now screw securing nut for grille (3) back onto the motor housing (1) to fix the protection grille rear (2) in position.
- Attach the fan blade (4) to the motor housing (1) and fix it in position with the fastening knob (5). Tighten the knob (5) to secure the fan blade (4).
- Place the protection grille front (6) onto the protection grille rear (2) and turn the grilles clockwise until they snap into place. The grilles are installed correctly when the holes for the security screw (7) are at the bottom and match. Secure the two protection grilles (2 and 6) with the securing screw (7).
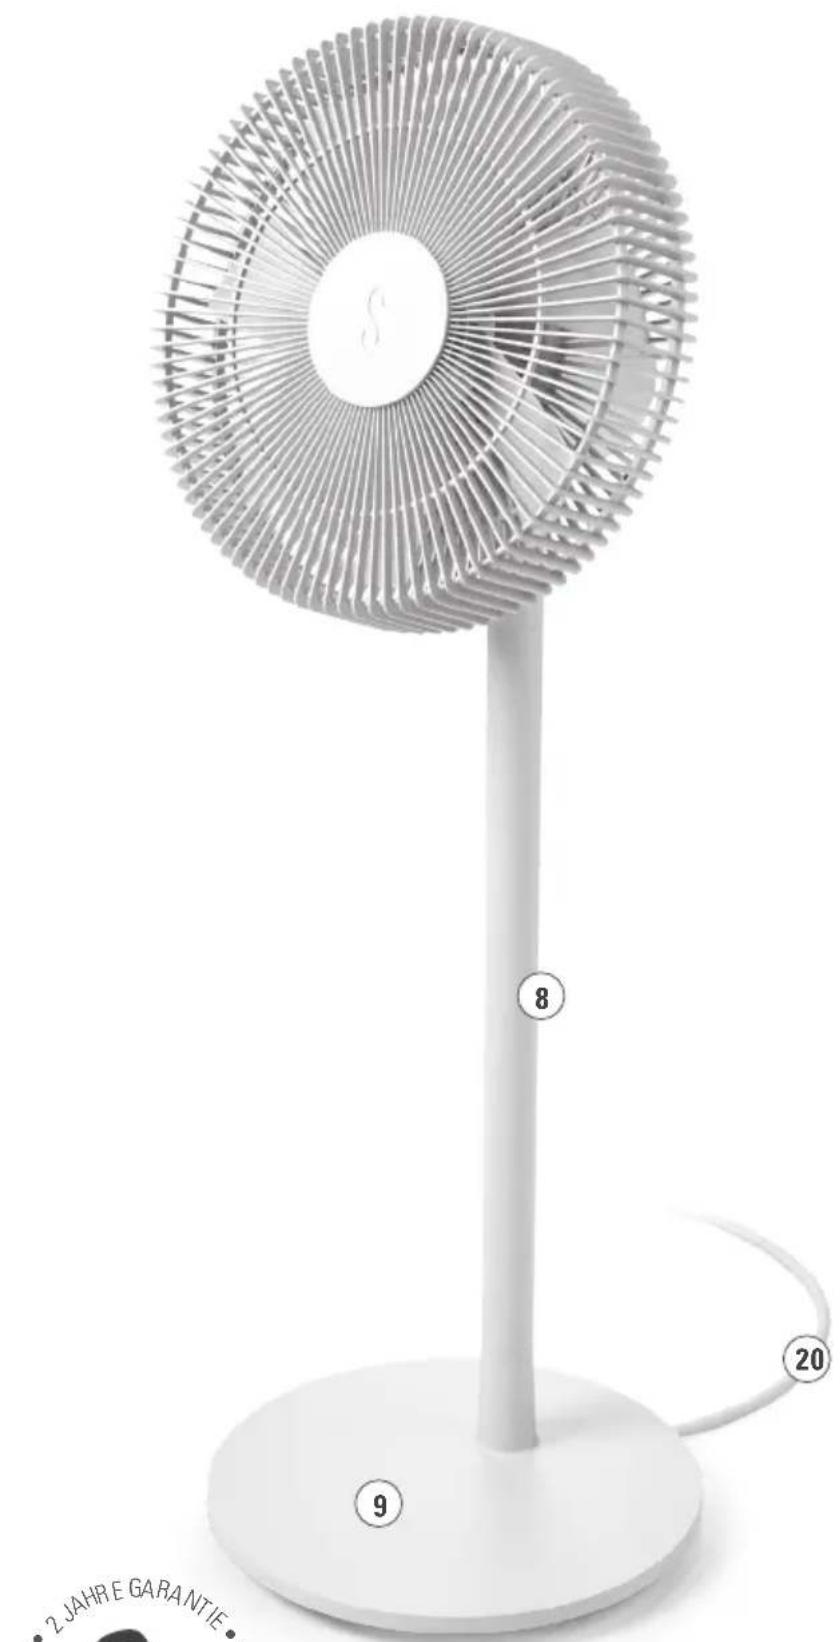
- First insert the connecting pole (8) onto the foot (9) until you hear it snap into place and finally place the assembled fan head onto the top of the connecting pole (8).
Note: By leaving out the connecting pole (8), the device can also be used as a floor or table fan.
Setting up / operation
-
Place Finn / Finn mobile in the desired location on a flat surface. Finn: Connect the mains cable (20) to a socket with the correct voltage rating. Finn mobile: Remove the cover for the connector for the USB-C cable (22) from the manual (page 7). Keep the cover in a safe place as it is essential for outdoor use: it protects the device against the ingression of water and dust. Charge the battery completely before using the device for the first time (approx. 3 hours). To do this, connect the USB-C cable to the device (22) and plug the power adapter (21) to a socket with the correct voltage rating. The progress of the charging process is shown by the illuminated LEDs (1 LED at 20 %, 2 LEDs at 40 %, 3 LEDs at 60 %, 4 LEDs at 80 % and 5 LEDs at 100 %). When the battery is fully charged, the battery status display (23) goes out. If the bottom LED starts to flash, the battery is almost empty (charge level 10 % or less). After the battery has been fully charged for the first time, you can operate the appliance without the cable using the power from the integrated rechargeable battery. A fully charged battery will give the appliance a running time of up to 35 h*.
-
Finn mobile is splash-proof (IP44) certified, making him suitable for use in covered areas outdoors. In such cases, the USB-C connector (22) must always be protected using the cover provided (see page 7). Make sure that your device is not exposed to rain or snow. The device should only be charged by plugging it into a power socket indoors.
-
Switch on the appliance by pressing the on/off button (10). The appliance gives an audible signal. When the device is used for the first time, the motor will have to align itself first. This can take a couple of seconds. Note: The device can be controlled using the buttons on the appliance or via the remote control, which offers more functions.
-
Press the button for the selection of the speed level (15) on the remote control (14) to change the fan speed (levels 1–8). Pressing the «+» button once increases the speed by one level. Pressing the «-» button reduces the speed level. If you would like to increase / reduce the speed by another level, press again. The selected level is shown by the number of illuminated LEDs (13) (1 LED for level 1, 2 LEDs for level 2, 3 LEDs for level 3, etc.). Note: You can change the speed level on the device itself by briefly pressing the on/off button (10). Pressing multiple times increases the level from 1 to 8 and starts again at 1 when you continue tapping.
-
For optimum distribution of cooling air from left to right, activate the horizontal swing function (12). The appliance now swings at an angle of 120^ to ensure optimum distribution of cooling air throughout the room. Press the swing mode button (12) again if the appliance is to remain at a certain angle.
-
The vertical tilt of the fan can be manually adjusted to an angle of 0–90°. To change the angle, grasp the fan head with both hands and carefully tilt it to the desired position.
-
Press the button for the selection of "Natural Breeze" mode (16) for natural wind conditions. This mode provides an even more pleasant cooling effect, simulating a natural breeze. The fan speed of this breeze automatically varies depending on the selected speed level.
-
By pressing the button for the timer (11) you can set the operating time for between 1 and 8 hours. The selected time is displayed above the timer button (11) with white LEDs (13). Press once to set the operating time to 1 h, press the button again for 2 h, and so on. The display (13) disappears after 4 seconds and shows the speed level. To check the remaining operating time, briefly press the timer button (11). The LED display (13) then lights up again. The unit switches off automatically after the set operating time has elapsed. The illuminated LED next to the timer button (11) indicates that the timer function is active. If this LED is not illuminated, the unit is set to continuous operation.
-
Finn mobile: On the top of the foot (9), you will find the status display for the battery (23):
-
Normal operation with fully charged battery: LEDs are not illuminated
- Battery level 10 % or lower: bottom LED flashes
- Battery is charging: LEDs are illuminated constantly
When the device is fully charged, the LEDs will go out. You can now disconnect the USB cable and use the device in battery mode (up to 35 hours*). To check the battery status, briefly press the button (24). The status of the battery is shown by the number of illuminated LEDs (1 LED at 20%, 2 LEDs at 40%, 3 LEDs at 60%, 4 LEDs at 80% and 5 LEDs at 100%).
-
The remote control (14) is in the compartment for remote control (18) on the back of the appliance. It operates via infrared – for this purpose, point the remote control at the infrared receiver on the front of the unit. The battery compartment (19) is on the back of the remote control (14). This can be opened by pushing the cover downwards.
-
If you find the lamps too bright (in a bedroom for example), you may deactivate (activate) the LEDs by pressing the night mode button (17). You can choose between two different modes::
• Normal mode (default mode)
• Light-off mode (press once)
By pressing the night mode button (17) once more, you can go back into normal mode.
Note: In night mode (LED switched off), the speed level is automatically set to level 1. However, the speed level can be changed manually by pressing the button for the selection of the speed level (15). The status display for the battery (23) cannot be switched off during charging.
- Switch off the appliance by pressing the on/off button (10) for 3 seconds.
Cleaning
Prior to any maintenance, cleaning and after each use, switch off the appliance and unplug the mains cable (20)/power adapter (21) from the socket.
Attention: Never submerge the appliance in water (danger of short-circuit).
- For external cleaning, rub with a damp cloth and then dry thoroughly.
- Make sure that the protection grilles (2 and 6) are cleaned regularly to prevent the build-up of dust. The protection grilles (2 and 6) can be cleaned with a dry brush or a vacuum cleaner.
- To clean the fan blades, remove securing screw (7) and carefully lift off the protection grille front (6). Now you can wipe the fan blades (4) with a damp cloth and dry well afterwards. After cleaning, put the protection grilles (2 and 6) back together and tighten the securing screw (7).
- Make sure that the protection grilles (2 and 6) and the fan blade (4) are completely dry and that the securing screw (7) is firmly tightened before using the device again.
Repairs
- Repairs to electrical appliances must only be carried out by a qualified electrical technician. If improper repairs are carried out, the warranty lapses and all liability is refused.
- Never operate the appliance if the adaptor or plug is damaged, after it has malfunctioned, if it has been dropped or has been damaged in any other way (cracks/breaks in the casing).
- Do not push any object into the appliance.
- If the appliance is beyond repair, make it unusable immediately by cutting through the cable and hand it in at the collection point provided for the purpose.
Disposal
The European directive 2012 / 19 / CE on Waste Electrical and Electronic Equipment (WEEE), requires that old household electrical appliances must not be disposed in the normal unsorted municipal waste stream. Old appliances must be collected separately in order to optimize the recovery and recycling of the materials they contain and reduce the impact on human
health and the environment. The crossed out "wheeled bin" symbol on the product reminds you of your obligation, that when you dispose of the appliance it must be separately collected. Consumers should contact their local authority or retailer for information concerning the correct disposal of their
old appliance. Battery disposal method (Finn mobile): When the battery is at end of life, the appliance shall be properly disposed of. Do not throw into the trash can, the electrode is wrapped in insulating paper, it can be recycled and reused.
Specifications Finn
Rated voltage 100–240 V / 50/60 Hz
Rated power 1.6–13 W
Dimensions Housing: 349 x 954 x 226 mm
(width x height x depth)
Foot: 340 mm (diameter)
Weight 4.6 kg
Sound level 24–53 dB(A)
Complies with EU
regulations CE / WEEE / RoHS / EAC / UKCA
Specifications Finn mobile
Rated voltage 100–240 V / 50/60 Hz, 1.5 A
Rated output: DC 24 V, 2.0 A
Rated power 1.6–28 W
Running time up to 35 h* on battery power
*with fully charged battery, speed level 1
and deactivated swing function
Dimensions Housing: 349 x 954 x 226 mm
(width x height x depth)
Foot: 340 mm (diameter)
Weight 4.6 kg
Sound level 24–53 dB(A)
Complies with EU
regulations CE / WEEE / RoHS / EAC / UKCA
All rights for any technical modifications are reserved
Specifications Finn mobile
Nominale spanning 100–240 V / 50/60 Hz, 1.5 A
Rangert spenning 100–240 V / 50/60 Hz, 1.5 A
Utgangsspenning: DC 24V, 2.0A
This warranty covers defects of construction, manufacturing and material. Excluded are all wearing parts and improper usage, or consequential damages due to lack of cleaning and/or descaling of the appliance.
2 Jahre Garantie
natural_image
Black-and-white portrait of two men standing side by side against a dark background (no text or symbols visible)Design by Bernhard / Burkard
Thanks to all people involved in this project: Barry Huang for his engagement and organization, Jerry Lee with Shen Yongjiu for the main engineering and Niu Yanji for his CAD work, Mario Rothenbühler for the photos, Fabian Bernhard and Thomas Burkard for the cool design, Matti Walker for the graphic work.
Martin Stadler, CEO Stadler Form Aktiengesellschaft
Subscribe to our newsletter!
www.stadlerform.com/newsletter
MANUFACTURER
Stadler Form
Aktiengesellschaft
Chamerstrasse 174
6300 Zug, Switzerland
Phone +41 41 720 48 48
DISTRIBUTION EU
Stadler Form Germany GmbH
Alt-Heerdt 104
40549 Düsseldorf, Germany
Phone +49 211 97531-640