Lukas Pro - Dehumidifier Stadler Form - Free user manual and instructions
Find the device manual for free Lukas Pro Stadler Form in PDF.

User questions about Lukas Pro Stadler Form
0 question about this device. Answer the ones you know or ask your own.
Ask a new question about this device
Download the instructions for your Dehumidifier in PDF format for free! Find your manual Lukas Pro - Stadler Form and take your electronic device back in hand. On this page are published all the documents necessary for the use of your device. Lukas Pro by Stadler Form.
USER MANUAL Lukas Pro Stadler Form
Operating instructions
Gebrauchsanweisung
Mode d'emploi
natural_image
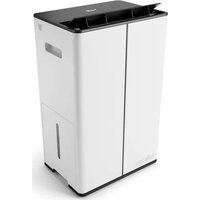
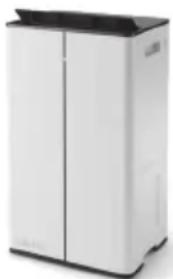
White Stadles Form air purifier with black lid and ventilation slots (no visible text or symbols on device body)Stadler Form®
Lukas PRO
text_image
10 15 25 24 22 20 19 PARTICLE SENSOR
text_image
43 3 14 13 12 11 10 9 45678 16 17 23 2 21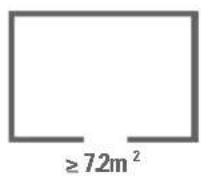
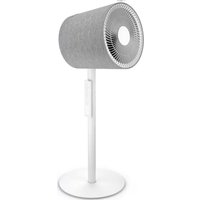
Congratulations! You have just purchased the exceptional air dehumidifier LUKAS PRO. It will give you great pleasure and improve the indoor air for you.
As with all domestic electrical appliances, particular care is needed with this model also, in order to avoid injury, fire damage or damage to the appliance. Please study these operating instructions carefully before using the appliance for the first time and follow the safety advice on the appliance itself.
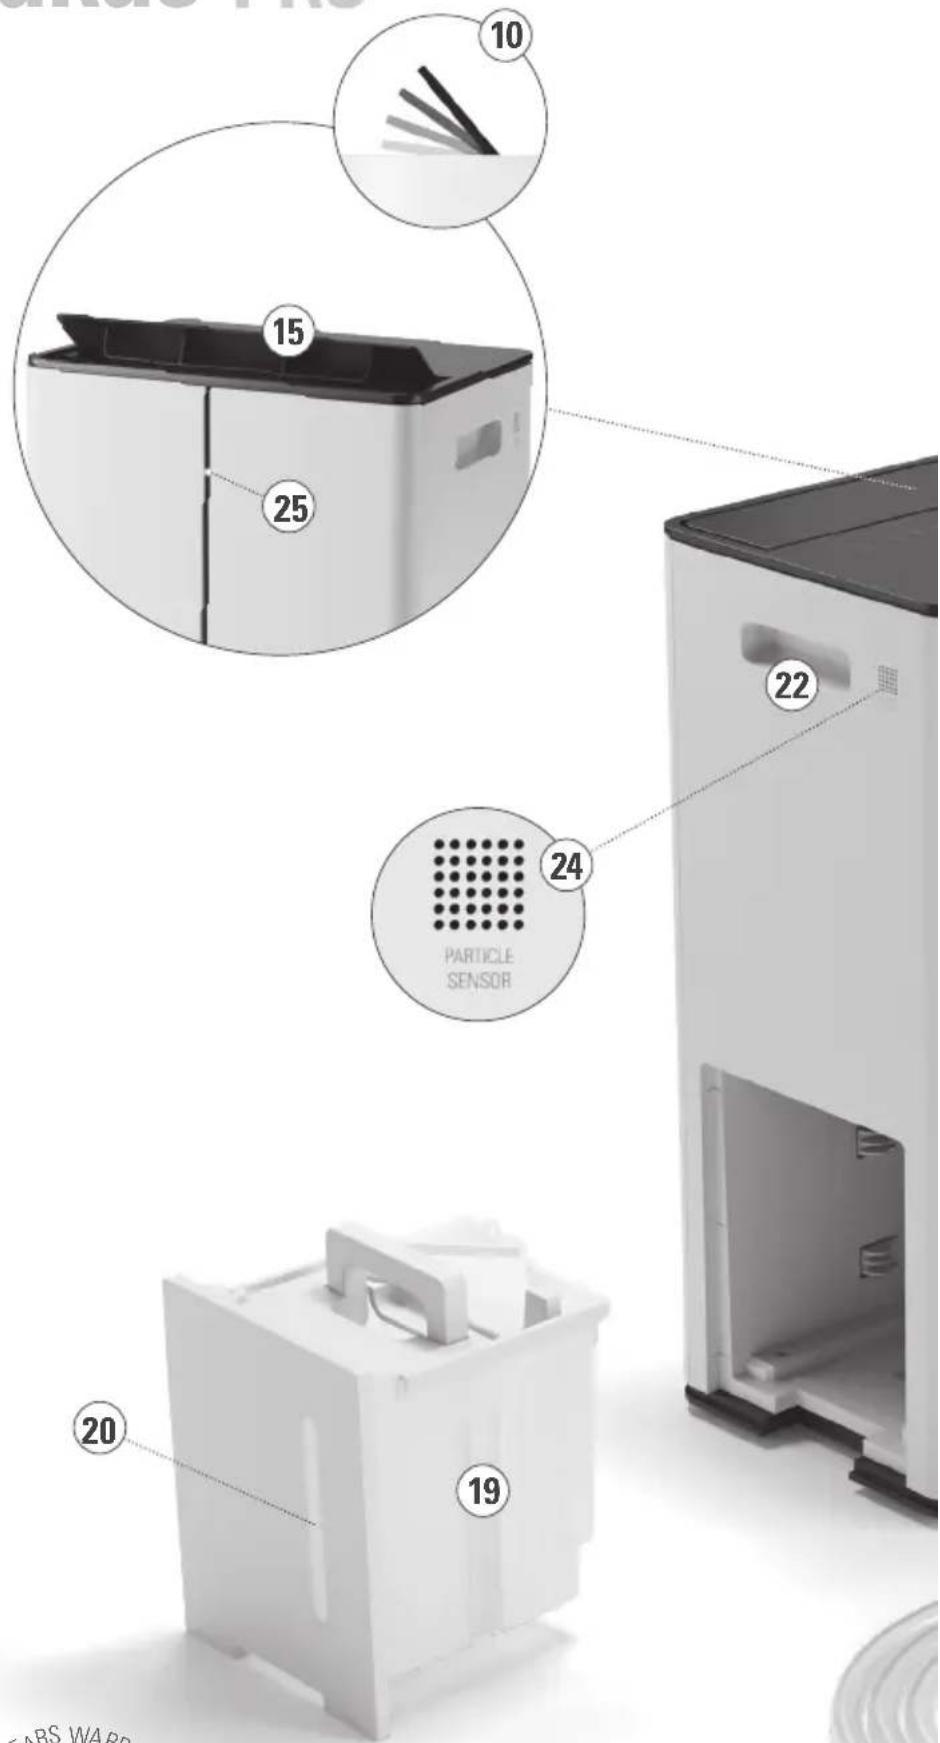
Description of the appliance
The appliance consists of the following main components:
- Housing
- Mains cable
- Display
- On/Off button
- Dehumidfying mode ("DRY")
- Laundry drying mode ("LAUNDRY")
- Air purification mode ("PURIFY")
- Selection of dehumidification level (1-4 "SPEED")
- Hygrostat (Continuous operation „CO“ / 30–80 %)
-
Swing mode ("SWING")
-
Timer(1–9h)
-
Button for night mode ("NIGHT MODE")
-
LED illuminated = water tank full ("TANK FULL")
-
Button for Wi-Fi
-
Air outlet
-
Air inlet grille
-
Air inlet
-
HEPAfilter
19.Watertank
-
Water level indicator
-
Hose for drainage operation
-
Hidden handle for easy carrying of the appliance
-
Hidden wheels for easy transportation
-
Particlesensor
-
Air quality indicator
Important safety instructions
Please read through the operating instructions carefully before you use the appliance for the first time and keep them safely for later reference; if necessary pass them on to the next owner.
- This appliance can be used by children aged from 8 years and above and persons with reduced physical, sensory or mental capabilities or lack of experience and knowledge if they have been given supervision or instruction concerning use of the appliance in a safe way and understand the hazards involved. Children shall not play with the appliance. Cleaning and user maintenance shall not be made by children without supervision.
If the supply cord is damaged, it must be replaced by the manufacturer, or its service agent, or a qualified person in order to avoid a hazard.
- Stadler Form refuses all liability for loss or damage that arises as a result of failure to follow these operating instructions.
- The appliance is only to be used in the home for the purposes described in these instructions. Unauthorised use and technical modifications to the appliance can lead to danger to life and health.
- Prior to any maintenance, cleaning and after each use, switch off the appliance and unplug the mains cable from the socket.
- For indoor use only.
- Do not store the appliance outdoors.
- Always transport the dehumidifier in an upright position. Before using the dehumidifier for the first time, leave it standing in an upright position for 24 hours. Always stand the dehumidifier in an upright position immediately after transporting the appliance and wait for at least 60 minutes before switching it back on. The water tank must be emptied every time before transport.
- Place the dehumidifier on a firm, even, waterproof surface. Make sure it is standing securely so that the dehumidifier cannot tip over or fall down. If it tipped over, please pull out the plug at once. Water can damage furniture and floor coverings.
- Unwind the cord completely. An incompletely unwound cord can lead to overheating and cause a fire.
- Do not immerse the dehumidifier into water or any other liquids and do not pour water or any other liquids onto the appliance or into the air intake and air outflow vents.
- Do not use the appliance in immediate vicinity of a bath tub, a shower or a swimming pool (observe a minimum distance of 3 m). Place the appliance such that a person in the bath tub cannot touch the appliance.
- Do not place the appliance near a heat source. Do not subject the power cord to direct heat (such as a heated hotplate, open flames, hot iron sole plates or heaters for example). Protect power cords from oil.
- Do not use the dehumidifier if it is faulty or could show signs of damage, or if it is not functioning correctly. Disconnect the plug from the power socket.
- Never insert your fingers or any other objects into the air inlet or outlet. Do not cover the appliance during operation.
- Do not sit or stand on the appliance.
- Discard of the water in the water tank when the tank is full.
- Do not operate the appliance in a closed area such as inside a closet, as it may cause a fire.
- Warning: the appliance shall be installed, operated and stored in a room with a floor area not less than the minimum room area (7.2 m ^2 ).
- When operating to dry clothes keep the clothing at least 50 cm away from the unit and do not allow water to drip onto the unit.
- If using the appliance with the drainage hose, make sure the end of the hose is lower than the spout, otherwise the water will not drain and flooding may occur.
-
If any parts of the appliance are damaged, please contact the retailer or a designated repair shop.
-
Details of type and rating of fuses: 2010 T3.15 A / 250 V; 2010 T6.3 A / 250 V.
- The dehumidifier functions optimally at a room temperature of between 13 °C and 35 °C. The specified dehumidifying performance is only achievable in the higher temperature range (from 22 °C) and with higher room humidity (from 70 %). The lowest recommended operating temperature is 5 °C. In case of lower temperatures, the DEFROST mode is activated too frequently. The highest operating temperature is 35 °C and the relative humidity is 80 %.
Setting up / operation
Note: Make sure that there is always sufficient space between the dehumidifier and the wall or other large objects (> 50 cm). The air flow must not be blocked by objects of any kind.
-
Remove the air inlet grille (16) on the back by reaching into the recess in the lower area of the grille and tilting the grille away from the device. Take the HEPA filter (18) out of the housing (1), remove the plastic film and reinsert the filter into the device. Arrows on the top of the filter (18) indicate the direction in which the filter must be inserted. Place the grille (16) back into the housing.
-
Place Lukas Pro on a flat surface in the desired area. Plug the mains cable (2) to a socket with the correct voltage rating (see rating label on the device).
-
Press the On/Off button (4) to turn on the dehumidifier.
-
In "DRY" mode (5), the dehumidification level 2 and the hygrostat in continuous operation („CO“) are preset. The swing function is activated. In addition, the Wi-Fi function is switched on and the device is in pairing mode. All functions can be changed manually. The "DRY" mode is activated by default when you put the device into operation. You can also activate/deactivate the air purification mode by pressing the "PURIFY" button (7). If the LED above the "PURIFY" button (7) lights up, the air purification mode is activated. Once the desired humidity has been reached, the compressor switches off and the appliance continues to run in air purification mode only. You can adjust the speed of the fan by pushing the "SPEED" button (8).
-
In "LAUNDRY" mode (6), the swing function, dehumidification level 4 and the hygrostat on continuous operation ("CO") are preset. The timer is programmed to 6 hours by default but can be changed manually. The other functions cannot be changed in this mode. The remaining operating time is indicated on the display.
-
To activate the air purification mode, press the "PURIFY" button (7). If the air purification mode is active, the LED above the "PURIFY" button (7) lights up. In this mode, the air is purified without the dehumidification function. The air quality is measured by the particle sensor and indicated by the LED display (25) on the front of the housing. The white LED indicates good air quality. The yellow LED indicates medium air quality and the red LED indicates poor air quality. If the device is switched on again, the display lights up in yellow for the first 3 seconds. The display then changes to the currently measured air quality (white, yellow or red).
-
You can select the speed of the fan in the dehumidifier by pushing the button for selection of dehumidification level ("SPEED") (8). There are 4 dehumidification levels. The levels are displayed as bars (level 1 = 2
bars, level 2 = 4 bars, level 3 = 6 bars, level 4 = 8 bars). If the speed is higher, the dehumidifying performance increases accordingly.
-
The desired humidity level can be set using the hygrostat (9) (CO = continuous / 30–80 %). Press the "+" or "-" button to set the target humidity. The setting is saved if there is no change on the control panel for 3 seconds. The display then shows the current humidity in the room. When the desired humidity has been reached, the appliance switches off and then checks the humidity at intervals by briefly switching on the fan.
-
With the button for the "SWING" mode (10) you can activate / deactivate the swing function of the air outlet (15). This mode optimally distributes the dehumidified air in the room.
-
You can set an operating period of between 1–9 hours by pressing the timer button (11). The timer is switched off when the display shows "0 h". Press the timer button to set the desired operation time. The setting is saved if there is no change on the control panel for 3 seconds. The display then shows the current humidity in the room. The time remaining is indicated on the display, when you press the timer button (11). The appliance will switch on automatically at the end of the period of time set.
-
If you find the lamps too bright (in a bedroom for example), you can reduce the brightness of the LEDs by pressing the night mode button (12).
You can choose between two different modes:
• Normal mode (default mode)
- Dimmed mode (press once—LED dimmed to 30 %, display switched off and "SPEED" at level 1)
- By pressing the night mode button (12) once more, you can go back into normal mode.
Note: In night mode (dimmed mode), the dehumidification level is automatically set on level 1. However, the dehumidification level can be changed manually by pressing the "SPEED" button (8).
-
Press the Wi-Fi button (14) for 3 seconds to connect Lukas Pro to the "Stadler Form" App or the "Smart Life – Smart Living" App from Tuya Inc. (available in the App Store and via Google Play) on your smartphone. If the device is in pairing mode, the LED above the Wi-Fi button (14) flashes. If the LED above the Wi-Fi button is illuminated continuously, this indicates that there is an existing connection between Lukas Pro and your smartphone. You can control all the functions of the appliance via the app and monitor the air quality in real time, even when you are not at home. More detailed information on connecting the device to your smartphone can be found in the enclosed "Wi-Fi – Quick Setup Guide" or on our website: www.stadlerform.com/connect.
-
Child lock function: When switched on, all functions can be locked by pressing and holding (for 3 seconds) the "TIMER" button (11). "CL" (for "child lock") lights up briefly in the display. In "DRY" mode, the current humidity is then displayed. In "TIMER" and "LAUNDRY" mode, the display shows the remaining operating time. If the device is disconnected from the mains and switched on again, you have to activate the child lock function again. To deactivate the function, press the "TIMER" button (11) again for 3 seconds.
-
When the water tank (19) is full, the LED above the "TANK FULL" display (13) appliance lights up. The dehumidifier switches off automatically. Please empty the water tank. When you reinsert it, the dehumidifier will automatically switch back on.
-
If desired, it is possible to connect a drainage hose to the unit for permanent water drainage. In this case connect the hose (21) to the unit through the hole in the back of the dehumidifier and place the end of the drainage in a water outlet. Please make sure the end of the hose is lower than the spout, otherwise the water will not drain and flooding may occur.
-
For easy side movement of the unit there are hidden wheels (23) attached. First, empty the tank completely. Now you can easily move the dehumidifier to the desired location.
-
If the device is not used on a daily basis, switch it off by pressing the On/Off button (4) and empty the water tank. Note: The device has a memory function and saves the last selected setting when you switch off the device and disconnect it from the power supply.
Replacement of the HEPA filter
The HEPA filter (18) cannot be cleaned and must be replaced after approx. 12 months. To replace the filter, switch off the device and remove the air inlet filter (16) on the back. Remove the HEPA filter (18) and insert the new filter. Then reattach the air inlet grid. The HEPA filter can be obtained from the dealer where you purchased your Lukas Pro.
Cleaning
Prior to any maintenance, cleaning and after each use, switch off the appliance (4) and unplug the mains cable (2) from the socket.
- Attention: Never immerse the appliance in water (danger of short-circuit).
- For external cleaning, rub with a damp cloth and then dry thoroughly.
- Make sure that the air inlet (17) and air outlet (15) are cleaned regularly to prevent the build-up of dust. The air inlet (17) and air outlet (15) can be cleaned with a dry brush or a vacuum cleaner. The air inlet (17) is fitted with an air inlet grille (16) which can be removed and cleaned with a damp cloth.
- If you don't use the dehumidifier for some time, empty the water tank and dry the unit fully before storing it in its original carton.
Repairs
- Repairs to electrical appliances must only be carried out by a qualified electrical technician. If improper repairs are carried out, the warranty lapses and all liability is refused.
- Never operate the appliance if the adaptor or plug is damaged, after it has malfunctioned, if it has been dropped or has been damaged in any other way (cracks/breaks in the casing).
- Do not push any object into the appliance.
- If the appliance is beyond repair, make it unusable immediately by cutting through the cable and hand it in at the collection point provided for the purpose.
- In the event of a repair, the following points must be observed before the appliance is shipped or taken to the dealer: completely empty the water in the appliance (water tray or water tank), and allow the appliance to dry completely. Appliances containing residual water may be damaged during transport, invalidating the warranty.
- Repairs to the refrigeration system of the device must not be carried out by local service companies, since the device is operated with the flammable refrigerant R290. Repair work on the refrigeration system may only be carried out by the manufacturer's authorized technicians who are trained in handling flammable refrigerants.
Disposal
The European directive 2012 / 19 / CE on Waste Electrical and Electronic Equipment (WEEE), requires that old household electrical appliances must not be disposed in the normal unsorted municipal waste stream. Old appliances must be collected separately in order to optimize the recovery and recycling of the materials they contain and reduce the impact on human health and the environment. The crossed out “wheeled bin” symbol on the product reminds you of your obligation, that when you dispose of the appliance it must be separately collected. Consumers should contact their local authority or retailer for information concerning the correct disposal of their old appliance.
Specifications
Rated voltage 220 – 240 V / 50 Hz
Power input 545 W (26.7 °C 60 % RH)
Rated power 735 W (35 °C 80 % RH)
Dimensions 382 x 650 x 287 mm
(width x height x depth)
Weight 18.0 kg
Tank capacity 5.2L
Max. dehumidification
per day 50 L
CADR up to 327 m ^3 /h
(Clean Air Delivery Rate according to AHAM)
Room size up to 44 m ^2 /109 m ^3 with 3x/h air exchange
(moderate air pollution / normal use)
Sound level 38 - 55 dB(A)
Refrigerant R290 (127 g)
Complies with EU
regulations CE / WEEE / RoHS / UKCA / RED / EAC
This device contains a radio module from Stadler Form Aktiengesellschaft type: WBR3. It operates in the ISM band in the range 2.400 – 2.4835 GHz with a maximum transmitted power 20 dBm.
All rights for any technical modifications are reserved
natural_image
Exterior view of a modern white industrial air purifier unit (no visible text or symbols)Deutsch
natural_image
Exterior view of a modern white industrial air purifier unit (no visible text or symbols)natural_image
Exterior view of a modern white industrial air purifier unit (no visible text or symbols)natural_image
Exterior view of a modern white industrial air purifier unit (no visible text or symbols)(Clean Air Delivery Rate iht. AHAM)
natural_image
Exterior view of a modern white industrial air conditioner unit (no visible text or symbols)natural_image
White industrial air conditioner unit with black lid (no visible text or symbols)natural_image
Exterior view of a white industrial air conditioner unit (no visible text or symbols)natural_image
Exterior view of a white industrial air conditioner unit with black lid (no text or symbols visible)natural_image
Exterior view of a white industrial air conditioner unit (no visible text or symbols)Warranty/Garantie/Garantie/Garanzia/Gwarancji Garantie/Garanti/Takuu/Garanti/Garanti
5 Years warranty
This warranty covers defects of construction, manufacturing and material. Excluded are all wearing parts and improper usage, or consequential damages due to lack of cleaning and/or descaling of the appliance.
5 Jahre Garantie
natural_image
Portrait of a bald man wearing glasses and a dark shirt (no text or symbols visible)Design by Matti
Thanks to to all people involved in this project: Stanley Chen for his engagement and Melody Hu for her perfect organization, Vincent Hsu for the main engineering, Li Xin for his CAD work, Mario Rothenbühler for the photos, Matti Walker for the timeless and cool design.
Martin Stadler, CEO Stadler Form Aktiengesellschaft
Subscribe to our newsletter!
www.stadlerform.com/newsletter
MANUFACTURER
Stadler Form
Aktiengesellschaft
Chamerstrasse 174
6300 Zug, Switzerland
Phone +41 41 720 48 48
DISTRIBUTION EU
Stadler Form Germany GmbH
Alt-Heerdt 104
40549 Düsseldorf, Germany
Phone +49 211 97531-640