EGT 1440 - Lawn mower Grizzly - Free user manual and instructions
Find the device manual for free EGT 1440 Grizzly in PDF.

User questions about EGT 1440 Grizzly
0 question about this device. Answer the ones you know or ask your own.
Ask a new question about this device
Download the instructions for your Lawn mower in PDF format for free! Find your manual EGT 1440 - Grizzly and take your electronic device back in hand. On this page are published all the documents necessary for the use of your device. EGT 1440 by Grizzly.
USER MANUAL EGT 1440 Grizzly
natural_image
Red and black tiller machine with dual blades, no visible text or symbolsTranslation of the original instructions for use
natural_image
Two identical agricultural power tools with stator and rotor blades, labeled ① and ② (no text or symbols on the devices themselves)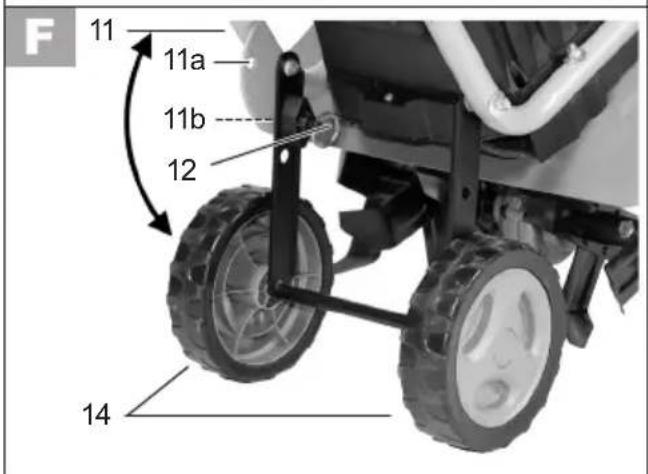
text_image
F 11 11a 11b 12 14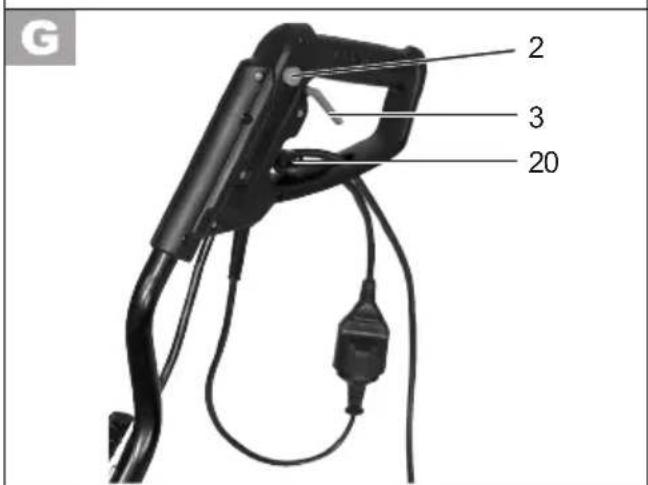
text_image
G 2 3 20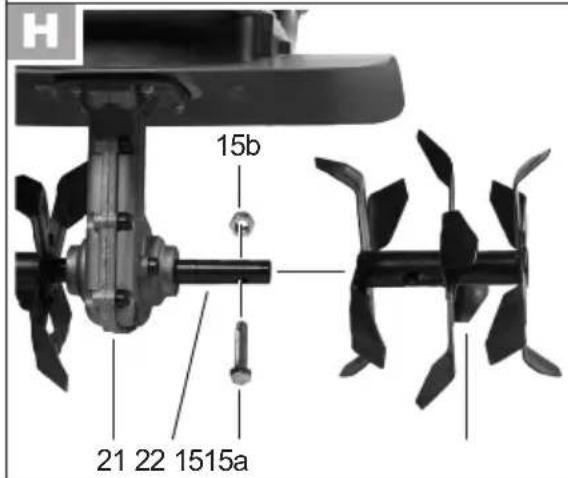
text_image
H 15b 21 22 1515a
natural_image
Exterior view of a modern agricultural tiller machine (no signage or text visible)
DE Originalbetriebsanleitung....5
FR Traduction de la notice d'utilisation originale.... 18
IT Traduzione delle istruzioni per l'uso in originale 31
NL Vertaling van de originele gebruiksaanwijzing 44
PL Tłumaczenie oryginalnej instrukcji obsługi 56
UK Translation of the original instructions for use....68
CZ Překlad originálního návodu k obsluze....79
LT Vertimas iš originalių eksploatavimo instrukcijoje 90
LV Originālās ekspluatācijas instrukcijas tulkojums 102
EST Originaalkasutusjuhendi tõlge....114
Inhalt
General safety notes....69
Functional description....72
Functional parts....72
Assembly instructions....73
Scope of delivery 73
Fitting the wheels....73
Mount the control element 73
Mounting the grip rod 73
Operation....74
Working position/
transport position 74
Switching on and off 74
Cutting Blade 75
Operating instructions....75
Cleaning/maintenance/storage ..... 75
General cleaning and maintenance
work 76
Changing the tines....76
Storage 77
Spare Parts/Accessories 77
Disposal, environmental protection ...77
Technical specifications .... 77
Guarantee....78
Repair service....78
Translation of the original EC
declaration of conformity 129
Exploded Drawing....132/133
Grizzly Service-Center....135

Before first using the machine, please read this instruction manual carefully, for your own safety and for the safety of others. Keep the manual in a safe place and pass it on to any subsequent owner to ensure that the information contained therein is available at all times.
Intended purpose
The equipment is intended for use in the DIY sector. It is not designed for constant commercial use.
The tool is intended for breaking up and tilling coarse soil for the purpose of mixing in fertiliser, peat and compost in domestic areas.
Any use other than that specifically named in this manual may lead to damage to the tool and represents a serious injury hazard for the operator.
The operator or user of the tool is responsible for any damage or injury caused to other persons or property.
This tool is intended for use by adults. Children and persons unfamiliar with the manual must not be allowed to use the tool. Do not use the tool in rain or damp surroundings. The manufacturer shall not be held liable for damage arising from improper use or incorrect operation of the tool.
Safety notes
This section deals with the basic safety regulations while working with the electric tiller.
Symbols
Symbols in the manual

Warning symbols with in- formation on damage and injury prevention.

Instruction symbols (the instruction is explained at the place of the exclamation mark) with information on preventing damage.

Help symbols with information on improving tool handling.
Symbols on the tool

Warning!

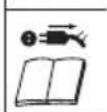
Read the user manual.
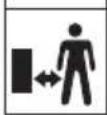
Danger of injury from objects spinning off! Keep surrounding persons away form the hazard area.

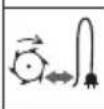
Danger of injury from rotating parts. The tines will continue to rotate after the tool has been switched off. Wait for them to stop moving.


Danger from damaged mains cable. Keep mains cables away from tines!

Warning! Switch off the tool and disconnect it from the mains before carrying out any cleaning or maintenance work.

Warning! Protect from rain and damp

Basically, wear protective goggles or face protection, ear protection and safety helmet

Wear cut-protection gloves.

Wear cut-protection safety boots with anti-slip soles.
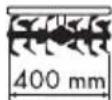
Max. working width

Safety class II
Do not dispose of electrical equipment in household waste.

Sound power level L_WA in dB.
General safety notes

Warning! Improper use of this tool may lead to serious injury. Read this instruction manual carefully before you start working with the tool, and familiarise yourself with its controls.
Keep the manual in a safe place and pass it on to any subsequent owner to ensure that the information it contains is always available.

Please read the following safety guidelines in order to avoid risk of fire, electric shock, personal injury and damage to objects
Preparation:
- Never allow children or other persons unfamiliar with the user manual to use the appliance. Local regulations or by-
UK
laws may determine the mini- mum age for using the device.
• Children must be supervised in order to ensure that they do not play with the equipment.
- Never use the tool while others, especially children or pets, are close by.
- Familiarise yourself with handling the tool and pay attention to all possible dangers that may be overheard while working with the tool.
- Check the terrain on which you will be using the tool, and remove stones, sticks, wires or other foreign objects that may be caught up and spun off.
- Wear proper working clothes, such as firm footwear with non-slip soles and strong long trousers. Do not use the tool barefoot or wearing open-toed sandals.
• To prevent injury from the tines, only switch the tool on in its working position.
- Examine the tool beforehand every time you use it. Do not use the tool when the safety components (such as the power safety catch or guard), cutting parts or bolts are missing, worn or damaged. In particular, check the mains cable and dead-man lever for damage.
- Only replace damaged bolts or tines in complete sets to prevent imbalance.
- Only use replacement and accessory parts delivered and recommended by the manufacturer. Using foreign parts will immediately lead to loss of guarantee.
Working with the tool:

Keep your hands and feet away from the tines while working, especially when starting up the tool – injury hazard!
- Observe any noise-prevention regulations and local by-laws.
- Do not use the tool to chop up stones or till lawn soil, as such use may damage the tool.
- Do not use the tool in rain, foul weather or damp surroundings (such as near garden ponds or swimming pools). Only use in daylight or good lighting conditions.
- Be sensible. Do not use the tool if you are tired or easily distracted, or after the use of alcohol or medicines. Take a break as soon as you need one.
• Make sure that you are standing firmly when using the tool, especially on slopes. If working on a slope, work along the slope, not upwards or downwards. Be particularly careful when changing direction on the slope. Do not use the tool on excessively steep slopes.
- If there is any danger of slipping on sloped ground, have a second person secure the tool with a rod or cable. The second person should stand up the slope at a safe distance from the tool.
• Always hold the tool securely in both hands while working with it.
• Make sure that the grips are
dry and clean. Be careful while moving backwards – danger of tripping over!
- Do not use the tool if it is damaged, incomplete or altered without the approval of the manufacturer. In particular, do not work with the tool if guards or protection fittings are damaged or missing.
- Do not overload the tool. Only work in the performance range stated. Do not use tools that do not have sufficient power for heavy jobs. Do not use the tool for any use other than that intended by the manufacturer.
- Avoid damage to the tool. Do not apply extra weight and do not drag the tool over hard surfaces such as tiles or steps.
Stopping work:

Warning! The tines will continue to turn for a few seconds after you switch the tool off. Wait until they have stopped moving – injury hazard!
- Do not lift or transport the tool while the motor is running. Turn the tool off and wait for the tines to stop moving, then disconnect the tool from the mains before changing the area you are working on.
- Never leave the tool unattended where you were using it.
- Switch the tool off, wait for the tines to stop moving and disconnect the tool from the mains under the following cir-
cumstances:
- Always before leaving the tool.
- Before removing remnants of soil and plants
- When the tool is not in use
- Before you conduct maintenance or cleaning work on the tool
- If the mains cable is damaged or caught up
- If the tool collides with an obstacle or starts to vibrate in an unusual manner. In this case, examine the tool for damage, and have it repaired if necessary.
- Use the tool away from flammable fluids or gases. Failure to do so may result in fire or explosion.
Maintenance and storage:
- Make sure that all nuts, bolts and screws are tight and that the tool is in safe working order.
- Do not attempt to repair the tool yourself unless you are qualified to do so. Return the tool to our service centre to carry out any work not listed in the user manual.
- Keep the tool in a dry place out of children's reach.
- Be careful in handling the tool. Keep the tines sharp and clean to improve its working safety and effectiveness.
- Follow the maintenance regulations.
Electrical safety:

Warning! Do not use the tool if the mains or extension cable is damaged – danger of electrical shock.
- Before each use, check the mains cable and the extension cable for damage and aging. Do not use the equipment if the cable is damaged or worn.
- If the connecting cable to this equipment is damaged, it must be replaced by the manufacturer, the customer service of the same, or a similarly qualified person in order to avoid hazards.
- Make sure that the mains voltage matches the data on the tool's rating label.
- If possible, connect the tool to a socket with a residual-current circuit breaker (RCD) trip switch at a triggering current of not more than 30 mA.
- Avoid skin contact with earthed objects such as metal fences and posts.
- Make sure that the connector on the extension cable is protected from splash water, and is made of rubber or has a rubber covering. Only use extension cables that are intended for outdoor use and are labelled as such. Use extension cables with a cable core diameter of at least 2,5 square millimetre. Always completely unwind the cable reel before use. Check the cable for damage.
- Use the cable hanger fitted for the purpose when using an extension cable.
- Do not carry the tool by the cable. Do not unplug the cable by tugging on it. Keep the cable away from heat, oil and sharp edges.
Functional description
Your hand-operated garden tiller is equipped with a maintenance free electric motor and a gearbox with sump lubrication. The tool is fitted with six rotating tine wheels that automatically dig themselves into the ground.
The steel frame can be folded to aid storage.
Please refer to the following descriptions for the function of the controls.
Functional parts

The major functional parts are shown on page 2 and 3.

1 Control element
2 Release button
3 Starting lever
4 Right grip
5 Left grip
6 Upper grip handle
7 2 tightening levers for fastening the upper grip handle
8 Mains cable
9 Middle handle bar
10 2 tightening levers for fastening the middle handle
11 Bottom handle
12 Wheel adjustment ring
13 Protective cover
14 2 wheels
15 Cutting blade
16 Motor housing
17 Carrying handle
18 Device cable
19 2 cable clamps
20 Cable relief

21 Gears
Drive shaft
Assembly instructions

Always disconnect the tool from the mains before conducting any work on it.
Scope of delivery
Carefully remove the tool from the packaging and check that the following parts are complete:
- Motor housing with cutting blade and control element
- Upper grip handle
- Middle handle bar
- Mounting accessories for handle mounting
(4 tightening levers, 4 washers, 4 screws)
- 2 wheels
- Mounting accessories for wheel mounting
(2 hubcaps, 2 screws, 2 washers, 2 spring washers)
- 2 cable clamps
- Translation of the original instructions for use
Fitting the wheels

-
Put a wheel (14) on the wheel axle (14a) so that the hub cap is facing outwards.
-
Screw the wheel (14) on to the device. To do this, use the enclosed screw (14c), spring washer (14d) and standard washer (14e).
-
Press the end cap (14b) on the wheel.
- Mount the second wheel in the same way.
Mount the control element

-
If necessary, loosen the 4 screws (1a) on the control element (1) and remove the handle cover (1b).
-
Press the end of the upper handle bar (6) into the control element (1) so that the holes in the upper handle bar fit into the pins on the control element (1).
Make sure that the cable of the device (18) is not twisted.
- Put on the handle bar cover (1b) and screw it tight with the 4 screws (1a).
Mounting the grip rod

Make sure during assembly that the device cable is not pinched and has enough play.

Mounting the middle handle bar:
- Position the curved end of the middle handle bar (9) between the lower handle bar (11).
- Attach the middle handle bar with the screws (10), washers (10b) and clamping levers (10) supplied.
- Turn the tightening levers (10) clockwise.
- Lock the tightening levers (10) by pressing them in the direction of the middle handle (9). The tightening levers must be positioned against the handle
such that tightening can be carried out with medium force. If this fails, continue to turn the tightening lever clockwise, or loosen it by turning counter clockwise (see small image).
Mounting the upper handle:
- Position the curved end of the upper handle (6) between the middle handle (9).
- Attach the upper handle (6) with the screws (7a), washers (7b) and clamping levers (10) supplied.
- Lock the clamping levers as described under 3. and 4.
Clipping in cable clamps:
- Clip in the cable clamps (19) to the middle handle (9) and use these to fix the device cable (18) in position.

If you release the clamping levers (7/10), you can fold down the upper handle (6) and the middle handle (9) to store the lawnmower.
Operation

Observe noise-abatement laws and local by-laws.
Working position/transport position

The wheels can be adjusted in 2 ways:
① Transport position: The wheels are folded down, the device is mobile.
② Working position: The wheels are folded up. The device is ready for use.
F Setting the working position:
- Tighten the wheel adjustment ring (12) and fold the wheels (14) upwards.
- Release the wheel adjustment (12). The locking pin snaps into the upper hole (11a) on the lower handle (11).
Setting the transport position:
- Tighten the wheel adjustment ring (12) and fold the wheels (14) downwards.
- Release the wheel adjustment (12). The locking pin snaps into the lower hole (11a) on the lower handle (11).
Switching on and off

Note: Before switching the tool on, make sure that the tool is not touching any other objects and hold it firmly in both hands.

- Plug the tool into the extension cable.
-
For cable strain relief, form a loop in the end of the extension cable and hang it into the cable relief (20).
-
Connect the equipment to the mains power supply.
-
To switch on, press the release button (2) on the handle then the starting lever (3). Release the release button (2).
The cutting blades start to rotate and dig into the ground.
- To switch off, release the starting lever (3).

Warning! The tines will continue to turn for a few seconds after the tool has been switched off. Do not touch the rotating tines – injury hazard!
Cutting Blade
The device is equipped with 2 rows of cutting blades, totalling 6 cutting blades in all, which are easy to change. Both rows of cutting blades can be inserted as desired on the left or right of the gears (see H 21).
Operating instructions

Always keep a firm grip on the tool with booth hands and watch your feet.
The tines may cause an accident. Be careful while moving backwards – danger of tripping!
Do not touch the gearbox (21) - as it may become hot during operation – danger of burns!

To avoid damage to the tool:
ever lift or drag the tool with the motor running.
- Use the transport position when transporting the lawnmower (see "Working position/Transport position").
- Raise the device to transport it over stairs.

To avoid injuries and damage:
Switch the tool off after working with it and for transport; disconnect from the mains and wait for the tines to stop moving.

- Walk the tool through the soil at normal pace and in a line as straight as possible.
• Always work away from the mains socket. Make sure that the cable is kept well away from the working area.
• Always run the extension cable behind you and, after turning, move it to the side already worked.
• Overload protection: The motor will cut out immediately if overloaded. The tool cannot be used until it has completely cooled down again.
Cleaning/maintenance/storage

Warning! Always return the tool to the service centre for work not described in the manual. Only use original parts.

Switch the tool off, unplug it from the mains, and wait for the tines to stop moving before carrying out any maintenance or cleaning work on the tool.
Perform regular maintenance and cleaning on the tool. This will ensure long, reliable service.
General cleaning and maintenance work

- Do not spray the tool down with water (especially not under pressure), and do not clean it under running water. There is a risk of electric shock and the equipment could be damaged.
- Before each use, check the equipment for obvious defects such as lose, worn or damaged parts. Check that all nuts, bolts and screws are sitting firmly.
- Check covers and safety devices for damage and check that they are sitting correctly. Replace them if necessary.

Wear protective gloves when carrying out maintenance and cleaning work on the tool to avoid injury from cuts.
Always clean the tool thoroughly after each use. Always keep the tool clean. Do not use cleaning fluids or solvents.
- Remove any soil and dirt residues stuck to the tines, driveshaft, tool surface and vents with a brush or dry cloth.
- Spray or rub biodegradable oil into the tines.
- Clean soiled grips with a damp cloth
We shall not be held responsible for any damage caused in any of the following ways:
- Improper repair
- Use of non-original parts
- Use other than for the intended purpose
Changing the tines
The device is equipped with 2 rows of cutting blades, totalling 6 cutting blades in all, which are easy to change. Both rows of cutting blades can be inserted as desired on the left or right of the gears (see H 21).

Always change both tine pairs at the same time to avoid damage to the tool from imbalance.

Switch the tool off, unplug it and wait for the tines to stop turning.

-
Place the equipment on the ground with the wheels pointing upwards.
-
Undo the hexagon screw (15a) and self-locking nut (15b) on the row of cutting blades (15).
- Take off the cutting blades from the drive shaft (22).
-
Clean the drive shaft with bio oil.
-
Push the new row of cutting blades onto the drive shaft such that the holes on the blade axis are lined up with the holes on the drive shaft.
-
Push the hexagon screw (15a) through the hole and screw on a new self-locking nut (included in the delivery contents with a new cutting blade).
Storage
- Leave the motor to cool down before you put the tool into a closed space.
- Keep the tool clean, dry and out of the reach of children.
- Do not wrap the equipment in plastic bags as damp could form.

Release the tightening levers (7+10) and fold the upper handle (6) and centre handle (9) downwards so that the device takes up less space.
The cables must not be jammed when you do this.

The device must not be used if the handles are folded over. Risk of injury.
Spare Parts/Accessories
Spare parts and accessories can be obtained at www.grizzly-service.eu
If you do not have internet access, please contact the Service Center via telephone (see "Grizzly Service-Center").
Disposal, environmental protection
Be environmentally friendly. Return the tool, accessories and packaging to a recycling centre when you have finished with them.

Do not dispose of electrical appliances in household waste.
- Return the tool to a recycling centre. The plastic and metal parts used can be separated and sorted for recycling. Ask our service centre for details.
- To dispose of the packaging, place the box with waste paper. Dispose of plastic parts in the dual system.
• We will dispose of your defective equipment sent in, free of charge.
Technical specifications
Electric Garden Hoe ....EGT 1440
Motor power input....1400 W Mains voltage .... 230-240 V\~, 50 Hz Idling speed (n _0 )....280 min ^-1 (rpm) Safety class....□
Degree of protection....IPX4 Max. working width....400 mm Number of tine wheels....6 Max working depth....220 mm Weight....11.8 kg
Sound pressure level (L_pA) ..... 71.3 dB(A), K_pA = 3 dB Sound power level ( L_WA ) Measured ..... 91.71 dB(A); K_WA = 1.5 dB Guaranteed ..... 93 dB(A)
Vibration on the grip ( a_h ) on the right .....1.130 m/s ^2 , K = 1.5 m/s ^2 on the left .....1.187 m/s ^2 , K = 1.5 m/s ^2
Noise and vibration values have been determined according to the standards and regulations named in the declaration of conformity.
Technical and optical alterations may be made without notice for the purposes of improvement. No guarantee can be given for the accuracy of dimensions, notices and specifications stated in this manual. The manufacturer shall therefore not accept liability for statutory claims arising from the manual.
The stated vibration emission value was measured in accordance with a standard testing procedure and may be used to compare one power tool to another.
UK
The stated vibration emission value may also be used for a preliminary exposure assessment.

Warning:
vibration emission value may differ during actual use of the power tool from the stated value depending on the manner in which the power tool is used.
Safety precautions aimed at pro- tecting the user should be based on estimated exposure under actu- al usage conditions (all parts of the operating cycle are to be consid- ered, including, for example, times during which the power tool is turned off and times when the tool is turned on but is running idle).
Guarantee
• We grant a 24-month warranty for this appliance. Industrial use will invalidate the guarantee.
- Damage due to natural wear and tear, overload or incorrect use is excluded from the guarantee. Certain components are subject to normal wear and tear and are excluded from the guarantee. These include in particular: Tines.
• Furthermore, the prerequisite for guarantee services is that the references indicated in the operating instructions regarding cleaning and maintenance have been adhered to.
- Damage, which has been caused from material or manufacturing faults, will be made good free of charge, by replacement delivery or repair.
This requires that the appliance is re-turned to our service center undismantled and with proof of purchase and guarantee.
Repair service
• Repairs, which are not covered by the guarantee, can be carried out for charge by our service center. Our service center will be glad to provide you with a cost estimate.
We can only process devices which have been packaged sufficiently and which have been dispatched with correct stamping.
- Note: In case of complaint or service, please deliver your device cleaned, and with an indication of the defect, to our service address.
Devices sent in freight collect - by bulk freight, express or with other special freight - are not accepted.
- Defective units returned to us will be disposed of for free.
Obsah
Účel použití 79
text_image
Exploded view diagram of a mechanical assembly with numbered parts for identificationGrizzly Service-Center

Unit 3, Beldray Park
Beldray Road, Mount Pleasant
Bilston, West Midlands WV14 7NH
Tel.: 0845 683 2672
e-mail: care@novoserv.co.uk

Krysiak Sp. z o.o.
ul. Rolna 6
62-081 Baranowo
Tel.: 061 650 75 30
Fax: 061 650 75 32
e-mail: krysiak@krysiak.pl
Homepage: www.krysiak.pl

HECHT MOTORS s.r.o.
U Mototechny 131
251 62 Mukařov-Tehovec
Tel.: 323 661 347 linka 27
Fax: 323 661 348