ART 2420 Lion - Grass trimmer Grizzly - Free user manual and instructions
Find the device manual for free ART 2420 Lion Grizzly in PDF.

User questions about ART 2420 Lion Grizzly
0 question about this device. Answer the ones you know or ask your own.
Ask a new question about this device
Download the instructions for your Grass trimmer in PDF format for free! Find your manual ART 2420 Lion - Grizzly and take your electronic device back in hand. On this page are published all the documents necessary for the use of your device. ART 2420 Lion by Grizzly.
USER MANUAL ART 2420 Lion Grizzly
Cordless Lawn Trimmer
Accu-gazontrimmer
natural_image
Two red metal detector holders with black caps and white handles, shown from different angles (no text or symbols visible)ART 2420 Lion
ART 2420 Lion Set

Translation of the original instructions for use
natural_image
Mechanical lever device with articulated joints and handle (no visible text or symbols)H

natural_image
Metal tool with curved handle and blade, no visible text or symbolsI
text_image
21 23 13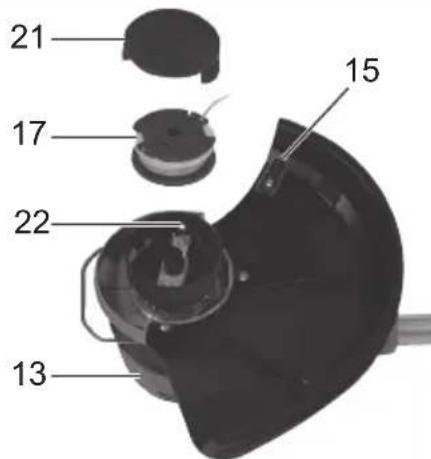
text_image
21 17 22 13 15J

text_image
14 15
DE Originalbetriebsanleitung 5
GB Translation of the original instructions for use .....22
NL Vertaling van de originele gebruiksaanwijzing......39
FR Traduction de la notice d'utilisation originale .....56
IT Traduzione delle istruzioni per l'uso in originale ...74
PL Tłumaczenie oryginalnej instrukcji obsługi......91
CZ Překlad originálního návodu k obsluze......109
LT Vertimas iš originalių eksploatavimo instrukcijoje ....125
Inhalt
Einleitung ....5
(Akku 24V, 4 Ah)....15
Grizzly Service-Center 147
Einleitung

Akku (Li-Ion) ......24LB2004
natural_image
Illustration of two workers in protective gear using a tool, with one holding a 30-degree angle marker (no text or symbols)Introduction......23
Intended purpose ....23
General description....23
Extent of the delivery....23
Overview 24
Functional description .....24
Technical data....24
Safety instructions....25
Symbols and icons 25
General safety instructions......26
Charging the battery ....31
Removing / inserting the battery .....31
Recharging the battery 31
Indicator charge level
(Battery 24 V, 4 Ah)....32
Used batteries....32
Assembling instructions....32
Operation 32
Turning on and off 32
Trimmer settings....33
Lengthening the cutting lines .....33
Manner of operation....34
Cutting grass 34
Vertical cut / lawn edge trimming ....34
Cleaning and maintenance....34
Cleaning 34
General maintenance....35
Replacing the trimming assembly ...35
Storage 35
Disposal and protection
of the environment....36
Replacement parts ....36
Guarantee....37
Repair Service....37
Trouble shooting ....38
Translation of the original
EC declaration of conformity .....141
Exploded Drawing....145
Grizzly Service-Center ....147
Introduction

Before initial start-up, please read through these operating instructions carefully prior to using the machine. Keep the instructions safe and pass them on to any subsequent user so that the information is always available.
Intended purpose
The appliance is solely intended for cutting grass and weeds in the garden and for edge trimming. Any other use that is not specifically approved in these Instructions can result in damage to the trimmer and give rise to serious danger for the user. Do not use the appliance to trim hedges or bushes. The appliance must only be used by adults. Young people aged 16 and over may only use the trimmer under adult supervision. The user or operator is responsible for accidents causing injury to other people or damage to property. The manufacturer cannot be held liable for damage when the trimmer is not used in conformity with its intended purpose or due to incorrect operation.
General description

The illustration how to handle the appliance can be found on pages 2-3.
Extent of the delivery
Carefully unpack the trimmer and check that it is complete:
Scope of Delivery for Prod. No. 72035203 Device WITHOUT battery
- Battery-operated lawn trimmer
- Protective cover with three screws
- Auxiliary handle
- Translation of the original instructions for use
Scope of Delivery for Prod. No. 72035202 Device WITH battery
- Battery-operated lawn trimmer
- Protective cover with three screws
- Auxiliary handle
- Battery charger
- Battery
- Translation of the original instructions for use
Dispose of the packaging material correctly.
Overview

1 Top handle
On/Off switch
3 Switch lock
4 Guide track
5 Auxiliary handle
6 Handle screw (hidden)
7 Handle rod
8 Lock of handle rod adjustment
9 Threaded bush for length adjustment
10 Telescopic shaft
11 Motor head
12 Spacer bow (flower guard)
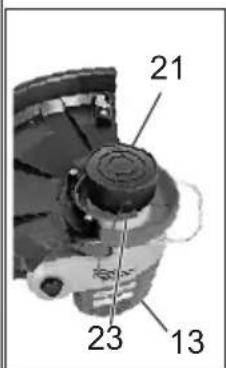
13 Cutter head with spool
14 Protective cover
15 String cutter (hidden)
16 Bar for tilt angle adjustment
17 Spool
18 Battery
19 Battery charger

20 Handle holder

21 Hood
22 String outlet eye
23 Lock button
Functional description
The hand-held and portable battery lawn trimmer uses a fully automatic string spool as cutting unit.
The appliance also features a pivoting motor head, adjustable aluminium telescopic shaft, and a spacer bow. A hood covering the cutting device protects the user.
The following describes the functions of the operating parts. This equipment is not suitable for commercial use. Commercial use will invalidate the guarantee.
Technical data
Appliance
Motor voltage ....24 V==
Idling speed....9200 min ^-1 (rpm)
Protection Class....III
Cutting circle 25 cm
String thickness, single string....1.6 mm
Weight (without battery charger and battery) 1.87 kg
Sound pressure level (L_pA) .....80 dB(A), K_pA = 3 dB
Sound power level ( L_WA ) guaranteed.....96 dB(A) measured.....88.4 dB(A); K_WA = 2.48 dB
Vibration (a_h) ...... 3.4m / s^2 , K = 1.5m / s^2
Battery (Li-Ion)....24LB2004
Nominal voltage ....24 V==
Capacity 2.0 Ah
Charging time......approx. 8 h
Recharger......HYCHO132400500G
Uptake voltage / Input ...... 100-240V; \~50/60Hz; 0.32 A
Voltage output / Output.....24 V=0.5 A
Protection class....
Protection category ......IPX0
Noise and vibration values have been determined according to the standards and regulations mentioned in the declaration of conformity.
Technical and optical changes may be undertaken in the course of further development without notice. All dimensions, references and information in this instruction manual are therefore not guaranteed. Legal claims made on the basis of the instruction manual can therefore not be considered as valid.
The stated vibration emission value was measured in accordance with a standard testing procedure and may be used to compare one power tool to another. The stated vibration emission value may also be used for a preliminary exposure assessment.

ning:
ibration emission value may differ during actual use of the power tool from the stated value depending on the manner in which the power tool is used. Safety precautions aimed at protecting the user should be based on estimated exposure under actual usage conditions (all parts of the operating cycle are to be considered, including, for example, times during which the power tool is turned off and times when the tool is turned on but is running idle).
Safety instructions
Ensure that the safety instructions are observed when operating the trimmer.
Symbols and icons
Symbols on the trimmer

WARNING!

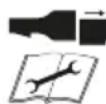
Carefully read these Operating Instructions.


Wear goggles and ear defenders.

Danger due to materials blown out of machine!

ve persons in the vicinity from the danger area.
After turning off the appliance, the cutting disk will keep revolving for a couple of seconds. Keep away from your hand and feet.

Do not expose the trimmer to moisture. Do not work when it is raining and do not cut wet grass.
Keep by-standers well away. They could be injured by flung out objects.
Remove the battery prior to servicing the appliance.

Noise level rating L _WA in dB
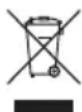
Electrical appliances must not be disposed of with the domestic waste.

Cutting circle
Symbols on the battery


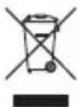
Do not dispose of batteries in household waste, fire or water.
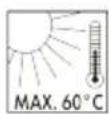
Do not subject the battery to strong sunlight over long periods and do not leave it on a heater (max. 60°C).

Take batteries to an old battery collection point where they will be recycled in an environmentally friendly manner.
Symbols on the recharger

WARNING!

Before using for the first time, carefully read through the user manual

The recharger is for indoor use only.

Pole orientation

Protection class II
Electrical appliances must not be disposed of with the domestic waste.
Symbols in the manual

Warning symbols with information on damage and injury prevention.

Instruction symbols (the instruction is explained at the place of the exclamation mark) with information on preventing damage.

Help symbols with information on improving tool handling.
General safety instructions

Observe! When using the machine, please observe the safety instructions.
Operating the trimmer

CAUTION: How to avoid accidents and injuries:
Preparations:
- This appliance can be used by persons with reduced physical, sensory or mental capabilities or lack of experience and knowledge if they have been given supervision or instruction concerning use of the appliance in a safe way and understand the hazards involved. Children shall not play with the appliance.
- Never allow children and people who are not familiar with these Operating Instructions to use the trimmer. Local regulations may stipulate a minimum age for operators.
- This appliance is not intended for use by persons (including children) with reduced physical, sensory or mental capabilities, or lack of experience and knowledge, unless they have been given supervision or instruction concerning use of the appliance by a person responsible for their safety.
• Children should be supervised to ensure that they do not play with the appliance.
- Keep the equipment well away from by-standers, children and pets. Turn off the equipment if they are in the vicinity.
- Always wear appropriate work clothes and personal protective equipment! Always wear a face shield or goggles as well as ear defenders, boots or shoes with non-slip soles, strong long trousers and work gloves. Never operate the equipment while bare footed or wearing sandals.
The protective devices and your personal protective equipment will protect yourself and other people and ensure that the equipment can be smoothly operated:
- Never use the equipment if it is damaged, incomplete or has been modified without the approval of the manufacturer. Never operate the equipment if the protective equipment is defective. Before starting up the equipment always check that the equipment is in a perfectly safe condition, especially the power cable, the switch and the protective cover. Never disconnect or remove any protective devices. This ensures that the equipment remains safe.
Use:
• Always maintain a secure footing while working. Be especially careful when working on a sloping terrain. This enables you to control the equipment better in unexpected situations.
- Do not operate the equipment if you are tired or lack concentration and after having drunk alcohol or taken medication. Always take a work break in due time. A moment of carelessness when using the equipment can result in serious injury.
- Do not use the equipment while it is raining, in poor weather conditions and when the surrounding area is wet. Only work when the light conditions are good. There is a risk of accidents.
- Always keep the cutting line well away from the body, particularly the hands and feet, when you switch on the motor and while the motor is running. Risk of injury from cuts.
- Never start the equipment when it is turned over or not in the correct working position.
-
Switch off the motor and disconnect the plug from the mains socket:
-
Whenever you are not using the equipment
- If the equipment is left unattended
- When the equipment is being cleaned, maintained or is to be in-spected
- When relocating the equipment
- If the power or extension cable is damaged
-
When you remove or exchange the cutting device or manually adjust the length of the cutting line
-
Check when starting up and working with the cutting head that it does not come into contact with stones, rubble, wire or other foreign bodies. Danger due to materials blown out of machine.
- Never try to stop the cutting device (cutting line) with your hands. Always wait until it has stopped rotating. Contact with the cutter can result in injury.
- Only use an original cutting line. The use of a metal wire instead of the nylon line is impermissible. This can result in serious injury.
- Do not use the equipment to cut grass that is not growing on the ground, e.g. grass on walls, rocks, etc. Using the equipment for purposes other than those intended can result in dangerous situations.
- Do not traverse gravel paths while the equipment is operating. Gravel can be thrown up and result in injury.
GB
- Do not operate the equipment in the vicinity of inflammable liquids or gases as this could give rise to the danger of a fire or explosion.
- Store the equipment in a dry place that is not accessible to children.

CAUTION! The following states how damage to the equipment and possible injury to people can be avoided:
Taking care of the equipment:
- Ensure that the ventilation openings are not clogged.
- Only use spare parts and accessories that have been supplied or recommended by the manufacturer.
- Never try to repair the equipment yourself. All work that has not been listed in these Instructions must only be carried out by an authorised servicing agency.
- Treat the equipment with the greatest care. Always keep the equipment clean for better and safer work. Follow the maintenance instructions.
- Never overload the equipment. Always work within the stated capacity range. Do not use low-power machines for heavy-duty work. Do not operate the equipment for purposes for which it is not intended.
- Always inspect the equipment before it is to be used. Do not operate the equipment if safety devices, parts of the cutting device or bolts are missing, worn out or damaged.
Electrical safety:

CAUTION! The following states how to avoid accidents and injuries due to electric shock:
- Before each usage, check the mains power cable and the extension cable for damage and signs of aging. Do not use the device if the cable is damaged or worn. Damaged mains power cables increase the risk of electric shock.
• Always keep the extension cable well away from the cutting tools.
Should the power cable become damaged during work, then instantly disconnect the power cable from the mains. DO NOT TOUCH THE POWER CABLE BEFORE IT HAS BEEN DIS- CONNECTED FROM THE MAINS! Risk of electric shock.
- If the power cable for this equipment is damaged, it must be replaced with a special power cable, which is available from the manufacturer or a customer service agent of the same.
- Check that the mains voltage is the same as indicated on the rating plate.
- Wherever possible connect the equipment to a power socked with a residual-current circuit breaker that has a rated current of not more than 30 mA.
- Protect the equipment from moisture. The equipment must not be moist nor operated in a moist environment. Water entry into the equipment increases the risk of electric shock.
- Avoid body contact with earthed parts (e.g. metal fences, metal posts). There is an increased risk of electric shock if your body is earthed.
- Only use extension cables with a maximum length of 75 m that have been approved for open-air use. The stranded cord diameter of the extension cable must be at least 2.5 mm ^2 . Always unreel a cable drum to its full length so that the entire cable can be inspected for damage.
- Never pass an operating equipment over the extension cable. Ensure that
the power cable is always trailing behind the operator. The extension cable can be accidentally severed.
- Use the envisaged cable suspensions when attaching an extension cable.
- Never carry the equipment by its power cable. Never pull the cable to disconnect the plug from the mains socket. Protect the cable from heat, oil and sharp edges. The mains power cable could be damaged.
CAREFUL HANDLING AND USE OF BATTERY DEVICES
a) Charge the batteries only in chargers that are recommended by the manufacturer. Risk of fire if a charger that is suitable for a specific type of battery is used with other batteries.
b) In the power tools, use only the batteries designed for the purpose. The use of other batteries may result in injuries and risk of fire.
c) Keep the unused battery away from paper clips, coins, keys, nails, screws and other small metal objects, which could cause bridging of the contacts. A short circuit between the battery contacts may cause burns or fire.
d) If used incorrectly, liquid may leak from the battery. Avoid contact with this. In the event of accidental contact, rinse off with water. If the liquid gets into eyes, seek medical assistance. Leaking battery fluid may cause skin irritations or burns.
SERVICE
- Have your power tool serviced by a qualified repair person using only identical replacement parts. This will
ensure that the safety of the power tool is maintained.
SPECIAL SAFETY DIRECTIONS FOR BATTERY-OPERATED TOOLS
a) Ensure that the device is switched off before inserting the battery. Inserting a battery into a power tool that is switched on may result in accidents.
b) Recharge the batteries indoors only because the battery charger is designed for indoor use only.
c) To reduce the electric shock hazard, unplug the battery charger from the mains before cleaning the charger.
d) Do not subject the battery to strong sunlight over long periods and do not leave it on a heater. Heat damages the battery and there is a risk of explosion.
e) Allow a hot battery to cool before charging.
f) Do not open up the battery and avoid mechanical damage to the battery.
Risk of short circuit and fumes may be emitted that irritate the respiratory tract. Ensure fresh air and seek medical assistance in the event of discomfort.
g) Do not use non-rechargeable batteries!
CORRECT HANDLING OF THE BATTERY CHARGER
- This appliance is not intended for operation by persons (including children) with reduced physical, sensory or mental capabilities, or lacking experience and/or knowledge, unless they are under the supervision of or have been instructed on how to use the appliance by a person responsible for their safety.
- Keep the equipment away from children and pets. Children should be supervised in order to ensure that they do not play with the equipment.
GB
- To charge the battery, use only the charger supplied. Risk of fire and explosion. This ensures that the safety of the device is maintained.
- Before each use, check the charger, cable and plug and have them repaired by qualified professionals and only with original parts. Do not use a defective charger and do not open it up yourself. This ensures that the safety of the device is maintained.
- Connect the charger only to a socket with an earth. Ensure that the mains voltage matches the specifications on the charger rating plate. Risk of electric shock.
- Disconnect the charger from the mains before closing or opening connection to the battery / power tool / device.
- Keep the charger clean and away from wet and rain. Do not use the charger outdoors. Dirt and the entry of water increase the risk of electric shock.
- Operate the charger only with the appropriate original batteries. Charging other batteries may result in injuries and risk of fire.
- Avoid mechanical damage to the charger. This can result in internal short circuits.
- Do not operate the charger on a combustible surface (e.g. paper, textiles). Risk of fire due to heating during charging
- If the power cable for this equipment is damaged, it must be replaced by the manufacturer, a customer service agent of the same or a similarly qualified person in order to prevent hazards.
- The battery of the appliance is not fully charged at the time of delivery. It therefore needs to be fully recharged before you use it for the first time. For the first recharge cycle we recommend that you charge the battery for about 1 hour. Slot
the battery into the base and plug the battery charger into a mains outlet.
- When the battery is fully charged, unplug the charger from the mains and from the appliance. Charging time is approx. 1 hour.
- Do not charge the battery continuously since this may damage the battery cells. Note: Repeatedly charging small capacities may damage the battery cells. Recharge the battery only if the appliance is becoming slow.
- Do not use the charger to charge non-rechargeable batteries.
RESIDUAL RISKS
Even if properly operating and handling this electric tool, some residual risks will remain. Due to its construction and build, this electric tool may present the following hazards:
a) Cuts
b) Ear damage if working without ear protection.
c) Damage to your health caused by swinging your hands and arms when operating the appliance for longer periods of time or if the unit is not held or maintained properly.

Warning! During operation, this electric tool generates an electromagnetic field which, under certain circumstances, may impair the functionality of active or passive medical implants. To reduce the risk of serious or lethal injuries, we recommend that persons with medical implants consult their doctor and the manufacturer of their medical implant before operating the machine.
Charging the battery

Do not expose the battery to extreme conditions such as heat or impact. Risk of injury from escaping electrolytic solution! After eye/skin contact, rinse the affected areas with water or a neutraliser and consult a doctor.

Charge the battery in a dry room only.
Prior to attaching the charger, check that the battery's outer surface is clean and dry.
There is a risk of injury due to electric shock.

Only use the original charger from the package to charge the battery. Mind not to charge the appliance for more than 8 hours at a time. If you do, the battery and the appliance may be damaged and longer charging times would be a waste of energy. Excessive charging will void the warranty.
- Charge the battery before the first time of use. Do not briefly charge the battery several time in a row.
- Recharge the battery when you notice that the appliance is becoming slower.
- If a fully recharged battery lasts for considerably shorter operating times, the battery is used up and needs to be replaced. Only use an OEM spare battery available from our Customer Service.
• Always take heed of the applicable safety instructions as well as the environmental protection regulations and information.
- The warranty excludes all defects caused by improper handling.
Removing / inserting the battery

-
To remove the battery (18) from the appliance, press the release button (18a) on the battery and pull out the battery.
-
To insert the battery (18), place it on the guide track (4) and push it back into the appliance. It will audibly snap in.

Do not insert the battery until the appliance is fully assembled. Risk of injury!
Recharging the battery

Allow a freshly charged battery (18) to cool down for approx. 15 minutes before inserting it into the battery charger (19).

-
Remove the battery (18) from the appliance, as necessary.
-
Inser the battery (18) in the charging compartment of the battery charger (19). It will audibly snap in.
- Plug the battery charger (19) into a mains outlet.
- When the battery is fully re- charged unplug the battery charger (19) from the mains.
- Press the release button (18a) on the battery (18) and pull the battery out of the battery charger (19).
Indicator charge level (Battery 24 V, 4 Ah)
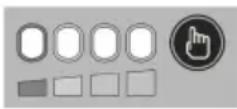
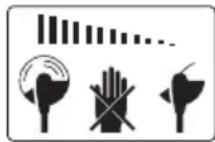
Press the „Press“ button on the right of charging level indicator in order to check the status of the battery.
The number of illuminated LED lights shows the charge level of the battery. 4 lights means battery is fully charged. 1 light means that the battery needs to be charged.
Used batteries
- If a fully recharged battery lasts for considerably shorter operating times, the battery is used up and needs to be replaced. Only use an OEM battery pack replacement available from our Customer Service.
- Always take heed of the applicable safety instructions as well as the environmental protection regulations and information (see “Cleaning and Maintenance”).
Assembling instructions

Do not insert the battery until the appliance is fully assembled. Risk of injury!

To put on the protective cover:
Place the protective cover (14) on the motor head (11) and screw it down with the 3 Phillips screws.

To put on the auxiliary handle:
Pull the ends of the auxiliary handle (5) to extend the handle and slide it over the handle holder (20).
- Screw down the screw (6) in the auxiliary handle (5).
Operation

Caution: risk of injury! Do not operate the appliance without the protective cover. To operate the appliance, wear suitable clothing, eye and ear protection.
Prior to every use, check that the appliance is operative. Do not block the On/Off switch or the switch lock. They must reliably turn off the motor when you release the switch. Do not operate the appliance if one of the switches is damaged.

Please observe local regulations concerning noise protection.
Turning on and off

Maintain a firm stand and hold the appliance well with both hands and at some distance away from your body. Before turning on the appliance, check that it will not touch any objects.

-
Check that the battery (18) is in. To turn on, use your thumb to actuate the switch lock (3), then press the On/Off switch (2). Re- lease the switch lock.
-
To turn off, release the On/Off switch (2). There is no continuous operation mode.

After turning off the appliance, the trimming assembly will keep revolving for some time. Allow the trimming assembly to come to a standstill. Neither touch nor
slow down the moving cutting insert. Risk of injury!

Trimmer settings
To adjust the auxiliary handle:
The auxiliary handle can be set to various positions. Set the handle in such a manner that the cutting head (13) is slightly tilting forwards when in the working position.
① Loosen the screw (6) in the handle and move the auxiliary handle (5) to your favourite position. Tighten the screw in the handle.
To adjust the height:
The telescopic shaft allows you to adjust the appliance to your personal size.
② Loosen the threaded bush (9). Adjust the telescopic shaft (10) to the correct length and tighten the threaded bush.
To adjust the cutting angle:
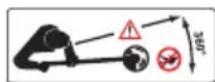
Changing the cutting angle lets you trim grass at places that a difficult to reach, e.g. under benches or wall offsets.
③ Tread on the pedal (16) on the motor housing and tilt the telescopic shaft (10). There are 5 preset tilt angles (see "Work instructions").
To adjust the handle rod:
The handle rod can be turned by 90^ and 180^ (see “Work instructions”).
④ Push down the lock (8) and turn the handle rod 0^90^180^ (7) until it snaps into your favourite position.
To adjust the spacer bow (flower guard): The spacer bow keeps the trimming assembly away from plants and trunks not to be cut.
⑤ Push the spacer bow (12) forward. When the spacer bow is not in use you can move it back to its parking position.
Lengthening the cutting lines

A short or worn string will make bad cuts. If you notice reduced cutting performance, you should therefore check if there is still enough string on the spool. Pull the power plug first! Spool replacement is detailed in section „Replacing the Trimming Assembly“.
Automatic single-string mechanism
Your device is equipped with an automatic single-string mechanism. The string extends automatically during every starting process. For the correct functioning of the automatic string extension mechanism, the spool must have stopped before you restart the device. If the string is initially longer than the cutting diameter, it is automatically shortened to the right length by string cutter.

Regularly check the nylon lines for damage and whether the lines still have the correct length defined by the line cutter
When no line ends are visible:
- Renew the line spool (see "Cleaning and maintenance").
Adjusting the line length manually:
- Switch off the device and remove the battery (18) from the device. Press the retaining head (17) release it again and pull the ends of the cord out.
Manner of operation

WARNING. Danger of injury!
not cut moist or wet grass.
• Before starting the trimmer check that the cutting head will not come into contact with stones, rubble or other foreign bodies.
- Switch on the trimmer before you approach the grass that is to be cut. - Do not overload the trimmer during operation.
- Avoid contact with obstacles (stones, walls, fences, etc.) since this would make the string wear out too quickly. Use the edge of the protective cover to keep the appliance away from such obstacles.
Cutting grass
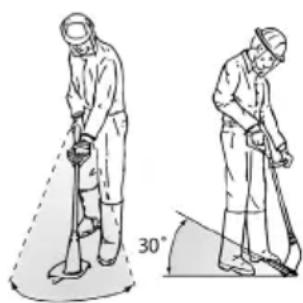
natural_image
Illustration of two workers using a tool, one holding a device and the other bending over a 30-degree angle (no text or symbols)Cut the grass by swaying the trimmer sideways to the right and left. Cut slowly while the trimmer is tilted forwards by approx. 30°.
Cut tall grass by a
series of levels from top to bottom.
Vertical cut / lawn edge trimming

Be particularly careful and attentive when holding the cutter head vertically. To avoid injuries, keep
enough distance to the trimming assembly.
Setup for vertical trimming:
Move the appliance to the right and left in a slow swinging motion to trim slopes and steep inclines.
- Handle rod: 180^ (see
F④)
• Cutting angle: 0^ (see
F ③) - Spacer bow in parking position
Setup for edge trimming:
To trim lawn edges, slowly move the appliance along the lawn edges.
- Handle rod: 90^ (see
F ④)
• Cutting angle: 90° (see
F ③)
- Spacer bow in parking position
Cleaning and maintenance

Contact our Service Centre about repairs and servicing not described in this manual. Only use OEM parts. Risk of injury!

Turn off the appliance and, before doing any servicing, remove the battery.
The following cleaning and servicing should be done regularly. This will ensure a long and reliable service life.
Cleaning

Do not spray the appliance with water and do not immerse it in water. Electric shock hazard!
- Keep clean the ventilation slots, motor housing and handles of the appliance. Use a damp cloth or a brush. Do not use cleaning agents or solvents. You may otherwise irreparably damage the appliance.
• After every trimming session, remove grass and soil from the protective cover and the trimming assembly.
General maintenance
- Prior to every use, check the appliance for obvious defects such as loose, worn or damaged parts.
Check that the screws in the cutting disk are tight.
- Check covers and safety devices for damages and correct installation. Replace as necessary.
Replacing the trimming assembly

Never manipulate the cutting device by inserting worn out original or alien parts. Only use original-spare parts. Never use metal lines. The use of alien parts can result in serious personal injury and cause irreparable damage to the trimmer and the guarantee will become instantly null and void.
Exchanging the line spool:

-
Switch off the device and remove the battery (A18) from the device.
-
Turn over the trimmer so that the cutting head (13) is facing upwards
- Press the two latches on the hood (21) at the same time and remove them.
4 Remove the line spool (17) from the cutting head. - Set the new string spool with the smooth side facing upward onto the cutter head and put the string end through the string
outlet eye (22). Pay attention that the string end does not slip off the grooves of the spool.
- Return the hood. Ensure that the locks of the hood are accurately inserted in the corresponding recesses of the cutting head. They lock in audibly.
- Keep the latch button (23) pressed and pull out the string end far enough so that it protrudes over the string cutter (15).
Change string cutter:

Check the string cutter. Never use the device without a string cutter or defective string cutter. Replace a defective string cutter.

-
Switch off the device and remove the battery (A18) from the device.
-
Screw off the string cutter (15) from the protective cover (14).
- Screw the new string cutter (15) onto the protective cover.
Storage
- Clean the device prior to storage.
- Store the trimmer in a dry place well out of reach of children.
- Do not stand the trimmer on its protective cover. Suspend it by its upper handle in such a manner that the protective cover does not come into contact with other objects. This is because the protective cover could become deformed, thereby changing its dimensions and its safety properties.
- In order to keep the battery well charged, avoid exposing the appliance to extreme heat or cold in storage.
GB
- Remove the rechargeable battery from the device before storing the device.
- Store the battery only in a partially charged state. The state of charges should be 40 – 60 % over a longer storage period.
- During a longer storage period, check the state of charge of the battery and recharge if necessary roughly every 3 months.
- Store the equipment between 10°C and 25°C. During storage, avoid extreme cold or heat so the battery does not lose power.
Disposal and protection of the environment
Remove the battery from the device and take the device, battery, accessories and packaging for environmentally friendly recycling.
Machines do not belong with domestic waste.

Do not dispose of batteries in household waste, fire (risk of explosion) or water. Damaged batteries may damage the environment and your health if toxic fumes or liquids leak out.
- Return the unit to a recycling centre. The plastics and metals in the unit can be sorted and appropriately recycled. Ask our Service Centre for details.
-
Dispose of batteries in discharged condition. We recommend covering the pole with adhesive tape to prevent a short circuit. Do not open up the battery.
-
Dispose of batteries in accordance with the local regulations. Take batteries to an old battery collection point where they will be recycled in an environmentally friendly manner. For information about this, ask your local waste management company or our service centre.
- Defective units returned to us will be disposed of for free.
- Throw the cut grass on the compost. Do not throw it in the normal household waste.
Replacement parts
The following spares are available from Service-Center. Please indicate the machine type and the number of the spare part with your order.
If further spare parts should be necessary, please find the part number on the exploded drawing.
String spool set....91104379
Battery, 24 V, 2 Ah....80001190
Battery, 24 V, 4 Ah....80001191
Battery charger....80001085
Quick charger 80001084
Spare parts and accessories can be obtained at www.grizzly-service.eu
If you do not have internet access, please contact the Service Centre via telephone (see "Service-Center"). Please have the order number mentioned below ready.
If further spare parts should be necessary, please find the part number on the exploded drawing.
Alternatively, you can also purchase a 1.6-mm thick nylon string from a specialised retailer and wind it up on the string spool yourself. In that case, be sure that you roll up the string and wind it into the string channel counter to the motor rotation direction. The motor rotation direction is marked with an arrow on the protective cover.
Guarantee
This appliance has a 24-month guarantee. This equipment is not suitable for commercial use. Commercial use will invalidate the guarantee.
Damages, which can be attributed to natural wear, overloading or inappropriate use, are excluded from the guarantee. Certain component parts are subject to a normal wear and are excluded from the guarantee
The guarantee applies for all material and manufacturing defects. This guarantee does not extend to cover product parts that are subject to normal wear and may therefore be considered as wearing parts (e.g. spool and battery) or to cover damage to breakable parts (e.g. switches).
Furthermore, the prerequisite for guarantee services is that the references indicated in the operating instructions regarding cleaning and maintenance have been adhered to.
Damage, which has been caused from material or manufacturing faults, will be made good free of charge, by replacement delivery or repair.
This requires that the appliance is re-turned to the merchant undismantled and with proof of purchase and guarantee.
Repair Service
For a charge, repairs not covered by the guarantee can be carried out by our service branch, which will be happy to issue a cost estimate for you.
We can handle only equipment that has been sent with adequate packaging and postage.
Justified guarantee claims should be reported to our Service Centre. Our Service Team will tell you more about our complaints handling procedure.
Attention: Please send your equipment to our service branch in clean condition and with an indication of the defect.
Equipment sent carriage forward or by bulky goods, express or other special freight will not be accepted.
We will dispose of your defective devices free of charge when you send them to us.
Trouble shooting
| Problem Possible | cause Corrective action | |
| Appliance won't start | Battery (18) discharged Recharge battery (18) (see „Charging“) | |
| Battery (18) not in Insert battery (18) (see „Operation“) | ||
| On/Off switch (A 2) defective | Send in to Service Centre for repair | |
| Motor defective | ||
| Intermittent operation | Internal loose contact | Send in to Service Centre for repair |
| On/Off switch (2) defective | ||
| Much vibration Loud noise | Spool (A 17) is dirty | Clean spool(see „Cleaning and servicing“) |
| Spool (A 17) is defective | Exchange spool (see „Cleaning and servicing“) | |
| Motor defective Send in to Service Centre for repair | ||
| Bad trim | Line spool (A 17) does not have sufficient line | Lengthen cutting line(see “Operation”)or exchange spool(see “Cleaning and maintenance”) |
| The string is not guided out of the spool | Take off the string spool and thread the string to the outside through the string outlet eye (I 22); then remount the string spool. | |
| Trimming assembly dirty | Clean trimming assembly (see „Cleaning and servicing“) | |
| Battery (18) not fully charged | Recharge battery (18) (see „Charging“) | |
Inhoud
Introductie ....39
Gebruik....39
Grizzly Service-Center ....147
Introductie

Accu (Li-Ion)....24LB2004
Nominale spanning....24 V==
natural_image
Pure graphical icons showing airplane control panels and a pointing hand icon (no text or symbols)natural_image
Illustration of two workers in protective gear using a tool, showing different angles (no text or symbols)Grizzly Service-Center 147
Introduction

natural_image
Pure graphical icons including airplane, rounded rectangles, and a hand cursor icon (no text or symbols)natural_image
Two technical illustrations of a person using a tool, one holding a device and the other bending over a 30-degree angle (no text or symbols present)Grizzly Service-Center 147
Introduzione

natural_image
Pure graphical icons including a hand cursor pointing at an oval shape, no text or symbols presentnatural_image
Two-step illustration of a person in protective gear using a power shaver and digging, with a 30° angle marker (no text or symbols)Grizzly Service-Center ....147
Wprowadzenie

natural_image
Pure graphical icons representing a button, shape, and cursor symbol without any text or labelsnatural_image
Illustration of two workers using a tool to reach a 30-degree angle, no text or symbols presentGrizzly Service-Center ....147
Úvod

natural_image
Illustration of two workers in protective gear using a tool, one holding a detector and the other digging with a 30° angle marker (no text or symbols)Grizzly Service-Center 147
Ivadas

natural_image
Pure graphical icons showing airplane control panels and a pointing hand icon (no text or symbols)natural_image
Illustration of two workers in protective gear using a walking stick, with one holding a 30-degree angle marker (no text or symbols)Grizzly Service-Center

Unit 3, Beldray Park
Beldray Road, Mount Pleasant
Bilston, West Midlands WV14 7NH
Tel.: 0845 683 2672
e-mail: care@novoserv.co.uk