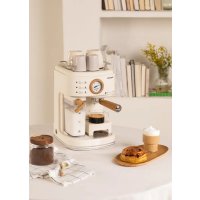
THERA RETRO MATT - Coffee machine Create - Free user manual and instructions
Find the device manual for free THERA RETRO MATT Create in PDF.

User questions about THERA RETRO MATT Create
0 question about this device. Answer the ones you know or ask your own.
Ask a new question about this device
Download the instructions for your Coffee machine in PDF format for free! Find your manual THERA RETRO MATT - Create and take your electronic device back in hand. On this page are published all the documents necessary for the use of your device. THERA RETRO MATT by Create.
USER MANUAL THERA RETRO MATT Create
natural_image
Line drawing of a coffee machine with analog gauges and control buttons (no text or symbols)ESPRESSO COFFEE MACHINE
CAFETERA ESPRESSO
USER MANUAL
CREATE CREATE CREATE ATE CREATE CREATE CRE CREATE CREATE CREATE ATE CREATE CREATE CRE CREATE CREATE CREATE ATE CREATE CREATE CRE CREATE CREATE CREATE ATE CREATE CREATE CRE CREATE CREATE CREATE ATE CREATE CREATE CRE CREATE CREATE CREATE CREATE CREATE CREATE ATE CREATE CREATE CRE CREATE CREATE CREATE ATE CREATE CREATE CRE CREATE CREATE CRE CREATE CREATE CRE CREATE CREATE CRE CREATE CREATE CRE CREATE CREATE CRE CREATE CREATE CRE CREATE CREATE CRE
CREATE CREATE CREATE ATE CREATE CREATE CRE CREATE CREATE CREATE ATE CREATE CREATE CRE CREATE CREATE CREATE ATE CREATE CREATE CRE CREATE CREATE CREATE ATE CREATE CREATE CRE CREATE CREATE CREATE CREATE CREATE CREATE ATE CREATE CREATE CRE CREATE CREATE CREATE ATE CREATE CREATE CRE CREATE CREATE CREATE ATE CREATE CREATE CRE CREATE CREATE CREATE ATE CREATE CREATE CRE CREATE CREATE CRE CREATE CREATE CRE CREATE CREATE CRE CREATE CREATE CRE CREATE CREATE CRE CREATE CREATE CRE
INDEX
ENGLISH
Important safeguards 6
Part list 7
Control panel 7
Placing the filter 8
Before first use 8
Preheating 9
Making espresso coffee 9
Preparing a cappuccino 10
How to use the vaporizer arm 10
Automatic power off function 11
Cleaning and maintenance 11
Descaling your coffee maker 11
Troubleshooting 12
PORTUGÊS
Thank you for choosing our coffee maker. Before using the appliance, and to ensure the best use, carefully read these instructions.
The safety precautions enclosed herein reduce the risk of death, injury and electrical shock when correctly adhered to. Keep the manual in a safe place for future reference, along with the completed warranty card, purchase receipt and package. If applicable, pass these instructions on to the next owner of the appliance. Always follow basic safety precautions and accident-prevention measures when using an electrical appliance. We assume no liability for customer failing to comply with these requirements.
IMPORTANT SAFEGUARDS
Before using this electrical appliance basic precautions should always be followed:
- Ensure that the voltage indicated on the Technical Specification matches the mains voltage before plugging in the appliance.
• The appliance must be earthed. - Never lift up, carry or unplug the appliance by pulling from the power cord.
- The steam is extremely hot and can burn. Please, handle with care.
- Never operate the coffee machine without water.
- Children should be supervised to ensure that they don't play with the appliance.
- This appliance can be used by children and persons with reduced physical, sensory or mental capabilities or lack of experience and knowledge if they have been given supervision or instruction concerning the use of the appliance in a safe way and understand the hazards involved.
- Do not place the coffee maker on hot surfaces or next to open fire, as it can cause damage to the appliance.
- Remove the plug from the power outlet before cleaning or when idle. Allow the appliance to cool down completely before removing and/or attaching components, and before cleaning.
- Do not pick up or operate the appliance if the power supply cord or the plug are damaged, or if the coffee maker is malfunctioning or has been dropped or damaged in any way. In case of damage, contact the after-sales service. A damaged cord or plug must be exclusively replaced by the manufacturer or a qualified person in order to avoid injuries.
- Do not use any accessories not recommended by the manufacturer, as it may cause injury to persons or damage to the appliance.
- Place the appliance on a flat surface or table, do not hang the power cord over the edge of the table or counter.
-
Make sure the power cord does not come into contact with the hot surface of the appliance.
-
Some parts of the appliance get hot when in use, avoid direct contact.
- Do not immerse the appliance or the power cord into water or any other liquids. Should the appliance fall into water, immediately unplug it from the mains and have the appliance checked by an expert before using it again. It may cause fire, electric shock, injury or death.
PART LIST
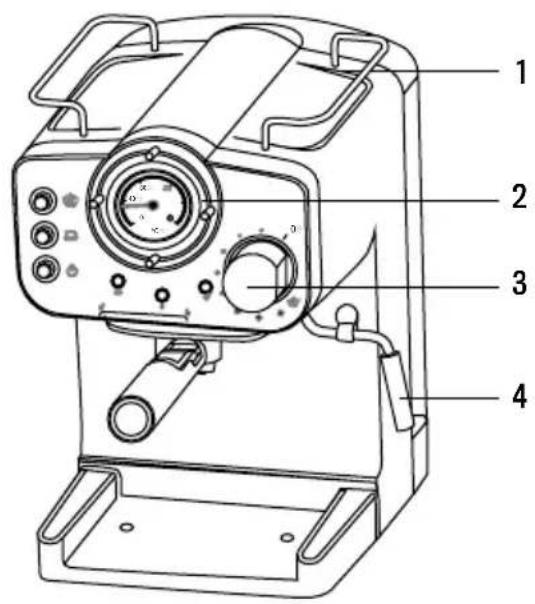
text_image
Technical diagram of a mechanical device with numbered parts labeled 1 to 4- Cup warming tray
- Control panel
- Steam knob
- Steam wand
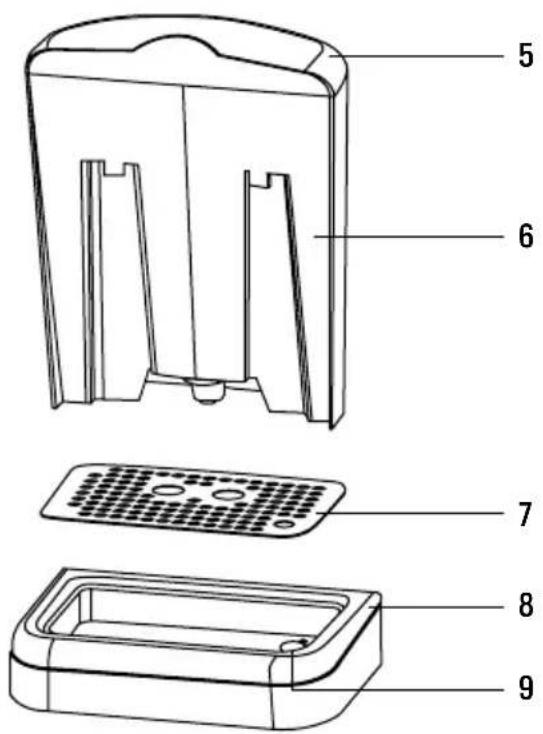
text_image
Technical diagram of a device with numbered parts for identification- Water tank lid
- Water tank
- Drip plate
- Drip tray
- Anti-flood system
CONTROL PANEL

text_image
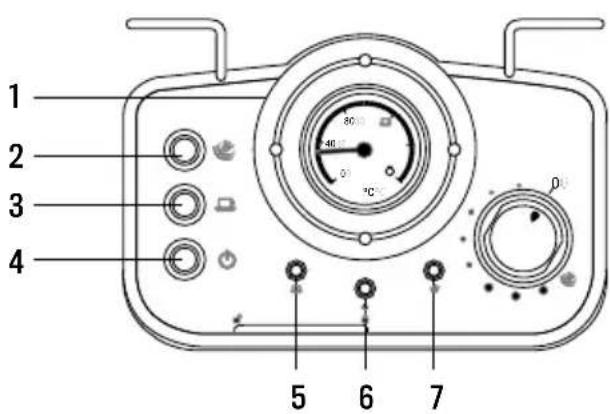
1 2 3 4 5 6 7 80 40 0°C 0°- Thermometer.
- Steam button: pressed down for steaming and up for making coffee.
- Coffee button: pressed down to make coffee and pump hot water, up to stop.
- ON/OFF button.
- Coffee indicator. When the water temperature is hot enough, the pilot will light up.
- Power indicator. When the appliance turns on, the pilot will light up.
- Steam indicator. When the steam temperature is hot enough, the pilot will light up.
PLACING THE FILTER
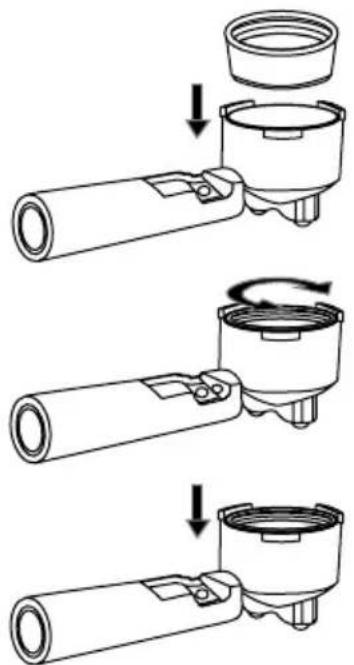
text_image
Technical diagram showing three-step assembly of a mechanical component with labeled parts and directional arrows indicating motion.-
To insert the filter in the filter holder, please align the notch on the filter with the ridge inside the filter holder.
-
Now turn the filter to lock it in place. This will secure the filter in the filter holder.
-
Lift the tab to hold the filter holder and shake out the coffee after use without removing the filter.
BEFORE FIRST USE
- To ensure you get the best coffee possible, please rinse the coffee maker before its first use. - Fill up the tank with water without exceeding the "MAX" line marked on the tank. Then cover the water tank.
Note: The appliance is supplied with a detachable tank to allow for easy cleaning. You can detach the tank to fill it up and then place it back into the appliance.
- Place the filter in the filter holder (make sure there's no coffee in the filter).
- Place a mug on the drip tray.
natural_image
Line drawing of a coffee machine with control panel and upward arrow indicator (no text or symbols)
natural_image
Line drawing of a mechanical device with control panel and directional arrow (no text or symbols)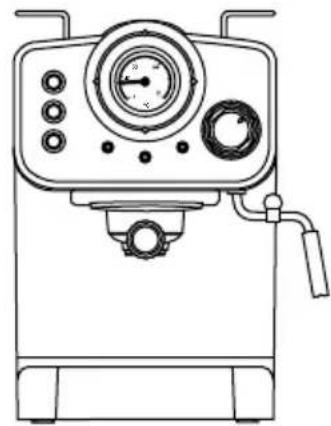
natural_image
Line drawing of a laboratory instrument with control panel and gauges (no text or symbols)Note: The appliance is not equipped with a mug; please use your own coffee mug.
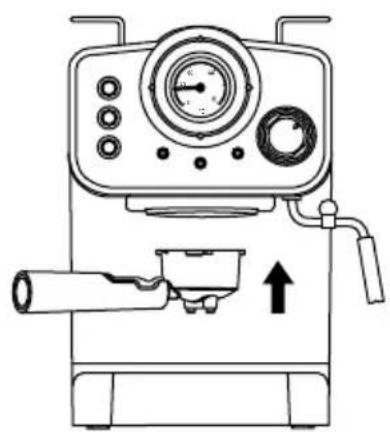
- Plug the coffee machine in and press the ON/OFF button “☐”. A red indicator light will turn on. Press the coffee button “☐” As soon as water starts coming out press the coffee button “☐” again and the machine will start preheating. When the coffee indicator lights green, it means the temperature is hot enough.
- Press the coffee button “☐” and allow the entire tank of water to flow out. Once the machine is no longer dripping, pour out the processed water and clean the container thoroughly. Now you can start brewing.
Note: There may be a noise when pumping the water out for the first time, it is normal; the appliance is simply releasing trapped air. After approximately 20 seconds, the noise will disappear.
To make a good cup of hot espresso, we recommend preheating the appliance before brewing coffee; this includes the filter holder, filter and your coffee mug. This will ensure you obtain the best coffee drinking experience.
- Remove the detachable water tank from the appliance. Remove the lid from the tank and fill it with water, the water level should never exceed the “MAX” line marked on the tank. Then correctly attach the water tank back to the appliance.
- Place the filter into the filter holder (without any coffee), then insert the filter holder into the appliance and turn it anticlockwise until it is at the “lock” position.
- Place your cup on the drip tray.
- Then connect the appliance to a power supply source. Make sure the steam control knob is set to the "0" position.
- Press the ON/OFF button “☐” to turn on the unit, the power indicator (red) will light up. Make sure that neither the coffee button “☐” nor the steam button “” are pressed down.
- Press down the coffee button “☐”. As soon as water starts coming out press the coffee button “☐” again. The purpose of this step is to pump the water from the tank into the housing.
- When the coffee indicator turns on (green), press the coffee button " down again and hot water will start flowing out.
- After water has flown for 20 seconds, press the coffee button “ ☐”. Now the preheating process is finished.
MAKING ESPRESSO COFFEE
- Remove the filter holder by turning it clockwise. Place the filter in the filter holder, fill it with ground coffee using the measuring spoon and compress the ground coffee tightly with the tamper. A scoop of ground coffee is enough to make a cup of high-quality coffee.
- Place the filter holder in the machine and lock it by turning it in an anticlockwise direction.
- Make sure that the steam knob is at the "0" position and that neither the coffee button "☐" nor the steam button "☒" are pressed down.
- Press the coffee button “☐” manually when you have brewed the desired amount of coffee or if it’s coming out too diluted.
- Once you have finished brewing your coffee, press the ON/OFF button “ ⏻ ” and the power indicator light will turn off.
WARNING: Do not leave the coffee maker unattended while making coffee, as it requires manual operation!
Note: During the brewing or steaming process, it is normal that the temperature light turns off. This means the machine is heating up to keep the temperature at the standard range.
- Once the coffee making process is complete, you can remove the filter holder by turning it clockwise from its "Lock" position and discard the coffee residue from the steel filter.
- Allow the appliance to cool down completely before rinsing it under running water.
You can achieve the perfect cappuccino by topping up an espresso with frothed milk.
Note: please make sure the steam wand is assembled during the steaming process.
Method:
- First, prepare your espresso following the instructions.
- Press the steam button “” and wait until the yellow indicator light is on.
- Fill a pitcher with 100ml of milk per cappuccino. We recommend you use room temperature whole fat milk.
Note: In order to get better milk foam, we recommend you keep the steam knob open for approximately 15 seconds before steaming your milk, since the early steam contains too much water. Then turn the knob back to the "0" position.
- Insert the steam wand into the pitcher about two centimetres deep. Turn the knob slowly anticlockwise and steam will start coming out from the steam wand. Froth the milk by moving the pitcher in circular up and down motions.
Note: Never touch the steam wand during operation to avoid burns and other injuries.
Note: Never turn the steam control knob quickly, as steam can accumulate rapidly in a short period of time, which may result in the potential increase of explosion.
- When you have achieved your desired foam consistency, turn the steam control knob clockwise.
Note: Clean the steam outlet immediately after frothing to avoid clotting it. Be careful not to burn yourself.
- Pour the frothed milk into the prepared espresso and your cappuccino is ready! Sweeten to your desired taste and top your cappuccino with a sprinkle of cocoa powder.
Note: If the steam outlet is clotted, please follow these instructions.
- First, allow the coffee machine to cool down for about half an hour, then poke the steam outlet several times with a needle of about 1mm in diameter. Finally, press the coffee/steam button “” and turn on the steam knob to check if the appliance can produce steam normally when the yellow indicator light is on.
If the steamer still doesn't work, please, contact our aftersales service.
HOW TO USE THE VAPORIZER ARM
- Remove the detachable water tank from the appliance. Remove the lid from the tank and fill it with water, the water level should never exceed the “MAX” line marked on the tank. Then correctly attach the water tank back to the appliance.
- Plug the appliance to the mains and turn it on by pressing the ON/OFF button “💡”. The red indicator light will turn on.
- Make sure the steam button “” is not pressed, then press the coffee button “.” When there is water flowing out, close the pump immediately.
- Press the steam button “💡” and wait until the YELLOW indicator light is on.
- Insert the steam wand two centimetres deep into the pitcher. Turn the steam control knob slowly anticlockwise and steam will start coming out from the steam wand.
- When you have achieved your desired foam consistency, turn the steam control knob clockwise.
Note: Clean the steam outlet immediately after frothing to avoid clotting it. Be careful not to burn yourself.
- To turn the appliance off just press the ON/OFF button "⏻".
Note: If the steam outlet is clotted, please follow these instructions. First, allow the coffee machine to cool down for about half an hour, then poke the steam outlet several times with a needle of about 1mm in diameter.
- Finally, Press the coffee/steam button “ 🎨 ” and turn on the steam knob to check if the appliance can produce steam normally when the yellow indicator light is on.
- If the steamer still doesn't work, please, contact our aftersales service.
AUTOMATIC POWER OFF FUNCTION
The appliance will turn off automatically 29 minutes after pressing the ON/OFF button “ ⏻”.
CLEANING AND MAINTENANCE
- Unplug the coffee maker and allow it to cool down completely before cleaning it.
- Clean the coffee maker housing with a damp cloth regularly and rinse the water tank, drip tray and removable shelf and dry them right after.
Note: Do not clean the appliance with alcohol or any solvent cleaning products. Never immerse the housing in water for cleaning.
- Detach the metal filter holder by turning it clockwise, discard coffee residue inside, then you can clean the filter holder with a mild cleanser and rinse it with clear water.
- Clean all the attachments and dry thoroughly.
Note: Do not wash the portafilter arm or the filter in a dishwasher.
DESCALING YOUR COFFEE MAKER
- To make sure your coffee maker is operating efficiently, make sure you are regularly cleaning the internal piping. You should decalcify your coffee machine every 1-2 months to ensure the best coffee flavour.
- Fill the water tank with a solution of water and descaler to the MAX level (the ratio of water to descaler should be 4:1; please refer to the instructions on the label of your descaler).
- Follow the same instructions as for the preheating process and place the metal and pitcher or cup of choice in place.
- Press the ON/OFF button “💡” to turn on the appliance and the power indicator will light up red. Make sure the steam button “💡” is not pressed, then press the coffee button “💡”. When there is water flowing out, close the pump immediately. Now the appliance is heating.
- When the green light turns on the appliance will be heated. Now press the coffee button “☐” and brew two cups worth of descaler (about 2oz). Then close the pump and wait 5 seconds.
- Press the steam button “💡” and wait until the yellow indicator light is on. Make steam for 2 min., then turn the steam knob to the “0” position. Press the ON/OFF button “💡” to turn the unit off immediately and let the descaler sit in the unit for at least 15 minutes.
- Restart the unit and repeat the steps 4-6 at least 3 times.
- Make sure that neither the coffee button “☐” nor the steam button “☒” are pressed down. When the green light comes on, press the coffee button “☐” down and brew until there isn’t any descaler left.
- Now repeat steps 4-6 with tap water (without descaler). Then brew until there isn't any water left in the tank.
- Repeat step 9 at least 3 times to make sure the piping is clean.
| PROBLEM | CAUSE SOLUTION | |
| The tank is leaking or water is seeping out from the tank | The tank is not positioned properly. | Allow the centre of the tank to align with the opening of the main body. |
| The volume of water in the tank exceeds the indicated MAX line. | The water volume in the tank should be within the MIN and MAX line indicators. | |
| Water is leaking from the bottom of the coffee maker. | There is too much water in the drip tray. | Please empty the drip tray. |
| There is a malfunction with the coffee maker | Please contact the authorized service facility for repairing. | |
| Water is leaking from the outer side of the filter. | There is coffee powder residue on the filter edge. | Clean any excess coffee or residue. |
| Acidic (vinegary) after-taste in the Espresso coffee. | You haven't decalcified the machine properly. | Decalcify the coffee machine following the instructions in this manual. |
| If ground coffee is stored in a hot, damp place for a long period of time, the coffee will turn bad. | Please use fresh coffee grinds, or store coffee in a cool, dry place. After opening a package of coffee grinds, store it in an air tight container to maintain its freshness. | |
| The coffee maker does not work. | The power outlet is not connected correctly. | Plug the power cord into a wall outlet correctly. If the appliance still does not work, please contact the authorized service facility for repairing. |
| The steamer does not froth. | The steam ready indicator is not lighting up. | Only after the steam ready indicator is illuminated, can the steamer be used to froth. |
| The frothing jug is too big or the shape is not compatible | Use a high cylindrical pitcher. | |
| The steam indicator has a yellow light. | Overheating. | It is necessary to release a little hot water with the knob. When the light goes out, it can be used again to boil the coffee. |
Do not attempt to disassemble the appliance by yourself. If you are experiencing any malfunction, please contact the aftersales service.
In compliance with Directives: 2012/19/EU and 2015/863/EU on the restriction of the use of dangerous substances in electric and electronic equipment as well as their waste disposal. The symbol with the crossed dustbin shown on the package indicates that the product at the end of its service life shall be collected as separate waste. Therefore, any products that have reached the end of their useful life must be given to waste disposal centres specialising in separate collection of waste electrical and electronic equipment, or given back to the retailer at the time of purchasing new similar equipment, on a one for one basis. The adequate separate collection for the subsequent start-up of the equipment sent to be recycled, treated and disposed of in an environmentally compatible way contributes to preventing possible negative effects on the environment and health and optimises the recycling and reuse of components making up the apparatus. Abusive disposal of the product by the user involves application of the administrative sanctions according to the laws.
text_image
Technical diagram of a mechanical device with numbered parts labeled 1 to 4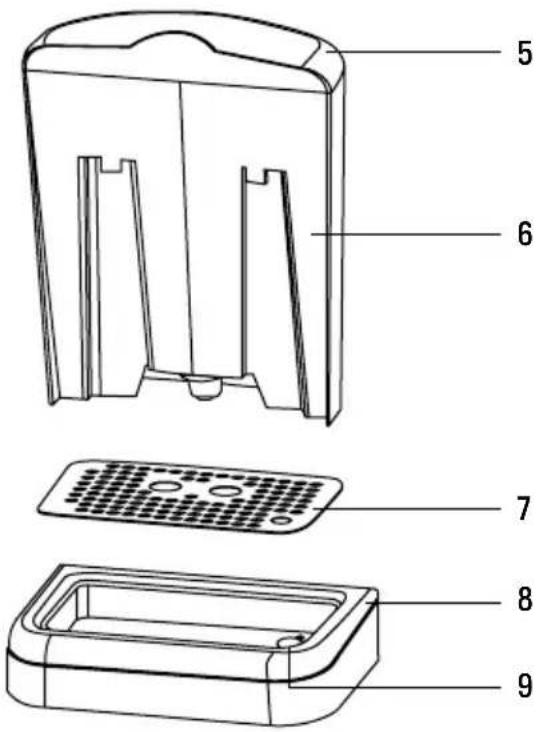
text_image
Technical diagram of a device with numbered parts for identificationnatural_image
Three-step diagram showing mechanical assembly steps: press, press valve, and motor (no text or symbols)natural_image
Line drawing of a coffee machine with control panel and upward arrow indicator (no text or symbols)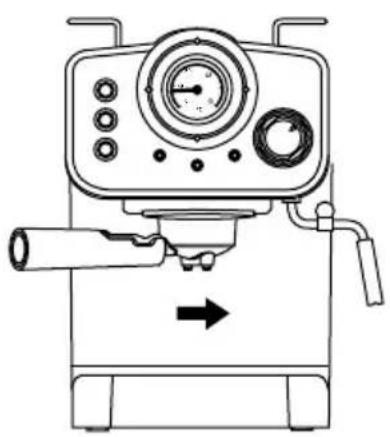
natural_image
Line drawing of a mechanical device with gauges and lever mechanism (no text or symbols)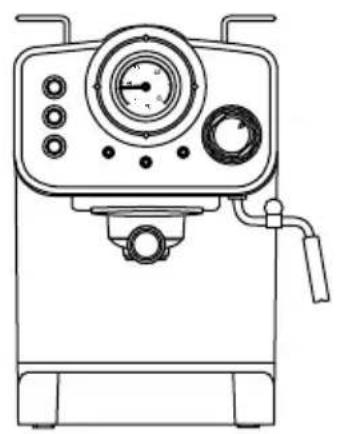
natural_image
Line drawing of a laboratory instrument with control panel and gauges (no text or symbols)text_image
Technical diagram of a device with numbered parts labeled 1 to 4, showing internal components and control knobs.natural_image
Illustration of a computer keyboard with no text or symbols on the main body (pure diagram)
text_image
8 9natural_image
Three-step diagram showing mechanical assembly steps: press, rotating component, and final assembly (no text or symbols)natural_image
Line drawing of a coffee maker with control panel and upward arrow indicator (no text or symbols)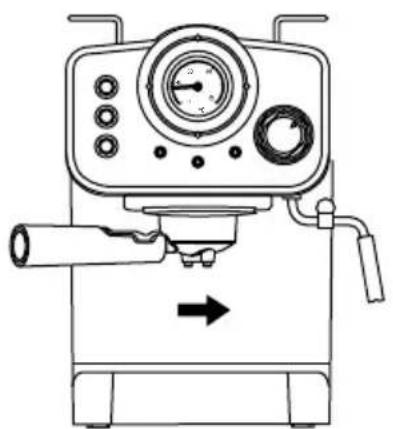
natural_image
Line drawing of a mechanical device with control panel and directional arrow (no text or symbols)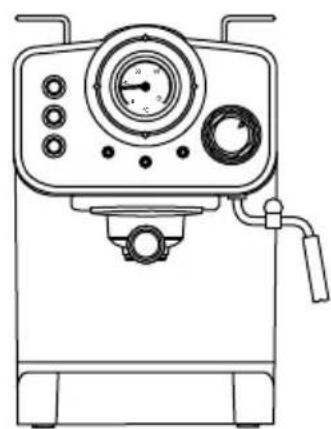
natural_image
Line drawing of a laboratory instrument with control panel and gauges (no text or symbols)PREPARAR UM CAFÉ ESPRESSO
text_image
Technical diagram of a mechanical device with numbered parts labeled 1 to 4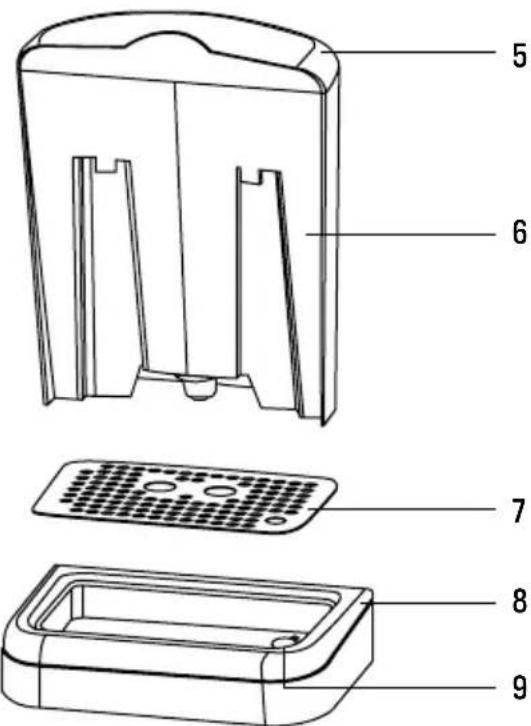
text_image
Technical diagram of a device with numbered parts for identificationtext_image
Technical diagram showing three-step assembly of a mechanical component with arrows indicating motion or assembly steps.natural_image
Line drawing of a coffee machine with control panel and upward arrow indicator (no text or symbols)
natural_image
Line drawing of a mechanical device with control panel and directional arrow (no text or symbols)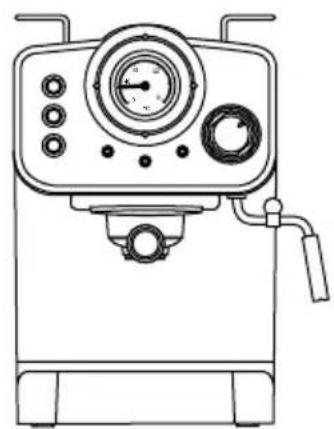
natural_image
Line drawing of a mechanical device with control panel and handle (no text or symbols)text_image
Technical diagram of a device with numbered parts labeled 1 to 4, showing internal components and control knobs.natural_image
Illustration of a computer keyboard with no text or symbols on the main body
text_image
8 9natural_image
Technical line drawing of a mechanical assembly with a cylindrical component and a base component, showing a downward arrow indicating motion (no text or symbols present)natural_image
Technical line drawing of a mechanical component with a cylindrical shaft and rotating knob (no text or symbols)natural_image
Technical line drawing of a mechanical component with a cylindrical shaft and housing (no text or symbols)natural_image
Line drawing of a coffee machine with control panel and upward arrow indicator (no text or symbols)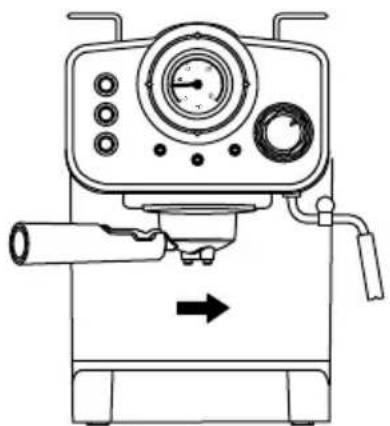
natural_image
Line drawing of a mechanical device with control panel and directional arrow (no text or symbols)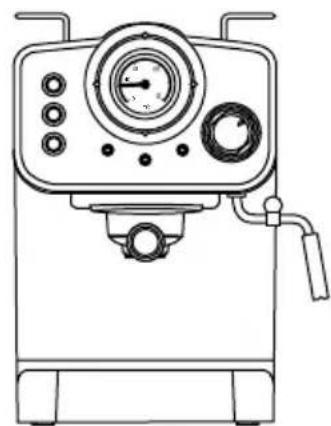
natural_image
Line drawing of a mechanical device with control panel and gauges (no text or symbols)text_image
Technical diagram of a mechanical device with numbered parts labeled 1 to 4text_image
Technical diagram of a device's internal components with numbered labels pointing to different parts.natural_image
Three-step diagram showing mechanical assembly steps: adding a cylindrical component, rotating a curved component, and finally adding a cylindrical component (no text or symbols present)natural_image
Line drawing of a coffee machine with control panel and upward arrow indicator (no text or symbols)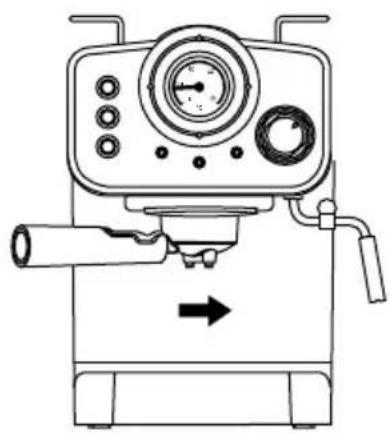
natural_image
Line drawing of a mechanical device with pressure gauge and lever (no text or symbols)
natural_image
Line drawing of a laboratory instrument with control panel and gauges (no text or symbols)text_image
Technical diagram of a mechanical device with numbered parts labeled 1 to 4natural_image
Illustration of a computer keyboard with no text or symbols on the main body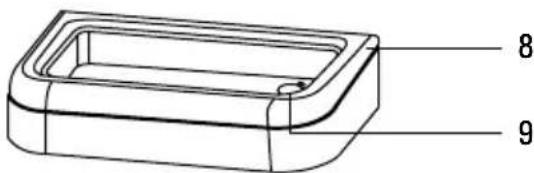
text_image
8 9- Afneembare watertank
- Deksel lekbak
- Afdruiprek
- Anti-overstroom system
CONFIGURATIESCHERM
text_image
1 2 3 4 5 6 7 80 40 0 90°C 0.0text_image
Technical diagram showing three-step assembly of a mechanical component with arrows indicating motion or rotation.natural_image
Line drawing of a coffee machine with control panel and upward arrow indicator (no text or symbols)
natural_image
Line drawing of a mechanical device with control panel and directional arrow (no text or symbols)
natural_image
Line drawing of a laboratory instrument with gauges and control knobs (no text or symbols)text_image
Technical diagram of a mechanical device with numbered parts labeled 1 to 4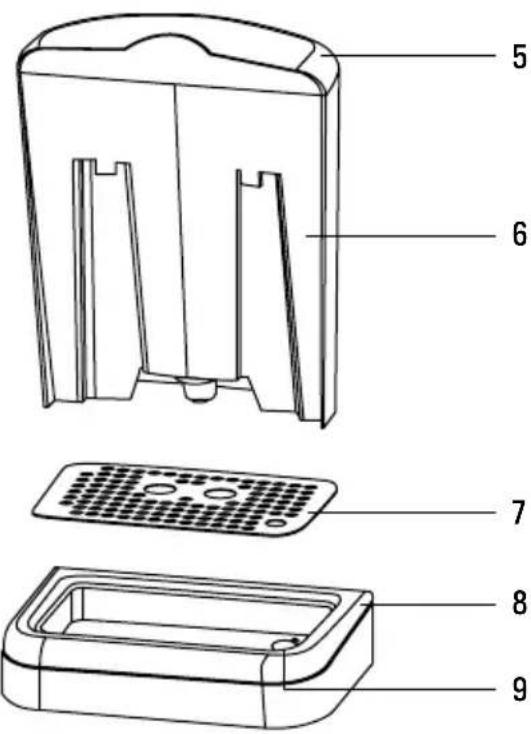
text_image
Technical diagram of a refrigerator internal structure with numbered labels pointing to each component.text_image
Technical diagram showing three-step assembly of a mechanical component with arrows indicating motion or rotation.natural_image
Line drawing of a coffee machine with control panel and upward arrow indicator (no text or symbols)
natural_image
Line drawing of a mechanical device with control panel and directional arrow (no text or symbols)