
MH6TL4TB - Soundbar HISENSE - Free user manual and instructions
Find the device manual for free MH6TL4TB HISENSE in PDF.

| Brand | Hisense |
| Model | HS2100 (MH6TL4TB) |
| Product Type | 2.1-channel soundbar with wireless subwoofer |
| Soundbar dimensions (W × H × D) | 800 × 60 × 90 mm |
| Soundbar weight | 1.5 kg |
| Subwoofer dimensions (W × H × D) | 110 × 300 × 350 mm |
| Subwoofer weight | 3.4 kg |
| Power supply | 100-240 V ~ 50/60 Hz |
| Power consumption | 20 W (standby < 0.5 W) |
| Total audio power | 240 W (soundbar: 60 W × 2, subwoofer: 120 W) |
| Connectivity | HDMI ARC, OPTICAL, AUX (3.5 mm), USB (FAT16/32, max 32 GB), Bluetooth 5.3 |
| USB audio formats | WAV, WMA, MP3, FLAC |
| Frequency response (soundbar) | 120 Hz - 20 kHz |
| Frequency response (subwoofer) | 40 Hz - 120 Hz |
| EQ modes | Music, Movie, News, Game, Sport, Night |
| Special features | Surround sound (SURR), bass/treble adjustment, auto standby, auto wake, Hisense EzPlay |
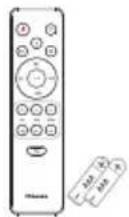
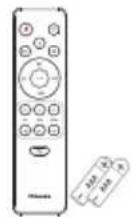
| Remote control | Range 6 m / angle 30°, AAA batteries 2× |
| Care and cleaning | Unplug before cleaning. Use a soft, dry cloth. Do not use abrasive products. |
| Safety | Do not expose to moisture, do not open the device, risk of electric shock. |
| Spare parts and repairability | Contact Hisense after-sales service. Do not attempt to repair yourself. |
| Warranty | 2 years (standard, subject to local conditions) |
Frequently Asked Questions - MH6TL4TB HISENSE
User questions about MH6TL4TB HISENSE
0 question about this device. Answer the ones you know or ask your own.
Ask a new question about this device
Download the instructions for your Soundbar in PDF format for free! Find your manual MH6TL4TB - HISENSE and take your electronic device back in hand. On this page are published all the documents necessary for the use of your device. MH6TL4TB by HISENSE.
USER MANUAL MH6TL4TB HISENSE
natural_image
Black rectangular and rectangular sound streaming devices on a white background (no text or symbols visible)Dolby Audio

Bluetooth®
HDMI™
HIGH-DEFINITION MULTIMEDIA INTERFACE
dts®

Complete UM on web

Before using the soundbar, please read this manual thoroughly and retain it for future reference.
Contents
1. What's in the Box 3
2. Product Diagram 4
2.1 Main Unit 4
2.2 Wireless Subwoofer....4
2.3 Remote Control 5
3. Preparations 5
3.1 Prepare the Remote Control....5
3.2 Replace the Remote Control Battery 5
3.3 Placement and Mounting....6
3.4 Wall Mounting (if using option-B)....6
4. Connections....7
4.1 Use the HDMI ARC Socket....7
4.2 Use the OPTICAL Socket....7
4.3 Use the AUX Socket....7
4.4 Connect Power 8
5. Pair up with the Subwoofer 8
5.1 Automatic pairing....8
5.2 Manual pairing....8
5.3 Use the Hisense EzPlay Function....8
6. Basic Operation 9
6.1 Standby/ON....9
6.2 Auto-Standby / Auto-Wake 9
6.3 Select Modes....9
6.4 Adjust the Volume....9
6.5 Turn the Surround Sound ON/OFF 10
6.6 Select Equalizer (EQ) Effect....10
6.7 Adjust the Bass/Treble 10
6.8 Adjust the Brightness....10
6.9 Factory reset 10
7. AUX/ OPTICAL/HDMI ARC Operation.... 10
8. USB Operation.... 10
9. Bluetooth Operation....11
10. Troubleshooting.... 12
11. Specifications.... 13
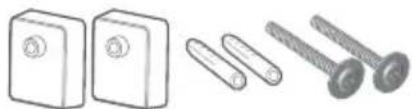
1. What's in the Box
natural_image
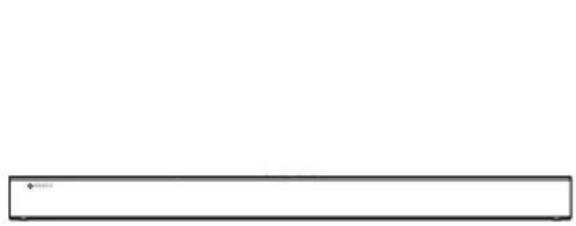
Simple horizontal line with a small dot at the top-left corner (no text or symbols)Main unit

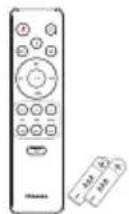
Remote control
AAA batteries x 2 *

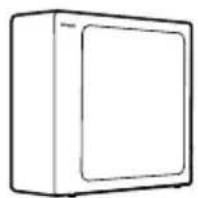
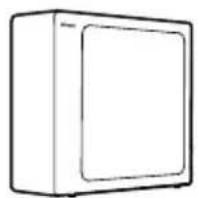
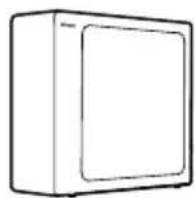
Wireless subwoofer

natural_image
Line drawing of a coiled electrical cable with connectors and a connector pin (no text or symbols)HDMI cable AC Power cord *

natural_image
Illustration of two coiled electrical connectors with power leads (no text or symbols)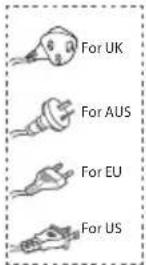

natural_image
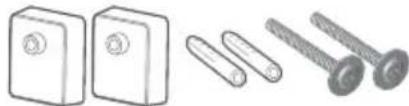
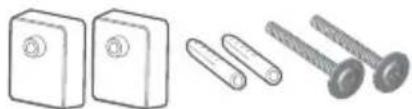
Illustration of three different types of electrical connectors: a two-pin switch, a three-pin screw, and a four-pin screw (no text or symbols present)Wall mount kit

natural_image
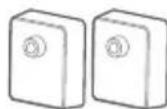
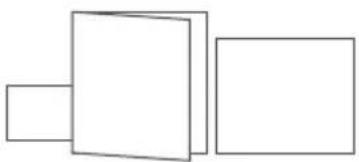
Three simple geometric shapes: two rectangles stacked vertically, one outlined and one solid, with no text or symbols.Warranty card/Quick start manual / Wall mount guide
* Power cord quantity and plug type vary by regions.
* AAA Batteries are not available in some locations. Batteries are not included in Colombia and need to be purchased.
- Images, illustrations and drawings shown on this User Manual are for reference only, actual product may vary in appearance.
2. Product Diagram
2.1 Main Unit
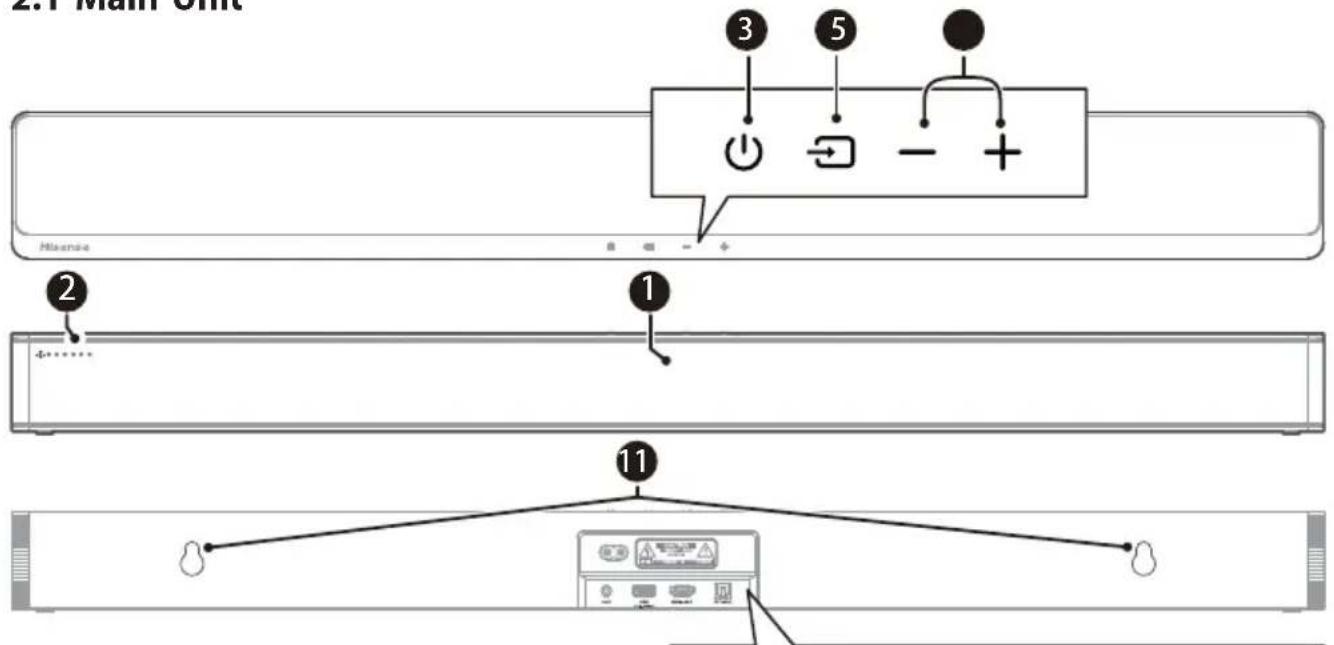
① Remote Control Sensor
Receive signal from the remote control.
② LED Indicators
| amp | Mode |
| ● Red | Standby |
| ● Green AUX | |
| ● Blue BT (Bluetooth) | |
| ● Orange OPTICAL | |
| ● White HDMI ARC | |
| ● Yellow | USB |

③ ⏻ (ON/OFF) Button
Switch the soundbar between ON and Standby mode.
④ (SOURCE) Button
Select the play function.
⑤ +/−(Volume) Buttons
Increase/decrease the volume level.
⑥ AC\~Socket
Connect to the power supply.
⑦ AUX Socket
Connect to an external audio device.
⑧ USB Socket
Insert the USB device to play music.
⑨ HDMI ARC Socket
Connect to a TV via HDMI cable.
10 OPTICAL Socket
Connect to an optical audio output on the TV.
⑪ Wall hanging points
2.2 Wireless Subwoofer
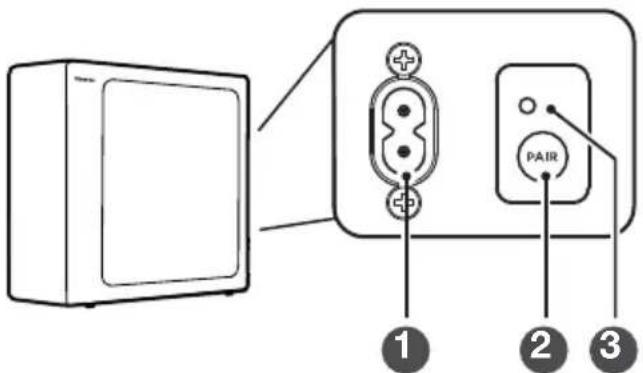
① AC\~ Power Cord
Connect to power.
② PAIR button
Press activate the pairing function between the main unit and the subwoofer.
③ PAIR Indicator
Light stops blinking once the Subwoofer is paired with the Soundbar.
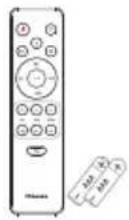
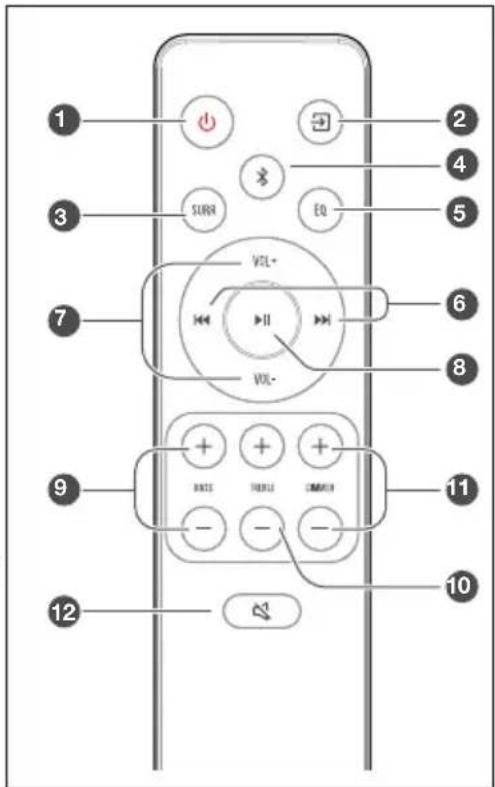
2.3 Remote Control
① ⏻ Switch the unit between ON and STANDBY mode.
② (SOURCE) Select the play function.
③ SURR Adjust the surround ON/OFF.
④ (BT) Select the Bluetooth mode. Press and hold the BT) button to activate the pairing function in Bluetooth mode or disconnect the existing paired Bluetooth device.
⑤ EQ Select a preset sound effect.
⑥ / Skip to previous/next track in BT / USB mode.
⑦ VOL +/VOL- Increase/decrease the volume level.
⑧ ▶ Play/pause/resume playback in BT / USB mode.
⑨ BASS +/− Adjust bass level.
⑩ TREBLE +/- Adjust treble level.
⑪ DIMMER +/− Adjust LED brightness.
12 (MUTE) Mute or resume the sound.

3. Preparations
3.1 Prepare the Remote Control
The provided Remote Control allows the unit to be operated from a distance.
• Even if the Remote Control is operated within the effective range 19.7 feet (6m), remote control operation may be impossible if there are any obstacles between the unit and the remote control.
• If the Remote Control is operated near other products which generate infrared rays, or if other remote control devices using infra-red rays are used near the unit, it may operate incorrectly. Conversely, the other products may operate incorrectly.
3.2 Replace the Remote Control Battery
1 Press and slide the back cover to open the battery compartment of the remote control.
2 Insert two AAA size batteries. Make sure the (+) and (−) ends of the batteries match the (+) and (−) ends indicated in the battery compartment.
3 Close the battery compartment cover.
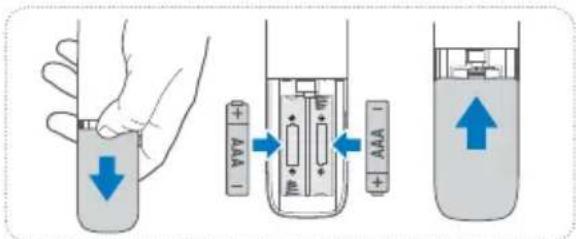
Precautions Concerning Batteries
- Be sure to insert the batteries with correct positive “⊕” and negative “⊖” polarities.
- Use batteries of the same type. Never use different types of batteries together.
- Either rechargeable or non-rechargeable batteries can be used. Refer to the precautions on their labels.
- Be aware of your fingernails when removing the battery cover and the battery.
- Do not drop the remote control.
- Do not allow anything to impact the remote control.
- Do not spill water or any liquid on the remote control.
- Do not place the remote control on a wet object.
- Do not place the remote control under direct sunlight or near sources of excessive heat.
- Remove the battery from the remote control when not in use for a long period of time, as corrosion or battery leakage may occur and result in physical injury, and/or property damage, and/or fire.
- Do not use any batteries other than those specified.
- Do not mix new batteries with old ones.
- Never recharge a battery unless it is confirmed to be a rechargeable type.
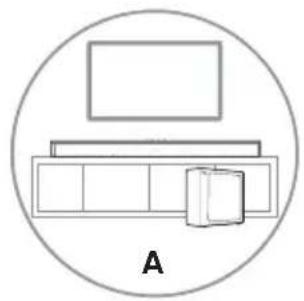
3.3 Placement and Mounting
Placement
A If your TV is placed on a table, you can place the unit on the table directly in front of the TV stand, centered with the TV screen.
B If your TV is attached to a wall, you can mount the unit on the wall directly below the TV screen.
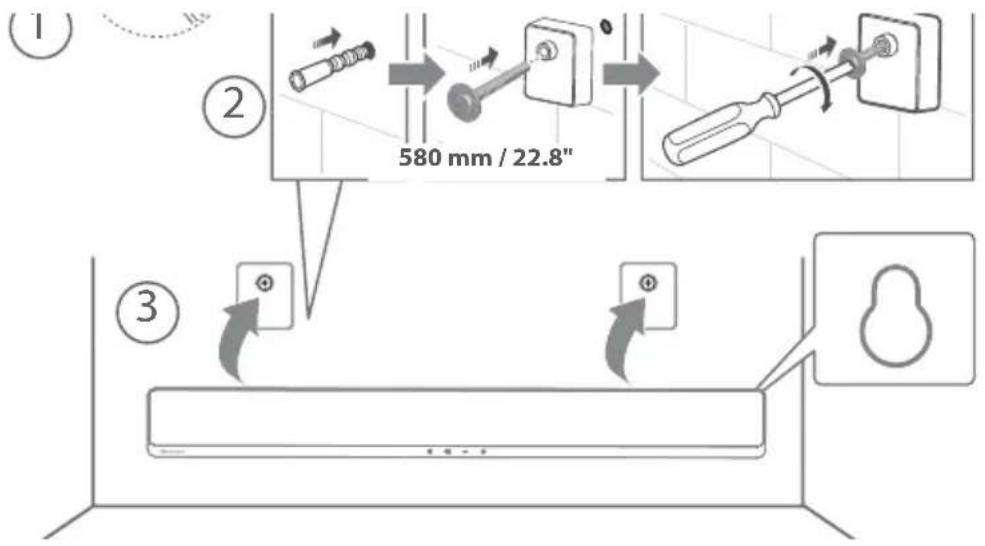
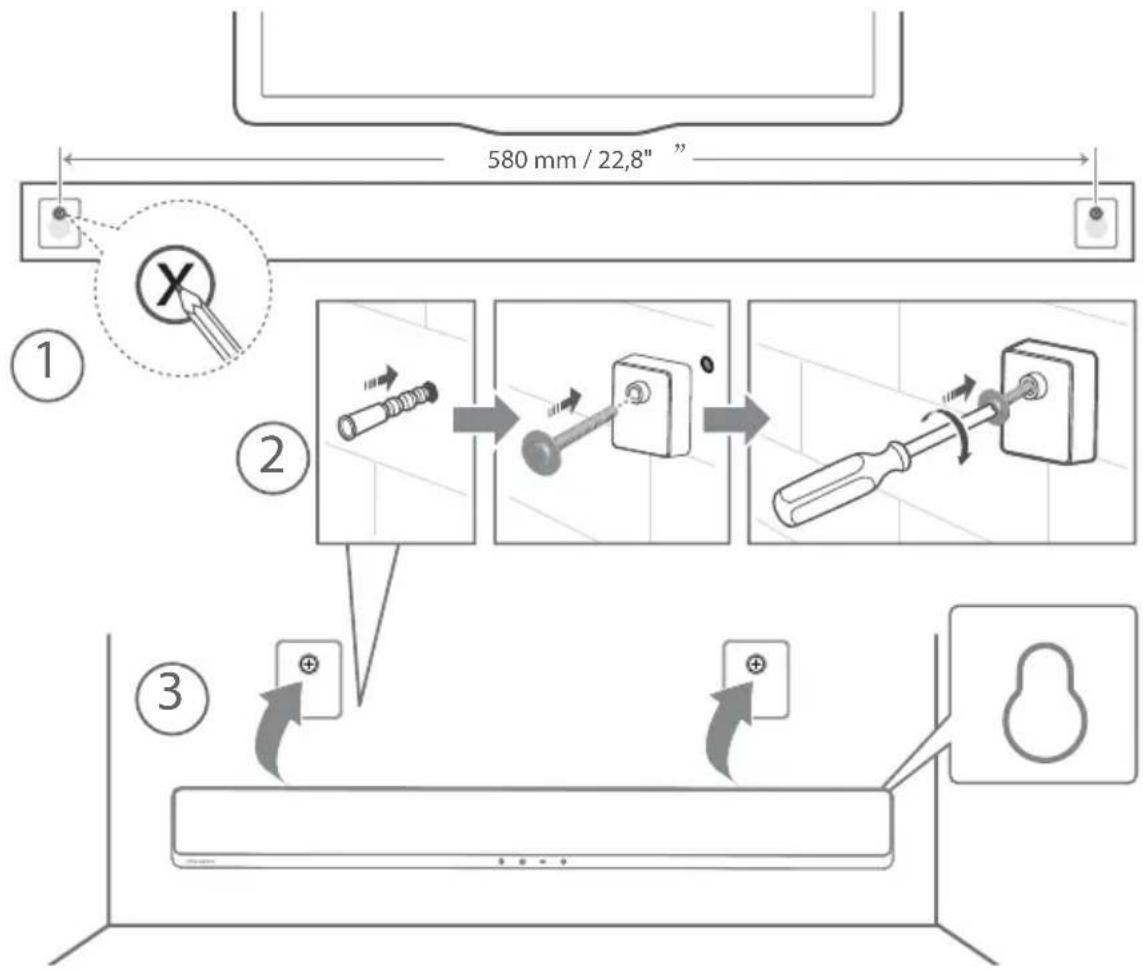
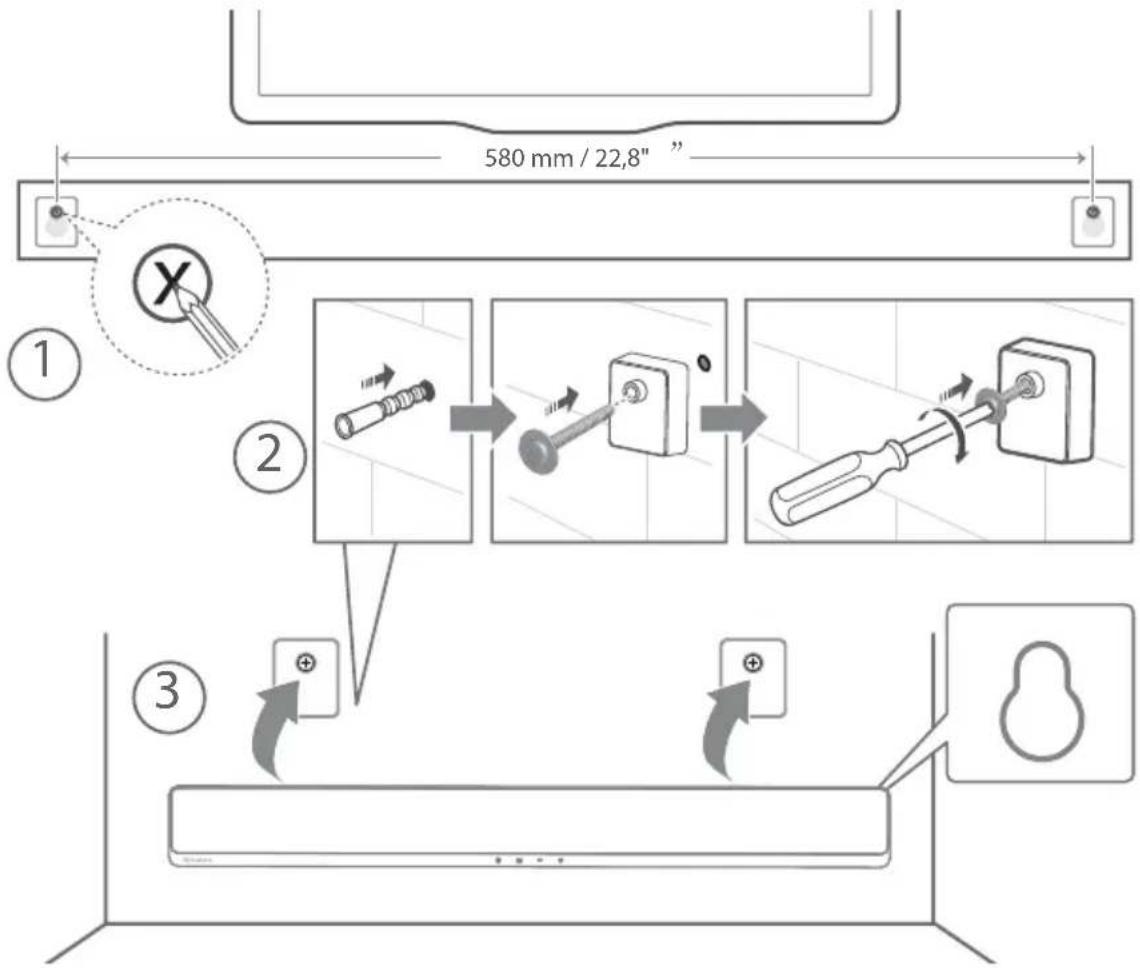
3.4 Wall Mounting (if using option-B)
Note:
- Installation must be carried out by qualified personnel only. Incorrect assembly can result in severe personal injury and property damage (if you intend to install this product yourself, you must check for installations such as electrical wiring and plumbing that may be buried inside the wall). It is the installer's responsibility to verify that the wall will safely support the total load of the unit and wall brackets.
- Additional tools (not included) are required for the installation.
- Do not overtighten screws.
- Keep this instruction manual for future reference.
- Use an electronic stud finder to check the wall type before drilling and mounting.
natural_image
Simple line drawing of a room layout with a rectangle above a cabinet and a box, enclosed in a circle (no text or symbols)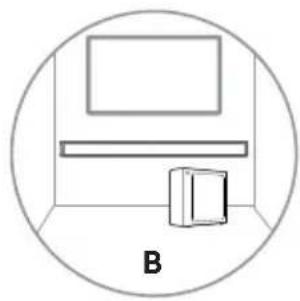
natural_image
Simple line drawing of a room with a monitor and a cabinet, enclosed in a circle (no text or symbols)WARNING
-
To prevent injury, this apparatus must be securely attached to the floor/wall in accordance with the installation instructions.
• Suggested wall mounting height: ≤ 1.5 meters. -
Drill 2 parallel holes (∅ 5.5-6 mm each according to wall type) in the wall. The distance between the holes should be 580 mm.
- Insert the supplied wall anchors into 2 screw holes on the wall. Insert the supplied wall bracket screws through the wall brackets into the wall anchors. Fix and tighten the screws on the wall.
- Hang the unit on the wall mount brackets.
4. Connections
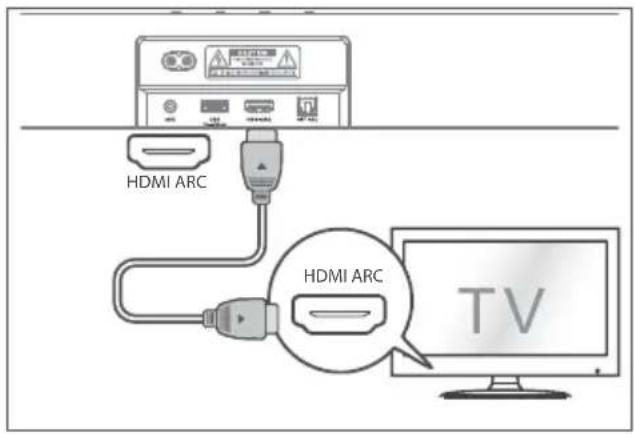
4.1 Use the HDMI ARC Socket
The ARC (Audio Return Channel) function allows you to send audio from your ARC- compliant TV to your soundbar through a single HDMI connection. To enjoy the ARC function, please ensure your TV is both HDMI-CEC and ARC compliant and set up accordingly. When correctly set up, you can use your TV remote control to adjust the volume output (VOL + /– and Mute) of the soundbar.
- Connect the HDMI cable from unit's HDMI ARC socket to the HDMI (ARC) socket on your ARC compliant TV. Then press the remote control to select HDMI ARC.
Tips:
- Your TV must support the HDMI-CEC and ARC function. HDMI-CEC and ARC must be set to On.
- The setting method of HDMI-CEC and ARC may differ depending on the TV. For details about ARC function, please refer to the owner's manual.
- Only HDMI 1.4 or higher version cable can support the ARC function.
Use the Roku TV
- If you have a Roku TV™, simply plug in the HDMI cable to the ARC ports and follow the Roku TV™ Ready on-screen instructions.

√ Simple setup
√ One remote
√ Quick Settings
4.2 Use the OPTICAL Socket
- Connect an OPTICAL cable to the TV's OPTICAL OUT socket and the OPTICAL socket on the unit.
Tip: The Soundbar may not be able to decode all digital audio formats from the input source. In this case, the Soundbar will mute. This is NOT a defect. Ensure that the audio setting of the input source (e.g. TV, game console, DVD player, etc.) is set to PCM or Dolby Digital (Refer to the user manual of the input source device for its audio setting details) with HDMI ARC / OPTICAL input.
4.3 Use the AUX Socket
A. Use a 3.5mm to 3.5mm audio cable to connect the TV's or external audio device headphone socket to the AUX socket on the unit.
B. Use a RCA to 3.5mm audio cable to connect the TV's audio output sockets to the AUX socket on the unit.

4.4 Connect Power
Risk of product damage!
- Ensure that the power supply voltage corresponds to the voltage printed on the back or the underside of the unit.
- Before connecting the AC power cord, ensure you have completed all other connections.
Soundbar
- Connect the mains cable to the AC\~ socket of the Sound Bar and then into a mains socket.
Subwoofer
- Connect the mains cable to the AC\~ socket of the subwoofer and then into a mains socket.
* Power cord quantity and plug very by regions.
5. Pair up with the Subwoofer
5.1 Automatic pairing
The subwoofer and soundbar will automatically pair when both units are plugged into the mains sockets and turned on. No cable is needed for connecting the two units.
- Determine the status based on the wireless Subwoofer indicator.

Lamp
Status
Fast blink Subwoofer in pairing mode Slow blink Connection / Pairing Failed Constant on Connected / Pairing successful
NOTE:
- Do not press the PAIR button on the rear of the subwoofer, except for manual pairing.
- If the automatic pairing fails, pair the subwoofer with the Soundbar manually.
5.2 Manual pairing
- Ensure that all the cables are well connected and the Soundbar is in Standby mode.
- Press and hold the PAIR button on the rear of the subwoofer for a few seconds. The subwoofer will enter the pairing mode and the Pair Indicator will blink quickly.
- Press the button on the Soundbar or on the remote control to switch the Soundbar on.
- Press and hold the button on the Soundbar or on the remote control for a few seconds.
- After the wireless connection succeeded, the Pair Indicator will light up.
- If the Pair indicator blinks, the wireless connection has failed. Unplug the cable of the subwoofer and then reconnect the main cable after 4 minutes. Repeat step 1 \~ 4.
NOTE:
- If the wireless connection fails again, check if there is conflict or strong interference (for example, interference from an electronic device) around your location. Remove these conflicts or strong interferences and repeat the above procedures.
- The subwoofer should be within 6m (19.7 feet) of the soundbar in an open area.
- If the Soundbar is not connected with the subwoofer and it is in On mode, the POWER Indicator will flash. Follow step 1 \~ 4 above to pair the subwoofer to the Soundbar.
5.3 Use the Hisense EzPlay Function
For Hisense EzPlay, when the Soundbar connects with a Hisense TV via HDMI ARC, the will be a Soundbar Setting menu on the TV, and you can control this menu via you TV remote to control most of the Soundbar features.

TV menu example (different models may have different menus):
Setting--sound--Soundbar Setting.
bar
| Category | Value | |---|---| | Soundbar Settings | | | EQ Modes | | | Sport | | | Surround Modes | | | Bass Level | 4 | | Treble Level | -4 | | Dimmer Level | 2 | Reset | |Note:
- This function is available only when both Soundbar and TV support Hisense Ezplay.
- This function requires Soundbar and TV connected via HDMI ARC, and the CEC of the TV must be trned ON.
- If every time setting right, for the first time connect, there would be a tip on the TV screen to guide you find the Soundbar setting menu.
6. Basic Operation
6.1 Standby/ON
When you first connect the main unit to the mains socket, the main unit will be in Standby mode.
- Press the button on the unit or on the remote control to switch the unit ON.
- Press the button again to switch the unit back to STANDBY mode.
- Disconnect the mains plug from the mains socket if you want to switch the unit OFF completely.
6.2 Auto-Standby / Auto-Wake
[Auto-Standby] The soundbar automatically turns to Standby mode after about 15 minutes if the TV or the external soundbar is disconnected (or USB, BT function bit playback pause), or switched off.
[Auto-Wake] If a TV or an external device is connected (AUX / OPTICAL / HDMI ARC socket), the unit will switch on automatically when the TV or the external device is switched on.
Auto-standby ON/OFF
Switch the soundbar on the optical mode, double click the 1◀◀(x2) and ▶(×2) buttons on the remote control to activate and deactivate the auto-standby:
Auto Standby
| On | Your Soundbar has been programmed to enter Standby mode automatically when no audio is detected for 15 minutes. |
| Off | You can turn off the Auto Standby to keep your Soundbar always working. |
Activate and Deactivate the Auto-Wake:
Turn on the soundbar, press the[→] [+] button at the same time on the soundbar to activate and deactivate the auto-wake:
Auto-Wake
| On | The Soundbar will wake up automatically when audio input is detected. |
| Off | The Soundbar does not wake up automatically. |
6.3 Select Modes
- Press the → (SOURCE) button repeatedly on the unit or on the remote control to select the desired mode.
- The indicator light on the front of the main unit will show which mode is currently in use.
Lamp
Mode
Red
● Green AUX
● Blue BT (Bluetooth)
Orange OPTICAL
● White HDMI ARC
● Yellow USB
6.4 Adjust the Volume
- Press the + / VOL -buttons on the unit or on the remote control to adjust the volume.
- If you wish to turn the sound off, press the (MUTE) button on the remote control. Press the (MUTE) button again or press the VOL +/- buttons to resume normal listening.
6.5 Turn the Surround Sound ON/OFF
- Press the SURR button on the remote control to turn on the surround sound. Press this button again to turn off the surround sound.
- While playing, press the EQ button on the remote control to select desired preset equalizers: music, movie, news, game, sport, night.
6.7 Adjust the Bass/Treble
- Press the +BASSuttons on the remote control to adjust bass level.
- Press the TREBLEuttons on the remote control to adjust treble level.
6.8 Adjust the Brightness
- Press the DIMMER +/- button on the remote control to select brightness level.
6.9 Factory reset
Reset device to default setting.
- Switch the soundbar on the optical mode, press and hold the [⏻] button on the soundbar, the soundbar will enter factory reset mode and turn to standby state.
| MODE DEFAULT | |
| SOURCE OPTICAL | |
| Volume 30 | |
| Surround ON | |
| Dimmer MAX | |
| Bass 0 | |
| Treble 0 | |
| EQ Music | |
| Auto Wake | OFF |
| Auto Standby | ON |
7. AUX/ OPTICAL/HDMI ARC control Operation
1 Ensure that the unit is connected to the TV or audio device.
2 Press the → button repeatedly on the unit or on the remote control to select AUX, OPTICAL, HDMI ARC mode.
3 Operate your audio device directly for playback features.
4 Press the VOL +/− button to adjust the volume to your desired level.
Tip: The Soundbar may not be able to decode all digital audio formats from the input source. In this case, the Soundbar will mute. This is NOT a defect. Ensure that the audio setting of the input source (e.g. TV, game console, DVD player, etc.) is set to PCM or Dolby Digital (Refer to the user manual of the input source device for its audio setting details) with HDMI ARC / OPTICAL input.
8. USB Operation
1 Insert the USB device.
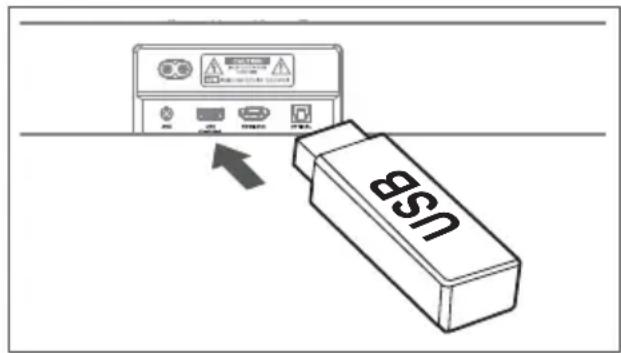
2 Press the → button repeatedly on the unit or on the remote control to select USB mode.
3 During playback:

Start, pause or resume play

▶▶▶ Skip to the previous or next track
Tips:
- The unit can support USB devices with up to 32 GB of memory.
- This unit can play WAV / WMA / MP3 / FLAC.
- This product may not be compatible with certain types of USB storage devices.
- If you use a USB extension cable, USB hub, or USB Multifunctional card reader, the USB storage device may not be recognized.
- Do not remove the USB storage device while reading files.
9. Bluetooth Operation
Through Bluetooth, connect the Soundbar with your Bluetooth device (such as an iPad, iPhone, iPod touch, Android phone, or laptop), and then you can listen to the audio files stored on the device through your Soundbar speakers.
First time pairing
1 Press the → (SOURCE) button on the unit or the ✗ button on the remote control to select Bluetooth mode. The Blue indicator will flash slowly and the white running horse lamp rolling.
2 Activate your Bluetooth device and select the search mode.
3 Select "Hisense HS2100" in the pairing list. After audio prompt, the system is successfully connected and Blue indicator will light up solidly.
- If you want to connect your soundbar with another Bluetooth device, press and hold the ✗ button on the remote control to disconnect the currently connected Bluetooth device. Follow step 2-3 to pair your Bluetooth device.
To disconnect the Bluetooth function, you can :
- Switch to another function on the unit.
- Disable the function from your Bluetooth device.
- Press and hold the ✝ button, the Bluetooth device will be disconnected from the soundbar.
Listen to music from Bluetooth Device
- If the connected Bluetooth device supports Advanced Audio Distribution Profile (A2DP), you can listen to the music stored on the device through the player.
-
If the device also supports Audio Video Remote Control Profile (AVRCP), you can use the player's remote control to play music stored on the device.
-
Pair your device with the player.
- Play music via your device (if it supports A2DP).
- Use supplied remote control to control play (if it supports AVRCP).
▶||
Start, pause or resume play
|←,
▶▶
Skip to the previous or next track
Tips:
- The operational range between the Sound Bar and the device is approximately 8 metres.
- Before connecting a Bluetooth® device to the Sound Bar, ensure you know the device's capabilities.
- Compatibility with all Bluetooth ^ devices is not guaranteed.
- Any obstacle between the device and the Sound Bar can reduce operational range.
- Keep this player away from other electronic devices that may cause interference.
- The player will also be disconnected when your device is moved beyond the operational range.
10. Troubleshooting
To keep the warranty valid, never try to repair the system yourself. If you encounter problems when using this unit, check the following points before requesting service.
No power
- Ensure that the AC cord of the apparatus is properly connected.
- Ensure that there is power at the AC outlet.
- Press standby button to turn the unit on.
Remote control does not work
- Before you press any playback control button, first select the correct source.
- Reduce the distance between the remote control and the unit.
- Insert the battery with its polarities (+/-) aligned as indicated.
- Replace the battery.
- Aim the remote control directly at the sensor on the front of the unit.
No sound
- Make sure that the unit is not muted. Press or VOL+/- button to resume normal listening.
- Press ⏻ button on the unit or on the remote control to switch the soundbar to standby mode. Then press the ⏻ button again to switch the soundbar on.
- Unplug both the soundbar and the subwoofer from the mains socket, then plug them again. Switch on the soundbar.
- Ensure the audio setting of the input source (e.g. TV, game console, DVD player, etc.) is set to PCM or Dolby Digital mode while using digital (e.g. HDMI, OPTICAL, COAXIAL) connection.
- The subwoofer is out of range, please move the subwoofer closer to the soundbar. Make sure the subwoofer is within 5 m of the soundbar (the closer the better).
- The soundbar may have lost connection with the subwoofer. Re-pair the units by following the steps on the section "Pairing the Wireless Subwoofer with the Soundbar".
- The unit may not be able to decode all digital audio formats from the input source. In this case, the unit will mute. This is NOT a defect. device is not muted.
I can't find the Bluetooth name of this unit on my Bluetooth device for Bluetooth pairing
- Ensure the Bluetooth function is activated on your Bluetooth device.
- Ensure you have paired the unit with your Bluetooth device.
The Soundbar turns off
- When the unit's external input signal level is too low, the unit will be turned off automatically in 15 minutes. Please increase the volume level of your external device.
The Subwoofer is idle or the indicator of Subwoofer do not light up.
- Please unplug power cord from the mains socket, and plug it in again after 4 minutes to reset the subwoofer.
11. Specifications
| Brand Hisense | |
| Model HS2100 |
Soundbar
| Power Supply 100-240V~ 50/60Hz | |
| Power Consumption | 20 W< 0.5 W (StandBy) |
| USB | 5V == 500mAHi-Speed USB (2.0) / FAT32 / FAT1632G (max), WAV / WMA / MP3 / FLAC. |
| Dimension (WxHxD) 800 x 60 x 90 mm / 31.5" x 2.4" x 3.5" | |
| Net weight 1.5 kg | |
| Audio input sensitivity 700mV | |
| Frequency Response 120Hz - 20KHz | |
| Operating Temperature 0°C - 45°C | |
Wireless Specification
| Bluetooth version / profilesBluetooth frequency rangeBluetooth Max. transmitting power | V 5.3 (A2DP, AVRCP)2400 MHz ~ 2483.5 MHz≤ 5 dBm |
| 2.4G Wireless frequency range2.4G Max. transmitting power | 2400 MHz ~ 2483 MHz≤ 6 dBm |
| Modulation Type GFSK, π/4 DQPSK |
Subwoofer
| Power Supply 100-240V~ 50/60Hz | |
| Power Consumption | 20 W< 0.5 W (StandBy) |
| Dimension (W x H x D) 110 x 300 x 350 mm / 4.3" x 11.8" x 13.8" | |
| Net weight 3.4 kg | |
| Frequency Response 40Hz - 120Hz | |
Amplifier (max audio power)
| Total 240 W | |
| Soundbar 60 W x 2 | |
| Subwoofer | 120 W |
Remote Control
| Distance/Angle | 19.7 feet (6m) / 30° |
| Battery type | AAA (1.5V x 2) |
- Design and specifications are subject to change without notice.
Hisense
natural_image
Two black rectangular devices, one rectangular and one rectangular, displayed against a white background (no text or symbols visible)Dolby Audio
Bluetooth®
HDMI™
HIGH-DEFINITION MULTIMEDIA INTERFACE
dts
MANUEL D'UTILISATION

natural_image
Simple horizontal line with a small dot at the top-left corner (no text or symbols)Unité principale
natural_image
Line drawing of a coiled electrical cable with connectors and a connector pin (no text or symbols)natural_image
Illustration of two coiled electrical connectors with power leads (no text or symbols)
natural_image
Illustration of three different types of electrical connectors: two rectangular blocks, three threaded screws, and one screw (no text or symbols present)Kit du support mural

natural_image
Three simple geometric shapes: two overlapping squares and one blank, arranged horizontally (no text or symbols)natural_image
Simple line drawing of a room layout with a rectangle, a cabinet, and a window (no text or symbols)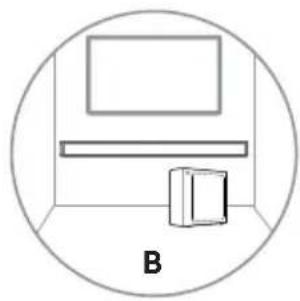
natural_image
Simple line drawing of a room with a monitor and a cabinet, enclosed in a circle (no text or symbols)AVERTISSEMENT
natural_image
Two black rectangular electronic devices, one rectangular and one rectangular, displayed against a white background (no text or symbols visible)Dolby Audio

Bluetooth®
HDMI™
HIGH-DEFINITION MULTIMEDIA INTERFACE
dts®
MANUAL DE USUARIO

natural_image
Simple horizontal line with a small dot at the top-left corner (no text or symbols)Unidad principal
natural_image
Line drawing of a coiled electrical cable with connectors and a connector pin (no text or symbols)natural_image
Illustration of two coiled electrical connectors with power leads (no text or symbols)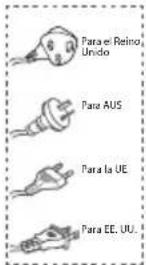
natural_image
Illustration of three different types of electrical connectors: a two-pin switch, a three-pin screw, and a four-pin screw (no text or symbols present)natural_image
Three simple geometric shapes: two overlapping squares and one blank, arranged horizontally (no text or symbols)
natural_image
Simple line drawing of a room layout with a rectangle, a cabinet, and a window (no text or symbols)
natural_image
Simple line drawing of a room with a monitor and a cabinet, enclosed in a circle (no text or symbols)ADVERTENCIA
natural_image
Two black rectangular objects, one rectangular and one rectangular, displayed against a white background (no text or symbols visible)Dolby Audio
Bluetooth®
HDMI™
HIGH-DEFINITION MULTIMEDIA INTERFACE
dts®
MANUAL DO UTILIZADOR

natural_image
Simple horizontal line with a small dot at the top-left corner (no text or symbols)Unidade Principal

Controlo remoto
Pilhas AAA × 2 *

natural_image
Simple line drawing of a rectangular appliance with a lid and front panel (no text or symbols)Subwoofer sem fios

natural_image
Line drawing of a coiled electrical cable with connectors and a connector pin (no text or symbols)natural_image
Illustration of two types of electrical plugs tied in a coiled cord (no text or symbols)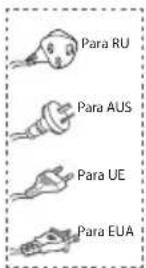

natural_image
Illustration of three types of electrical connectors: two blocks, two screws, and two bolts (no text or symbols)natural_image
Three simple geometric shapes: two rectangles stacked vertically, one outlined and one solid, with no text or symbols.
natural_image
Simple line drawing of a room layout with a rectangle, a cabinet, and a window (no text or symbols)
natural_image
Simple line drawing of a room with a monitor and a cabinet, enclosed in a circle (no text or symbols)AVISO
natural_image
Two black rectangular objects, one rectangular and one rectangular, displayed against a white background (no text or symbols visible)Dolby Audio
Bluetooth®
HDMI™
HIGH-DEFINITION MULTIMEDIA INTERFACE
dts®
BENUTZERHANDBUCH

natural_image
Simple horizontal line with a small dot at the top-left corner (no text or symbols)Soundbar
natural_image
Line drawing of a coiled electrical cable with connectors and a connector pin (no text or symbols)natural_image
Illustration of two coiled electrical connectors with power leads (no text or symbols)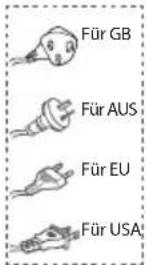
natural_image
Illustration of three different types of electrical connectors: a two-pin switch, a three-pin screw, and a four-pin screw (no text or symbols present)Wandmontage-Set

natural_image
Three simple geometric shapes: two rectangles stacked vertically, one outlined and one solid, with no text or symbols.natural_image
Simple line drawing of a room layout with a rectangle, a cabinet, and a tray (no text or symbols)
natural_image
Simple line drawing of a room with a monitor and a cabinet, enclosed in a circle (no text or symbols)WARNUNG
natural_image
Two black rectangular electronic devices, one rectangular and one rectangular, displayed against a white background (no text or symbols visible)Dolby Audio

Bluetooth®
HDMI™
HIGH-DEFINITION MULTIMEDIA INTERFACE
dts®
MANUALE DELL'UTENTE

natural_image
Simple horizontal line with a small dot at the top-left corner (no text or symbols)Unità Principale

Telecomando Batterie AAA × 2 *
Subwoofer wireless

natural_image
Line drawing of a coiled cable with connectors and a connector pin (no text or symbols)natural_image
Illustration of two types of electrical connectors with leads and wires (no text or symbols)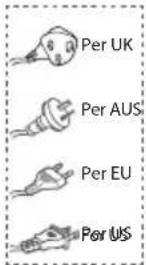
natural_image
Illustration of three different types of electrical connectors: a two-pin switch, a three-pin screw, and a four-pin screw (no text or symbols present)natural_image
Three simple geometric shapes: two overlapping squares and one blank, arranged horizontally (no text or symbols)natural_image
Simple line drawing of a room layout with a rectangle, a cabinet, and a window (no text or symbols)
natural_image
Simple line drawing of a room with a monitor and a cabinet, enclosed in a circle (no text or symbols)AVVISO
6.1 Standby/ACCENSIONE
natural_image
Two black rectangular devices, one rectangular and one rectangular, displayed against a white background (no text or symbols visible)Dolby Audio

Bluetooth®
HDMI™
HIGH-DEFINITION MULTIMEDIA INTERFACE
dts®
natural_image
Simple horizontal line with a small dot at the top-left corner (no text or symbols)Jednostka główna
Pilot
Baterie AAA × 2 *
natural_image
Line drawing of a coiled cable with connectors and a connector pin (no text or symbols)natural_image
Illustration of two types of electrical connectors with leads and wires (no text or symbols)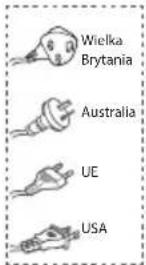

natural_image
Illustration of three different types of electrical connectors: a two-pin switch, a three-pin screw, and a four-pin screw (no text or symbols present)natural_image
Three simple geometric shapes: two rectangles stacked vertically, one outlined and one solid, with no text or symbols.③ ⏻ Przycisk (WŁ./WYŁ.)
natural_image
Simple line drawing of a room layout with a rectangle, a cabinet, and a window (no text or symbols)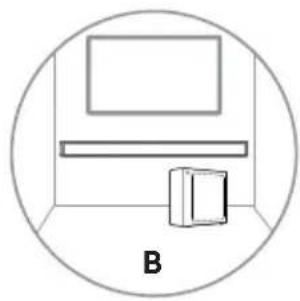
natural_image
Simple line drawing of a room with a monitor and a cabinet, enclosed in a circle (no text or symbols)OSTRZEŻENIE
natural_image
Two black rectangular devices, one rectangular and one rectangular, displayed against a white background (no text or symbols visible)Dolby Audio

Bluetooth®
HDMI™
HIGH-DEFINITION MULTIMEDIA INTERFACE
dts®
Manual de utilizare complet pe web

natural_image
Simple horizontal line with a small dot at the top-left corner (no text or symbols)Unitate principală
natural_image
Line drawing of a coiled cable with connectors and a connector pin (no text or symbols)Cablu HDMI Cablu de alimentare c.a. *

natural_image
Illustration of two types of electrical connectors with leads and wires (no text or symbols)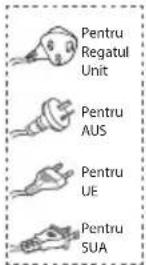
natural_image
Illustration of three types of electrical components: a two-pin socket, a pair of screws, and a four-pin screw (no text or symbols present)natural_image
Three simple geometric shapes: two rectangles stacked vertically, one outlined and one solid, with no text or symbols.① Cablu de alimentare c.a.\~

natural_image
Simple line drawing of a room layout with a rectangle, a cabinet, and a window (no text or symbols)
natural_image
Simple line drawing of a room with a monitor and a cabinet, enclosed in a circle (no text or symbols)AVERTIZARE
natural_image
Two black rectangular electronic devices, one rectangular and one rectangular, displayed against a white background (no text or symbols visible)Dolby Audio

Bluetooth®
HDMI™
HIGH-DEFINITION MULTIMEDIA INTERFACE
dts®
natural_image
Simple horizontal line with a small dot at the top-left corner (no text or symbols)Hlavní přístroj
natural_image
Simple line drawing of a rectangular appliance with a lid and front panel (no text or symbols)natural_image
Line drawing of a coiled electrical cable with connectors (no text or symbols)natural_image
Illustration of two types of electrical plugs tied in a coiled cord (no text or symbols)

natural_image
Illustration of three types of electrical connectors: two blocks, two screws, and two threaded bolts (no text or symbols present)natural_image
Three simple geometric shapes: two rectangles stacked vertically, one outlined and one outlined (no text or symbols)natural_image
Simple line drawing of a room layout with a rectangle above a cabinet and a box, enclosed in a circle (no text or symbols)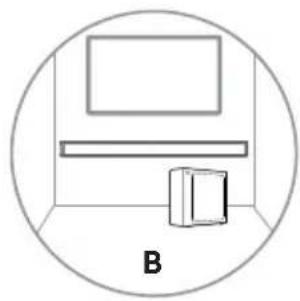
natural_image
Simple line drawing of a room with a monitor and a cabinet, enclosed in a circle (no text or symbols)UPOZORNĚNÍ
natural_image
Two black rectangular devices, one rectangular and one rectangular, displayed against a white background (no text or symbols visible)Dolby Audio

Bluetooth®
HDMI™
HIGH-DEFINITION MULTIMEDIA INTERFACE
dts®
natural_image
Simple horizontal line with a small dot at the top-left corner (no text or symbols)Hlavná jednotka
natural_image
Line drawing of a coiled cable with connectors and a connector pin (no text or symbols)natural_image
Illustration of two types of electrical connectors with leads and wires (no text or symbols)

natural_image
Illustration of three different types of electrical connectors: a two-pin switch, a three-pin screw, and a four-pin screw (no text or symbols present)natural_image
Three simple geometric shapes: two overlapping squares and one blank, arranged horizontally (no text or symbols)
natural_image
Simple line drawing of a room layout with a rectangle above a cabinet and a box, enclosed in a circle (no text or symbols)
natural_image
Simple line drawing of a room with a monitor, shelf, and cabinet (no text or symbols)UPOZORNENIE
natural_image
Two black rectangular devices, one rectangular and one rectangular, displayed against a white background (no text or symbols visible)Dolby Audio

Bluetooth®
HDMI™
HIGH-DEFINITION MULTIMEDIA INTERFACE
dts®
natural_image
Simple horizontal line with a small dot at the top-left corner (no text or symbols)Glavna enota
Daljinski upravljalnik
Bateriji AAA × 2 *
natural_image
Line drawing of a coiled cable with connectors and a connector pin (no text or symbols)HDMI kabel Napajalni kabel AC *

natural_image
Illustration of two types of electrical connectors with leads and wires (no text or symbols)
natural_image
Illustration of three different types of electrical connectors: a two-pin switch, a three-pin screw, and a four-pin screw (no text or symbols present)Sestav za zidno montažo

natural_image
Three simple geometric shapes: two overlapping squares and one blank, arranged horizontally (no text or symbols)① Napajalni kabel AC\~ Povezava na napajanje.
Previdnostni ukrepi v zvezi z baterijami
natural_image
Simple line drawing of a room layout with a rectangle, a cabinet, and a window (no text or symbols)
natural_image
Simple line drawing of a room with a monitor and a cabinet, enclosed in a circle (no text or symbols)OPOZORILO
natural_image
Two black rectangular devices, one rectangular and one rectangular, displayed against a white background (no text or symbols visible)Dolby Audio

Bluetooth®
HDMI™
HIGH-DEFINITION MULTIMEDIA INTERFACE
dts®
Završite UM na mreži

Prije upotrebe soundbara temel jito pročitajte ovaj priručnik i sačuvajte ga za daljnju upotrebu.
Sadržaj
1. Što se nalazi u kutiji .... 3
2. Grafički prikaz proizvoda 4
2.1 Glavna jedinica ....4
2.2 Bežični niskotonski zvučnik 4
2.3 Daljinski upravljač....5
3. Pripreme....5
3.1 Priprema daljinskog upravljača 5
3.2 Zamjena baterije u daljinskom upravljaču 5
3.3 Postavljanje i montaža....6
3.4 Postavljanje na zid (ako upotrebljavate mogućnost - B)....6
4. Veze 7
4.1 Upotrijebite utičnicu HDMI ARC....7
4.2 Upotrebljavajte OPTICAL utičnicu....7
4.3 Upotrebljavajte AUX utičnicu....7
4.4 Priključivanje na napajanje ....8
natural_image
Simple horizontal line with a small dot at the top-left corner (no text or symbols)Glavna jedinica

Daljinski upravljač
Baterije AAA × 2 *
natural_image
Line drawing of a coiled cable with connectors and a connector pin (no text or symbols)Kabel HDMI Kabel za napajanje

natural_image
Illustration of two types of electrical connectors with leads and wires (no text or symbols)natural_image
Illustration of three types of electrical connectors: two rectangular blocks, two threaded screws, and two circular screws (no text or symbols)Komplet za postavljanje na zid
natural_image
Three simple geometric shapes: two rectangles stacked vertically, one outlined and one solid, with no text or symbols.Jamstvena kartica / Priručnik za brzo pokretanje / Vodič za postavljanje na zid
* Količina kabela za napajanje i vrsta utikača razlikuju se po regijama.
* Baterije AAA nisu dostupne u nekim mjestima. Baterije se ne isporučuju u Kolumbiji i potrebno ih je kupiti.
- Slike, ilustracije i crteži prikazani u ovom korisničkom priručniku služe samo kao uputa, a izgled stvarnog proizvoda može se razlikovati.
① Kabel za napajanje izmjeničnom strujom Spojite na napajanje.
② Tipka za UPARIVANJE
Pritiskom se aktivira funkcija uparivanja između glavne jedinice i niskotonskog zvučnika.
③ Pokazatelj UPARIVANJA
Svjetlo prestaje treperiti nakon što se niskotonski zvučnik upari s uređajem soundbar.

Mjere opreza glede baterija
- Pobrinite se da umetnete baterije s ispravnim pozitivnim „ ⊕ ” i negativnim polaritetom „Θ”.
- Upotrijebite baterije iste vrste. Nikada zajedno ne upotrebljavajte različite vrste baterije.
- Mogu se upotrebljavati punjive ili nepunjive baterije. Pogledajte mjere opreza na njihovim oznakama.
- Pazite na svoje nokte prilikom uklanjanja poklopca i baterija.
• Nemojte ispustiti daljinski upravljač. - Pazite da ništa ne udre daljinski upravljač.
- Nemojte proliti vodu ili bilo koju drugu tekućinu na daljinski upravljač.
- Ne postavljajte daljinski upravljač na mokri predmet.
- Ne postavljajte daljinski upravljač na izravnu Sunčevu svjetlost ili blizu izvora prekomjerne topline.
- Uklonite bateriju iz daljinskog upravljača kada se ne upotrebljava duže vrijeme budući da može doći do korozije ili curenja baterije i nastanka tjelesnih ozljeda i/ili imovinske štete i/ili požara.
- Ne upotrebljavajte nijedne druge baterije osim onih navedenih.
- Ne miješajte nove baterije sa starima.
- Nikad nemojte ponovo puniti bateriju ako se ne potvrdi da je vrsta koja se može ponovno puniti.
natural_image
Simple line drawing of a room layout with a rectangle, a cabinet, and a window (no text or symbols)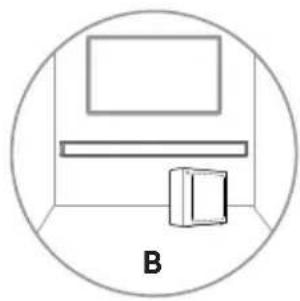
natural_image
Simple line drawing of a room with a monitor and a cabinet, enclosed in a circle (no text or symbols)UPOZORENJE
- Kako bi se spriječile ozljede, ovaj uređaj mora biti pričvršćen na tlo/zid u skladu s uputama za postavljanje.
-
Preporučena visina zidne montaže: ≤ 1,5 metara.
-
Izbušite dvije paralelne rupe u zidu (svaka promjera od 5,5 do 6 mm ovisno o vrsti zida). Razmak između rupa treba iznositi 580 mm.
- Umetnite isporučene zidne pričvrščivače u dvije vijčane rupe na zidu. Umetnite isporučene vijke zidnog nosača kroz zidne nosače u zidne pričvrščivače. Pričvrstite i zategnite vijke na zidu.
- Objesite jedinicu na zidne nosače.
4. Veze
4.1 Upotrijebite utičnicu HDMI ARC
Funkcija ARC (kanal povrata zvuka) omogućava vam slanje zvuka iz vašeg televizora usklađenog sa značajkom ARC na vaš uređaj soundbar pomoću jednog priključka HDMI. Za upotrebu značajke ARC pobrinite se da je vaš televizor usklađen s funkcijama HDMI-CEC i ARC i postavljen u skladu s tim. Ako je pravilno postavljen, možete se koristiti daljinskim upravljačem za televizor da biste namjestili glasnoću (VOL + /− i isključivanje zvuka) uređaja soundbar.
- Spojite kabel HDMI iz utičnice jedinice HDMI ARC s utičnicom HDMI (ARC) na vašem televizoru usklađenom s ARC-om. Zatim pritisnite daljinski upravljač i odaberite HDMI ARC.
Savjeti:
- Vaš televizor mora podržavati funkcije HDMI-CEC i ARC. Funkcije HDMI-CEC i ARC moraju se postaviti na položaj Uključeno.
- Način postavke funkcija HDMI-CEC i ARC može se razlikovati ovisno o televizoru. Kako biste saznali više pojedinosti o funkciji ARC, pogledajte vaš korisnički priručnik za televizor.
- Funkciju ARC moguće je podržati samo kabelom HDMI inačice 1.4 ili više.
Savjet: Uređajem soundbar možda neće biti moguće dekodirati sve digitalne zvučne formate iz ulaznog izvora. U tom će slučaju zvuk uređaja soundbar biti isključen. Ovo NE predstavlja kvar. Pobrinite se da je postavka zvuka ulaznog izvora (npr. TV, igraća konzola, reproduktor DVD) postavljena na PCM ili Dolby Digital (potražite pojedinosti o postavci zvuka uređaja ulaznog izvora u njegovu korisničkom priručniku) s ulazom HDMI ARC / OPTICAL.
natural_image
Two black rectangular electronic devices, one rectangular and one rectangular, displayed against a white background (no text or symbols visible)Dolby Audio

Bluetooth®
HDMI™
HIGH-DEFINITION MULTIMEDIA INTERFACE
dts®
natural_image
Simple horizontal line with a small dot at the top-left corner (no text or symbols)Fő egység
natural_image
Line drawing of a coiled cable with connectors and a connector pin (no text or symbols)natural_image
Illustration of two types of electrical connectors with leads and wires (no text or symbols)
natural_image
Illustration of three different types of electrical connectors: a two-pin switch, a three-pin screw, and a four-pin screw (no text or symbols present)natural_image
Three simple geometric shapes: two overlapping squares and one blank, arranged horizontally (no text or symbols)① AC\~ Áramkábel
3. Előkészületek
natural_image
Simple line drawing of a room layout with a rectangle, a cabinet, and a window (no text or symbols)
natural_image
Simple line drawing of a room with a monitor and a cabinet, enclosed in a circle (no text or symbols)FIGYELMEZTETÉS
natural_image
Two black rectangular objects, one rectangular and one rectangular, displayed against a white background (no text or symbols visible)Dolby Audio
Bluetooth®
HDMI™
HIGH-DEFINITION MULTIMEDIA INTERFACE
dts
natural_image
Three simple geometric shapes: two overlapping squares and one rectangle, drawn with thin lines on a white background (no text or symbols)natural_image
Simple line drawing of a room layout with a rectangle above a cabinet and a box, enclosed in a circle (no text or symbols)
natural_image
Simple line drawing of a room with a monitor and a cabinet, enclosed in a circle (no text or symbols)ПРЕДУПРЕЖДЕНИЕ
natural_image
Two black rectangular devices, one rectangular and one rectangular, displayed against a white background (no text or symbols visible)Dolby Audio

Bluetooth®
HDMI™
HIGH-DEFINITION MULTIMEDIA INTERFACE
dts®
Kompletno korisničko uputstvo na internetu

Pre korišćenja Soundbar zvučnika, temeljno pročitajte ovaj priručnik i sačuvajte ga za korišćenje u budućnosti.
Sadržaj
1. Sadržaj kutije....3
2. Dijagram proizvoda 4
2.1 Glavna jedinica ....4
2.2 Bežični niskotonac....4
2.3 Daljinski upravljač 5
3. Pripreme....5
3.1 Priprema daljinskog upravljača 5
3.2 Zamena baterije daljinskog upravljača....5
3.3 Postavljanje i montiranje....6
3.4 Montiranje na zid (ako se koristi opcija B) 6
4. Priključci....7
natural_image
Simple horizontal line with a small dot at the top-left corner (no text or symbols)Glavna jedinica

Daljinski upravljač
AAA baterije × 2 *
natural_image
Simple line drawing of a rectangular appliance with a lid and front panel (no text or symbols)Bežični niskotonac

natural_image
Line drawing of a coiled cable with connectors and a connector pin (no text or symbols)HDMI kabl Kabl za napajanje

natural_image
Illustration of two types of electrical plugs tied in a coiled cord (no text or symbols)
natural_image
Illustration of three types of electrical connectors: two rectangular blocks, two threaded screws, and two separate screw-like components (no text or symbols)Komplet za zidnu montažu

natural_image
Three simple geometric shapes: two rectangles stacked vertically, one outlined and one solid, with no text or symbols.Garantni list / Vodič za brzi početak / Vodič za zidnu montažu
* Broj strujnih kablova i vrste utikača variraju u zavisnosti od regiona.
* AAA baterije nisu dostupne na nekim lokacijama. Baterije nisu priložene u Kolumbiji i potrebno je da se kupe.
- Slike, ilustracije i crteži u ovom Korisničkom priručniku služe samo kao referenca; stvarni proizvod se može razlikovati u izgledu.
natural_image
Simple diagram of a rectangular object with two labeled points (1 and 2) and a dotted line at the bottom center, no text or symbols present.
flowchart
graph TD
    A["Lightbulb Node"] --> B["Central Hub 11"]
    C["Lightbulb Node"] --> B
    D["Lightbulb Node"] --> B
① AC\~ kabl za napajanje
Mere predostrožnosti u vezi sa baterijama
- Postarajte se da ubacite baterije sa pravilnim pozitivnim „ ⊕ ” i negativnim „⊖ ” polaritetom.
- Koristite baterije iste vrste. Nikada nemojte da kombinujete različite vrste baterija.
- Mogu se koristiti punjive ili nepunjive baterije. Pogledajte mere opreza na etiketama.
- Vodite računa o noktima prilikom uklanjanja poklopca odeljka baterija i samih baterija.
• Nemojte da ispustite daljinski upravljač. - Nemojte da dopustite da bilo šta ostvari uticaj na daljinski upravljač.
- Nemojte da prospete vodu ili tečnost na daljinski upravljač.
- Nemojte da postavljate daljinski upravljač na vlažne predmete.
- Nemojte da postavljate daljinski upravljač na mesto koje je direktno izloženo sunčevoj svetlosti ili u blizini izvora prekomerne toplote.
- Izvadite bateriju iz daljinskog upravljača kada se ne koristi duže vreme, jer može doći do korodiranja i curenja baterije, što može dovesti do telesne povrede i/ili oštećenja svojine i/ili požara.
- Nemojte da koristite baterije koje nisu naznačene.
• Nemojte da kombinujete nove i stare baterije. - Nikada nemojte da punite bateriju osim ako je potvrđeno da se baterija može puniti.
3.3 Postavljanje i montiranje
Postavljanje
A Ako je vaš televizor postavljen na sto, jedinicu možete da postavite na sto direktno ispred postolja televizora, centralno u odnosu na ekran televizora.
natural_image
Simple line drawing of a room layout with a rectangle, a cabinet, and a window (no text or symbols)
natural_image
Simple line drawing of a room with a monitor and a cabinet, enclosed in a circle (no text or symbols)UPOZORENJE
- Da bi se sprečila povreda, ovaj aparat mora da bude čvrsto montiran na pod/zid u skladu sa uputstvom za montažu.
-
Predložena visina za zidnu montažu: ≤ 1,5 metara.
-
Izbušite 2 paralelne rupe (obe prečnika 5,5–6 mm u skladu sa vrstom zida) u zidu. Razdaljina između rupa treba da bude 580 mm.
- Ubacite priložene zidne ankere u 2 rupe za vijke na zidu. Ubacite priložene vijke za zidne nosače kroz zidne nosače u ankere na zidu. Fiksirajte i zategnite vijke na zidu.
- Okačite jedinicu na nosače za zidnu montažu.

4. Priključci
Savet: Soundbar zvučnik možda neće moći da dekodira sve formate digitalnog zvuka iz ulaznog izvora. U tom slučaju Soundbar zvučnik će se utišati. To NIJE defekt. Postarajte se da postavka zvuka ulaznog izvora (npr. TV, igračka konzola, DVD plejer itd.) bude podešena na PCM ili Dolby Digital (pogledajte korisnički priručnik uređaja ulaznog izvora za detalje o podešavanju zvuka) pomoću HDMI ARC/OPTIČKOG ulaza.
natural_image
Two black rectangular devices, one rectangular and one rectangular, displayed against a white background (no text or symbols visible)Dolby Audio

Bluetooth®
HDMI™
HIGH-DEFINITION MULTIMEDIA INTERFACE
dts®
natural_image
Simple horizontal line with a small dot at the top-left corner (no text or symbols)Glavna jedinica
Daljinski upravljač
Baterije AAA × 2 *

natural_image
Simple line drawing of a rectangular appliance with a lid and front panel (no text or symbols)natural_image
Line drawing of a coiled cable with connectors and a connector pin (no text or symbols)natural_image
Illustration of two types of electrical plugs tied in a coiled cord (no text or symbols)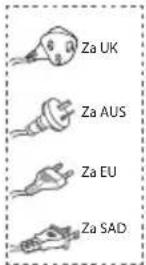
natural_image
Illustration of three types of electrical connectors: two blocks, two screws, and two threaded bolts (no text or symbols present)Komplet za postavljanje na zid

natural_image
Three simple geometric shapes: two rectangles stacked vertically, one outlined and one solid, with no text or symbols.Garantni list / Priručnik za brzo pokretanje / Vodič za postavljanje na zid
* Količina napojnog kabla i utikač razlikuju se u zavisnosti od regiona.
* Baterije AAA nisu dostupne na nekim mjestima. Baterije se ne isporučuju u Kolumbiji i treba ih kupiti.
- Slike, ilustracije i crteži prikazani u ovom korisničkom priručniku služe samo kao referenca, izgled stvarnog proizvoda može se razlikovati.
① Kabl za napajanje naizmjeničnom strujom Spojite na napajanje.
② Tipka PAIR
Pritiskom aktivirajte funkciju uparivanja glavne jedinice i niskotonskog zvučnika.
③ Indikator UPARIVANJA
Lampica prestaje treperiti nakon što se niskotonski zvučnik upari sa zvučnom trakom.

natural_image
Simple line drawing of a room layout with a rectangle, a cabinet, and a window (no text or symbols)
natural_image
Simple line drawing of a room with a monitor and a cabinet, enclosed in a circle (no text or symbols)UPOZORENJE
- Da biste spriječili povrede, uređaj morate sigurno pričvrstiti za pod/zid u skladu s uputstvom za postavljanje.
-
Predložena visina za postavljanje na zid: ≤ 1,5 metara.
-
Izbušite dva paralelna otvora (svaki promjera 5,5 – 6 mm, zavisno od vrste zida) u zidu. Razmak između otvora treba biti 580 mm.
-
Isporučena zidna sidra umetnite u dva otvora za vijke na zidu. Isporučene vijke za zidni nosač umetnite u zidna sidra kroz zidni nosač. Pričvrstite i zategnite vijke na zidu.
-
Objesite jedinicu na zidni nosač.
4. Spojevi
natural_image
Two black rectangular devices, one rectangular and one rectangular, displayed against a white background (no text or symbols visible)Dolby Audio

Bluetooth®
HDMI™
HIGH-DEFINITION MULTIMEDIA INTERFACE
dts®
natural_image
Simple horizontal line with a small dot at the top-left corner (no text or symbols)Njësia kryesore

Telekomanda
Bateri AAA × 2 *

natural_image
Simple line drawing of a rectangular appliance with a lid and front panel (no text or symbols)natural_image
Line drawing of a coiled cable with connectors and a connector pin (no text or symbols)Kablloja HDMI

natural_image
Illustration of three types of electrical connectors: two blocks, two screws, and two threaded bolts (no text or symbols)natural_image
Three simple geometric shapes: two rectangles stacked vertically, one outlined and one solid, with no text or symbols.
natural_image
Simple line drawing of a room layout with a rectangle, a cabinet, and a door, labeled A (no text or symbols on the diagram itself)
natural_image
Simple line drawing of a room with a monitor and a cabinet, enclosed in a circle (no text or symbols)PARALAJMĚRIM
flowchart
graph TD
    A["①: Tool Insert"] --> B["②: Screen with screw"]
    B --> C["③: Screen with plus"]
    C --> D["④: Screen with screw"]
    style A fill:#f9f,stroke:#333
    style B fill:#ccf,stroke:#333
    style C fill:#cfc,stroke:#333
    style D fill:#fcc,stroke:#333
    note1["580 mm / 22,8""] --> A
4. Lidhjet
6.1 Gatishmëria/AKTIV
natural_image
Two black rectangular devices, one rectangular and one rectangular, displayed against a white background (no text or symbols visible)Dolby Audio

Bluetooth®
HDMI™
HIGH-DEFINITION MULTIMEDIA INTERFACE
dts®
Целосно КУ на веб

natural_image
Simple line drawing of a room layout with a rectangle, a cabinet, and a window (no text or symbols)
natural_image
Simple line drawing of a room with a monitor and a cabinet, enclosed in a circle (no text or symbols)ПРЕДУПРЕДУВАЊЕ
natural_image
Two black rectangular electronic devices, one rectangular and one rectangular, displayed against a white background (no text or symbols visible)Dolby Audio

Bluetooth®
HDMI™
HIGH-DEFINITION MULTIMEDIA INTERFACE
dts®
Roku TV Ready
natural_image
Simple horizontal line drawing of a rectangular object with no text or symbolsΚύρια μονάδα
natural_image
Simple line drawing of a rectangular appliance with a lid and front panel (no text or symbols)Ασύρματο υπογούφερ

natural_image
Line drawing of a coiled cable with connectors and a connector pin (no text or symbols)natural_image
Illustration of two coiled electrical cables with terminal leads (no text or symbols)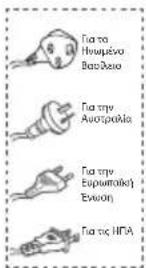
natural_image
Illustration of three types of electrical components: two blocks, three screws, and two bolts (no text or symbols)natural_image
Three simple geometric shapes: two overlapping squares and one rectangle, drawn with thin lines on a white background (no text or symbols)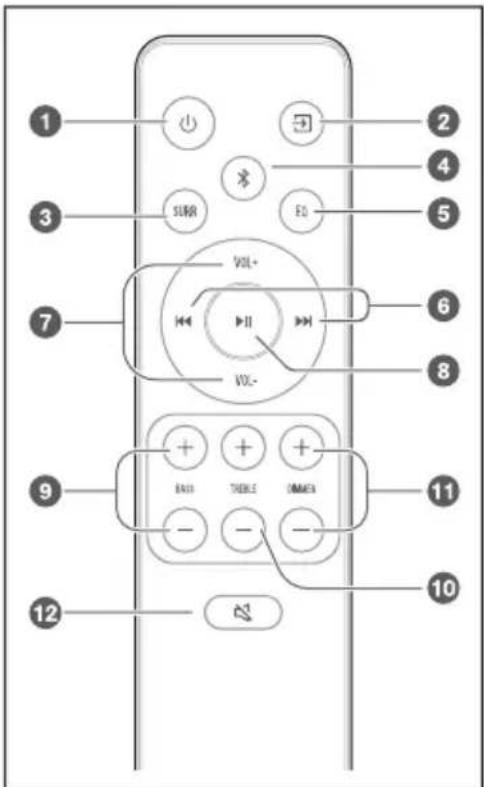
natural_image
Simple line drawing of a room layout with a monitor, cabinet, and storage unit (no text or symbols)
natural_image
Simple line drawing of a room with a monitor and a cabinet, enclosed in a circle (no text or symbols)natural_image
Two black rectangular electronic devices, one rectangular and one rectangular, displayed against a white background (no text or symbols visible)Dolby Audio

Bluetooth®
HDMI™
HIGH-DEFINITION MULTIMEDIA INTERFACE
dts®
Roku TV Ready
natural_image
Simple horizontal line drawing of a rectangular object with no text or symbolsОсновен модул
natural_image
Simple line drawing of a rectangular appliance with a lid and front panel (no text or symbols)Безжичен субуфър

natural_image
Line drawing of a coiled cable with connectors and a connector pin (no text or symbols)natural_image
Illustration of three types of electrical components: two blocks, three screws, and two screws (no text or symbols)Комплект за стенен монтаж

natural_image
Three simple geometric shapes: two rectangles stacked vertically, one outlined and one solid, with no text or symbols.natural_image
Simple line drawing of a room layout with a rectangle above a cabinet and a paper box, enclosed in a circle (no text or symbols)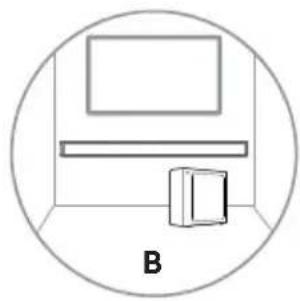
natural_image
Simple line drawing of a room with a monitor and a cabinet, enclosed in a circle (no text or symbols)ПРЕДУПРЕЖДЕНИЕ
natural_image
Two black rectangular devices, one rectangular and one rectangular, displayed against a white background (no text or symbols visible)Dolby Audio

Bluetooth®
HDMI™
HIGH-DEFINITION MULTIMEDIA INTERFACE
dts
Brugermanual

natural_image
Simple horizontal line with a small dot at the top (no text or symbols)Hovedenhed

Fjernbetjening
AAA-batterier × 2 *

natural_image
Simple line drawing of a rectangular appliance with a lid and front panel (no text or symbols)Trådløs subwoofer

natural_image
Line drawing of a coiled electrical cable with connectors and a connector pin (no text or symbols)natural_image
Illustration of two coiled electrical plugs with leads (no text or symbols)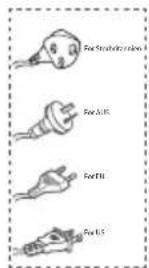

natural_image
Illustration of three types of screws: two blocks, two screws with threaded heads, and two screws with threaded bolts (no text or symbols)Vægmonteringssæt

natural_image
Three simple geometric shapes: two rectangles stacked vertically, one outlined and one solid, with no text or symbols.① AC\~netledning
Tilslut til strøm.
② PAIR-knap

natural_image
Simple line drawing of a room layout with a rectangle, two shelves, and a cabinet inside a circle (no text or symbols)
natural_image
Simple line drawing of a room with a monitor and a cabinet, enclosed in a circle (no text or symbols)ADVARSEL
natural_image
Black rectangular and rectangular electronic devices on a white background, no visible text or symbolsDolby Audio

Bluetooth®
HDMI™
HIGH-DEFINITION MULTIMEDIA INTERFACE
dts
Bruksanvisning

natural_image
Simple horizontal line with a small dot at the top (no text or symbols)Huvudenhet

Fjärrkontroll
AAA-batterier × 2 *
natural_image
Simple line drawing of a rectangular appliance with a lid and front panel (no text or symbols)Trådlös subwoofer

natural_image
Line drawing of a coiled electrical cable with connectors and a terminal connector (no text or symbols)HDMI-kabel AC Nätkabel *

natural_image
Illustration of two coiled electrical connectors with power leads (no text or symbols)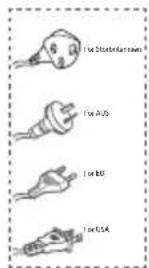
natural_image
Three simple geometric shapes: two rectangles stacked vertically, one outlined and one solid, with no text or symbols.① AC\~ Nätkabel
Anslut till elnätet.
② PAIR-knapp
3. Förberedelser
natural_image
Simple line drawing of a room layout with a rectangle above a shelf and a small box, enclosed in a circle (no text or symbols)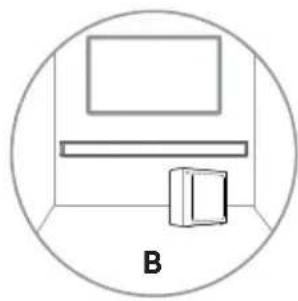
natural_image
Simple line drawing of a room with a monitor and a cabinet, enclosed in a circle (no text or symbols)WARNING
natural_image
Black rectangular and rectangular electronic devices on a white background, no visible text or symbolsDolby Audio

Bluetooth®
HDMI™
HIGH-DEFINITION MULTIMEDIA INTERFACE
dts
Käyttöopas

natural_image
Simple horizontal line with a small dot at the top (no text or symbols)Pääyksikkö

Kaukosäädin
Langaton subwoofer
AAA-paristot, 2 kpl *

natural_image
Line drawing of a coiled electrical cable with connectors (no text or symbols)natural_image
Illustration of two coiled electrical cables with terminal leads (no text or symbols)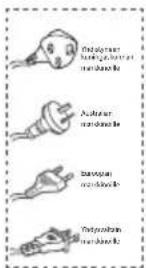

natural_image
Illustration of three types of electrical components: two blocks, two screws, and two bolts (no text or symbols)Seinäasennussarja

natural_image
Three simple geometric shapes: two overlapping squares and one rectangle, drawn with thin lines on a white background (no text or symbols)natural_image
Simple line drawing of a room layout with a monitor, cabinet, and storage unit (no text or symbols)
natural_image
Simple line drawing of a room with a monitor, shelf, and cabinet (no text or symbols)VAROITUS
natural_image
Black rectangular and rectangular electronic devices on a white background, no visible text or symbolsDolby Audio

Bluetooth®
HDMI™
HIGH-DEFINITION MULTIMEDIA INTERFACE
dts
Brukerhåndbok

Før du bruker lydplanken, vennligst les denne håndboken grundig og ta vare på den for fremtidig referanse.
Innhold
natural_image
Simple horizontal line with a small dot at the top (no text or symbols)Hovedenhet
Fjernkontroll
AAA-batterier × 2*

natural_image
Simple line drawing of a rectangular appliance with a lid and front panel (no text or symbols)Trådløs subwoofer

natural_image
Line drawing of a coiled electrical cable with connectors and a connector pin (no text or symbols)natural_image
Illustration of two coiled electrical plugs with leads, no text or symbols present

natural_image
Illustration of three types of electrical connectors: two blocks, two screws, and two bolts (no text or symbols)Veggmonteringssett

natural_image
Three simple geometric shapes: two rectangles stacked vertically, one outlined and one solid, with no text or symbols.Garantikort/Hurtigstartmanual/Veggmonteringsveiledning
① AC\~ Strømledning Koble til strøm.
natural_image
Simple line drawing of a room layout with a rectangle, a cabinet, and a window (no text or symbols)
natural_image
Simple line drawing of a room with a monitor, shelf, and cabinet (no text or symbols)ADVARSEL
natural_image
Black rectangular and rectangular electronic devices on a white background, no visible text or symbolsDolby Audio

Bluetooth®
HDMI™
HIGH-DEFINITION MULTIMEDIA INTERFACE
dts
natural_image
Simple horizontal line with a small dot at the top (no text or symbols)Aðaleiningin

Fjarstýring
AAA rafhlöður × 2 *

natural_image
Simple line drawing of a rectangular appliance with a lid and front panel (no text or symbols)Práðlaus bassahátalari

natural_image
Line drawing of a coiled electrical cable with connectors and a connector pin (no text or symbols)natural_image
Illustration of two coiled electrical plugs with leads (no text or symbols)
natural_image
Illustration of three types of electrical connectors: two blocks, two screws, and two bolts (no text or symbols)Veggfestingarsett
natural_image
Three simple geometric shapes: two rectangles and one square, arranged horizontally (no text or symbols)Ábyrgðarskírteini/ Hraðbyrjunarhandbók/ Veggfestingarleiðbeiningar
① AC\~ Rafmagnssnúra
Tengdu við rafmagn.
② PAIR hnappur
natural_image
Simple line drawing of a room layout with a rectangle, two shelves, and a cabinet inside a circle (no text or symbols)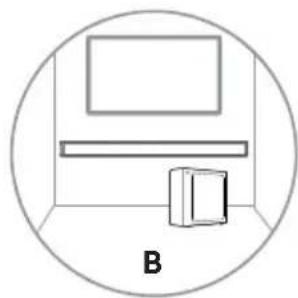
natural_image
Simple line drawing of a room with a monitor and a cabinet, enclosed in a circle (no text or symbols)VIDVÖRUN

- Complete UM on web
- Contents
- What's in the Box 3
- Product Diagram 4
- Preparations 5
- Connections....7
- Pair up with the Subwoofer 8
- Basic Operation 9
- AUX/ OPTICAL/HDMI ARC Operation.... 10
- USB Operation.... 10
- Bluetooth Operation....11
- Troubleshooting.... 12
- Specifications.... 13
- What's in the Box
- Product Diagram
- Main Unit
- Wireless Subwoofer
- Remote Control
- Preparations
- Prepare the Remote Control
- Replace the Remote Control Battery
- Precautions Concerning Batteries
- Placement and Mounting
- Placement
- Wall Mounting (if using option-B)
- Note:
- WARNING
- Connections
- Use the HDMI ARC Socket
- Tips:
- Use the Roku TV
- Use the OPTICAL Socket
- Use the AUX Socket
- Connect Power
- Risk of product damage!
- Soundbar
- Subwoofer
- Pair up with the Subwoofer
- Automatic pairing
- Manual pairing
- Use the Hisense EzPlay Function
- Basic Operation
- Standby/ON
- Auto-Standby / Auto-Wake
- Auto-standby ON/OFF
- Activate and Deactivate the Auto-Wake:
- Select Modes
- Lamp
- Mode
- Adjust the Volume
- Turn the Surround Sound ON/OFF
- Adjust the Bass/Treble
- Adjust the Brightness
- Factory reset
- AUX/ OPTICAL/HDMI ARC control Operation
- USB Operation
- Bluetooth Operation
- First time pairing
- To disconnect the Bluetooth function, you can :
- Listen to music from Bluetooth Device
- Troubleshooting
- No power
- Remote control does not work
- No sound
- I can't find the Bluetooth name of this unit on my Bluetooth device for Bluetooth pairing
- The Soundbar turns off
- The Subwoofer is idle or the indicator of Subwoofer do not light up.
- Specifications
- Hisense
- MANUEL D'UTILISATION
- AVERTISSEMENT
- MANUAL DE USUARIO
- ADVERTENCIA
- MANUAL DO UTILIZADOR
- AVISO
- BENUTZERHANDBUCH
- WARNUNG
- MANUALE DELL'UTENTE
- AVVISO
- Standby/ACCENSIONE
- OSTRZEŻENIE
- Manual de utilizare complet pe web
- AVERTIZARE
- UPOZORNĚNÍ
- UPOZORNENIE
- Previdnostni ukrepi v zvezi z baterijami
- OPOZORILO
- Završite UM na mreži
- Sadržaj
- Što se nalazi u kutiji .... 3
- Grafički prikaz proizvoda 4
- Pripreme....5
- Veze 7
- Mjere opreza glede baterija
- UPOZORENJE
- Veze
- Upotrijebite utičnicu HDMI ARC
- Savjeti:
- Dolby Audio
- Előkészületek
- FIGYELMEZTETÉS
- ПРЕДУПРЕЖДЕНИЕ
- Kompletno korisničko uputstvo na internetu
- Sadržaj kutije....3
- Dijagram proizvoda 4
- Priključci....7
- Mere predostrožnosti u vezi sa baterijama
- Postavljanje i montiranje
- Postavljanje
- Priključci
- Spojevi
- PARALAJMĚRIM
- Lidhjet
- Gatishmëria/AKTIV
- Целосно КУ на веб
- ПРЕДУПРЕДУВАЊЕ
- Brugermanual
- ADVARSEL
- Bruksanvisning
- Förberedelser
- Käyttöopas
- VAROITUS
- Brukerhåndbok
- Innhold
- VIDVÖRUN
Brand : HISENSE
Model : MH6TL4TB
Category : Soundbar