EPS - Projection screen Duronic - Free user manual and instructions
Find the device manual for free EPS Duronic in PDF.
| Product type | Motorized projection screen |
| Motorization type | Electric with wired and wireless control (433 MHz, optional) |
| Installation | Wall, ceiling, or on tripods (not included) |
| Screen material | PVC |
| Border color | Black |
| Power supply | Mains (230V ~50Hz, European plug with 3A fuse) |
| Main functions | UP/STOP/DOWN control, adjustment of extension and retraction |
| Care and cleaning | Dry cloth or duster; stains: damp cloth with mild soap |
| Safety | Do not use abrasive chemicals |
| Warranty | 1 year (Shine-Mart Ltd) |
| Standards | CE (WEEE) |
Frequently Asked Questions - EPS Duronic
User questions about EPS Duronic
0 question about this device. Answer the ones you know or ask your own.
Ask a new question about this device
Download the instructions for your Projection screen in PDF format for free! Find your manual EPS - Duronic and take your electronic device back in hand. On this page are published all the documents necessary for the use of your device. EPS by Duronic.
USER MANUAL EPS Duronic
Creative Consumer Electronics
EPS - Electric Projector Screen
PLEASE READ ALL THE INSTRUCTIONS BEFORE USE

duronic.com

duronic

@duronicmedia

Duronic

@duronicmedia
DURONIC
Contents
English Manual 5
- Clear a large enough area to assemble the screen. Make sure the area is larger than the sides of the screen.
- Assembly of the screen requires at least two people for some of the steps.
- Do not assemble the screen in areas of high temperature to avoid incurring any damage to the screen.
- Ensure that you read through this manual entirely before beginning to assemble the screen.
Tools Required for Assembly
• Phillips screwdriver
- Allen key (included in the box)
- Spirit level
- Drill (if installing onto a wall)
Assembly Instructions
- Ensure your assembly area is clean and completely clear.
- Unpack all of the parts from the box and lay them out in an orderly way. Do not unroll the screen yet.
- Place the screen on the flat even surface. In order to protect the screen from getting marked or stained, ensure that the screen is kept away from dust and dirt.
- Decide on a location for your screen. The EPS screen can be installed in three ways: wall mounted, ceiling mounted or tripod mounted.
Wall Mounted:
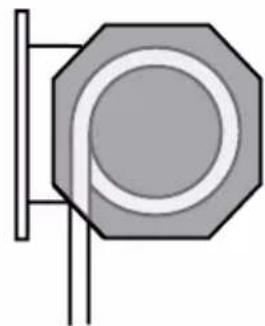
Using the holes on the back of the brackets to guide you, hold the screen up onto the wall where you wish to install it and mark the two places where you need to put the screws.
a. Use a spirit level to check the screen will be level and straight on the wall.
b. Set the screen aside.
c. Use a drill to make two holes in the places you marked, ensuring that they are the same size to correspond with your raw plugs. Then insert the raw plugs.
natural_image
Pure geometric diagram of a hexagonal shape with a circular center and vertical lines (no text or symbols)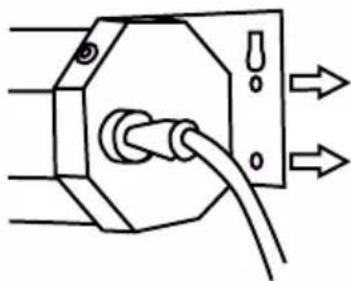
natural_image
Pure electrical circuit lines without any symbolsNote: The EPS comes with some standard raw plugs for brick walls; however you may need to find suitable alternatives depending on the material of your wall.
d. Lift the projector screen into place, and using a screwdriver, insert the screws through the brackets and into the aligning holes. Tighten in place.
e. Check to make sure the screen is level on the wall.
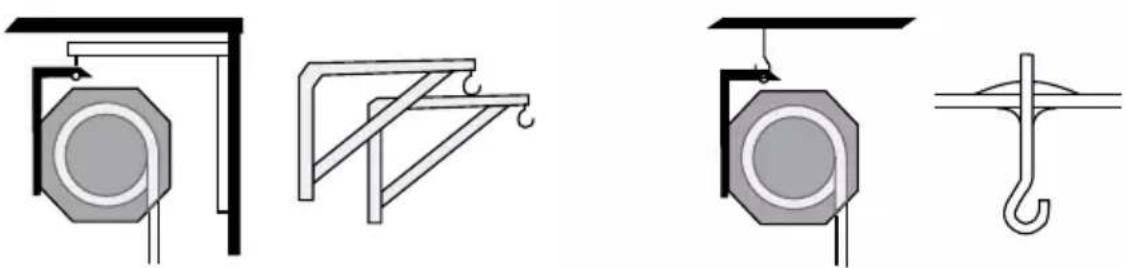
Ceiling Mounted:
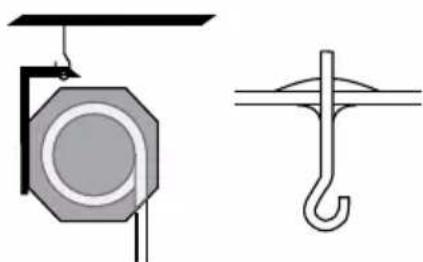
You can hang your projector from ceiling-height in two ways: directly from the ceiling using eyebolt screws, or from the top of the wall using spacer brackets. For both kinds of installation, you may also need S-shaped hooks.
As ceilings can be made of different materials - some weaker than others - you will need to assess if your ceiling is capable of holding the weight of the screen and if it's safe to do so. Then, make sure you choose the right fixings for your type of ceiling.
natural_image
Four technical diagrams showing mechanical or structural components with no visible text or symbolsSpacer brackets Eyebolt screws
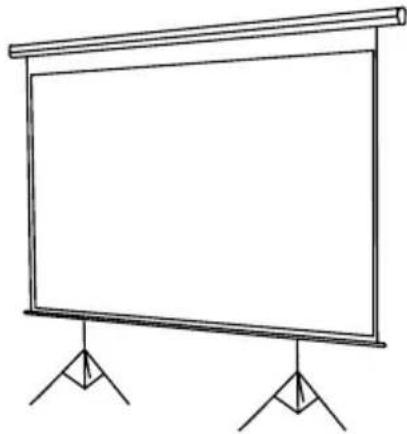
Tripod Mounted:
The brackets have holes to allow the screen to be mounted on to tripods. In most cases, you will need two tripod stands (one for each end of the screen). Usually you will need two hooks and/or two S-shaped hooks.
Please note: The only fixings included in the box are raw plugs for brick walls. If you require alternative fixings such as tripod stands, spacer brackets or eyebolt screws you will need to buy these separately.
natural_image
Simple line drawing of a blank projector screen mounted on two stand legs (no text or symbols)Setting up the Screen
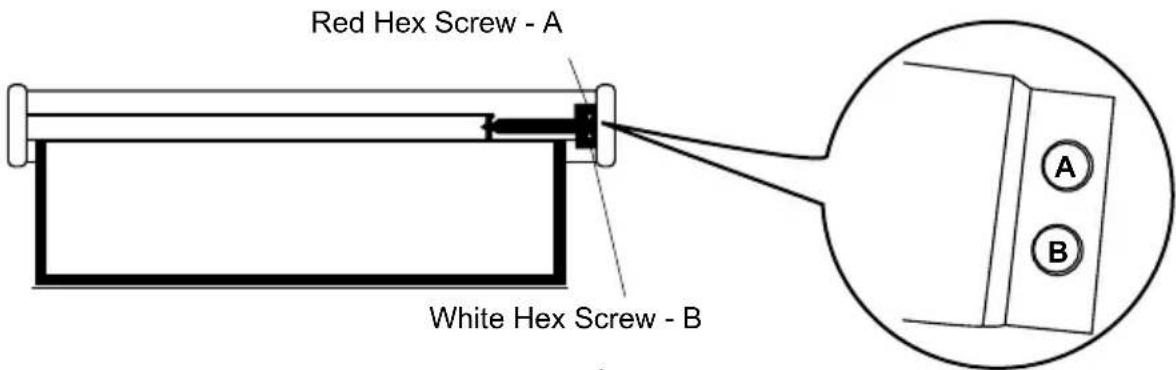
When first setting up the screen, check that you are happy with the position/ size of the black border and that the screen extends and retracts to the correct positions. If it doesn't, this can be easily adjusted. Occasionally you may notice that the screen does not extend to the correct length or completely retract. This can easily be corrected and re-adjusted to rectify the problem.
'A' red/grey hex screw: controls the range of extension (how far the screen goes down)
'B' white/yellow hex screw: controls the range of retraction (how much the screen rolls up into the casing and at what angle it does so)
- If there is a wide black border across the top of the screen and you wish to decrease it, turn the "A" hex clockwise to narrow the width of the black border.
- If the black border across the top is too narrow or the screen hasn't extended fully, turn the "A" hex anticlockwise.
- If the screen extends wonky and needs straightening, adjust the "B" hex to straighten the screen.
Operating Instructions
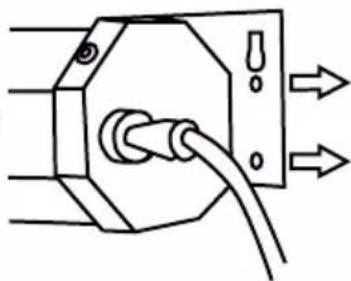
Plug the cable into a mains power socket.
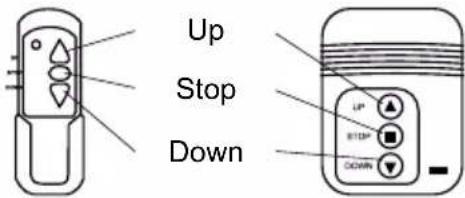
The screen is controlled by the wired-in control on the side of the screen. It has three buttons: UP / STOP / DOWN.
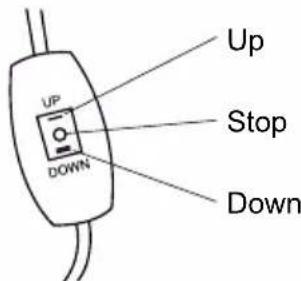
The screen can also be controlled by a wireless remote (sold separately), which has the same buttons: UP / STOP / DOWN. The remote control frequency is: 433 MHz.
Cleaning
When not in use, keep your screen rolled up to keep it dust-free. If the screen or casing gather dust, simply clean with a dry cloth or duster.
The screen is made of PVC. If the screen has a mark or stain that needs to be removed, use a wet cloth with a mild soap to gently clean the screen. Use minimal pressure to prevent damaging the fabric.
Do not use any abrasive chemicals or cleaning agents on any part of the screen or casing.
Troubleshooting
| Problem Solution | |
| The screen does not go up or down | Check that the power cable is connected properly and that it is switched on at the mains power socket. If the screen still does not move up or down, contact Duronic directly for further advice. |
| Screen does not extend to the correct length | If the screen does not extend to the correct length, use the hex tool to turn and adjust the red or grey (A) hex screw inside the projector casing. (See ‘Setting Up the Screen’) |
| Screen does not completely retract | If the screen does not retract fully into the projector casing, use the hex tool to turn and adjust the white or yellow (B) hex screw inside the projector casing. |
DURONIC
Warranty
1 Year Guarantee from Shine-Mart Ltd, Trademark owners of Duronic Products. NOTE: THESE STATEMENTS DO NOT AFFECT YOUR STATUTORY RIGHTS AS A CONSUMER
This product has been manufactured under the strictest or quality control procedures, and using the highest quality of materials, to ensure excellent performance and reliability. It will give very good and long lasting service, provided it is properly used and maintained. The product is guaranteed for 1 years from the date of original purchase. If any defect arises due to a faulty materials or poor workmanship, the faulty product must be returned to the original place of purchase. Refund or replacement is at the discretion of that company.
Duronic Products are offered with a 1 year guarantee under the following conditions:
- The product must be returned to the retailer with original proof of purchase.
- The product must be installed and used in accordance with the instructions contained in this operating manual.
- It must be used only for domestic purposes.
- It does not cover wear and tear, malicious damage, misuse, neglect, inexpert repairs or consumable parts.
- Shine-Mart Ltd has no responsibilities for accidental or consequential loss or damage.
- Shine-Mart Ltd are not liable to carry out any type of servicing work, under the guarantee
- Valid in the UK only
This product is fitted with CE:1363 plug and fuse Imported by Shine-Mart Ltd, RM3 8SB

Information on waste Disposal for Consumers of
Electrical & Electronic Equipment.
This mark on a product and/or accompanying documents indicates that when it is to be disposed of, it must be treated as Waste
Electrical & Electronic Equipment, (WEEE).
Any WEEE marked products must not be mixed with general household waste, but kept separate for the treatment, recovery and recycling of the materials used.
For proper treatment, recovery and recycling; please take all WEEE marked
waste to your Local Authority Civic waste site,
where it will be accepted free of charge.
If customers dispose of Waste Electrical & Electronic Equipment correctly, they will be helping to save valuable resources and preventing any potential negative effects upon human health and the environment, of any hazardous materials that the waste may contain.
Follow Us

duronic.com

duronic

@duronicmedia

Duronic

@duronicmedia
natural_image
Pure geometric diagram of a hexagonal shape with a central circle and vertical lines, no text or symbols present.
natural_image
Pure electrical circuit lines without any symbolsnatural_image
Technical line drawing showing two mechanical or structural components: a circular component mounted on a bracket and a support frame with curved notches (no text or symbols)Support Boulon
natural_image
Technical diagram showing two mechanical or structural components: a circular component with a ring and a hook-like structure (no text or symbols)à oeil d'espacement
natural_image
Simple line drawing of a blank projector screen mounted on two stand holders (no text or symbols)natural_image
Pure geometric diagram of a hexagonal shape with internal concentric circles and vertical lines (no text or symbols)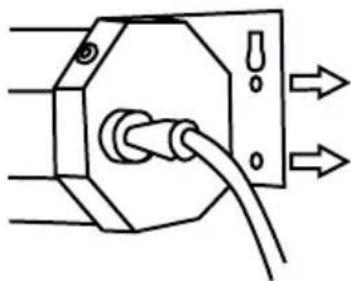
natural_image
Pure electrical circuit lines without any symbolsnatural_image
Two technical diagrams showing structural components: one with a circular opening and vertical support, the other with a bracket and curved supports (no text or symbols)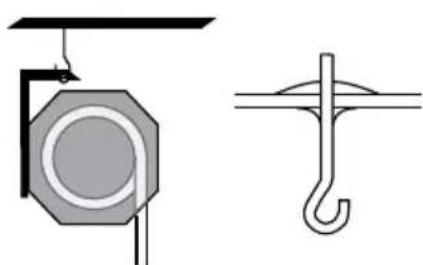
natural_image
Technical line drawing of a mechanical lifting device and a hook component (no text or symbols)natural_image
Simple line drawing of a blank projector screen with two stand supports (no text or symbols)Leinwand einrichten
natural_image
Pure geometric diagram of a hexagonal shape with a circular center and vertical lines (no text or symbols)natural_image
Pure electrical circuit lines without any symbolsnatural_image
Technical line drawing showing two mechanical or structural components: a circular component mounted on a bracket and a support frame with curved supports (no text or symbols)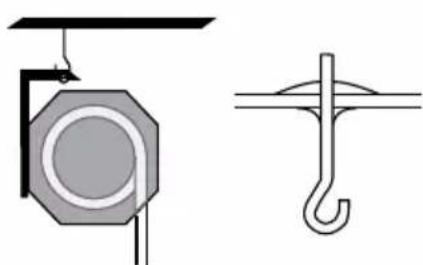
natural_image
Technical line drawing of a mechanical lifting device and a hook component (no text or symbols)natural_image
Simple line drawing of a blank projector screen with two stand supports (no text or symbols)natural_image
Pure geometric diagram of a hexagonal shape with a circular center and vertical line, no text or symbols present.natural_image
Pure electrical circuit lines without any symbolsnatural_image
Four technical diagrams showing mechanical or structural components with no visible text or symbolsnatural_image
Simple line drawing of a blank projector screen with two stand supports (no text or symbols)DURONIC
natural_image
Pure geometric diagram of a hexagonal shape with a central circle and vertical lines, no text or symbols present.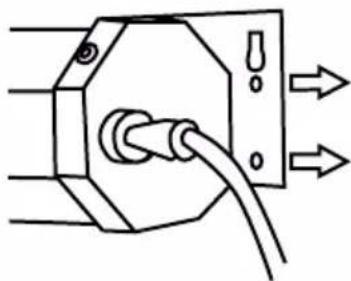
natural_image
Pure electrical circuit lines without any symbolsnatural_image
Technical line drawing showing two mechanical or structural components: a circular octagonal component and a bracket-like structure with curved notches (no text or symbols)natural_image
Technical diagram showing two mechanical or electrical component configurations: one with a circular component and the other with a hook-like structure (no text or symbols)Śruby oczkowe
natural_image
Simple line drawing of a blank projector screen mounted on two stand holders (no text or symbols)Ustawianie ekranu
natural_image
Pure geometric diagram of a hexagonal shape with a central circle and vertical lines, no text or symbols present.