QuietComfort Ultra Earbuds - Wireless Earbuds BOSE - Free user manual and instructions
Find the device manual for free QuietComfort Ultra Earbuds BOSE in PDF.
| Product type | Wireless earbuds |
| Brand | Bose |
| Model | QuietComfort Ultra Earbuds (2nd generation) |
| Earbud power supply | 3.85V lithium-ion battery (type 1454), non-replaceable |
| Case power supply | Input: 5V = 1A; Output: 5V DC, 160mA x 2; Capacity: 680mAh |
| Battery life (immersive audio off) | Up to 6 hours |
| Battery life (immersive audio on) | Up to 4 hours |
| Earbud charging time | Up to 2 hours |
| Case charging time | Up to 3 hours (wired charging), wireless charging possible |
| Quick charge | 20 minutes of charging provides up to 2 hours of playback |
| Connectivity | Multipoint Bluetooth (up to 2 devices simultaneously), Snapdragon Sound compatible |
| Noise cancellation | Active (Quiet, Aware with ActiveSense, Immersion modes) |
| Immersive Audio | Motion tracking, still, or off |
| Water resistance | IPX4 (sweat and weather resistant) |
| Controls | Touch (tap, swipe, long press) on each earbud |
| In-ear detection | Auto play/pause, auto answer calls, auto transparency |
| Listening modes | Quiet, Aware (with ActiveSense), Immersion, up to 7 custom modes |
| Package contents | Earbuds, charging case, USB-C to USB-A cable, ear tips (S, M, L), stability bands (1, 2, 3) |
| Batteries | Not user-replaceable; recycle according to local regulations |
| Warranty | Limited warranty (see worldwide.Bose.com/Warranty) |
Frequently Asked Questions - QuietComfort Ultra Earbuds BOSE
User questions about QuietComfort Ultra Earbuds BOSE
0 question about this device. Answer the ones you know or ask your own.
Ask a new question about this device
Download the instructions for your Wireless Earbuds in PDF format for free! Find your manual QuietComfort Ultra Earbuds - BOSE and take your electronic device back in hand. On this page are published all the documents necessary for the use of your device. QuietComfort Ultra Earbuds by BOSE.
USER MANUAL QuietComfort Ultra Earbuds BOSE
Please read and keep all safety and use instructions.
Declarations of conformity can be found at: www.Bose.com/compliance

Bose Corporation hereby declares that this product is in compliance with the essential requirements and other relevant provisions of Directive 2014/53/EU and all other applicable EU directiverequirements.
Important Safety Instructions
Clean only with a dry cloth.
Only use attachments/accessories specified by the manufacturer.
Refer all servicing to qualified personnel. Servicing is required when the apparatus does not operate normally, or has been physically damaged.

WARNINGS/CAUTIONS
- To avoid accidental ingestion, keep the product away from children and pets. The product contains a battery, and may be hazardous if swallowed. If ingested, seek immediate medical attention. When not in use, store the product out of reach of children and pets.
- Product is not intended for use by children.
- To avoid hearing damage, do not use your headphones at a high volume. Turn the volume down on your product before placing the headphones in/on your ears, then turn the volume up gradually until you reach a comfortable, moderate listening level.
- Use of these headphones while operating a vehicle is not recommended and may be prohibited by law in some locations. Use caution and follow applicable laws regarding headphone use while operating a vehicle. Stop using your headphones immediately if they interfere with your ability to remain attentive or if they interfere with your ability to hear surrounding sounds, including alarms and warning signals, while operating a vehicle.
- Use caution if using these headphones while performing any activity that requires your attention. Do not use the headphones when the inability to clearly hear surrounding sounds may present a danger to yourself or others, for example while riding a bicycle or walking in or near traffic, a construction site, railroad, etc.
- Do NOT use the earbuds if they emit any loud unusual noise. If this happens, remove the earbuds and contact Bose customer service.
- Do NOT submerge the product in water or expose the product to water for extended periods.
- Remove product immediately if you notice heat coming from the product.
▲WARNING
- INGESTION HAZARD: This product contains a button cell or coin battery.
- DEATH or serious injury can occur if ingested.
• A swallowed button cell or coin battery can cause Internal Chemical Burns in as little as 2 hours. - KEEP new and used batteries OUT OF REACH of CHILDREN
- Seek immediate medical attention if a battery is suspected to be swallowed or inserted inside any part of the body.

- Remove and immediately recycle or dispose of used batteries according to local regulations and keep away from children. Do NOT dispose of batteries in household trash or incinerate.
• Even used batteries may cause severe injury or death. - Call a local poison control center for treatment information.
- Do not force discharge, recharge, disassemble, heat above 185^ (85°C) or incinerate. Doing so may result in injury due to venting, leakage or explosion resulting in chemical burns.
• Non-rechargeable batteries are not to be recharged.
• This product contains non-replaceable batteries.
• Battery Type: 1454 | Nominal battery voltage: 3.85V

Contains small parts which may be a choking hazard. Not suitable for children under age 3.

This product contains magnetic material. Consult your physician on whether this might affect your implantable medical device.
- Do NOT make unauthorized alterations to this product.
- Keep the product away from fire and heat sources. Do NOT place naked flame sources, such as lighted candles, on or near the product.
- Do NOT use the earbuds without the supplied eartips attached.
- Use this product only with an agency-approved LPS power supply that meets local regulatory requirements (e.g., UL, CSA, VDE, CCC).
- The battery provided with this product may present a risk of fire or chemical burn if mishandled, incorrectly replaced or replaced with an incorrect type.
- If the battery leaks, do not allow the liquid to come in contact with the skin or eyes. If contact is made, seek medical advice.
- Do not expose products containing batteries to excessive heat (e.g. from storage in direct sunlight, fire or the like).
- Wipe off sweat from the earbuds and the charging case before charging.
- IPX4 is not a permanent condition, and resistance might decrease as a result of normal wear.
- To avoid hazardous radiation exposure from the internal laser component, use the product only as specified in the instructions. The earbuds should not be adjusted or repaired by anyone except properly qualified service personnel.
- Do not place or install near any heat sources, such as fireplaces, radiators, heat registers, stoves or other apparatus (including amplifiers) that produce heat.
- Complies with 21 CFR 1040.10 and 1040.11 except for conformance with IEC 60825-1 Ed. 3 as described in Laser Notice 56, date May 8, 2019.

This product is classified as a CLASS 1 CONSUMER LASER PRODUCT according to EN 50689:2021 and IEC 60825-1:2014.
NOTE: This equipment has been tested and found to comply with the limits for a Class B digital device, pursuant to Part 15 of the FCC Rules. These limits are designed to provide reasonable protection against harmful interference in a residential installation. This equipment generates, uses, and can radiate radio frequency energy and, if not installed and used in accordance with the instructions, may cause harmful interference to radio communications. However, there is no guarantee that interference will not occur in a particular installation. If this equipment does cause harmful interference to radio or television reception, which can be determined by turning the equipment off and on, the user is encouraged to try to correct the interference by one or more of the following measures:
- Reorient or relocate the receiving product or antenna.
- Increase the separation between the equipment and receiver.
- Connect the equipment into an outlet on a circuit different from that to which the receiver is connected.
- Consult the dealer or an experienced radio/TV technician for help.
Changes or modifications not expressly approved by Bose Corporation could void the user's authority to operate this equipment.
This device complies with part 15 of the FCC Rules and with ISED Canada license-exempt RSS standard(s). Operation is subject to the following two conditions: (1) This device may not cause harmful interference, and (2) this device must accept any interference received, including interference that may cause undesired operation.
This device complies with FCC and ISED Canada radiation exposure limits set forth for general population. This transmitter must not be co-located or operating in conjunction with any other antenna or transmitter.
FCC ID: A94408L / A94408R | IC: 3232A-408L / 3232A-408R
Case Model: 444965 | Right Earbud Model: 408R | Left Earbud Model: 408L
The earbuds in this system have been certified in accordance with the provisions set out in the Radio Law.

020-230152 (L)
020-230144(R)
CAN ICES (B) / NMB (B)
CAN RSS-216 / CNR-216
For Europe: Frequency band of operation 2400 to 2483.5 MHz. | Maximum transmit power less than 20 dBm EIRP. | Frequency band of operation: 111 kHz - 148 kHz. | Maximum transmit power less than 37.7 dBuA/m.
SAR Information
| Earbud | Measured1-g SAR W/kg | Measured10-g SAR W/kg |
| Left 0.18 0.08 | ||
| Right 0.13 0.06 |
This symbol means the product must not be discarded as household waste, and should be delivered to an appropriate collection facility for recycling. Proper disposal and recycling helps protect natural resources, human health and the environment. For more information on disposal and recycling of this product, contact your local municipality, disposal service, or the shop where you bought this product.
Low-power Radio-frequency Devices Technical Regulations
Without permission granted by the NCC, any company, enterprise, or user is not allowed to change frequency, enhance transmitting power or alter original characteristic as well as performance to an approved low power radio-frequency devices. The low power radio-frequency devices shall not influence aircraft security and interfere legal communications; If found, the user shall cease operating immediately until no interference is achieved. The said legal communications means radio communications is operated in compliance with the Telecommunications Management Act. The low power radio-frequency devices must be susceptible with the interference from legal communications or ISM radio wave radiated devices.
The power delivered by the charging source must be between min 2.5 Watts required by the radio equipment, and at least 3.5 Watts in order to achieve the maximum charging speed.
DON'T attempt to remove the rechargeable lithium-ion battery from this product. Contact your local Bose retailer or other qualified professional for removal.

Please dispose of used batteries properly, following local regulations. Do not incinerate.


R33807 RoHS

| Names and Contents of Toxic or Hazardous Substances or Elements | ||||||||||
| Toxic or Hazardous Substances and Elements | ||||||||||
| Part Name | Lead (Pb) | Mercury (Hg) | Cadmi-um (Cd) | Hexava-lent (CR(VI)) | Polybromi-nated Biphenyl (PBB) | Polybromi-nated diphenyle-ther (PBDE) | Dybutyl phthalate (DBP) | Diisobutyl phthalate (DIBP) | Butyl benzyl phthalate (BBP) | Bis(2-ethylhexyl) phthalate (DEHP) |
| PCBs X O | O O O | O O O O O | ||||||||
| Metal Parts | X O | O O O O O | O O O | |||||||
| Plastic Parts | O | O O O | O O O O | O O | ||||||
| Speakers | X O | O O O O O | O O O | |||||||
| Cables | X O | O O O O O | O O O | |||||||
| This table is prepared in accordance with the provisions of SJ/T 11364.O: Indicates that this toxic or hazardous substance contained in all of the homogeneous materials for this part is below the limit requirement of GB/T 26572. |  | |||||||||
| X: Indicates that this toxic or hazardous substance contained in at least one of the homogeneous materials used for this part is above the limit requirement of GB/T 26572. | ||||||||||
| Equipment name: Earbuds and Charging Case Type designation: 444965 | ||||||
| Restricted substances and its chemical symbols | ||||||
| Unit | Lead (Pb) | Mercury (Hg) | Cadmium (Cd) | Hexavalent chromium ( Cr^+δ ) | Polybrominated biphenyls (PBB) | Polybrominated diphenyl ethers (PBDE) |
| PCBs | - | ○ | ○ | ○ | ○ | ○ |
| Metal Parts | - | ○ | ○ | ○ | ○ | ○ |
| Plastic Parts | ○○ | ○ | ○ | ○ | ○ | |
| Speakers | - | ○ | ○ | ○ | ○ | ○ |
| Cables | - | ○ | ○ | ○ | ○ | ○ |
| Note 1: “○” indicates that the percentage content of the restricted substance does not exceed the percentage of reference value of presence.Note 2: The “-” indicates that the restricted substance corresponds to the exemption. | ||||||
Date of Manufacture: The eighth digit in the serial number indicates the year of manufacture; "5" is 2015 or 2025. | Location of Manufacture: The seventh digit in the serial number indicates the location of manufacture.
Importers: Bose Electronics (Shanghai) Company Limited, Level 6, Tower D, No. 2337 Gudai Rd. Minhang District, Shanghai 201100 | Bose Products B.V., Vijzelstraat 68, 1017HL Amsterdam, The Netherlands | Ingram Micro Mexico SA de CV, Joselillo 3 Int. Piso 5 Col. El Parque, Naucalpan de Juarez, Edo Mex 53398 Phone Number: +52 55 5263 6500 | Bose Limited (H.K.), 7F., No. 2, Sec. 3, Minsheng E. Road, Zhongshan Dist., Taipei City 104511, Phone Number: +886-2-2514 7676 | Bose Limited, 16 Dufour's Place, London W1F 7SP
Input Rating Charging Case: 5V --- 1A | Output Voltage: 5VDC | Output Current: 160mA x 2 | Output Capacity: 680mAh | IPXX Rating: IPX4 (for the earbuds)
Input Rating Left and Right Earbuds: 5VDC, 160mA
The CMIIT ID is located on the carton.
The Bose Terms of Use apply to this product: worldwide.Bose.com/termsofuse
License Disclosures: To view the license disclosures that apply to the third-party software packages included as components of the Bose QuietComfort Ultra Earbuds ( 2^nd Gen), use the Bose app. You can access this information from the Settings menu.
Apple, the Apple logo, iPad, iPhone, and macOS are trademarks of Apple Inc., registered in the U.S. and other countries. The trademark "iPhone" is used in Japan with a license from Aiphone K.K. App Store is a service mark of Apple Inc.
Use of the Made for Apple badge means that an accessory has been designed to connect specifically to the Apple product(s) identified in the badge, and has been certified by the developer to meet Apple performance standards. Apple is not responsible for the operation of this device or its compliance with safety and regulatory standards.
The Bluetooth ^® word mark and logos are registered trademarks owned by Bluetooth SIG, Inc. and any use of such marks by Bose Corporation is under license.
Google, Android, and Google Play are trademarks of Google LLC.
Microsoft Teams is a trademark of the Microsoft group of companies.
Snapdragon Sound is a product of Qualcomm Technologies, Inc. and/or its subsidiaries. Qualcomm, Snapdragon and Snapdragon Sound are trademarks or registered trademarks of Qualcomm Incorporated.
Spotify is a registered trademark of Spotify AB.
USB Type-C ^® and USB-C ^® are registered trademarks of USB Implementers Forum.
Bose, the B logo, ActiveSense, SimpleSync, and QuietComfort are trademarks of Bose Corporation. | Bose Corporation Headquarters: 1-877-230-5639 | ©2025 Bose Corporation. No part of this work may be reproduced, modified, distributed, or otherwise used without prior written permission.
Please complete and retain for your records
The earbud date code is located on the earbud under the band. The charging case serial number is located in the charging case well between the earbuds. The model numbers are located in the charging case lid.
Serial number: ____
Model number: 444965
Please keep your receipt. Now is a good time to register your Bose product. You can easily do this by going to worldwide.Bose.com/ProductRegistration
WHAT'S IN THE BOX
Contents.... 12
BOSE APP SETUP
Download the Bose app.... 13
SWEAT AND WEATHER RESISTANCE 14
HOW TO WEAR
Insert the earbuds 15
Check your fit.... 16
Eartips.... 16
Stability bands.... 17
Try another size 18
Eartips.... 18
Stability bands 18
Change the eartips.... 19
Change the stability bands.... 20
POWER
Power on 22
Power off.... 23
Standby 23
TOUCH CONTROL
Touch surface area.... 24
Media playback and volume 24
Phone calls.... 25
Call notifications.... 26
Modes.... 26
Immersive Audio settings.... 26
Device voice control.... 27
SHORTCUTS
Use your shortcut.... 28
Change or disable your shortcut 28
IN-EAR DETECTION
Auto play/pause 29
Auto answer call 29
Auto transparency 29
NOISE CANCELLATION
Change the noise cancellation setting 30
Noise cancellation while on a call 30
Use noise cancellation only 30
IMMERSIVE AUDIO
Immersive Audio settings.... 31
Change the Immersive Audio setting 32
Change the mode 32
Use your shortcut.... 32
Immersive Audio while on a call.... 32
LISTENING MODES
Modes.... 33
Aware mode with ActiveSense.... 33
Change the mode 34
Add or remove modes from the earbuds.... 34
SPOTIFY TAP 35
BATTERY
Charge the earbuds 36
Charge the charging case.... 37
Charge wirelessly.... 38
Check the earbud battery level.... 39
While using the earbuds 39
While charging the earbuds.... 39
Check the charging case battery level 40
Charging time 41
EARBUD AND CHARGING CASE STATUS
Earbuds status light 42
Bluetooth® status.... 42
Battery, update, and error status 42
Charging case status light 43
Battery, update, and error status.... 43
BLUETOOTH CONNECTIONS
Connect using the Bose app.... 44
Connect using the Bluetooth menu on your device 44
Disconnect a device 45
Reconnect to a device 45
Reconnect to the most recently-connected device.... 45
Reconnect to a different device 46
Connect another device 46
Switch between two connected devices.... 47
Clear the earbuds device list.... 47
Android™ devices only 48
Connect using Fast Pair 48
Snapdragon Sound™ technology 49
CONNECT BOSE PRODUCTS
Connect to a Bose Smart Speaker or Soundbar 50
Benefits....50
Compatible products.... 50
Connect using the Bose app.... 51
Connect using the product controls.... 52
Reconnect to a Bose Smart Speaker or Soundbar 52
CARE AND MAINTENANCE
Store the earbuds 53
Clean the earbuds and charging case.... 53
Replacement parts and accessories 53
Limited warranty.... 53
Update the earbuds.... 54
Update the charging case 54
View the earbud date code.... 54
View the charging case serial number 54
TROUBLESHOOTING
Try these solutions first.... 55
Other solutions....55
Reset the earbuds and charging case.... 67
Restore the earbuds to factory settings.... 68
CONTENTS
Confirm that the following parts are included:
natural_image
Line drawing of a pair of beige sneakers with 'BOSE' branding on the side (no additional text or symbols)
natural_image
Line drawing of a handheld electric shaver (no text or symbols)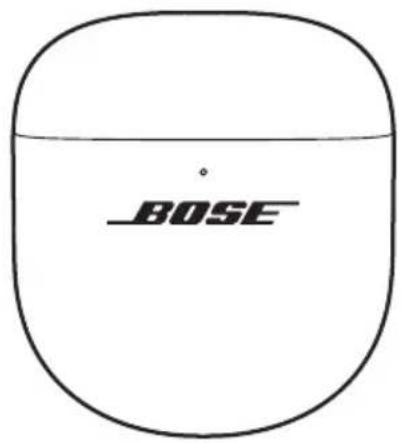
text_image
BOSEBose QuietComfort Ultra Earbuds ( 2^nd Gen) Charging case
Eartips (sizes small and large)
NOTE: Medium eartips are attached to the earbuds. For help identifying the eartip sizes, see page 18.

Stability bands (sizes 2 and 3)
NOTE: Size 1 bands are attached to the earbuds. For help identifying the band sizes, see page 18.
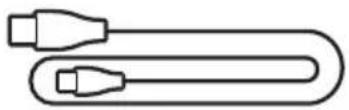
USB Type-C ^® to USB-A cable
NOTE: If any part of your product appears to be missing or damaged, don't use it. Visit support.Bose.com/qcue2 for troubleshooting articles, videos, and product repair or replacement.
The Bose app lets you set up and control the earbuds from any mobile device, such as a smartphone or tablet.
Using the app, you can verify the earbud fit, manage Bluetooth connections, manage earbud settings, adjust the audio, choose your voice prompt language, and get any future updates and new features made available by Bose.
NOTE: If you've already downloaded the Bose app for another Bose product, you can add the earbuds from the product list screen.
DOWNLOAD THE BOSE APP
- On your device, download the Bose app.
text_image
BOSE

text_image
GET IT ON Google Play- Follow the app instructions to add the earbuds.
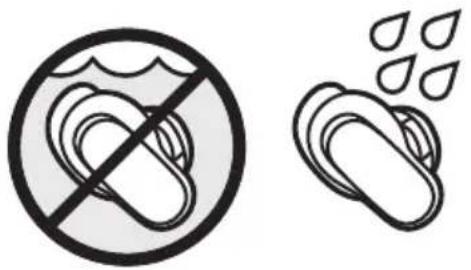
The earbuds are rated IPX4 water resistant. They are designed to be sweat and weather resistant but aren't meant to be submerged under water.
CAUTIONS:
- Do NOT swim or shower with the earbuds.
- Do NOT submerge the earbuds.
natural_image
Two symbolic icons: a circle with a diagonal line and a teardrop-shaped object emitting droplets (no text or symbols present)NOTES:
- To prevent corrosion, regularly clean the charging contacts on the earbuds with a dry, soft cotton swab or equivalent.
- IPX4 isn't a permanent condition, and resistance might decrease as a result of normalwear.
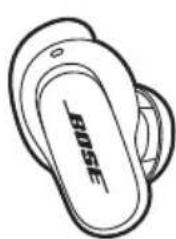
INSERT THE EARBUDS
- Insert the earbud so the eartip gently rests at the opening of your ear canal.
NOTE: Each earbud is marked with either an R (right) or L (left).
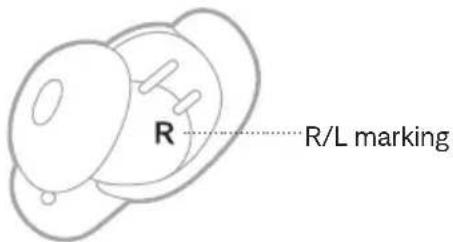
text_image
R R/L marking- Slightly rotate the earbud back until the eartip creates a comfortable seal at your ear canal and the stability band rests against your ear ridge.
NOTE: You may need to rotate the earbud back and forth for the eartip to create a comfortable seal. However, rotating it too far back or forward may impact audio and microphone sound quality.
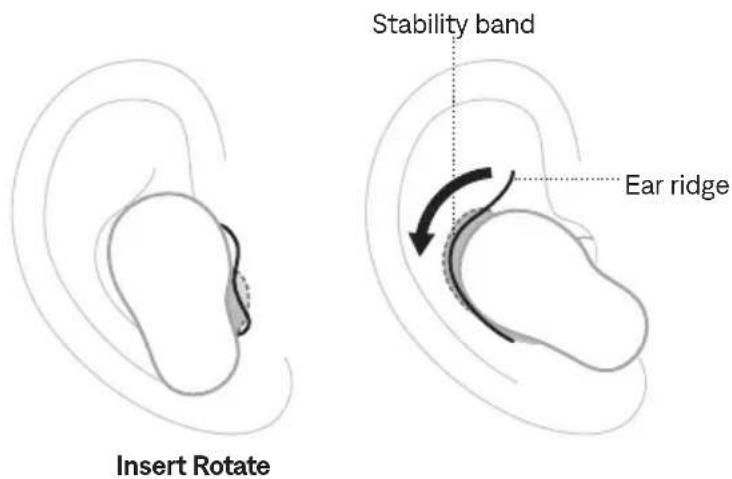
text_image
Stability band Ear ridge Insert Rotate-
Check the fit (see page 16).
-
Repeat steps 1 - 3 to insert the other earbud.
When you insert the earbuds, the audio is personalized to your ears for the best audio performance and noise cancellation.
NOTE: If you're sharing the earbuds, place them in the charging case to clear the audio personalization between each user.
CHECK YOUR FIT
For the best fit, audio performance, and noise cancellation, use a mirror to make sure you're using the correct size eartips and stability bands. You may need to try a different size eartip or stability band for each ear.
TIP: You can also check your fit using the Earbud Seal Test in the Bose app. You can access this option from the Settings menu.
Eartips
FIT WHAT TO CHECK
| Proper fit | 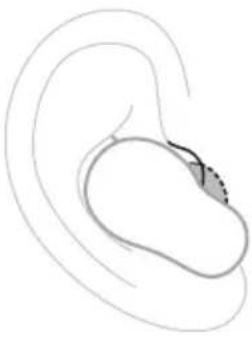 | The eartip gently rests at the opening of your ear canal to create a comfortable seal. Background noise should sound muffled. NOTE: Noise cancellation may impact the ability to hear muffled noise. |
| Too much pressure | 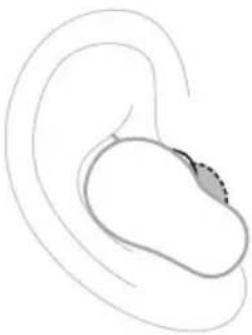 | The eartip feels uncomfortable and squished in your ear canal. |
| Too loose | 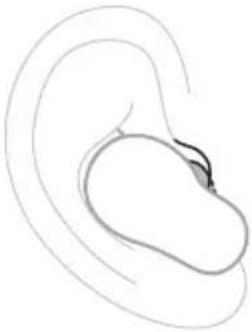 | The eartip rests too deep in your ear canal, feels loose in your ear, or falls out when you move your head. |
Stability bands
FIT WHAT TO CHECK
| Proper fit | 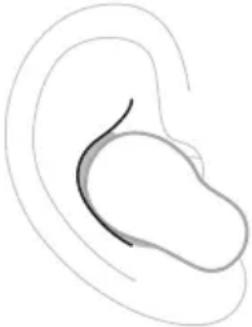 | The band doesn’t stick out or feel squished against your ear ridge. |
| Too big |  | The band is sticking out or feels squished under your ear ridge. |
| Too small The band doe | 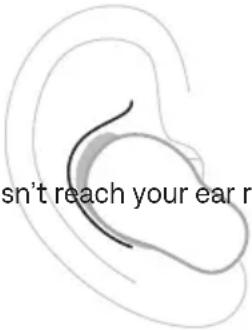 | idge. |
TRY ANOTHER SIZE
Wear the earbuds for an extended period of time. If the earbuds don't feel comfortable or secure, or noise cancellation or sound quality isn't as expected, try another size eartip or stability band.
You may need to try all three eartip or band sizes or use a different size eartip or band for each ear.
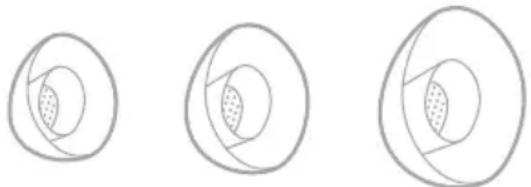
Eartips
Three sizes of eartips are included with the earbuds: small, medium, and large.
natural_image
Three identical diagrams showing concentric circles with shaded inner regions, no text or symbols present.Medium eartips come attached to the earbuds. If they feel too small, try large eartips. If they feel too big, try small eartips.
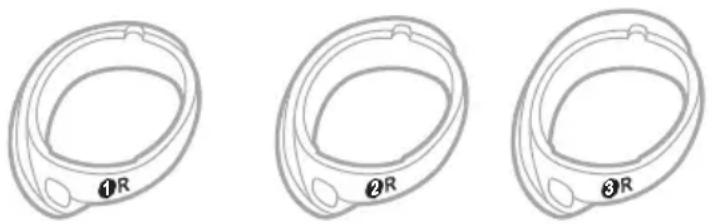
Stability bands
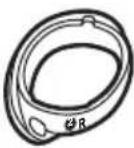
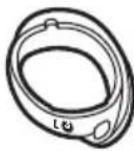
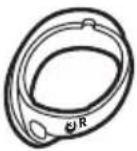
The stability bands are marked with size 1 (small), 2 (medium), or 3 (large) and an R (right) or L (left).
natural_image
Three identical wireframe diagrams of a ring or container with labeled points (1, 2, 3) and 'R' on each side, no text or symbols beyond labels.Size 1 bands come attached to the earbuds. If they feel too small, try size 2 bands.
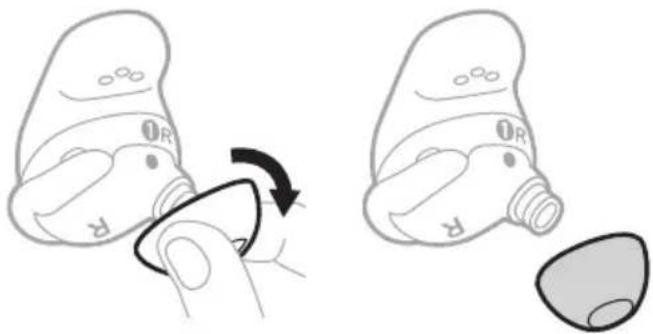
CHANGE THE EARTIPS
- Holding the earbud, gently squeeze the eartip and peel it away from the earbud.
text_image
Diagram illustrating the step-by-step transformation of a device's internal components, showing hand positioning and disassembly.Squeeze and peel Separate
CAUTION: To prevent tearing, do NOT pull on the edge of the eartip.
-
Choose a new eartip size (see page 18).
-
Align the eartip with the earbud nozzle and press the eartip onto the nozzle until you feel it snap securely into place and hear it click.
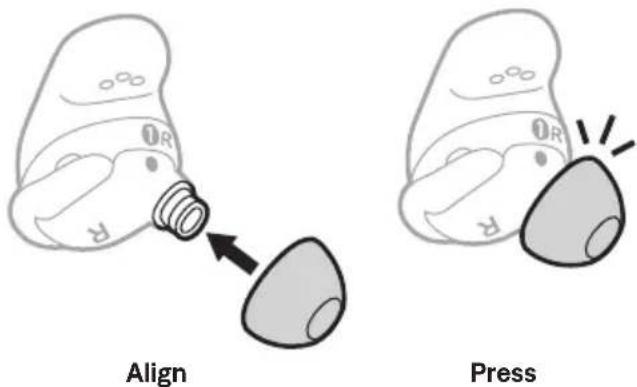
text_image
Align Press- Repeat steps 1 - 3 for the other earbud, as needed.
NOTE: You may need to use a different size eartip for each ear.
-
Insert the earbuds (see page 15).
-
Check the fit (see page 16).
NOTES:
- If you change the eartip, you may need to change the stability band so the band rests comfortably against your ear ridge (see page 20).
• To see how-to videos about changing the eartips, visit: support.Bose.com/qcue2
- If you need additional eartip sizes, contact Bose customer service or visit: ____support.Bose.com/qcue2
CHANGE THE STABILITY BANDS
- Holding the earbud, gently grab the stability band scoop and peel the band toward you, over the eartip, and away from the earbud.
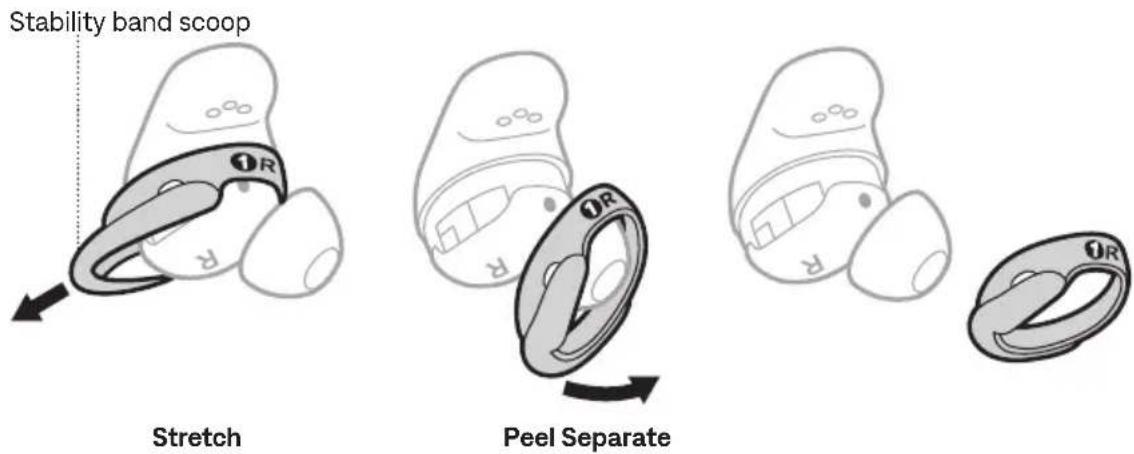
text_image
Stability band scoop Stretch Peel SeparateCAUTION: To prevent tearing, do NOT pull on the thin part of the band.
- Choose a new band size (see page 18). Select the band marked with either an R (right) or L (left), depending on the earbud.
- With the band markings facing you and the band scoop facing away from you, align the dot on the band with the gray dot on the bottom of the earbud.
- Gently stretch the band over the eartip, making sure the dots align and the tab on the band fits in the notch on the top of the earbud.
NOTE: Aligning the band correctly makes sure that the hole on the side of the band is over the acoustic port on the earbud so the port isn't blocked.
- Press down until the band fits securely into place, then check for alignment.
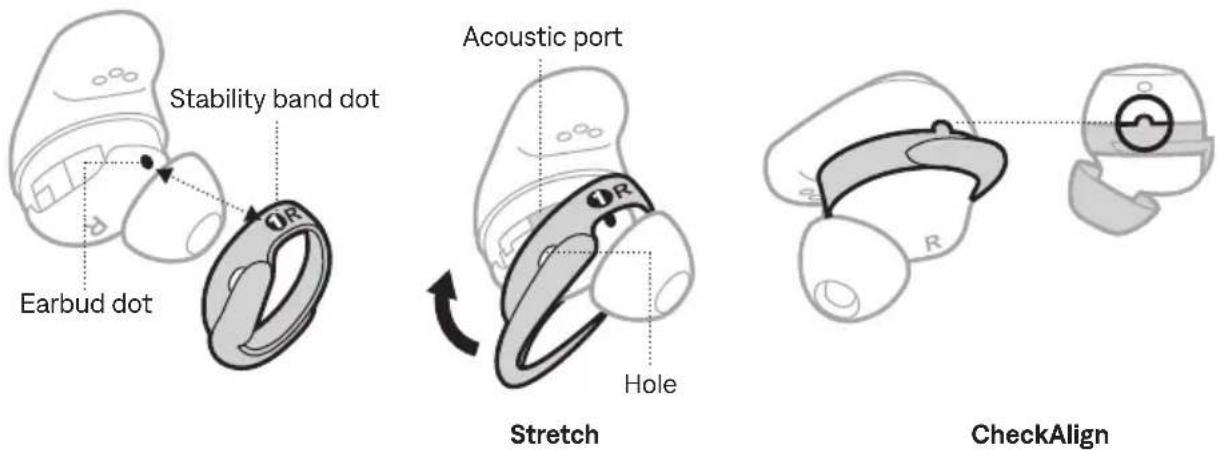
text_image
Stability band dot Earbud dot Acoustic port Hole Stretch CheckAlign- Repeat steps 1 - 5 for the other earbud, as needed.
NOTE: You may need to use a different size band for each ear.
- Insert the earbuds (see page 15).
- Check the fit (see page 16).
NOTES:
• To see how-to videos about changing the bands, visit: support.Bose.com/qcue2
- If you need additional stability band sizes, contact Bose customer service or visit: ____support.Bose.com/qcue2
POWER ON
Open the charging case.
The earbuds power on. The earbuds status light glows according to the charging status (see page 42). The charging case status light glows according to the battery level (see page 43).
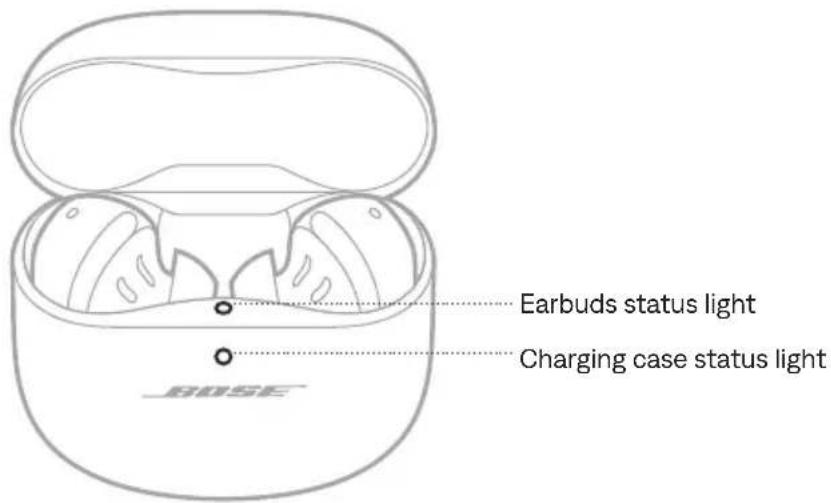
text_image
Earbuds status light Charging case status light BOSENOTE: When you remove the earbuds from the charging case, close the case to help preserve the battery life and keep the case free of debris.
POWER OFF
- Place both earbuds in the charging case.

text_image
L R BOSEThe earbuds disconnect from your device.
- Close the case.
The earbuds power off. The charging case status light glows according to the battery level (see page 43).
text_image
BOSESTANDBY
Standby conserves the earbud battery when an earbud is out of the case and not in use. The earbud switches to Standby when you remove it from your ear and don't move it for 10 minutes.
To wake the earbud, insert the earbud in your ear.
Use touch control by tapping or swiping the touch surface of either earbud. With touch control, you can play/pause audio, change the volume, perform basic call functions, and use a shortcut to change the mode, change Immersive Audio settings, and more (see page 28).
TOUCH SURFACE AREA
The touch surface is located on the outer surface of both earbuds. It controls media playback, volume, phone calls, and your shortcut.
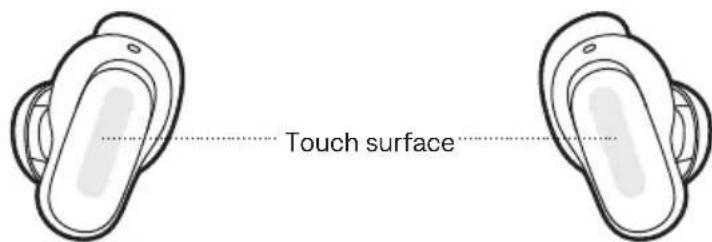
text_image
Touch surfaceMEDIA PLAYBACK AND VOLUME
CONTROL WHAT TO DO
| Play/Pause Tap an earbud. | 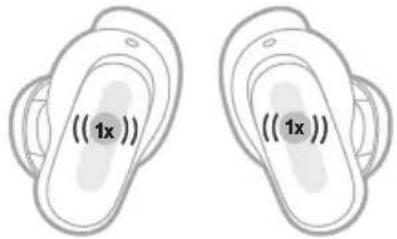 | |
| Increase the volume | Swipe up on an earbud. | 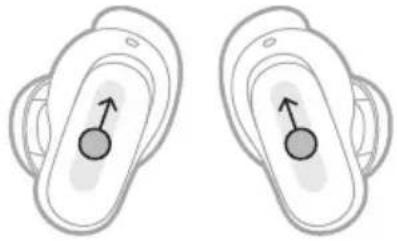 |
| Decrease the volume | Swipe down on an earbud. | 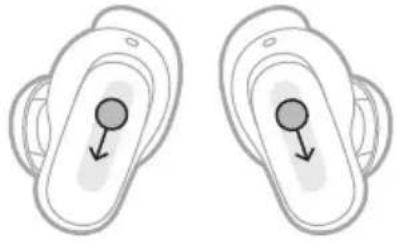 |
CONTROL WHAT TO DO
| Skip to the next track Double-tap an earbud. | 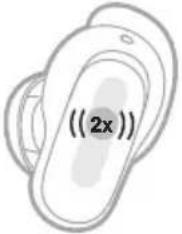 |  |
| Skip to the previous track Triple-tap an earbud. | 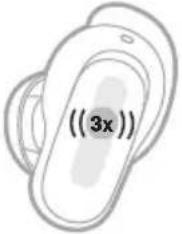 |  |
PHONE CALLS
CONTROL WHAT TO DO
| Answer a call Tap an earbud. | 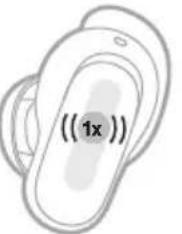 |  | |
| End/Decline a call Double-tap an earbud. | 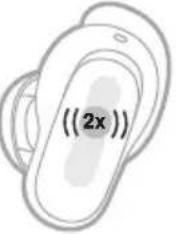 | 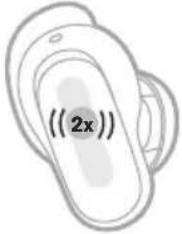 | |
| Answer a second incoming call and put the current call on hold | Tap an earbud. | 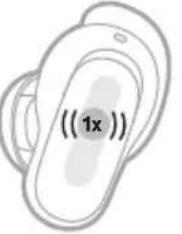 | 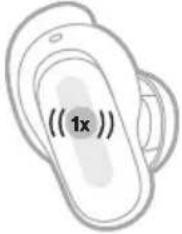 |
CONTROL WHAT TO DO
Decline a second incoming call and stay on current call
Double-tap an earbud.
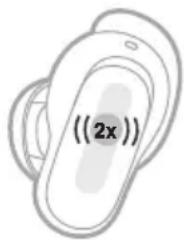
text_image
((2x))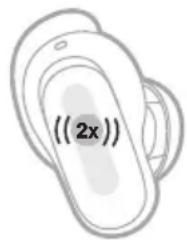
text_image
(2x)Call notifications
A voice prompt announces incoming callers and call status.
To stop call notifications, disable voice prompts using the Bose app. You can access this option from the Settings menu.
MODES
For information about changing the mode, see page 34.
IMMERSIVE AUDIO SETTINGS
For information about changing the Immersive Audio setting, see page 32.
DEVICE VOICE CONTROL
You can set a shortcut to access your device voice control using the earbuds. The microphone on the earbuds acts as an extension of the microphone on your device.
NOTE: To access device voice control using the earbuds, it must be set as a shortcut (see page 28).
CONTROL WHAT TO DO
| Access device voice control | Touch and hold an earbud until you hear a tone. Release, then say your request. | 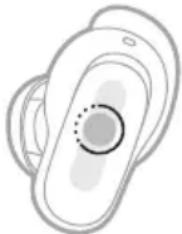 | 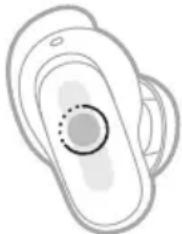 |
| Stop device voice control | Tap an earbud. | 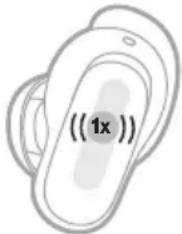 |  |
A shortcut enables you to quickly and easily access one of the following functions:
• Cycle through modes (see page 33)
• Cycle through Immersive Audio settings (see page 31)
- Reconnect to a device (see page 46)
- Use your device voice control (see page 27)
- Access Spotify Tap (see page 35)
NOTE: By default, cycling through modes is enabled on both earbuds.
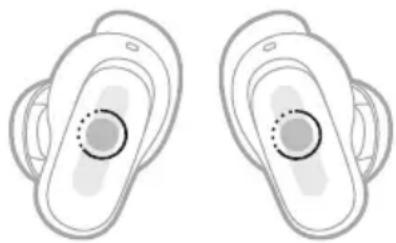
USE YOUR SHORTCUT
Touch and hold an earbud.
natural_image
Two identical illustrations of a stylized ear or ear device with concentric rings and central circular features (no text or symbols)CHANGE OR DISABLE YOUR SHORTCUT
To change or disable a shortcut or to assign a different shortcut to each earbud, use the Bose app. To access this option, tap Shortcut on the product control screen.
NOTE: If you assign a different shortcut to each earbud, you must touch and hold the appropriate earbud. If you remove an earbud, you can only use the shortcut assigned to the earbud in your ear.
In-ear detection uses sensors to identify when you're wearing both earbuds or just a single earbud.
You can automatically play/pause audio, answer phone calls (if enabled), and adjust noise cancellation by inserting or removing an earbud.
NOTE: To manage in-ear detection features, use the Bose app. You can access this option from the Settings menu.
AUTO PLAY/PAUSE
When you remove an earbud, audio pauses on both earbuds.
To resume audio, reinsert the earbud.
NOTE: If you want to use a single earbud, you can tap the earbud in your ear to resume audio.
AUTO ANSWER CALL
You can answer phone calls by inserting an earbud.
NOTE: To enable this feature, use the Bose app. You can access this option from the Settings menu.
AUTO TRANSPARENCY
When you remove an earbud, the mode adjusts to Aware mode on the earbud in your other ear (see page 33).
When you reinsert the earbud, the earbud in your ear adjusts to the previous noise cancelling level.
NOTE: If you want to use a single earbud, you can use your shortcut to cycle through the modes and choose the appropriate mode.
Noise cancellation reduces unwanted noise, providing a clearer, more lifelike audioperformance.
CHANGE THE NOISE CANCELLATION SETTING
You can switch between preset noise cancellation settings by changing the mode. For information about modes, see page 33.
NOISE CANCELLATION WHILE ON A CALL
When you make or receive a call, the earbuds remain at the current noise cancellation setting and self voice is activated. Self voice helps you hear yourself speak more naturally.
To adjust noise cancellation while on a call, change the mode (see page 34).
NOTES:
- Auto transparency is disabled while on a call (see page 29).
- To adjust self voice, use the Bose app. You can access this option from the Settings menu.
USE NOISE CANCELLATION ONLY
You can use noise cancellation only, without audio or interruptions from phone calls.
- Do one of the following:
- If you're wearing the earbuds, disconnect your device (see page 45).
- If the earbuds are in the charging case, turn the Bluetooth feature off on your device. Then, remove the earbuds from the case and insert them in your ears.
- Touch and hold an earbud to change the mode (see page 34).
NOTE: To reconnect your device, select the earbuds from the Bluetooth list on your device.
Immersive Audio takes what you're hearing out of your head and places it in front of you—like you're always in the acoustic sweet spot. It feels like the sound is coming from outside the earbuds, resulting in a more natural listening experience. Immersive Audio works on any streaming content from any source, taking it to new heights with better sound clarity and richer sound quality.
NOTE: When you make or receive a phone call, Immersive Audio is temporarily set to Off (see page 32).
IMMERSIVE AUDIO SETTINGS
SETTING DESCRIPTION WHEN TO USE
| Motion | Audio sounds like it's coming from two stereo speakers in front of you that follow the movements of your head.NOTE: This setting is used by default in Immersionmode. | Use for the most consistentexperience. Best for when you're doingactivities that require you to frequently turn your head or look down. |
| Still | Audio sounds like it's coming from two stereo speakers in front of you that stay where they are when you move your head.NOTES:A few seconds after you stop moving your head, the speakers recenter on your position.To access this setting, use the Bose app. Tap Immersive Audio on the product control screen. | Use for the most realistic and powerful experience. Best for when you're stationary. |
| Off | Audio sounds like it's coming from your earbuds. | Use when you want a classic listening experienceorwantto conserve battery life. |
CHANGE THE IMMERSIVE AUDIO SETTING
You can change the Immersive Audio setting by changing the mode or using a shortcut to cycle through Immersive Audio settings.
TIP: You can also change the Immersive Audio setting using the Bose app. You can access this option from the product control screen.
Change the mode
For information about changing the mode, see page 34.
NOTES:
- Changing the mode changes both the Immersive Audio and noise cancellationsettings.
- You can also create a custom mode with your preferred Immersive Audio and noise cancellation settings (see page 33).
Use your shortcut
You can change your shortcut to cycle through Immersive Audio settings without affecting your current mode's noise cancellation setting. This temporarily customizes the current mode until you power the earbuds off or change the mode.
NOTE: To change the Immersive Audio setting using the earbuds, it must be set as a shortcut (see page 28).
- Touch and hold an earbud.
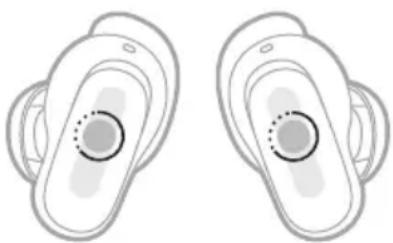
natural_image
Two identical illustrations of earbuds with central circular features, no text or symbols present.A voice prompt announces each Immersive Audio setting in a loop.
- When you hear the name of your preferred setting, release the earbud.
IMMERSIVE AUDIO WHILE ON A CALL
When you make or receive a phone call, Immersive Audio is temporarily set to Off. When you end the call, the earbuds return to the previous Immersive Audio setting.
Listening modes are preset audio settings that you can switch between based on your listening preferences and environment. They consist of noise cancellation and Immersive Audio settings.
You can choose between three pre-configured modes — Quiet, Aware, and Immersion — or create up to seven of your own custom modes.
MODES
MODE DESCRIPTION
| Quiet | Full noise cancellation with Bose-optimized stereo audio. Allows you to block out distractions using the highest level of noise cancellation. |
| Aware | Full transparency with Bose-optimized stereo audio. Allows you to hear your surroundings while enjoying your audio in stereo. |
| Immersion | Full noise cancellation with Immersive Audio set to Motion. Allows you to block out distractions and immerse yourself in lifelike audio. |
| Custom | Custom noise cancellation and Immersive Audio settings based on your listening preferences and environment.NOTE: You can create up to seven custom modes using the Bose app. To access this option, tap Modes on the product control screen. |
NOTES:
- By default, the earbuds power on in the last mode used, including any temporary changes to audio settings.
- For information about noise cancellation and Immersive Audio settings, see page 30 and page 31.
Aware mode with ActiveSense
The dynamic noise cancellation of Aware mode with ActiveSense technology allows you to hear your surroundings while reducing unwanted noise.
Aware mode with ActiveSense allows the earbuds to automatically increase noise cancellation when sudden or loud noises occur near you, so you can maintain awareness without intermittent noise interrupting your audio. Once the noise stops, noise cancellation automatically returns to the previous setting.
To enable ActiveSense, use the Bose app. To access this option, on the product control screen, tap Modes > Aware > ••••.
CHANGE THE MODE
NOTE: To change the mode using the earbuds, it must be set as a shortcut (see page 28).
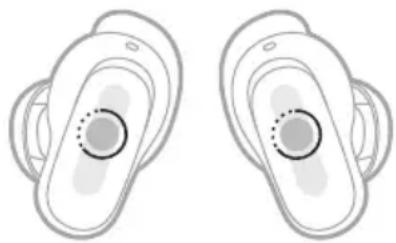
- To cycle through modes, touch and hold an earbud.
natural_image
Two identical illustrations of a stylized ear with circular features and concentric rings, no text or symbols present.A voice prompt announces each mode in a loop.
- When you hear the name of your preferred mode, release the earbud.
TIP: You can also change the mode using the Bose app. To access this option, tap Modes on the product control screen.
Add or remove modes from the earbuds
To access modes on the earbuds, they must be set as favorites in the Bose app. By default, Quiet, Aware, and Immersion modes are set as favorites.
To add or remove modes from the earbuds, tap Modes on the product control screen and customize which modes are set as favorites.
Spotify Tap is music to your ears, quite literally. Get the tunes playing with a simple gesture.
NOTE: To use Spotify Tap, it must be set as your shortcut in the Bose app and the Spotify app must be up to date. If using an Android device, make sure that the Nearby Devices permission is enabled for the Spotify app.
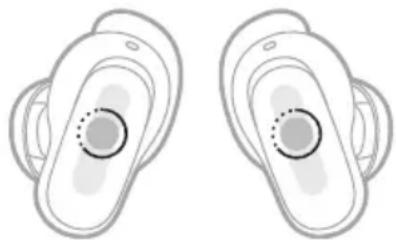
- Touch and hold an earbud to play a recommendation based on your listening taste.
natural_image
Two identical illustrations of a stylized ear or ear device with circular features and central hub (no text or symbols)- Touch and hold an earbud again for the next recommendation made just for you.
CHARGE THE EARBUDS
- Align the charging contacts on the left earbud with the charging pins on the left side of the charging case.
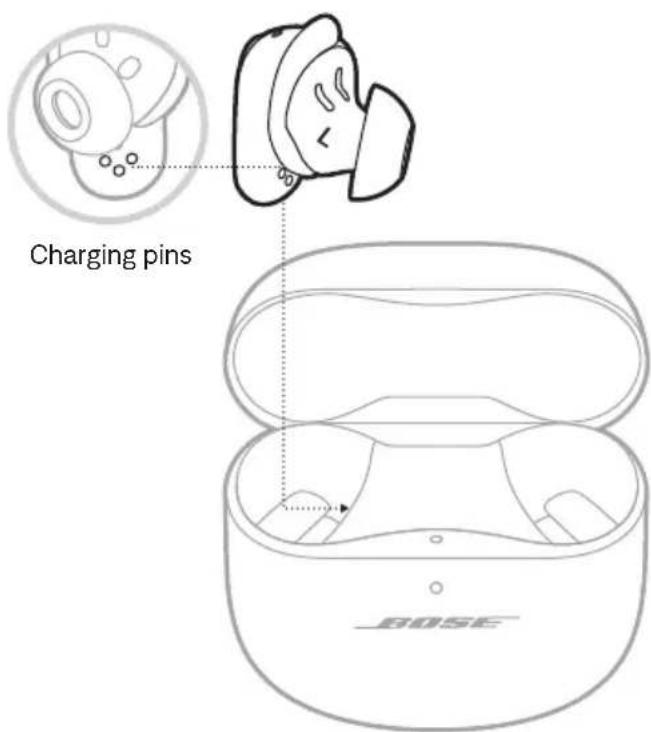
text_image
Charging pins BOSENOTE: Before charging, make sure the earbuds are at room temperature, between 46^ F ( 8^ C) and 102^ F ( 39^ C).
- Place the earbud in the case until it magnetically snaps into place.
The earbuds status light glows according to the charging status (see page 42).
natural_image
Line drawing of an open BOSB earbuds case with exposed internal components (no text or symbols)- Repeat steps 1 – 2 for the right earbud.
NOTE: The earbuds charge if the case is open or closed.
CHARGE THE CHARGING CASE
CAUTION: Use this product only with an agency-approved LPS power supply that meets local regulatory requirements (e.g., UL, CSA, VDE, CCC).
- Connect the small end of the USB cable to the USB-C® port on the bottom of the charging case.
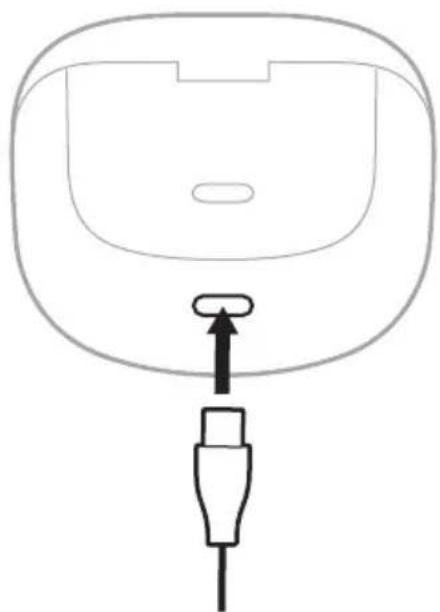
natural_image
Line drawing of a device component with a plug inserted into the base (no text or symbols)- Connect the other end to a USB-A wall charger (not provided) or computer.
The charging case status light slowly pulses amber (see page 43).
NOTE: Before charging, be sure the case is at room temperature, between 46^ F ( 8^ C) and 102^ F ( 39^ C).
Charge wirelessly
You can use a compatible third-party wireless charger (not provided) to charge the case.
- For the fastest charging time, align the button on the back of the charging case with the center of your wireless charger.
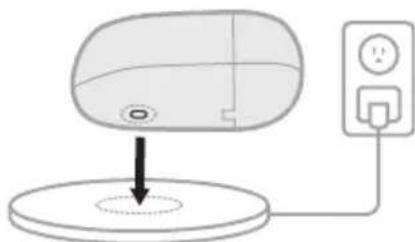
natural_image
Simple line drawing of a device with a circular base and a power outlet, no text or symbols present.- Place the case on the charger.
The charging case status light glows according to the case charging status (see page 43).
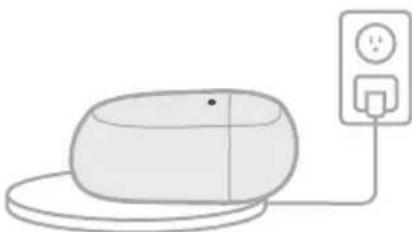
natural_image
Simple line drawing of a computer mouse connected to a power outlet (no text or symbols)NOTE: For more information, refer to your wireless charger owner's guide.
CHECK THE EARBUD BATTERY LEVEL
While using the earbuds
- When you remove the earbuds from the charging case and insert them into your ears, a voice prompt announces the earbud battery level.
- Use the Bose app. The earbud battery level is displayed on the product control screen.
NOTE: If one earbud has a lower battery level than the other, the voice prompt announces the lower battery level. If the battery is low, you hear "Battery low."
While charging the earbuds
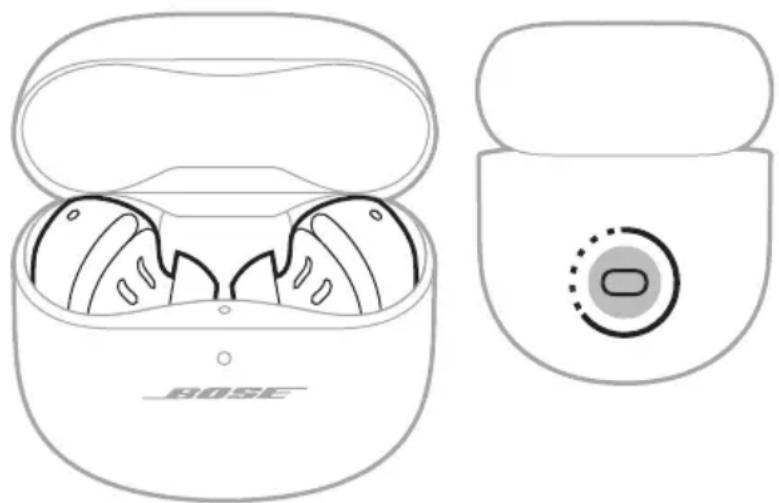
When you place the earbuds into the charging case, the earbuds status light glows according to the charging status (see page 42).

natural_image
Line drawing of a Bose-branded wireless earbuds with open case and black buttons (no text or symbols on device)NOTE: If one earbud has a lower battery level than the other, the earbuds status light reflects the lower battery level.
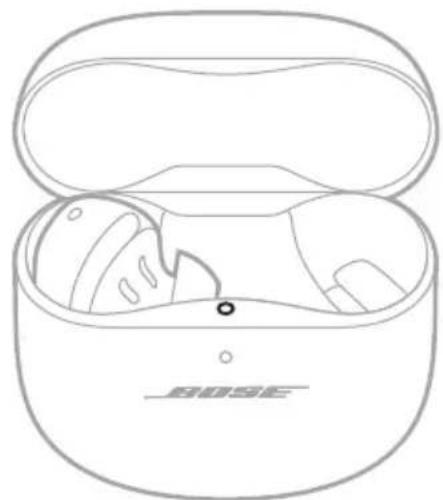
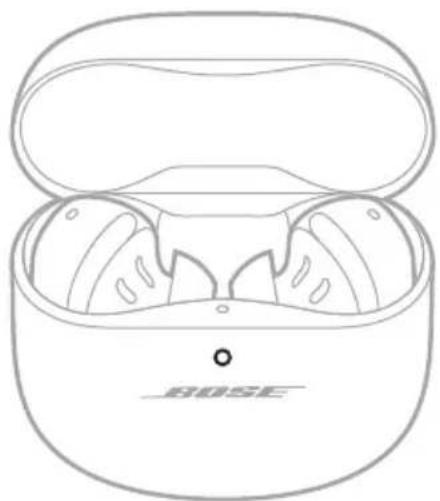
CHECK THE CHARGING CASE BATTERY LEVEL
Open the charging case.
The charging case status light glows according to the battery level (see page 43).
natural_image
Line drawing of a BOSE-branded VR headset with open lid and front panel (no text or symbols on the device itself)NOTE: For more detailed battery level information, use the Bose app. The case battery level is displayed on the product control screen.
CHARGING TIME
COMPONENT CHARGING TIME
| Earbuds Up to 2 hours | 1 |
| Charging case Up to 3 hours |
NOTES:
- When the earbud battery level is low, a 20-minute charge with the case closed powers the earbuds for up to 2 hours ^2 .
- A full charge powers the earbuds for up to 6 hours with Immersive Audio set to Off (up to 4 hours with Immersive Audio set to On) ^3 .
- When the case is fully charged, you can fully charge the earbuds up to 3 times. ^4
- When the earbuds are inside of the case, the case charging time varies.
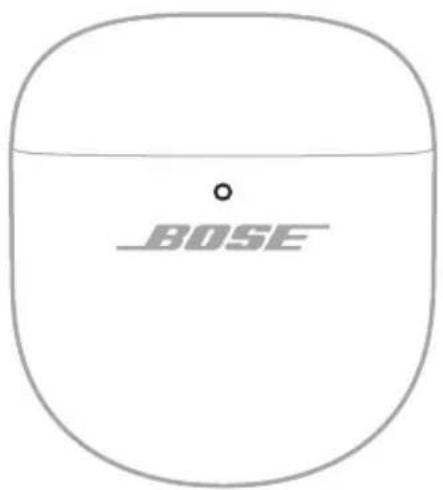
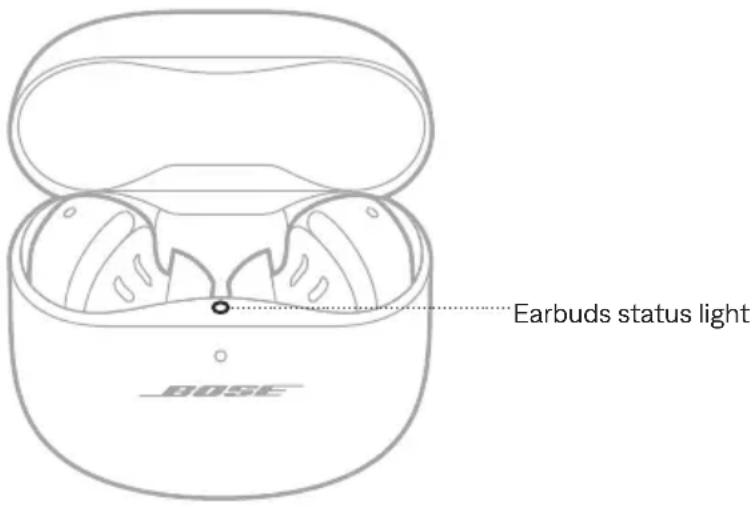
EARBUDS STATUS LIGHT
The earbuds status light is located on the inside surface of the charging case.
text_image
Earbuds status light BOSEBluetooth status
Shows the Bluetooth connection status to devices.
LIGHT ACTIVITY SYSTEM STATE
| Slowly pulses blue Ready to connect | |
| Quickly blinks blue Connecting | |
| Solid blue (5 seconds) Connected | |
| Blinks white 2 times Device list cleared |
Battery, update, and error status
Shows the earbud battery, update, and error status.
LIGHT ACTIVITY SYSTEM STATE
| Glows solid white (10 minutes) Fully charged | |
| Slowly pulses amber (10 minutes) Charging | |
| Blinks white 2 times, slowly pulses blue, and turns off | Reboot complete |
LIGHT ACTIVITY SYSTEM STATE
Blinks white 3 times (repeated) Updating software
Blinks amber (3 seconds), then turns off Restoring factory settings
Blinks amber and white Error – contact Bose customer service
CHARGING CASE STATUS LIGHT
The charging case status light is located on the front of the charging case.
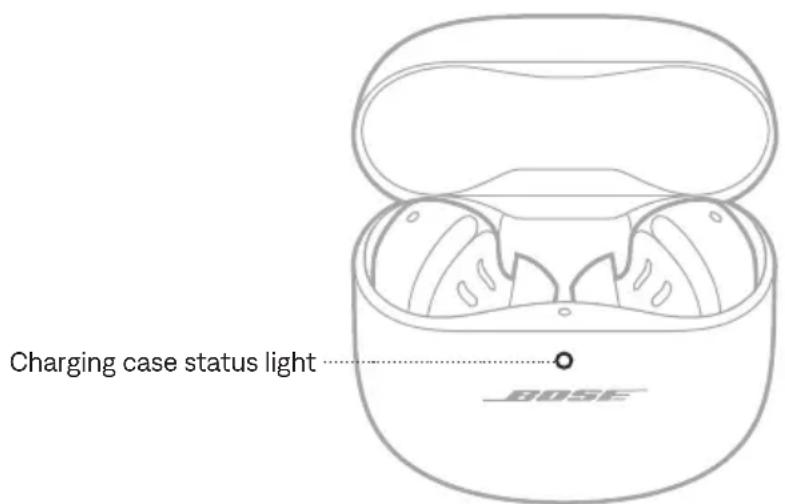
text_image
Charging case status light BOSEBattery, update, and error status
Shows the charging case battery, update, and error status.
LIGHT ACTIVITY SYSTEM STATE
Solid white Fully charged (100%) and connected to power
Solid white (5 seconds) Charged (34% - 99%)
Solid amber (5 seconds) Low charge (10% - 33%)
Blinks amber 2 times Need to charge (less than 10%)
Slowly pulses amber Charging and connected to power
Blinks white 3 times (repeated) Updating software
Blinks amber and white Error – contact Bose customer service
You can connect the earbuds to your device using the Bose app, the Bluetooth menu on your device, or Fast Pair (Android devices only).
You can store up to six devices in the earbud device list, and the earbuds can be actively connected to up to two devices at a time (multi-point connection). You can play audio from only one device at a time.
NOTES:
- For the best experience, use the Bose app to set up and connect your device (see page 13).
- For information about connecting using Fast Pair, see page 48.
CONNECT USING THE BOSE APP
To connect the earbuds and manage Bluetooth settings using the Bose app, see page 13.
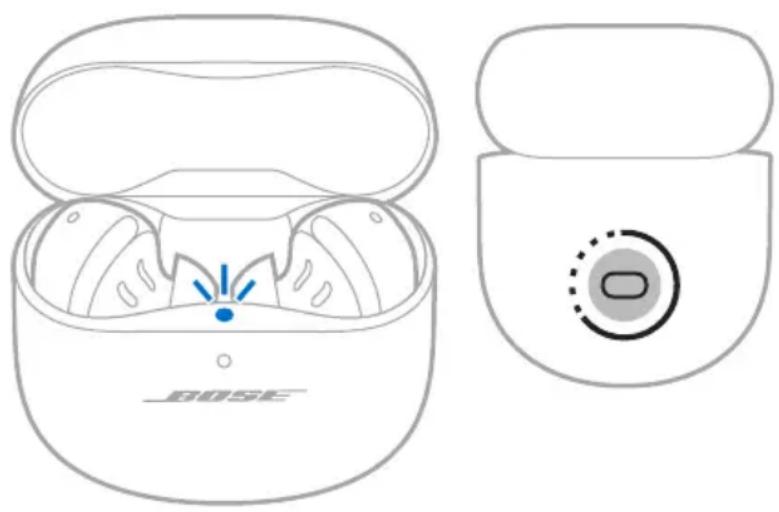
CONNECT USING THE BLUETOOTH MENU ON YOUR DEVICE
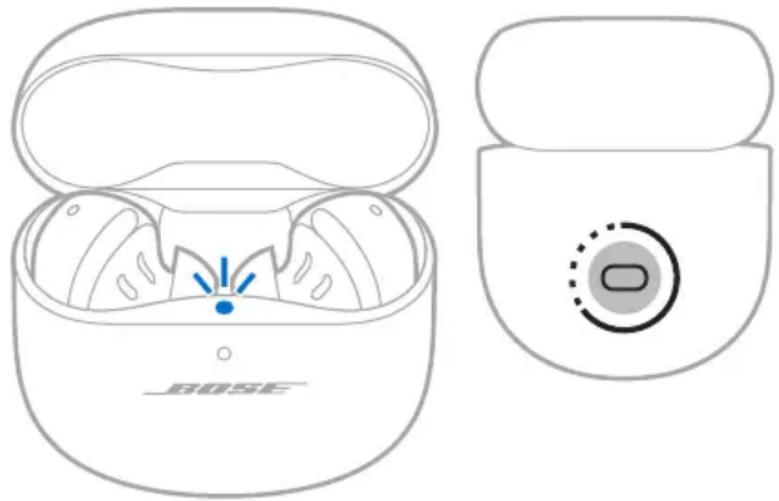
- With the earbuds in the charging case and the case open, press and hold the button on the back of the case until the earbuds status light slowly pulses blue.
NOTE: Make sure both earbuds are in the case and the case is open.
natural_image
Line drawing of a Bose brand wireless earbuds showing front and side views (no text or symbols)- On your device, access Bluetooth settings.
- Select the earbuds from the list of available products.
NOTE: Look for the name you entered for your earbuds in the Bose app. If you didn't name your earbuds, the default name appears.
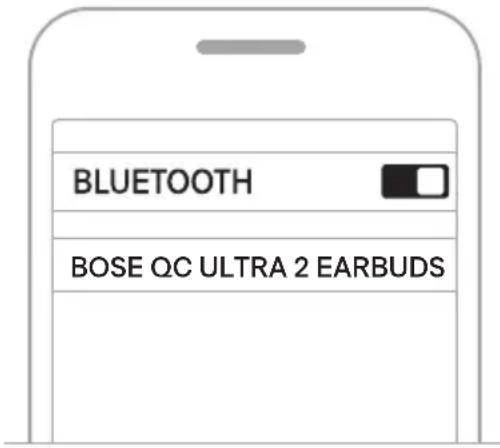
text_image
BLUETOOTH BOSE QC ULTRA 2 EARBUDSThe earbuds appear in the list of connected products. The earbuds status light glows solid blue (see page 42).
DISCONNECT A DEVICE
Place the earbuds in the charging case.
TIP: You can also use the Bose app or your Bluetooth settings to disconnect your device. Disabling the Bluetooth feature on your device disconnects the earbuds and all other devices.
RECONNECT TO A DEVICE
Reconnect to the most recently-connected device
When the earbuds are removed from the case, they connect to the two most recently-connected devices.
NOTES:
- The devices must be within range (30 ft or 9 m) and powered on.
- Make sure the Bluetooth feature is enabled on your device.
- If the multi-point connection feature is disabled, the earbuds try to reconnect with the most recently-connected device.
Reconnect to a different device
You can set a shortcut to reconnect to a different device in the earbud device list.
NOTE: To reconnect to a different device using the earbuds, you must set a shortcut to Switch Devices (see page 28).
- Touch and hold the earbud assigned to this shortcut.

natural_image
Two identical illustrations of ear ear devices with central circular features, no text or symbols present.A voice prompt announces the name of the first connected device, then the second connected device (if any), followed by the names of the other devices in the earbud device list.
- When you hear the correct device name, release the earbud.
You hear a tone that indicates when the device is connected.
TIP: You can also reconnect to a different device using the Bose app (see page 13) or the device Bluetooth settings.
NOTE: If two devices are already connected to the earbuds, the newly-connected device replaces the older of the two connections.
CONNECT ANOTHER DEVICE
By default, the earbuds can be actively connected to up to two devices at a time (multi-point connection).
To connect another device, connect using the Bose app (see page 13), the Bluetooth menu on your device (see page 44), or Fast Pair (Android devices only) (see page 48).
NOTES:
- You can only play audio from one device at a time.
- To manage or disable the multi-point connection feature, use the Bose app. You can access this option from the Settings menu.
- Disabling the multi-point connection feature disconnects the second connected device.
SWITCH BETWEEN TWO CONNECTED DEVICES
-
Pause audio on your first device.
-
Play audio on your second device.
The earbuds switch to the second device's audio stream.
NOTES:
- Your earbuds receive phone calls from both devices, regardless of which device is playing audio.
- Switching between devices is disabled during phone calls.
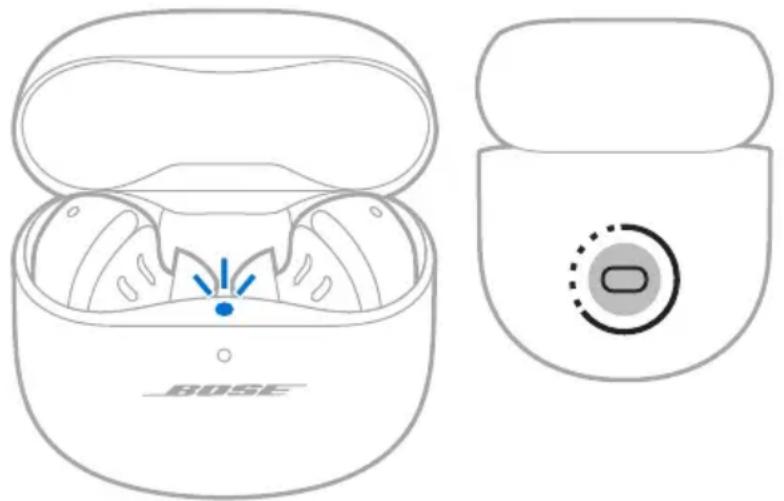
CLEAR THE EARBUDS DEVICE LIST
- With the earbuds in the charging case and the case open, press and hold the button on the back of the case for 15 seconds until the earbuds status light blinks white 2 times and then slowly pulses blue.
NOTE: Make sure both earbuds are in the case and the case is open.

natural_image
Line drawing of a Bose-branded wireless earbuds showing the inner casing and external casing with a circular button (no text or symbols on the device itself)- Delete the earbuds from the Bluetooth list on your devices.
All devices are cleared, and the earbuds are ready to connect (see page 13).
ANDROID DEVICES ONLY
If you have an Android device, you can access the following additional connection features.
Connect using Fast Pair
In one tap, the earbuds enable quick, effortless Bluetooth pairing with your Android devices.
NOTES:
- To use Fast Pair, you need an Android device running Android 6.0 or higher.
-
Your Android device must have the Bluetooth and Location features enabled.
-
With the earbuds in the charging case and the case open, press and hold the button on the back of the case until the earbuds status light slowly pulses blue.
NOTE: Make sure both earbuds are in the case and the case is open.
natural_image
Line drawing of a Bose-branded wireless earbuds with open case and closed lid (no text or symbols)- Place the case next to your Android device.
A notification appears on your device prompting you to pair the earbuds.
NOTE: If you don't see a notification, check that notifications are enabled for the Google Play Services app on your device.
- Tap the notification.
Once the earbuds are connected, a notification appears confirming that the connection is complete.
NOTE: You can also tap the button on the notification to download the Bose app and finish setting up the earbuds.
Snapdragon Sound technology
Bose QuietComfort Ultra Earbuds ( 2^nd Gen) feature Snapdragon Sound technology. Snapdragon Sound optimizes Qualcomm ^® audio technologies across connected devices to ensure the best sound quality, connection stability, and latency for your streaming audio.
To experience Snapdragon Sound, you need a Snapdragon Sound-certified device, such as a compatible Android device. Once you connect the earbuds, your device will automatically stream audio using the aptX Adaptive Bluetooth codec.
NOTE: To see which Snapdragon Sound features the earbuds support and check if your device is compatible, visit: support.Bose.com/qcue2
CONNECT TO A BOSE SMART SPEAKER OR SOUNDBAR
Using SimpleSync technology, you can connect the earbuds to a Bose Smart Speaker or Bose Smart Soundbar for a personal listening experience.
Benefits
- Use independent volume controls on each product to lower or mute your Bose Smart Soundbar while keeping the earbuds as loud as you like.
- Hear your music clearly from the next room by connecting the earbuds to your Bose Smart Speaker.
NOTE: SimpleSync technology has a Bluetooth range of up to 30 ft (9 m). Walls and construction materials can affect reception.
Compatible products
You can connect the earbuds to any Bose Smart Speaker or Bose Smart Soundbar.
Popular compatible products include:
- Bose Smart Ultra Soundbar/Bose Ultra Soundbar
- Bose Smart Soundbar
- Bose Smart Soundbar 900
- Bose Smart Soundbar 700/Bose Soundbar 700
- Bose Smart Soundbar 600
- Bose Soundbar 500
- Bose Smart Speaker 500/Bose Home Speaker 500
- Bose Home Speaker 300
- Bose Portable Smart Speaker/Bose Portable Home Speaker
New products are added periodically. For a complete list and more information, visit: ____support.Bose.com/Groups
Connect using the Bose app
- With the earbuds in the charging case and the case open, press and hold the button on the back of the case until the earbuds status light slowly pulses blue.
NOTE: Make sure both earbuds are in the case and the case is open.

natural_image
Line drawing of a Bose brand wireless earbuds showing front and side views (no text or symbols)- Use the Bose app to connect the earbuds to a compatible Bose product. For more information, visit: support.Bose.com/Groups
NOTES:
- It could take up to 30 seconds to connect.
• Make sure that the earbuds are within 30 ft (9 m) of your soundbar or speaker. - You can connect the earbuds to only one product at a time.
Connect using the product controls
- With the earbuds in the charging case and the case open, press and hold the button on the back of the case until the earbuds status light slowly pulses blue.
NOTE: Make sure both earbuds are in the case and the case is open.
natural_image
Line drawing of a Bose brand wireless earbuds showing front and side views (no text or symbols)- On your soundbar remote or the top of your speaker, press and hold the Bluetooth button until the light bar or light ring pulses blue.
The earbuds connect to your soundbar or speaker, and you hear the same audio through both devices.
NOTES:
- It could take up to 30 seconds to connect.
- Make sure that the earbuds are within 30 ft (9 m) of your soundbar or speaker.
- You can connect the earbuds to only one product at a time.
RECONNECT TO A BOSE SMART SPEAKER OR SOUNDBAR
Use the Bose app to reconnect the earbuds to a previously-connected compatible Bose product. For more information, visit: support.Bose.com/Groups
NOTES:
- Your soundbar or speaker must be within range (30 ft or 9 m) and powered on.
- If the earbuds don't reconnect, see "Earbuds don't reconnect to a previously-connected Bose Smart Soundbar or Speaker" on page 66.
STORE THE EARBUDS
When you're not using the earbuds, store them in the charging case. Close the charging case to help preserve battery life and keep the charging case free of debris.
CLEAN THE EARBUDS AND CHARGING CASE
COMPONENT PROCEDURE
| Eartips and stability bands | Remove the eartips and bands from the earbuds and gently wash them by hand with a mild detergent and water.CAUTION: Never insert any cleaning tool into the eartips.NOTE: Make sure you thoroughly rinse and dry the eartips and bands before re-attaching them to the earbuds. |
| Earbud nozzles | Gently wipe the opening of the nozzle only with a dry, soft cotton swab or equivalent.CAUTION: Never insert any cleaning tool into the nozzle. |
| Charging contacts (on earbuds) | To prevent corrosion, wipe with a dry, soft cotton swab or equivalent. |
| Charging case Wipe only with a dry, soft cotton swab or equivalent. | |
REPLACEMENT PARTS AND ACCESSORIES
Replacement parts and accessories can be ordered through Bose customer service.
Visit: ____ support.Bose.com/qcue2
LIMITED WARRANTY
The earbuds are covered by a limited warranty. Visit our website at ____ worldwide.Bose.com/Warranty for details of the limited warrant
To register your product, visit worldwide.Bose.com/ProductRegistration for instructions. Failure to register will not affect your limited warranty rights.
UPDATE THE EARBUDS
The earbuds begin updating automatically when connected to the Bose app and an update is available. Follow the app instructions.
UPDATE THE CHARGING CASE
Update the charging case using the Bose updater website. On your computer, visit: btu.Bose.com and follow the on-screen instructions.
VIEW THE EARBUD DATE CODE
Remove the stability band from the earbud (see page 20).
The date code is located on the earbud in the wide area near the acoustic port.
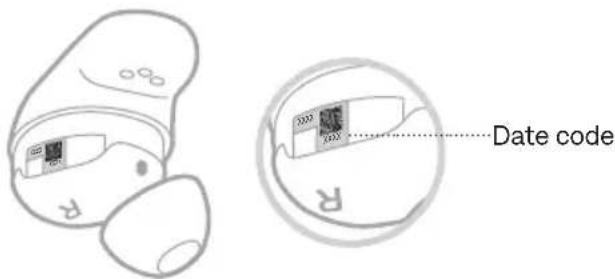
text_image
Date codeVIEW THE CHARGING CASE SERIAL NUMBER
Remove the earbuds from the charging case.
The charging case serial number is located below the earbuds status light inside the earbud well.
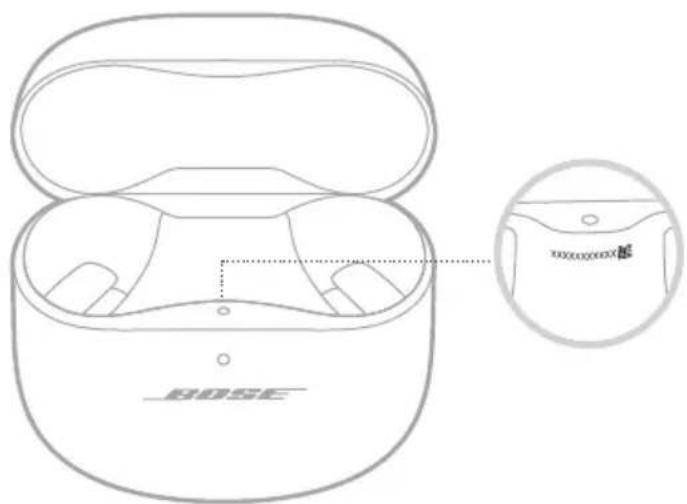
text_image
BOSE X20000000000000000000000000000000000000000000000000000000000000000000000000000000000000000000000000000TRY THESE SOLUTIONS FIRST
If you experience problems with the earbuds, try these solutions first:
- Charge the earbuds and the charging case (see page 36).
• Power on the earbuds (see page 22). - Check the earbuds status light (see page 42) and charging case status light (see page 43).
- Make sure your device supports Bluetooth connections (see page 44).
- Download the Bose app and run available software updates (see page 13).
- Move your device closer to the earbuds (30 ft or 9 m) and away from any interference or obstructions.
- Increase the volume on the earbuds, your device, and the music app.
- Connect another device (see page 13).
OTHER SOLUTIONS
If you could not resolve your issue, see the table below to identify symptoms and solutions to common problems. You can also access troubleshooting articles, videos, and other resources at: support.Bose.com/qcue2
If you're unable to resolve your issue, contact Bose customer service.
Visit: ____ worldwide.Bose.com/contact
SYMPTOM SOLUTION
| Earbuds don’t power on | Make sure the earbuds aren’t in Standby state. To wake the earbuds, insert the earbuds in your ears.Place both earbuds in the charging case until they magnetically snap into place. Close and re-open the case. The earbuds status light displays charging status (see page 42).If the earbuds have been exposed to high or low temperatures, let the earbuds return to room temperature.See “Earbuds don’t charge” on page 65. |
SYMPTOM SOLUTION
| Earbuds don't connect with device | Connect using the Bluetooth menu on your device (see page 44).Disable the Bluetooth feature on your device and then re-enable.Clear the earbud device list (see page 47). Delete the earbuds from the Bluetooth list on your device, including any duplicate listings labeled LE (Low Energy). Connect again (see page 13).Place both earbuds in the charging case until they magnetically snap into place. Close and re-open the case. The earbuds status light displays charging status (see page 42). Connect again (see page 13).Make sure both earbuds are in the charging case securely (see page 36).Visit: support.Bose.com/qcue2 to see how-to videos.Reset the earbuds and charging case (see page 67). |
| Earbuds don't reconnect with macOS | Try reconnecting to the earbuds using the Bluetooth menu on your computer.Use the Bose app to select your earbuds. On the product control screen, tap Source, then use the Paired Devices list to reconnect your earbuds to your computer. |
| Earbuds don't respond during app setup | Uninstall the Bose app on your device. Reinstall the app (see page 13).Make sure you're using the Bose app for setup (see page 13).Make sure you have given the Bose app access to Bluetooth connections in your device Settings menu.Make sure the Bluetooth feature is on in your device Settings menu. |
SYMPTOM SOLUTION
| Bose app can't find earbuds | Uninstall the Bose app on your device. Reinstall the app (see page 13).Make sure you have given the Bose app access to Bluetooth connections in your device Settings menu.Place both earbuds in the charging case until they magnetically snap into place. Close and re-open the case.The earbuds status light displays charging status (see page 42). Remove the earbuds.With the earbuds in the charging case and the case open, press and hold the button on the back of the case until the earbuds status light slowly pulses blue.If the earbuds were previously connected to a PC currently running Microsoft Teams, quit the Microsoft Teams app. If this does not resolve the issue, turn off Bluetooth on that PC or leave its Bluetooth range (typically around 30 feet).See "Earbuds don't connect with device" on page 56. |
| Bose app doesn't work on device | Make sure your device is compatible with the Bose app and meets minimum system requirements. For more information, refer to the app store on your device.Uninstall the Bose app on your device. Reinstall the app (see page 13). |
| Eartips aren't comfortable at ear canal | Make sure the eartip isn't resting too deep in your ear canal (see page 16).Try a larger eartip. If that doesn't help, try a smaller eartip (see page 19).Try a smaller stability band (see page 20).Check the earbud fit using a mirror (see page 16).Check the earbud fit using the Earbud Seal Test in the Bose app. You can access this option from the Settings menu.Contact Bose customer service or visit ____support.Bose.com/qcue2 for additional size ea stability bands or to see how-to videos. |
SYMPTOM SOLUTION
| Stability band isn't comfortable at ear ridge | Try a smaller stability band (see page 20). If you're already using the smallest stability band, try a smaller eartip (see page 19).Check the earbud fit using a mirror (see page 16).Check the earbud fit using the Earbud Seal Test in the Bose app. You can access this option from the Settings menu.Contact Bose customer service or visit ____support.Bose.com/qcue2 for additional size ea stability bands or to see how-to videos. |
| Earbuds aren't secure | Make sure the eartip is resting gently at the opening of your ear canal (see page 15).Try a larger stability band (see page 20).Try a larger eartip (see page 19).Contact Bose customer service or visit ____support.Bose.com/qcue2 for additional size ea stability bands or to see how-to videos. |
| Eartips are falling off | Make sure the eartips are securely attached to the earbuds (see page 19). |
| Stability bands are falling off | Make sure the bands are securely attached to the earbuds (see page 20).Make sure the bands are positioned on the earbuds correctly (see page 20). |
SYMPTOM SOLUTION
| Intermittent Bluetooth connection | Clear the earbud device list (see page 47). Delete the earbuds from theBluetoothlist on your device, including any duplicate listings labeled LE (Low Energy). Connect again (see page 13).Move the device closer to the earbuds.Reset the earbuds and charging case (see page 67). |
| No sound | Make sure you're using the correct eartip and band sizes for each ear (see page 18).Check the earbud fit using a mirror (see page 16).Check the earbud fit using the Earbud Seal Test in the Bose app. You can access this option from the Settings menu.Visit:support.Bose.com/qcue2to see how-to videos.Make sure the volume is turned up (see page 24).Make sure that both eartips fit securely in your ear, and they aren't rotated too far back (see page 15).Make sure your head is upright when inserting the earbuds.Press play on your device to make sure audio is playing.Play audio from a different application or music service.Play audio from content stored directly on your device.If two devices are connected, pause your other device first.Clear any debris or wax buildup from the eartips and earbud nozzles (see page 53).Restart your device.Disable in-ear detection features using the Bose app (see page 29). |
SYMPTOM SOLUTION
| No sound from one earbud | Make sure you're using the correct eartip and band sizes for each ear (see page 18).Check the earbud fit using a mirror (see page 16).Check the earbud fit using the Earbud Seal Test in the Bose app. You can access this option from the Settings menu.Visit:support.Bose.com/qcue2to see how-to videos.Make sure the software in the Bose app is up to date (see page 54).Make sure that both eartips fit securely in your ear, and they aren't rotated too far back (see page 15).Make sure your head is upright when inserting the earbuds.Clear any debris or wax buildup from the eartips and earbud nozzles (see page 53).If two devices are connected, disconnect the second device.Place both earbuds in the charging case until they magnetically snap into place. Close and re-open the case.The earbuds status light displays charging status (see page 42). Remove the earbuds. |
| Audio and video are out of sync | Close and re-open the application or music service.Play audio from a different application or music service.Place both earbuds in the charging case until they magnetically snap into place. Close and re-open the case.The earbuds status light displays charging status (see page 42). Remove the earbuds. |
SYMPTOM SOLUTION
| Poor sound quality | Check the earbud fit using a mirror (see page 16).Check the earbud fit using the Earbud Seal Test in the Bose app. You can access this option from the Settings menu.Make sure you're using the correct eartip and band sizes for each ear (see page 18).Visit:support.Bose.com/qcue2to see how-to videos.Make sure you're using the Bose app for setup (see page 13).Try a different audio track.Play audio from a different application or music service.Clear any debris or wax buildup from the eartips and earbud nozzles (see page 53).If two devices are connected, disconnect the second device.Turn off any audio enhancement features on the device or music app.Make sure your earbuds are connected over the correctBluetoothprofile: Stereo A2DP. Check your device'sBluetooth/audio settings menu to make sure the correct audio profile is selected.Disable theBluetoothfeature on your device and then re-enable.Clear the earbud device list (see page 47). Delete the earbuds from theBluetoothlist on your device, including any duplicate listings labeled LE (Low Energy). Connect again (see page 13).If you're sharing the earbuds, place them in the charging case to clear the audio personalization between each user. |
SYMPTOM SOLUTION
| Microphone doesn't pick up sound | Make sure the earbuds aren't rotated too far back or forward (see page 15). For the best microphone sound quality, the earbuds should be angled so that they point towards your mouth or chin.Try another phone call.Try another compatible device.Disable the Bluetooth feature on your device and then re-enable.Make sure the stability bands are positioned properly so the hole on the side of the band is aligned with the acoustic port on the earbud (see page 20).Clear the earbud device list (see page 47). Delete the earbuds from the Bluetooth list on your device, including any duplicate listings labeled LE (Low Energy). Connect again (see page 13). |
| Can't adjust the mode | Place both earbuds in the charging case until they magnetically snap into place. Close and re-open the case. The earbuds status light displays charging status (see page 42). Remove the earbuds.If you customized your shortcut to be on a specific earbud, make sure you touch and hold the correct earbud.See “Earbuds don’t respond to touch control” on page 64.Use the Bose app to adjust the mode. You can access this option from the product control screen (see page 13). |
SYMPTOM SOLUTION
| Poor noise cancellation | Place both earbuds in the charging case until they magnetically snap into place. Close and re-open the case. The earbuds status light displays charging status (see page 42). Remove the earbuds.Check if ActiveSense is enabled (see page 33).Check the earbud fit using a mirror (see page 16).Check the earbud fit using the Earbud Seal Test in the Bose app. You can access this option from the Settings menu.Check the mode (see page 33).Remove the earbuds from your ears and reinsert in your ears.Clear any debris or wax buildup from the eartips and earbud nozzles (see page 53).If you're on a phone call or using voice control on your device, lower or turn off self voice using the Bose app (see page 30).If you're sharing the earbuds, place them in the charging case to clear the audio personalization between each user.Reset the earbuds and charging case (see page 67). If that doesn't work, restore the earbuds to factory settings (see page 68). |
| Difficulty hearing caller while on a phone call | Increase the volume using your device.Make sure the call is being routed through your earbuds instead of your device speakers.Try a different mode (see page 33).Clear any debris or wax buildup from the eartips and earbud nozzles (see page 53). |
| Difficulty hearing own voice while on a phone call | Change the mode to Aware mode (see page 34).Use the Bose app to adjust self voice. You can access this option from the Settings menu. |
| Earbuds don't respond | Place both earbuds in the charging case until they magnetically snap into place. Close and re-open the case. The earbuds status light displays charging status (see page 42). Remove the earbuds.Reset the earbuds and charging case (see page 67). If that doesn't work, restore the earbuds to factory settings (see page 68). |
SYMPTOM SOLUTION
| Earbuds don't respond to touch control | Make sure you're touching the correct touch control surface (see page 24).Make sure your finger is making good contact with the touch control surface (see page 24).For multi-tap functions, vary the tap pressure.Make sure your fingers are dry.If your hair is wet, make sure it isn't interfering with the touch surface.If wearing gloves, remove them before touching the touch control surface.Disable in-ear detection features using the Bose app (see page 29).If the earbuds have been exposed to high or low temperatures, let the earbuds return to room temperature.Reset the earbuds and charging case (see page 67).Make sure touch controls are enabled using the Bose app. |
| Touch controls activate unintentionally | Use the Bose app to disable touch controls. You can access this option from the Settings menu. |
| Can't adjust volume | Make sure volume control is enabled using the Bose app (see page 24).Make sure you're swiping the touch control surface in the correct direction (see page 24).See "Earbuds don't respond to touch control." |
| Can't access shortcut | Make sure you have set a shortcut using the Bose app (see page 28).If you customized the shortcut to a specific earbud, make sure you touch and hold the correct earbud. |
SYMPTOM SOLUTION
| Earbuds don’t charge | Make sure the earbuds are properly placed in the charging case. To help preserve the battery life, the case should be closed while the earbuds are charging (see page 36).Make sure there is no dirt or debris covering the charging contacts on the earbuds or the charging pins in the case.Make sure the stability bands are positioned on the earbuds correctly (see page 20). If the bands are positioned incorrectly, the charging contacts on the earbuds may not align with the charging pins in the case.Make sure the USB cable is correctly aligned with the port on the charging case.Secure both ends of the USB cable.Try another USB cable.Try another wall charger.If using a wireless charger, make sure you align the button on the back of the charging case with the center of your wireless charger to obtain a full wireless connection (see page 38).If the earbuds or charging case have been exposed to high or low temperatures, let the earbuds or case return to room temperature. Charge again (see page 36). |
| Charging case doesn’t charge | Make sure the USB cable is correctly aligned with the port on the charging case.If the charging case battery is fully depleted, make sure the USB cable is attached long enough for the case to gain an initial charge. If you remove the cable and the charging case status light goes out, reattach the USB cable.Secure both ends of the USB cable.Try another USB cable.Make sure the charging case is closed. To help preserve the battery life, the case should be closed while it’s charging.Try another wall charger.If the charging case has been exposed to high or low temperatures, let the case return to room temperature. Charge again (see page 37).Make sure any charging case accessories are properly installed and don’t prevent the USB cable from securely connecting to the port on the charging case.If using a wireless charger, make sure you align the button on the back of the charging case with the center of your wireless charger to obtain a full wireless connection (see page 38). |
SYMPTOM SOLUTION
| Voice prompt language isn't correct | Change the voice prompt language using the Bose app (see page 13). You can access this option from the Settingsmenu. |
| Not receiving call notifications | Make sure your device isn't set to Do Not Disturb.Make sure voice prompts are enabled using the Bose app (see page 13). You can access this option from the Settingsmenu.Make sure you have given the earbuds access to your contacts in your device Bluetooth menu. |
| Earbuds making chirping sound | Make sure the earbud nozzles aren't blocked (see page 19).Clear any debris or wax buildup from the eartips and earbud nozzles (see page 53). |
| Earbuds don't connect to a Bose Smart Soundbar or Speaker | Make sure you are connecting to a compatible Bose product. For a list of compatible products, visit: ____support.Bose.com/GroupsWith the earbuds in the charging case and the case open, press and hold the button on the back of the case until the earbuds status light slowly pulses blue.Make sure that the earbuds are within 30 ft (9 m) of your soundbar or speaker. |
| Earbuds don't reconnect to a previously-connected Bose Smart Soundbar or Speaker | With the earbuds in the charging case and the case open, press and hold the button on the back of the case until the earbuds status light slowly pulses blue. Use the Bose app to connect the earbuds to a compatible Bose product. For more information, visit: support.Bose.com/Groups |
| Delayed audio when connected to a Bose Smart Soundbar or Speaker | Download the Bose app and run available software updates. |
RESET THE EARBUDS AND CHARGING CASE
If the earbuds or charging case are unresponsive, you can reset them.
Resetting the earbuds and charging case resets the product controls and reboots the earbuds and case. It doesn't clear any device settings.
- Place both earbuds in the charging case until they magnetically snap into place and the earbuds status light displays charging status (see page 42).
- Close the case lid, then connect the small end of the USB cable to the USB-C® port on the bottom of the case.

natural_image
Line drawing of a device component with a plug inserted into a housing (no text or symbols)- Connect the other end to a USB-A wall charger (not provided) or computer.
The charging case status light slowly pulses amber (see page 43).
- Press and hold the button on the back of the case for up to 30 seconds until the charging case status light turns off.
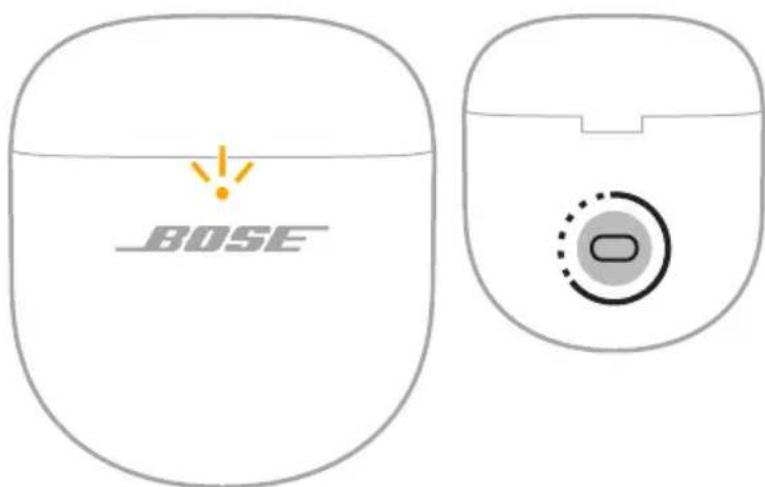
text_image
BOSERESTORE THE EARBUDS TO FACTORY SETTINGS
A restore to factory settings clears all settings and return the earbuds to their original out-of-box state. After, the earbuds can be configured as if they were being set up for the first time.
Restoring to factory settings is only recommended if you are having issues with the earbuds or you have been instructed to do so by Bose customer service.
- Remove the earbuds from the Bluetooth list on your device.
- Remove the earbuds from your Bose account using the Bose app.
NOTE: For more information about how to remove the earbuds from your Bose account using the Bose app, visit: support.Bose.com/qcue2
- With the earbuds in the charging case and the case open, press and hold the button on the back of the case for 25 seconds until the earbuds status light blinks white 2 times, slowly pulses blue, and then turns off.
NOTE: Make sure both earbuds are in the case and the case is open.
natural_image
Line drawing of a Bose wireless earbuds showing front and side views (no text or symbols)- Repeat the previous step 2 more times.
After the third time, the status light blinks amber for 3 seconds to indicate factory settings are being restored.
When the restore is complete, the status light slowly blinks blue. The earbuds are now in their original out-of-box state.
NOTE: If you're unable to resolve your issue, additional troubleshooting and support is available at: support.Bose.com/qcue2
- INGESTION HAZARD: This product contains a button cell or coin battery.
- DEATH or serious injury can occur if ingested.
• A swallowed button cell or coin battery can cause Internal Chemical Burns in as little as 2 hours. - KEEP new and used batteries OUT OF REACH of CHILDREN
- Seek immediate medical attention if a battery is suspected to be swallowed or inserted inside any part of the body.

TILSLUT PRODUKTER FRA BOSE
Opret forbindelse til en Bose Smart Speaker eller Soundbar.... 50
Fordele 50
Kompatible produkter 50
natural_image
Line drawings of two different types of household appliances, one with a labeled 'BOSE' and the other with a handle (no text or symbols beyond branding)Bose QuietComfort Ultra øretelefoner (2. generation)
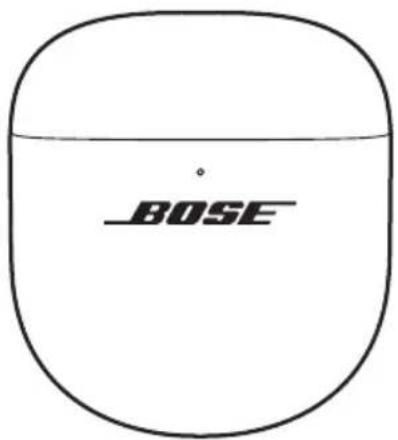
text_image
BOSEOpladningsetui

natural_image
Simple line drawing of two egg-shaped objects with internal cross-sections (no text or symbols)natural_image
Four identical circular mechanical or architectural diagrams with no visible text, numbers, or symbols.natural_image
Two symbolic icons: a circle with a diagonal line and a teardrop-shaped object emitting droplets (no text or labels)BEMAERKNINGER:
natural_image
Three identical diagrams showing concentric circles with internal shaded regions, no text or symbols present.natural_image
Three identical line drawings of a circular object with labeled points (1, 2, 3) and R symbols on its surfaces (no text or symbols beyond labels)text_image
Diagram illustrating a finger pressing a button on a device, showing the process with labeled parts and directional arrow.Tryk og træk Adskil
text_image
Diagram showing two stages of a device with labeled components and directional arrows indicating process flow.Juster Tryk
natural_image
Two identical illustrations of a stylized object with concentric layers and central circular features, no text or symbols present.SKIFT ELLER DEAKTIVER DIN GENVEJ
natural_image
Two identical illustrations of a stylized ear with shaded circular centers and dotted outlines (no text or symbols)natural_image
Two identical illustrations of ear ear devices with central circular features, no text or symbols present.natural_image
Two identical illustrations of a medical or surgical device with circular features and central dot pattern (no text or symbols)natural_image
Line drawing of a Bose-branded wireless earbuds with open case (no text or symbols on device)natural_image
Line drawing of a device with a plug inserted into a housing (no text or symbols)natural_image
Simple line drawing of a device with a circular base and a power outlet connected to it (no text or symbols)natural_image
Simple line drawing of a computer mouse connected to a power outlet (no text or symbols)natural_image
Line drawing of a Bose-branded earbuds with open case and black buttons (no text or symbols on the device itself)BEMÄRK: Hvis den ene in-ear hovedtelefon har et lavere batteriniveau end den anden, viser statuslampen det laveste batteriniveau.
KONTROLLÉR OPLADNINGSETUIETS BATTERINIVEAU
natural_image
Line drawing of a BOSE-branded VR headset with open casing and internal earpieces (no text or symbols)natural_image
Line drawing of a Bose-branded electronic device with open casing and internal earbuds (no text or symbols)'In-ear hovedtelefonernes statuslampe
Bluetooth-status
Viser status for Bluetooth-forbindelsen til enheder.
LYSAKTIVITET SYSTEMTILSTAND
TILSLUT VED HJÆLP AF BOSE-APPEN
natural_image
Line drawing of a Bose brand wireless earbuds showing front and side views (no text or symbols)natural_image
Two identical illustrations of earbuds with central circular features, no text or symbols present.natural_image
Line drawing of a BOSE wireless earbuds showing front and side views with no text or symbolsnatural_image
Line drawing of a Bose brand wireless earbuds showing front and side views (no text or symbols)natural_image
Line drawing of a Bose brand wireless earbuds showing front and side views (no text or symbols)natural_image
Line drawing of a Bose brand wireless earbuds showing front and side views (no text or symbols)natural_image
Simple line drawing of a device component with a connector and cable (no text or symbols)natural_image
Line drawing of a Bose wireless earbuds showing front and side views (no text or symbols)- Gentag det foregående trin 2 gange mere.
Efter tredje gang blinker statuslampen gult i 3 sekunder for at angive, at fabriksindstillingerne gendannes.
- INGESTION HAZARD: This product contains a button cell or coin battery.
- DEATH or serious injury can occur if ingested.
• A swallowed button cell or coin battery can cause Internal Chemical Burns in as little as 2 hours. - KEEP new and used batteries OUT OF REACH of CHILDREN
- Seek immediate medical attention if a battery is suspected to be swallowed or inserted inside any part of the body.

natural_image
Line drawings of two different electronic devices, one labeled '80SE' and the other resembling a vacuum cleaner (no text or symbols beyond branding)Bose QuietComfort Ultra Ohrhörer (2. Generation)

text_image
BOSELade-Etui

natural_image
Two abstract oval shapes with internal patterns, no text or symbols presentnatural_image
Four identical circular mechanical or architectural diagrams with no visible text, numbers, or symbols.natural_image
Two symbolic icons: a circle with a diagonal line and a droplet on its side, both without any text or labels.HINWEISE:
natural_image
Three abstract geometric diagrams showing concentric circles with shaded inner regions, no text or symbols present.natural_image
Three identical wireframe diagrams of a mechanical component with labeled sections (1R, 2R, 3R), no text or symbols present.text_image
Diagram illustrating finger positioning and adjustment of a device, showing hand positioning and tip insertion stepstext_image
Diagram showing two types of dental implants with labels R and Ø, illustrating a mechanical or surgical procedure.Ausrichten Drücken
natural_image
Two identical illustrations of a stylized object with concentric layers and central circular features, no text or symbols present.ÄNDERN ODER DEAKTIVIEREN IHRES SHORTCUTS
natural_image
Two identical illustrations of earless devices with central circular features, no text or symbols present.natural_image
Two identical illustrations of a stylized ear or ear device with concentric rings and central circular features (no text or symbols)natural_image
Two identical illustrations of a medical or surgical device with circular features and central dot pattern (no text or symbols)natural_image
Line drawing of an outdoor wireless earbuds with exposed case and display (no text or symbols)natural_image
Simple line drawing of a device with a plug and connector (no text or symbols)natural_image
Simple line drawing of a computer monitor with an open lid and a power outlet connected to it (no text or symbols)natural_image
Simple line drawing of a bowl connected to a power outlet (no text or symbols)natural_image
Line drawing of a Bose-branded earbuds with open case and black buttons (no text or symbols on the device itself)natural_image
Line drawing of a BOSE-branded VR headset with open lid and front panel (no text or symbols on the device itself)natural_image
Line drawing of a BOSE-branded earless device with open casing and black dots indicating measurement points (no text or symbols on the device itself)natural_image
Line drawing of a Bose-branded VR headset with open casing and internal compartments (no text or symbols)natural_image
Line drawing of a Bose brand wireless earbuds showing front and side views (no text or symbols)natural_image
Two identical illustrations of ear earments with central circular features, no text or symbols present.natural_image
Line drawing of a Bose brand wireless earbuds showing front and side views (no text or symbols)natural_image
Line drawing of a Bose brand wireless earbuds showing front and side views (no text or symbols)natural_image
Line drawing of a Bose brand wireless earbuds showing front and side views (no text or symbols)natural_image
Line drawing of a Bose brand wireless earbuds showing front and side views (no text or symbols)support.Bose.com/Groups
HINWEISE:
natural_image
Line drawing of a device component with a plug inserted into the base (no text or symbols)natural_image
Line drawing of a Bose-branded wireless earbuds showing front and side views (no text or symbols)- INGESTION HAZARD: This product contains a button cell or coin battery.
- DEATH or serious injury can occur if ingested.
• A swallowed button cell or coin battery can cause Internal Chemical Burns in as little as 2 hours. - KEEP new and used batteries OUT OF REACH of CHILDREN
- Seek immediate medical attention if a battery is suspected to be swallowed or inserted inside any part of the body.

natural_image
Line drawing of a pair of beige sneakers with 'BOSE' branding on the side (no additional text or symbols)
natural_image
Line drawing of a handheld device with a circular handle and spout (no text or symbols)
text_image
BOSEBose QuietComfort Ultra-oordopjes (2 ^e gen.) Oplaadetui
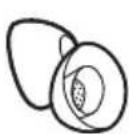

Oortips (formaten small en large)
natural_image
Two symbolic icons: a circle with a diagonal line and a pair of droplets falling from the center (no text or symbols)OPMERKINGEN:
natural_image
Three identical diagrams showing concentric circles with shaded inner regions, no text or symbols present.natural_image
Three identical wireframe diagrams of a ring-shaped object with labeled points (1, 2, 3) and no text or symbols beyond labels.text_image
Diagram illustrating a finger pressing a button on a device, showing the process with labeled parts and directional arrow.text_image
Diagram showing two stages of a device with labeled components and directional arrows indicating process flow.Uitlijnen Vastduwen
natural_image
Two identical illustrations of ear earments with central circular features, no text or symbols present.natural_image
Two identical white illustrations of a stylized ear or ear device with circular features and central hub (no text or symbols)natural_image
Two identical illustrations of a stylized ear or ear device with concentric rings and central circular features (no text or symbols)natural_image
Two identical illustrations of earbuds with central circular features, no text or symbols present.natural_image
Line drawing of an open wireless earbuds with visible internal components (no text or symbols)natural_image
Simple line drawing of a device with a plug and connector (no text or symbols)natural_image
Simple line drawing of a computer monitor with an open lid and a power outlet connected to it (no text or symbols)natural_image
Simple line drawing of a bowl connected to a power outlet (no text or symbols)natural_image
Line drawing of a Bose-branded earbuds with open case and black buttons (no text or symbols on the device itself)natural_image
Line drawing of a BOSE-branded VR headset with open casing and internal earbuds (no text or symbols)natural_image
Line drawing of a Bose-branded wireless earbuds with open casing and black dotted line indicating measurement (no text or symbols on the device itself)Statuslampje oordopjes
Bluetooth-status
natural_image
Line drawing of a Bose brand wireless earbuds showing front and side views (no text or symbols)natural_image
Two identical illustrations of ear-shaped objects with central circular features, no text or symbols present.natural_image
Line drawing of a BOSE wireless earbuds showing front and side views (no text or symbols)natural_image
Line drawing of a BOSE wireless earbuds showing front and side views (no text or symbols)natural_image
Line drawing of a Bose brand wireless earbuds showing front and side views (no text or symbols)natural_image
Line drawing of a Bose brand wireless earbuds showing front and side views (no text or symbols)natural_image
Simple line drawing of a device component with a connector and cable (no text or symbols)natural_image
Line drawing of a BOSE wireless earbuds showing front and side views (no text or symbols)- INGESTION HAZARD: This product contains a button cell or coin battery.
- DEATH or serious injury can occur if ingested.
• A swallowed button cell or coin battery can cause Internal Chemical Burns in as little as 2 hours. - KEEP new and used batteries OUT OF REACH of CHILDREN
- Seek immediate medical attention if a battery is suspected to be swallowed or inserted inside any part of the body.

natural_image
Line drawing of a beige electronic device with 'BOSE' branding on the side (no additional text or symbols)
natural_image
Line drawing of a handheld device with a circular button and handle (no text or symbols)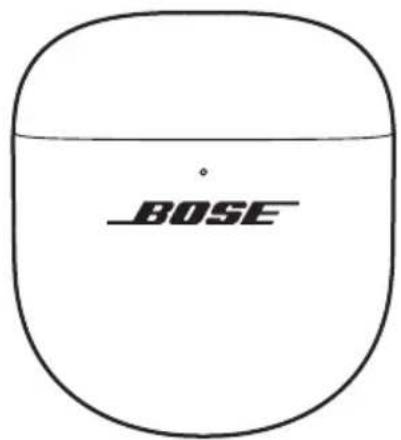
text_image
BOSEAuriculares Bose QuietComfort Ultra (2ª Gen) Estuche de carga


natural_image
Two symbolic icons: a circle with a diagonal line and a teardrop-shaped object emitting droplets (no text or labels)NOTAS:
text_image
Diagram illustrating finger positioning and movement of a device, showing two states with labeled components and directional arrows.text_image
Diagram showing two stages of a device with labeled ports and directional arrows indicating process flow.Alinear Presionar
text_image
Diagram illustrating the step-by-step transformation of a mechanical component with labeled parts and directional arrows.natural_image
Two identical illustrations of a stylized object with concentric rings and central dot, no text or symbols present.CAMBIAR O DESACTIVAR EL ACCESO DIRECTO
natural_image
Two identical illustrations of a medical or electronic device with circular ports and central hub (no text or symbols)natural_image
Two identical illustrations of a stylized ear with circular features and concentric rings (no text or symbols)natural_image
Two identical illustrations of earbuds with central circular features, no text or symbols present.natural_image
Line drawing of a Bose-branded wireless earbuds with open case (no text or symbols on device)natural_image
Line drawing of a device with a plug inserted into a housing (no text or symbols)natural_image
Simple line drawing of a computer monitor with an open button and a circular base, connected to a power outlet (no text or symbols)natural_image
Simple line drawing of a bowl connected to a wall-mounted electrical outlet (no text or symbols)natural_image
Line drawing of a Bose-branded earbuds with open case (no text or symbols on device)natural_image
Line drawing of a BOSE-branded VR headset with open casing and internal earpieces (no text or symbols)natural_image
Line drawing of a Bose-branded earbuds with open case and black dotted line indicating measurement (no text or symbols on the device itself)natural_image
Line drawing of a BOSE-branded VR headset with open casing and internal compartments (no text or symbols)natural_image
Line drawing of a Bose brand wireless earbuds showing front and side views (no text or symbols)natural_image
Two identical illustrations of a stylized ear or button device with concentric rings and central circular features (no text or symbols)natural_image
Line drawing of a Bose brand wireless earbuds showing front and side views (no text or symbols)natural_image
Line drawing of a Bose brand wireless earbuds showing front and side views (no text or symbols)natural_image
Line drawing of a Bose brand wireless earbuds showing front and back views with no text or symbolsnatural_image
Line drawing of a Bose brand wireless earbuds showing front and side views (no text or symbols)support.Bose.com/Groups
NOTAS:
Visite: ____ support.Bose.com/qcue2
GARANTÍA LIMITADA
Visite: ____ worldwide.Bose.com/contact
SÍNTOMA SOLUCIÓN
natural_image
Simple line drawing of a device with a plug inserted into a housing (no text or symbols)natural_image
Line drawing of a BOSE wireless earbuds with open case and close-up view showing internal components (no text or symbols)- INGESTION HAZARD: This product contains a button cell or coin battery.
- DEATH or serious injury can occur if ingested.
• A swallowed button cell or coin battery can cause Internal Chemical Burns in as little as 2 hours. - KEEP new and used batteries OUT OF REACH of CHILDREN
- Seek immediate medical attention if a battery is suspected to be swallowed or inserted inside any part of the body.

natural_image
Line drawings of two different types of hair accessories, one with a labeled 'BOSE' and the other with a handle (no text or symbols beyond branding)natural_image
Two abstract oval shapes with internal patterns, no text or symbols presentnatural_image
Four identical circular mechanical or architectural diagrams with no visible text, numbers, or symbols.natural_image
Two symbolic icons: a circle with a diagonal line and a pair of droplets falling from the ear (no text or labels)HUOMAUTUKSIA:
natural_image
Three identical diagrams showing concentric circles with shaded inner regions, no text or symbols present.natural_image
Three identical line drawings of a ring-shaped object with labeled points (1, 2, 3) and no additional text or symbols.text_image
Diagram illustrating a hand-pulling process on a device, showing step-by-step states of rotation and disassembly.Purista ja irrota Erota
text_image
Diagram showing two stages of a device with labeled parts and directional arrows indicating process flow.Kohdista Paina
natural_image
Two identical illustrations of a stylized ear with shaded centers and dotted outlines, no text or symbols present.PIKAVALINNAN VAIHTAMINEN TAI POISTAMINEN KÄYTÖSTÄ
natural_image
Two identical illustrations of a stylized ear with shaded circular centers, no text or symbols present.natural_image
Two identical illustrations of ear-shaped objects with central circular features, no text or symbols present.natural_image
Two identical illustrations of earbuds with central circular features, no text or symbols present.natural_image
Line drawing of a Bose brand earbuds with open case (no text or symbols on the device itself)natural_image
Simple line drawing of a device with a plug and connector (no text or symbols)natural_image
Simple line drawing of a computer monitor with an open lid and a power outlet connected to it (no text or symbols)natural_image
Simple line drawing of a bowl connected to a wall-mounted electrical outlet (no text or symbols)natural_image
Line drawing of a Bose-branded earbuds with open case (no text or symbols on device)natural_image
Line drawing of a BOSE-branded earbuds with open case and black buttons (no text or symbols on the device itself)natural_image
Line drawing of a Bose-branded earbuds with open case and black dots indicating measurement (no text or symbols on the device itself)natural_image
Line drawing of a Bose brand wireless earbuds showing front and side views (no text or symbols)natural_image
Two identical illustrations of ear earments with central circular features, no text or symbols present.natural_image
Line drawing of a Bose brand wireless earbuds showing front and side views (no text or symbols)natural_image
Line drawing of a Bose brand wireless earbuds showing front and side views with no text or symbols- Aseta kotelo Android-laitteen viereen.
natural_image
Line drawing of a Bose brand wireless earbuds showing front and side views (no text or symbols)natural_image
Line drawing of a Bose brand wireless earbuds showing front and side views (no text or symbols)natural_image
Simple line drawing of a device component with a plug and connector (no text or symbols)natural_image
Line drawing of a Bose wireless earbuds showing front and side views (no text or symbols)- INGESTION HAZARD: This product contains a button cell or coin battery.
- DEATH or serious injury can occur if ingested.
• A swallowed button cell or coin battery can cause Internal Chemical Burns in as little as 2 hours. - KEEP new and used batteries OUT OF REACH of CHILDREN
- Seek immediate medical attention if a battery is suspected to be swallowed or inserted inside any part of the body.

CONNEXIONS BLUETOOTH
natural_image
Line drawings of two different types of baseless devices, one with a labeled 'BOSE' and the other with a handle (no text or symbols beyond branding)natural_image
Two abstract oval shapes with internal patterns, no text or symbols presentnatural_image
Four identical circular mechanical or architectural diagrams with no visible text, numbers, or symbols.natural_image
Two symbolic icons: a circle with a diagonal line and a teardrop-shaped object emitting droplets (no text or labels)REMARQUES :
natural_image
Three identical diagrams showing concentric circles with internal shaded regions, no text or symbols present.natural_image
Three identical wireframe diagrams of a ring device with labeled points (1, 2, 3) and no text or symbols beyond labels.CHANGEMENT D'EMBOUTS
text_image
Diagram illustrating a finger pressing a button on a device, showing the process with labeled components and directional arrow.Aplatir et tirer Retirer
text_image
Diagram showing two stages of a device with labeled components and directional arrows indicating process flow.Aligner Appuyer
text_image
Surface tactileLECTURE ET VOLUME MULTIMÉDIA
COMMANDE ACTION
natural_image
Two identical illustrations of a stylized ear or ear device with concentric rings and central circular features (no text or symbols)MODIFICATION OU DÉSACTIVATION D'UN RACCOURCI
natural_image
Two identical illustrations of ear ear devices with central circular features, no text or symbols present.natural_image
Two identical illustrations of earbuds with shaded centers and dotted outlines, no text or symbols present.natural_image
Two identical illustrations of a medical or anatomical device with circular features and concentric rings (no text or symbols)natural_image
Line drawing of an open wireless earbuds case with visible internal components (no text or symbols)natural_image
Simple line drawing of a device with a plug and connector (no text or symbols)natural_image
Simple line drawing of a computer monitor with an open button and a power outlet connected to a circular base (no text or symbols)natural_image
Simple line drawing of a bowl connected to a wall-mounted electrical outlet (no text or symbols)natural_image
Line drawing of a Bose-branded wireless earbuds with open case (no text or symbols on device)natural_image
Line drawing of a Bose-branded VR headset with open casing and exposed internal components (no text or symbols)natural_image
Line drawing of a Bose-branded earbuds with open case and black dotted line indicating measurement (no text or symbols on the device itself)natural_image
Line drawing of a Bose brand wireless earbuds showing front and side views (no text or symbols)natural_image
Two identical illustrations of a stylized ear with a central dot and concentric rings, no text or symbols present.natural_image
Line drawing of a Bose-branded wireless earbuds showing front and side views (no text or symbols)natural_image
Line drawing of a Bose brand wireless earbuds showing front and side views (no text or symbols)natural_image
Line drawing of a Bose brand wireless earbuds showing front and side views (no text or symbols)natural_image
Line drawing of a Bose brand wireless earbuds showing front and side views (no text or symbols)natural_image
Line drawing of a device component with a plug inserted into a housing (no text or symbols)natural_image
Line drawing of a Bose brand wireless earbuds showing front and side views (no text or symbols)- INGESTION HAZARD: This product contains a button cell or coin battery.
- DEATH or serious injury can occur if ingested.
• A swallowed button cell or coin battery can cause Internal Chemical Burns in as little as 2 hours. - KEEP new and used batteries OUT OF REACH of CHILDREN
- Seek immediate medical attention if a battery is suspected to be swallowed or inserted inside any part of the body.
natural_image
Line drawing of a pair of beige sneakers with 'BOSE' branding on the side (no additional text or symbols)
natural_image
Line drawing of a handheld device with a circular handle and perforated body (no text or symbols)
text_image
BOSEAuricolari Bose QuietComfort Ultra (2 ^a gen.) Custodia di carica


natural_image
Two symbolic illustrations: a circle with a diagonal line and a ring with droplets (no text or symbols)NOTE:
natural_image
Three abstract geometric diagrams showing concentric circles with shaded inner regions, no text or symbols present.natural_image
Three identical line drawings of a circular object with labeled points (1, 2, 3) and R symbols on its surfaces (no text or symbols beyond labels)text_image
Diagram illustrating a finger pressing a button on a device, showing the process with labeled components and directional arrow.text_image
Diagram showing two stages of a device with labeled ports (R) and directional arrows indicating process flow.Allineare Premere
text_image
Diagram illustrating the step-by-step transformation of a mechanical component with labeled parts and directional arrows.natural_image
Two identical illustrations of a stylized ear or ear device with concentric rings and central dot pattern (no text or symbols)CAMBIARE O DISABILITARE LA SCELTA RAPIDA
natural_image
Two identical illustrations of ear-shaped devices with central circular features, no text or symbols present.natural_image
Two identical illustrations of a stylized ear or ear device with concentric rings and central circular features (no text or symbols)natural_image
Two identical illustrations of a stylized ear or ear device with circular features and central hub (no text or symbols)natural_image
Line drawing of a Bose brand wireless earbuds with open case (no text or symbols on device)natural_image
Simple line drawing of a device with a plug and connector (no text or symbols)natural_image
Diagram showing a computer monitor with an open button and a circular base, connected to a power outlet (no text or symbols present)natural_image
Simple line drawing of a dome-shaped object connected to a power outlet with a smiley face (no text or symbols)natural_image
Line drawing of a Bose-branded earbuds with open case and black buttons (no text or symbols on the device itself)natural_image
Line drawing of a Bose-branded VR headset with open casing and exposed internal components (no text or symbols)natural_image
Line drawing of a Bose-branded earbuds with open case and black dots indicating measurement (no text or symbols on the device itself)natural_image
Line drawing of a Bose-branded VR headset with open casing and internal earbuds (no text or symbols)natural_image
Line drawing of a Bose-branded wireless earbuds with open case and close-up view showing brand logo (no text or symbols on device)natural_image
Two identical illustrations of ear ear devices with central circular features, no text or symbols present.natural_image
Line drawing of a Bose brand wireless earbuds showing front and side views (no text or symbols)natural_image
Line drawing of a Bose brand wireless earbuds showing front and side views with no text or symbolsnatural_image
Line drawing of a Bose brand wireless earbuds showing front and side views (no text or symbols)natural_image
Line drawing of a Bose brand wireless earbuds showing front and side views (no text or symbols)support.Bose.com/Groups
NOTE:
text_image
BOSE X20000000000000000000000000000000000000000000000000000000000000000000000000000000000000000000000000000PROVARE PRIMA QUESTE SOLUZIONI
Visitare: ____ worldwide.Bose.com/contact
SINTOMO SOLUZIONE
natural_image
Simple line drawing of a device component with a connector (no text or symbols)natural_image
Line drawing of a BOSE wireless earbuds with open case and close-up view (no text or symbols)- INGESTION HAZARD: This product contains a button cell or coin battery.
- DEATH or serious injury can occur if ingested.
• A swallowed button cell or coin battery can cause Internal Chemical Burns in as little as 2 hours. - KEEP new and used batteries OUT OF REACH of CHILDREN
- Seek immediate medical attention if a battery is suspected to be swallowed or inserted inside any part of the body.

natural_image
Line drawing of a pair of beige sneakers with 'BOSE' branding on the side (no additional text or symbols)
natural_image
Line drawing of a hand pump device (no text or symbols)natural_image
Two symbolic icons: a circle with a diagonal line and a pair of droplets falling from the center (no text or symbols)MEGJEGYZÉSEK:
natural_image
Three abstract diagrams showing concentric circles with shaded inner regions, no text or symbols presentnatural_image
Three identical line drawings of a ring-shaped object with labeled points (1R, 2R, 3R), no text or symbols present.text_image
Diagram illustrating a hand-pulling process on a device, showing the left and right views with labeled components and directional arrows.text_image
Diagram showing two stages of a device with labeled components and directional arrows indicating process flow.natural_image
Line drawing of a Bose-branded earbuds with open casing and black buttons, no text or symbols presentnatural_image
Two identical illustrations of a stylized ear or ear device with concentric rings and central circular features (no text or symbols)A GYORSFUNKCIÓ MÓDOSÍTÁSA VAGY LETILTÁSA
natural_image
Two identical illustrations of a stylized ear or ear device with circular features and concentric rings (no text or symbols)natural_image
Two identical illustrations of a stylized ear with circular features and concentric rings (no text or symbols)natural_image
Two identical illustrations of ear earments with central circular features, no text or symbols present.natural_image
Line drawing of an open BOSB earbuds case with exposed internal components (no text or symbols)natural_image
Simple line drawing of a device component with a connector and cable (no text or symbols)natural_image
Diagram showing a device with a circular base and a power outlet connected to a wall-mounted switch (no text or symbols present)natural_image
Simple line drawing of a dome-shaped object connected to a power outlet with a smiley face (no text or symbols)natural_image
Line drawing of a Bose-branded wireless earbuds with open case (no text or symbols on device)natural_image
Line drawing of a Bose-branded earbuds with open case and black buttons (no text or symbols on the device itself)natural_image
Line drawing of a Bose-branded earbuds with open case and black dots indicating measurement points (no text or symbols on the device itself)natural_image
Line drawing of a Bose-branded earbuds with open case and internal compartments (no text or symbols)natural_image
Line drawing of a Bose brand wireless earbuds showing front and side views (no text or symbols)natural_image
Two identical illustrations of a stylized ear with a central dot and concentric rings (no text or symbols)natural_image
Line drawing of a BOSE wireless earbuds showing front and side views (no text or symbols)natural_image
Line drawing of a Bose brand wireless earbuds showing front and side views (no text or symbols)natural_image
Line drawing of a Bose brand wireless earbuds showing front and side views (no text or symbols)natural_image
Line drawing of a Bose brand wireless earbuds showing front and side views (no text or symbols)natural_image
Simple line drawing of a device with a plug and connector (no text or symbols)natural_image
Line drawing of a Bose wireless earbuds showing front and side views (no text or symbols)- INGESTION HAZARD: This product contains a button cell or coin battery.
- DEATH or serious injury can occur if ingested.
• A swallowed button cell or coin battery can cause Internal Chemical Burns in as little as 2 hours. - KEEP new and used batteries OUT OF REACH of CHILDREN
- Seek immediate medical attention if a battery is suspected to be swallowed or inserted inside any part of the body.

- Ta ut og resirkuler og avhend umiddelbart brukte batterier i henhold til lokale bestemmelser, og oppbevar dem utilgjengelig for barn. Batteriet må IKKE kastes i husholdningsavfallet eller brennes.
- Selv brukte batterier kan forårsake alvorlige skader eller død.
- Kontakt et lokalt giftkontrollsenter for informasjon om behandling.
- Batteriet må ikke utlades, lades, demonteres, varmes opp til over 85 °C (185 °F) eller brennes. Det kan føre til skader på grunn av avlufting, lekkasje eller eksplosjon som kan gi kjemiske brannsår.
- Ikke-oppladbare batterier må ikke lades.
- Dette produktet inneholder batterier som ikke kan byttes.
• Batteritype: 1454 | Nominell batterispenning: 3,85 V

Innstillinger for Immersive Audio 26
Innstillinger for Immersive Audio 31
Endre innstillingen for Immersive Audio 32
Endre modus.... 32
Bruke snarveien 32
Immersive Audio under en samtale.... 32
LYTTEMODUSER
Moduser 33
Oppmerksomhetsmodus med ActiveSense.... 33
Endre modus.... 34
KOBLE TIL BOSE-PRODUKTER
Koble til en Bose smarthøyttaler eller -lydplanke.... 50
Fordeler....50
Kompatible produkter 50
Koble til med Bose-appen 51
STELL OG VEDLIKEHOLD
natural_image
Line drawing of a pair of beige sneakers with 'BOSE' branding on the side (no additional text or symbols)
natural_image
Line drawing of a handheld device with a circular handle and spout (no text or symbols)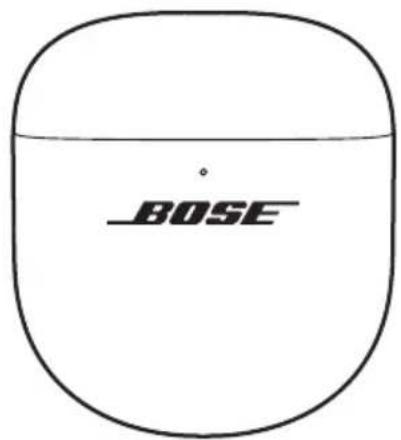
text_image
BOSEBose QuietComfort Ultra ørepropper (2. gen) Ladeetui


natural_image
Two symbolic icons: a circle with a diagonal line and a pair of droplets falling from the ear (no text or labels)MERKNADER:
PASSFORM SJEKK DETTE
PASSFORM SJEKK DETTE
natural_image
Three identical diagrams showing concentric circles with shaded inner regions, no text or symbols present.natural_image
Three identical line drawings of a ring-shaped object with labeled points (1, 2, 3) and no additional text or symbols.text_image
Diagram illustrating finger positioning and movement of a device, showing two states with labeled points and directional arrows.text_image
Diagram showing two stages of a device with labeled components and directional arrows indicating process flow.Juster Trykk
natural_image
Two identical illustrations of a stylized ear with shaded centers and dotted outlines, no text or symbols present.ENDRE ELLER DEAKTIVERE SNARVEIEN
natural_image
Two identical illustrations of a stylized ear device with circular features and concentric rings (no text or symbols)En stemme leser opp hver innstilling for Immersive Audio i en sløyfe.
natural_image
Two identical illustrations of ear-shaped objects with central circular features, no text or symbols present.En stemme leser opp hver modus i en sløyfe.
natural_image
Two identical illustrations of a medical or surgical device with circular features and central dot pattern (no text or symbols)text_image
Ladepinner BOSEnatural_image
Line drawing of an open BOSB earbuds case with visible internal components (no text or symbols)natural_image
Simple line drawing of a device component with a connector and cable (no text or symbols)natural_image
Diagram showing a device with a circular base and a wall-mounted power outlet connected to a circular switch (no text or symbols present)natural_image
Simple line drawing of a bowl connected to a wall-mounted electrical outlet (no text or symbols)natural_image
Line drawing of a Bose-branded wireless earbuds with open casing (no text or symbols on device)natural_image
Line drawing of a BOSE-branded VR headset with open lid and front panel (no text or symbols on device)natural_image
Line drawing of a Bose-branded earbuds with open case and black dotted line indicating measurement (no text or symbols on the device itself)KOBLE TIL MED BOSE-APPEN
natural_image
Line drawing of a Bose brand wireless earbuds showing front and side views (no text or symbols)KOBLE TIL EN ENHET PÅ NYTT
Koble til den sist tilkoblede enheten på nytt
natural_image
Two identical illustrations of ear earments with central circular features, no text or symbols present.natural_image
Line drawing of a BOSE wireless earbuds showing front and side views with no text or symbolsnatural_image
Line drawing of a Bose brand wireless earbuds showing front and side views (no text or symbols)natural_image
Line drawing of a Bose brand wireless earbuds showing front and side views (no text or symbols)- Bruk Bose-appen til å koble øreproppene til et kompatibelt Bose-produkt. Hvis du vil ha mer informasjon, kan du gå til ____support.Bose.com/Groups
MERKNADER:
natural_image
Line drawing of a Bose brand wireless earbuds showing front and side views (no text or symbols)natural_image
Line drawing of a device component with a plug inserted into a housing (no text or symbols)natural_image
Line drawing of a Bose wireless earbuds showing front and side views (no text or symbols)- INGESTION HAZARD: This product contains a button cell or coin battery.
- DEATH or serious injury can occur if ingested.
• A swallowed button cell or coin battery can cause Internal Chemical Burns in as little as 2 hours. - KEEP new and used batteries OUT OF REACH of CHILDREN
- Seek immediate medical attention if a battery is suspected to be swallowed or inserted inside any part of the body.

natural_image
Line drawings of two different electronic devices, one with a labeled 'BOSE' and the other with a handle (no text or symbols beyond branding)natural_image
Simple line drawing of two egg-shaped objects with internal cross-sections (no text or symbols)natural_image
Four identical hand-shaped diagrams with labeled ports (L, θ, R) and no text or symbols beyond labelsnatural_image
Two symbolic icons: a circle with a diagonal line and a teardrop-shaped object emitting droplets (no text or labels)UWAGI:
natural_image
Three identical diagrams showing concentric circles with internal shaded regions, no text or symbols present.natural_image
Three identical wireframe diagrams of a ring device with labeled points (1, 2, 3) and base notches, no text or symbols present.text_image
Diagram illustrating a finger pressing a button on a device, showing the process with labeled parts and directional arrow.text_image
Diagram showing two stages of a device with labeled components and directional arrows indicating process flow.Wyrównaj Naciśnij
text_image
Diagram illustrating the step-by-step transformation of a mechanical component with labeled parts and directional arrows.natural_image
Line drawing of a Bose-branded wireless earbuds with open casing and black buttons (no text or symbols on the device itself)natural_image
Two identical illustrations of a medical or surgical device with circular features and shaded regions, no text or symbols present.ZMIANA LUB WYŁĄCZENIE SKRÓTU
natural_image
Two identical illustrations of earbuds with central circular features, no text or symbols present.natural_image
Two identical illustrations of earbuds with central circular features, no text or symbols present.natural_image
Two identical illustrations of ear earments with central circular features, no text or symbols present.natural_image
Line drawing of a Bose-branded wireless earbuds with open case (no text or symbols on device)natural_image
Simple line drawing of a device component with a connector and arrow indicator (no text or symbols)natural_image
Simple line drawing of a computer monitor with an open button and a circular base, connected to a power outlet (no text or symbols)natural_image
Simple line drawing of a bowl connected to a power outlet (no text or symbols)natural_image
Line drawing of a Bose-branded wireless earbuds with open casing (no text or symbols on device)natural_image
Line drawing of a BOSE-branded earless device with open lid and front panels (no text or symbols on the device itself)natural_image
Line drawing of an open Bose-branded earbuds case (no text or symbols on the device itself)natural_image
Line drawing of a Bose-branded earbuds with open case and black buttons (no text or symbols on the device itself)natural_image
Line drawing of a Bose brand wireless earbuds showing front and side views (no text or symbols)natural_image
Two identical illustrations of ear earments with central circular features, no text or symbols present.natural_image
Line drawing of a BOSE wireless earbuds showing front and side views (no text or symbols)natural_image
Line drawing of a Bose brand wireless earbuds showing front and side views (no text or symbols)natural_image
Line drawing of a Bose brand wireless earbuds showing front and side views (no text or symbols)natural_image
Line drawing of a Bose brand wireless earbuds showing front and side views (no text or symbols)text_image
BOSE xxxxxxx8PODSTAWOWE ROZWIĄZANIA
natural_image
Simple line drawing of a device with a plug inserted into a housing (no text or symbols)natural_image
Line drawing of a Bose-branded wireless earbuds showing front and side views (no text or symbols)- INGESTION HAZARD: This product contains a button cell or coin battery.
- DEATH or serious injury can occur if ingested.
• A swallowed button cell or coin battery can cause Internal Chemical Burns in as little as 2 hours. - KEEP new and used batteries OUT OF REACH of CHILDREN
- Seek immediate medical attention if a battery is suspected to be swallowed or inserted inside any part of the body.

Brusreducing under samtal 30
ANSLUTA BOSE-PRODUKTER
natural_image
Line drawings of two different types of electronic devices, one with a labeled 'BOSE' and the other with a handle (no text or symbols beyond branding)natural_image
Two abstract oval shapes with internal patterns, no text or symbols presentnatural_image
Four identical circular diagrams with labeled inner and outer rings, no text or symbols present.natural_image
Two symbolic icons: a circle with a diagonal line and a teardrop-shaped object emitting droplets (no text or labels)OBS!
natural_image
Three identical diagrams showing concentric circles with internal shaded regions, no text or symbols present.natural_image
Three identical line drawings of a ring-shaped object with labeled points (1, 2, 3) and no additional text or symbols.text_image
Diagram illustrating a finger pressing a button on a device, showing the process with labeled parts and directional arrow.text_image
Diagram showing two stages of a device with labeled components and directional arrows indicating process flow.Rikta in Tryck
natural_image
Two identical illustrations of ear earments with central circular features, no text or symbols present.BYTA ELLER INAKTIVERA GENVÄGEN
natural_image
Two identical illustrations of a stylized ear or ear device with concentric rings and central circular features (no text or symbols)natural_image
Two identical illustrations of ear ear devices with central circular features, no text or symbols present.natural_image
Two identical illustrations of a stylized ear or ear device with circular features and central hub (no text or symbols)natural_image
Line drawing of an open BOSB earbuds case with visible internal components (no text or symbols)natural_image
Simple line drawing of a device component with a connector inserted (no text or symbols)natural_image
Simple line drawing of a device with a circular base and a power outlet, no text or symbols present.natural_image
Simple line drawing of a computer mouse connected to a power outlet (no text or symbols)natural_image
Line drawing of a Bose-branded wireless earbuds with open casing (no text or symbols on device)natural_image
Line drawing of a Bose-branded VR headset with open lid and front bezel (no text or symbols on device)OBS! Du kan se mer detaljerad batterinivåinformation i Bose-appen. Fodralets batterinivå visas på skärmen Produktkontroll.
LADDNINGSTID
KOMPONENT LADDNINGSTID
natural_image
Line drawing of a Bose-branded earbuds with open case and black dots indicating measurement (no text or symbols on the device itself)LADDNINGSFODRALETS STATUSLAMPA
natural_image
Line drawing of a Bose brand wireless earbuds showing front and side views (no text or symbols)natural_image
Two identical illustrations of ear ear devices with central circular features, no text or symbols present.natural_image
Line drawing of a BOSE wireless earbuds showing front and side views (no text or symbols)natural_image
Line drawing of a BOSE wireless earbuds showing front and side views with no text or symbols- Placera fodralet intill din Android-enhet.
natural_image
Line drawing of a Bose brand wireless earbuds showing front and side views (no text or symbols)natural_image
Line drawing of a Bose brand wireless earbuds showing front and side views (no text or symbols)natural_image
Simple line drawing of a device with a plug and connector (no text or symbols)natural_image
Line drawing of a BOSE wireless earbuds showing front and side views (no text or symbols)• INGESTION HAZARD: This product contains a button cell or coin battery.
• DEATH or serious injury can occur if ingested.
• A swallowed button cell or coin battery can cause Internal Chemical Burns in as little as 2 hours.
- KEEP new and used batteries OUT OF REACH of CHILDREN
- Seek immediate medical attention if a battery is suspected to be swallowed or inserted inside any part of the body.
수입업체: Bose Electronics (Shanghai) Company Limited, Level 6, Tower D, No. 2337 Gudai Rd. Minhang District, Shanghai 201100 | Bose Products B.V., Vijzelstraat 68, 1017HL Amsterdam, The Netherlands | Ingram Micro Mexico SA de CV, Joselillo 3 Int. Piso 5 Col. El Parque, Naucalpan de Juarez, Edo Mex 53398 전화 번호: +52 55 5263 6500 | Bose Limited (H.K.), 7F., No. 2, Sec. 3, Minsheng E. Road, Zhongshan Dist., Taipei City 104511, 전화 번호: +886-2-2514 7676 | Bose Limited, 16 Dufour's Place, London W1F 7SP
natural_image
Line drawing of a beige electronic device with 'BOSE' branding on the side (no additional text or symbols)
natural_image
Line drawing of a handheld device with a circular head and bulb (no text or symbols)natural_image
Two symbolic icons: a circle with a diagonal line and a droplet shape emitting raindrops (no text or labels)참고:
natural_image
Three identical diagrams showing concentric circles with internal shaded regions, no text or symbols present.natural_image
Three identical line drawings of a circular object with labeled points (1, 2, 3) and R symbols on its surfaces (no text or symbols beyond labels)text_image
Diagram illustrating a hand-pulling process of a device with labeled parts and directional arrows쥐어 벗기기 분리하기
text_image
Diagram illustrating the step-by-step installation of a mechanical component with labeled parts and directional arrows.들이기 벗기기 분리하기
natural_image
Two identical illustrations of a medical or surgical device with concentric layers and central circular features (no text or symbols)바로 가기 변경 또는 사용 해제
natural_image
Two identical illustrations of earbuds with central circular features, no text or symbols present.natural_image
Two identical illustrations of ear ear devices with central circular features, no text or symbols present.natural_image
Two identical illustrations of a medical or surgical device with circular features and concentric layers (no text or symbols)natural_image
Line drawing of a Bose-branded wireless earbuds with open case (no text or symbols on device)natural_image
Simple line drawing of a device with a plug and connector (no text or symbols)natural_image
Diagram showing a device with a circular base and a power outlet connected to it (no text or symbols present)- 케이스를 충전 케이스에 놓습니다.
natural_image
Simple line drawing of a dome-shaped object connected to a power outlet with a smiley face (no text or symbols)natural_image
Line drawing of a Bose-branded earbuds with open case and black buttons (no text or symbols on the device itself)natural_image
Line drawing of a Bose-branded VR headset with open lid and front bezel (no text or symbols on device)natural_image
Line drawing of a Bose brand wireless earbuds showing front and side views with no text or symbolsnatural_image
Two identical illustrations of ear-shaped devices with central circular features, no text or symbols present.natural_image
Line drawing of a Bose brand wireless earbuds showing front and side views with no text or symbolsnatural_image
Line drawing of a Bose brand wireless earbuds showing front and side views (no text or symbols)natural_image
Line drawing of a BOSE wireless earbuds showing front and side views with no text or symbolsnatural_image
Line drawing of a Bose brand wireless earbuds showing front and side views with no text or symbolsnatural_image
Line drawing of a device component with a plug and arrow pointing to a connector (no text or symbols)natural_image
Line drawing of a Bose brand wireless earbuds showing front and side views (no text or symbols)- INGESTION HAZARD: This product contains a button cell or coin battery.
- DEATH or serious injury can occur if ingested.
• A swallowed button cell or coin battery can cause Internal Chemical Burns in as little as 2 hours. - KEEP new and used batteries OUT OF REACH of CHILDREN
- Seek immediate medical attention if a battery is suspected to be swallowed or inserted inside any part of the body.
natural_image
Line drawings of two different types of washing machines, one with a label 'BUSE' on its side (no other text or symbols)natural_image
Four identical circular ring diagrams with labeled inner and outer rings, no text or symbols present.固定带(2号和3号)
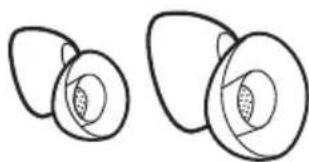
natural_image
Two abstract geometric shapes resembling ovals or ovals with internal cross-sections (no text or symbols)natural_image
Two symbolic icons: a circle with a diagonal line and a droplet-shaped object emitting water droplets (no text or symbols)注意:
natural_image
Three identical diagrams showing concentric circles with internal shaded regions, no text or symbols present.natural_image
Three identical line drawings of a ring with labeled points (1R, 2R, 3R), no text or symbols present.text_image
Diagram showing two-step cleaning or assembly process of a device with labeled parts and directional arrows挤压并剥离 分离
text_image
Diagram showing two types of dental implants with labeled parts and directional arrows indicating insertion or positioning.对齐 按下
- 根据需要,为另一个耳塞重复步骤1-3。
text_image
固定带勺 R R R R R R伸展 剥离 分离
natural_image
Simple line drawing of a pair of overlapping ovals or gauges (no text or symbols)触摸表面
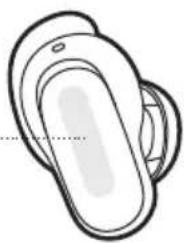
natural_image
Simple line drawing of a stylized object resembling a helmet or device (no text or symbols)媒体播放和音量
控制 操作方法
natural_image
Two identical illustrations of a stylized ear or ear device with concentric rings and central circular features (no text or symbols)更改或禁用快捷方式
natural_image
Two identical illustrations of ear earments with central circular features, no text or symbols present.语音提示会循环播报每个沉浸式音频设置。
- 当您听到喜欢的设置名称时,放开耳塞。
通话时的沉浸式音频
natural_image
Two identical illustrations of a stylized ear with shaded regions and dotted centerlines, no text or symbols present.语音提示会循环播报每种模式。
- 当您听到喜欢的模式名称时,放开耳塞。
natural_image
Two identical illustrations of a stylized object with circular features and concentric rings, no text or symbols present.natural_image
Line drawing of a Bose-branded wireless earbuds with open case (no text or symbols on device)- 为右耳塞重复执行步骤1-2。
natural_image
Line drawing of a device component with a plug inserted into a housing (no text or symbols)natural_image
Simple line drawing of a device with a circular base and an electrical outlet connected to it (no text or symbols)- 将充电盒放在充电器上。
natural_image
Simple line drawing of a bowl connected to a wall-mounted electrical outlet (no text or symbols)natural_image
Line drawing of a Bose-branded earbuds with open case and black buttons (no text or symbols on the device itself)natural_image
Line drawing of a Bose-branded earless device with open lid and front bezel (no text or symbols on the device itself)text_image
耳塞状态灯 BOSEBluetooth 状态
text_image
充电盒状态灯 BOSE电池、更新和错误状态
显示充电盒电池、更新和错误状态。
指示灯活动 系统状态
natural_image
Line drawing of a Bose brand wireless earbuds showing front and side views (no text or symbols)text_image
BLUETOOTH BOSE QC Ultra 2 耳塞natural_image
Two identical illustrations of ear-shaped objects with central circular features, no text or symbols present.natural_image
Line drawing of a Bose brand wireless earbuds showing front and side views with no text or symbolsnatural_image
Line drawing of a Bose brand wireless earbuds showing front and side views with no text or symbolsnatural_image
Line drawing of a BOSE wireless earbuds showing front and side views with no text or symbolsnatural_image
Line drawing of a BOSE wireless earbuds showing front and side views with no text or symbolsnatural_image
Line drawing of a device component with a plug inserted into a housing (no text or symbols)natural_image
Line drawing of a Bose brand wireless earbuds showing front and side views (no text or symbols)- 重复前面的步骤2次。
- INGESTION HAZARD: This product contains a button cell or coin battery.
- DEATH or serious injury can occur if ingested.
• A swallowed button cell or coin battery can cause Internal Chemical Burns in as little as 2 hours. - KEEP new and used batteries OUT OF REACH of CHILDREN
- Seek immediate medical attention if a battery is suspected to be swallowed or inserted inside any part of the body.
natural_image
Line drawings of two different types of washing machines, one with a visible brand logo and the other without any text or symbols.Bose QuietComfort Ultra 耳塞(第代2 充電盒
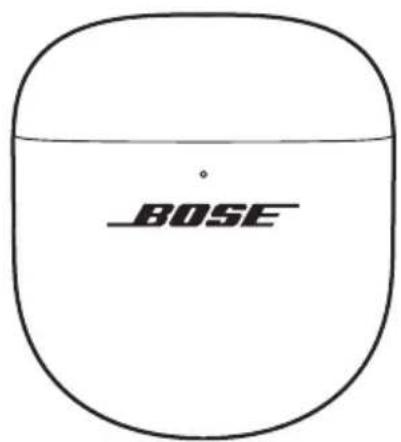
text_image
BOSE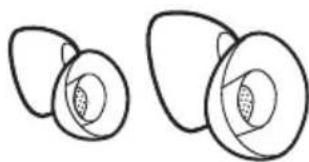
natural_image
Two abstract circular shapes with internal patterns, no text or symbols presentnatural_image
Four identical circular ring diagrams with labeled segments (L, R) and no additional text or symbolsnatural_image
Two symbolic icons: a circle with a diagonal line and a teardrop-shaped object emitting droplets (no text or symbols present)注意:
natural_image
Three identical diagrams showing concentric circles with internal shaded regions, no text or symbols present.natural_image
Three identical wireframe diagrams of a ring or container with labeled points (1, 2, 3) and R symbols on each side (no text or numerical data beyond labels)text_image
Diagram illustrating a hand-pulling process of a device with labeled parts and directional arrows擠壓並剝離 分離
text_image
Diagram showing two stages of a device with labeled components and directional arrows, likely illustrating a process or manufacturing step.對準 按下
text_image
固定帶勺 R OR R OR R OR伸展 剝離 分離
natural_image
Diagram of a medical device with labeled components (no text or symbols present)檢查
- 根據需要,為另一個耳塞重複步驟1-5。
natural_image
Simple line drawing of a stylized object resembling a door or seat (no text or symbols)觸控表面
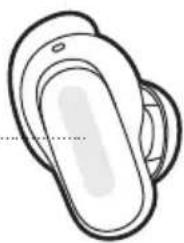
natural_image
Simple line drawing of a stylized object resembling a hand or device with a circular body and oval top (no text or symbols)媒體播放和音量
控制 操作方法
natural_image
Two identical illustrations of a stylized ear or button device with concentric rings and central dot pattern (no text or symbols)變更或停用捷徑
natural_image
Two identical illustrations of ear-shaped objects with central circular features, no text or symbols present.語音提示會循環播報每個沉浸式音訊設定。
- 當您聽到喜歡的設定名稱時,放開耳塞。
通話時的沉浸式音訊
natural_image
Two identical illustrations of a stylized ear with a central dot and concentric rings, no text or symbols present.語音提示會循環播報每種模式。
- 當您聽到喜歡的模式名稱時,放開耳塞。
natural_image
Two identical illustrations of ear earments with shaded centers and circular patterns (no text or symbols)natural_image
Line drawing of a Bose-branded wireless earbuds with open case (no text or symbols on device)- 重複步驟1-2為右耳塞充電。
natural_image
Line drawing of a device component with a plug inserted into a housing (no text or symbols)natural_image
Simple line drawing of a computer monitor with an open lid and a power outlet connected to its base (no text or symbols)- 將充電盒放在充電器上。
natural_image
Simple line drawing of a computer mouse connected to a power outlet (no text or symbols)natural_image
Line drawing of a Bose-branded earbuds with open case and black buttons (no text or symbols on the device itself)natural_image
Line drawing of a Bose-branded VR headset with open lid and front bezel (no text or symbols on device)natural_image
Line drawing of a Bose brand wireless earbuds showing front and side views with no text or symbolsnatural_image
Two identical illustrations of ear ear devices with central circular features, no text or symbols present.natural_image
Line drawing of a Bose brand wireless earbuds showing front and side views with no text or symbolsnatural_image
Line drawing of a Bose brand wireless earbuds showing front and side views with no text or symbolsnatural_image
Line drawing of a BOSE wireless earbuds showing front and side views with no text or symbolsnatural_image
Line drawing of a BOSE wireless earbuds showing front and side views with no text or symbolsworldwide.Bose.com/Warranty °