
BioPlus 50 - Water filter OASE - Free user manual and instructions
Find the device manual for free BioPlus 50 OASE in PDF.

| Product type | Internal aquarium filter |
| Brand | Oase |
| Model | BioPlus 50 |
| Application | Filtration and water circulation in private aquatics, indoor use |
| Recommended water temperature | +4 °C to +35 °C |
| Housing material | Plastic |
| Filter media | Filter sponge and filter fiber cloth |
| Main functions | Mechanical filtration, water circulation, optional heating (with compatible HeatUp) |
| Electrical supply | 230 V / 50 Hz |
| Power consumption | 4 W |
| Dimensions (L x W x H) | 200 x 100 x 100 mm |
| Weight | 0.4 kg |
| Recommended aquarium volume | Up to 100 L |
| Filter flow rate | 300 L/h |
| Wear parts | Filter sponge, filter fiber cloth, suction cups, operating unit |
| Maintenance and cleaning | Rinse with clear water, soft brush, no chemicals, Oase PumpClean descaler recommended |
| Safety | Dry-run protection, swan neck for cables, disconnect before maintenance |
| Included accessories | Suction cups, outflow regulator, filter modules |
| Optional heater compatibility | Oase HeatUp suitable for the model |
Frequently Asked Questions - BioPlus 50 OASE
User questions about BioPlus 50 OASE
0 question about this device. Answer the ones you know or ask your own.
Ask a new question about this device
Download the instructions for your Water filter in PDF format for free! Find your manual BioPlus 50 - OASE and take your electronic device back in hand. On this page are published all the documents necessary for the use of your device. BioPlus 50 by OASE.
USER MANUAL BioPlus 50 OASE
natural_image
Black-and-white photo of three striped fish swimming in a pool with fish head visible (no text or symbols)BioPlus 50/100/200 - BioPlus Thermo 50/100/200
EN Operating instructions
FR Notice d'emploi
natural_image
Two identical cylindrical industrial vacuum tanks with ventilation grilles and heat sinks (no text or symbols visible)A
BioPlus Thermo 50
BioPlus Thermo 100
BioPlus Thermo 200

BioPlus Thermo 50/100/200
BPLOOO1
B
BPL0002
C
BioPlus Thermo
natural_image
Technical illustration of a handheld device with a vertical cylindrical component and internal components, showing motion arrows (no text or symbols)
natural_image
Line drawing of a portable electric vacuum cleaner with attached power outlet (no text or symbols)BPLOO03
D
natural_image
Technical line drawing of a portable air purifier device with control panel and buttons (no text or symbols)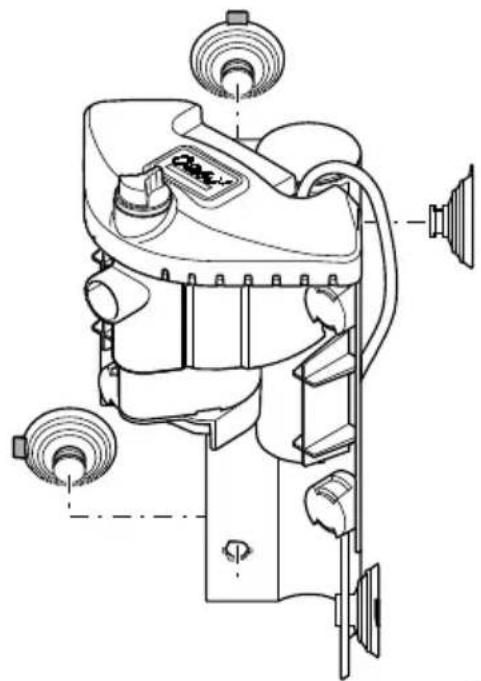
natural_image
Technical line drawing of a mechanical device with multiple ports and mounting holes (no text or symbols)BPL0004
E
natural_image
Diagram of a gas outlet connected to a vertical pipe with water droplets, showing internal components and airflow direction (no text or labels)BPLOOOS
F
BPL0006
G
H
BPL001D
BPL0007
Translation of the original Operating Instructions
WARNING
- This unit can be used by children aged 8 and above and by persons with reduced physical, sensory or mental capabilities or lack of experience and knowledge if they are supervised or have been instructed on how to use the unit in a safe way and they understand the hazards involved.
- Do not allow children to play with the unit.
- Only allow children to carry out cleaning and user maintenance under supervision.
- Switch off all units in the aquarium or disconnect the power plugs of all units before reaching into the water.
- Do not use the unit if electrical cables or housings are damaged.
- A damaged connection cable cannot be replaced. Dispose of the unit.
- Only connect the unit if the electrical data of the unit and the power supply correspond. The unit data is to be found on the unit type plate, on the packaging or in this manual.
SAFETY INFORMATION
- Only connect the unit to a correctly fitted socket.
- Protect the plug connection from moisture.
- Never carry or pull the unit by the electrical cable.
- Route cables such that they are protected from damage and do not present a tripping hazard.
- Only carry out work on the unit that is described in this manual. If problems cannot be overcome, please contact an authorised customer service point or, if in doubt, the manufacturer.
- Never carry out technical changes to the unit.
- Only use original spare parts and accessories for the unit.
Warnings used in these instructions
NOTE
Information for the purpose of clarification or for preventing possible damage to assets or to the environment.
Cross-references used in these instructions
☐ A Reference to a figure, e.g. Fig. A.
PRODUCT DESCRIPTION
Intended use
BioPlus 50/100/200, referred to as "unit", may only be used as specified in the following:
• BioPlus: Water filtering and recirculation
- BioPlus Thermo: Water heating, filtering and recirculation.
- Operate in accordance with instructions.
The following restrictions apply to the unit:
- Only use indoors and for aquaristic purposes in the home (not for commercial use).
- Only operate with water at a water temperature of +4 °C to +35 °C.
Function description
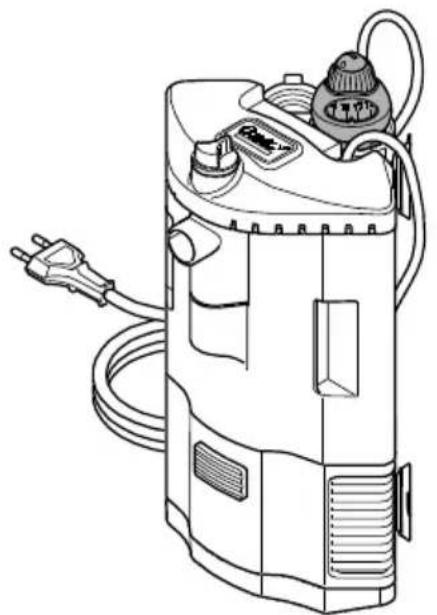
□ B
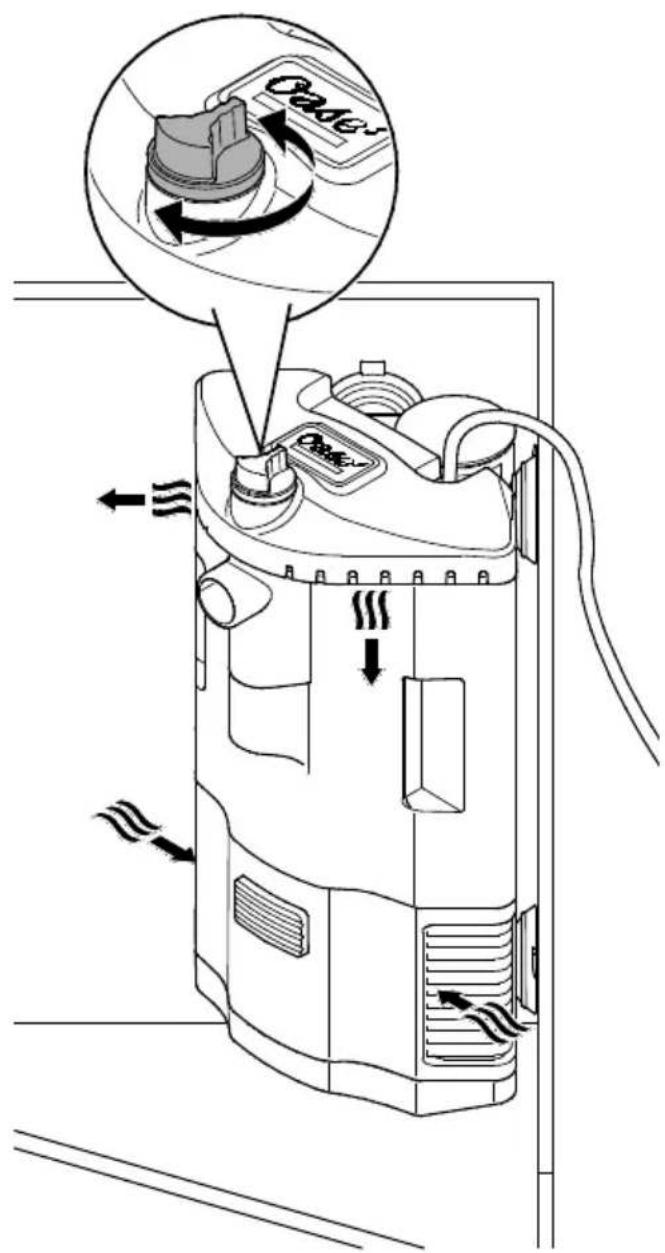
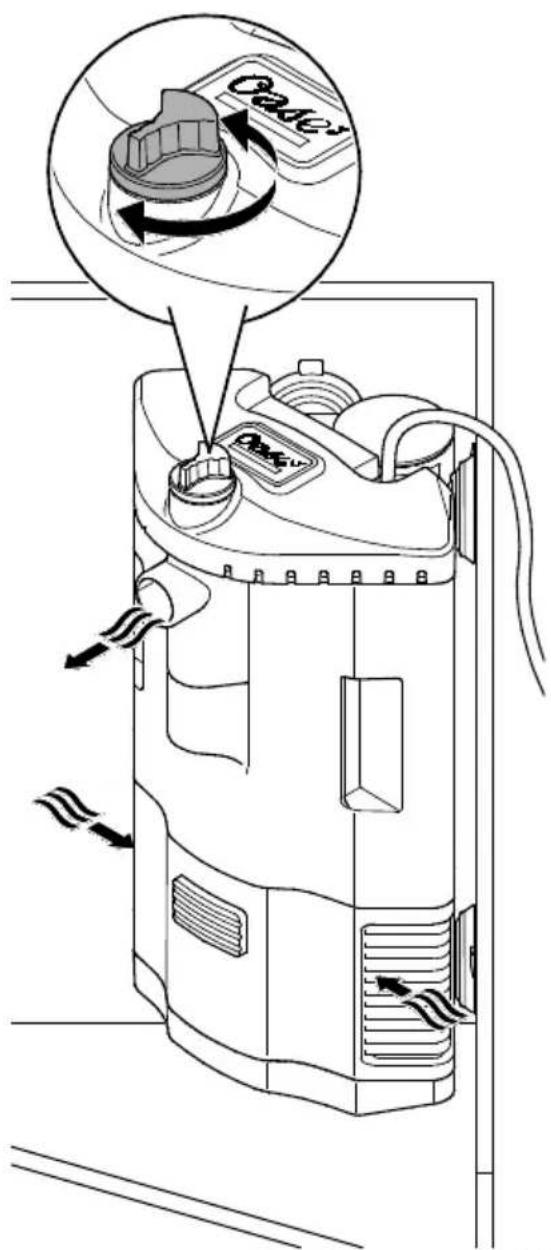
Path of the water: Drawn in by a pump into the pump unit, the water flows through the filter modules, arranged above each other in stages to form the filter unit. Each filter module is equipped with a foam filter and/or filter fleece (top filter module). The water enters the filter module through the inlet on the side and exits through the small flow-out nozzles or the central outlet, depending on the position of the outlet control knob.
BioPlus Thermo: The water is heated by a heater on its way through the filter unit.
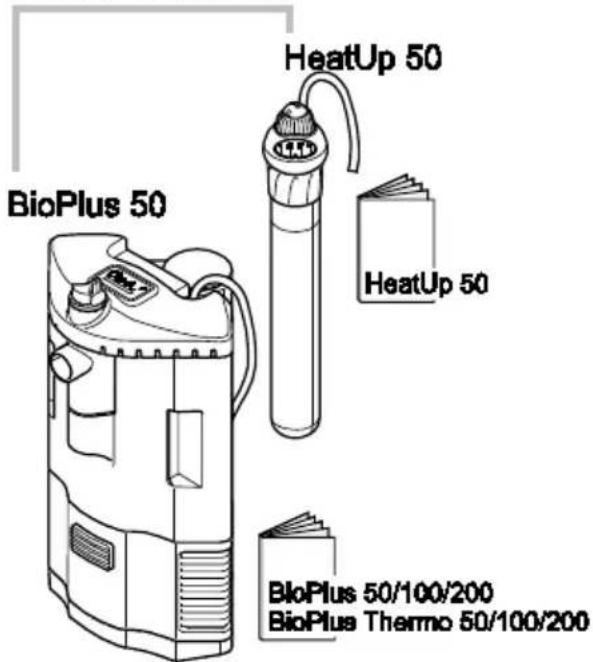
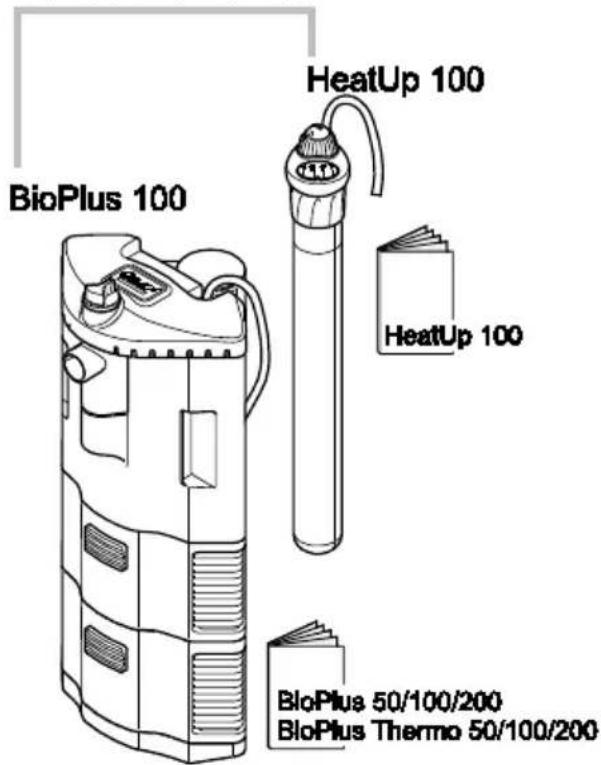
Retrofitting
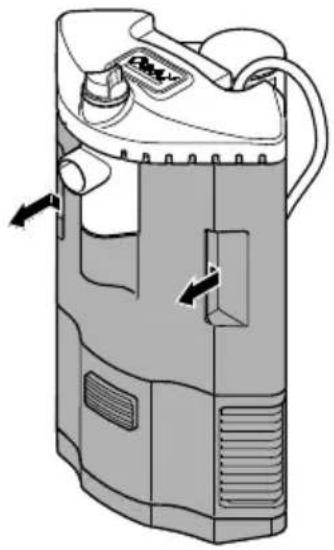
□ C
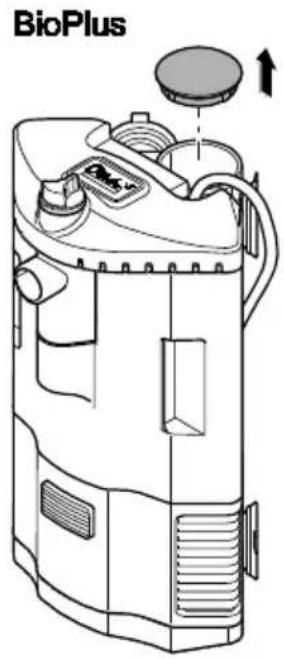
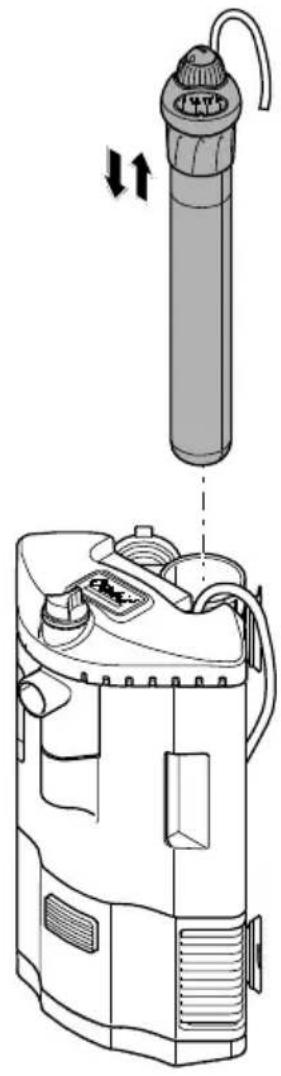
By additionally purchasing an OASE heater HeatUp it is possible to extend BioPlus to BioPlus Thermo. After removal of the cap, simply insert the selected HeatUp (see following table), which is suitable for the BioPlus and the size of the aquarium, into the heater chamber.
O: Suitable ●: Particularly recommended
INSTALLATION AND CONNECTION

NOTE
Ensure that the pump never runs dry!
Possible consequences: The pump will be destroyed.
Protective measure: Regularly check the water level in the aquarium.
NOTE
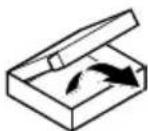
Thoroughly rinse out all filter material with warm tap water before using for the first time in order to remove any soiling. ( Cleaning or replacing the filter media)
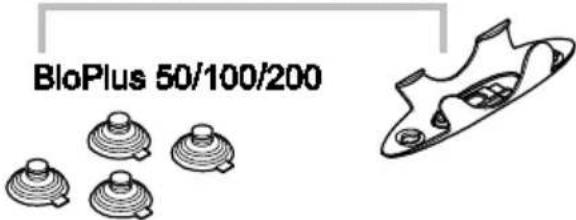
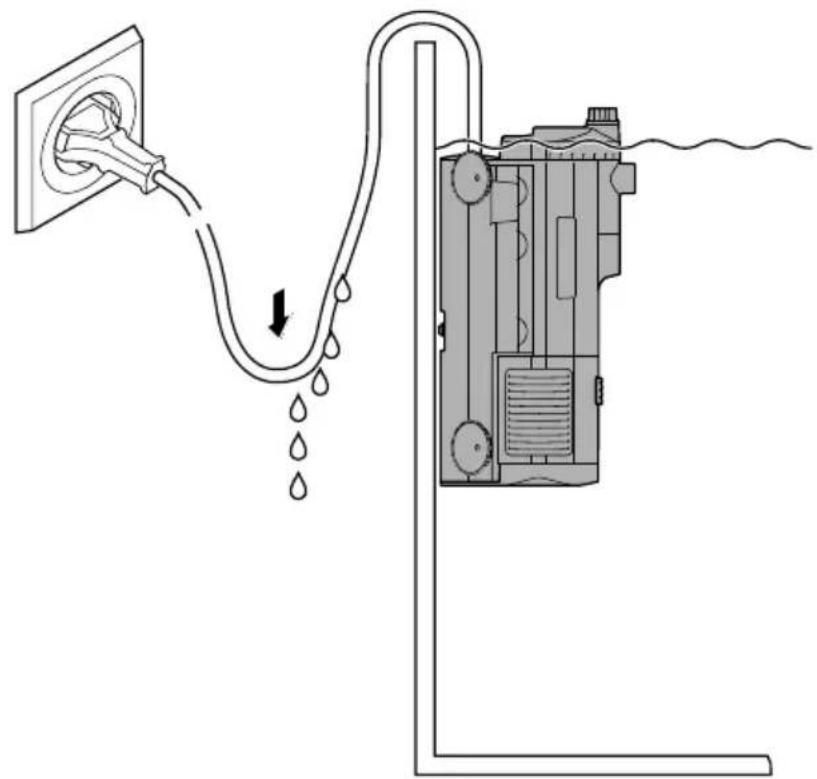
□ D, E, B
The supplied suction cups serve for fastening the unit to a clean, smooth surface.
- Push the suction cups into the mounting holes of the pump unit with a twisting movement.
- Pay attention to the alignment of the tab (it should point upwards or to the side).
- Fasten the unit in a corner of the aquarium: Ensure that the flow-out nozzles are just below the surface of the water.
COMMISSIONING/START-UP
□ E, B
- Route each power connection cable such that it forms a drip loop.
- BioPlus Thermo: Adjust the temperature at the thermo-control heater HeatUp (separately enclosed instructions).
Switching on: Connect the unit to the mains. The unit switches on immediately. When the unit is switched on, it takes several minutes for the air to escape from the unit (this makes a noise).
- Use the outlet control knob to determine which water outlet is used (central outlet or flow-out nozzles).
Switching off: Disconnect the unit from the mains.
REMEDY OF FAULTS
| Malfunction | Cause | Remedy |
| The unit does not start up | No mains voltage | Check the mains voltage. |
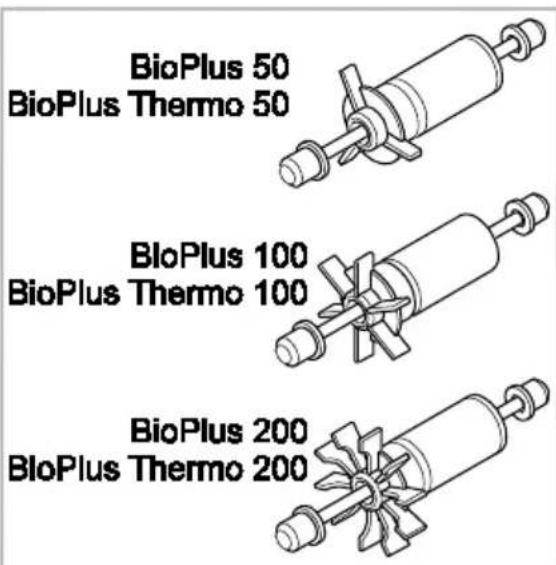
| Impeller unit blocked | Clean | |
| Water flow insufficient | Filter housing or impeller unit soiled | Clean |
| Impeller unit worn | Replace impeller unit | |
| Central outlet or flow-out nozzles soiled | Clean | |
| Foam filter or filter fleece soiled | Clean | |
| Insufficient filtering performance | Foam filter or filter fleece soiled | Clean |
| Foam filter or filter fleece worn | Replace | |
| Filter housing clogged | Clean the filter housing. | |
| Only BioPlus Thermo Insufficient water heating | Heater defective, not calibrated or temperature incorrectly set. | Replace, reset or calibrate. |
SPARE PARTS
The use of original parts from OASE ensures continued safe and reliable operation of the unit.
Please visit our website for spare parts drawings and spare parts.
MAINTENANCE AND CLEANING
For cleaning and maintenance, first separate the filter unit from the pump unit and then remove both units from the water.
- Maintenance of the pump unit involves cleaning the central outlet, flow-out nozzles and impeller unit.
- If necessary, clean with clear water using a soft brush.
- Do not use cleaning agents or chemical solutions. We recommend using OASE PumpClean for removing calcium deposits.
- Cleaning and replacement cycles for filter media such as foam filters are dependent on the size of the aquarium and the number of fish. Therefore, it is necessary to clean and replace the filter media as required to ensure optimum filter performance.
- If there are several foam filters: Clean or replace the foam filters at different times. This saves enough useful bacteria to ensure good biological filtration of the water.
- Recommendation for clear water: Replace the filter fleece at least each time the filter sponges are cleaned.
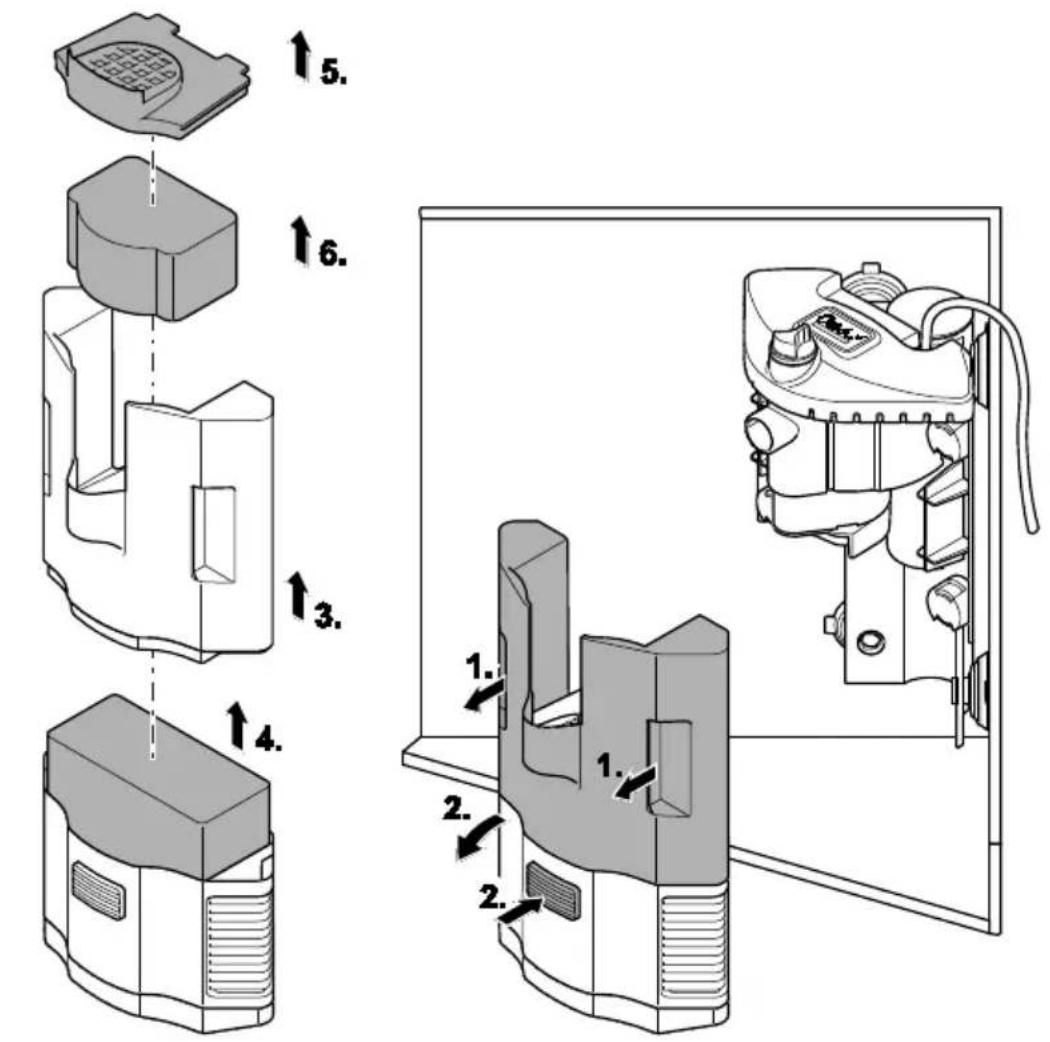
Cleaning or replacing the filter media
□ F
- Carefully pull the filter unit from the pump unit (magnetic holder) and remove from the aquarium.
- Separate the filter modules (press the button).
- Empty the filter modules over a wash basin and rinse the foam filters or filter fleece under warm water or replace.
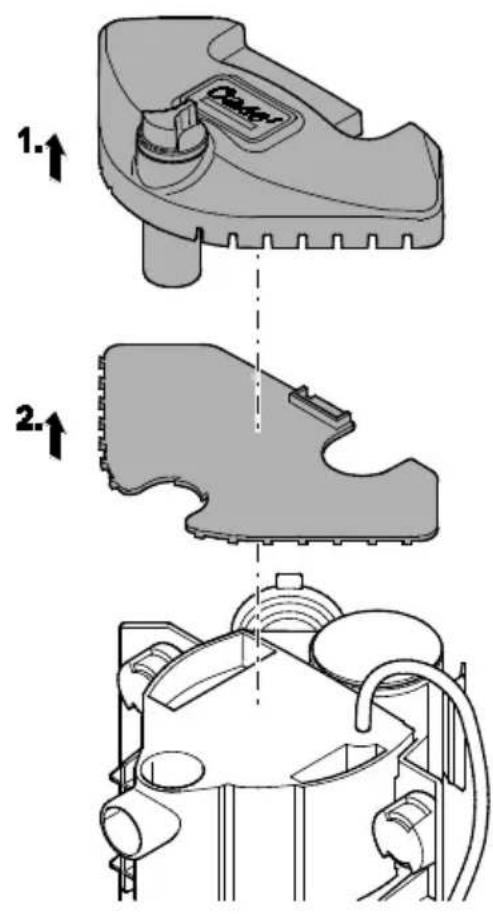
Cleaning the heater unit
□ C
- BioPlus Thermo: Remove the heater and clean according to the separately enclosed instructions.
- Also clean the chamber for the heater.
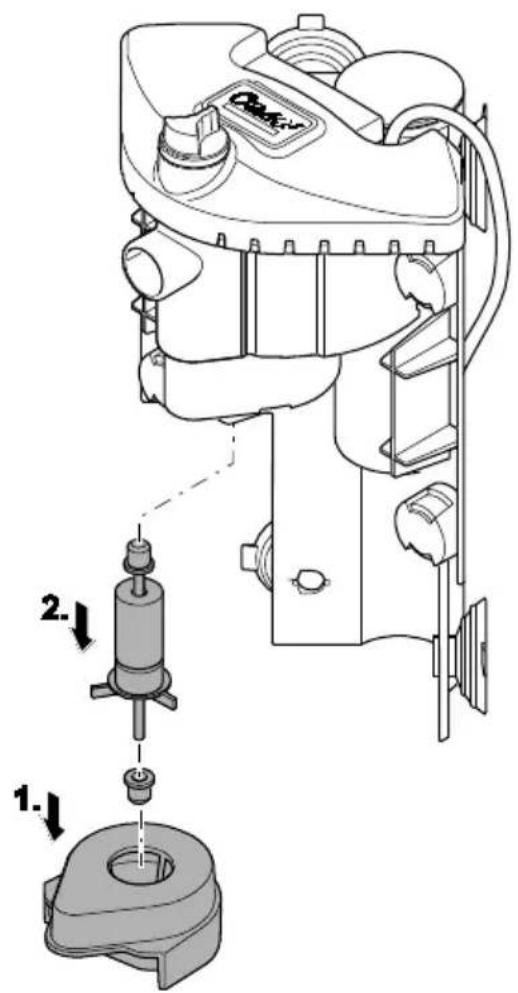
Pump unit maintenance
□ G
- Remove the pump unit.
- Release the suction cups with the aid of the tab.
- Pull up the nozzle unit and separate it from the base plate.
- Clean the central outlet and flow-out nozzles.
- Reassemble the unit in the reverse order.
□H - Pull the pump lid off downward.

www.oase-livingwater.com/spareparts-ia
- Remove the impeller unit, clean or replace.
- Reassemble the unit in the reverse order.
- Ensure that the two rubber bearings are correctly seated.
Re-installing the unit
- Fit the pump unit and filter unit together again, and install and connect as before in the aquarium ( Installation and connection):
- Flow-out nozzles just below the surface of the water
– Outlet control knob adjusted as required
— Power connection cables with drip loop
WEAR PARTS
- Filter fleece
- Foam filter
- Suction cups
- Impeller unit
DISPOSAL
Do not dispose of this unit with domestic waste! For disposal purposes, please use the return system provided. Render the unit unusable beforehand by cutting the cables.

www.oase-livingwater.com/onderdelen-ia
AFVOER VAN HET AFGEDANKTE
APPARAAT
OPSTILLING OG TILSLUTNING

BEMÄRK
INSTALLATION OCH ANSLUTNING

ANVISNING!

www.oase-livingwater.com/nahradnidily-ia
natural_image
Abstract line drawing of three overlapping curved shapes resembling stylized leaves or petals (no text or symbols)
- BioPlus 50/100/200 - BioPlus Thermo 50/100/200
- Translation of the original Operating Instructions
- WARNING
- SAFETY INFORMATION
- Warnings used in these instructions
- NOTE
- Cross-references used in these instructions
- PRODUCT DESCRIPTION
- Intended use
- Function description
- Retrofitting
- INSTALLATION AND CONNECTION
- COMMISSIONING/START-UP
- SPARE PARTS
- MAINTENANCE AND CLEANING
- Cleaning or replacing the filter media
- Cleaning the heater unit
- Pump unit maintenance
- Re-installing the unit
- WEAR PARTS
- DISPOSAL
- AFVOER VAN HET AFGEDANKTE
- APPARAAT
- OPSTILLING OG TILSLUTNING
- BEMÄRK
- INSTALLATION OCH ANSLUTNING
- ANVISNING!
Brand : OASE
Model : BioPlus 50
Category : Water filter