LUMI - Baby products Kinderkraft - Free user manual and instructions
Find the device manual for free LUMI Kinderkraft in PDF.
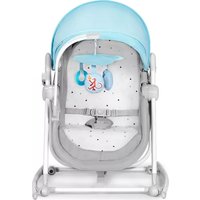
| Product type | Baby bouncer (swing) |
| Brand | Kinderkraft |
| Model | LUMI |
| Maximum child weight | 9 kg |
| Recommended age | From birth until the child can sit up unaided (max 9 kg) |
| Power supply for the bouncer | 4 AAA 1.5 V batteries (not included) or USB-DC cable 5.8 V / 1 A (power adapter not included) |
| Remote control power supply | 1 CR2025 3 V battery (included) |
| Main functions | Swing with 5 speeds, built-in music, Bluetooth connectivity, audio file playback (MP3, WAV, WMA) via USB port, timer (8, 15, 30 min), remote control, touch screen |
| Safety harness | 5-point harness adjustable in height (2 positions) |
| Sleep mode | Swinging for 15 minutes at speeds 2 and 1 |
| Materials and care | Cover, cushion and toy bar: clean with a damp cloth and mild soap. Frame: dry cloth. Do not immerse. |
| Storage | Remove batteries when not in use for extended periods. Keep out of reach of children. |
| Safety | Do not leave the child unattended. Do not use on an elevated surface. Do not use if the child can sit up unaided. Do not use for prolonged sleep. |
| Included accessories | Seat, frame, toy bar, remote control, USB-DC cable |
| Warranty | 24 months (extendable to 120 months under conditions) |
| Repairability and spare parts | Spare parts recommended by the manufacturer. Claims via online form. |
| Intended use | Indoor use only |
Frequently Asked Questions - LUMI Kinderkraft
User questions about LUMI Kinderkraft
0 question about this device. Answer the ones you know or ask your own.
Ask a new question about this device
Download the instructions for your Baby products in PDF format for free! Find your manual LUMI - Kinderkraft and take your electronic device back in hand. On this page are published all the documents necessary for the use of your device. LUMI by Kinderkraft.
USER MANUAL LUMI Kinderkraft
natural_image
Line drawing of a circular device with internal components and a base (no text or symbols)A.

natural_image
Line drawing of a curved mechanical component with no visible text or symbolsB.

natural_image
Simple line drawing of two animal heads hanging from a curved cable or tube (no text or symbols)C.
text_image
MUSIC Time VOL+ VOL- ▶8 ▶▶1 SLEEP 1 STOP 2 3 4 5D.
natural_image
Pure electrical connector diagram showing a USB cable with two ports (no text or symbols)E.

text_image
Technical diagram showing a car seat assembly with three close-up views of the component and a downward arrow indicating a detail.la
natural_image
Line drawing of a baby car seat with animal head and seatbelt, showing no text or symbolslb
natural_image
Technical line drawing of a mechanical component with an inset close-up showing a detail (no text or symbols)||

text_image
DC USBIII
text_image
KinderkraftIV

text_image
Bluetooth swing chairV

natural_image
Technical line drawing of a curved mechanical component with internal components, shown in two views: top view and side view (no text or symbols)VI

natural_image
Line drawing of a mechanical component with a circular inset highlighting a small feature (no text or symbols)VII
natural_image
Simple line drawing of a seatbelt with a belt buckle, no text or symbols presentVIII
AR
عميلنا المحترم!
text_image
Diagram illustrating human behavior with stick figures and directional arrows, possibly depicting a physical or social interaction scenario.natural_image
Simple line drawing of a trash bin with crossed lines indicating no waste or restriction (no text or symbols)
natural_image
Symbol of a trash bin crossed with no text or numbers, representing waste sorting or disposal (no text present)text_image
Diagram illustrating human movement and safety rules with labeled figures and directional arrows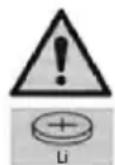
natural_image
Symbol of a trash bin crossed with no text or labels, accompanied by a black rectangular block below (no readable text or symbols)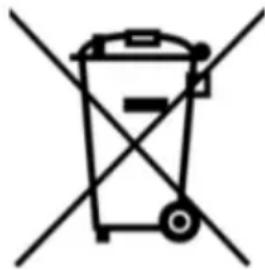
natural_image
Symbol of a trash bin crossed with no text or labelstext_image
Diagram illustrating human behavior with a person climbing, a walking figure, and a hand holding a directional arrow.natural_image
Symbol of a trash bin with crossed lines indicating no waste, and a solid black rectangle below (no text or labels)
natural_image
Symbol of a trash bin with crossed lines indicating no waste or restriction (no text or labels)Thank you for choosing a product by Kinderkraft.
Our designs are child-oriented – safety and quality always comes first, stay comfortable knowing that you have made the best choice.
IMPORTANT! READ CAREFULLY AND KEEP FOR FUTURE REFERENCE.
Safety and care notes!
WARNING!
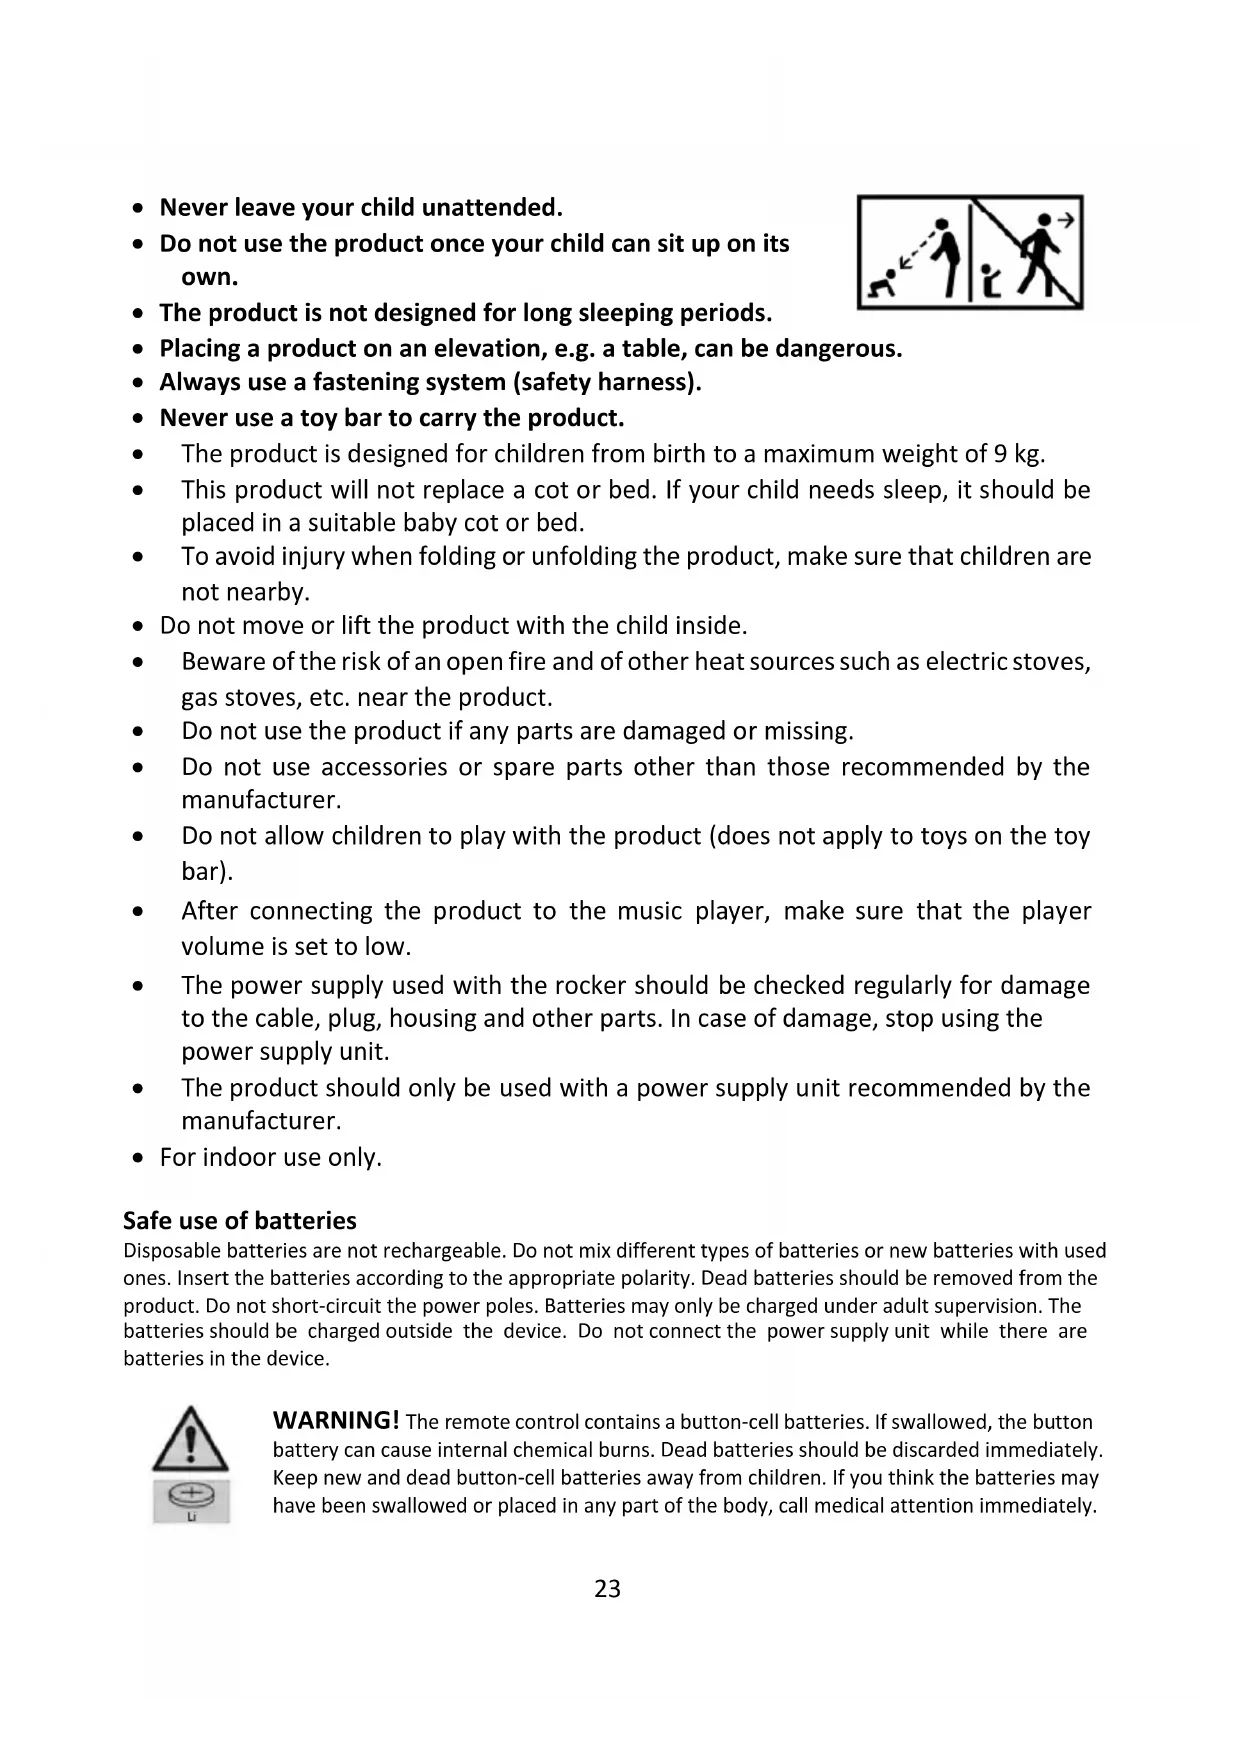
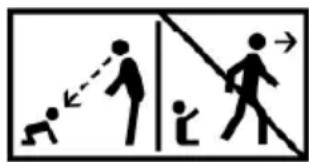
- Never leave your child unattended.
- Do not use the product once your child can sit up on its own.
- The product is not designed for long sleeping periods.
- Placing a product on an elevation, e.g. a table, can be dangerous.
• Always use a fastening system (safety harness).
- Never use a toy bar to carry the product.
text_image
Diagram illustrating human behavior with stick figures and directional arrows, possibly indicating movement or interaction.- The product is designed for children from birth to a maximum weight of 9 kg.
- This product will not replace a cot or bed. If your child needs sleep, it should be placed in a suitable baby cot or bed.
- To avoid injury when folding or unfolding the product, make sure that children are not nearby.
- Do not move or lift the product with the child inside.
- Beware of the risk of an open fire and of other heat sources such as electric stoves, gas stoves, etc. near the product.
- Do not use the product if any parts are damaged or missing.
- Do not use accessories or spare parts other than those recommended by the manufacturer.
- Do not allow children to play with the product (does not apply to toys on the toy bar).
- After connecting the product to the music player, make sure that the player volume is set to low.
- The power supply used with the rocker should be checked regularly for damage to the cable, plug, housing and other parts. In case of damage, stop using the power supply unit.
- The product should only be used with a power supply unit recommended by the manufacturer.
- For indoor use only.
Safe use of batteries
Disposable batteries are not rechargeable. Do not mix different types of batteries or new batteries with used ones. Insert the batteries according to the appropriate polarity. Dead batteries should be removed from the product. Do not short-circuit the power poles. Batteries may only be charged under adult supervision. The batteries should be charged outside the device. Do not connect the power supply unit while there are batteries in the device.

WARNING! The remote control contains a button-cell batteries. If swallowed, the button battery can cause internal chemical burns. Dead batteries should be discarded immediately. Keep new and dead button-cell batteries away from children. If you think the batteries may have been swallowed or placed in any part of the body, call medical attention immediately.
Technical data:
Battery power supply: 4 pcs x AAA 1.5 V – (not included)
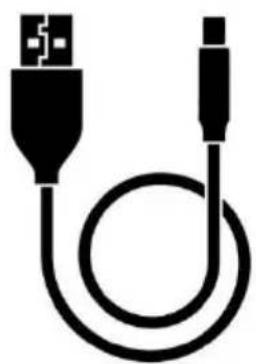
Power supply via USB-DC cable (included): requires a power supply unit with USB-A port with the following output parameters: voltage 5.8V, minimum current 1A.
Remote control power supply: 1 pc x CR2025 3 V (included in the set)
Product description
| no. | Item description | no. | Item description |
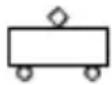
| A | Seat | B | Rocker foot |
| C | Toy bar | D | Remote |
| E | USB-DC cable |
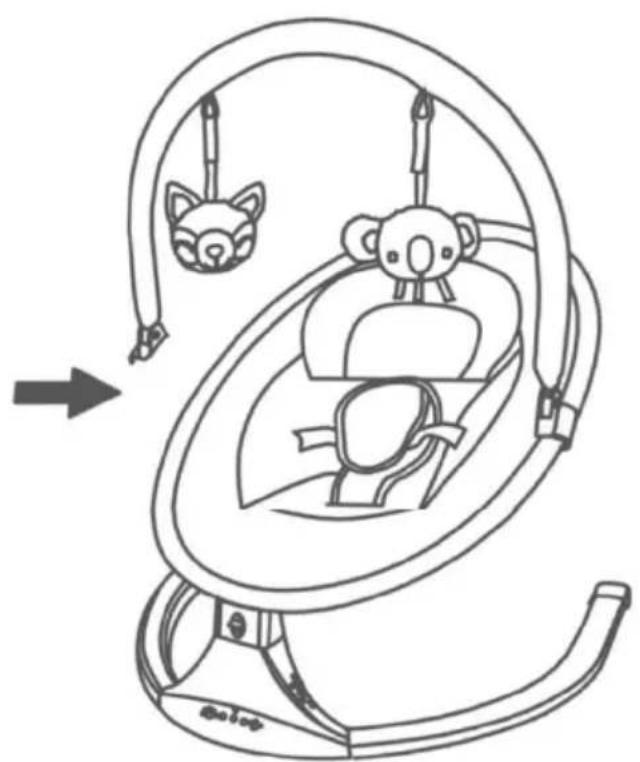
Product assembly/disassembly:
Follow the fig. 1a and 1b.
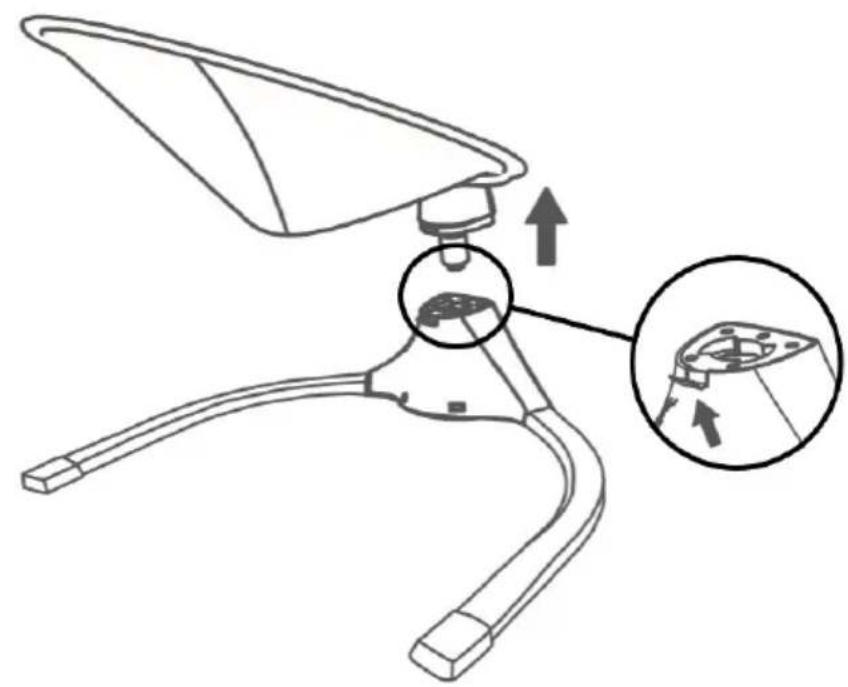
The installation should take place on a soft ground that will not damage the surface of the elements. All parts of the rocker (A,B,C) should be carefully inspected after taking it out of the box and make sure that none of them are damaged. Place the foot of the rocker (B) on the ground. With both hands, grasp the seat (A) and gently push the seat pin into the hole in the foot. When the elements connect, you will hear a characteristic sound (click). Attention! The seat pin and the hole in the foot are D-shaped. Adjust the shape so that the seat can connect to the foot without obstacles or force. Slide the toy bar (C) onto the seat frame.
To dismantle the product, press the metal button at the back of the foot of the rocker (Figure II) and then, with firm move, separate the seat from the foot of the rocker.
The rocker has a rocking function. If you want the seat to swing to the sides, move the locking button upwards (Figure VII). Attention! Do not activate the rocker function if the button is in the motion blocking position.
The rocker has two belt heights. Choose one of these depending on the size of your child.
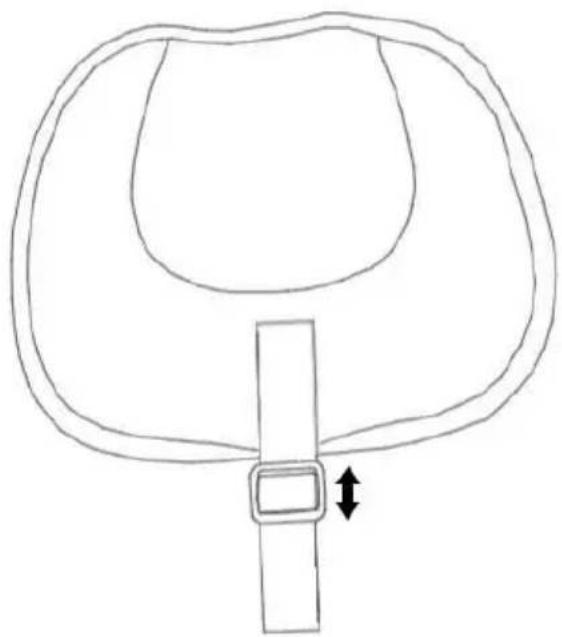
Cushion adjustment
Adjustment is by means of a Velcro strap (Figure VIII). By sliding the belt buckle down, you can adjust the cushion lower, while by pulling the belt buckle up, you can adjust the cushion higher. Velcro straps on the adjusting belt and cushion are used to stabilize the position of the cushion.
Installation/replacement of batteries in the rocker:
To install or replace the batteries, use a Phillips screwdriver (not included), unscrew the safety flap from element B (one screw) and replace the batteries paying attention to polarity. Follow the figure VI
Replacing the remote control batteries:
To replace the batteries, follow the drawing on the back of the remote control. Press and hold the button, and then slide out the battery compartment. Discard the dead battery and insert a new one, paying attention to the polarity (plus up). Slide the battery compartment.
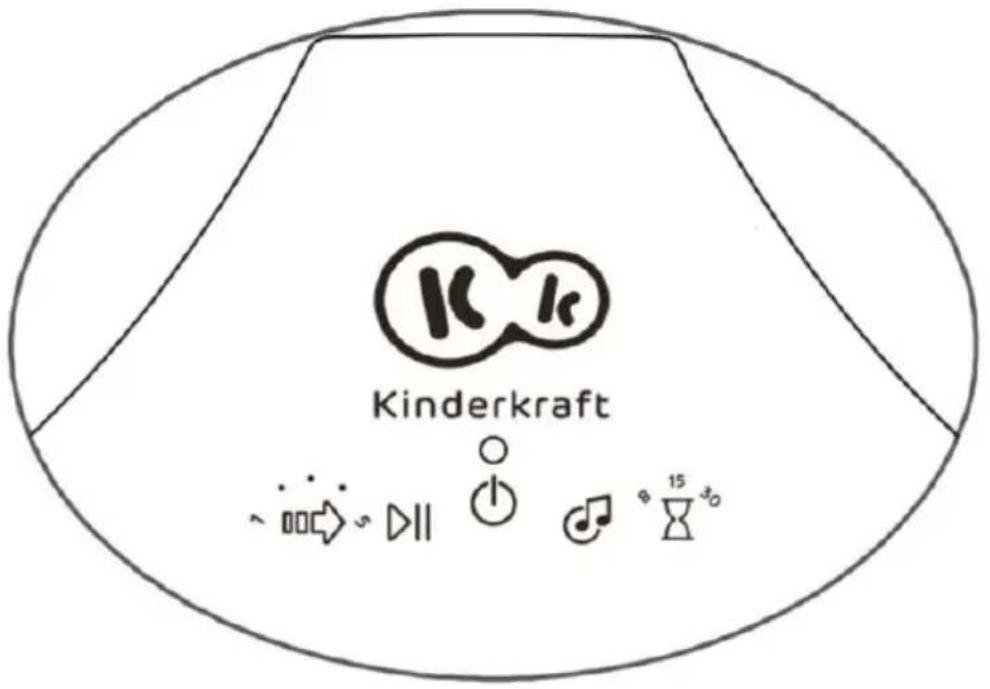
Product control:
You can control the rocker using a remote control (D) as well as the touch panel on the foot of the rocker
(Figure IV).
When the device is turned on, the LED above the On/Off icon lights up.
Bluetooth control.
In addition, you can connect the rocker to your phone via Bluetooth to play your child's favourite melody. To connect, activate the Bluetooth function on your phone and select "swing chair" (Figure V). When the connection is active, you will hear a characteristic sound coming from the rocker.
Audio files support
You can play audio files via the USB port. Insert the media with the audio files into the USB port. The rocker supports mp3, wav and wma file formats.
Panel control (Figure IV)
 | On/Off |
 | Swinging speed control. Adjustment from 1 to 5. |
 | Turn on or stop the music. |
 | Switching songs |
 | Swinging time adjustment. Swinging can be activated for 8, 15 or 30 minutes. |
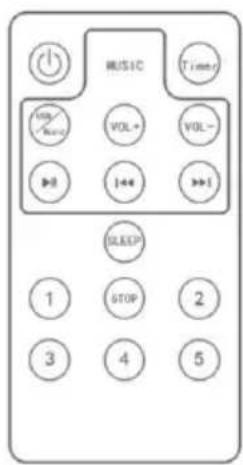
Remote control (Figure D)
 | On/Off | Turning on the music | |
 | Swinging time adjustment | Start/pause music | |
 | Volume up | Previous song | |
 | Volume down | Next song | |
 | Sleep mode (swing for 15 minutes at intensity 2 and 1) | Stop | |
 | Swing speed - level 1 (lowest) | Swing speed - level 2 | |
 | Swing speed - level 3 | Swing speed - level 4 | |
 | Swing speed - level 5 (highest) |
Maintenance and cleaning
The seat pad, pillow and the toy bar: Clean with a clean, damp cloth and mild soap. Leave to air-dry. Do not immerse in water.
Rocker foot: clean with a soft, clean and dry cloth.
Storage
Keep the product out of the reach of children.
Batteries should be removed from the product if it is not used for a long time to avoid corrosion and leakage.
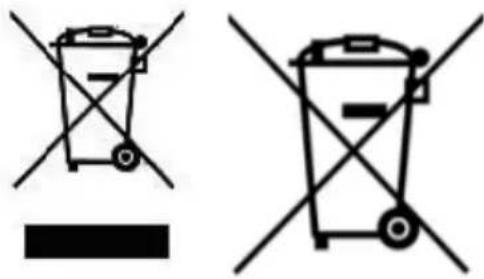
DISPOSAL OF WASTE EQUIPMENT AND BATTERIES
text_image
Two types of waste sorting symbols: one with crossed-out bins and a blank bar, the other with crossed-out bins and a blank rectangular block.The symbol of the crossed-out wheeled bin placed on equipment, batteries, packaging or accompanying documents indicates that the product must not be disposed of with other waste.
It is the user's responsibility to hand over waste equipment and batteries to a designated collection point for proper treatment. Information about the available waste electrical equipment and battery collection system can be found in the shop's information point and in the municipal/commune office.
Each household is a user of electrical and electronic equipment and batteries and therefore a potential producer of waste hazardous to humans and the environment due to the presence of hazardous substances, mixtures and components in the equipment and batteries. On the other hand, waste equipment is a valuable material from which we can recover raw materials such as copper, tin, glass, iron and others.
Proper handling of waste equipment and batteries prevents negative consequences for the environment and human health!
Warranty
C. All Kinderkraft products are covered by a 24-month warranty. The warranty period begins on the date of releasing the product to the Buyer.
D. The warranty is valid for products sold in the following countries: France, Spain, Germany, Poland, United Kingdom, Italy.
E. In countries not listed above warranty terms and conditions are determined by the Seller.
F. It is possible to extend the warranty period to 120 months (10 years). Full text of the terms and conditions and warranty extension registration form are available at WWW.KINDERKRAFT.COM
G. The warranty is valid only in the country where the purchase was made.
H. Complaints should be submitted by completing the form available at WWW.RMA.KINDERKRAFT.COM
I. The warranty shall not cover:
a. claims arising from product specifications, as long as they comply with those specified by the manufacturer in the instruction manual or other documents of a legislative nature;
b. product damage caused by improper maintenance or use of inadequate chemicals;
c. colour change (discolouration) when the product has been exposed to direct sunlight against the instructions provided in the instruction manual;
d. tear, wear, crack of fabric/plastic that is the fault of the Customer;
e. reduction in the quality of the product and consumables due to normal wear and tear;
f. products which have not been used according to specifications;
J. The warranty period for accessories attached to the device is 6 months from the date of sale, with the exception of mechanical damage.
K. These guarantee terms and conditions are complementary to the Customer's rights in relation to 4KRAFT sp. z o.o. The warranty shall not exclude, limit or suspend the rights of the Customer arising from the provisions on the warranty for defects in the goods sold.
L. Full text of Warranty Terms and Conditions is available at WWW.KINDERKRAFT.COM
All rights to this data are entirely reserved to 4Kraft Sp. z o.o. Any unauthorized use or misuse, including usufruct, copying, duplication and sharing, wholly or partially, without consent of 4Kraft Sp. z o.o. may result in legal consequences.
ES
Estimado cliente!
text_image
Safety warning illustration showing human and pedestrian crossing safety rules with arrows indicating movementnatural_image
Symbol of a trash bin with crossed lines indicating no waste, and a solid black rectangle below (no text or labels)
natural_image
Symbol of a trash bin crossed out by two diagonal lines (no text or numbers present)text_image
Diagram illustrating human and pedestrian crossing behaviors with labeled figures and directional arrowsCommande via bluetooth.
natural_image
Symbol of a trash bin crossed with two crossed arms, no text or labels present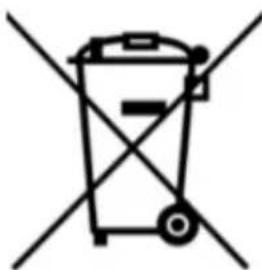
natural_image
Symbol of a trash bin crossed out by two diagonal lines (no text or labels)natural_image
Silhouette of a person with a stick and two adults facing away from a diagonal line (no text or symbols)text_image
Two crossed-out recycling bins with no visible text or symbolstext_image
Diagram illustrating human behavior with a walking stick, running person, and child, showing directional arrows.Controllo Bluetooth.
text_image
Two types of waste sorting symbols: one with crossed-out bins and a blank bar, the other with crossed-out bins and a blank rectangular block.text_image
Diagram illustrating human behavior with stick figures and directional arrows, possibly indicating movement or interaction.Bediening via bluetooth.
natural_image
Symbol of a trash bin crossed with a diagonal line and a horizontal bar below (no text or labels)
natural_image
Symbol of a trash bin crossed with no text or labelstext_image
Diagram illustrating human behavior with a person assisting another, showing directional arrows and symbolstext_image
Two types of waste sorting symbols: one with crossed-out bins and a black rectangle, the other with crossed-out bins and a black rectangle.text_image
Diagram illustrating human and child movement with directional arrows and a stick figure, likely depicting a physical or educational scenario.Siga as fotos la e Ib.
natural_image
Simple line drawing of a trash bin with crossed lines indicating no waste or plastic, and a solid black rectangle below (no text or symbols)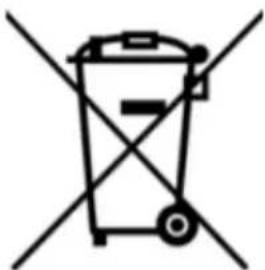
natural_image
Symbol of a trash bin crossed with no text or labelstext_image
Diagram illustrating human and pedestrian crossing behaviors with labeled figures and directional arrowsnatural_image
Simple line drawing of a trash bin with crossed lines indicating no waste or plastic, and a solid black rectangle below (no text or symbols)
natural_image
Symbol of a trash bin with crossed x-marks and no text or numberstext_image
Diagram illustrating human behavior with stick figures and directional arrows, possibly indicating movement or interaction.natural_image
Simple line drawing of a trash bin with crossed lines and a black rectangular base (no text or symbols)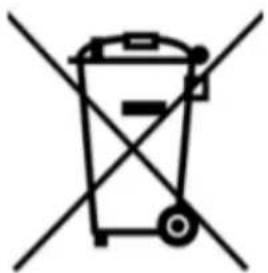
natural_image
Symbol of a trash bin with crossed lines indicating no waste or restriction (no text or labels)text_image
Diagram illustrating human behavior with a walking figure, a person climbing, and a diagonal line indicating direction or distance.natural_image
Simple line drawing of a trash bin with crossed lines indicating no waste or plastic, and a solid black rectangle below (no text or symbols)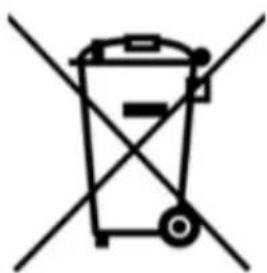
natural_image
Symbol of a trash bin with crossed lines indicating no waste or restriction (no text or labels)(EN) In the interests of our Clients - we are at your disposal! If you have a problem with the product you received, contact us in the most convenient way for you!