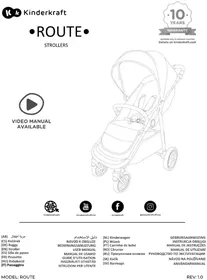
Luli - Baby products Kinderkraft - Free user manual and instructions
Find the device manual for free Luli Kinderkraft in PDF.
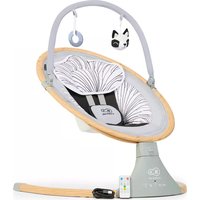
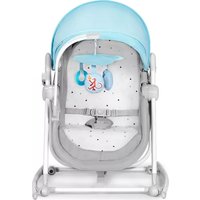
| Product type | Baby bouncer |
| Brand | Kinderkraft |
| Model | Luli |
| Maximum supported weight | 9 kg |
| Power supply | 4 AAA 1.5 V batteries (not included) or USB-DC cable (5.8-6.0 V, 1 A minimum) |
| Battery operating time | Up to 5 hours |
| Number of rocking speeds | 5 |
| Rocking timer | 8, 15 or 30 minutes |
| Music functions | Yes (4 volume levels, song change) |
| Control panel | Touch screen at the base of the bouncer |
| Harness system | Safety harness |
| Recommended age | From birth until the child can sit up alone (max 9 kg) |
| Usage | Indoor use only |
| Cover material | Washable textile |
| Cover washing | 40°C max, normal cycle |
| Cover drying | Air dry, do not use a tumble dryer |
| Toy bar maintenance | Damp cloth with mild soap, air dry |
| Bouncer base maintenance | Soft, dry cloth |
| Included parts | Seat, base, toy bar, USB-DC cable, screws (x4) |
| Safety | Do not leave child unattended, do not use on an elevated surface, check for damaged parts |
Frequently Asked Questions - Luli Kinderkraft
User questions about Luli Kinderkraft
0 question about this device. Answer the ones you know or ask your own.
Ask a new question about this device
Download the instructions for your Baby products in PDF format for free! Find your manual Luli - Kinderkraft and take your electronic device back in hand. On this page are published all the documents necessary for the use of your device. Luli by Kinderkraft.
USER MANUAL Luli Kinderkraft
natural_image
Line drawing of a baby's seatbelt device with a teddy bear inside, no text or symbols present
text_image
10 YEARS WARRANTY register now at: www.kinderkraft.com
kinderkraft.com

kinderkreitofficial

kinderkraft

kindenkraftofficial
(AR) اللاستخدام (CS) NÁVOD K OBSLUZE (DE) BEDIENUNGSANLEITUNG (EN) USER MANUAL (ES) MANUAL DE USO (FR) GUIDE D'UTILISATION (HU) HASZNÁLATI ÚTMUTATÓ (IT) ISTRUZIONI PER UTENTE (NL) HANDLEIDING (PL) INSTRUKCJA OBSŁUGI (PT) MANUAL DE INSTRUÇÕES (RO) MANUAL DE UTILIZARE (RU) РУКОВОДСТВО ПО (SK) NÁVOD NA POUŽITIE (SV) ANVÄNDARMANUAL
(AR) لمت Skeع (CS) LEHÁTKO (DE) BABYWIPPE (EN) RECLINED CRADLE (ES) HAMACAS RECLINABLES (FR) TRANSAT (HU) IHENŐSZÉK (IT) SDRAIETTE (NL) IPSTOEL (PL) LEŽACZEK (PT) BERÇO (RO) LEAGĂN (RU) ШЕЗЛОНГ (SK) LEŽADLO (SV) BABYSITTER
All rights to this data are entirely reserved to 4Kraft Sp. z o.o. Any unauthorized use or misuse, including usufruct, copying, duplication and sharing, wholly or partially, without consent of 4Kraft Sp. z o.o. may result in legal consequences.
AR 8
CS....12
DE 16
EN 21
ES....25
FR....30
HU....34
IT....39
NL....43
PL....48
PT....52
RO....57
RU 61
SK....66
SV....70

natural_image
Simple line drawing of a bowl with handles and two rectangular cutouts (no text or symbols)1

natural_image
Line drawing of two curved, elongated objects with no text or symbols3
natural_image
Simple line drawing of a monkey climbing a curved ramp with hanging pins (no text or symbols)4
4x

natural_image
Black and white illustration of a USB cable with two connectors (no text or symbols)5

6
natural_image
Diagram of a car seat with red curved arrows indicating rotational direction (no text or symbols)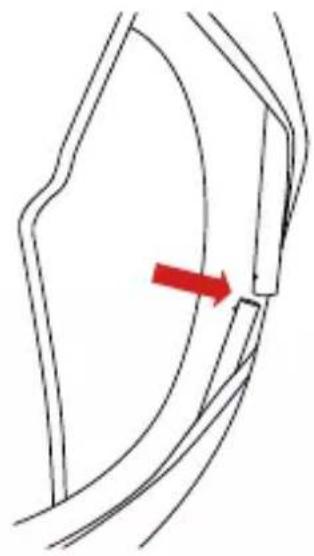
natural_image
Diagram of a curved mechanical or structural component with a red arrow indicating a specific point (no text or symbols present)A
natural_image
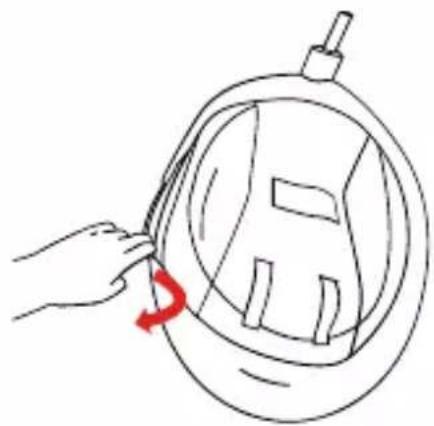
Line drawing of a hand holding a circular device with a red arrow indicating rotation (no text or symbols)B

natural_image
Line drawing of a stylized helmet or device with no text or symbols
natural_image
Line drawing of a circular mechanical component with internal structure and mounting base (no text or symbols)C

natural_image
Diagram of a mechanical component with curved arms and a central hub, showing a red curved arrow indicating rotation (no text or symbols)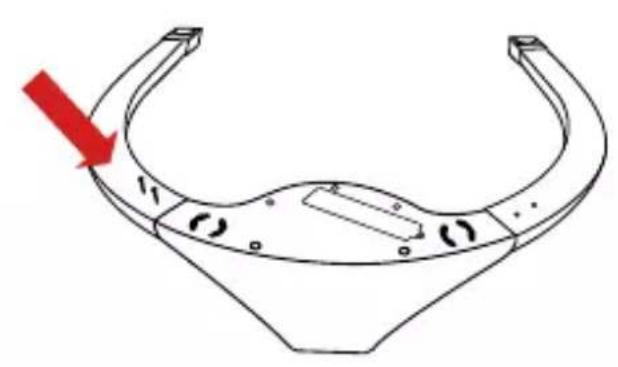
natural_image
Technical line drawing of a mechanical component with curved surfaces and a red arrow indicating direction (no text or symbols)D
natural_image
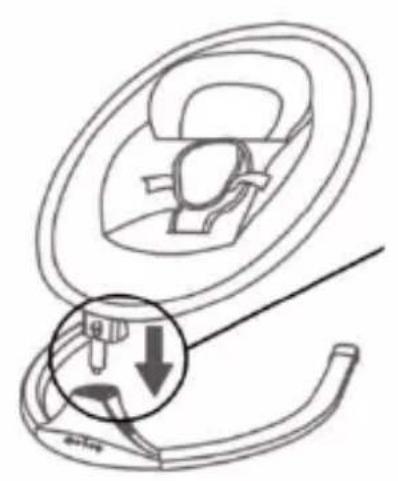
Diagram of a car seatbelt with a magnified inset showing a cable being inserted (no text or symbols)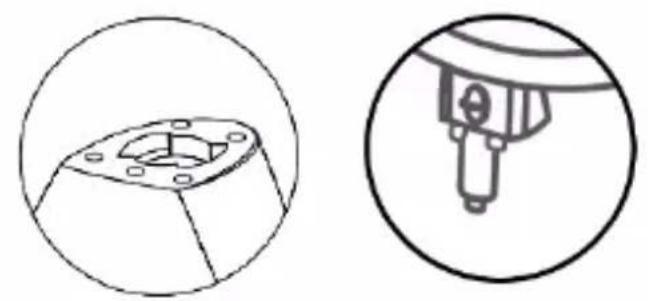
natural_image
Technical line drawing of a mechanical component with two views: top shows a flanged part with bolt holes, bottom shows a cylindrical component inserted into a housing (no text or symbols)E

natural_image
Line drawing of a baby's seatbelt device with no text or symbolsF

text_image
DCG
natural_image
Hand holding a circular object with a red arrow indicating rotation (no text or symbols)H
natural_image
Diagram showing a mechanical component with red arrows indicating direction, no text or symbols present|

natural_image
Technical line drawing of a mechanical component with an inset showing internal components (no text or symbols)K

natural_image
Line drawing of a mechanical component with a circular inset highlighting a specific feature (no text or symbols)L
text_image
K KinderkraftM
AR
عميلنا المحترم!
text_image
Diagram illustrating human behavior with stick figures and directional arrows, possibly indicating movement or interaction.text_image
Diagram showing two waste sorting bins with crossed-out lanes, indicating no disposal or recycling.text_image
Diagram illustrating human behavior with stick figures and directional arrows, possibly indicating movement or interaction.text_image
Diagram showing two waste sorting methods with crossed-out bins and a blank rectangular symbol below.text_image
Diagram illustrating human behavior with stick figures and directional arrows, possibly indicating movement or interaction.text_image
Diagram showing two waste sorting symbols with crossed-out bins and a blank rectangular bar belowThank you for choosing a product by Kinderkraft.
Our designs are child-oriented – safety and quality always comes first, stay comfortable knowing that you have made the best choice.
IMPORTANT! READ
CAREFULLY AND
KEEP FOR FUTURE
REFERENCE.
Safety and care notes!
WARNING!
- Never leave your child unattended.
- Do not use the product once your child can sit up on its own.
- The product is not designed for long sleeping periods.
- Placing a product on an elevation, e.g. a table, can be dangerous.
- Always use a fastening system (safety harness).
- Never use a toy bar to carry the product.
- The product is designed for children from birth to a maximum weight of 9 kg.

text_image
Safety warning illustration showing pictograms of a person using a tool to avoid crossing a road, with a child nearby.- This product will not replace a cot or bed. If your child needs sleep, it should be placed in a suitable baby cot or bed.
- To avoid injury when folding or unfolding the product, make sure that children are not nearby.
- Do not move or lift the product with the child inside.
- Beware of the risk of an open fire and of other heat sources such as electric stoves, gas stoves, etc. near the product.
- Do not use the product if any parts are damaged or missing.
- Do not use accessories or spare parts other than those recommended by the manufacturer.
- Do not allow children to play with the product (does not apply to toys on the toy bar).
- After connecting the product to the music player, make sure that the player volume is set to low.
- The power supply used with the rocker should be checked regularly for damage to the cable, plug, housing and other parts. In case of damage, stop using the power supply unit.
- The product should only be used with a power supply unit recommended by the manufacturer.
- For indoor use only.
Safe use of batteries
Disposable batteries are not rechargeable. Do not mix different types of batteries or new batteries with used ones. Insert the batteries according to the appropriate polarity. Dead batteries should be removed from the product. Do not short-circuit the power poles. Batteries may only be charged under adult supervision. The batteries should be charged outside the device. Do not connect the power supply unit while there are batteries in the device.
Technical data:
Battery power supply: 4 pcs x AAA 1.5 V (not included)
Power supply via USB-DC cable (included): requires a power supply unit with USB-A port with the following output parameters: voltage 5.8 – 6.0V — —, minimum current 1A. Estimated run time of the rocker on batteries (depending on battery type is a maximum of 5 hours).
Product description
| no. | Item description | no. | Item description |
| 1 | Seat | 2 | Rocker foot |
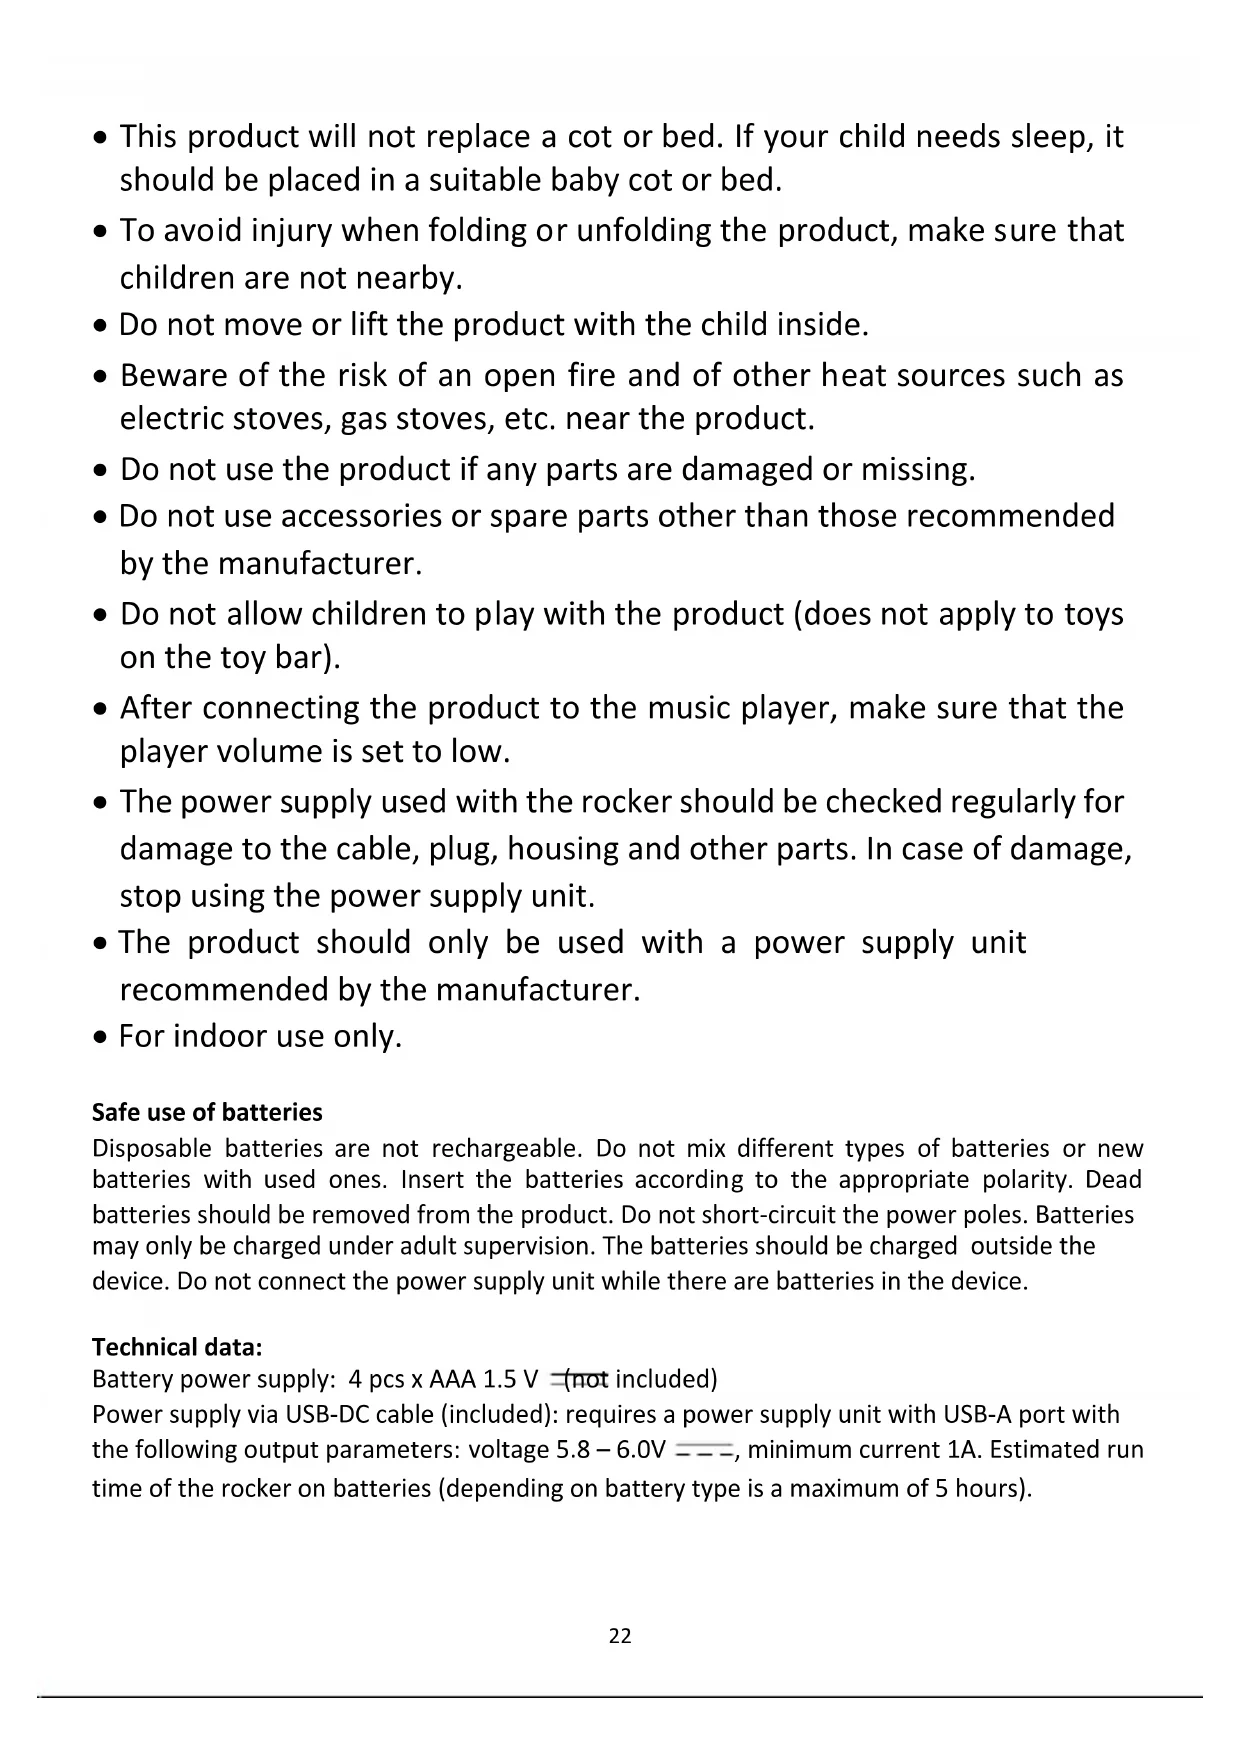
| 3 | Legs | 4 | Toy bar |
| 5 | USB-DC cable | 6 | Screws x4 |
Product assembly/disassembly:
Follow the fig. A and M.
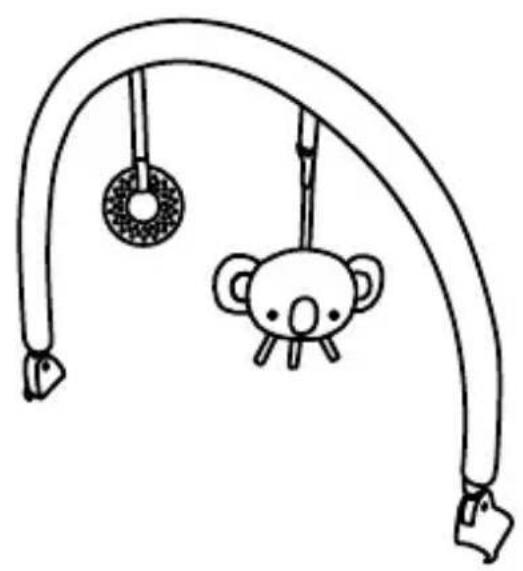
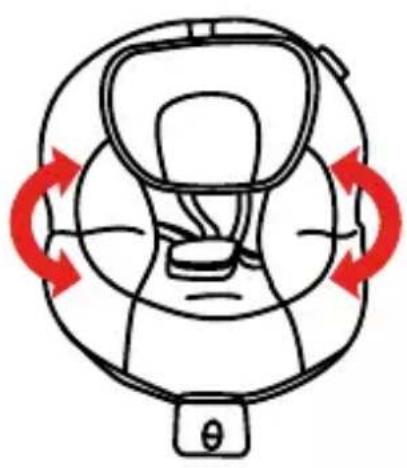
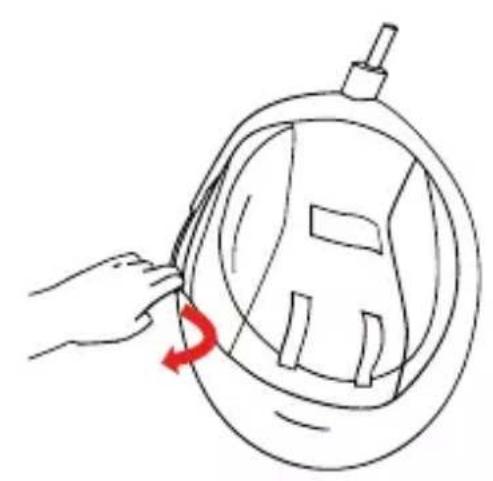
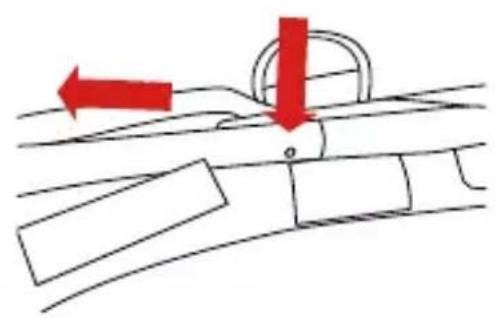
The installation should take place on a soft ground that will not damage the surface of the elements. All parts of the rocker (1, 2, 3, 4, 5, 6) should be carefully inspected after taking it out of the box and make sure that none of them are damaged. Unfold the seat. Then connect the frame components using the pins on both sides (fig. A). The clicking of the pins characterises correct assembly. Then, slide the cover material over the seat frame and fasten the hook and loop fasteners (fig. B). The picture (fig. C) shows a correctly assembled frame with cover material. Next, slide the legs of the bouncer (3) onto the footrest with the control panel (2) and fasten the four screws (6) with a cross-head screwdriver (which is not included in the product) (fig. D). Thus assembled place the foot of the rocker on the ground. With both hands, grasp the seat (fig. E) and gently push the seat pin into the hole in the foot. When the elements connect, you will hear a characteristic sound (click). Attention! Adjust the shape so that the seat can connect to the foot without obstacles or force. Slide the toy bar (4) onto the seat frame (fig. F). To dismantle the product, press the metal button at the back of the foot of the rocker (Figure G) and then, with firm move, separate the seat from the foot of the rocker. To disassemble the frame of the bouncer, slide the cover material off the frame of the bouncer (fig. H), then press the pins and separate the frame parts with a firm movement (fig. I). Slide the cover material from the frame. The rocker has a rocking function. If you want the seat to swing to the sides, move the locking button upwards (Figure L). Attention! Do not activate the rocker function if the button is in the motion blocking position. The rocker has two belt heights. Choose one of these depending on the size of your child.
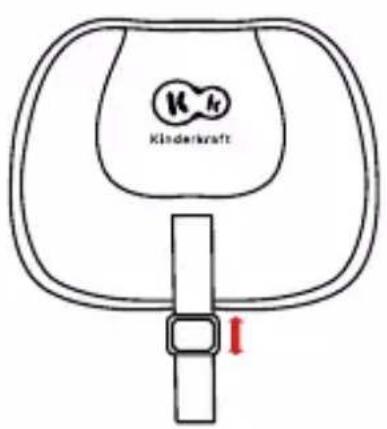
Cushion adjustment
Adjustment is by means of a Velcro strap (Figure M). By sliding the belt buckle down, you can adjust the cushion lower, while by pulling the belt buckle up, you can adjust the cushion higher. Velcro straps on the adjusting belt and cushion are used to stabilize the position of the cushion.
Installation/replacement of batteries in the rocker:
To install or replace the batteries, use a Phillips screwdriver (not included), unscrew the safety
flap from element 2 (one screw) and replace the batteries paying attention to polarity. Follow the figure K.
Product control:
You can control the rocker using the touch panel on the rocker foot (2).
When the device is turned on, the LED above the On/Off icon lights up.
Panel control (Figure J)
 | On/Off |
 | Swinging speed control. Adjustment from 1 to 5. |
 | Turn on or stop the music. |
 | Switching songs - single click; Volume adjustment on a 4-level scale - press and hold the button |
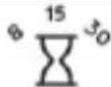 | Swinging time adjustment. Swinging can be activated for 8, 15 or 30 minutes. |
Maintenance and cleaning
The seat pad, pillow
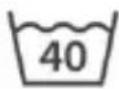 | Wash at 40°C, normal process |  | Do not tumble-dry. |
 | Air dry, on a rope or clothes horse |  | Do not iron. |
 | Do not bleach. |  | Do not dry-clean. |
The toy bar: Clean with a clean, damp cloth and mild soap. Leave to air-dry. Do not immerse in water.
Rocker foot: clean with a soft, clean and dry cloth.
Storage
Keep the product out of the reach of children.
Batteries should be removed from the product if it is not used for a long time to avoid corrosion and leakage.
DISPOSAL OF WASTE EQUIPMENT

text_image
Diagram showing two waste sorting bins with crossed-out lanes and a blank rectangular symbol belowThe symbol of the crossed-out wheeled bin placed on equipment, packaging or accompanying documents indicates that the product must not be disposed of with other waste.
It is the user's responsibility to take waste equipment to a designated collection point for proper handling. Information about the available waste electrical equipment collection system can be found in the shop's information point and in the
municipal/commune office.
Each household is a user of electrical and therefore a potential producer of waste hazardous to humans and the environment due to the presence of hazardous substances, mixtures and components in the equipment. On the other hand, waste equipment is a valuable material from which we can recover raw materials such as copper, tin, glass, iron and others.
Proper handling of waste equipment prevents negative consequences for the environment and human health!
ES
Estimado cliente!
text_image
Safety warning illustration showing pictograms of human and child walking with a diagonal barrier, indicating safety or hazard.natural_image
Symbol of a trash bin with crossed lines indicating no waste or discharge (no text or labels)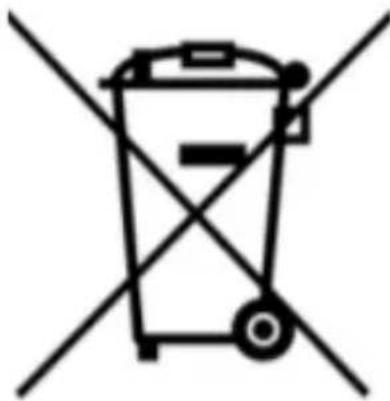
natural_image
Symbol of a trash bin with crossed lines indicating no waste or discharge (no text or labels)text_image
Diagram illustrating human behavior with stick figures and directional arrows, possibly indicating movement or interaction.text_image
Two crossed-out recycling bins with prohibition signs, one labeled 'No' and the other 'Yes'text_image
Diagram illustrating human behavior with stick figures and directional arrows, possibly indicating movement or interaction.text_image
Diagram showing two waste sorting bins with crossed-out lanes, indicating no waste disposal or recycling.text_image
Diagram illustrating human behavior with stick figures and directional arrows, possibly indicating movement or navigationtext_image
Diagram showing two waste sorting bins with crossed-out lanes and a blank rectangular symbol belowtext_image
Diagram illustrating human behavior with stick figures and directional arrows, possibly indicating movement or safety instructions.text_image
Diagram showing two waste sorting bins with crossed-out lanes and a blank rectangular symbol belowtext_image
Diagram illustrating human behavior with stick figures and directional arrows, possibly indicating movement or interaction.text_image
Diagram showing two types of waste sorting symbols: one with crossed-out bins and the other with crossed-out bins, both marked with prohibition signs.text_image
Diagram illustrating human behavior with stick figures and directional arrows, possibly indicating movement or interaction.Siga as fotos A e M.
text_image
Diagram showing two waste sorting bins with crossed-out lanes and a blank rectangular symbol belowtext_image
Diagram illustrating human behavior with stick figures and directional arrows, possibly indicating movement or interaction.natural_image
Two identical line-drawn trash bins with cross-bracing, no text or symbols presenttext_image
Safety warning illustration showing pictograms of human and child walking with a diagonal barrier, indicating safety or hazard.text_image
Diagram showing two waste sorting symbols with crossed-out bins and a blank rectangular bar belowtext_image
Diagram illustrating human behavior with a walking person, child, and directional arrows indicating movement or interaction.text_image
Diagram showing two waste sorting bins with crossed-out lanes, indicating no disposal or recycling.text_image
Diagram illustrating human behavior with a walking person, child, and directional arrows indicating movement or interaction.text_image
Diagram showing two waste sorting bins with crossed-out lanes and a warning symbol below(EN) In the interests of our Clients - we are at your disposal! If you have a problem with the product you received, contact us in the most convenient way for you!