
UR18DSL - Radio HiKOKI - Free user manual and instructions
Find the device manual for free UR18DSL HiKOKI in PDF.
| Product Type | Job Site Radio |
| Brand | HiKOKI |
| Model | UR18DSL |
| Dimensions (W × D × H) | 231 × 184 × 281 mm (antenna retracted) |
| Weight | 3.3 kg |
| Power Supply | HiKOKI rechargeable battery (9.6 V - 18 V) or 230 V AC mains adapter |
| Frequency Bands | FM: 87.5 - 108 MHz, AM: 522 - 1620 kHz |
| Speakers | 2 × 76 mm (8 Ω), stereo + bass reflex |
| Maximum Output Power | 5 W × 2 (under 18 V) |
| Main Functions | FM/AM radio, alarm (buzzer/radio), sleep, AUX input, USB charging (5 V / 0.5 A), voice messages |
| Battery Compatibility | HiKOKI batteries 9.6 V - 18 V (excluding 3.6 V, 7.2 V, 10.8 V, 24 V and above) |
| Included Accessories | AC adapter (12 V / 1 A), 3 spare AAA batteries |
| Care and Cleaning | Wipe with a soft, dry cloth; do not use solvents |
| Storage | Dry, temperate place, away from direct sunlight |
| Safety | Use only specified batteries; do not expose to moisture; do not disassemble |
| Spare Parts and Repairability | Repairs exclusively by an authorized HiKOKI after-sales service |
| Warranty | Compliant with national regulations; excludes wear and tear or misuse |
Frequently Asked Questions - UR18DSL HiKOKI
User questions about UR18DSL HiKOKI
0 question about this device. Answer the ones you know or ask your own.
Ask a new question about this device
Download the instructions for your Radio in PDF format for free! Find your manual UR18DSL - HiKOKI and take your electronic device back in hand. On this page are published all the documents necessary for the use of your device. UR18DSL by HiKOKI.
USER MANUAL UR18DSL HiKOKI
natural_image
Line drawing of a vintage electronic device with control panel and buttons (no text or symbols)Read through carefully and understand these instructions before use.


1

2

natural_image
Line drawing of a hand holding a tool with a numbered label (8) pointing to a cable or connector (no text or symbols present)3

4

5
6

7
natural_image
Illustration of hands operating a digital multimeter with rotating buttons (no text or symbols)| Symbols⚠ WARNINGThe following show symbols used for the machine. Be sure that you understand their meaning before use. | Symbole⚠ WARNUNGDie folgenden Symbole werden für diese Maschine verwendet. Achten Sie darauf, diese vor der Verwendung zu verstehen. | Symboles⚠ AVERTISSEMENTLes symboles suivants sont utilisés pour l’outil. Bien se familiariser avec leur signifi cation avant d’utiliser l’outil. | Simboli⚠ AVVERTENZADi seguito mostriamo i simboli usati per la macchina.Assicurarsi di comprenderne il signifi cato prima dell’uso. | |
 | Read all safety warnings and all instructions.Failure to follow the warnings and instructions may result in electric shock, fi re and/or serious injury. | Lesen Sie sämtliche Sicherheitshinweise und Anweisungen durch.Wenn die Warnungen und Anweisungen nicht befolgt werden, kann es zu Stromschlag, Brand und/oder ernsthaftenVerletzungen kommen. | Lire tous les avertissements de sécurité et toutes les instructions.Tout manquement à observer ces avertissements et instructions peut engendrer des chocs électriques, des incendies et/ou des blessures graves. | Leggere tutti gli avvertimenti di sicurezza e tutte le istruzioni.La mancata osservanza degli avvertimenti e delle istruzioni potrebbe essere causa di scosse elettriche, incendi e/o gravi lesioni. |
 | Only for EU countriesDo not dispose of electric tools together with household waste material!In observance of European Directive 2002/96/EC on waste electrical and electronic equipment and its implementation in accordance with national law, electric tools that have reached the end of their life must be collected separately and returned to an environmentally compatible recycling facility. | Nur für EU-LänderWerfen Sie Elektrowerkzeuge nicht in den Hausmüll!Gemäss Europäischer Richtlinie 2002/96/EG über Elektro- und Elektronik-Altgeräte und Umsetzung in nationales Recht müssen verbrauchte Elektrowerkzeuge getrennt gesammelt und einer umweltgerechten Wiederververitung zugeführt werden. | Pour les pays européens uniquementNe pas jeter les appareils électriques dans les ordures ménagères!Conformément à la directive européenne 2002/96/CE relative aux déchets d’équipements électriques ou électroniques (DEEE), et à sa transposition dans la législation nationale, les appareils électriques doivent être collectés à part et être soumis à un recyclage respectueux de l’environnement. | Solo per Paesi UENon gettare le apparecchiature elettriche tra i rifi uti domestici.Secondo la Direttiva Europea 2002/96/CE sui rifi uti di apparecchiature elettriche ed elettroniche e la sua attuazione in conformità alle norme nazionali, le apparecchiature elettriche esauste devono essere raccolte separatamente, al fi ne di essere reimpiegate in modo eco-compatible. |
| Symbolen⚠ WAARSCHUWINGHieronder staan symbolen afgebeeld die van toepassing zijn op deze machine. U moet de betekenis hiervan begrijpen voor gebruik. | Símbolos⚠ ADVERTENCIAA continuación se muestran los símbolos usados para la máquina. Asegúrese de comprender su signifi cado antes del uso. | Símbolos⚠ AVISOA seguir aparecem os símbolos utilizados pela máquina. Assimile bem seus signifi cados antes do uso. | ||
 | Lees alle waarschuwingen en instructies aandachtig door.Nalating om de waarschuwingen en instructies op te volgen kan in een elektrische schok, brand en/of ernstig letsel resulteren. | Lea todas las instrucciones y advertencias de seguridad.Si no se siguen las advertencias e instrucciones, podría producirse una descarga eléctrica, un incendio y/o daños graves. | Leia todas as instruções e avisos de segurança.Se não seguir todas as instruções e os avisos, pode provocar um choque eléctrico, incêndio e/ou ferimentos graves. | |
 | Alleen voor EU-landen Geef elektrisch gereedschap niet met het huisvuil mee!Volgens de Europese richtlijn 2002/96/EC inzake oude elektrische en elektronische apparaten en de toepassing daarvan binnen de nationale wetgeving, dient gebruikt elektrisch gereedschap gescheiden te worden ingezameld en te worden afgevoerd naar een recycle bedrijf dat voldoet aan de geldende milieu-eisen. | Sólo para países de la Unión Europea¡No deseche los aparatos eléctricos junto con los residuos domésticos!De conformidad con la Directiva Europea 2002/96/CE sobre residuos de aparatos eléctricos y electrónicos y su aplicación de acuerdo con la legislación nacional, las herramientas eléctricas cuya vida útil haya llegado a su fi n se deberán recoger por separado y trasladar a una planta de reciclaje que cumpla con las exigencias ecológicas. | Apenas para países da UENão deite ferramentas eléctricas no lixo doméstico!De acordo com a directiva europeia 2002/96/CE sobre ferramentas eléctricas e electrónicas usadas e a transposição para as leis nacionais, as ferramentas eléctricas usadas devem ser recolhidas em separado e encaminhadas a uma instalação de reciclagem dos materiais ecológica. |
CORDLESS RADIO SAFETY WARNINGS
WARNING
Read all safety warnings and all instructions.
Failure to follow the warnings and instructions may result in electric shock, fi re and/or serious injury.
Save all warnings and instructions for future reference.
- Use only the specified power supply voltage.
- Use of any other voltage may lead to fire or electric shock.
-
Avoid damaging the AC adapter cord.
-
Do not modify, forcibly bend, twist or pull the cord, place heavy objects on it or place it near heating appliances.
-
When not in use, remove the power plug (AC adapter) from the electric socket and from the radio. Failure to do so may lead to electric shock or fire.
-
Do not touch the power plug (AC adapter) with wet hands.
Doing so may result in electric shock.
- Do not use the radio in the bathroom or shower.
- Do not use the radio in wet or damp places or in the rain. Doing so may result in electric shock, emission of smoke or malfunction.
- Do not touch the FM antenna or power plug (AC adapter) during thunderstorms.
Doing so may result in electric shock.
- Do not disassemble or modify the radio.
- Doing so may result in electric shock or fire. Inspections and repairs should be performed by the store where purchased or by a HiKOKI power tool service center.
- Insert the power plug (AC adapter) securely as far as it will go.
- Dust or dirt between the power plug and the electric socket may lead to fi re. Remove the power plug periodically and wipe off any dust or dirt with a dry cloth.
-
Do not let any unspecified objects or water get inside the radio body.
-
With the exception of the AC adapter and the rechargeable battery, if any metal or flammable object or water gets inside the rear door, it may lead to electric shock or fire.
• Take care to prevent iron powder from the bass refl ex speakers, dust or water getting into the radio. -
Do not sit or stand on the radio.
- Doing so may lead to accidents or malfunction.
- Do not place the radio on an unstable surface or in a high place. Do not hang the radio from the handle or guard bar.
The radio may fall and cause injury or malfunction.
- Reduce the volume before turning on the power.
- Failure to do so may result in sudden loud noise and damage the speakers or cause hearing impairment.
- Do not turn the volume up too high when using headphones or earphones.
- Listening to the radio for a long time at a high volume may result in hearing impairment.
-
When no slide battery is loaded, attach the slide terminal cover to the terminal to prevent cuts and other injuries that may result from touching the terminal area.
-
Handle the backup batteries with care.
- Incorrect handling of the batteries may result in rupture or leakage, leading to fire, injury or pollution of the surrounding area. Be sure to observe the following precautions.
- Use only the specified batteries
- Do not heat or disassemble the batteries
- Do not throw the batteries into fire or water
- Do not charge the batteries
- Make sure the batteries are correctly oriented and avoid short-circuiting
- Do not reuse batteries or use different types of battery
- Remove the batteries when the radio is not in use
In the event of leakage from the batteries, wipe the battery case clean.
Should any battery fluid get on your body, wash it off carefully.
If ☐ is displayed when you turn the power on with the rechargeable battery inserted, the battery power is low.
Power the radio from the AC adapter or insert a charged battery.
- Recharge only with the charger specified by the manufacturer.
- A charger that is suitable for one type of rechargeable battery may create a risk of fire when used with another battery.
- Use the radio only with specifically designated rechargeable battery.
- Use of any other rechargeable battery may create a risk of injury and fire.
- When rechargeable battery is not in use, keep it away from other metal objects like paper clips, coins, keys, nails, screws, or other small metal objects that can make a connection from one terminal to another.
- Shorting the battery terminals together may cause burns or a fire.
- Under abusive conditions, liquid may be ejected from the battery; avoid contact. If contact accidentally occurs, flush with water. If liquid contacts eyes, additionally seek medical help.
- Liquid ejected from the battery may cause irritation or burns.
- Have your radio serviced by a qualified repair person using only identical replacement parts.
- This will ensure that the safety of the radio is maintained.
MAIN FUNCTIONS
- Manual/Auto select
- Save (Memory) (5 AM + 5 FM stations)
• Radio On/Off /Alarm
• High-quality stereo speaker + bass refl ex
• Cell phone charging - Compatibility with HiKOKI power tool rechargeable battery and AC adapter
NAMES OF PARTS
| 1 | FM antenna | 16 | Memory button (1 - 5) | A | Stereo indicator |
| 2 | Handle | 17 | Search button (Clock (-) button) | B | Tuner indicator |
| 3 | Rear door | 18 | Search button (Clock (+) button) | C | AUX indicator |
| 4 | Speaker | 19 | Volume dial | D | Battery exhausted indicator |
| 5 | Buckle | 20 | Select dial | E | Sleep timer indicator |
| 6 | Exterior input (AUX IN) terminal | 21 | Backup battery box | F | Alarm indicator |
| 7 | Headphone jack | 22 | Rechargeable battery compartment | G | Buzzer alarm indicator |
| 8 | AC adapter jack | 23 | AC adapter | H | Radio alarm indicator |
| 9 | Charging jack (5 V 0.5 A) | 24 | Rubber band | I | Frequency |
| 10 | Guard bar | 25 | Fasten to hook | J | Clock |
| 11 | Bass refl ex | 26 | Plug-in battery | K | Memory indicator |
| 12 | Power button | 27 | Belt | L | AM broadcast indicator |
| 13 | Sleep timer / Clock button | 28 | Slide terminal cover | M | FM broadcast indicator |
| 14 | Band selector button | 29 | Terminal | N | Time indicafor (AM / PM) |
| 15 | FM mode / Alarm button | 30 | Slide battery |
SPECIFICATIONS
| Model UR18DSL | |
| Frequency band | FM: 87.5 to 108 MHzAM: 522 to 1620 KHz |
| Antenna | FM: Rod antennaAM: Ferrite bar antenna (built-in) |
| Speaker | 76 mm (8 Ω) x 2 |
| Input terminal | AUX IN (ø 3.5 mm) |
| Output terminal | Headphone jack (ø 3.5 mm)Charging jack (5 V 0.5 A) |
| Maximum available output | 9.6 V: 1.4 W x 212 V: 2.2 W x 214.4 V: 3.2 W x 218 V: 5 W x 2 |
| Power supply | Slide battery: DC 14.4 V, 18 VPlug-in battery: DC 9.6 V, 12 V, 14.4 V, 18 VBackup batteries: DC 4.5 V, three AA batteriesHousehold power supply: AC 230 V (using provided AC adapter) |
| Maximum exterior dimensions | Length 231 mm x width 184 mm x height 281 mm (with antenna retracted) |
| Weight | 3.3 kg |
| Standard accessories | AC adapter (DC 12 V 1 A), three AA batteries |
NOTE:
Rechargeable battery
Most rechargeable batteries for HiKOKI power tools can be used with this radio, except for the following. 3.6 V, 7.2 V, 10.8 V and 24 V and over
SERVICE TIME PER BATTERY CHARGE
| Battery capacity Service time* | |
| 1.3 Ah Approx. 7 hours | |
| 1.4 Ah Approx. 8 hours | |
| 1.5 Ah Approx. 8 hours | |
| 2.0 Ah Approx. 11 hours | |
| 2.4 Ah Approx. 13 hours | |
| 2.6 Ah Approx. 14 hours | |
| 3.0 Ah Approx. 17 hours | |
| 3.3 Ah Approx. 18 hours |
* The service time is approximate (at 2 W × 2 output). It varies depending on the type of battery, charging condition and conditions of use.
STANDARD ACCESSORIES
① AC adapter ....1
② AA batteries ....3

natural_image
Line drawing of an electronic device with coiled cable and plug, alongside three cylindrical batteries (no text or symbols)BEFORE USE
- Inserting the backup batteries
Inserting backup batteries lets you save the clock setting and radio station frequencies.
- Loosen the buckle and open the rear door. The backup battery box is inside. (Fig. 1)
- Open the battery box and insert the three AA batteries provided, making sure they are oriented as illustrated.
CAUTION
○ Make sure that the batteries are correctly oriented.
○ Replace all the batteries at the same time. Do not use old batteries and new batteries at the same time.
○ Do not discard the batteries with household garbage or throw them into fire.
- Attaching the AC Adapter
The provided AC adapter can be used to power the radio from an electric socket.
Pull back the rubber cover and connect the AC adapter to the AC adapter terminal. Next, insert the AC adapter power plug into the electric socket. (Fig. 2)
The AC adapter can be stored inside the top of the rear door. When storing the AC adapter, secure the it with an elastic band. (Fig. 3)
NOTE
When the AC adapter and rechargeable battery are used simultaneously, the AC adapter takes priority. No power is used from the battery.
☐ The radio has no charging function. The rechargeable battery is not charged when the AC adapter and battery are used simultaneously.
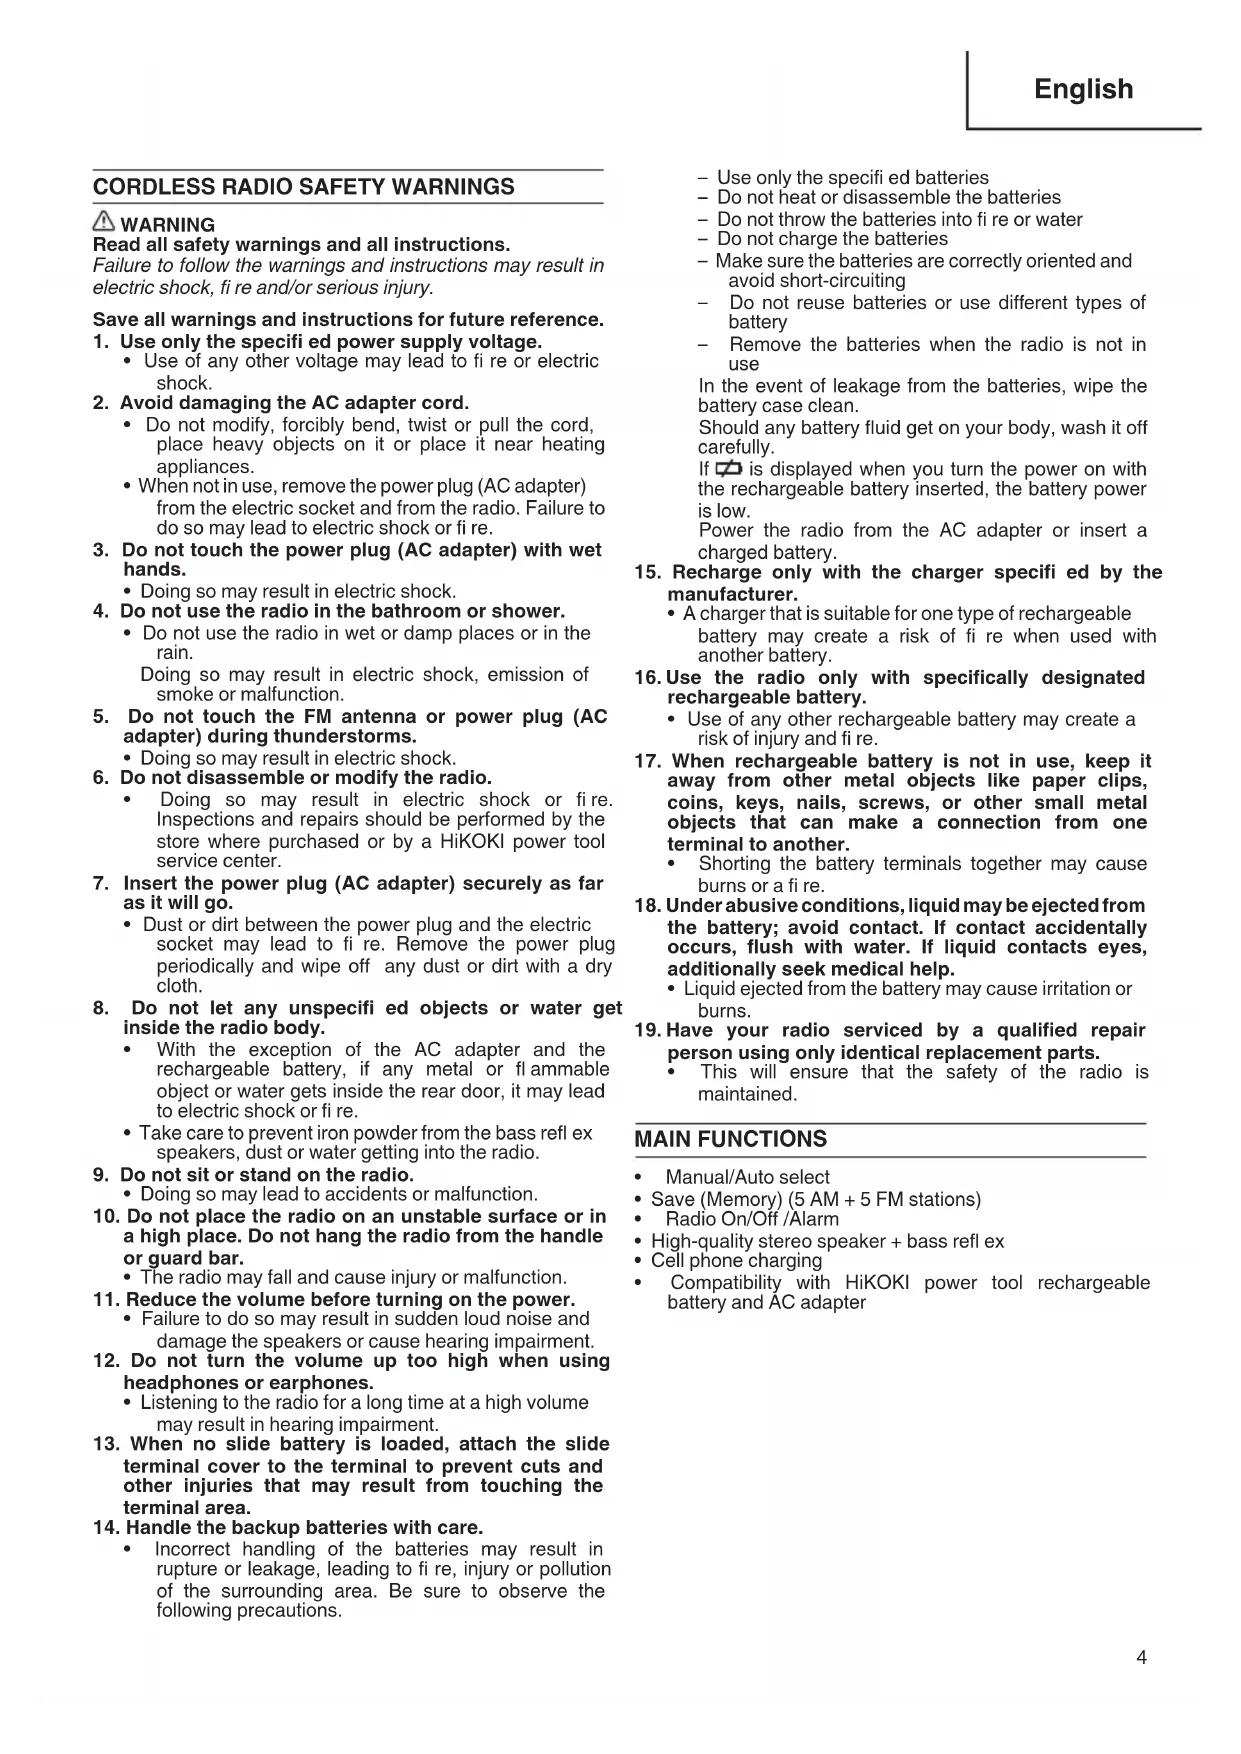
● Loading the rechargeable battery
CAUTION
When no slide battery is loaded, attach the slide terminal cover to the terminal to prevent cuts and other injuries that may result from touching the terminal area.
NOTE
☐ The following batteries are not compatible with this equipment.
3.6 V, 7.2 V, 10.8 V and 24 V and over
When inserting the battery, do not use unnecessary force. If the battery does not go in easily, it is not being inserted correctly.
Check that the battery is correctly oriented and that no foreign object has been trapped.
☐ The radio has no charging function. Using the AC adapter and rechargeable battery simultaneously will not charge the battery.
If is displayed when you turn the power on with the rechargeable battery inserted, the battery power is low.
Power the radio from the AC adapter or insert a charged battery.
Loading a plug-in battery (Fig. 4)
Insert the battery into the space in the radio body as far as it will go before securing with the belt.
If the belt is not the right length, adjust the length of the belt.
Loading a slide battery (Fig. 5)
Remove the slide terminal cover.
Match the battery with the grooves in the radio body and insert the battery as far as it will go.
● Adjusting the Clock
Adjust the clock with the power turned off.
- Press and hold the sleep timer/clock button for more than 2 seconds. The "hour" indicator blinks.
Pressing the band selector button in this state switches between the 12-hour display and 24-hour display.
- Turn the select dial or press the search button to select the "hour".
- Press the sleep timer/clock button again. The "minutes" indicator blinks.
- Turn the select dial or press the search button to select the "minutes".
- Press the sleep timer/clock button again to save the clock setting.
NOTE
☐ To save the clock setting, the backup batteries must be installed.
Turn down the volume before pressing the power button.
Failure to do so may result in sudden loud noise and cause damage to the speakers or lead to hearing impairment.
1. Press the power button to turn on the radio.
2. Press the band select button and select the radio band (FM or AM).
NOTE
☐ The display changes in the order of [FM AM AUX FM] each time the band select button is pressed.
3. Select a station using Auto, Manual or Save (Memory).
4. If noise occurs or reception is poor, refer to "For Better Reception".
5. Turn the volume dial to adjust the volume.
6. Press the power button to turn off the radio.
● Auto Select
Press the ◀▶ search button to automatically search for stations with strong radio waves.
When a station is detected, the radio plays for 3 seconds.
Press the search button before the next search starts to continue listening to the detected radio station.
- Manual Select
Turn the select dial to find the station you want to listen to.
- Save (Memory)
Find the station that you want to save.
Press and hold down the memory button (1 to 5) for more than 2 seconds to save the setting.
The MEMORY indicator appears at the bottom left of the display panel and the number of the assigned memory button is displayed below that.
You can save 5 AM and 5 FM stations in the memory buttons 1 to 5.
To select the saved station, press the memory button corresponding to the saved number.
● For Better Reception
FM (Fig. 6)
Adjust the length, direction and angle of the antenna to ensure the best reception.
When tuned in to an FM stereo broadcast, STEREO is displayed.
If a lot of noise occurs during an FM stereo broadcast, press the FM mode / Alarm button.
The radio switches to monaural (the STEREO indicator turns off) to reduce the noise. To return to stereo reception, press the FM mode / Alarm button again.
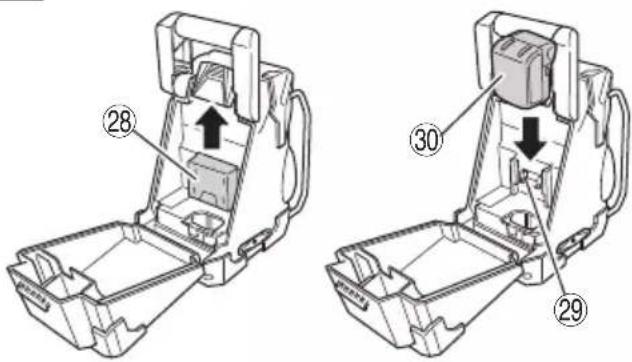
AM (Fig. 7)
The radio has a built-in antenna. Turn the radio around to find the direction with the best reception.
Positioning
Reception may be poor when the radio is used inside a vehicle or building. When inside a building, place the radio near the window to ensure better reception.
Noise may occur if the radio is placed near an appliance that generates noise. Move the radio away from the source of the noise.
● Auto Power Off
The radio turns off automatically after 8 hours.
USING THE TIMER FUNCTION
○ The radio turns on/off at the preset time
○ Use the radio as an alarm clock
- Sleep Timer
Setting the sleep timer turns the radio off after the set time has elapsed.
-
Pressing the sleep timer / clock button while the power is turned on displays the SLEEP indicator. The time (minutes) indicator changes in order of [90807010 OFF] in 10-minute units each time the button is pressed.
-
Press the button repeatedly until the desired time is displayed.
-
The radio turns off when the set time has elapsed.
-
To cancel the timer, press the sleep timer / clock button until the indicator is set to OFF.
The SLEEP indicator goes off and the sleep timer is cancelled.
To check the remaining time
The SLEEP indicator is displayed when the sleep timer has been set.
Press the sleep timer / clock button to check the remaining time on the timer.
● Buzzer Alarm / Radio Alarm
NOTE
○ The volume of the buzzer alarm cannot be adjusted.
☐ If the rechargeable battery is running low, the radio alarm timer may not work.
Charge the battery before setting the timer or use the AC adapter.
☐ The radio alarm turns on in the station and at the volume selected before the timer was set. Set the volume and time to avoid creating a disturbance when the radio turns on.
When the alarm time is set and the buzzer alarm is selected, the buzzer sounds at the preset time.
When the radio alarm is selected, the radio turns on in the selected radio station at the preset time.
-
Set the time with the radio turned off.
-
Press and hold the FM mode / alarm button for more than 2 seconds to switch to alarm mode.
The ALARM indicator is displayed.
- The "hour" indicator blinks. Turn the select dial or press the search button to select the desired "hour".
Press the FM mode / alarm button to set the "hour". The "minutes" indicator blinks. Turn the select dial or press the search button to select the desired "minutes".
-
Press the FM mode / alarm button to save the set time. The ALARM indicator goes off.
-
The display changes in order of [buzzer alarm→radio alarm→no display] each time the FM mode / alarm button is pressed.
-
The power turns on and the buzzer sounds or the radio plays when the preset time is reached.
Buzzer Alarm
To turn off the buzzer alarm, press the FM mode / alarm button. If it is not turned off, the buzzer will continue to sound for 1 minute and then stop.
Radio Alarm
To turn off the radio, press the power button. If it is not turned off, the radio will continue to play for 30 minutes.
To check the alarm
To check the time set on the alarm, press the band selector button with the power turned off.
OTHER FUNCTIONS
● Connecting an External Device
You can use the radio to listen to an MP3, MD or CD player.
-
With the radio and the external device both turned off, connect the audio cord ( 3.5 mm, available at an electric store) of the external device to the external input (AUX IN) terminal on the side of the radio.
-
Turn on the radio and press the band select button to display [AUX].
NOTE
☐ The display changes in the order of [FM AM AUX FM] each time the band select button is pressed.
-
Turn on the external device to start listening.
-
Adjust the volume.
-
To disconnect the external device, turn off the device and the radio before removing the audio cord.
● Using Headphones
You can use headphones or earphones purchased from an electric store to listen to the radio.
CAUTION
○ Be sure to turn the volume down before connecting the headphones or earphones.
Failure to do so may result in sudden loud noise and cause hearing impairment.
- Connect the headphones or earphones to the headphone jack on the side of the radio.
- No sound is emitted from the radio speakers when headphones or earphones are connected.
- Adjust the volume.
● Charging a Cell Phone
NOTE
When using the rechargeable battery as the power source, make sure that it is adequately charged. If the battery power is low, it may not be possible to charge the cell phone.
○ Disconnect the cell phone except when charging.
Do not make or receive calls on the cell phone in the vicinity of the radio as radio reception may be adversely affected.
○ The charging time varies depends on the type of cell phone.
○ Do not use the radio to charge devices other than a cell phone.
- Connect a USB charging cable suitable for your cell phone (purchased from an electric store) to the charging jack on the side of the radio.
- Turn on the radio and press the band select button to display [AUX].
NOTE
☐ The display changes in the order of [FM AM AUX FM] each time the band select button is pressed.
3. Select AUX mode to start charging.
● To turn the voice messages on/off
By factory default setting, the voice message function plays "Welcome to HiKOKI Power Tools" when the power is turned on and "Presented by HiKOKI Power Tools" when the power is turned off.
To mute the voice messages, press memory button 1 while the power is turned off and display [OFF] on the display panel.
To restore the voice messages, press memory button 1 while the power is turned off and display [ON] on the display panel.
MAINTENANCE AND INSPECTION
WARNING
When not in use or during inspection and maintenance, be sure to remove the AC plug, rechargeable battery and backup batteries.
● Inspecting the mounting screws
Regularly inspect all mounting screws and ensure that they are properly tightened. Should any of the screws be loose, retighten them immediately. Failure to do so could result in serious hazard.
● Cleaning on the outside
When the radio is stained, wipe with a soft dry cloth or a cloth moistened with soapy water. Do not use chloric solvents, gasoline or paint thinner, for they melt plastics.
● Storing the Radio
Do not store the radio in the following places.
○ Within reach of or easily accessible to children
○ In humid or dusty places
○ In high temperature such as inside a car or exposed to direct sunlight
○ In extremely cold places or directly exposed to cold draughts
○ Where the temperature changes drastically
○ Where it is exposed to smoke or steam such as near a cooking appliance or humidifier
● Service parts list
CAUTION
Repair, modification and inspection of HiKOKI Power Tools must be carried out by a HiKOKI Authorized Service Center.
This Parts List will be helpful if presented with the tool to the HiKOKI Authorized Service Center when requesting repair or other maintenance.
In the operation and maintenance of power tools, the safety regulations and standards prescribed in each country must be observed.
MODIFICATIONS
HiKOKI Power Tools are constantly being improved and modified to incorporate the latest technological advancements.
Accordingly, some parts may be changed without prior notice.
GUARANTEE
We guarantee HiKOKI Power Tools in accordance with statutory/country specific regulation. This guarantee does not cover defects or damage due to misuse, abuse, or normal wear and tear. In case of complaint, please send the Power Tool, undismantled, with the GUARANTEE CERTIFICATE found at the end of this Handling instruction, to a HiKOKI Authorized Service Center.
NOTE:
Due to HiKOKI's continuing program of research and development, the specifications herein are subject to change without prior notice.
natural_image
Line drawing of an electronic device with coiled cables and a power plug (no text or symbols)
VOR DER BENUTZUNG
Batterie rechargeable
natural_image
Line drawing of an electronic device with coiled cable and plug, alongside three cylindrical batteries (no text or symbols)AVANT UTILISATION
natural_image
Line drawing of an electronic device with coiled cable and power cord (no text or symbols)
PRIMA DELL'USO
Failure to do so may result in sudden loud noise and cause damage to the speakers or lead to hearing impairment.
natural_image
Line drawing of an electronic device with coiled cable, power plug, and connector (no text or symbols)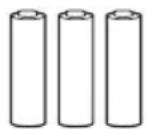
VOORDAT U HET APPARAAT GEBRUIKT
natural_image
Line drawing of an electrical enclosure with coiled cable and two cylindrical batteries (no text or symbols)ANTES DEL USO
natural_image
Line drawing of an electronic device with coiled cable and two cylindrical batteries (no text or symbols)ANTES DA UTILIZAÇÃO
| ITEM NO. | PART NAME |
| 43 | ADAPTOR BELT |
| 44 | BACK DOOR PACKING |
| 45 | SCREW (BLACK) M2.6×8 |
| 46 | HOLDER COVER LOCKER |
| 47 | TPE COVER (D) |
| 48 | NAME PLATE |
| 49 | BACK DOOR |
| 50 | METAL SHAFT (B) |
| 51 | BUCKLE |
| 52 | BUCKLE CONNECTOR |
| 53 | BATTERY HOLDER COVER |
| 54 | BATTERY BELT |
| 55 | HANDLE BRACKET |
| 56 | HANDLE BRACKET SPRING |
| 57 | HANDLE |
| 58 | METAL SHAFT (C) |
| 59 | JACK COVER (L) |
| 60 | SPEAKER BACK COVER |
| 61 | FRONT ORING |
| 62 | BATTERY BOX WASHER |
| 63 | BACK HOUSING |
| 64 | FUSE (250V 2A) |
| 65A | TERMINAL ASS'Y |
| 66 | AA BATTERY BOX |
| 67 | BATTERY DOOR |
| 68 | JACK |
| 69 | JACK COVER (R) |
| 70 | METAL SHAFT (A) |
| 71 | TPE COVER (C) |
| 501B | AC ADAPTER |
| 502 | AA BATTERY |

| English Nederlands | ||
| GUARANTEE CERTIFICATE1 Model No.2 Serial No.3 Date of Purchase4 Customer Name and Address5 Dealer Name and Address(Please stamp dealer name and address) | GARANTIEBEWIJS1 Modelnummer2 Serienummer3 Datum van aankoop4 Naam en adres van de gebruiker5 Naam en adres van de handelaar(Stempel a.u.b. naam en adres vande de handelaar) | |
| Deutsch Español | ||
| GARANTIESCHEIN1 Modell-Nr.2 Serien-Nr.3 Kaufdaturn4 Name und Anschrift des Kunden5 Name und Anschrift des Händlers(Bitte mit Namen und Anschrift des Handlers abstempeln) | CERTIFICADO DE GARANTÍA1 Número de modelo2 Número de serie3 Fecha de adquisición4 Nombre y dirección del cliente5 Nombre y dirección del distribudor(Se ruega poner el sello del distribudor con su nombre y dirección) | |
| Français Português | ||
| CERTIFICAT DE GARANTIE1 No. de modèle2 No de série3 Date d'achat4 Nom et adresse du client5 Nom et adresse du revendeur(Cachet portant le nom et l'adresse du revendeur) | CERTIFICADO DE GARANTIA1 Número do modelo2 Número do série3 Data de compra4 Nome e morada do cliente5 Nome e morada do distribuidor(Por favor, carímbe o nome e morada do distribuidor) | |
| Italiano | ||
| CERTIFICATO DI GARANZIA1 Modello2 N° di serie3 Data di acquisto4 Nome e indirizzo dell'acquirente5 Nome e indirizzo del rivenditore(Si prega di apporre il timbro con questi dati) | ||
HiKOKI
| 1 | |
| 2 | |
| 3 | |
| 4 | |
| 5 |
Siemensring 34, 47877 willich, Germany
Tel: +49 2154 49930
Fax: +49 2154 499350
URL: http://www.hikoki-powertools.de
Hikoki Power Tools Netherlands B.V.
Brabanthaven 11, 3433 PJ Nieuwegein, The Netherlands
Tel: +31 30 6084040
Fax: +31 30 6067266
URL: http://www.hikoki-powertools.nl
Hikoki Power Tools (U.K.) Ltd.
Precedent Drive, Rooksley, Milton Keynes, MK 13, 8PJ,
United Kingdom
Tel: +44 1908 660663
Fax: +44 1908 606642
URL: http://www.hikoki-powertools.uk
Hikoki Power Tools France S.A.S.
Hikoki Power Tools Belgium N.V./S.A.
Koningin Astridlaan 51, B-1780 Wemmel, Belgium
Tel: +32 2 460 1720
Fax: +32 2 460 2542
URL http://www.hikoki-powertools.be
Hikoki Power Tools Italia S.p.A
Via Piave 35, 36077, Altavilla Vicentina (VI), Italy
Tel: +39 0444 548111
Fax: +39 0444 548110
URL: http://www.hikoki-powertools.it
Hikoki Power Tools Ibérica, S.A.
C/ Puigbarral, 26-28, Pol. Ind. Can Petit, 08227 Terrassa
(Barcelona), Spain
Tel: +34 93 735 6722
Fax: +34 93 735 7442
URL: http://www.hikoki-powertools.es


- CORDLESS RADIO SAFETY WARNINGS
- WARNING
- Save all warnings and instructions for future reference.
- MAIN FUNCTIONS
- NOTE:
- Rechargeable battery
- STANDARD ACCESSORIES
- BEFORE USE
- - Inserting the backup batteries
- CAUTION
- - Attaching the AC Adapter
- NOTE
- ● Loading the rechargeable battery
- Loading a plug-in battery (Fig. 4)
- Loading a slide battery (Fig. 5)
- ● Adjusting the Clock
- ● Auto Select
- - Manual Select
- - Save (Memory)
- ● For Better Reception
- FM (Fig. 6)
- AM (Fig. 7)
- Positioning
- ● Auto Power Off
- USING THE TIMER FUNCTION
- - Sleep Timer
- To check the remaining time
- ● Buzzer Alarm / Radio Alarm
- Buzzer Alarm
- Radio Alarm
- To check the alarm
- OTHER FUNCTIONS
- ● Connecting an External Device
- ● Using Headphones
- ● Charging a Cell Phone
- ● To turn the voice messages on/off
- MAINTENANCE AND INSPECTION
- ● Inspecting the mounting screws
- ● Cleaning on the outside
- ● Storing the Radio
- ● Service parts list
- MODIFICATIONS
- GUARANTEE
- VOR DER BENUTZUNG
- Batterie rechargeable
- AVANT UTILISATION
- PRIMA DELL'USO
- VOORDAT U HET APPARAAT GEBRUIKT
- ANTES DEL USO
- ANTES DA UTILIZAÇÃO
- Hikoki Power Tools Netherlands B.V.
- Hikoki Power Tools (U.K.) Ltd.
- Hikoki Power Tools France S.A.S.
- Hikoki Power Tools Belgium N.V./S.A.
- Hikoki Power Tools Italia S.p.A
- Hikoki Power Tools Ibérica, S.A.
Brand : HiKOKI
Model : UR18DSL
Category : Radio