NUTRIBREAD OW311E10 - Bread maker MOULINEX - Free user manual and instructions
Find the device manual for free NUTRIBREAD OW311E10 MOULINEX in PDF.
| Product type | Bread machine |
| Brand | MOULINEX |
| Model | NUTRIBREAD OW311E10 |
| Bread capacity | 500 g, 750 g, 1000 g (depending on program) |
| Number of programs | 15 automatic programs |
| Types of programs | Gluten-free savory bread, gluten-free sweet bread, gluten-free cake, quick whole wheat bread, whole wheat bread, salt-free bread, super quick bread, quick sweet bread, French bread, sweet bread, bake only, leavened doughs, cake, jam, pasta dough |
| Crust control | Light, medium, dark |
| Delay timer | Up to 15 hours (not available for all programs) |
| Display | Digital screen with remaining time |
| Viewing window | Yes, on the lid |
| Bread pan | Non-stick, removable |
| Kneading paddle | Single, removable, with removal hook provided |
| Included accessories | Measuring cup, double spoon (coffee/soup), hook for removing the kneading paddle |
| Keep warm function | Yes, 1 hour after baking (depending on program) |
| Safety | Overheat protection (code E01/E00), automatic shut-off, lockable lid |
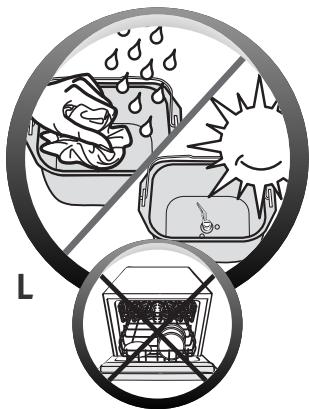
| Care and cleaning | Clean with a damp sponge; do not immerse the body; pan and paddle hand washable with warm soapy water; do not use in dishwasher |
| Body material | Plastic and metal |
| Power supply | 220-240 V, 50/60 Hz (check on the appliance) |
| Power | Approximately 800-1000 W (estimated) |
| Weight | Approximately 6 kg (estimated) |
| Dimensions (L x W x H) | Approximately 30 x 25 x 30 cm (estimated) |
| Warranty | Check with after-sales service |
Frequently Asked Questions - NUTRIBREAD OW311E10 MOULINEX
User questions about NUTRIBREAD OW311E10 MOULINEX
0 question about this device. Answer the ones you know or ask your own.
Ask a new question about this device
Download the instructions for your Bread maker in PDF format for free! Find your manual NUTRIBREAD OW311E10 - MOULINEX and take your electronic device back in hand. On this page are published all the documents necessary for the use of your device. NUTRIBREAD OW311E10 by MOULINEX.
USER MANUAL NUTRIBREAD OW311E10 MOULINEX
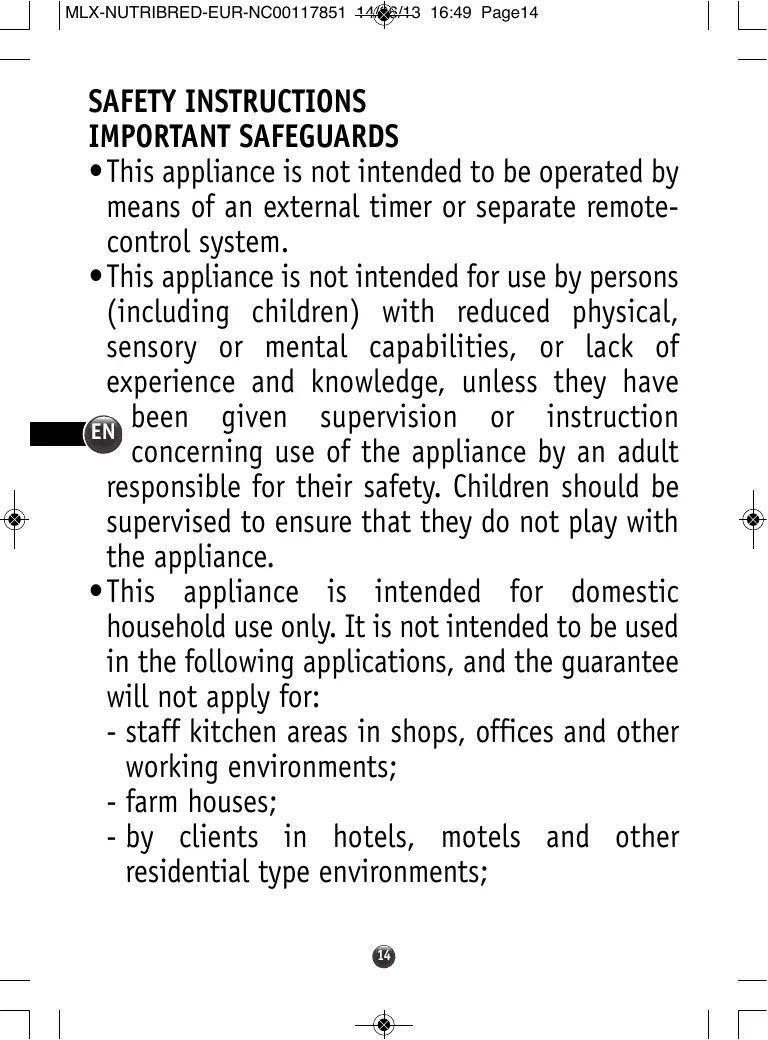
SAFETY INSTRUCTIONS IMPORTANT SAFEGUARDS
- This appliance is not intended to be operated by means of an external timer or separate remote-control system.
- This appliance is not intended for use by persons (including children) with reduced physical, sensory or mental capabilities, or lack of experience and knowledge, unless they have
N been given supervision or instruction concerning use of the appliance by an adult responsible for their safety. Children should be supervised to ensure that they do not play with the appliance.

- This appliance is intended for domestic household use only. It is not intended to be used in the following applications, and the guarantee will not apply for:
- staff kitchen areas in shops, offices and other working environments;
- farm houses;
- by clients in hotels, motels and other residential type environments;
- bed and breakfast type environments.
- If the power supply cord is damaged, it must be replaced by the manufacturer or its service agent or a similarly qualified person in order to avoid a hazard.
- This appliance can be used by children aged from 8 years and above and persons with reduced physical, sensory or mental capabilities or lack of experience and knowledge if they have been given supervision or instruction concerning use of the appliance in a safe way and understand the hazards involved. Children shall not play with the appliance. Cleaning and user maintenance shall not be made by children unless they are older than 8 and supervised.
Keep the appliance and its cord out of reach of children less than 8 years.
- Do not exceed the quantities indicated in the recipes.
Do not exceed a total of 1000 g of dough,
Do not exceed a total of 620 g of flour and 10 g of yeast.
- Use a cloth or a wet sponge to clean the parts in contact with food.
- Carefully read the instructions before using your appliance for the first time: the manufacturer does not accept responsibility for use that does not comply with the instructions.
- For your safety, this product conforms to all applicable standards and regulations (Low Voltage Directive, Electromagnetic Compatibility, Food Compliant Materials, Environment, ...).
- Use the appliance on a stable work surface away from water splashes and under no circumstances in a cubby-hole in a built-in kitchen.
- Make sure that the power it uses corresponds to your electrical supply system. Any error in connection will cancel the guarantee.
- It is compulsory to connect your appliance to a socket with an earth. Failure to respect this requirement can cause electric shock and possibly lead to serious injury. It is essential for your safety for the earth connection to correspond to the standards for electrical installation applicable in your country. If your installation does not have an outlet connected to earth, it is essential that before making any connection, you have a certified organisation intervene to bring your electrical installation into conformance.
- This product has been designed for domestic use only.
- Unplug the appliance when you have finished using it and when you want to clean it.
- Do not use the appliance if: - the supply cord is defective or damaged, - the appliance has fallen to the floor and shows visible signs of damage or does not function correctly.
In either case, the appliance must be sent to the nearest approved service centre to eliminate any risk. See the guarantee documents.
- All interventions other than cleaning and everyday maintenance by the customer must be performed by an authorised service centre.
- Do not immerse the appliance, power cord or plug in water or any other liquid.
- Do not leave the power cord hanging within reach of children.
- The power cord must never be close to or in contact with the hot parts of your appliance, near a source of heat or over a sharp corner.
- Do not move the appliance when in use.
- Do not touch the viewing window during and just after operation. The window can reach a high temperature.
- Do not pull on the supply cord to unplug the appliance.
- Only use an extension cord that is in good condition, has an earthed socket and is suitably rated.
- Do not place the appliance on other appliances.
- Do not use the appliance as a source of heating.
-
Do not use the appliance to cook any other food than breads and jams.
-
Do not place paper, card or plastic in the appliance and place nothing on it.
- Should any part of the appliance catch fire, do not attempt to extinguish it with water. Unplug the appliance. Smother flames with a damp cloth.
- For your safety, only use accessories and spare parts designed for your appliance.
-
At the end of the programme, always use oven gloves to handle the pan or hot parts of the appliance. The appliance gets very hot during use.
-
Never obstruct the air vents.
- Be very careful, steam can be released when you open the lid at the end of or during the programme.
- When using programme No. 14 (jam, compotes) watch out for steam and hot spattering when opening the lid.
- The measured noise level of this product is 60 dBA.

Let's help to protect the environment!
① Your appliance contains many materials that can be reused or recycled.
Take it to a collection point so it can be processed.
Note: These instructions are not suitable for use in the UK as the ingredients and timings may differ for UK use and therefore the performance of the breadmaker may vary and be disappointing for the UK consumer.
natural_image
Abstract circular diagram with concentric wave-like patterns inside a rectangular frame (no text or symbols)Trop liquide

natural_image
Illustration of a rolled food item inside a circular frame (no text or symbols)OK
natural_image
Cross-sectional illustration of a layered object with concentric ridges and a small spiral feature inside (no text or symbols)Trop sèche
natural_image
Diagram showing two hands holding a tool, one crossed over the other by a diagonal line (no text or symbols)
LES INGREDIENTS
natural_image
Symbol of a device with crossed lines indicating prohibition (no text or labels)natural_image
Abstract circular diagram with concentric wave-like patterns inside a rectangular frame (no text or symbols)Te vloeibaar
natural_image
Illustration of a spiral-patterned object inside a circular frame (no text or symbols)OK

natural_image
Cross-sectional illustration of a cheese chip with spiral grooves (no text or symbols)Te droog
| FRANS BROOD (programma 9) | INGREDIËNTEN - th = theelepel - el = eetlepel |
| GOUDBRUIN KORSTJE = GEMIDDELD | 1. WATER = 365 ml 3. MEEL = 620 g2. ZOUT = 2 th 4. GIST = 112 th |
| GEWICHT = 1000 g | |
| TIJD = 3:10 |
natural_image
Diagram showing two hands holding a tool, one with arrows indicating direction, the other with an arrow, enclosed in a circle (no text or symbols)
DE INGREDIËNTEN
natural_image
Symbolic illustration of a mechanical device with crossed lines indicating no protection or prohibition (no text present)- Geen onderdelen in de vaatwasser wassen.
PROG. 1 - HARTIG GLUTENVRIJ BROOD PROG. 2 - ZOET GLUTENVRIJ BROOD
1000 g
natural_image
Abstract circular diagram with concentric wave-like patterns inside a rounded rectangle (no text or symbols)Zu flüssig

natural_image
Illustration of a rolled-up food item inside a circular frame (no text or symbols)OK
natural_image
Cross-sectional illustration of a cheese chip with concentric layers and a small mouth (no text or symbols)Zu fest
natural_image
Symbol of a device with crossed-out lines indicating prohibition (no text or labels)1 - lid with window
2 - control panel
a - display screen
b - on/off button
c - weight selection
d - buttons for setting delayed start and adjusting the time for programmes 11
e - select crust colour
f - choice of programmes
g - operating indicator light

PRACTICAL ADVICE
Preparation
1 Please read these instructions carefully: the method for making bread with this appliance is not the same as for hand-made bread.
2 All ingredients used must be at room temperature (unless otherwise indicated) and must be weighed exactly. Measure liquids with the graduated beaker supplied. Use the double doser supplied to measure teaspoons on one side and tablespoons on the other. All spoon measures are level and not heaped. Incorrect measurements give bad results.
3 For successful bread making using the correct ingredients is critical. Use ingredients before their use-by date and keep them in a cool, dry place.
4 It is important to measure the quantity of flour precisely. That is why you should weigh out flour using a kitchen scale. Use packets of flaked dried yeast (sold in the UK as Easy Bake or Fast Action Yeast). Unless otherwise
Using
- Bread preparation is very sensitive to temperature and humidity conditions. In case of high heat, use liquids that are cooler than usual. Likewise, if it is cold, it may be necessary to warm up the water or milk (never exceeding 35^ ).
3 - bread pan
4 - kneading paddle
5 - graduated beaker
6 - teaspoon measure/ tablespoon measure
7 - hook accessory for lifting out kneading paddle
indicated in the recipe, do not use baking powder. Once a packet of yeast has been opened, it should be sealed, stored in a cool place and used within 48 hours.
5 To avoid spoiling the proving of the dough, we advise that all ingredients should be put in the bread pan at the start and that you should avoid opening the lid during use (unless otherwise indicated). Carefully follow the order of ingredients and quantities indicated in the recipes. First the liquids, then the solids. Yeast should not come into contact with liquids, sugar or salt.
General order to be followed:
Liquids (butter, oil, eggs, water, milk)
Salt
Sugar
Flour, first half
Powdered milk
Specific solid ingredients
Flour, second half
Yeast
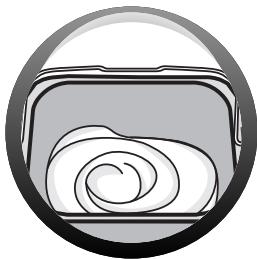
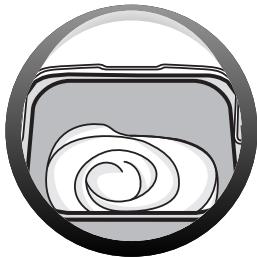
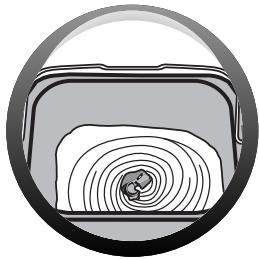
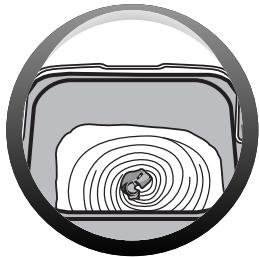
- It can also sometimes be useful to check the state of the dough during the second kneading: it should form an even ball which comes away easily from the walls of the pan. - If not all of the flour has been blended into the dough, add a little more water,
- if the dough is too wet and sticks to the sides, you may need to add a little flour. Such corrections should be undertaken very gradually (no more than 1 tablespoon at a time) and wait to see if there is an improvement before continuing.
- A common error is to think that adding more yeast will make the bread rise more.
Too much yeast makes the structure of the bread more fragile and it will rise a lot and then fall while baking. You can determine the state of the dough just before baking by touching it lightly with your fingertips: the dough should be slightly resistant and the fingerprint should disappear little by little.
Precautions for using gluten-free programs
- The flour mixtures have to be sifted with the yeast to avoid clumps.
- The kneading needs some encouragement: to foster their incorporation, scrape down any unmixed ingredients from the sides to the middle of the bowl using a spatula (made of wood or plastic to avoid scratching the coating).
-
You should also help with incorporation when adding ingredients.
-
The nature of the ingredients used for gluten-free recipes does not allow the bread to brown as it normally would. The top of the bread often remains rather white.
- Gluten-free bread cannot rise like traditional bread and often remains flat on top.
- Not all premix brands deliver the same results: the recipes may need to be adjusted. Therefore, we recommend that you experiment (see example below).
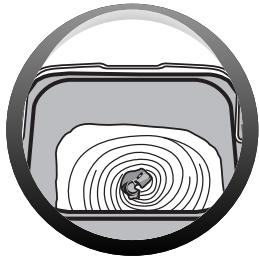
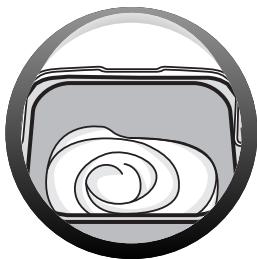
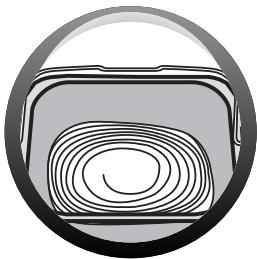
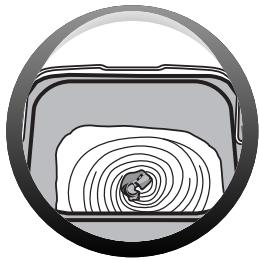
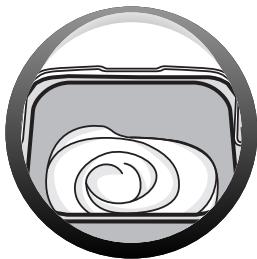
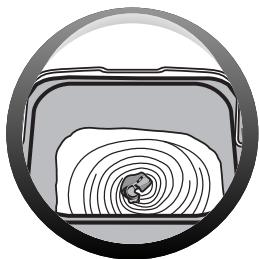
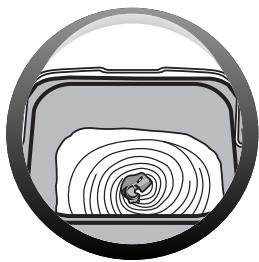
Example: Adjust the quantity of liquid. according to the consistency of the dough. It should be relatively supple, but not liquid.
natural_image
Abstract circular diagram with concentric wave-like patterns inside a rounded rectangle (no text or symbols)Too liquid

natural_image
Illustration of a rolled-up food item inside a circular frame (no text or symbols)OK

natural_image
Circular icon depicting a stylized airplane viewed through a spiral pattern, enclosed in a frame (no text or symbols)Too dry
Exception: Cake dough should remain rather liquid.

BEFORE YOU USE YOUR APPLIANCE FOR THE FIRST TIME
- Remove the accessories and any stickers either inside or on the outside of the appliance - A.
- Clean all of the parts and the appliance itself using a damp cloth.

QUICK-START
- Fully unwind the power cord and plug it into an earthed socket.
- A slight odour may be given off when used for the first time.
- Remove the bread pan by lifting the handle and turning the bread pan slightly anticlockwise. Then insert the kneading paddle - B-C.
- Put the ingredients in the pan in exactly the order recommended. Make sure that all ingredients are weighed with precision -D-E.
-
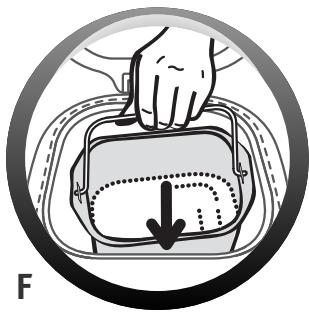
Place the bread pan in the breadmaker. By holding the bread pan thanks to the handle, insert it in the breadmaker so that it fits over the drive shaft (you will need to tilt it slightly to one side to do this). Turn it gently clockwise and it will lock into place -F-G.
-
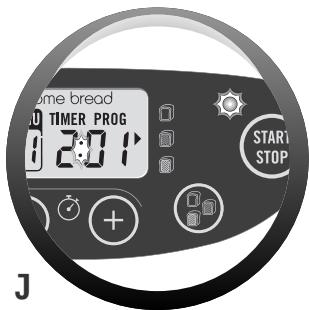
Close the lid. Plug in the breadmaker and switch it on. After you hear the beep, programme 1 will appear on the display as the default setting, i.e. 1000 g, medium browning -H.
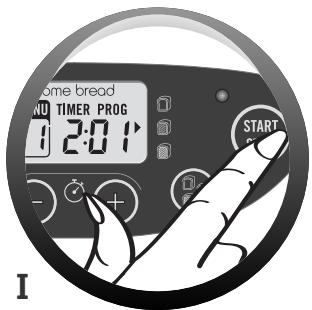
- Select the desired programme using the MENU button.
- Press the START STOP button. The timer colon flashes. The operating indicator lights up -I-J.
- Unplug the breadmaker at the end of the cooking or warming cycle. Lift the bread pan out of the breadmaker. Always use oven gloves as the pan handle is hot, as is the inside of the lid. Turn out the hot bread and place it on a rack for at least 1 hour to cool -K.
To get to know your breadmaker, we suggest trying the FRENCH BREAD recipe for your first loaf.
| FRENCH BREAD (programme 9) | INGREDIENTS - tsp = teaspoon - tbsp = tablespoon |
| BROWNING = MEDIUM | 1. WATER = 365 ml 3. FLOUR = 620 g2. SALT = 2 tsp 4. YEAST = 112 tsp |
| WEIGHT = 1000 g | |
| TIME = 3:10 |
Note: These instructions are not suitable for use in the UK as the ingredients and timings may differ for UK use and therefore the performance of the breadmaker may vary and be disappointing for the UK consumer.
A default setting is displayed for each programme. You will therefore have to select the desired settings manually.
Selecting a programme
Choosing a programme triggers a series of steps which are carried out automatically one after another.

The menu button enables you to choose a certain number of different
programmes. The time corresponding to the programme is displayed.
Every time you press the MENU button, the number on the display panel switches to the next programme from 1 - 15:
Using gluten-free programs.
Programs 1, 2 and 3 should be used to bake gluten-free breads and cakes. Only one weight is available for each of the programs (1000 g for programs 1 and 2 and 750 g for program 3).
Gluten-free breads and cakes are suitable for people who are intolerant (celiac disease) of the gluten found in several cereals (wheat, barley, rye, oat, Khorasan wheat, spelt, etc).
It is important to avoid cross-contamination with flour containing gluten. Use extra care when cleaning the bowl, paddle and all the utensils that will be used to prepare gluten-free breads and cakes. Also check that the yeast you use is free of gluten.
These gluten-free recipes were developed using ready-to-use mixes (also called
premixes) for gluten-free bread, such as Schär or Valpiform.
These types of gluten-free mixes are available on the retail market and in specialised shops. Please note that not all brands of ready-to-use gluten-free mixtures deliver the same results.
The consistency of gluten-free flours does not favour optimal mixing: We recommend that you sift the flour mixes together with the yeast to prevent the forming of clumps. This is why the delayed start feature is not available for the gluten-free programs.
You must also use a flexible wooden or plastic spatula to scrape the dough down from the sides of the bowl to the centre, along with any unincorporated ingredients, until the dough is homogenous.
Gluten-free bread will have a denser consistency and be lighter in colour than normal bread.
-
Savoury gluten-free bread. We recommend using a ready-to-use mix. Only the 1000 g setting is available for this program. Bread made using a premix in a recipe that is low in sugar and fat.
-
Sweet gluten-free bread. We recommend using a ready-to-use mix. Only the 1000 g setting is available for this program. Bread made using a premix in a recipe that contains sugar and fat.
-
Gluten-free cake. We recommend using a ready-to-use mix. Only the 750 g setting is available for this program. Bread using a premix and baking powder in a cake recipe.
-
Fast Wholemeal Bread. This programme is similar to the Wholemeal Bread programme but is quicker. The texture of the bread may be a little more compact.
-
- Wholemeal Bread. Wholemeal Bread Programme is used to make whole wheat bread using whole wheat flour.
- Salt Free Bread. Bread is one of the foods that provide the largest daily contribution of salt. Reducing salt consumption can help reduce the risks of cardio-vascular problems.
- Super Fast White Bread. Programme 7 is specific to the Super Fast White Bread recipe. Bread made using fast programmes is more compact than that made with the other programmes.
- Fast Sweet Bread. This programme is similar to the Sweet Bread programme but is quicker. The texture of the bread may be a little more compact.
- French Bread. The French Bread programme corresponds to a traditional French crusty white bread recipe.
- Sweet Bread. The Sweet Bread programme is for recipes containing more sugar and fat such as brioches and milk breads. If you are using special flour blends for brioche or rolls, do not exceed 750 g of dough in total.
Selecting the weight of the bread
The bread weight is set by default at 1000 g. This weight is shown for informational purposes. See the recipes for more details.
Programmes 1, 2, 3, 11, 12, 13, 14, 15 do
Selecting the crust colour
By default, the colour of the crust is set at MEDIUM. Programmes 12, 14, 15 do not have a colour setting.
Three choices are possible: Light / Medium/Dark.
- Loaf Cooking. The Loaf cooking programme allows you to bake for 10 to 70 minutes (adjustable in steps of 10 min). It can be selected alone and used:
a) with the Bread Dough programme,
b) to reheat cooked and cooled breads or to make them crusty,
c) to finish cooking in case of a prolonged electricity cut during a bread baking cycle.
The breadmaker should not be left unattended when using programme 11.
To interrupt the cycle before it is finished, the programme can be stopped manually by holding down the START STOP button.
- Bread Dough. The Bread Dough programme does not bake. It is a kneading and rising programme for all leavened doughs such as pizza dough, rolls, sweet buns.
- Cake. Can be used to make pastries and cakes with baking powder.
Only the 750 g setting is available for this programme.
- Jam. The Jam programme automatically cooks jams and compots (stewed fruits) in the pan.
- Pasta. Programme 15 only kneads. It is for unleavened pasta, like noodles and gluten-free pizza dough for example.
not have weight settings. Press the 📋 button to set the chosen product - 500 g, 750 g or 1000 g. The indicator light against the selected setting comes on.
If you want to change the default setting, press the 📄 button until the indicator light facing the desired setting comes on.
Start /Stop
Press the START STOP button to switch the appliance on. The countdown begins. To stop the programme or to cancel delayed programming, hold down on the START STOP button for 3 seconds.

CYCLES
A table (see the end of these instructions) indicates the breakdown of the various cycles for the programme chosen.

Kneading
For forming the dough's structure so that it can rise better.
During this cycle, and for programmes 1, 2, 3, 4, 5, 6, 7, 8, 9, 10, 12, 13, you can add ingredients: dried fruit or nuts, olives, etc. A beep indicates when you can intervene. See the summary table for preparation times (see the end of these instructions) et à la colonne "extra".and the "extra" column. This column indicates the time that will be displayed on your appliance's screen when the beep sounds. For more precise information on how long before the beep sounds, subtract the "extra" column time from the total baking time.
For example: "extra" = 1:45 and "total time" = 2:01, the ingredients can be added after 16 min.

Rest
Allows the dough to rest to improve kneading quality.

Rising
Time during which the yeast works to let the bread rise and to develop its aroma.

Baking
Transforms the dough into bread and gives it a golden, crusty crust.

Warming
Keeps the bread warm after baking. It is recommended that the bread should be turned out promptly after baking, however. for programmes 1, 2, 3, 4, 5, 6, 7, 8, 9, 10, 13, you can leave your preparation in the appliance. A one-hour warming cycle automatically follows baking. During the hour for which the bread is kept warm, the display shows 0:00 and the dots ■ on the timer flash. At the end of the cycle, the appliance stops automatically after several sound signals.

DELAYED START PROGRAMME
You can programme the appliance up to start 15 hours in advance to have your preparation ready at the time you want. This function cannot be used on programmes 1, 2, 3, 7, 11, 12, 13, 14, 15.
This step comes after selecting the programme, browning level and weight. The programme time is displayed. Calculate the time difference between the moment when you start the programme and the time at which you want your preparation to be ready. The machine automatically includes the duration of the programme cycles.
Using the ⭕ and ⭕, buttons, display the calculated time (⊕ up and ⭕ down). Short presses change the time by intervals of 10 min + a short beep. Holding the button down gives 'continuous scrolling of 10-min intervals.
For example, it is 8 pm and you want your bread to be ready for 7 am the next morning. Programme 11:00 using the + and -. Press the 🧑️ button. A beep is emitted. The timer colon ■ blinks. The countdown begins. The operating indicator light comes on.
If you make a mistake or want to change the time setting, hold down the START STOP button until it makes a beep. The default time is displayed. Start the operation again.
With the delayed start programme do not use recipes which contain fresh milk, eggs, soured cream, yoghurt, cheese or fresh fruit as they could spoil or stale overnight.
Practical advice
If there is a power cut: if, during the cycle, the programme is interrupted by a power cut or mishandling, the machine has a 7-min protection time during which the settings are saved.
The cycle starts again where it stopped. Beyond that time, the settings are lost.
If you plan to run a second programme bake a second loaf, open the lid and wait 1 hour before beginning the second preparation.
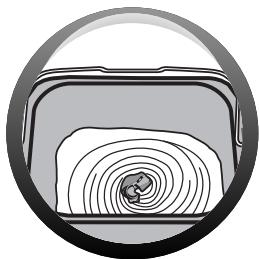
To turn out your loaf of bread: it may happen that the kneading paddle remain stuck in the loaf when it is turned out. In this case, use the hook accessory as follows:
once the loaf is turned out, lay it on its side while still hot and hold it down with one hand, wearing an oven glove,
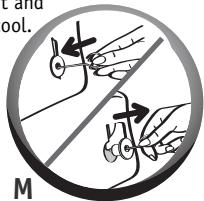
with the other hand, insert the hook in the axis of the kneading paddle - M,
pull gently to release the kneading paddle - M,
turn the loaf upright and stand on a grid to cool.

INGREDIENTS
Gluten-free flour: there are a great number of so-called "non-bread" flours (which do not contain gluten). The most widely known are buckwheat, rice (white and brown), quinoa, corn, chestnut and sorghum flours.
To attempt to recreate the elasticity of gluten, it is crucial to mix together several types of non-bread flours and to add thickening agents.
Thickening agents: to obtain a proper consistency and to try to imitate the elasticity of gluten, you can also add xanthan gum and/or guar gum to your dough. These ingredients are used as thickeners, stabilisers and emulsifiers in the agri-food industry.
Ready-to-use gluten-free mixes: These make it easier to bake gluten-free bread because they contain thickeners and have the advantage of being guaranteed to contain no gluten; some are also organic.
Not all brands of ready-to-use gluten-free mixtures deliver the same results.
Fats and oils: fats make the bread softer and tastier. It also stores better and longer. Too much fat slows down rising. If you use butter, cut it into tiny pieces so that it is distributed evenly throughout the preparation, or soften it. You can substitute 15g butter for 1 tablespoon of oil. Do not add hot butter. Keep the fat from coming into contact with the yeast, as fat can prevent yeast from rehydrating. Do not use low fat spreads or butter substitutes.
Eggs: eggs make the dough richer, improve the colour of the bread and encourage the development of the soft, white part. If you use eggs, reduce the quantity of liquid you use proportionally. Break the egg and top up with the liquid until you reach the quantity of liquid indicated in the recipe. Recipes are designed for one 50g size egg; if your eggs are bigger, add a little flour; if they are smaller, use less flour.
Milk: recipes use either fresh or powdered milk. If using powdered milk, add the quantity of water stated in the recipe. It enhances the flavour and improves the keeping qualities of the bread. For recipes using fresh milk, you can substitute some of it with water but the total volume must equal the quantity stated in the recipe. Semi-skimmed or skimmed milk is best to avoid bread having a close texture. Milk also has an emulsifying effect which evens out its airiness, giving the soft, white part a better aspect.
Water: water rehydrates and activates the yeast. It also hydrates the starch in the flour and helps the soft, white part to form. Water can be totally or partially replaced with milk or other liquids. Use liquids at room temperature, except for gluten-free breads that require the use of lukewarm water (approximately 35^ C).
Flour: the weight of the flour varies significantly depending on the type of flour used. Depending on the quality of the flour, baking results may also vary. Keep flour in a hermetically sealed container, as flour reacts to fluctuations in atmospheric conditions, absorbing moisture or losing it. Use “strong flour”, “bread flour” or “baker’s flour” rather than standard flour. Adding oats, bran, wheat germ, rye or whole grains to the bread dough will give a smaller, heavier loaf of bread.
Using T55 flour is recommended unless otherwise specified in the recipe. If you are using special flour blends for bread, brioche or rolls, do not exceed 750 g of dough in total.
Sifting the flour also affects the results: the more the flour is whole (i.e. the more of the outer envelope of the wheat it contains), the less the dough will rise and the denser the bread. You can also find ready-to-use bread preparations on the market. Follow the manufacturer's instructions when using these preparations. Usually, the choice of the
programme will depend on the preparation used. For example: Wholemeal bread - Programme 5.
Sugar: use white sugar, brown sugar or honey. Do not use sugar lumps. Sugar acts as food for the yeast, gives the bread its good taste and improves browning of the crust. Artificial sweeteners cannot be substituted for sugar as the yeast will not react with them.
Salt: salt gives taste to food and regulates the yeast's activity. It should not come into contact with the yeast. Thanks to salt, the dough is firm, compact and does not rise too quickly. It also improves the structure of the dough. Use ordinary table salt. Do not use coarse salt or salt substitutes.
'Yeast: baker's yeast exists in several forms: fresh in small cubes, dried and active to be rehydrated or dried and instant. Fresh yeast is sold in supermarkets (bakery or fresh produce departments), but you can also buy fresh yeast from your local baker's. In its fresh or instant dried form, yeast should be added directly to the baking pan of your breadmaker with the other ingredients.
Remember to crumble the fresh yeast with your fingers to make it dissolve more easily. Only active dried yeast (in small granules) must be mixed with a little tepid water before use. Choose a temperature close to 35^ C, less and it will not rise as well, more will make it lose its rising power. Keep to the stated amounts and remember to multiply the quantities if you use fresh yeast (see equivalents chart below). Equivalents in quantity/weight between dried yeast and fresh yeast:
Dried yeast (in tsp.)
| 1 | 1,5 | 2 | 2,5 | 3 | 3,5 | 4 | 4,5 | 5 |
| Fresh yeast (in g) | ||||||||
| 9 | 13 | 18 | 22 | 25 | 31 | 36 | 40 | 45 |
To make gluten-free breads, you must use a special gluten-free yeast.
Additives (dried fruit or nuts, olives.): add a personal touch to your recipes by adding whatever ingredients you want, taking care:
to add following the beep for additional ingredients, especially those that are fragile such as dried fruit,
to add the most solid grains (such as linseed or sesame) at the start of the kneading process to facilitate use of the machine (delayed starting, for example),
to thoroughly drain moist ingredients (olives),
to lightly flour fatty ingredients for better blending,
not to add too large a quantity of additional ingredients, especially cheese, fresh fruit and fresh vegetables, as they can affect the development of the dough, respect the quantities indicated in the recipes,
to have no ingredients fallen outside the pan.

CLEANING AND MAINTENANCE
- Unplug the appliance.
- Clean all the parts, the appliance itself and the inside of the pan with a damp cloth. Dry thoroughly -L.
- Wash the pan and kneading paddle in hot soapy water.
If the kneading paddle remain stuck in the pan, let it soak for 5 to 10 min. - When necessary the lid can be cleaned with
warm water and a sponge.
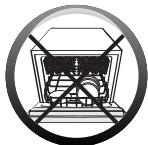
- Do not wash any part in a dishwasher.
- Do not use household cleaning products, scouring pads or alcohol. Use a soft, damp cloth.
- Never immerse the body of the appliance or the lid.
- Do not wash any part in a dishwasher. - Do not use household cleaning products, scouring pads or alcohol. Use a soft, damp cloth. - Never immerse the body of the appliance or the lid.
natural_image
Symbolic icon of a device with crossed lines indicating prohibition or exclusion (no text or symbols present)For each recipe, add the ingredients in the exact order indicated. Depending on the recipe chosen and the corresponding programme, you can take a look at the summary table of preparation times (see the end of these instructions) and follow the breakdown for the various cycles.
tsp = teaspoon - tbsp = tablespoon
PROG. 1 - SAVOURY GLUTEN-FREE BREAD PROG. 2 - SWEET GLUTEN-FREE BREAD
1000 g
We recommend using a ready-to-use mixture such as Schär or Valpiform.
Follow the recommendations on the ready-to-use packet or cookbook.
Do not exceed 1000 g of dough.
PROG. 4 - FAST WHOLEMEAL BREAD PROG. 5 - WHOLEMEAL BREAD
| WHOLEMEAL BREAD | 500 g | 750 g | 1000 g |
| 1. Water | 205 ml | 270 ml | 355 ml |
| 2. Sunflower oil | 1^1/2 tbsp | 2 tbsp | 3 tbsp |
| 3. Salt | 1 tsp | 1^1/2 tsp | 2 tsp |
| 4. Sugar | 1^1/2 tsp | 2 tsp | 3 tsp |
| 5. White bread flour | 130 g | 180 g | 240 g |
| 6. Wholemeal flour | |||
| T150 | 200 g | 270 g | 360 g |
| 7. Yeast | 1 tsp | 1 tsp | 1^1/2 tsp |
PROG. 7 - SUPER FAST WHITE BREAD
| 500 g | 750 g | 1000 g | |
| 1. Water(warmed, 35°C) | 210 ml | 285 ml | 360 ml |
| 2. Sunflower oil | 3 tsp | 1 tbsp | 1^1/2 tbsp |
| 3. Salt | 1^1/2 tsp | 1 tsp | 1^1/2 tsp |
| 4. Sugar | 2 tsp | 3 tsp | 1 tbsp |
| 5. Powdered milk | 1^1/2 tbsp | 2 tbsp | 2^1/2 tbsp |
| 6. White bread flour | 325 g | 445 g | 565 g |
| 7. Yeast | 1^1/2 tsp | 2^1/2 tsp | 3 tsp |
PROG. 3 - GLUTEN-FREE CAKE
750 g
We recommend using a ready-to-use mixture such as Schär or Valpiform.
Do not exceed 1000 g of dough.
Whisk the eggs with the sugar and salt for 5 minutes, until white.
PROG. 6 - SALT FREE BREAD
| 500 g | 750 g | 1000 g | |
| 1. Water | 200 ml | 270 ml | 365 ml |
| 2. White bread flour | 350 g | 480 g | 620 g |
| 3. Dried baker yeast | 1/2 tsp | 1 tsp | 1 tsp |
| Add, when beeps | |||
| 4. Sesame seed | 50 g | 75 g | 100 g |
PROG. 8 - FAST SWEET BREAD
PROG. 10 - SWEET BREAD
| BRIOCHE | 500 g | 750 g | 1000 g |
| 1. Eggs*, beatened | 2 | 2 | 3 |
| 2. Butter, softened | 115 g | 145 g | 195 g |
| 3. Salt | 1 tsp | 1 tsp | 1^1/2 tsp |
| 4. Sugar | 2^1/2 tbsp | 3 tbsp | 4 tbsp |
| 5. Milk | 55 ml | 60 ml | 80 ml |
| 6. White bread flour | 280 g | 365 g | 485 g |
| 7. Yeast | 1^1/2 tsp | 2 tsp | 3 tsp |
Optional: 1 tsp of orange flower water.
*1 medium egg = 50 g
Note: These instructions are not suitable for use in the UK as the ingredients and timings may differ for UK use and therefore the performance of the breadmaker may vary and be disappointing for the UK consumer.
PROG. 9 - FRENCH BREAD
| 500 g | 750 g | 1000 g | |
| 1. Water | 200 ml | 275 ml | 365 ml |
| 2. Salt | 1 tsp | 1^1/2 tsp | 2 tsp |
| 3. White bread flour | 350 g | 465 g | 620 g |
| 4. Yeast | 1 tsp | 1 tsp | 1^1/2 tsp |
PROG. 13 - CAKE
| LEMMON CAKE | 1000 g |
| 1. Eggs*, beatened | 4 |
| 2. Sugar | 260 g |
| 3. Salt | 1 pinch |
| 4. Butter, softened but cooled | 90 g |
| 5. Lemmon zest | of 1^1/2 lemmon |
| 6. Lemmon juice | of 1^1/2 lemmon |
| 7. White bread flour | 430 g |
| 8. Chemical yeast | 3^1/2 tsp |
Whisk the eggs with the sugar and salt for 5 minutes, until white. Pour into the bowl of the machine. Add the cooled melted butter. Add the juice + zest of the lemon.
Mix together the flour and baking powder and add to the mixture. Make sure you put the flour in a pile, right in the middle of the recipient.
PROG. 15 - PASTA
| 500 g | 750 g | 1000 g | |
| 1. Water | 45 ml | 50 ml | 70 ml |
| 2. Eggs*, beatened | 3 | 4 | 5 |
| 3. Salt | 1 pinch | 1/2 tsp | 1 tsp |
| 4. White bread flour | 375 g | 500 g | 670 g |
*1 medium egg = 50 g
PROG. 12 - LOAF COOKING
| PIZZA | 500 g | 750 g | 1000 g |
| 1. Water | 160 ml | 240 ml | 320 ml |
| 2. Olive oil | 1 tbsp | 1^1/2 tbsp | 2 tbsp |
| 3. Salt | 1^1/2 tsp | 1 tsp | 1^1/2 tsp |
| 4. White bread flour | 320 g | 480 g | 640 g |
| 5. Yeast | 1^1/2 tsp | 1 tsp | 1^1/2 tsp |
PROG. 14 - JAM
Cut or chop up the fruit of your choice before putting in the breadmaker.
| 1. Strawberry, peach, rhubarbor apricot | 580 g |
| 2. Sugar | 360 g |
| 3. Lemmon juice | of 1 lemmon |
| 4. Pectin | 30 g |
| 1. Orange or grapefruit | 500 g |
| 2. Sugar | 400 g |
| 3. Pectin | 50 g |
| Not getting the expected results?This table will help you. | Bread rises too much | Bread falls after rising too much | Bread does not rise enough | Crust not golden enough | Sides brown but bread not fully cooked | Top and sides floury |
| The button was pressed during baking. | ||||||
| Not enough flour. | ||||||
| Too much flour. | ||||||
| Not enough yeast. | ||||||
| Too much yeast. | ||||||
| Not enough water. | ||||||
| Too much water. | ||||||
| Not enough sugar. | ||||||
| Poor quality flour. | ||||||
| Wrong proportions of ingredients (too much). | ||||||
| Water too hot. | ||||||
| Water too cold. | ||||||
| Wrong programme. |

TECHNICAL TROUBLESHOOTING GUIDE
| PROBLEMS | CAUSES - SOLUTIONS |
| The kneading paddle is stuck in the pan. | Let it soak before removing it. |
| After pressing on, nothing happens. | E01 is displayed and flashes on the screen, the appliance beeps: the appliance is too hot. Wait 1 hour between 2 cycles.E00 is displayed and flashes on the screen, the appliance beeps: the appliance is too cold. Wait for it to reach room temperature.HHH or EEE is displayed and flashes on the screen, the appliance beeps: malfunction. The machine must be serviced by authorised personnel.A delayed start has been programmed. |
| After pressing on, the motor is on but no kneading takes place. | The pan has not been correctly inserted.Kneading paddle missing or not installed properly.In the two cases cited above, stop the appliance manually with a long press on the button. Start the recipe again from the beginning. |
| After a delayed start, the bread has not risen enough or nothing happens. | You forgot to press on after programming the delayed start programme.The yeast has come into contact with salt and/or water.Kneading paddle missing. |
| Burnt smell. | Some of the ingredients have fallen outside the pan: unplug the appliance, let it cool down, then clean the inside with a damp sponge and without any cleaning product.The preparation has overflowed: the quantity of ingredients used is too great, notably liquid. Follow the proportions given in the recipe. |

DESCRIZIONE
natural_image
Abstract circular diagram with concentric wave-like patterns inside a rectangular frame (no text or symbols)Troppo liquido
natural_image
Illustration of a rolled food item inside a container, enclosed in a circular frame (no text or symbols)OK

natural_image
Cross-sectional illustration of a layered structure with spiral patterns, enclosed in a circular frame (no text or symbols)Troppo asciutto
natural_image
Symbol of a device with crossed lines indicating prohibition (no text or labels)natural_image
Abstract circular diagram with concentric wave-like patterns inside a rectangular frame (no text or symbols)Demasiado líquida
natural_image
Illustration of a rolled pastry or pastry inside a circular frame (no text or symbols)OK
natural_image
Cross-sectional illustration of a bread loaf with spiral pattern (no text or symbols)Demasiado seca
natural_image
Diagram showing two hands holding a tool, one with arrows indicating motion or force, the other with an arrow indicating direction (no text or symbols)
LOS INGREDIENTES
natural_image
Symbolic image of a computer monitor with two crossed lines indicating no text or symbols (no readable text)natural_image
Abstract circular diagram with concentric wave-like patterns inside a rounded rectangle (no text or symbols)Muito líquida

natural_image
Illustration of a spiral-patterned object inside a rectangular frame, enclosed in a circular frame (no text or symbols)OK
natural_image
Cross-sectional illustration of a layered cake with spiral patterns (no text or symbols)Muito seca
natural_image
Symbol of a device with crossed lines indicating prohibition (no text or labels)natural_image
Abstract circular diagram with concentric wave-like patterns inside a rectangular frame (no text or symbols)Πολύ υγρή

natural_image
Illustration of a spiral-patterned object inside a circular frame (no text or symbols)OK
natural_image
Cross-sectional illustration of a layered object with spiral patterns, enclosed in a circular frame (no text or symbols)Πολύ στεγνή
natural_image
Diagram showing two hands holding tools inside a circle, no text or symbols present
ΤΑ ΥΛΙΚΑ
natural_image
Symbol of a computer monitor with an 'X' crossed out, enclosed in a circle (no text or labels)natural_image
Abstract circular diagram with concentric wave-like patterns inside a rounded rectangle (no text or symbols)For flydende
natural_image
Illustration of a rolled food item inside a rectangular container (no text or symbols)OK

natural_image
Circular grayscale illustration of a layered object with concentric swirl patterns, no text or symbols present.For tør
natural_image
Symbol of a crossed-out electrical circuit inside a circle (no text or labels)natural_image
Abstract circular design with concentric wave-like patterns inside a rounded rectangle (no text or symbols)For flytende

natural_image
Illustration of a rolled pastry or pastry inside a circular frame (no text or symbols)OK
natural_image
Circular grayscale illustration of a spiral-patterned object inside a rectangular frame (no text or symbols)For tørr
natural_image
Diagram showing two hands performing a manual task with a diagonal line and a circular arrow, labeled 'M' (no text or symbols on diagram itself)
INGREDIENSER
natural_image
Abstract circular diagram with concentric wave-like patterns inside a rectangular frame (no text or symbols)För lös

natural_image
Illustration of a rolled pastry or pastry inside a circular frame (no text or symbols)OK
natural_image
Cross-sectional illustration of a layered material or coating structure, showing concentric circular patterns with no text or symbols.För torr
Undantag: kakdeg ska vara ganska lös.

INNAN DU ANVÄNDER APPARATEN FÖRSTA GÅNGEN
| FRANSKBRÖD (program 9) | INGREDIENSERNA - tsk = tesked - msk = matsked |
| FÄRG = MEDIUM | 1. VATTEN = 365 ml 3. VETEMJÖL = 620 g2. SALT = 2 tsk 4. JÄST = 112 tsk |
| STORLEK = 1000 g | |
| TID = 3:10 |
natural_image
Diagram showing two hands holding a tool, one with arrows indicating direction, the other with an arrow, enclosed in a circle (no text or symbols)
INGREDIENSERNA
natural_image
Symbol of a computer monitor with a crossed-out screen, enclosed in a circle (no text or numbers present)tsk = tesked - msk = matsked
PROG. 1 - KRYDDIGT GLUTENFRITT BRÖD PROG. 2 - SÖTT GLUTENFRITT BRÖD
1000 g
natural_image
Abstract circular diagram with concentric wave-like patterns inside a rectangular frame (no text or symbols)Liian juoksevaa

natural_image
Illustration of a spiral-shaped object inside a rectangular frame, enclosed in a circular frame (no text or symbols)OK

natural_image
Circular grayscale illustration of a stylized airplane viewed through a spiral pattern (no text or symbols)Liian kuivaa
natural_image
Symbolic illustration of a mechanical device with crossed-out lines, enclosed in a circle (no text or labels)Comment: the total duration does not include warming time.
natural_image
Illustration of a kitchen bread machine with kitchen utensils and a glass on a table, enclosed in a circular frame (no text or symbols)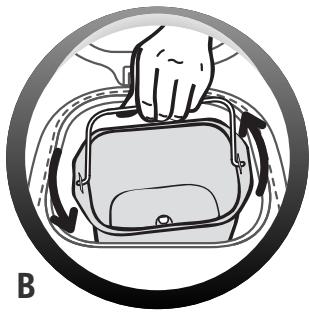
natural_image
Illustration of a hand placing a bag into a device inside a circular frame (no text or symbols)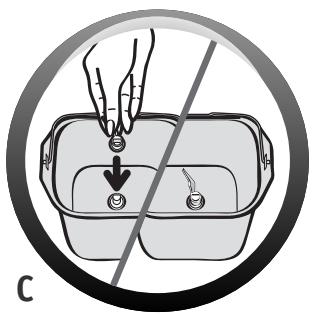
natural_image
Diagram of a hand placing a coin into a container with a downward arrow, enclosed in a circle (no text or symbols)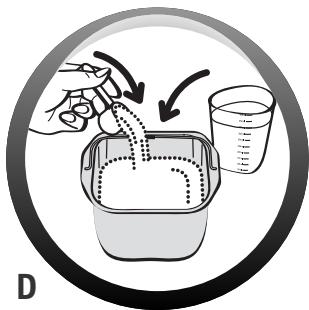
natural_image
Illustration of a hand pouring liquid into a container with a measuring cup nearby (no text or symbols)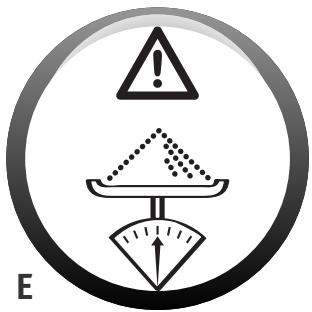
natural_image
Illustration of a hand pressing down on a bag with a downward arrow indicating force or pressure (no text or symbols)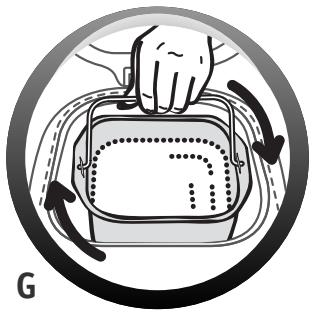
natural_image
Diagram of a hand pressing down on a device with arrows indicating motion (no text or symbols)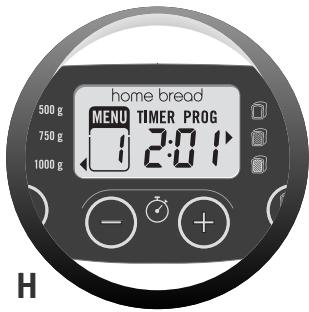

| INTERNATIONAL GUARANTEE : COUNTRY LIST | |||
| (###) | (###) | (###) | |
| الجز äثرÄLGERIA | CIJA9 rue Puvis de Chavannes - Saint EuqueneOran | (0)41- 28 18 53 | 1 year |
| ARGENTINA | GROUPE SEB ARGENTINA S.A.Billinghurst 1833 3° - C1425DTKCapital Federal - Buenos Aires | 0800-122-2732 | 2 años2 years |
| 211.31111111111111111111111111111111111111111111111111111111111111111111111111111111111111111111111111111 | ФГС Фрунция Убг-Ч,125171 Увнчина, Чубфарынкифубинц, 16А, чб. 3 | (010) 55-76-07 | 2 иппрп/2 years |
| AUSTRALIA | GROUPE SEB AUSTRALIAPO Box 7535,Silverwater NSW 2128 | 02 97487944 | 1 year |
| ÔSTERREICH | SEB ÖSTERREICH GmbHCampus 21 - Businesspark Wien Südliebermannstr. A02 702 - 2345 Brunn am Gebirge | 01 8903476 | 2 Jahre2 years |
| BELGIQUE BELGIEBELGIUM | GROUPE SEB BELGIUM SANV25 avenue de l'Espérance - ZI6220 Fleurus | 070 23 31 59 | 2 ans2 years |
| БЕЛАРУСЬBELARUS | ЗАО «Группа СЕБ-Восток»,125171, Москва, Ленинградское - шоссе, д. 16А, стр. 3 | 017 2239290 | 2 года2 years |
| BOSNA IHERCEGOVINA | SEB DéveloppementPredstavníštro u BiH - Vrazova 8/II71000 Sarajevo | Info-linija za potrošače033 551 220 | 2 godine2 years |
| BRASIL | SEB COMERCIAL DE PRODUTOS DOMÉSTICOS LTDARua Venâncio Aires, 433/437/447,Pompéia, São Paulo/SP | 0800-119933 | 1 ano1 year |
| БЪЛГАРИЯBULGARIA | ГРУП СЕБ БЪЛГАРИЯ ЕООДУл. Борово 52 Г, ет. 1, офис 1,1680 София | 0700 10 330 | 2 години2 years |
| CANADA | GROUPE SEB CANADA345 Passmore AvenueToronto, ON M1V 3N8 | 800-418-3325 | 1 an1 year |
| CHILE | GROUPE SEB CHILEComercial Ltda Av. Providencia, 2331, piso 5,oficina 501 Santiago | 12300 209207 | 2 años2 years |
| COLOMBIA | GROUPE SEB COLOMBIAApartado Aereo 172, Kilometro 1Via Zipaquira - Cajica Cundinamarca | 18000919288 | 2 años2 years |
| HRVATSKACroatia | SEB Développement S.A.S.Vodnjanska 261000 Zagreb | 01 30 15 294 | 2 godine2 years |
| ČESKÁ REPUBLIKCZECH REPUBLIC | GROUPE SEB ČR spol. s r .o.Jankovcova 1569/2c170 00 Praha 7 | 731 010 111 | 2 roky2 years |
| DANMARK | GROUPE SEB NORDIC ASTempovej 272750 Ballerup | 44 663 155 | 2 år2 years |
| DEUTSCHLAND | GROUPE SEB DEUTSCHLAND GmbH / KRUPS GmbHHerrmainweg 563067 Offenbach | 0212 387 400 | 2 Jahre2 years |
| EESTIESTONIA | GROUPE SEB POLSKA SP Z O.O.ul. Bukowińska 22b02-703 Warszawa | 5 800 3777 | 2 aastat2 years |
| SUOMIFINLAND | Groupe SEB FinlandKutojantie 702630 Espoo | 09 622 94 20 | 2 Vuotta2 years1 |
| FRANCE Continentale + Guadeloupe, Martinique, Réunion, Saint-Martin | GROUPE SEB FRANCEService Consommateur MoulinexBP 15 - 69131 ECULLY CEDEX | 09 74 50 10 14 | 1 an1 year |
| ΕΛΛΑΔΛGREECE | SEB GROUPE ΕΛΛΑΔΟΣ Α.Ε.Οδός Καβαλεράτου 7T.K. 145 64 N. Κηφισιά | 2106371251 | 2 χρόνια2 years |
| 香港HONG KONG | SEB ASIA Ltd.Room 903, 9/F, North Block, Skyway House3 Sham Mong Road, Tai Kok Tsui, Kowloon - Hong-Kong | 852 8130 8998 | 1 year |
| MAGYARORSZÁGHUNGARY | GROUPE SEB CENTRAL-EUROPE Kft.Távíró köz 42040 Budaðrs | 06 1 801 8434 | 2 év2 years |
| INDONESIA | Groupe SEB Indonesia (Representative office)Sudirman Plaza, Plaza Marein 8th FloorJL Jendral Sudirman Kav 76-78, Jakarta 12910, Indonesia | +62 21 5793 6881 | 1 year |
| ITALIAITALY | GROUPE SEB ITALIA S.p.A.Via Montefeltro, 420156 Milano | 1 99 207 892 | 2 anni2 years |
| JAPAN | GROUPE SEB JAPAN Co. Ltd.1F Takanawa Muse Building, 3-14-13, Higashi Gotanda,Shinagawa-Ku, Tokyo 141-0022 | 0570-077772 | 1 year |
| ΚΑЗАКСТАНКАЗАКНSTАН | ЖАҚ «Группа СЕБ- ВОСТОК»125171, Мәскеу, Ленинградскоешосесі,16А, 3 үйі | 727 378 39 39 | 2 жыл2 years |
| 한국어KOREA | (유)그룹 세브 코리아서울시 종로구 서린동 88 서린빌딩 3층 - 110-790 | 1588-1588 | 1 year |
| LATVJALATVIA | GROUPE SEB POLSKA Sp. z o.o.ul. Bukowińska 22b02-703 Warszawa | 6 716 2007 | 2 gadi2 years |
| LIETUVALITHUANIA | GROUPE SEB POLSKA Sp. z o.o.ul. Bukowińska 22b02-703 Warszawa | 6 470 8888 | 2 metai2 years |
| LUXEMBOURG | GROUPE SEB BELGIUM SANV25 avenue de l'Espérance - ZI6220 Fleurus | 0032 70 23 31 59 | 2 ans2 years |
| MACEDONIA | Groupe SEB Bulgaria EOODOffice 1, floor 1, 52G Borovo St., 1680 Sofia - BulgariaГРУП СЕБ БЪЛГАРИЯ ДООЕЛУл. Борово 52 Г, сп. 1, офис 1, 1680 София - България | (0)2 2050 022 | 2 годин2years |
| MALAYSIA | GROUPE SEB MALAYSIA SDN. BHDUnit No. 402-403, Level 4, Uptown 2, No. 2, Jalan SS21/37,Damansara Uptown, 47400, Petaling Jaya, Selangor D.E Malaysia | 65 6550 8900 | 1 year |
| MEXICO | G.S.E.B. MEXICANA, S.A. de C.V. Goldsmith 38 Desp. 401,Col. Polanco - Delegacion Miguel Hildalgo11 560 México D.F. | (01800) 112 8325 | 1 años1 year |
| MOLDOVA | TOB «Груп СЕБ Україна»02121, Харківське шосе, 201-203, 3 поверх,Київ, Україна | (22) 929249 | 2 ani2 years |
| NEDERLANDThe Netherlands | GROUPE SEB NEDERLAND BVGeneratorstraat 6 - 3903 LJ Veenendaal | 0318 58 24 24 | 2 jaar2 years |
| NEW ZEALAND | GROUPE SEB NEW ZEALANDUnit E, Building 3, 195 Main Highway,Ellerslie, Auckland | 0800 700 711 | 1 year |
| NORGENORWAY | GROUPE SEB NORDIC ASTempovej 272750 Ballerup | 815 09 567 | 2 år2 years |
| PERU | Groupe SEB PerúAv. Camino Real N° 111 of. 805 BSan Isidro - Lima | 441 4455 | 1 años1 year |
| CAPWAL | CETOL | DRAH | GARANT |
| POLSKA POLAND | GROUPE SEB POLSKA Sp. z o.oul. Bukowińska 22b02-703 Warszawa | 0 801 300 423koszt jak zapołączenie lokalne | 2 lata2 years |
| PORTUGAL | GROUPE SEB IBERICA SAUrb. da Matinha - Rua Projectada à Rua 3Bloco1 - 3° B/D 1950 - 327 Lisboa | 808 284 735 | 2 anos2 years |
| REPUBLIC OF IRELAND | GROUPE SEB IRELANDUnit B3 Aerodrome Business Park, College Road,Rathcoole, Co. Dublin | 01 677 4003 | 1 year |
| ROMÂNIA ROMANIA | GROUPE SEB ROMÂNIAStr. Daniel Constantin nr. 8 - 010632 Bucureşti | 0 21 316 87 84 | 2 ani2 years |
| POCCИЯ RUSSIA | ЗАО «Группа СЕБ-Восток», 119180 Москва,125171, Москва, Ленинградскоешоссе, д. 16А, стр. 3 | 495 213 32 29 | 2 года2 years |
| SRBIJA SERBIA | SEB DeveloppementĐorđa Stanojevića 11b11070 Novi Beograd | 060 0 732 000 | 2 godine2 years |
| SINGAPORE | GROUPE SEB SINGAPORE Pty Ltd.59 Jalan Pemipin, #04-01/02 L&Y BuildingSingapore 577218 | 65 6550 8900 | 1 year |
| SLOVENSKO SLOVAKIA | GROUPE SEB SLOVENSKO spol. s.r.o.Rybničná 40 - 831 07 Bratislava | 233 595 224 | 2 roky2 years |
| SLOVENIJA SLOVENIA | SEB d.o.oGregorčičeva ulica 6 - 2000 MARIBOR | 02 234 94 90 | 2 leti2 years |
| ESPAÑA SPAIN | GROUPE SEB IBÉRICA S.A.C/ Almogåvers, 119-123, Complejo Ecourban08018 Barcelona | 902 31 22 00 | 2 años2 years |
| SVERIGE SWEDEN | TEFAL SVERIGE SUBSIDIARY OF GROUP SEB NORDICTruckvägen 14 A,194 52 Upplands Väsby | 08 594 213 30 | 2 år2 years |
| SUISSE / SCHWEIZ SWITZERLAND | GROUPE SEB SCHWEIZ GmbHThurgauerstrasse 1058152 Glattbrugg | 044 837 18 40 | 2 ans2 Jahre2 years |
| TAIWAN | SEB ASIA Ltd. Taiwan Branch4F., No. 37 Dexing W. Rd., Shilin Dist., Taipei City 11158,Taiwan (R.O.C.) | 886-2-2833 3716 | 1 year |
| THAILAND | GROUPE SEB THAILAND2034/66 Italthai Tower, 14th Floor, n° 14-02,New Phetchburi Road,Bangkapi, Huaykwang, Bangkok, 10320 | 662 351 8911 | 2 years |
| TÜRKIYE TURKEY | GROUPE SEB ISTANBUL ASBeybi Giz Plaza Dereboyu Cad. - Meydan Sok.No: 28 K.12 Maslak | 216 444 40 50 | 2 YIL2 years |
| U.S.A. | GROUPE SEB USA2121 Eden Road - Millville, NJ 08332 | 800-395-8325 | 1 year |
| YKPAÏHA UKRAINE | TOB «Груп СЕБ Україна»02121, Харківське шосе, 201-203, 3 поверх, Київ, Україна | 044 492 06 59 | 2 роки2 years |
| UNITED KINGDOM | GROUPE SEB UK LTDRiverside House, Riverside WalkWindsor, Berkshire, SL4 1NA | 0845 602 1454 | 1 year |
| VENEZUELA | GROUPE SEB VENEZUELAAv Eugenio Mendoza, Centro Letonia, Torre ING Bank,Piso 15, Ofc 155 - Urb. La Castellana, Caracas | 0800-7268724 | 2 años2 year |
| VIETNAM | Vietnam Fan Joint Stock Company25 Nguyen Thi Nho Str, Ward 9,Tan Binh Dist, HCM city | +84-8 38644037+84-8 38645830 | 1 year |
MOULINEX INTERNATIONAL GUARANTEE
Date of purchase: ....../ Date d'achat / Fecha de compra / Data da compra / Data d'acquisto / Kaufdatum / Aankoopdatum / Købsdato / Inköpsdatum / Kjøpsdato / Ostopäivä / Data zakupu / Data vânzării / |sigijimo data/ Ostukuupäev / Datum nakupa / Sorozatszám / Dátum nákupu / Pirkuma datums / Datum Kupovine / Datum kupnje / Data cumpărării / Datum nákupu / Tarikh pembelian / Tanggal pembelian / Ngày mua hàng/ Satın alma tarihi / Дата прпдажи / Дата на закупуване / Датум на купуваое / Сатылған мерзімі / Нμερομηνία αγοράς/ Ч. μφιθμπηλή ορη/ ١٠١٣٥/ 購買日期/購入日/ 구입일자 / Cross- Latitude / 时间 當的
Product reference: ....../ Référence du produit / Referencia del producto / Referência do produto / tipo de prodotto / Typnummer des Gerätes / Artikelnummer van het apparaat / Referencenummer / Produktreferens / Artikkelnummer / Tuotenumero / referencia produktu / Model / Gaminio numeris / Toote viitenumber / Tip aparata / Vásárlás kelte / Typ výrobku / Produkta atsauces numurs / Model proizvoda / Oznaka proizvoda / Cod produs / Produk rujukan / Referensi produk / Mă sân phàm/ Úrün kodu / Мндель / Мндель / Мпдел на уреда / Мпделі / Көбікós προιόνησος / ۱۰ηλ/ ۱-リンผลิตภัณฑ์ / 産品模型 / 製品レファレンス番 / 제품명 / مرجع是最نّكالAMEم
Retailer name & address:
Nom et adresse du vendeur / Nombre y dirección del minorista / Nome e endereço do revendedor / Nome e indirizzo delnegozzo / Name und Anschrift des Händlers / Naam en adres van de dealer / Forhandler navn & adresse / Äterförsäljarens namn och adress / Forhandler navn og adresse / Jälleenmyyjän nimi ja osoite / nazwa i adres sprzedawcy / Numele şi adresa vânzătorului / Parduotuvés pavadinimas ir adresas / Müüja kauplus ja aadress / Naziv in naslov trgovine / Tipusszám / Názov a adresa predajcu / Veikala nosaukums un adrese / Naziv i adresa maloprodaje / Naziv i adresa prodavca / Naziv i adresa prodajnog mjesta / Nume și adresă vânzător / Název a adresa prodejce / Nama dan alamat peruncit / Nama Toko Penjual dan alamat / Tên và địa chỉ cŭra hàng bán/ Satici firmanın adı ve adresi / Название и адрес прпдавца / Назва і адреса прпдавця / Търглвки пъект / Назив и адреса на прпдавницата / Сатушының аты және мекен-жайы / Етөмүүμία και διεύθονζη καηαζημαησ / Чұндшқұнғ ұқұлұқымір ұ {* *} {* *} * * * * * * * * * * * * * * * * * * * * * * * * * * * * * * * * * * * * * * * * * * * * * * * * * * * * * * * * * * * * * * * * * * * *
Distributor stamp . . . . . . . . . . . . . . . . . . . . . . . . . . . . . . . . . . . . . . . . . . . . . . . . Cachet distributeur /Sello del distribuidor / Carimbo do revendedor / Timbro del negozzo / Händlerstempel / Stempel van de dealer / Forhandler stempel / Återförsäljarens stämpel / Forhandler stempel / Jälleenmyyjän leima / pieczęć sprzedawcy / Štampila vânzătorului / Antspaudas / Tempel / Žig trgovine / Eladó neve, címe/ Razítko predajcu / Zīmogs / Pečat maloprodaje/ Pečat prodavca / Pečat prodajnog mjesta / Štampila vânzătorului/ Razítko prodejce/ Cap peruncit / Cap dari Toko Penjual / Cúra hàng bán dóng dáu/ Satici Firmanin Kaşesi / Печать прпдавца / Печатка прпдавця / Печат на търгпвския пбект / Печат на прпдавницата / Сатушының мөрі / Σθραγίδα καηαζηήμαŋος / Υμιθωνημή Υβιθμή / ตราประътับของห้าง/ ⁴σητήσο / 零售商的蓋印 / 販売店印 / 소매점 직인 / فروش مهر خرده / ختم بائمع التجزئة
Moulinex®
nutribread
FR 2-5 - 52-63
NL 6-9 - 64-75
DE 10-13-76-87
EN 14-17 - 88-99
IT 18-21 -100-111
ES 22-25 - 112-123
PT 26-29 - 124-135
EL 30-33 - 136-147
DA 34-37 - 148-159
NO 38-41 - 160-171
SV 42-45 - 172-183
FI 46-49 - 184-195