
CS400 - Detector VELLEMAN - Free user manual and instructions
Find the device manual for free CS400 VELLEMAN in PDF.
| Brand | Velleman |
| Model | CS400 |
| Type | Metal detector |
| Detection coil | 240 mm, waterproof |
| LCD display | 45 x 80 mm |
| Weight | 1.430 kg |
| Power supply | 2 alkaline 9V batteries (not included) |
| Operating frequency | 6.6 kHz |
| Detection modes | All Metal, Discrimination, Notch, Auto-Notch |
| Sensitivity adjustment | 12 levels |
| Detection depth (max) | 25 cm for a 25-cent coin |
| Audio identification | 3 tones (low, medium, high) |
| Depth indicator | 12 levels |
| Ground balance | Manual (GND BAL) |
| Surface elimination | Yes (SURF ELIM) |
| Headphone jack | 6.5 mm |
| Operating temperature | 0 °C to 40 °C |
| Storage temperature | -20 °C to 60 °C |
| Warranty | 24 months (Velleman conditions) |
| Country of origin | EU (RED compliant) |
Frequently Asked Questions - CS400 VELLEMAN
User questions about CS400 VELLEMAN
0 question about this device. Answer the ones you know or ask your own.
Ask a new question about this device
Download the instructions for your Detector in PDF format for free! Find your manual CS400 - VELLEMAN and take your electronic device back in hand. On this page are published all the documents necessary for the use of your device. CS400 by VELLEMAN.
USER MANUAL CS400 VELLEMAN
ADVANCED METAL DETECTOR WITH LCD GEAVANCEERDE METAALDETECTOR MET LCD-DISPLAY DÉTECTEUR DE MÉTAUX AVANCÉ AVEC AFFICHEUR LCD DETECTOR DE METALES CON PANTALLA LCD METALLDETEKTOR MIT LCD-DISPLAY ZAAWANSOWANY WYKRYWACZ METALI Z LCD DETECTOR DE METAIS DE NÍVEL AVANÇADO COM LCD
natural_image
Black metal detector device with attached cable and dual side legs (no visible text or symbols)USER MANUAL 4
GEBRUIKERSHANDLEIDING 14
MODE D'EMPLOI 25
MANUAL DEL USUARIO 36
natural_image
Technical line drawing of a mechanical device with a circular base and connecting rod (no text or symbols)B

C

natural_image
Line drawing of a mechanical device with no visible text or symbolsD
natural_image
Technical line drawing of a mechanical device with handle and shaft (no text or symbols)E
natural_image
Technical line drawing of a device casing with internal components and mounting points (no text or symbols)USER MANUAL
1. Introduction
To all residents of the European Union
Important environmental information about this product
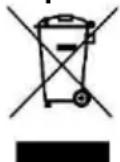
This symbol on the device or the package indicates that disposal of the device after its lifecycle could harm the environment. Do not dispose of the unit (or batteries) as unsorted municipal waste; it should be taken to a specialized company for recycling. This device should be returned to your distributor or to a local recycling service. Respect the local environmental rules.
If in doubt, contact your local waste disposal authorities.
Thank you for choosing Velleman! Please read the manual thoroughly before bringing this device into service. If the device was damaged in transit, do not install or use it and contact your dealer.
2. Safety Instructions

Keep the device away from children and unauthorised users.

Caution: wearing headphones in public places may lead to hazardous situations as traffic noise or audible warning signals are subdued.
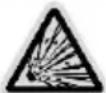
NEVER TOUCH AMUNITION OR OTHER POTENTIALLY LETHAL OBJECTS. Clearly mark the finding location – have somebody guard the site when possible - and contact the local authorities at once.
3. General Guidelines
Refer to the Velleman® Service and Quality Warranty on the last pages of this manual.
- Protect this device from shocks and abuse. Avoid brute force when operating the device.
- Protect the device against extreme heat, dust and moisture.
- Familiarise yourself with the functions of the device before actually using it.
- All modifications of the device are forbidden for safety reasons.
- Only use the device for its intended purpose. Using the device in an unauthorised way will void the warranty.
- Damage caused by disregard of certain guidelines in this manual is not covered by the warranty and the dealer will not accept responsibility for any ensuing defects or problems.
- The warranty does not cover damage caused by salty environments.
• Always make sure to comply with local rules and regulations. - If the device is not used for a long time, remove the batteries. Leaking batteries can cause serious damage.
4. Features
• 240 mm waterproof search coil
- large LCD display
- target ID
- depth readout
• variable sensitivity, discrimination and notch
- 3-tone audio
- low battery indicator
• adjustable ground balance
• surface elimination
- search modes: all metal – discrimination – notch – auto-notch
• volume control
CS400
5. Glossary
Following terms used throughout the manual are standard terminology among detectorists.
- Elimination
Reference to a metal being "eliminated" means that the detector will not emit a tone, not light up an indicator when a specified object passes through the coil's detection field.
• DISC - Discrimination
When the detector emits different tones for different types of metal, and when the detector "eliminates" certain metals, we refer to this as the detector "discriminating" among different types of metals. Discrimination is an important feature for professional detectorists. Discrimination allows the user to ignore trash and otherwise undesirable objects.
- Notch
Notching is the elimination of an item or range of items within the metallic spectrum. We "notch out" an object or objects selectively.
- Auto-notch
It eliminates trash metals automatically and keep the detection for most coins. The auto-notch range is preset and not adjustable.
- Relic
A relic is an object of interest because of its age or its association with the past. Many relics are made of iron, but can also be made of bronze or other precious metals.
- Iron
Iron is a common, low-grade metal that is an undesirable target in certain metal detecting applications. Examples of such undesirable iron objects are old cans, pipes, bolts and nails.
Sometimes, the desired target is made of iron. Property markers, for instance, contain iron. Valuable relics can also be composed of iron such as cannon balls, old armaments, and parts of old structures and vehicles.
- Ferrous
Adjective for an object made of or containing iron.
• GND TRAC - Ground tracking
The process of finding the exact location of a buried object. Long-buried metals can appear exactly like the surrounding soil and can therefore be very hard to isolate from the soil.
- Pull-tabs
Discarded pull-tab from beverage cans are the most bothersome trash items for the treasure hunter. They come in many different shapes and sizes, and can be eliminated from detection. However, some other valuable objects have a magnetic signature similar to pull-tabs and will also be eliminated when discriminating out pull-tabs.
• GND BAL - Ground balance
The ability of a metal detector to cancel or ignore ground mineralization, eliminating false signals from severe ground conditions and only emitting a tone when a metal object is detected.
• SURF ELIM - Surface elimination
A detector's ability to ignore all targets on or near the ground's surface, which is useful in heavy trash areas.
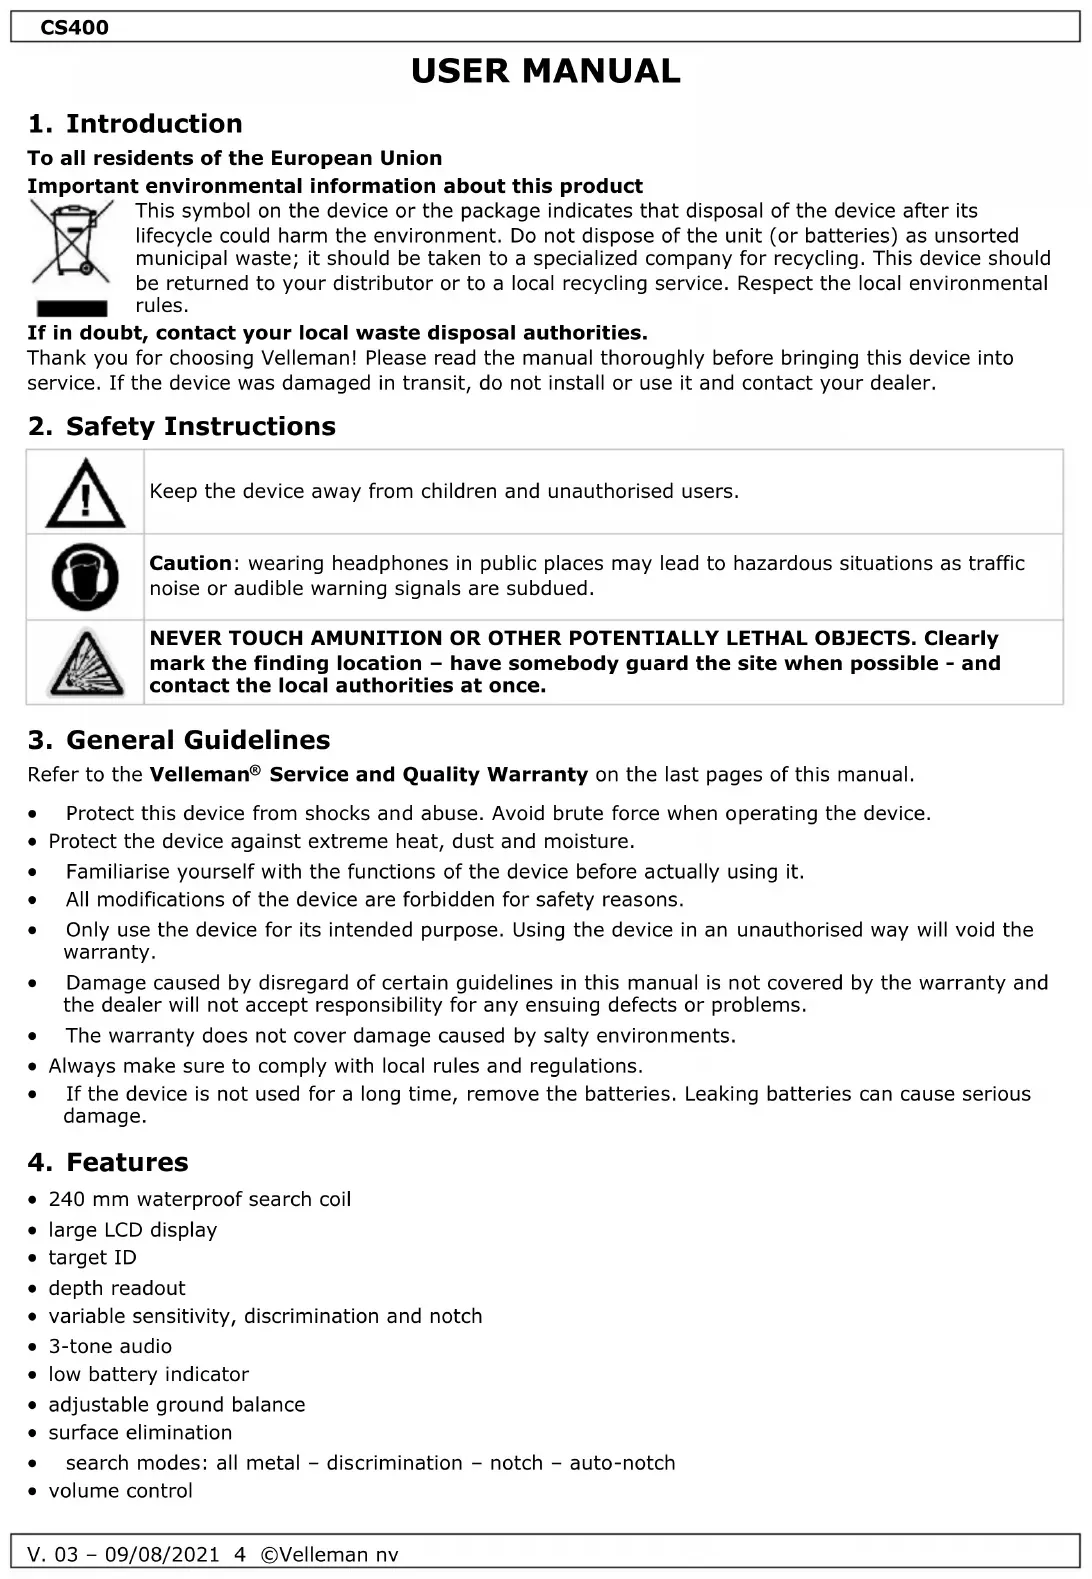
6. Overview
Refer to the illustrations on page 2 of this manual.
Control Panel
| 1 | on-off/volume button |
| 2 | LCD display |
| 3 | ground balance button |
| 4 | sensitivity buttons |
| 5 | headphones input |
| 6 | ground balance function button |
| 7 | surface elimination mode button |
| 8 | mode button |
CS400
LCD Display
| A | DISC/NOTCH range indication |
| B | target indicator |
| C | operating mode |
| D | status indication |
| E | sensitivity graph |
| F | depth graph |
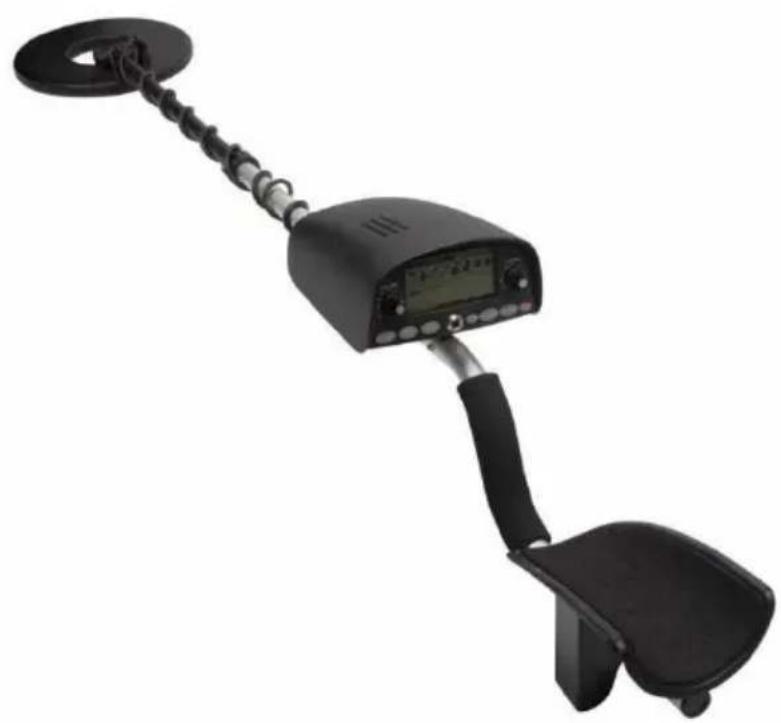
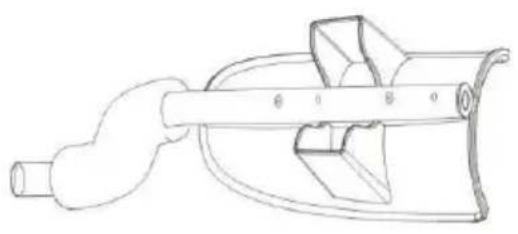
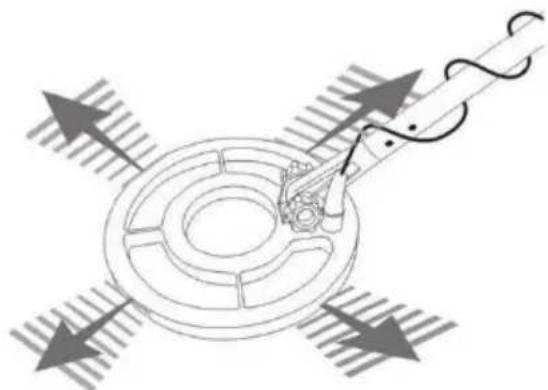
7. Assembly
Refer to illustrations A to D on page 3 of this manual.
- Join the search coil and the lower stem. Tighten the bolt.
- Press the silver button on the upper end of the lower stem and slide the lower stem into the upper stem. Adjust the stem to a length that you feel comfortable when you stand upright with the detector in your hand and the search coil is level with the ground, your arm relaxed at your side.
- Wind the cable from the search coil around the stem. Insert the coil's plug into the jack on the control housing.
- Assembly the arm support. Press the silver button on the upper end of the stem and insert the aluminium end of the arm support.

Do not over-tighten the search coil or use tools such as pliers to tighten it. The search coli's plug fits into the jack only one way. Do not force the plug and do not pull on the cable to avoid damage.
Adjusting the Armrest
The standard position of the armrest is comfortable for most people. Very large or short forearms can be accommodated by adjusting the armrest accordingly.
The armrest is adjustable in three positions. To adjust, remove the screw from the underside. Then, move the armrest to one of the alternate positions. Re-install the screw.
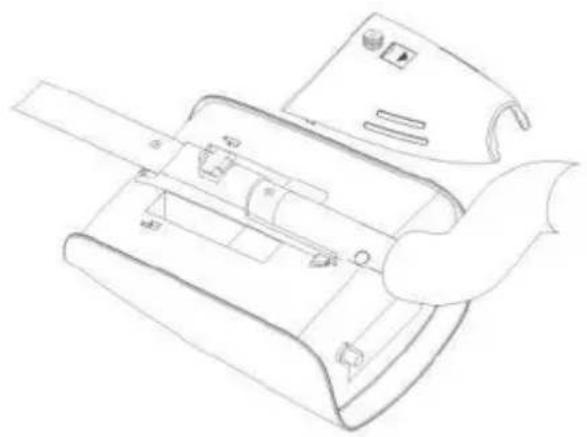
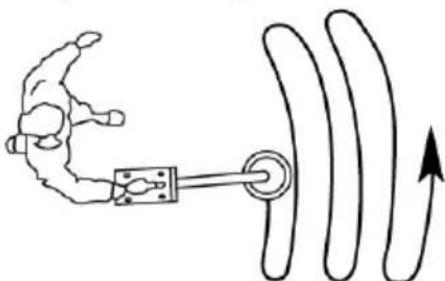
8. Batteries
• This metal detector uses 2x 9 V alkaline batteries (not included).
- Only use fresh batteries. Do not mix old and new batteries or different types of batteries.
- Replace the batteries with new ones when the battery icon is blinking.
Installation
Refer to illustration E on page 3 of this manual.
- Switch off the metal detector.
- Slide the battery cover in the direction of the arrow.
- Take out the two battery connectors from the compartments.
- Connect a battery to each connector. Mind the polarity.
- Re-install the battery cover and close the compartment.

Do not puncture or throw batteries in fire as they might explode.
Do not attempt to recharge non-rechargeable batteries.
Dispose of batteries in accordance with local regulations.
Keep batteries away from children.
Remove the batteries from the battery compartment when the metal detector is not in use.
9. Basic Operation
9.1 Code of Conduct
- Do not interfere with archaeological sites or ancient monuments. Join your local archaeological society if you are interested in ancient history.
- Do not leave a mess. Use a sharpened trowel or knife to cut a neat circle or triangle, extract the object and carefully replace the soil and the grass.
- Help keep your country tidy. Bottle tops, silver paper and tin cans belong in a waste bin. Rusty iron and other scrap should be collected and taken to a specialized company for further handling.
- Do not trespass: ask permission before venturing onto private property.
CS400
- Report all historical finds to the local museum or government and get expert help if you accidentally discover a site of archaeological interest.
- Be very careful if you discover any live ammunition or any lethal object such as an unexploded mine. Do not touch the object! Mark the site carefully and report the find at once to the local police.
- Do not leave gates open when crossing fields and do not damage crops or frighten animals.
- Try to get along with any other detectorist you may meet. There is much to be learnt from experienced users.
• Always obey local laws and regulations. Contact your local government for more information.

It is illegal for anyone to use a metal detector on a scheduled ancient monument unless permission has been obtained from the Historic Buildings and Ancient Monument Commission for England or the Secretary of State for the Environment in Scotland and Wales.

It is forbidden to use a metal detector in order to carry out excavations of monuments and objects, which may relate to prehistory, history, art and archaeology without prior administrative authorization issued in terms of the qualifications of the applicant and the nature and modalities of the excavators.
9.2 Motion and Non-Motion Modes
All-Metal Mode
The all-metal mode is a non-motion mode. In this mode, the metal is detected with the coil motionless over the ground and the detector emits a monotone sound. There is no need to move the coil over the ground.
Adjust the GND BAL controller and press the GND TRAC button several times to eliminate ordinary minerals and ores.
Disc, Notch and Auto-Notch Modes
All these modes are motion modes. This means that the coil must be in continuous motion; otherwise the target cannot be detected.
There are three tones to identify the different metals. Ground balance happens automatically and the sensitivity is adjustable. Adjust the discrimination and/or notch range to reject trash metals.
9.3 Switching On Your Metal Detector
Rotate the on-off/volume button in a clockwise direction to switch on your metal detector. The detector will run a self-test programme for about three seconds and switches automatically to the discrimination mode.
9.4 Operating Modes
Press the MODE button to select the operating mode in following order:
DISC > ALL METAL > AUTO-NOTCH > NOTCH > DISC...
The operating mode is displayed in the bottom left corner of the LCD display.
DISC Mode
The metal detector automatically enters the discrimination mode after power-up. The estimated depth of the object is displayed in the depth graph window (note that the depth indication is not accurate for larger objects) while the sensitivity graph displays the current sensitivity level.
In the discrimination mode, the metal detector eliminates unwanted objects from detection. The DISC/NOTCH range indication shows the current discrimination level while the target indicator displays an object's probable identification.
The depth graph will illuminate each time a target, i.e. a metal object, is detected.
To adjust the target discrimination range:
-
Press the ADJUST button to enter the setting mode. The LCD displays DISC/NOTCH in the bottom right corner.
-
Increase or decrease the discrimination level with the arrows.
CS400
ALL-METAL Mode
Press the MODE button to enter the all-metal mode (non-motion mode by default).
In this mode, the metal detector emits a monotone sound when finding a target; the depth graph indicates the relative signal strength. The stronger the signal, the louder the tone.
As the all-metal mode will detect all metal targets, the target identification function is useless. Please make sure the metal detector is perfectly ground-balanced before using this mode.
NOTCH Mode
Press the MODE button to enter the notch mode.
Use the notch mode to selectively eliminate one or several metals from the categories. The DISC/NOTCH range indication shows the current target discrimination level; the target indicator displays an object's probable identification. The sensitivity graph displays the current sensitivity level; the depth graph indicates the probable target depth.
To adjust the target notching range:
- Press the ADJUST button to enter the setting mode. The LCD displays DISC/NOTCH in the bottom right corner.
- Press one of the arrows on the control panel. One of the target indicator arrows will blink.
- Press the ENTER button to accept/reject a category.
- Select the next notching level with one of the arrows and accept or reject it.
- Do so for all the categories.
AUTO-NOTCH Mode
Press the MODE button to enter the auto-notch mode.
The auto-notch mode automatically rejects trash metals such as bottle caps, pull-tabs, tin foil... The DISC/NOTCH range indication shows the current target discrimination level; the target indicator displays an object's probable identification. The sensitivity graph displays the current sensitivity level; the depth graph indicates the probable target depth.
9.5 Sensitivity Adjustment
- Press the ADJUST button to enter the sensitivity setting mode.
- Adjust the sensitivity level with the arrows.

The sensitivity level is not adjustable in all-metal mode.
Electromagnetic Interference (EMI)
Sensitivity level adjustment is useful to eliminate EMI.
This metal detector is an extremely sensitive device. The search coil creates its own magnetic field and acts like an antenna. If your detector beeps erratically when the search coil is motionless, the unit is probably detecting another magnetic field.
Common sources of EMI are electric power lines (both suspended and buried), engines, household appliances like computers and ovens, some indoor electronic devices such as dimmers, etc.
Other metal detectors also produce their own electromagnetic fields. Keep metal detectors at least 6 meters apart if hunting with a fellow detectorist.
Severe Ground Conditions
A secondary use for sensitivity level adjustment is to reduce false detection signals caused by severe ground conditions.
Although this metal detector has a specially designed circuit to reduce ground mineralization, the ground conditions in field hunting cannot be anticipated. Highly magnetic soils in mountainous areas or highly saline soils can cause the detector to emit tones even when metal objects are not present.
Reduce the sensitivity level if the detector emits false, non-repeatable signals.
Multiple Targets
If you suspect the presence of a deeper target beneath a shallower target, reduce the sensitivity level to eliminate the detection of the deeper target. You will be able to locate the shallower target easier.
CS400
9.6 Surface Elimination
The surface elimination mode only works in motion mode and can improve the detection accuracy in soils with lots of trash. It restrains the signal from trash in the soil.
Note that the detector's sensitivity is decreased in this mode.
Press the SURF ELIM button to enter or to quit the surface elimination mode.
9.7 Using Headphones
Using headphones (not included) makes it easier to identify subtle changes in the threshold level. It also reduces battery drain.

To protect your hearing, set the volume level to the lowest setting, plug in the headphones and gradually increase the volume level.
Extended exposition to high volume levels can lead to permanent hearing loss.
9.8 Audio Target Identification (ATI)
You do not always keep your eyes on the LCD display when hunting in the field. However, the LCD display is very accurate in identifying buried objects.
Therefore, this metal detector features an audio feedback system to alert to the nature of the target. The three-tone system only functions in motion mode (DISC, NOTCH and AUTO-NOTCH mode).
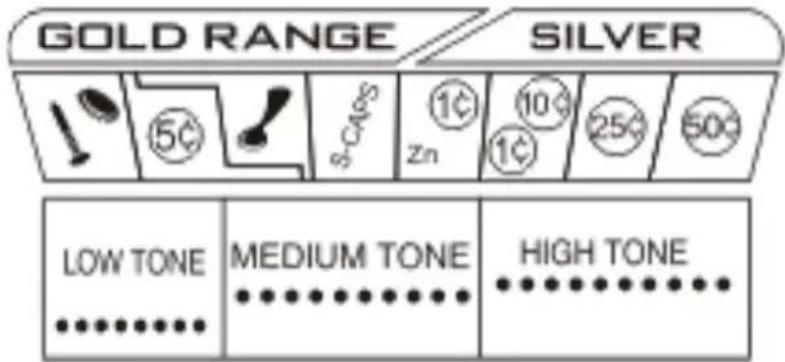
| LOW tone | MEDIUM tone | HIGH tone |
| bottle caps, nickel coins, small gold objects | pull-tabs, screw caps, zinc coins, newer pennies (post 1982), gold objects | copper and silver coins |
10. In-the-Field Technique
10.1 Reading the Display
Target Indicator
The LCD display shows the probable targeted metal, as well as the probable depth of the target. The metal detector will register a repeating, unchanging sound when a buried target has been located and identified. If, upon repeated passes over the same spot, the target identification reads inconsistently, the trash is probably trash or oxidized metal. With practice, you will learn to unearth only target generating repeated signals. Also, the greater the distance between the target and the coil, the less accurate the target identification.
| symbol | possible target |
 | gold flakesferrous objects, both worthless trash and more valuable iron relics |
CS400
 | nickel coinsnewer pull-tabs |
 | many gold ringsnewer pull-tabspull-tabs from older beverage cans |
 | larger gold itemsscrew caps |
 | larger gold itemscopper coins1 ¢ pennies (post 1982) |
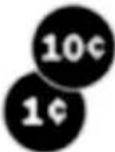 | aluminium coins1 ¢ pennies (pre 1982)10 ¢ dimes |
 | small silver coinslarger aluminium coins25 ¢ quarters |
 | large silver coins50 ¢ half dollars |

The target indications are just that: visual references. Many other types of metal can fall under any one of these categories. While this metal detector will eliminate or indicate the presence of most common trash, it is impossible to class all buried targets accurately.
Depth Indicator
The depth indicator is accurate for coin-sized targets. It indicates the relative depth of the target. Large and irregularly-shaped objects will yield less reliable depth ratings. When passing over an object, the depth indicator will light up and stay illuminated until another object is scanned.
Repeated indication at the same depth level indicates an accurate target detection. If the depth indication varies with each sweep, try sweeping at different angles; there may be more than one target present.
With practice, you will learn the difference between accurate readings, multiple targets and highly erratic readings which evidence trash or irregularly-shaped objects.
10.2 Indoor Testing
To test your metal detector, you will need:
- an iron nail
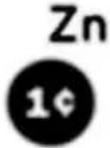
• a quarter or a small copper object - a penny (post 1982) or a small zinc object
CS400
To test your metal detector:
- Switch on your metal detector.
- Place it on a plastic or wooden table. Remove all watches, rings and other jewellery or metal objects on your hands, wrists and arms.
- Adjust the search coil so that the flat part faces upwards.
- Select the DISC, NOTCH or AUTO-NOTCH mode. Evenly sweep the nail 10 to 12 cm above the search coil. The detector will emit a low tone when detecting the sample, the target indicator pointing to the trash symbol. The depth indicator displays the corresponding value.
- Repeat the above test with a post-1982 dime (medium tone) and a quarter (low tone).
- In ALL-METAL mode, move a test sample about 30 cm above the search coil. Slowly lower the sample towards the search coil. The metal detector emits a tone and the depth indicator shows the relative depth. All objects should generate the same tone.
10.3 Outdoor Testing and Practice
Pinpointing in Motion Mode
Accurate pinpointing takes practice and is best accomplished by cross-sweeping the target area.
- Once a buried target is located and indicated by a good tone response, continue sweeping the coil over the target in a narrowing side-to-side motion.
- Take visual note of the place on the ground where the metal detector emits a tone.
- Stop the coil directly over this spot on the ground.
- Now move the coil a few times straight forward and straight back.
- Again, take visual note of the spot on the ground where the metal detector emits a tone.
- If needed, cross-sweep the target in an X-pattern at different angles to zero in on the exact spot.
natural_image
Diagram of a mechanical device with directional arrows indicating motion or force (no text or symbols)Coil Movement
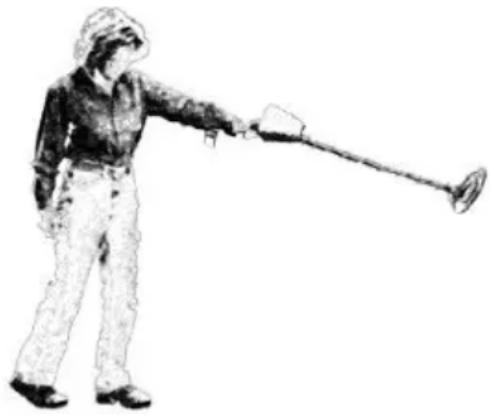
When sweeping the coil, be careful to keep it level to the ground at about 1 to 1.5 cm from the surface. Never swing the coil like a pendulum. Doing so will cause false readings. When searching, sweep the coil from side to side.
Swing the search coil slowly, overlapping each sweep as you move forward. It is important to sweep the coil at a consistent speed over the ground as you search. After identifying a target, the sweeping technique can help in identifying both the location and the nature of the target. If you encounter a weak signal, try moving the coil in short and rapid sweeps over the target zone.
Most worthwhile objects will respond with a repeatable tone. If the signal does not repeat after sweeping the coil directly over the suspected target, it is more than likely trash.
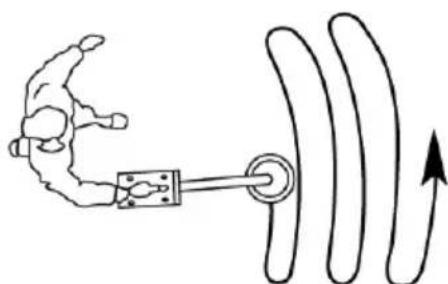
Crossing the target zone with multiple intersecting sweeps at multiple angles is another way to verify the repeatability of the signal and the potential of the buried object. To use this method, walk around the target area in a circle, sweeping the coil across the target repeatedly, every 30 to 40 degrees of the
circle, about ten different angles as you walk completely around the target. If a high-tone target completely disappears from detection at a given angle, chances are that you are detecting oxidized ferrous metals rather than a silver or copper object. If the tone changes at different angles, you may have encountered multiple objects. If you are new to treasure hunting, you may want to dig all targets at first. With in-the-field practice, you will learn to better discern the nature of buried objects by the nature of the detector's response.
natural_image
Simple line drawing of a person interacting with a mechanical device and a curved path (no text or symbols)You may encounter some false signals as you proceed. False signals occur when the detector beeps but no metal target is present. They can be induced by EMI, oxidation or highly mineralized ground soils. If
CS400
the detector beeps once but does not repeat the signal with several additional sweeps over the same spot, there is probably no target present.
When searching trashy soils, it is best to scan small areas with slow and short sweeps. You will be surprised just how much trash and foil you will find in some areas. The trashiest areas have been frequented by most people and frequently hold the promise for finding the most lost valuables.
10.4 Ground Balancing
Before using the ALL-METAL mode, it is necessary to ground balance your detector. This ground balancing adjustment offsets the effects of minerals and salts in the ground. To do so:
- Select the ALL-METAL mode and find a patch of ground, which is free of metal objects.
- Lift the search coil waist-high in the air.
- Turn the GND BAL button in the P position.
- Press the GND TRAC button.
- Slowly lower the search coil maintaining it elevated about 1 to 1.5 cm above the ground. If the detector emits a sound, repeat steps 3 and 4, and adjust the GND BAL button in small increments. If the detector remains silent, no further adjustment is necessary.
natural_image
Illustration of a person using a metal detector (no text or symbols)As your hunt takes you to different areas, verify the ground balance setting periodically using the above procedure. Ground conditions can vary within a geographical area due to water, rocks, sand or clay.
10.5 Pinpointing in Non-Motion Mode
The coil-sweeping technique is not important in this mode. However, user retuning is critical. The detector does not automatically adjust to changing ground and environmental conditions. The operator is required to make the adjustment.
Retuning
Make sure that the spot you choose for tuning does not contain metal. Keep the coil still, just above the ground. Pass over the area with the coil to ensure that the detector does not emit a tone.
Detection Field
The detection field depends on the size of the target.
Large Objects
After detecting a target, the LCD display shows the sensitivity level while the detector emits a tone. If, when lifting the search coil about 2 cm above the ground, the tone does not fade, you have detected a large or irregularly shaped object. Slightly lift the search coil and outline the target with slow coil movements at the same height.
Small Objects
After detecting a target, the LCD display shows a low sensitivity level while the detector emits a faint tone. Move the search coil from side to side while maintaining it at the same height. Note the spot where the tone is loudest and the sensitivity level is largest. Then, move the coil towards the ground to zero in on the target's location. A coin-size object will be detected when the object enters the range of the inner coil.
11. Cleaning and Storage
- The life of your detector is shortened by neglect or careless use. Wipe the housing with a damp cloth and then wipe it dry carefully if you have used the detector in a hostile environment (salty water, sand, etc.).
- Do not clean the detector with solvents or detergents.
- The search coil is waterproof and can be submerged in either fresh or salt water. However, do not let water enter the control box. Rinse the search coil with fresh water after using in salt water.
Salt damage
- Salty air can penetrate the control box in case of frequent use in a salty environment. Parts of the electronic circuitry may corrode. You can protect your metal detector by covering the control box with polythene. The warranty does not cover damage caused by salty environments.
CS400
Storage
- Store the detector in a dry and warm environment under normal humidity conditions.
- Remove the batteries to prevent them from leaking if the metal detector is to be stored for long periods.
12. Troubleshooting
- Before turning the device in for repair, read this section as it might contain the solution for your problem.
- When problems occur, first check the batteries. Replace the batteries when necessary and ensure the connections are correct and secure.
The detector drifts out of tune
- The metal detector can be affected by changing temperatures e.g. when the device is taken out of storage and out into the field. Wait a while until the temperature of your metal detector has stabilised. The device may need as much as half an hour to acclimatise if the change in temperature is extreme.
• Sometimes batteries will cause the signal to drift. Replace them if this is the case.
13. Technical Specifications
| headphone jack | 6.5 mm |
| power supply | 2x 9 V battery (6LR61C, not included) |
| frequency | 6.6 kHz |
| sensitivity adjustment | 12 levels |
| sensitivity | 25 cm (for a US quarter dollar) |
| multi-tone indication | 3 tones |
| depth indication | 12 segments |
| LCD | 45 x 80 mm |
| operating temperature range | 0°C to 40°C |
| storage temperature range | -20°C to 60°C |
| search coil | 240 mm |
| weight | 1.430 kg |
Use this device with original accessories only. Velleman nv cannot be held responsible in the event of damage or injury resulting from (incorrect) use of this device. For more info concerning this product and the latest version of this manual, please visit our website www.velleman.eu. The information in this manual is subject to change without prior notice.
RED Declaration of Conformity
Hereby, Velleman NV declares that the radio equipment type [CS400] is in compliance with Directive 2014/53/EU.
The full text of the EU declaration of conformity is available at the following internet address: www.velleman.eu.
© COPYRIGHT NOTICE
The copyright to this manual is owned by Velleman nv. All worldwide rights reserved. No part of this manual may be copied, reproduced, translated or reduced to any electronic medium or otherwise without the prior written consent of the copyright holder.
GEBRUIKERSHANDLEIDING
1. Inleiding
natural_image
Diagram of a mechanical or electrical component with directional arrows and a curved line, no text or symbols present.Spoelbeweging
natural_image
Simple line drawing of a person using a mechanical device connected to a multi-waves structure with an upward arrow (no text or symbols)Naarmate u verder zoekt, kan de detector valse signalen
natural_image
Illustration of a person holding a metal detector (no text or symbols)De detector is ontregeld
natural_image
Pure mechanical diagram showing a rotating shaft with four directional arrows indicating force or motion (no text or symbols)CS400
natural_image
Simple line drawing of a robotic arm interacting with a chain and a rope, with an upward arrow indicating motion (no text or symbols)natural_image
Illustration of a person using a metal detector (no text or symbols visible)natural_image
Diagram of a mechanical device with directional arrows indicating motion or force, no text or symbols present.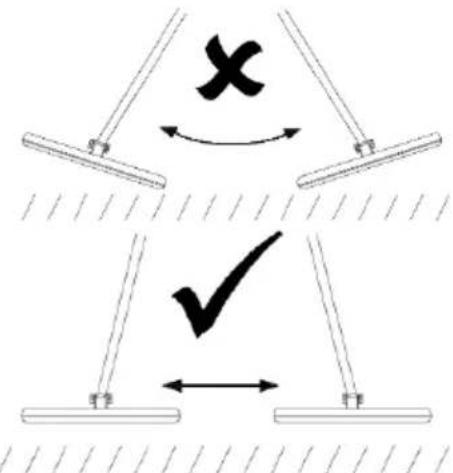
natural_image
Diagram showing a robotic arm interacting with a mechanical device and multiple curved wires, with an upward arrow indicating motion (no text or symbols)CS400
natural_image
Illustration of a person using a metal detector (no text or symbols)natural_image
Pure mechanical diagram showing a rotating shaft and gear mechanism with directional arrows, no text or symbols present.natural_image
Simple line drawing of a person climbing a rope with a pulley, connected to parallel lines with an upward arrow (no text or symbols)CS400
natural_image
Illustration of a person using a metal detector (no text or symbols)natural_image
Pure mechanical diagram showing a rotating shaft with directional arrows, no text or symbols presentRuch cewki
natural_image
Diagram showing a robotic arm interacting with a chain of curved wires, with an upward arrow indicating motion (no text or symbols)CS400
10.4 Balans gruntu
natural_image
Illustration of a person holding a metal detector (no text or symbols)© INFORMACJA O PRAWACH WŁASNOŚCI
natural_image
Pure mechanical diagram showing a rotating shaft and circular component with directional arrows, no text or symbols present.Movimento da Bobina
CS400
natural_image
Diagram showing a robotic arm interacting with a mechanical device and a curved wire loop, with an upward arrow indicating motion (no text or symbols)natural_image
Illustration of a person using a metal detector (no text or symbols)Velleman® Service and Quality Warranty
Since its foundation in 1972, Velleman® acquired extensive experience in the electronics world and currently distributes its products in over 85 countries.
All our products fulfil strict quality requirements and legal stipulations in the EU. In order to ensure the quality, our products regularly go through an extra quality check, both by an internal quality department and by specialized external organisations. If, all precautionary measures notwithstanding, problems should occur, please make appeal to our warranty (see guarantee conditions).
General Warranty Conditions Concerning Consumer Products (for EU):
- All consumer products are subject to a 24-month warranty on production flaws and defective material as from the original date of purchase.
- Velleman® can decide to replace an article with an equivalent article, or to refund the retail value totally or partially when the complaint is valid and a free repair or replacement of the article is impossible, or if the expenses are out of proportion.
You will be delivered a replacing article or a refund at the value of 100% of the purchase price in case of a flaw occurred in the first year after the date of purchase and delivery, or a replacing article at 50% of the purchase price or a refund at the value of 50% of the retail value in case of a flaw occurred in the second year after the date of purchase and delivery.
• Not covered by warranty:
- all direct or indirect damage caused after delivery to the article (e.g. by oxidation, shocks, falls, dust, dirt, humidity...), and by the article, as well as its contents (e.g. data loss), compensation for loss of profits;
- consumable goods, parts or accessories that are subject to an aging process during normal use, such as batteries (rechargeable, non-rechargeable, built-in or replaceable), lamps, rubber parts, drive belts... (unlimited list);
- flaws resulting from fire, water damage, lightning, accident, natural disaster, etc....;
- flaws caused deliberately, negligently or resulting from improper handling, negligent maintenance, abusive use or use contrary to the manufacturer's instructions;
- damage caused by a commercial, professional or collective use of the article (the warranty validity will be reduced to six (6) months when the article is used professionally);
- damage resulting from an inappropriate packing and shipping of the article:
- all damage caused by modification, repair or alteration performed by a third party without written permission by Velleman®.
- Articles to be repaired must be delivered to your Velleman® dealer, solidly packed (preferably in the original packaging), and be completed with the original receipt of purchase and a clear flaw description.
- Hint: In order to save on cost and time, please reread the manual and check if the flaw is caused by obvious causes prior to presenting the article for repair. Note that returning a non-defective article can also involve handling costs.
• Repairs occurring after warranty expiration are subject to shipping costs.
- The above conditions are without prejudice to all commercial warranties.
The above enumeration is subject to modification according to the article (see article's manual).
NL

- USER MANUAL
- Introduction
- To all residents of the European Union
- Important environmental information about this product
- If in doubt, contact your local waste disposal authorities.
- Safety Instructions
- General Guidelines
- Features
- CS400
- Glossary
- - Elimination
- • DISC - Discrimination
- - Notch
- - Auto-notch
- - Relic
- - Iron
- - Ferrous
- • GND TRAC - Ground tracking
- - Pull-tabs
- • GND BAL - Ground balance
- • SURF ELIM - Surface elimination
- Overview
- LCD Display
- Assembly
- Adjusting the Armrest
- Batteries
- Installation
- Basic Operation
- Code of Conduct
- Motion and Non-Motion Modes
- All-Metal Mode
- Disc, Notch and Auto-Notch Modes
- Switching On Your Metal Detector
- Operating Modes
- DISC Mode
- NOTCH Mode
- AUTO-NOTCH Mode
- Sensitivity Adjustment
- Electromagnetic Interference (EMI)
- Severe Ground Conditions
- Multiple Targets
- Surface Elimination
- Using Headphones
- Audio Target Identification (ATI)
- In-the-Field Technique
- Reading the Display
- Target Indicator
- Depth Indicator
- Indoor Testing
- Outdoor Testing and Practice
- Pinpointing in Motion Mode
- Coil Movement
- Ground Balancing
- Pinpointing in Non-Motion Mode
- Retuning
- Detection Field
- Large Objects
- Small Objects
- Cleaning and Storage
- Salt damage
- Storage
- Troubleshooting
- The detector drifts out of tune
- Technical Specifications
- © COPYRIGHT NOTICE
- GEBRUIKERSHANDLEIDING
- Inleiding
- Spoelbeweging
- De detector is ontregeld
- Ruch cewki
- Balans gruntu
- © INFORMACJA O PRAWACH WŁASNOŚCI
- Movimento da Bobina
- Velleman® Service and Quality Warranty
- General Warranty Conditions Concerning Consumer Products (for EU):
- • Not covered by warranty:
- NL
Brand : VELLEMAN
Model : CS400
Category : Detector