PCDC 3031 - Toothbrush ProfiCare - Free user manual and instructions
Find the device manual for free PCDC 3031 ProfiCare in PDF.
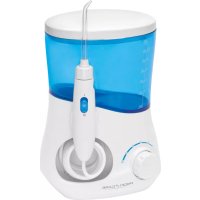
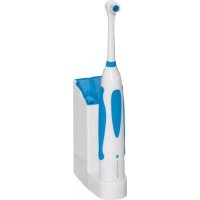
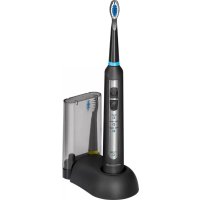
| Product type | Oral care kit with electric toothbrush and water flosser |
| Brand | ProfiCare |
| Model | PCDC 3031 |
| Net weight of the set | Approx. 622 g |
| Charging station power supply | 100-240 V~, 50-60 Hz, 1.2-2.8 W |
| Protection class of the station | II |
| Liquid protection rating | IPX7 (devices protected against temporary immersion) |
| Toothbrush battery | Rechargeable Li-Ion 3.7 V, 650 mAh |
| Toothbrush battery life | Up to 4.5 hours |
| Toothbrush charging time | Approx. 24 hours |
| Water flosser battery | Rechargeable Li-Ion 3.7 V, 1500 mAh |
| Water flosser battery life | Up to 60 minutes |
| Water flosser charging time | Approx. 24 hours |
| Brushing modes | Clean (daily cleaning), Sensitive (gentle), Massage (gum stimulation) |
| Water flosser modes | Normal (high pressure), Soft (low pressure), Pulse (pulsating pressure) |
| Package contents | Charging station, toothbrush, water flosser, 3 brush heads with color rings, 2 replacement brushes, 3 nozzles with color rings, 2 replacement jet tips |
| Maintenance | Clean brush heads and nozzles under running water; wipe the housing with a damp cloth; do not immerse the device or station |
| Safety | Do not handle with wet hands when charging; do not immerse in water; use only original accessories; have damaged cord replaced by a professional |
| Disposal | Batteries must not be disposed of with household waste; take the device to a recycling center at the end of its life |
Frequently Asked Questions - PCDC 3031 ProfiCare
User questions about PCDC 3031 ProfiCare
0 question about this device. Answer the ones you know or ask your own.
Ask a new question about this device
Download the instructions for your Toothbrush in PDF format for free! Find your manual PCDC 3031 - ProfiCare and take your electronic device back in hand. On this page are published all the documents necessary for the use of your device. PCDC 3031 by ProfiCare.
USER MANUAL PCDC 3031 ProfiCare
PykoBODCTBO no 3KcNpyataun

Dental-Center PC-DC 3031
Tandverzorgingsset · Necessaire de soins dentaires · Centro dental
Set per igiene orale · Dental Center · Zestaw do pielegnaci jamy ustnej
Szajapolocenter·Ipn6bopKOMJIeKCHOnuNCTKN3y6OB·
Bedienungsanleitung .Seite 4
Gebruiksaanwijzing.. 12
Mode d'emploi.. Page 19
Manual de instrucciones.. Pagina 27
Istruzioni per l'uso.. 35
Instruction Manual. Page 42
Instrukcja obslugi Strona 49
Hasznalatiutasitas. Oldal 57
PykoBoDCTBO no 3KcPnyaTuu.. cTp. 64
77
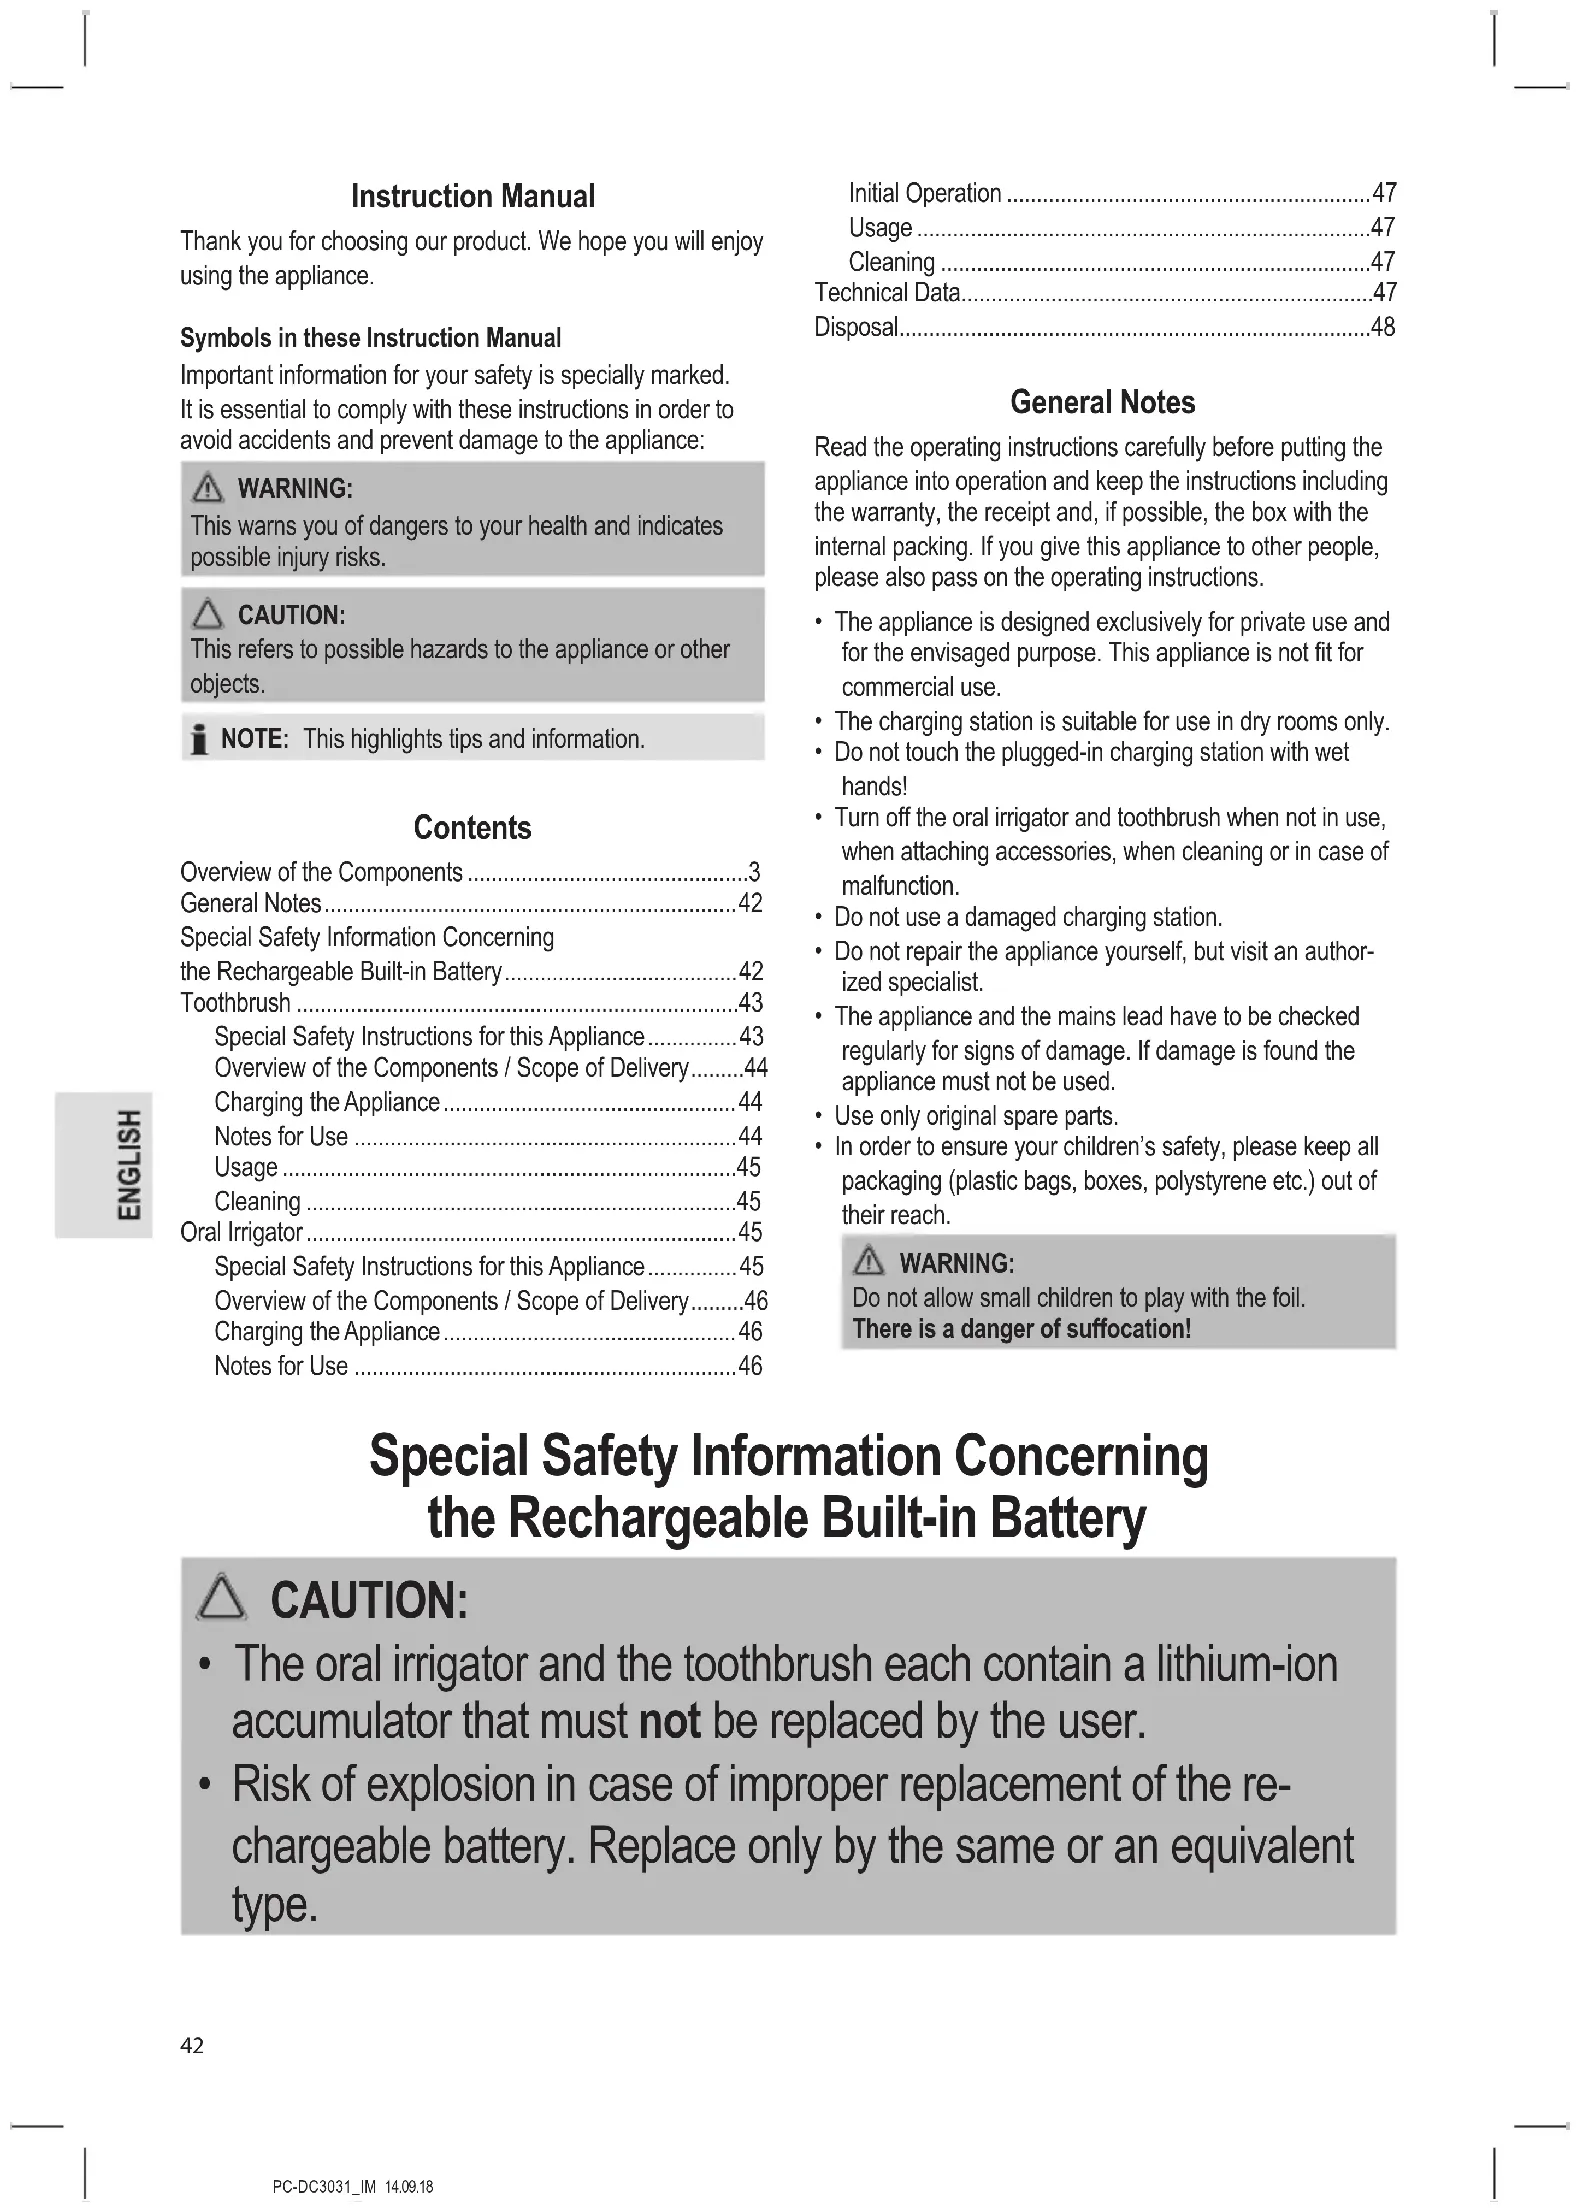
Thank you for choosing our product. We hope you will enjoy using the appliance.
Symbols in these Instruction Manual
Important information for your safety is specially marked. It is essential to comply with these instructions in order to avoid accidents and prevent damage to the appliance:

WARNING:
This warns you of dangers to your health and indicates possible injury risks.

CAUTION:
This refers to possible hazards to the appliance or other objects.

NOTE: This highlights tips and information.
Contents
Overview of the Components 3
General Notes 42
Special Safety Information Concerning the Rechargeable Built-in Battery 42
Toothbrush 43
Special Safety Instructions for this Appliance. 43
Overview of the Components / Scope of Delivery. 44
Charging the Appliance 44
Notes for Use 44
Usage 45
Cleaning 45
Oral Irrigator 45
Special Safety Instructions for this Appliance. 45
Overview of the Components / Scope of Delivery. 46
Charging the Appliance 46
Notes for Use 46
Initial Operation 47
Usage 47
Cleaning 47
Technical Data. 47
Disposal 48
General Notes
Read the operating instructions carefully before putting the appliance into operation and keep the instructions including the warranty, the receipt and, if possible, the box with the internal packing. If you give this appliance to other people, please also pass on the operating instructions.
- The appliance is designed exclusively for private use and for the envisaged purpose. This appliance is not fit for commercial use.
- The charging station is suitable for use in dry rooms only.
- Do not touch the plugged-in charging station with wet hands!
- Turn off the oral irrigator and toothbrush when not in use, when attaching accessories, when cleaning or in case of malfunction.
- Do not use a damaged charging station.
- Do not repair the appliance yourself, but visit an authorized specialist.
- The appliance and the mains lead have to be checked regularly for signs of damage. If damage is found the appliance must not be used.
- Use only original spare parts.
- In order to ensure your children's safety, please keep all packaging (plastic bags, boxes, polystyrene etc.) out of their reach.

WARNING:
Do not allow small children to play with the foil.
There is a danger of suffocation!
Special Safety Information Concerning the Rechargeable Built-in Battery

CAUTION:
- The oral irrigator and the toothbrush each contain a lithium-ion accumulator that must not be replaced by the user.
- Risk of explosion in case of improper replacement of the rechargeable battery. Replace only by the same or an equivalent type.

CAUTION:
- Do not expose the rechargeable built-in battery to hard impacts or pressure. Do not drop the oral irrigator and the toothbrush!
- Do not expose the appliance to intense heat such as sunlight. Also keep the appliance away from heat sources like radiators, stoves, etc.!
- The ambient temperature should be between 0^ C and max. 35^ C . Heat damages the rechargeable battery. Increasingly lower temperatures reduce the capacity and the life of the rechargeable battery.
- Do not charge the rechargeable battery unsupervised.
- Disconnect the charging station from the power outlet if you are not going to use the oral irrigator and the toothbrush for a longer time.
Toothbrush
Special Safety Instructions for this Appliance

WARNING of electrical shock!
- Keep the appliance dry!
- Keep the charging station dry.
- The appliance is intended for use with safety extra-low voltage. Connect only to a power supply according to the specifications on the rating label.
-
Do not replace any parts. Do not perform any modifications. Risk of electric shock!
-
If the supply cord is damaged, it must be replaced by the manufacturer, its service agent or similarly qualified persons in order to avoid a hazard.
-
Do not use the appliance without a brush attachment.
-
This appliance serves for the dental and oral hygiene of adult persons.
- This appliance can be used by children and persons with reduced physical, sensory or mental capabilities or lack of experience and knowledge if they have been given supervision or instruction concerning use of the appliance in a safe way and understand the hazards involved.

WARNING:

This appliance is not suited for children under the age of 3 as small parts could be broken off and swallowed.
Children may not play with the appliance.
- Cleaning and user maintenance shall not be made by children without supervision.
Overview of the Components / Scope of Delivery
Illustration A
1 Driving axle
2 POWER button
3 Indicator light "C"
4 Indicator light "S"
5 Indicator light "M"
6 Indicator light
7 Brush head
8 Brush attachment
9 Coloured marking ring
10 Slots for brush attachments
11 Charging surface for toothbrush
12 Charging station
No Illustration
2 replacement brushes
Charging the Appliance
- Connect the charging station to a correctly installed earthed socket.
- Place the appliance on the charging station. The control lamp turns on during charging
- Charge the appliance for 24 hours before the first use.

NOTE:
- Put the toothbrush back to the charging station after use. Thus, it is always ready for use, even if you use it several times a day.
- Even when switched off, the rechargeable battery discharges continuously. If the appliance is out of use for a longer period of time, charge the rechargeable battery at least once every 4 to 8 weeks.
Notes for Use
Brush Attachments
Delivery includes 3 brush attachments with different colour markings. These can be assigned to different users. 2 brush attachments can be stored in the slot of the charging station.
When the Gums are Bleeding ...
It is normal to experience slight gum bleeding when using the toothbrush for the first few times. Should your gums bleed continually, please consult your dentist.
Button
The button turns the appliance on and off. You may also use the button to select the programs.
| Pressing the Button | Indicator Lamp | Function |
| Press 1 x C | (Clean) | Turn appliance on |
| For daily use | ||
| Press 2 x S | (Sensitive) | Gently cleanses your teeth or other sensitive areas |
| Press 3 x M | (Massage) For a gentle gum stimulation | |
| Press 4 x N | one Turn appliance off | |
Usage
- Place the brush attachment with the brush head facing the button. Press the brush attachment onto the appliance as far as it will go.
- Moisten the brush head and apply some toothpaste.
- Rinse your mouth with water.
- Lead the brush to the teeth before switching on the appliance via the button. You will thus prevent splatters.
- Place the brush against the edge of the gums. Brush the outsides, the insides and the occlusal surface of your teeth. Slowly guide the brush head from tooth to tooth. Only exert little pressure. In this way, clean each of the four quarters of your mouth for about 30 seconds. The appliance will indicate these intervals by a brief
interruption. After a total of 2 minutes, the recommended cleaning time by dentists, the toothbrush will turn off automatically.

NOTE:
You may switch off the toothbrush at any time during the brushing process by using the button.
Cleaning

WARNING:
- Turn the appliance off. Remove the charging station plug from the socket when you clean the appliance.
- Do not submerge the appliance and the charging station in water. It could result in an electric shock or fire.

CAUTION:
- Do not use any wire brush or other abrasive objects.
-
Do not use any sharp or abrasive cleaners.
-
You may wipe the housing of the appliance with a slightly damp cloth.
- Pull off the brush attachment. Clean it under running water after each use.
- Wipe the charging station with a slightly damp, not wet cloth.
Oral Irrigator
Special Safety Instructions for this Appliance

WARNING of electrical shock!
- Keep the appliance dry!
- Keep the charging station dry.
- The appliance is intended for use with safety extra-low voltage. Connect only to a power supply according to the specifications on the rating label.
-
Do not replace any parts. Do not perform any modifications. Risk of electric shock!
-
If the supply cord is damaged, it must be replaced by the manufacturer, its service agent or similarly qualified persons in order to avoid a hazard.
- Only use the appliance for the cleaning of the mouth.
-
Do not use the appliance without a jet nozzle.
-
The appliance may only be used with cold or lukewarm water.
- Empty the water container after each application to prevent an accumulation of bacteria.
- When using braces, find out whether the usage of an oral irrigator is possible. We do not assume any liability for possible damages.
- In case of diseases in the mouth and throat area, you should ask your doctor whether the use of an oral irrigator is advisable.
- This appliance can be used by children over the age of 8 and by persons with reduced physical, sensory or mental capabilities or lack of experience and / or knowledge if they are supervised.
Children may not play with the appliance.
Overview of the Components / Scope of Delivery
Illustration B
1 Jet nozzle
2 Release button for the jet nozzle
3 ON/OFF button
4 MODE button
5 Indicator light "Normal"
6 Indicator light "Soft"
7 Indicator light "Pulse / CH"
8 Coloured marking ring
9 Suction hose
10 Filter
11 Sealing ring
12 Water tank
13 Sealing ring
14 Water tank cover
15 Charging surface for oral irrigator
16 Slots for jet nozzles
17 Charging station
No Illustration
2 replacement jet nozzles
Charging the Appliance
- Connect the charging station to a correctly installed earthed socket.
- Place the appliance on the charging station. The indicator light "CH" (Charge) will blink during the charging procedure.
- Charge the appliance for 24 hours before the first use.
NOTE:
If the appliance is fully charged, the indicator light "CH will glow continuously.
- Charge the rechargeable battery if the indicator light "CH" blinks during or after using the appliance.
- Even when switched off, the rechargeable battery discharges continuously. If the appliance is out of use for a longer period of time, charge the rechargeable battery at least once every 4 to 8 weeks.
Notes for Use
Jet Nozzles
3 jet nozzles with different colour markings are contained in the scope of delivery. These can be assigned to different users. 2 jet nozzles can be stored in the slot of the charging station.
When the Gums are Bleeding ...
It is normal for a normal bleeding to occur when using the oral irrigator the first few times. Should your gums bleed continually, please consult your dentist.
MODE Button
Select the desired water pressure setting using the MODE button:
Normal: Highest water pressure for a normal cleaning.
Soft: Lowest water pressure for gentle cleaning of sensitive gums.
Pulse: Water pressure at an interval for cleaning and massaging of the gums.

NOTE:
- You can adjust the setting during use.

NOTE:
- The higher the water pressure, the faster the water is used up.
Initial Operation
- Remove the oral irrigator from the charging station.
- Attach a jet nozzle. Turn the jet nozzle so that the opening faces the front of the appliance.
- Open the water tank cover on the back side of the appliance.
- Fill the water tank with lukewarm water and close the water tank cover again. Make sure the sealing ring is fitted properly.
- Select the "Normal" setting using the MODE button.
- Turn on the appliance using the ON/OFF button.
- Allow all water in the water tank to flow through the jet nozzle in order to remove any residue.
- Turn off the appliance.
- Briefly rinse off the jet nozzles under running water.
Your oral irrigator is now ready for use.
Usage
Before using the water jet you should clean your teeth with a toothbrush.
- Open the water tank cover on the back side of the appliance.
- Fill the water tank with lukewarm water and close the water tank cover again.

WARNING:
Do not fill it with hot water!
- In order to clean the jet nozzles, allow water to flow through the jet nozzle head (at maximum water pressure) into the wash basin before and after each time the appliance is used.

NOTE:
Do not hold the appliance at a too much slanting angle otherwise no water will be able to spray from the appliance.
- Next, use the MODE button to select the desired setting "Normal", "Soft", "Pulse").
- Lean over the wash basin. Guide the water jet along the gums, around the teeth. Hold the appliance upright as far as possible. Clean all four parts of your mouth in this way. Keep your mouth slightly open so the water can leak out.

WARNING:
Do not hold the jet nozzle too close to your gums or your teeth.
-
If the water becomes used up before you are finished with the cleaning, turn off the appliance using the ON / OFF button. Add more water.
-
To stop operation, turn the appliance off.

NOTE:
For security, the appliance automatically turns off after 2 minutes.
- Please clean the appliance as described under "Cleaning".
Cleaning

WARNING:
- Turn the appliance off. Remove the charging station plug from the socket when you clean the appliance.
- Do not submerge the appliance and the charging station in water. It could result in an electric shock or fire.

CAUTION:
- Do not use any wire brush or other abrasive objects.
-
Do not use any sharp or abrasive cleaners.
-
Draw the water tank downwards.
- If necessary, pour the remaining water out.
- Clean the suction hose with a soft cloth.
- Remove the filter and clean it carefully using warm running water.
- Insert the filter in the hose once again.
- Rinse out the water tank.
- Guide the hose into the upper opening of the water tank.
- Place the water tank in the appliance once again. Pay attention to the guides and make sure the sealing ring is fitted properly. The water tank must snap into place audibly.
- Press the release button and remove the jet nozzle. Clean the jet nozzle under running warm water. Dry the jet nozzle.
- Clean the appliance and the charging station with a damp cloth. Finally, wipe the parts until they are dry.
Technical Data
Model: PC-DC 3031
Net weight: approx. 622g
Degree of protection against liquids: .IPX7*
Charging station
Protection class: II
Power supply: 100 - 240 V~, 50 - 60 Hz
Power consumption: 1.2-2.8W
Toothbrush accumulator: 1 × 3.7V , 650 mAh Li-iron
Running time: 4.5 hours max.
Charging time: approx. 24 hours
Oral irrigator accumulator: 1 × 3.7V , 1500 mAh Li-Ion
Running time: 60 minutes max.
Charging time: approx. 24 hours
- This appliance complies with IPX7. This means that the appliance is protected against temporary submersion.
The right to make technical and design modifications in the course of continuous product development remains reserved.
This appliance has been tested according to all relevant current CE guidelines, such as electromagnetic compatibility and low voltage directives, and has been constructed in accordance with the latest safety regulations.
Disposal
Dispose of Batteries / Rechargeable Batteries

The oral irrigator and the toothbrush each contain a lithium-ion accumulator. Used batteries / accumulators (rechargeable batteries) do not belong in household waste.
The battery must be removed before the product is recycled. Contact qualified personnel.
Information, where batteries / accumulators are to be disposed of can be obtained from your local or municipal authorities.
Meaning of the "Dustbin" Symbol
Protect our environment: do not dispose of electrical equipment in the domestic waste.
Please return any electrical equipment that you will no longer use to the collection points provided for their disposal.
This helps avoid the potential effects of incorrect disposal on the environment and human health.
This will contribute to the recycling and other forms of re-utilisation of electrical and electronic equipment.
Information concerning where the equipment can be disposed of can be obtained from your local authority.
Instrukcja obslugi
CTC Clatronic Sp. z 0.0
Ul. Brzeska 1
45-960 Opole
Usuwanie
I I P N M E U A H N A:
- Ecn np6op nnoHocb3apxKe, INnKkaTOpHaJ lamna CH 6ydt HnepepbBHO CBeNTbC.
3apkaTe np6op,ecn HndkataOpHna lamna «CH» mraet BO Bpemr nn nocne nCnoIb30BaHna np6opa.
Дажрпь Вькюсном риборе Akkymлгог纳 6атаразноянho pa3ржаetс.Еси пьбор He NCПОБЗУETСВ Teченme ДИТЛБНОТпрпдЯВерMuH,Заржaite Akkymлгогу 6atapeHo He pexke,Чem pa3В4-8 HeДел.
PpmeHnno nCNoB3OBAHn
Conna
B KOMNJIeK T NOCTABKN BXOJAT 3 cONJa C pa3HOJ UBeTOBOI MAPKIOPOBKO, OHMOYt BbITbBbJeHb Pa3HbIM JIOJAM.
2ΦopcyHKn MoxHNO xpaHnTB Ba3e 3apdHcN CTaHcM.
PpKpOBoTeueHn decen ...
HopmaIbHOI peakuue Ha HeCKoJIbKO npEBbIX nCIOJIb3OBAHn dyua noIOCT pTa RaBnEeTcKPOBOTeUHe n3 DeceH.
EcnKpOBoTeUeHHe Decen He npeKpaTntcra,ObpaTntecb K 3y6Homv BpaHy.
Khonka «Mode»
BbIbpaIteKeJIaTeIbHoe DaJIeHHe BOJbC nOMOJIbKHOHKn «Mode»:
Normal: MaKcHMaJIbHOe daBHeHne BOdI nIg HopMaJIbHOH YIcTKn.
Soft: MUNHIMaJIbHOe DaJIbeHHe BOJbI JINr YNCTKNYBCTBnTeJIbHbIX DeCEH.
Pulse:Давпени ВОьс cперрьамИ дя�СТКИ MAccupobAHЯ DeCEH.

ПИМЕЧАнЯ:
Bb moKeTe peYInpoBaT hAcTpOKn B npOceCe nCIOJIb3OBAHn np6opa.
- Yem Bblie DaBHeHne BoDbl, Tem 6bIcTpee OHa paXoDyETc.
PepBoe npImMeHHe
- CHIMITE nprratop nnoocn pTa c 6a3bln 3apdkn.
- YctaHOBnTe cOnIO. IOBepHnTe cOnIO TaKIM o6pa3OM, yTO6bI OTBepCTne 6blIO cNEpeDN np6Opa.
- OtkpoTe KpbIuKy 6aUka DnA BoDbHa 3aHne YacTn npu6opa.
- 3aneIte 6aok ymepeHTo TenoB BDOi N 3akpoTe 6aok KpbIshKoN. PIOBepbTe, YTObI KOJIbueBOe yIIOTHHe 6blO yCTaHOBNeHO IIOTHO.
- C NOMOUIK HONIKI «Mode» yCTaHOBITE hAcTpoiKy «Normal».
- BkHouHTe np6op c nOMOuBIO KHOIKN «On / Off>.
- HanpaBnIe nOTOK BcEi BoDJI 6aKa Ycepe3 cOnIO, UTObI ydaNtB kAKe-Im6 OcaKn.
- Bbiknoute npmbop.
- KpaTkoBpeMeHNO npOMoTe coNna nOd cTpye npotoHHO BOnbl.
DyuI pOIOCTn pTa (IppraTOp) rTOB K IcNoJIb3OBAHNIU.
IcnoJb30BaHne
IpeepTeKAKBOONb3OBAbC4yUeM,HEo6xOIMOnounCTnTb 3y6blObuHOn 3y6HoJtKoN.
- OTKpoIte KpbIIuKy 6aUka DnRA BObI Ha 3aHHe YacTn npi6opa.
- 3aene Te 6aoyok ymepeHNO Tepno BDOIO n 3akpoTe 6aoyk KpbIuKoN.

IPEDYIPEXDEHNE:
He HanibaaiTe ropaTuO BDOy!
3.ДЯ OUCCTK CONeI, npeI pOcEduPoI n NocIe Hee, PpOMoIte Ix Hau yMbIbJIbHnKOM, pOnyCTuB Yepe3 HIX BOy (NoM MaKcIMaJIbHbIM DaBHeHnEM).

ПРИМЕЧАНО:
He depknte np6op noi 6oIbwm yIOM hKnloHa, nHaue B0da He 6ydt paTbnIaTbcn3 np6opa.
- 3aTeM BbIbepeTe JKeIaTeIbHyIO HAcTpoIky C NOMOuBIO KhoIKN «Mode»: «Normal», «Soft», «Pulse».
- HaktoHntecb na paKOBnOH. HanpaBte ctpyO Bobl BdoJI Decen n BOKpyr 3y6ob. DepxHTe np6op ka KMOxHO 6nKe K BepTkaIbHOMy NIOJoxEHIO. OuchTe TAKIM O6pa30M BCE Yetbipe qactn potOBo NIOJocTN. DepxHTe pot hemHoro OTkpblIM, yTo6bl BOa MOrna BblTEkATb.

PENEYIPEXDEHNE:
He nepKHTe cOnnO cnMkOM 6m3KO K deCham nn 3y6aM.
- Ecnn Boda n3pacxodobaHa Do OKOHuaHnYnCTKn, BbIKIOuHTe npIbOp c IMOUbKHOKN «On/Off». NobabTe BObl.
7.Дпгпркрашенипpoцecba Вькючтepn6op.

ПИМЕЧАНО:
B ueJx 630nacHocT np6op BbIKIOaEcT aBtOMaTHueckn Ype3 DBe MHyTbI.
8.Помойтpe np6op,кak3ToOnncahoВглавe《Истka》.
UcTka

IPEyIPEXDEHNE:
BKnIOuHTe np6Op. N3BNeKaIte BnKy 6a3bI nIa 3apAkn n3 po3ETKn, KOrDa Bbl uNCTnTe np6Op.
He nprykaite np6op n 6a3y dny 3apdKn B Body. 3TO MOKET npBecTN K npaxeHIO 3NeKtpueckm TOKOM INI NOxApY.

BHIMAHHE:
He npimehnIte npoBolouhble ueTkn nnDpyrne abpa3nBhle npncno6beHna.
He npimehnTe cInbHOeIcTByOuue nIin a6pa3NB HbIe YNCTaUne CpeDCTBa.
- CHINMAIte 6aOOK JnBIOy BbIOy BbITRnBaHnEM BHN3.
2.Пи HeobxOIMOCn CJIeTKe OCTaTKI BOJb I3 6aYka.
3.OuICTIe BCacbIbAIOUIN UJNAHMR MANKTKAHbI. - CHIMITE qnIbTp n octopoxHO ouHCTTe ero TepIOI npOTOHOBdoI.
5.YctaHOBtE pNbTp o6paTHo B uHaHr. - CnoJIOCHInTe 6aHOK nTBAObl.
- 3anpaBbTe uHaHr B BepxHee OTBepCTne 6aKa DnBa BObl.
- UcTaHOBnTe 6aOk DnBa BObI B npu6Op. O6paauTe BHIMAHHe Ha HnPaBnJIOUne n IpOBepaIte, YTO6bl KOJIbueBoe yPiNtHeHne 6bl NOy cTaNOBnEO NIOTHo. BaOcDnBaBObI DOJKeH BXODHTb Ha MeCTO CO 3ByHbIM 9eJIYKOM.
9.ДЯСЯТЯСОПАнжМTe KHONKуФИКcaTopa. IpOMbIaJIteФOPcyHky IOd CTpye TELNoI BODbl. BbICyUInTeФOPcyHky. - OuInCTHe npin6op n 6a3y dIy 3apJIK BnaJHOI TkaHbHO.HakoHeU, npOTpNTe KOMnOHeHTbI Do cyXoro COCTOHHIA.
TexHnueckne daHHbIe
MoeB: PC-DC 3031
Bec HeTTO: npn6n.622r
CTeneHb 3aunTbI OT XnKIOcTei: IPX7*
Ba3a dπI 3apπKn
Klacc 3aunTbI: II
3JIeKtponItaHHe: 100-240B\~,50-60Tc
IopTe6JIeMaMA MoUHocTb: 1,2-2,8BaTT
AkkymyTOp 3y6hOu 8eKn: ...1x3,7V, 650 mAh Li-Ion
Bpempaobbl: ..Makc.4,5yacOB
Bpem3apdkn: np6n.24 caoB
aaii aaiiig aaii i 1000000000000000000000000000000000000000000
J 100000000000000000000000000000000000000000000000
jolalil j5gill slly aelbtl cloglebl 1gulall jSe
jlo oio aiai iagai iiai. aiai jy jay jde b
a#
j01g. 1110 a1a3 a1ab2 jauu all abaoag jlaal alz0. 1jyI y
aaii ioglsl
PC-DC 3031
622 63
*IPX7.
jouill aboo
II.
60-50~J240-100
2,8-1,2
j60 650.381
dclw 4,5 gaiy J.
aclu 24 la
1500.3x1
60 1
aL24.
yell 1000 jgljll JUJ Uxj. IPX7 20 jgljll liu jglg y
jssu 1
aalglll Jao, aalall CCEoLg jao ooo
.doLoW
1
Ji 105j juiuai iuiuai uuiuuiuiuiui
jglall jll lglg 0g 1b1 jz
a11 11j1j112 11j j11j1j112
:
- 为 | z| = 1 .
baol (gaaa) 15jLbJbI JcI aaii 3
jglal jg j0s J 100g
ab = 10
gol no 101 sOy yI g ally d aay jy
jglj
gi."Normal"wglalb1sulyIuJouJ "Mode"j pduolUdsA
. "Pulse" 91, "Soft"
al. jui 1j0g 2uoi oaiy uai 4g g g g g g g g
gaaa aaii iiaai jiaig .jkaai jiaaa
E 151
yoo
1 1
jauuui juaaui aaii aaiii ioo
.1JjJbI J.1J2JJI "On/Off" j
jglal jusw gaiasll
ab = 10
y
"adill" 156
#
:
100 100
jglal
11 53
aab jayo la i 1yjill elal yaae jayu
A
"Modc"
gogll jpluowwuy gwhbcll bchd scc!
:Normal
Jy aalwlll 10000000000000000000000000000000000000000000000000000000
LgJogdlaijol jaoaiojolgoeLoBzPulse
4ab = 10
alil 1yolai 2e w oJl cbl bdo ol JLO5
y
aabaa aaaaal Jae jae aee 3.1
.1gJ 10000000000000000000000000000000000000
jglall jolll 1ggbll jzbs
Coo 100
yolio 5x y wll gio aolo
"Mode" jjuluul "Normal" uul 5
On/Off jplwjglj6
a 1
jglz11Jz#zL#
.5jlll 161 c000 j0g g jai aai ai
1.111111111111111
all jus j140
jlll lalil aollll
!
slo joljolde bolo
.
0 20 SgW d
.1JiJiJiJiJiJiJiJiJiJiJiJiJiJiJiJiJiJiJiJiJiJiJiJiJiJiJiJiJiJiJiJiJiJiJiJi
g 4
aI1111111111111111111111111111 5
Jn Jn Jn Jn Jn Jn Jn Jn Jn Jn Jn Jn Jn Jn Jn Jn Jn Jn Jn Jn Jn Jn Jn Jn Jn Jn Jn Jn Jn Jn Jn Jn Jn Jn Jn Jn Jn Jn Jn Jn Jn Jn Jn Jn Jn Jn Jn Jn Jn Jn Jn
:aloo
aill aoc 10g g jjlll ool
#
:
ie jai 100000000000000000000000000000000000000
11 1111111111111111111
:
.
Sulaloo jolao aabpluwljglzllcuae elie
pIaJU5 100000000000000000000000000000000000000000000000000
pulil 1 bai / pSoll nolie lde ole oybi
A
0.01 × 20 = 1
POWERjj2
"C" 3
S^ 4
"M" 50
6
oljj7
olj j 80
aiglo paoi 9
0LjJ 10
jLwJdJWJnJnJ 11
jai 12
g
202
joo
1.
a000
S OBC = S AOB + S_ BOC
Jle cldal jaiol g jaoi Jia Jia Jia Jia Jia Jia Jia Jia Jia Jia Jia Jia Jia Jia Jia Jia Jia Jia Jia Jia Jia Jia Jia Jia Jia Jia Jia Jia Jia Jia Jia Jia Jia Jia Jia Jia Jia Jia Jia
L
jglpluuiy gaiui j3 Jui liuui y
pUusuoyi UoLdoj jgo
L 1000000000000000000000000000000000000000000000000000000
:

j00g j 100000000000000000000000000000000000
:

1
1
-2021.12.24 19:47:46
Jbc gio 1algo
a. 12345678901234567890123456789012345678901234567890
1. 1. 1. 1. 1. 1. 1. 1. 1. 1. 1. 1. 1. 1. 1. 1. 1. 1. 1. 1. 1. 1. 1. 1. 1. 1. 1. 1. 1. 1. 1. 1. 1. 1.
7 7
77 76
75
75
·s ( 75)
75
74
74. jiu li jiàn lǐ wǎn lǚ lǚ
jglqdlplvcllwlpsuulcal5g>9
Jguloo 100000000000000000000000000000000000000

y
Joo
4

· L1 · L2
y. pLw yJx Jx Jx Jx Jx Jx Jx Jx Jx Jx Jx Jx
.
blawl i j. ouiu ciao g bixj jaxll osle y dlal aoud l u
jLwJl oLwG pJ LwJg
J 1
100 15
GARANTIEKARTE
warranty card · garantiekaart · carte de garantie · schedadi garanzia · tarjeta de garantia · cartao de garantia · garantikort · karta gwarancyjna · zaručni list · kartica jamstva · carte de garantie · fapanuonHnka KapTa · zaručny list · garancijski list · garanciajegy · rapahtiHmΦopMynp · fapaHTmHbI TaNoH
JUAN ZILBA
PC-DC 3031
24 Monate Garantie gemäß Garantieerklarung - 24 months warranty according to warranty declaration - 24 maanden garantie volgens garantieverklaring - 24 mois de garantie selon la déclaration de garantie - 24 mesi di garanzia secondo la dichiarazione di garanzia - 24 meses de garantia de acuero con la déclaracion de garantia - 24 meses de garantia, de accordo a declaracao de garantia - 24 manedes garantiat hem hold til garantibeteingenslese - 24 misisec gwarancjna podastawe oswiadczena gwarancjnego - zaruka 24 meseicu podle prohlasei o zarue - 24 mesece no jamstvo u skladu s jarnstvenom deklaraciujom - 24 luni garantie conform declaratie de garantie - 24 mecaa rapanu a cbotertcne c rapaunnohata deknapaua - 24-meacna zaruka podla vyhlasenia o zaruke - 24-mesecnagarcjna, skladno z garancjskjo ijavo - 24 honap garancia a garanciafeletetelekben leirtak szerint - rapahtra Ha 24 micui BIDNOIBHO ARII npo rapportio - RapaHTRA 24 mecaa cornacno zanBnHBM RAPAHINHM pRABNAM
Kaufdatum, Handlsterpmel, Unterschied - date of purchase, desier stamp, signature - zankopadatum, dealsterpmel, handelbekending - date d'achat, tampon du concessionaire, signature - data di acquittio, timbre del rivenitore, firma - fecha de compra, seile del distribuidor, firma - data de compra, carimbo do distribuidor, assinatura - kipsgsdato, forhandstermple, signature - data zakupu, pietzepi: sprezadnye, podispis datum zakupeni, naizho pejodje, podispis - datum kupovine, zig trovica, potosis - data of achitiple, stampli furnizurolii, semnatura - da na knykna, liceva na Ipojaavaa, Ipojanac - datum nukupu, petciatna obchodnichka/ preducji, podispis datum nukupu, zig trovica, podispis - vasiarsi datuma, kereskedne belyegjce, alarinas - da tpa npo6aien, nevata npo7aiau, npnoic - data npo6pdenetri, tllarn npo7aiau, npnojnc -
PROFI CARE.
www.proficare-germany.de